You can set due dates on tasks in your workflows to make sure that everything in your process is completed on schedule and nothing falls through the cracks.
This is especially helpful when you utilize task assignments together with task due dates so that members of your team get notified when tasks are ready to work on, or if they become overdue.
You have two options for setting due dates on tasks, either setting “Task due dates” on active workflow runs or “Dynamic due dates” on tasks within your workflows. Dynamic due dates can be anchored to other tasks or date fields within your workflow run, or the workflow run start date, which helps streamline your process or task deadlines.
What’s better is that you can even assign dynamic due dates to be due on weekdays only.
Users: Admins and Full Members can set task due dates on active workflow runs. In order to add dynamic due dates to workflows, you must be an Administrator or a Full Member who has been given ‘edit’ access by your Administrator.
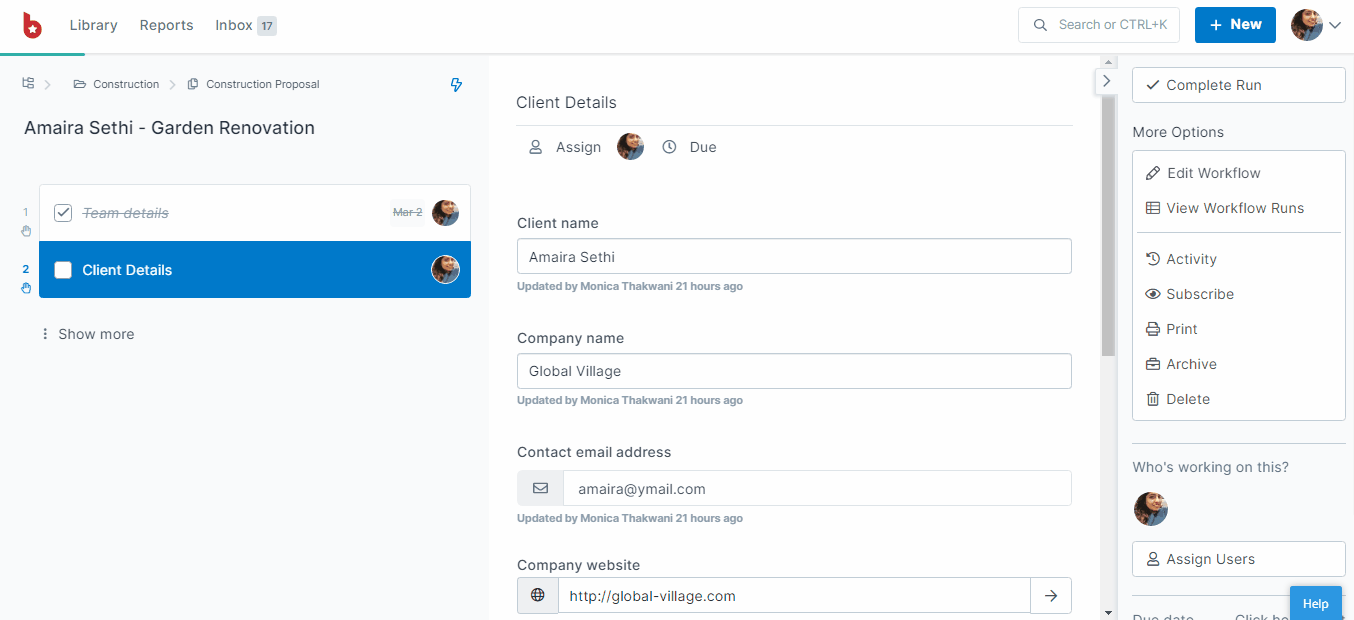
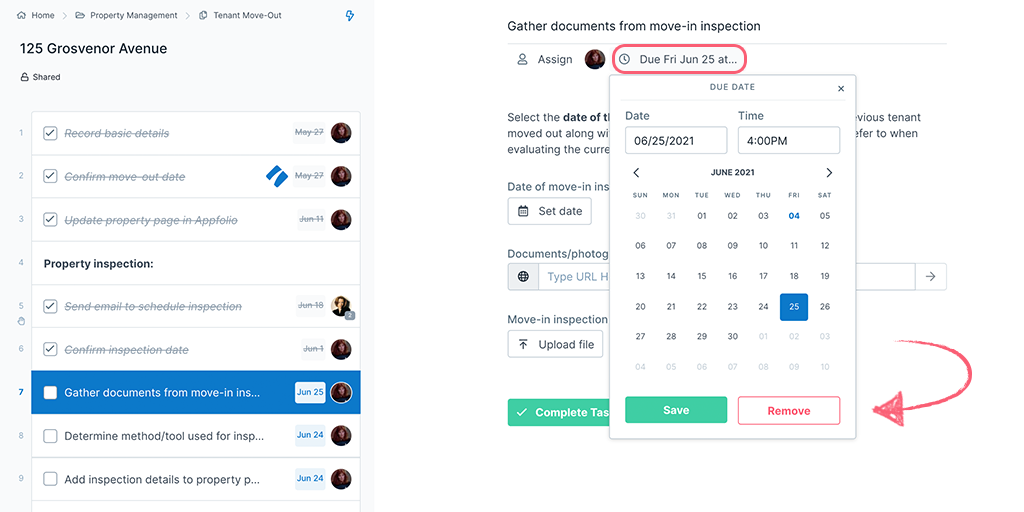
To set a due date for a task on an active workflow run, first open your workflow run and click on the task you want to add a due date to. Next, click the “Due” button in the top center of your screen as shown below.
Use the date picker to select the date and time (setting the time is optional) then click “Save” to finish.
Now you can select another task to add a due date to or any more that you require.
To have due dates automatically set every time you run a workflow, or based on a date field that you have added into your workflow, you can add dynamic due dates into your tasks.
Navigate to your Library and click your workflow’s name then click “Edit” in the top right corner.
You may want to add a date form field into your workflow for the anchor point of your dynamic due date if you haven’t already.
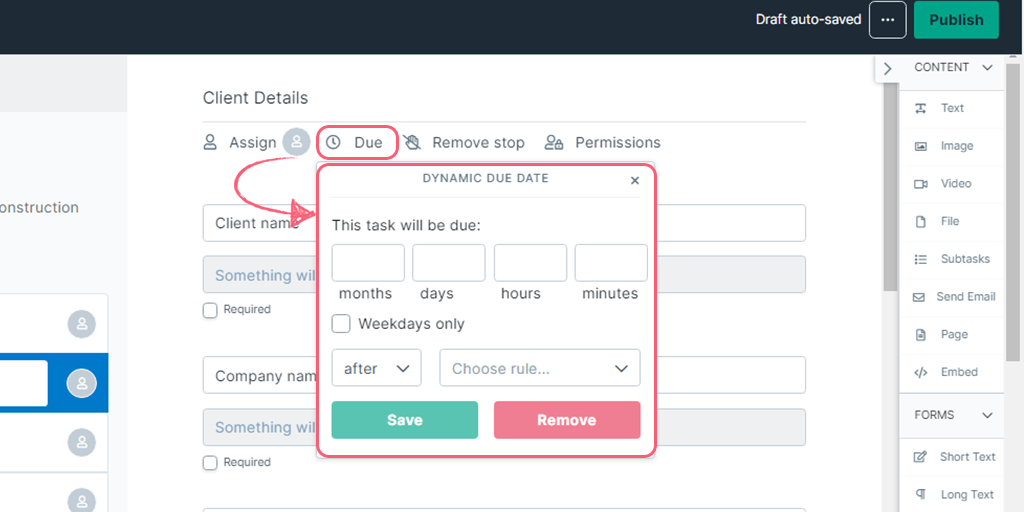
Click on the task you want to set the dynamic due date on, then click the “Due” button at the top of the task in the center of your screen.
The difference when setting dynamic due dates (compared to regular task due dates) is that you have a few more options to choose from:
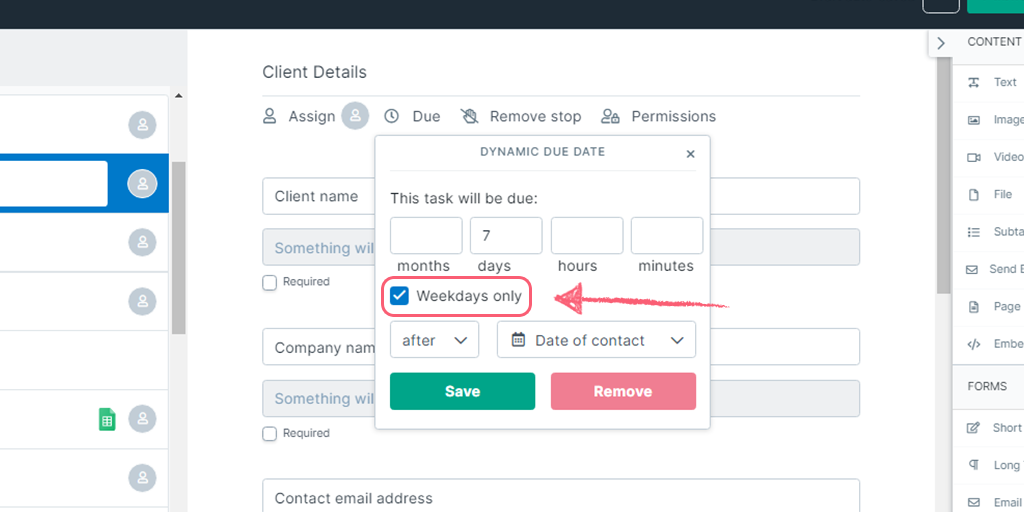
Start by selecting the time period. “This task will be due:” in # months, # days, # hours or # minutes.
Next, select after / before and then choose your rule, which is what the dynamic due date will work from, or be anchored to (such as the date field you added earlier).
When you click Choose rule, you will be prompted to choose from the workflow run start date, when the previous task is checked, or from any date form fields that you have in your workflow, as shown below.
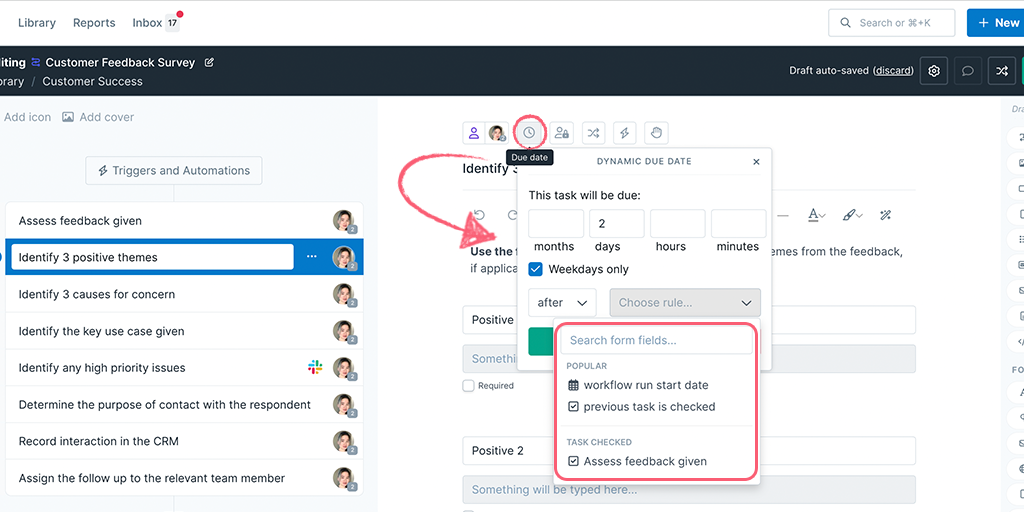
For example, you could set a task to be due after 10 minutes from the time the previous task was completed, or 5 days before your project completion date, or 14 days after your workflow run start date.
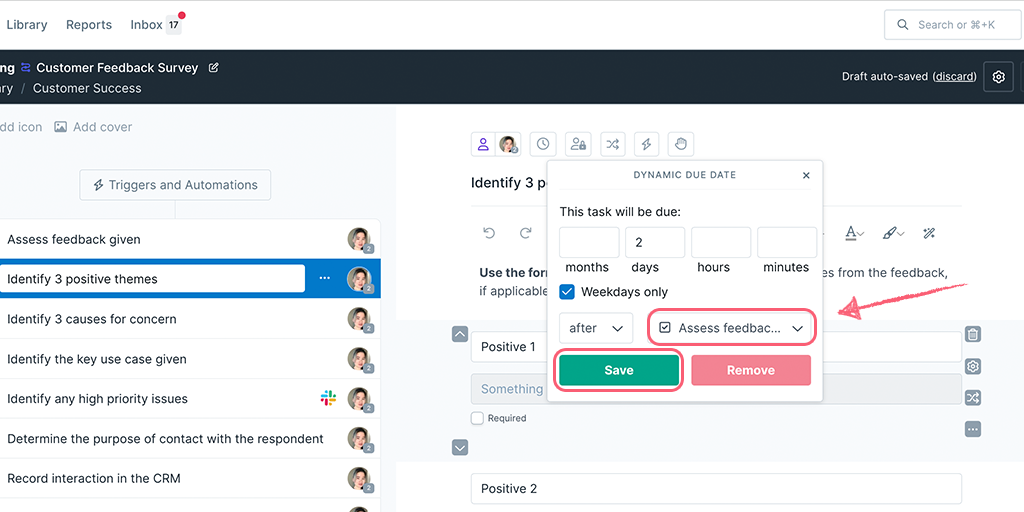
If you want your dynamic due dates to be limited to weekdays only, check the box provided. This is helpful to avoid tasks getting overdue over the weekend. This would also automatically push the due date to the next business day following the date you originally set.
Once you’ve set the due date, click “Save” to confirm, then “Publish” your workflow.
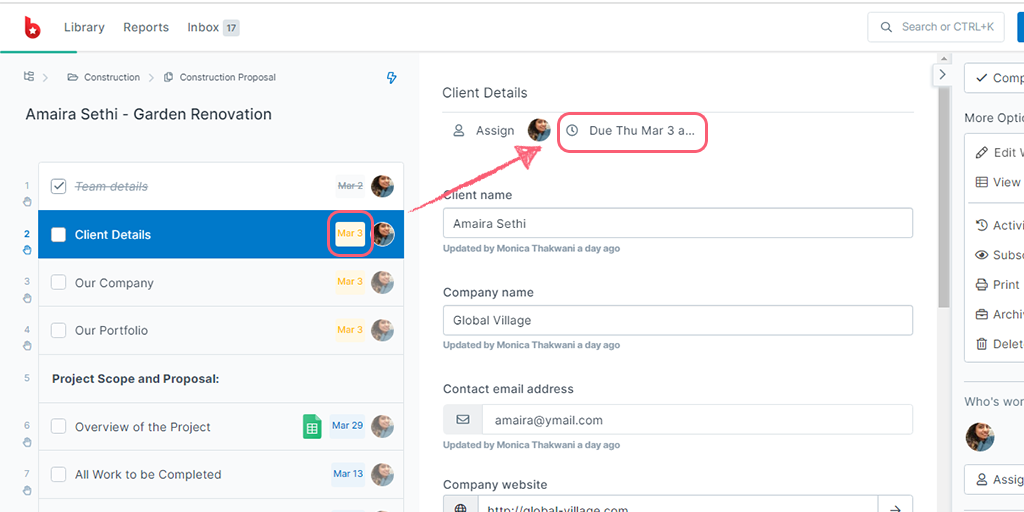
When you open a workflow run you can see any due dates that are set in the main task list on the left-hand side. When you select a task, you can also see the due date set in the top center of your screen, as shown below.
If a task in your workflow run is overdue, the due date in your main task list will turn red making it more visible and alerting you to the fact that it’s overdue.
To change a task due date in a workflow run, open it up and click “Due” at the top center of your screen, select a new date and time. Click “Save” to finish.
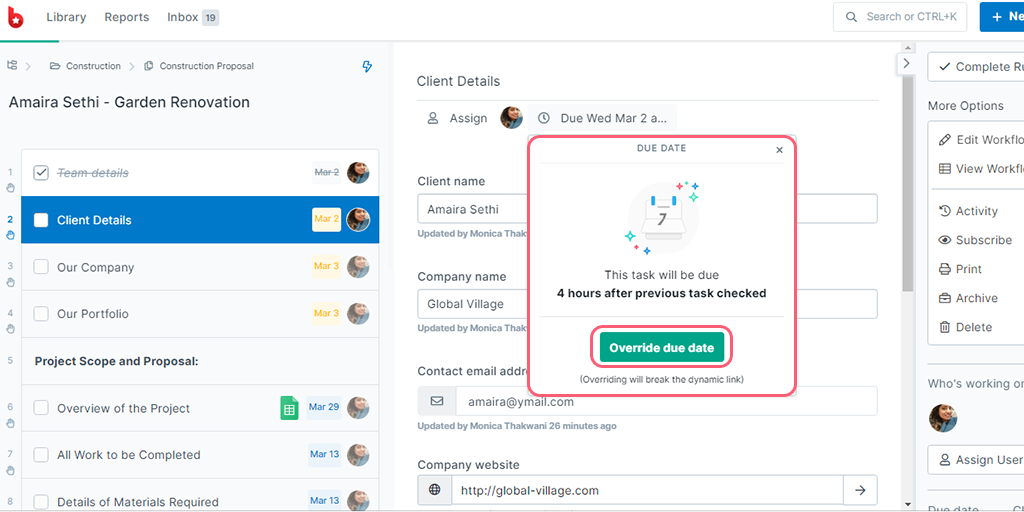
You can also override a dynamic due date in a workflow run, as shown below. If you do override, this will break the dynamic link that you built in your workflow.
For any automations or dynamic due dates where you haven’t set a time, the default time will always be 8 am PT.
You can also override the due dates for tasks from your Process Street inbox, by using the snooze function.
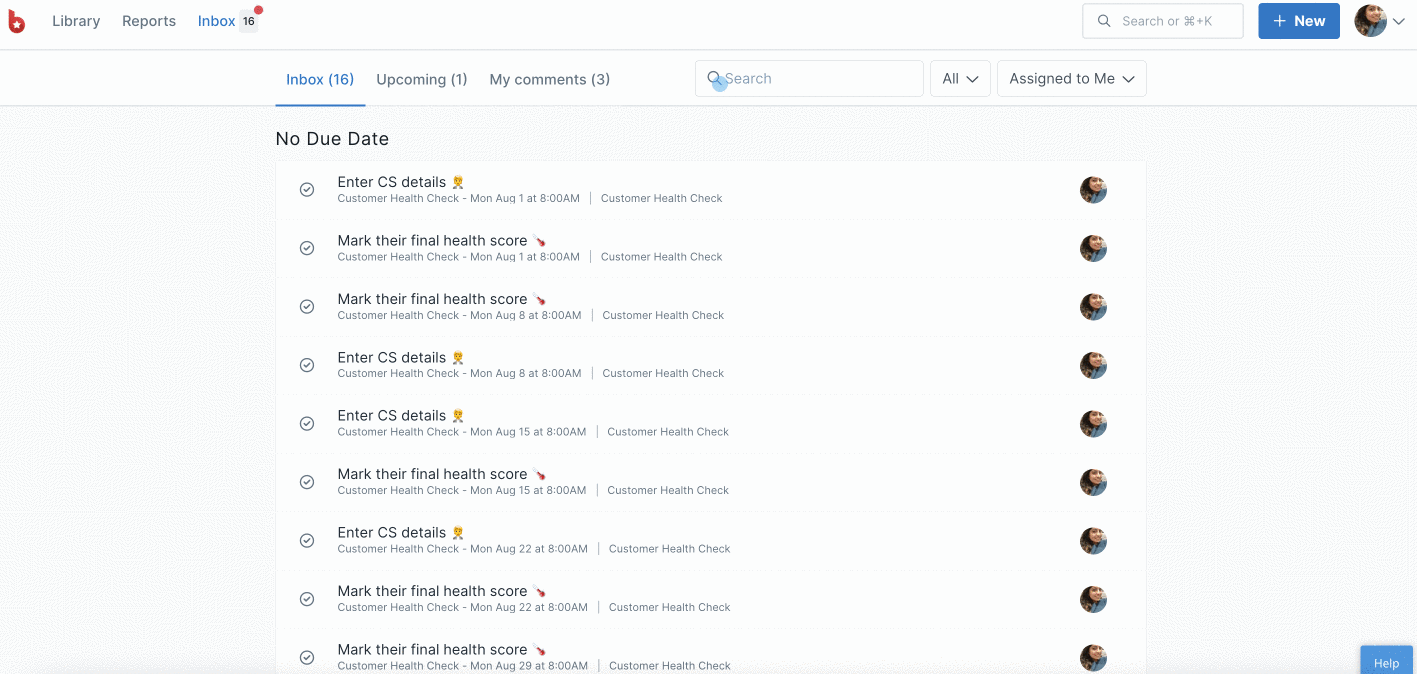
Hover over the task/s you’d like to snooze and you’ll see a checkbox appear, as shown above. Put a checkmark against all the tasks you’d like to snooze. When you select a date to snooze these tasks to, this effectively overrides the dynamic due date.
To remove a task due date from a workflow run, open it up, click on “Due” at the top center of your screen and then click “Remove”.
To remove a dynamic due date from tasks in a workflow, head to your workflow editor, select the task you would like to remove the due date from. Click “Due“, and then click “Remove“. Save changes to your workflow to finish.
Once a task is due, or overdue, the due date in your workflow run will turn red so you know it’s time to either complete the task or update the due date.
Anyone assigned to that task will receive an email notification (or a Slack notification) that the task is due. There will be a link in the email that they can click to take them directly to the task in question.
It will also get pushed to the top of your (or the user assigned to the task’s) Process Street Inbox and marked as overdue so that you (or they) know it’s a priority.
Task due dates are most useful when combined with task assignments since only people assigned to the task will be notified about due dates. We recommend you use due dates and assignments together like this.