Install ESXi on the server.
The version we used on Carnival, KCOM and the test bed is 6.7.0 (Standard).
Install ESXi on the server.
The version we used on Carnival, KCOM and the test bed is 6.7.0 (Standard).
The OVA file we installed on Carnival, KCOM and the test bed can be downloaded on the link below (bordernet-3.7.6-114)-
https://drive.google.com/open?id=1_SjRx6EYAnEhm8yQz7fR_QifXQ9xoIYd
- Create VSwitches and attached to the required physical nics if it is needed
- Create Portgroups and attach to the vSwitches
- assign the right CPUs
- assign memory
- assign disk space
- assign network adapters
To select the right physical NIC to make passthrough, check on VMWare Host/manage/Hardware/MAC address against Networking/Physical NICs/MAC address, and choose Toggle passthrough option.
You have to reboot the ESXi server to make passthrough active.
If you want to make sure ask MarJ or Kei or Nyi.
Select the bordernet VM, edit, add a new device, choose PCI device and select the right PCI address.
If we have done to this step, the bordernet VM is ready to be deployed. I would suggest you to take a snapshot at this point.
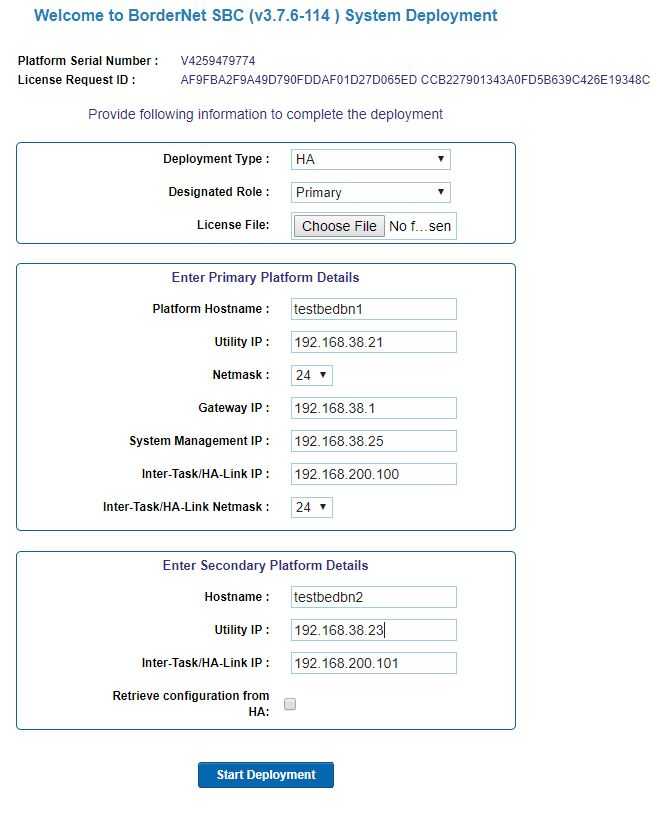
1 - first, give the utility IP on both Borderney VM by console
2 - log in to the above address for the first bordernet VM by a browser and assign the IPs as appropriate. Please have a look at the screenshot (bordernet1/Primary deployment) attached below as an example.
3 - If the deployment is successful, go to the management IP that you gave on the above (Notes - 192.168.38.25 in my example).
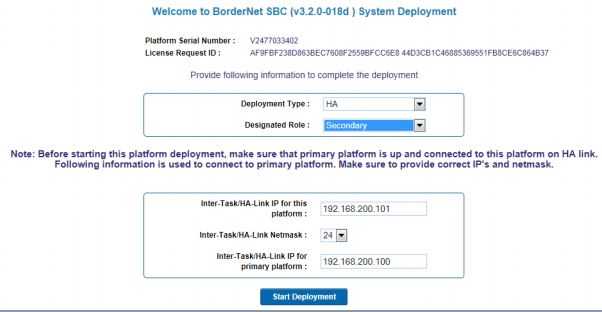
4 - go to the IP you set for Utility on 2nd bordernet VM and assign the IPs as needed. Please have a look at the screenshot (bordernet2/Secondary deployment) attached below as an example.
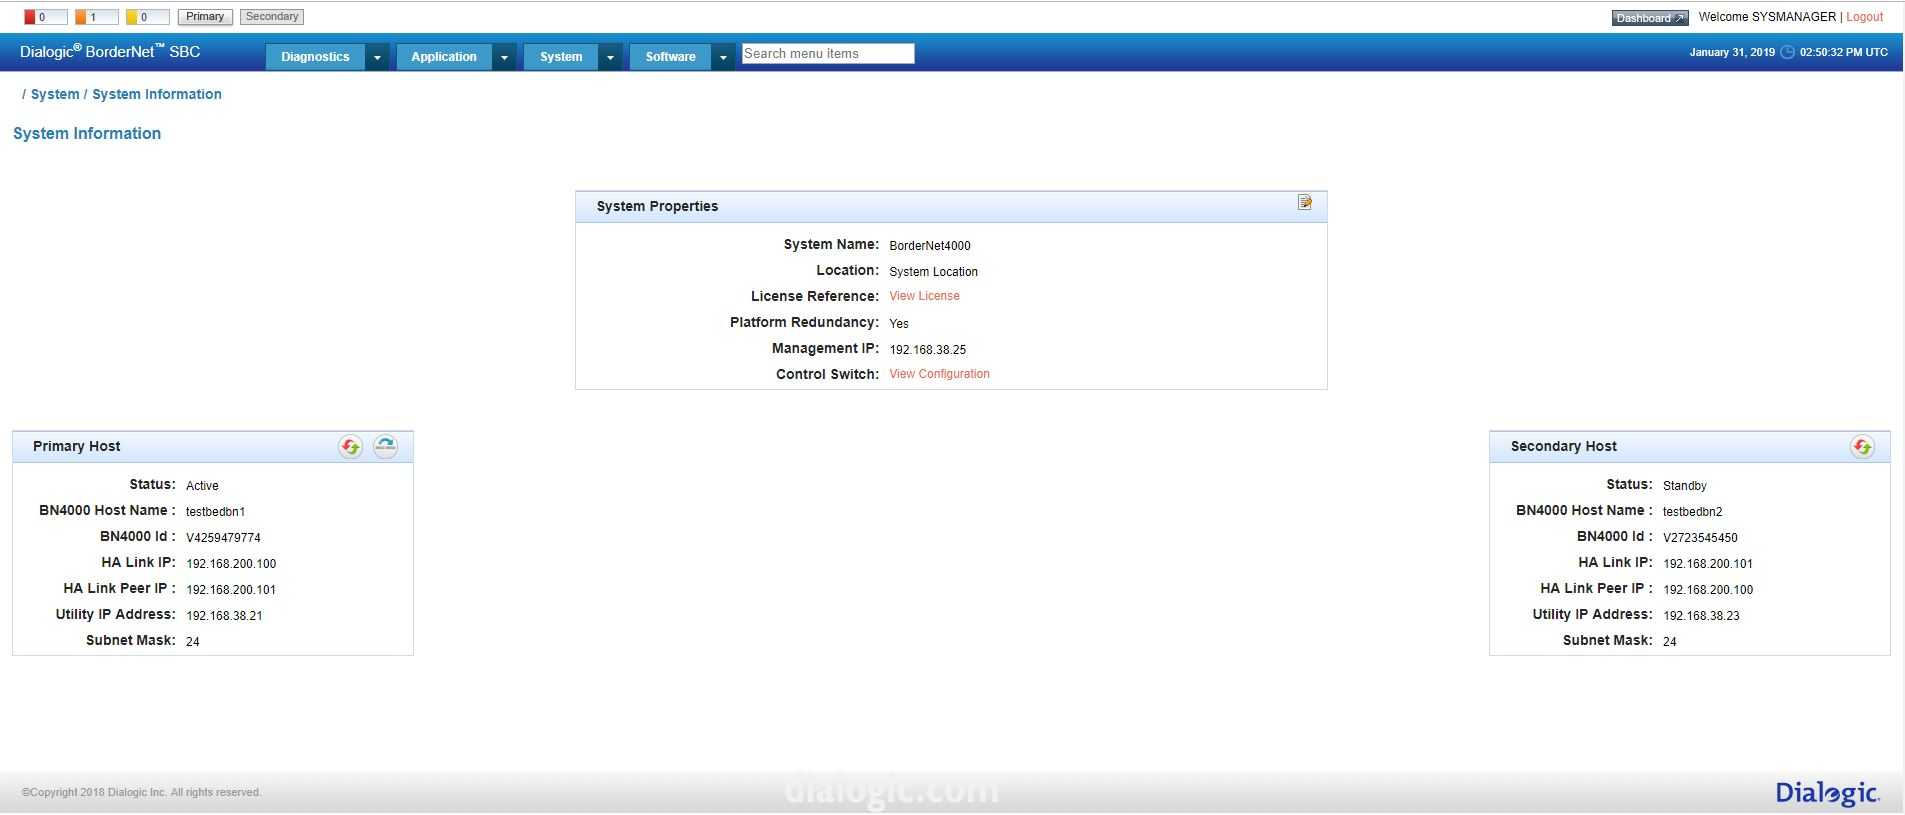
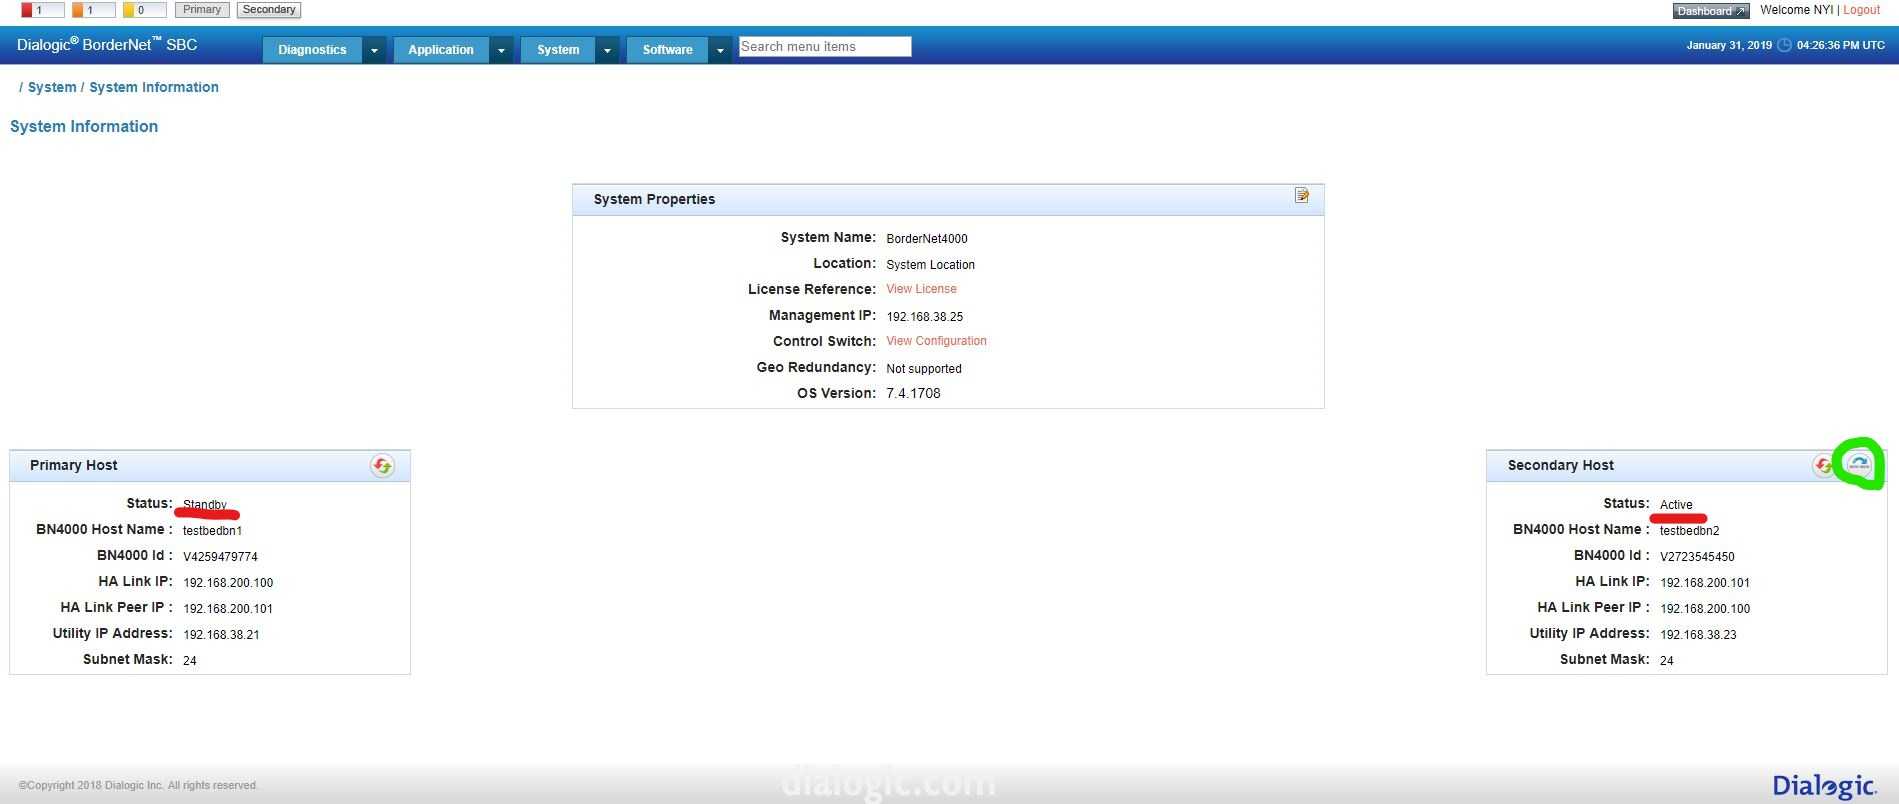
5 - you should be able to log in to GUI on management IP you have set above. If you go to System > System Information, you should see the two bordernet VMs as HA pair (1 active and 1 standby). Please have a look at the screenshot (bordernet HA management) attached below as an example.
We have to configure NTP and DNS to connect to the Dialogic license server.
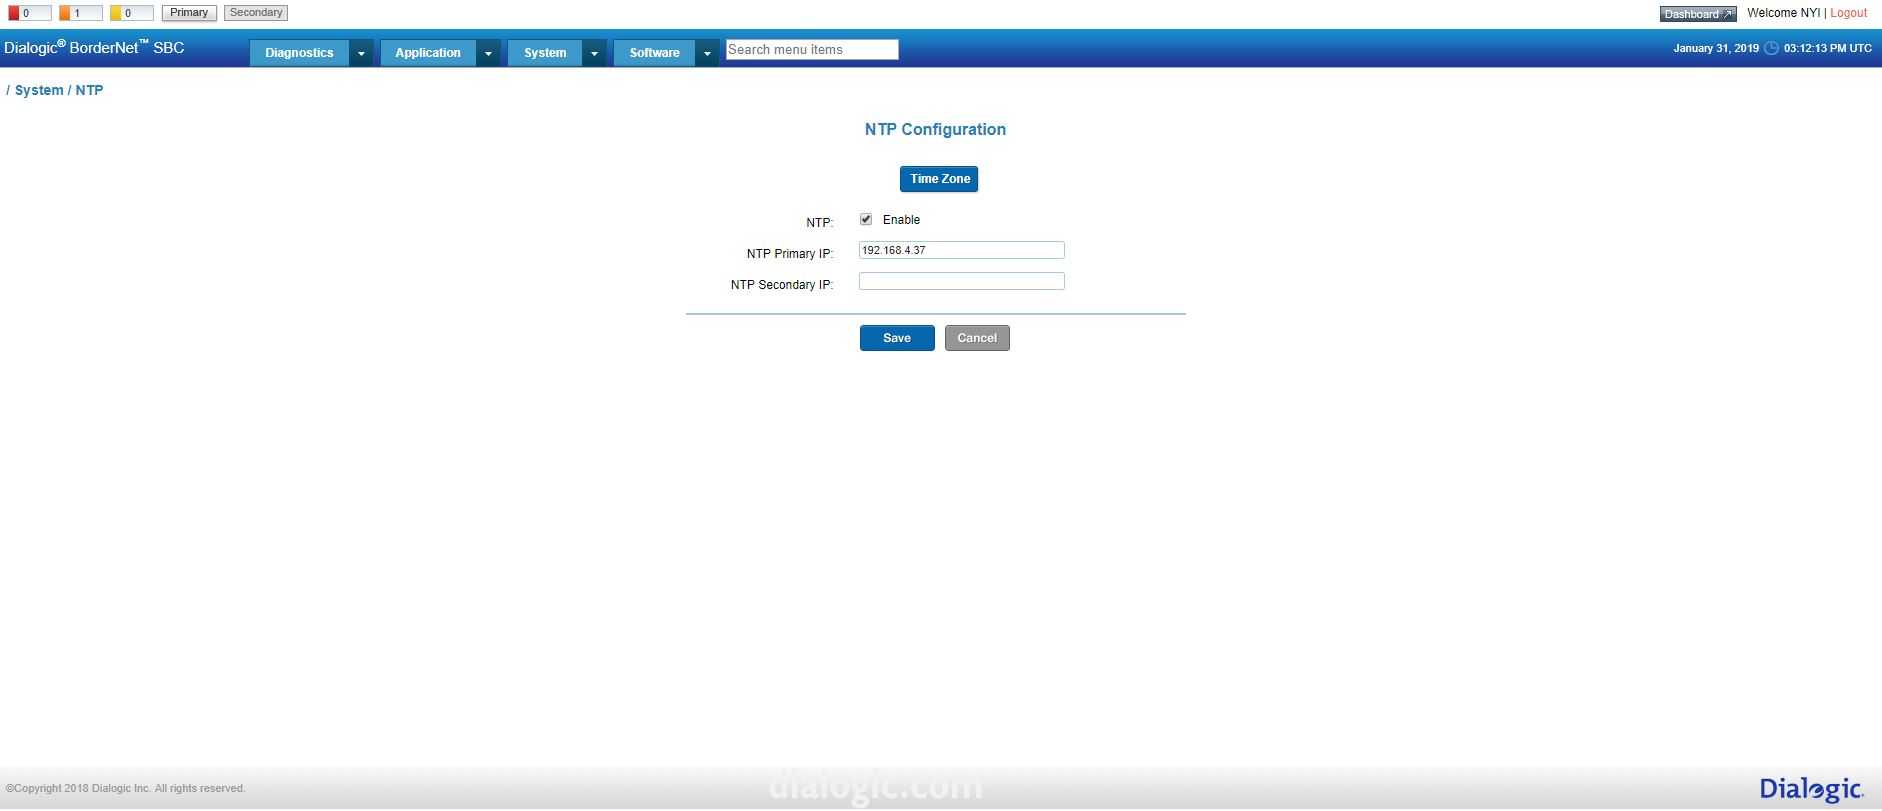
- In bordernet management GUI, go to System > NTP and configure the NTP.
Please have a look at the screenshot (ntp) as an example. I am setting up the testbed in our network so I could use our NTP server (192.168.4.37).
- On System > System External DNS, please configure DNS server details.
Please have a look at the screenshot (DNS) as an example. I am setting up the testbed in our network so I could use our DNS server (192.168.4.140).

At the time I am writing this, the latest stable bordernet version is 3.7.6-189 and the base production OVA file we have downloaded and deployed on 2nd step is 3.7.6-114.
Download the 3.7.6-189 version on the link below.
https://my.pcloud.com/publink/show?code=XZKabg7Z5i0dwRzm4q5ohK97RQcAFjQOvxTk
Go to Software > Upload New Release on bordernet GUI and upload the bordernet-3.7.6-189 tar file that we downloaded from the above link.
Go to Software > Upgrade and choose the file we uploaded (in my case, it is bordernet-3.7.6-189 ) and upgrade.
The way upgrade works on HA pair of Bordernet is the upgrade will perform on the standby server. So after we have done the upgrade on the standby server then we have to switch the one upgraded to be active and do the upgrade again on the other server. Please see the screenshot below (systemInfo) to how to switch the active server to standby.
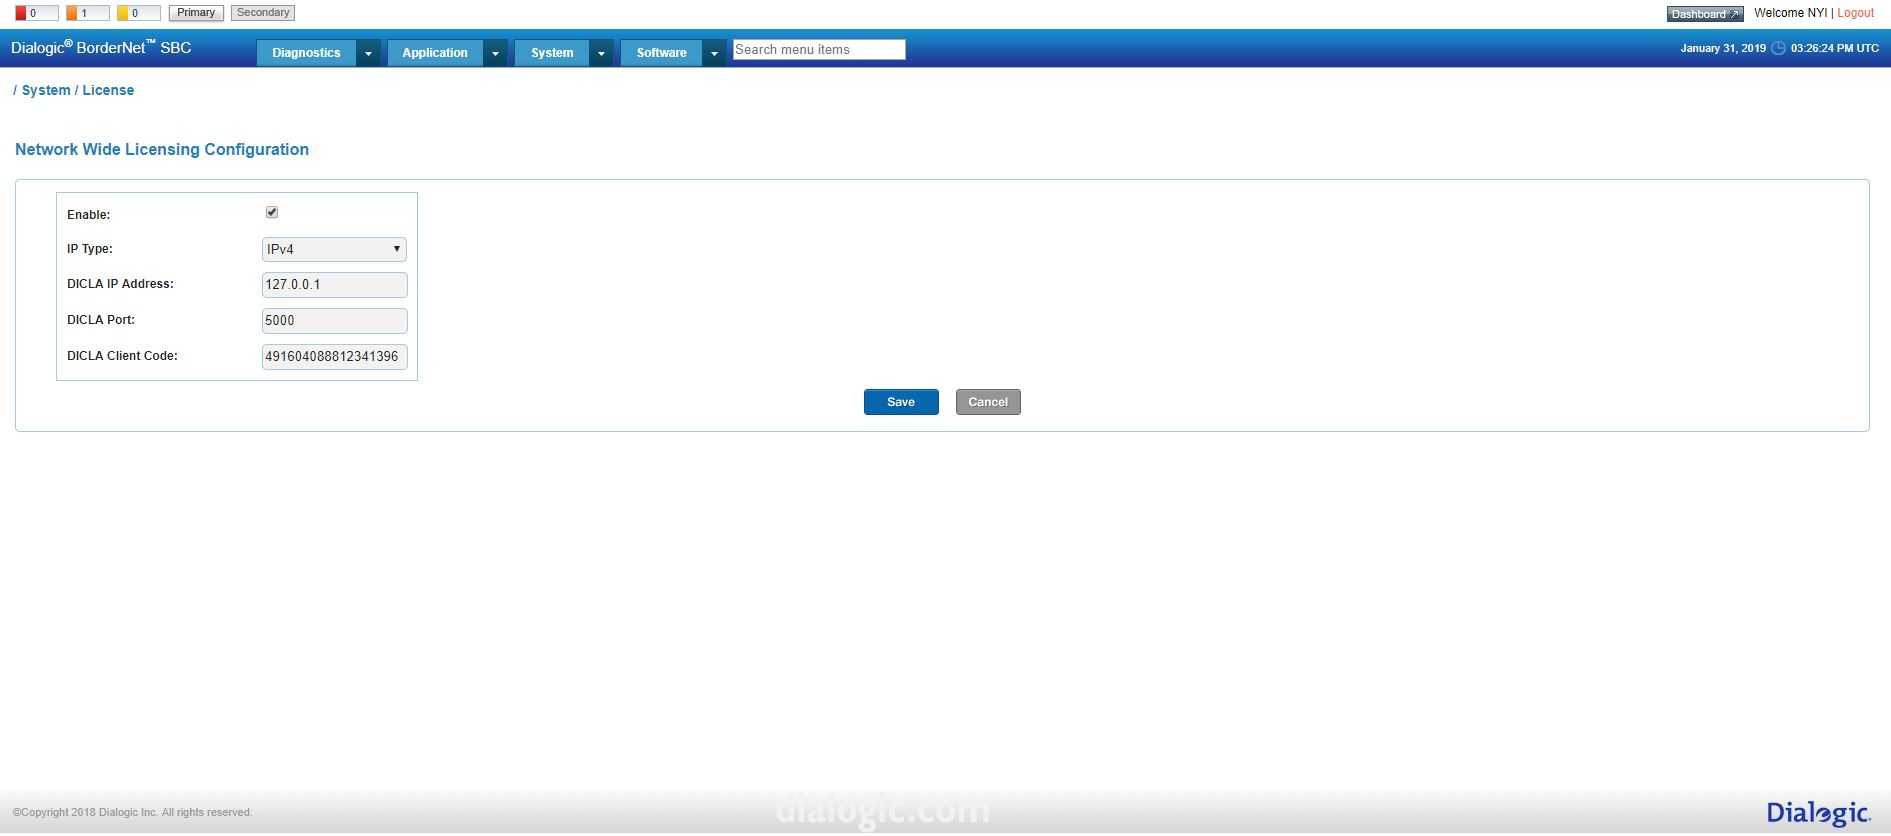
We have to connect a license server and in this case, we are using the license server from Dialogic.
Go to System > License > Network Wide License Configuration and fill the details as appropriate.
The following screenshot (license) is the example of getting the license on the testbed in CoLo room.
You will see the license capacity changed on the GUI Dashboard if the license connection is successful. I will advice you to take a snap shot at this point.