Templates /
Helpdesk Management

Helpdesk Management

Run this checklist every time you need to guide a client through the IT support process over the phone​
1
Introduction:
2
Support preparation:
3
Select client profile
4
Record support ticket details
5
General support issues:
6
Ask the client for more information
7
Check cable connections are secure
8
Check for updates in Linux Ubuntu
9
Check for updates in macOS
10
Check for updates in Windows 10
11
Restart client computer
12
Check the computer for overheating components
13
Application support:
14
Perform general application troubleshooting
15
Perform Clio troubleshooting
16
Perform DuxWare troubleshooting
17
Perform AutoCAD troubleshooting
18
Perform Salesforce troubleshooting
19
Perform Quickbooks troubleshooting
20
Slow computer fixes:
21
Clear out hard drive space
22
Check startup programs in Linux Ubuntu
23
Check startup programs in macOS
24
Check startup programs in Windows 10
25
Uninstall bloatware in Linux Ubuntu
26
Uninstall bloatware in macOS
27
Uninstall bloatware in Windows 10
28
Security solutions:
29
Make sure only one antivirus is active in Linux Ubuntu
30
Make sure only one antivirus is active in macOS
31
Make sure only one antivirus is active in Windows 10
32
Run a system check for malware in Linux Ubuntu
33
Run a system check for malware in macOS
34
Run a system check for malware in Windows 10
35
Internet connection fixes:
36
Check that the router is not the problem
37
Confirm that the computer is connected to the router
38
Troubleshoot network connection in Linux Ubuntu
39
Troubleshoot network connection in macOS
40
Troubleshoot network connection in Windows 10
41
Computer display fixes:
42
Check the screen resolution in Linux Ubuntu
43
Check the screen resolution in macOS
44
Check the screen resolution in Windows 10
45
Update the video card drivers in Linux Ubuntu
46
Update the video card drivers in macOS
47
Update the video card drivers in Windows 10
48
Finishing up:
49
Assess the status of the problem
50
Ask the client if you can help with anything else
51
Forward a copy of the report to a computer repair technician
52
Forward a copy of the report to the client
53
Sources:
54
Related checklists:

Introduction:

From simple oversights to major technical issues, helpdesk staff face one of the most difficult problems in remotely dealing with customer support requests.

As a helpdesk hero, your job is to troubleshoot and resolve all of the common gripes and gremlins in an effort to clear the way for optimum customer satisfaction. Whether it’s checking that the computer is actually turned on, or troubleshooting complex proprietary software, you’re there through thick and thin.

We’ve designed this checklist to make your life easier – streamlining the support process and using conditional triggers to get straight to the heart of the solution.

So let’s get started!

Support preparation:

Select client profile

Part of your role in managing a helpdesk is being prepared to service the variety of customer profiles quickly and reliably.

We’ve made that easy for you by implementing conditional logic which shows only the tasks you need to resolve your customer’s support request.

All you need to do is select the profile you’ll be servicing from the drop-down list below.


Record support ticket details

First of all, you’ll need to collect some important information on the client and the nature of their support request.

Fill in the form fields below to get started with the checklist.


  • 1

    Low system space
  • 2

    Slow startup
  • 3

    Unnecessary programs
  • 4

    Malware & antivirus
  • 5

    Internet connection
  • 6

    Overheating
  • 7

    Cable connections
  • 8

    System updates
  • 9

    System display
  • 10

    Uncertain
  • 11

    Application issues

General support issues:

Ask the client for more information

If you’re still unsure about the nature of the problem, ask the client for more information.

If possible, have them send you screenshots or give you remote access to their computer. If that’s not possible, then have them explain in as much detail what problem is occurring, and under what circumstances.

Check cable connections are secure

To kick off the primary helpdesk management checklist we have a potentially touchy subject with many clients on the other end of the phone; you need to make sure that their machine is plugged in correctly.

  • 1

    Power cables (on both ends)
  • 2

    Speakers or headphones (correct sockets, etc)
  • 3

    Ethernet cables or wireless boosters (ports, etc.)
  • 4

    USB devices (pugged in and indicating power, if appropriate)

Check for updates in Linux Ubuntu

Advise the client to check that their operating system is fully updated.

Updating in Ubuntu is very easy to do – simply open the terminal and enter the following command:

 sudo apt update && sudo apt upgrade

After this has done updating, be sure to perform a system reset to make sure all updates have been implemented.

Check for updates in macOS

Macs are simple to update, as all you need to do is guide the client through loading up their App Store, navigating to the Updates tab and clicking on Update All.

The steps are outlined in the sub-checklist bel

  • 1

    Open the App Store
  • 2

    Click on the Updates tab
  • 3

    Select “Update All”
  • 4

    Wait for the update to finish
  • 5

    Perform a system reset

Check for updates in Windows 10

In Windows 10, system updates are easy to install.

Simply tell the user to navigate to their Settings app or by typing “Settings” straight into the search bar.

These simple instructions will guide you through the update process:

  • 1

    Open the Settings app
  • 2

    Click on Updates & Security
  • 3

    Click on Windows Update
  • 4

    Select “Install”
  • 5

    Wait for the updates to finish
  • 6

    Restart the computer

Restart client computer

Whilst serving as one of the longest-running jokes of the IT Crowd, you need to ask the client to reset their computer.

Although they may have already done this, ask them to turn their machine off and on again once more to be certain that this basic check has been completed. Remind the client that they should shut the system down naturally, as a forced shutdown can both create new problems and worsen existing ones.

If nothing at all happens when turning the machine on (no sound, lights, etc.) despite being plugged in, it is most likely that either a fuse has blown in the plug, or that the PSU needs replacing. Advise the client as such.

In the event that the machine boots up, but either makes unhealthy clicking noises or presents you with a BIOS error relating to the hard disk, the PC should be turned off immediately and a data recovery company contacted.


Check the computer for overheating components

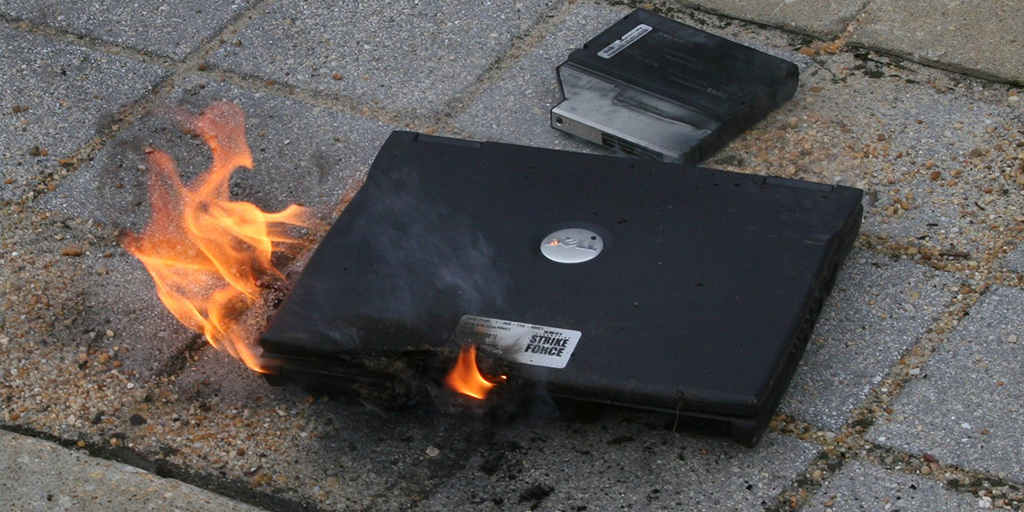
Although it sounds practically comical, a common issue which many unaware users do not even dream of is that their machine can overheat. Ask the client to touch their devices (around the laptop case, desktop tower, router box or external storage casing) and feel for overheating.

  • 1

    Turn off the computer
  • 2

    Wait for the computer to cool down
  • 3

    Ensure that the fan ventilation shafts are not obstructed

If the client detects high temperature in any part of their device, inform them that it is likely the component simply needs to cool down. Advise them to turn off the hot component and ensure that no vents are blocked or clogged up with dust.


Application support:

Perform general application troubleshooting

If your client is experiencing problems with one of their applications, you can use the following list of best-practice troubleshooting responses to determine the cause and hopefully resolve their issue.

Try each solution in the following sub-checklist one by one to see if the problem persists, checking them off as you go.

  • 1

    Ask what version of software they’re running
  • 2

    Search Google for common issues with this application
  • 3

    Check StackOverflow for existing solutions
  • 4

    Undo any recent hardware or software changes
  • 5

    Close and re-open the software
  • 6

    Open task manager and close unnecessary programs
  • 7

    Restart the computer in safe mode

Perform Clio troubleshooting

If your client is having trouble using Clio, your first port of call as a support officer will be the Clio Help Center.

Have your customer explain their problem in detail over the phone and then refer to the Clio Help Center for advice on how to solve their problem.

If you can get remote access to their desktop, have them recreate the situation in front of you; if not, then screenshots or screen recordings should be provided.

  • 1

    Have the client explain the problem in detail
  • 2

    Gain remote access to their desktop and recreate the error (if possible)
  • 3

    Ask for screenshots or screen recordings of the error (if possible)
  • 4

    Refer to the Clio Help Center
  • 5

    Advise the client on how to resolve their issue

Perform DuxWare troubleshooting

If your client is experiencing difficulties with DuxWare, have them explain the problem to you in detail.

If you can get remote access to their desktop, have them recreate the situation in front of you; if not, then screenshots or screen recordings should be provided.

You should then query the official online manual to see if an answer to their problem already exists. 

  • 1

    Have the client explain the problem in detail
  • 2

    Gain remote access to their desktop and recreate the error (if possible)
  • 3

    Ask for screenshots or screen recordings of the error (if possible)
  • 4

    Refer to the Duxware Online Manual for guidance
  • 5

    Advise the client on how to resolve their issue

Perform AutoCAD troubleshooting

Before you can assess the client’s problem, have them describe in as much detail the exact situation in which it occurred.

If you can get remote access to their desktop, have them recreate the situation in front of you; if not, then screenshots or screen recordings should be provided.

Autodesk has a comprehensive knowledge base designed to assist with support of their range of architecture and engineering-focused software products.

Check in here and see if you can find a solution to the client’s problem off-the-bat.

  • 1

    Have the client explain the problem in detail
  • 2

    Gain remote access to their desktop and recreate the error (if possible)
  • 3

    Ask for screenshots or screen recordings of the error (if possible)
  • 4

    Refer to the AutoDesk Knowledge Base
  • 5

    Advise the client on how to resolve their issue

Perform Salesforce troubleshooting

Salesforce has lots of resources readily available to aid with support requests.

If you can get remote access to their desktop, have them recreate the situation in front of you; if not, then screenshots or screen recordings should be provided.

Try checking it against the Salesforce Troubleshoot Processes page; many common issues and their solutions are listed.

  • 1

    Have the client explain the problem in detail
  • 2

    Gain remote access to their desktop and recreate the error (if possible)
  • 3

    Ask for screenshots or screen recordings of the error (if possible)
  • 4

    Refer to the Salesforce Troubleshooting Guide
  • 5

    Advise the client on how to resolve their issue

Perform Quickbooks troubleshooting

Have the client describe in as much detail as possible what kind of problem is occurring, when, and how.

If you can get remote access to their desktop, have them recreate the situation in front of you; if not, then screenshots or screen recordings should be provided.

Quickbooks has designated help pages designed to deal with common customer issues – you should be familiar with the extensive troubleshooting documentation available online for Quickbooks products.

Make sure to check the Quickbooks resources in case a solution to their problem has already been documented.

  • 1

    Have the client explain the problem in detail
  • 2

    Gain remote access to their desktop and recreate the error (if possible)
  • 3

    Ask for screenshots or screen recordings of the error (if possible)
  • 4

    Refer to the Quickbooks troubleshooting documentation
  • 5

    Advise the client on how to resolve their issue

Slow computer fixes:

Clear out hard drive space

The easiest way to increase the performance of a computer (if only by a little) is to get the owner to clear up some space on the hard drive.

Advise the user to delete unnecessary folders and files to make space on their hard drive.

Note that if they are unsure as to the purpose or function of a particular file or folder they should not delete it.


Check startup programs in Linux Ubuntu

Advise the client to check which programs are configured to launch on startup.

To check and disable which apps are running in Linux Ubuntu, you need only follow this sub-checklist:

  • 1

    Open the System application
  • 2

    Click on “Preferences”
  • 3

    Click on “Startup Applications”
  • 4

    Disable unnecessary startup programs

Check startup programs in macOS

Another feature which can damage a computer’s performance (although mostly upon booting up a computer, rather than a lasting effect) is the number of programs which attempt to start as soon as you turn on the computer.

As such, you need to check the client’s list of startup programs and remove any that are not useful.

Follow these steps to open up the “Login Items” menu and remove unwanted programs.

  • 1

    Open System Preferences
  • 2

    Select “Users & Groups”
  • 3

    Choose your username on the right
  • 4

    Select the “Login Items” tab
  • 5

    Check the programs you want to disable
  • 6

    Press the “-” symbol to disable the program

Check startup programs in Windows 10

In Windows 10, changing startup programs is done from the Task Manager.

From here, you can change each program’s status by right-clicking on the item and selecting your new preference.

  • 1

    Right click the Start icon
  • 2

    Select “Task Manager”
  • 3

    Select the program to be disabled
  • 4

    Right-click on the item
  • 5

    Change the status to “Disabled”

Uninstall bloatware in Linux Ubuntu

Linux users need to be directed down the following file path to open the GUI Package Management Tool, which will allow them to remove unwanted software packages:

  • 1

    Open the System app
  • 2

    Select “Administration”
  • 3

    Select “Synaptic Package Manager”

From here, simply select the software you want to disable and check “Mark for Removal”.

  • 1

    Select the software to disable
  • 2

    Select “Mark for Removal”

Uninstall bloatware in macOS

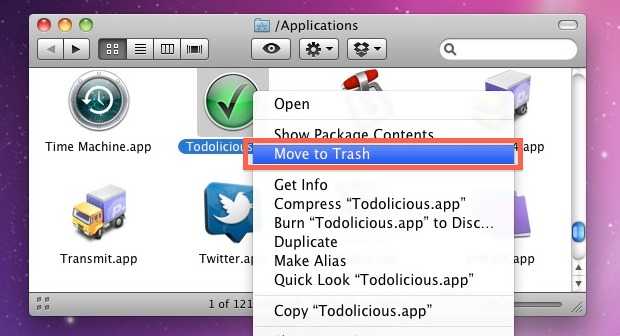
To guide a client in removing an app from their Mac computer, all you need to do is to tell them to move the application icon to their Trash and then empty the bin.

As well as dragging, you can also right-click the application and select “Move to Trash” from the menu.

  • 1

    Open the Applications folder
  • 2

    Move the application to the Trash
  • 3

    Empty the Trash

Uninstall bloatware in Windows 10

Tell your client to open the search bar in the Windows start menu and type “Programs and Features”, or do the following:

  • 1

    Open the Control Panel
  • 2

    Select “Programs”
  • 3

    Select “Programs and Features”

From here, you’ll see a list of installed programs. Discuss with your client which of these could be removed and instruct them to uninstall any unnecessary programs.


Security solutions:

Make sure only one antivirus is active in Linux Ubuntu

Linux makes use of the kernel-based Uncomplaiced Firewall (UFW) to manage netfilter and firewall set

You can check that UFW is running by inputting the following into the terminal:

sudo ufw status

Whenever ufw is active, you’ll get a listing of the current rules that looks similar to this:

Status: active

To               Action      From
--               ------      ----
22               ALLOW       Anywhere


Make sure only one antivirus is active in macOS

If your client is running macOS, instruct them to hit the Command+Option+Escape keys to open the Force Quit Applications panel.

From here, you will be able to check which antivirus programs are active, and Force Quit all but one.


Make sure only one antivirus is active in Windows 10

Tell your client to remove all but one of their antivirus programs. 

If they aren’t sure how to do this, guide them through the process with this sub-checklist:

  • 1

    Open the Control Panel
  • 2

    Select “Programs”
  • 3

    Select “Programs and Features”
  • 4

    Tell them to list all antivirus software installed
  • 5

    Consult with them and decide which antivirus should remain installed
  • 6

    Remove all other antivirus programs from the Programs and Features list

Run a system check for malware in Linux Ubuntu

Ask the client which antivirus they are running in Linux Ubuntu, and have them perform a complete system check. 

It’s possible they may not have any antivirus software installed. To install ClamAV, one of the most reliable Linux based antivirus programs, run the following in the terminal:

sudo apt install clamav clamtk

Then update ClamAV’s virus database:

sudo freshclam

Don’t forget togo to “Settings” and check off the following before the full scan:

  • 1

    “Scan files beginning with a dot”
  • 2

    “Scan files larger than 20 MB”
  • 3

    “Scan directories recursively”

Finally, start the ClamAV scan.

After returning to the main menu, select the directory that you want to check. If you want to scan the whole drive, select “Filesystem.”

  • 1

    Return to the main menu
  • 2

    Select “Scan A Directory”
  • 3

    Select the directory that you want to check

If you run into a problem here, it’s likely because you need to run “clamtk” (the graphical user interface of ClamAV) from the command line with “sudo” to grant relevant privileges, like so:

sudo clamtk

After the scan is complete, ClamAV will give you the option to either delete or quarantine the threats it has found. 


Run a system check for malware in macOS

Instruct your client to open whatever antivirus software that is left installed and perform a full system check.

After the check, you’ll want to have them deal with any threats the software has detected by removing or quarantining them.

  • 1

    Open the antivirus program
  • 2

    Perform a full system check
  • 3

    Quarantine or erase any detected threats

Run a system check for malware in Windows 10

Next up, instruct your client to open their antivirus program and perform a full system scan

After the scan has finished, tell them to erase or quarantine any threats which are detected.

  • 1

    Open the antivirus program
  • 2

    Run a full system scan
  • 3

    Quarantine or erase any detected threats

Internet connection fixes:

Check that the router is not the problem

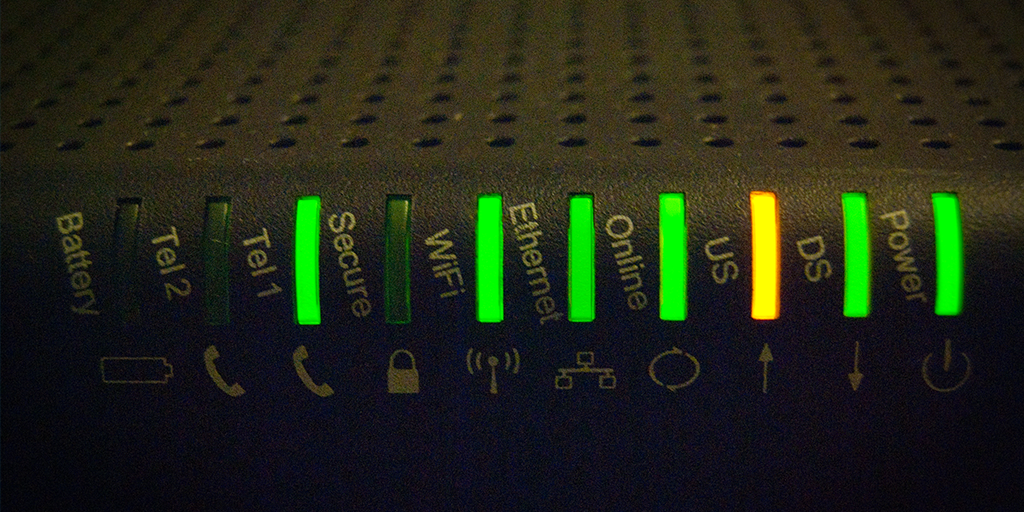
First things first; connectivity problems can make up a sizeable chunk of helpdesk calls, and so it only makes sense to deal with the easiest solution to many issues first. Ask the client to confirm that their router is working.

  • 1

    Check for unlit lights on the router
  • 2

    Ensure solid and secure physical connections
  • 3

    Turn the device off and on again
  • 4

    Check that the aerial is vertical
  • 5

    Make sure nothing is blocking the signal
  • 6

    Reset the router

By confirming this you can eliminate the router as a source of the problem and focus on fixing their device’s connection at the correct end. Although overheating should have already been covered in the initial inquiries, several general router checks must now be undertaken.

The method for performing the checks are as follows:

  • Look for unlit lights on the router to signify that there is a problem (these lights show the status of the router, and although they change from model to model, there will usually be a standard set of lights which demonstrate a working router, such as “Wireless” and so on) 
  • Ensure all connections are solid and secure (all cables are fully inserted)
  • Turn the device off and on again (there should be a button or switch at the back of the device)
  • Make sure the aerial is vertical (this gives a much larger coverage area than horizontal)
  • Ensure nothing is blocking the signal (between the router and device there should be as little interruption as possible)
  • Reset the router (tell them to grab a pencil, or something with a similar tip, and use it to press into the “Reset” divot in the back of the device; it should reset, shown by the wifi lights blinking)

Confirm that the computer is connected to the router

Once the client has confirmed that the router is working as it should be, ask them to make sure the computer has a good connection to the router.

The computer will be connected via ethernet cable or via wireless connection, so the first step will be to determine which – after which you can check the strength of the connection.

  • Wired: check the ethernet is securely plugged into the computer and router.
  • Wireless: check the Wi-Fi icon is indicating a stable connection
  • 1

    Determine whether the computer uses a wireless or ethernet connection
  • 2

    Ensure that connection is stable
  • 3

    Check that the computer has a working wireless connection (if applicable)

Troubleshoot network connection in Linux Ubuntu

Systems with Linux Ubuntu have the Network Manager graphical interface for easy network troubleshooting.

Have the client open the Network Manager by clicking the Wi-Fi icon to see the available connections.

  • 1

    Make sure “Enable Networking” is checked
  • 2

    Make sure “Enable Wi-Fi” is checked
  • 3

    Select the active internet connection
  • 4

    Click “Edit Connections”

Then instruct the client to make sure the SSID and password are correctly input and enable an automatic connection to the selected address.

  • 1

    Check SSID is input correctly
  • 2

    Check password is input correctly
  • 3

    Check “Automatically connect to this network when it is available”

Once you’ve configured Network Manager, instruct your client to input the following terminal command to perform a ping test:

ping -c 5 google.com

Doing so will send five Internet Control Message Protocol (ICMP) echo request packets to the domain specified.

  • If your connection is working as it should be, you will see five responses from google.com.
  • If there are no responses, then your computer can’t reach google.com, meaning there is a problem with the internet connection
  • If there are some (fewer than five, greater than 0) responses, then your computer is experiencing “packet loss”, which could mean that the problem is with any of your router, modem, Internet Service Provider (ISP) or Google itself.

Troubleshoot network connection in macOS

To troubleshoot network issues, direct your client to Apple’s Wi-Fi menu, which they can access by clicking the Wi-Fi icon located in the top right hand corner of the screen.

First of all, check the basics:

  • 1

    Make sure the client’s Wi-Fi is turned on
  • 2

    Make sure they are connected to the correct network

Following this, you should check and configure the advanced settings.

  • 1

    Open the Apple menu
  • 2

    Select “System Preferences”
  • 3

    Open the View menu
  • 4

    Select “Network”
  • 5

    Select “Wi-Fi”
  • 6

    Open the Advanced menu
  • 7

    Select the “TCP/IP” tab

At this point, they should be looking at the six additional Wi-Fi settings tabs.

Make sure they visit each tab and confirm that all settings are input correctly, as the computer won’t be able to connect to the internet if any of this information is incorrect.

Using the following sub-checklsit, have them verify everything looks acceptable.

  • 1

    Verify Wi-Fi settings are correctly configured
  • 2

    Verify TCP/IP settings are correctly configured
  • 3

    Verify DNS settings are correctly configured
  • 4

    Verify WINS settings are correctly configured
  • 5

    Verify 802.1X settings are correctly configured
  • 6

    Verify Proxies settings are correctly configured
  • 7

    Verify Hardware settings are correctly configured

Troubleshoot network connection in Windows 10

To wrap up any internet connection problems, tell the client to run the Windows Network Troubleshooting tool.

This is a handy way to get useful information about the nature of the connection issue; and quite often the issue will be resolved automatically if it can be.

  • 1

    Right-click the networking symbol in the taskbar
  • 2

    Select “Troubleshoot problems”

Computer display fixes:

Check the screen resolution in Linux Ubuntu

First up, ask the client to determine their current monitor’s resolution.

Then tell them to enter the following command in the terminal:

xrandr

This will show up a list of resolutions, from which their ideal one should be selected.

The process is outlined clearly in the sub-checklist below:

  • 1

    Have client check their screen resolution
  • 2

    Determine what their optimum screen resolution should be
  • 3

    Enter “xrandr” into the terminal
  • 4

    Select the optimal resolution from this list

Check the screen resolution in macOS

First up, direct them to What Is My Screen Resolution in order to determine what their current resolution is.

Next, ask them what size their monitor screen is and determine the optimum resolution.

If their resolution is correct, then move on. Otherwise, you will need to change their resolution with the following method.

  • 1

    Open the Apple menu
  • 2

    Select “System Preferences”
  • 3

    Select “Display”
  • 4

    Select “Scaled”
  • 5

    Select the optimal resolution from this list

Check the screen resolution in Windows 10

First of all have your client go to What Is My Screen Resolution in order to determine the current resolution of their monitor.

Then ask them what size their monitor screen is and determine the optimum resolution.

If their resolution is correct, then move on.

Otherwise, you will need to change their resolution with the following method.

  • 1

    Open the Control Panel
  • 2

    Select “Appearance and Personalization”
  • 3

    Select “Adjust Screen Resolution”
  • 4

    Select the optimal resolution from this list
  • 5

    Select “Apply”
  • 6

    Select “Keep”

Update the video card drivers in Linux Ubuntu

For Linux systems, begin by telling your client to open a terminal window, then enter the following command:

sudo lspci | grep VGA

They should see a detailed list including information about their graphics card’s manufacturer’s name (usually NVIDIA or ATI). Next you need to get them to check for the version of the driver they have installed. In the terminal, tell them to type the following command:

sudo glxinfo | grep OpenGL

This should return more data, of which the last series of numbers in the “OpenGL version string” line is the driver version.

Once they know both the driver version and manufacturer, direct them to the manufacturer’s website and download the newest driver.


Update the video card drivers in macOS

Apple has made it simple to update all software drivers, including video card drivers, inside of macOS.

Simply follow the tasks below:

  • 1

    Click on the Apple logo
  • 2

    Select “Software Update” from the drop-down menu
  • 3

    Wait for the update to complete
  • 4

    Restart the system

Update the video card drivers in Windows 10

Ask your client to hit Windows Key+”e” to open the search bar, and type “dxdiag” to run the DirectX Diagnostic Tool.

Instruct them to go to the “Display” tab and check the device name and manufacturer listed as the active video device.

They will then need to go to one of the following websites and download the latest driver (there will usually be a tool which you can use to automatically detect the latest applicable driver, if you are unsure of which one to download).

The following sub-checklist will guide you through the process of updating the visual drivers.

  • 1

    Open the start menu search bar
  • 2

    Type “dxdiag” and hit enter
  • 3

    Determine graphics card model name and number
  • 4

    Go to the manufacturer website and download the latest drivers

Finishing up:

Assess the status of the problem

Once all of these checks have been performed, you must assess the level to which the problem has been solved.


The criteria for each can be determined as follows:

  • Resolved – the issue has been solved.
  • Diagnosed – the solution (or at least offending part) is known, however, it cannot be solved by you guiding the client over the phone.
  • Inconclusive – the issue has no easily discernable cause and requires further analysis.

Ask the client if you can help with anything else

The helpdesk management process is in its final stage; now you only have to convey your final comments to the client.

As the client’s problem has been resolved, you can thank them for their time and move on to the next support ticket.

Start this checklist again to help you achieve a consistently high level of support.

Forward a copy of the report to a computer repair technician

For “diagnosed” problems which cannot be solved on your end (such as a broken cable or faulty component), inform the client of the situation and forward a summary of the checklist results to the support technician after you specify the nature of repairs required.


Forward a copy of the report to the client

If the issue remains “inconclusive” with no solution to be found, recommend that the client seeks further diagnostics on the machine by either the manufacturer or a reliable company which will physically examine the computer.

Before reviewing the following email form, provide additional comments and observations from your support process that the client may find useful.


Sources:

Take control of your workflows today.