 Creating workflows with Process Street is as quick and easy as 1-2-3. To prove it here are five tips to help you create your first workflow:
- Pages: The peanut butter to your workflows
- Pick a simple, repeatable workflow
- Complete your task list first
- Use form fields to capture information
- Assign your team members
- Connect your favorite apps in one place
Pages: The peanut butter to your workflows
Let me share something with you: Workflows can’t do everything.
I know: Shocking, right? But it’s true.
Workflows are great for a lot of things – automating your recurring tasks, maintaining transparency and accountability within your team, that oh-so-satisfying hit of dopamine when you click the “Complete” button.
Workflows are still the cornerstone of Process Street, but we’ve also added Pages as a companion product. Basically, Pages is the free-forever home for all your established team knowledge.
This is stuff like:
- Employee handbooks
- Process documentation
- Company organizational structures
- The SOP for a zombie apocalypse (Hey – things happen, okay?)
- Real SOPs for actual business operations
- Compliance and quality assurance
- Basically all the info you want your employees and teams to have easy access to
Just like your workflows, you can set permissions for Pages and the folders they’re in, so employees only see the documents they need – which means you still have all the security of that locked filing cabinet with the wonky middle drawer, but better.
The combination of Pages with Workflows creates a modern process management platform for teams. Your processes and knowledge base all live in the same location that everyone can find every time they need it.
It’s also super easy to update, so no printing off reams of appendices and amendments that’s chaotic and confusing. Plus, it’s pro-tree. We’re very pro-tree at Process Street.
You can read more about how awesome Pages is here, but for now let’s just start with building your first workflow.
Workflow Tip #1: Pick a simple, repeatable workflow
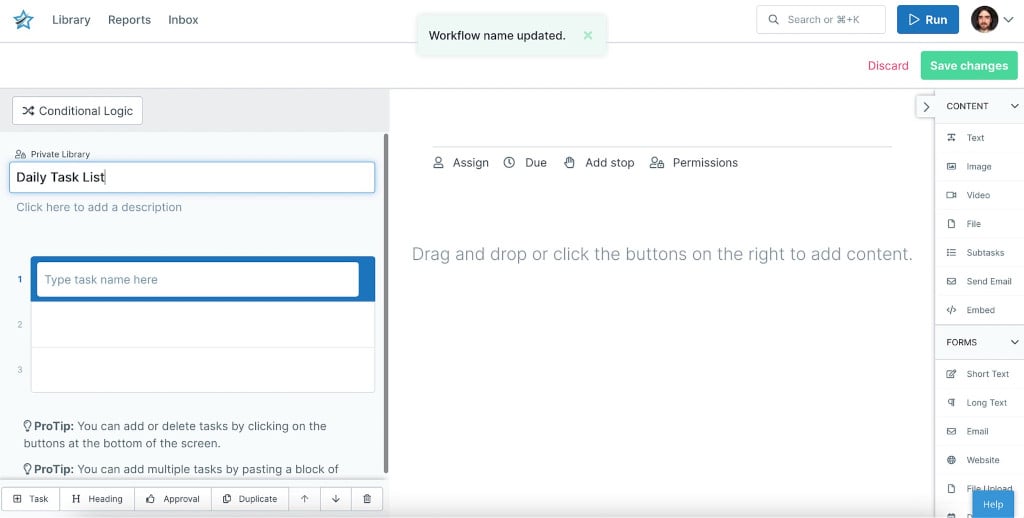 In this case, we’ll document our daily task list as it’s very simple but will make life easier every single day.
One very cool feature to keep in mind when documenting your task list is conditional logic.
Let’s say that from time to time, you write blurbs for social media campaigns. You don’t do this every day, but it happens often.
With conditional logic, you can add a simple yes or no question (I’ll get to this) to your first task:
Do you need to write social media copy today?
- If no, then the “write social media copy” task remains hidden.
- If yes, then the “write social media copy” task is added to the list.
This means you don’t need two separate workflows for the days you don’t write copy and the days that you do. Conditional logic allows you to use one workflow for multiple scenarios, which will make your life exponentially easier.
Trust me. I have an honest face.
Workflow Tip #2: Complete your task list first
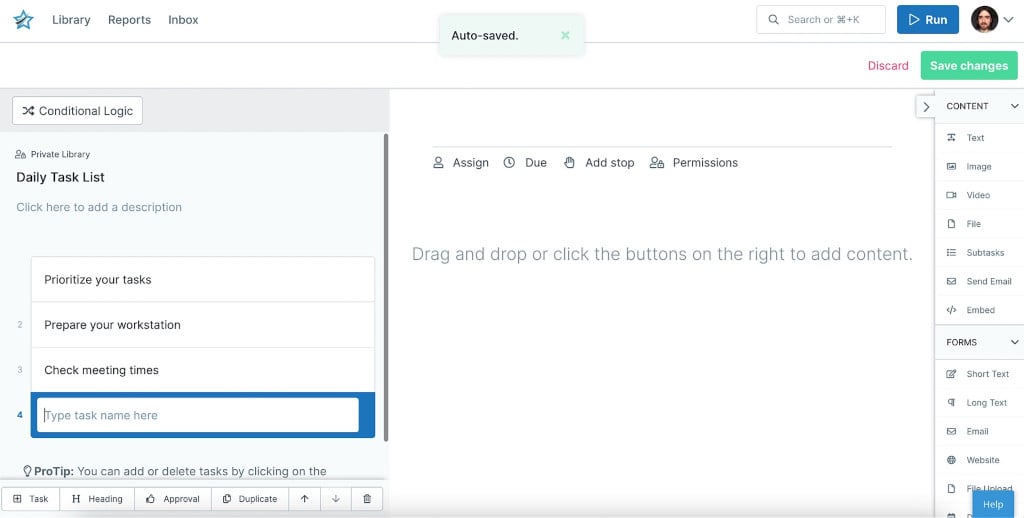 This lets you set the scope of your workflow and stops you from having to reorder your entire process to fit another task.
There’s actually an art to creating a task list. You’re probably thinking, Leks, you’re ridiculous. I know how to make a to-do list.
And I have no doubt that you do. But for a workflow to really, um, work it helps to set your tasks a certain way. Fortunately for you, I do this all the time, so here are the certified Process Street tips on creating a task list:
1. Use sections to categorize your tasks. If you type Section 1: (the colon is important), the text will be bold, and – voilà – you’ve created a section. A good use case for this feature is an onboarding workflow. Onboarding has several stages, each with its own set of tasks. With sections, you can separate those tasks into pre-onboarding, first week, and so on, and even keep later stages hidden until the new hire reaches a certain point.
2. Limit it to one action per task. I know this seems obvious, but it’s trickier than it seems. If you have a task in your list that involves several actions or additional steps, break it down into smaller tasks. This ensures that every task is clear and specific – no one gets overwhelmed or confused and nothing slips through the cracks.
3. Use imperative statements. Instead of having a task that says, “team meeting,” use, “Schedule team meeting.” Anyone using this workflow can then quickly scan the list of tasks and get an idea of what needs to be done. If a task just says, “team meeting,” it isn’t clear what action should be taken. It may mean holding the meeting, taking notes from the meeting, creating an agenda, etc. It’ll also help you identify whether or not a task has more than one action attached.
Workflow Tip #3: Use form fields to capture information
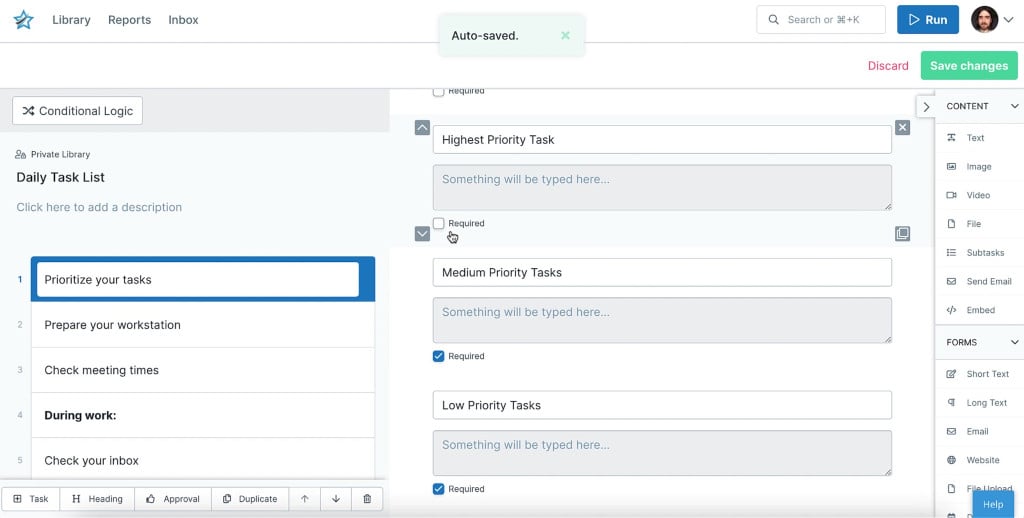 Form fields let you record information as you complete the workflow runs, letting you keep track of important details that aren’t always the same. You can even use form fields to send and receive data from the tools you love.
Form fields add a huge amount of flexibility to your workflow. They’re a great way to capture information that can then be automatically entered into a later task or exported to another app, like a Google spreadsheet or a Slack channel.
Your basic form fields are:
- Short text: As the name suggests, this is for short entries such as names, titles, and so on. For example, in an employee onboarding workflow, you can use short text fields to capture the employee’s name, the department they work in, and who their immediate supervisor is.
- Email address: This field is specifically designed to capture email addresses. If text is entered that doesn’t follow the standard address format ([email protected]), it’ll be flagged as incomplete.
- URL: This is the website version of the email address field. If text is entered that doesn’t follow the usual URL format (domain.suffix), it’ll be marked incomplete.
- Date: Okay, so you have a “Schedule team meeting” task but how do you actually do that? Don’t bother with a short text field; a date field is much better. This will open a mini-calendar where the appropriate date can be selected.
- Dropdown: Remember when I mentioned adding a yes or no question to use with conditional logic? Well, this is the field for that. It’s not limited to either/or questions, though. You can have multiple options – such as a list of departments or supervisors – that the user can choose from.
- Multi-choice: So this is similar to the dropdown menu, but allows multiple options to be selected rather than just one. If you use one workflow for new hires in multiple departments or multiple locations, the multi-choice field can be used to specify what resources or packages they need to get ready for their first day.
- Long text: Like their shorter counterpart, long text fields are for your longer chunks of information. This is good for meeting notes, addresses, or feedback. When doing an employee evaluation, you may want to include a section for additional notes. A long text field would be perfect for that.
- File upload: This field does exactly what it says on the tin. You can use it to upload any important file that needs to go with the workflow – images, documents, video, etc. If you need a copy of a signed contract or the employee’s photo for security, it can be uploaded by the user here.
- Subtasks: I know I said you should only have one action per task but sometimes you have to break the rules. Your onboarding employee needs to fill out the new hire paperwork, but there are several different forms. You don’t need to include a separate task for each form; use subtasks instead. This creates a simple checklist within the task that can be checked off as each action is completed.
Workflow Tip #4: Assign your team members
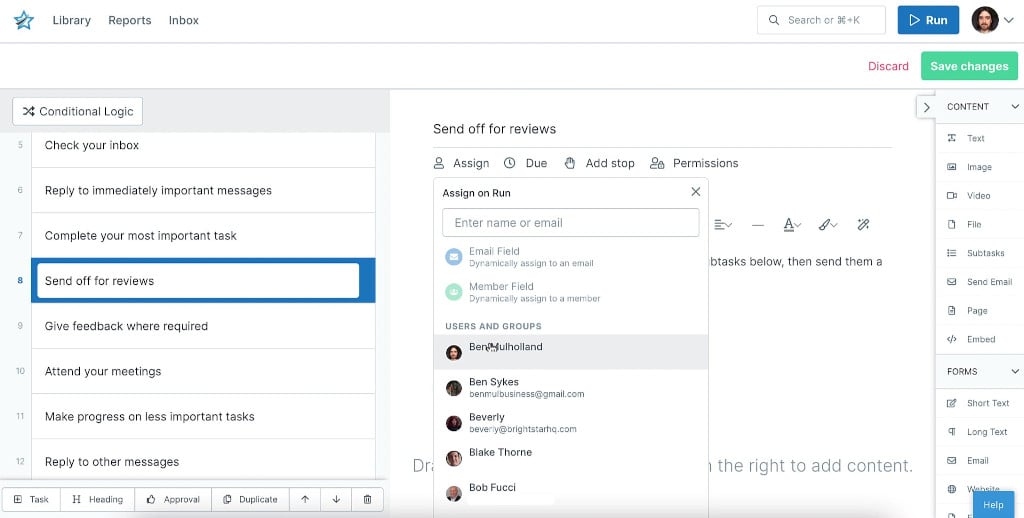 This will let your team see exactly what they have to do by checking their inbox. You don’t have to go digging to find your tasks.
The great thing about workflows is that they really do facilitate team collaboration. Most of your projects probably require input or revision from multiple people within your organization. With Process Street, you assign workflows and even individual tasks to different members and also different groups within your organization.
Even better, you can assign tasks to a specific role. So if you just need someone from HR to complete a task, anyone in that department with that role can take care of it. That way you aren’t waiting for a specific person to move forward.
The very best part of this is the Guest assignment. A Guest can be anyone inside or outside your organization that you need to collaborate with. The catch? They can only access what you give them permission to.
If you need a client to review a report or provide additional information to move forward, you can add that client as a guest, assign them to that specific task, and that’s the only thing they can view. You keep your security intact and make your collaborations that much simpler for everyone.
Workflow Tip #5: Connect your favorite apps in one place
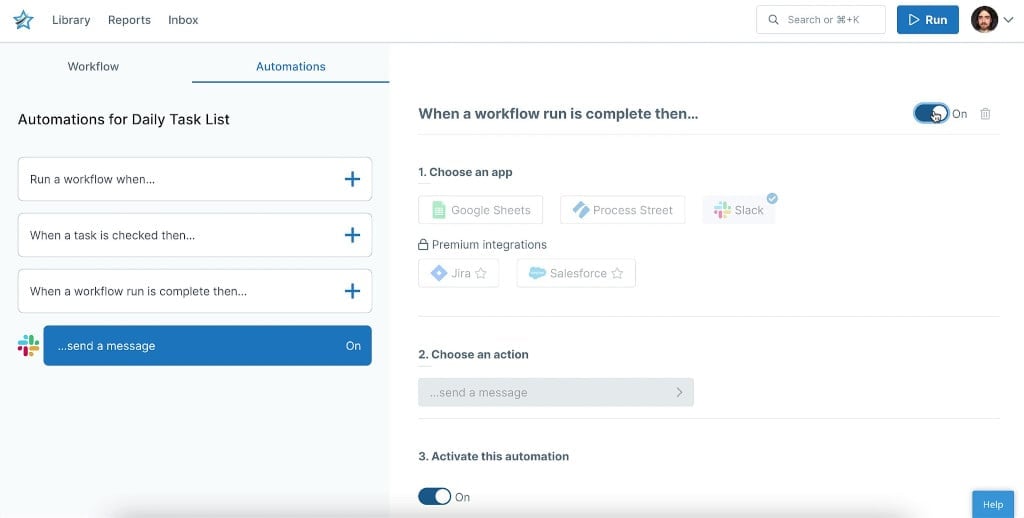
Supercharge your workflow by connecting Process Street with your other tools via Automations. Automations are the key to scaling any useful workflow and the sooner you include them, the more time you’ll save.
If you’re at all like me, you’re thinking, one more app? I already use 50. Why can’t I just use one for everything?
Well, you can. Process Street makes it possible. And we give you options.
Process Street’s first-party Automations will totally level up your favorite work apps. You can connect Slack, DocuSign, Salesforce, and many more all within a workflow to further automate your processes.
Need a message posted in Slack? Need a contract signed? Need data entered into Google Sheets? Done, done, and done.
In addition, Zapier adds even more integration possibilities. It’s simple enough to set up a zap between Process Street and literally thousands of the most popular apps for work. We have so many zaps running things, I don’t even know what they all do. Repetitive tasks just happen like magic and I don’t have to worry about them. It’s great.
I have an unhealthy relationship with Slack. It pings and I come running. So I have to mention Process Street’s Slack App.
This app connects Process Street and Slack so all of your Process Street notifications not only appear in Slack, but allow you to make approvals, complete tasks, and view other information all from within Slack.
Yes, it has increased the number of Slack pings, but it does mean we’re spending more quality time together.
Processes are a continuous process
See? Easy. The key is that your workflows don’t have to be super detailed at first in order to be useful. If you only have time to go in and write a task list, that’s fine. You can always come back, iterate, and expand the workflow later.
The more you use your workflows, the more you’ll appreciate how flexible and easy to update they are. Once a process has been created, it should keep evolving to suit your organization’s needs and requirements.
Practicing continuous improvement will ensure that all of your processes, methods, and practices are efficient and effective. All this means, really, is periodically checking your processes to make sure they still work the way they should – and improve them if they don’t.
Process Street is a fantastic tool for keeping your processes up-to-date, consistent, and accurate.
What’re you waiting for? Sign up for a free account at Process Street!
Let us know if you have any questions in the comments below!


 Workflows
 Forms
Forms Data Sets
 Pages
Pages Process AI
 Automations
 Analytics
 Apps
Apps Integrations

 Property management
 Human resources
 Customer management
 Information technology


Leks Drakos
Leks Drakos, Ph.D. is a rogue academic with a PhD from the University of Kent (Paris and Canterbury). Research interests include HR, DEIA, contemporary culture, post-apocalyptica, and monster studies. Twitter: @leksikality [he/him]