There may be occasions where you need to create one-off or ad hoc tasks for your team to complete.
This is particularly handy when you need to give a colleague a task to do that isn’t part of your existing process or daily operations, and it allows you to quickly handle simple tasks, as and when you need them.
In this article, we’ll show you how to create a quick task, by using a few of our great features, Role Assignments, and Dynamic Due Dates.
Users: To create or edit workflows, you must be an Administrator or a Member who has been given ‘edit’ access by your Administrator.
Create one-off tasks that utilize Role Assignments and Dynamic Due Dates.
Start by creating a blank workflow and name it “Quick Task” or something similar that you can identify easily when you’d like to run it.
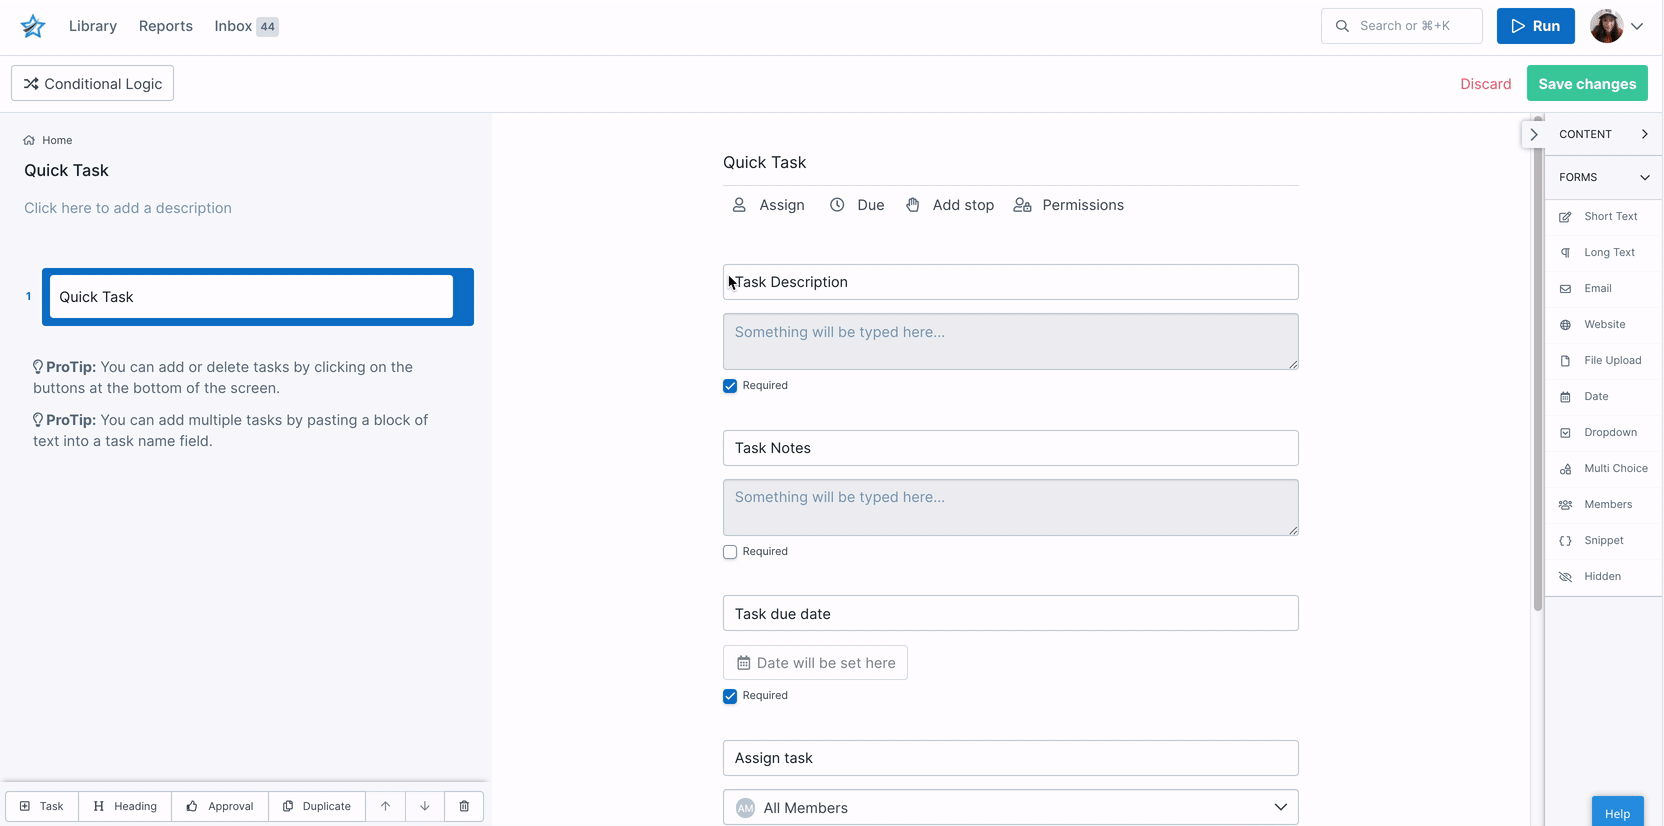
Remove two of the blank tasks and give your remaining task a name. In the example below we’ve also called the task “Quick Task”, as shown below:
Add two long text fields from the from field widget menu. Call one “Task description” and the other “Task notes”. The second form field is optional, so you could just use one here for the task description if you prefer.

Add a date field and label it “Task due date”.
Add a member’s form field and label it “Assign task”.
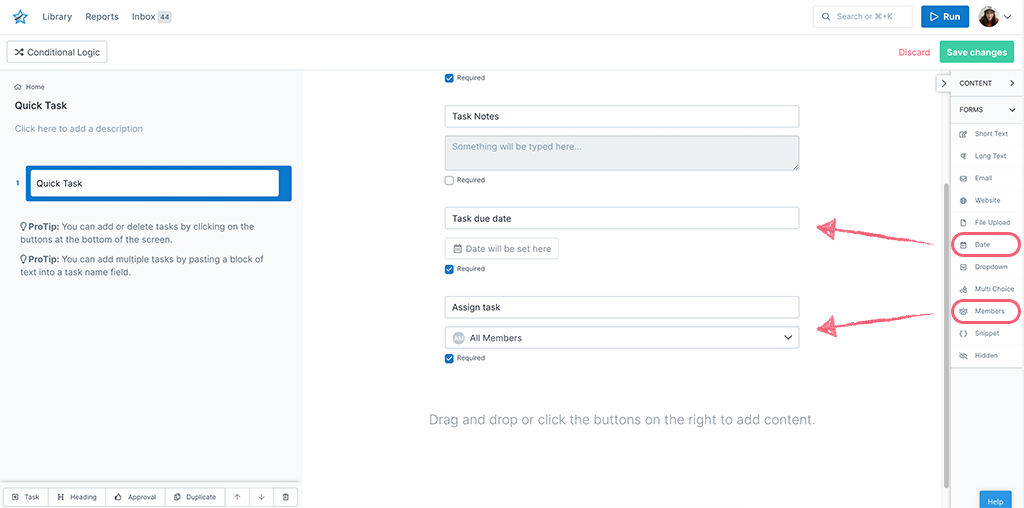
Assign the role of the “Assign task” members field to your task, and next add a dynamic due date to be due 1 minute after the “Task due date” date field.
Save changes to your workflow and run it to test it out, filling out the required form fields, setting a date, and assigning a team member.
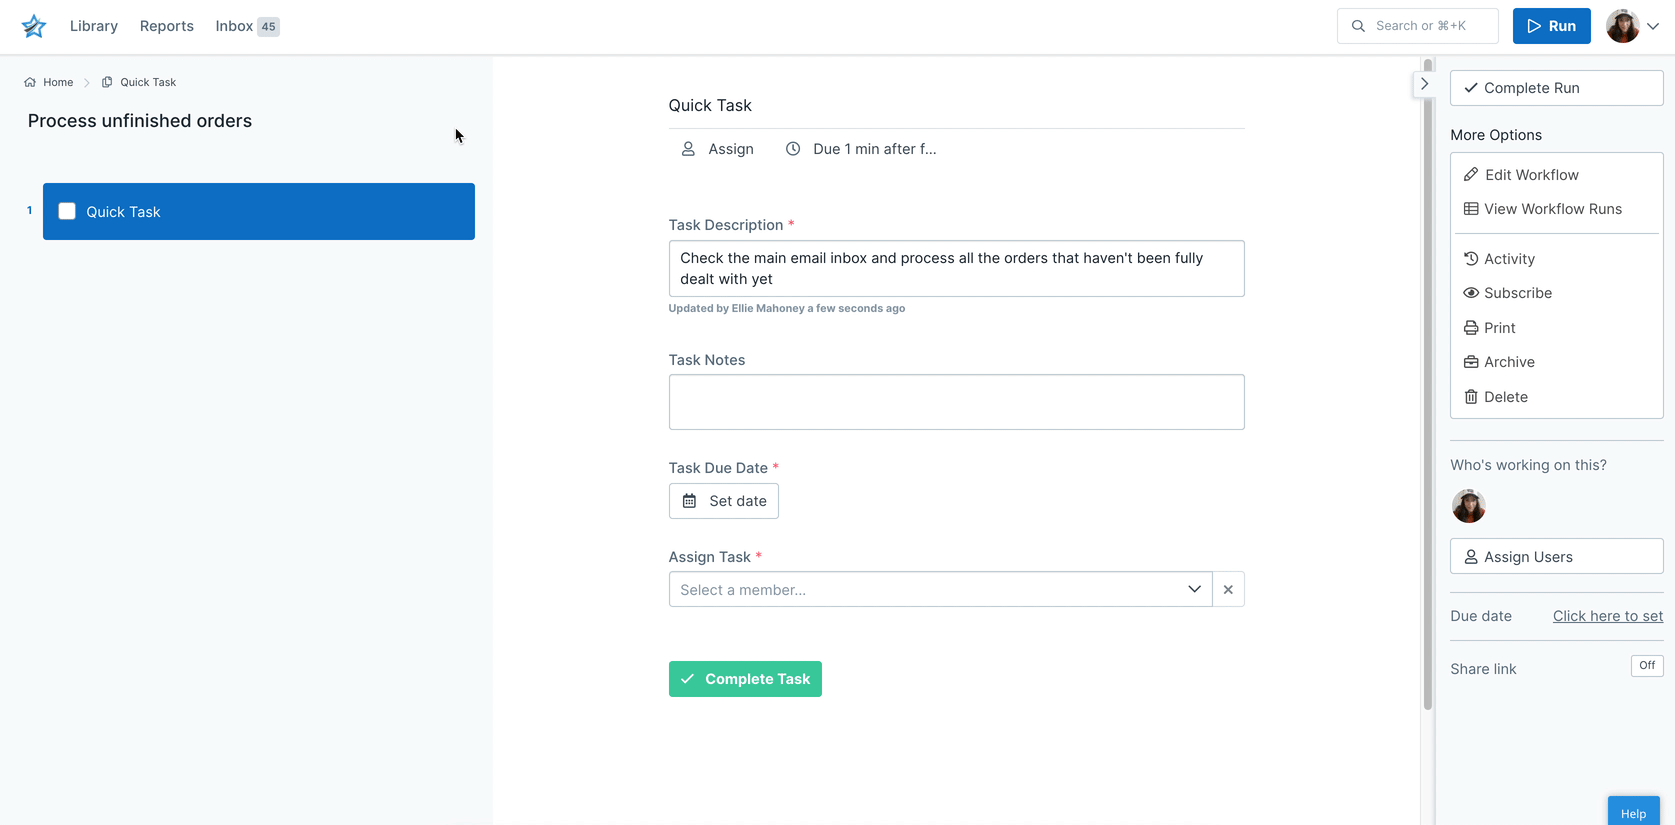
Optional: Remove yourself as the workflow run assignee from the right-hand side of the workflow run, so that you don’t see this run in your inbox. That way, only the person assigned to the task will see this task in their inbox.
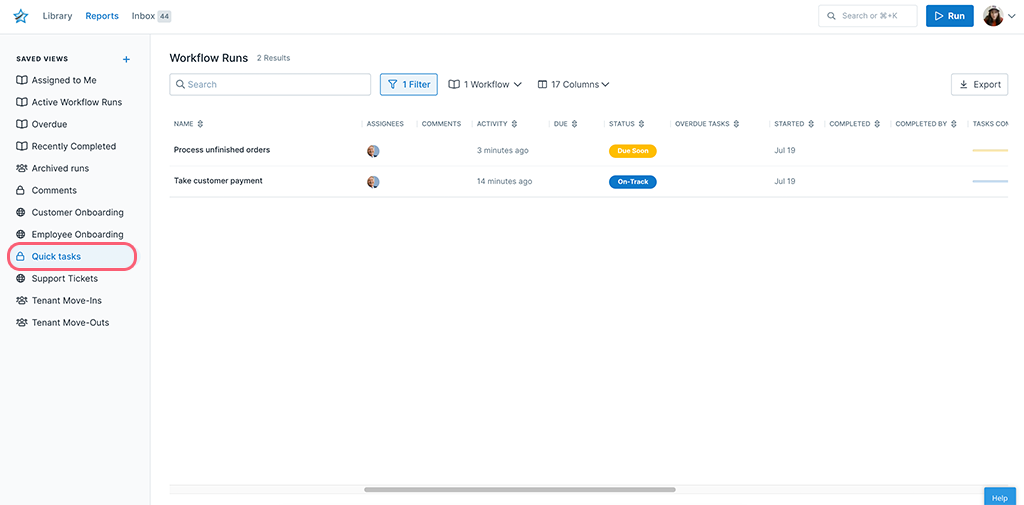
You can create a saved view for “Quick Tasks” in your Reports dashboard so that you can see which ones are in progress, due soon, or overdue.