 Workflows
 Forms
Forms Data Sets
 Pages
Pages Process AI
 Automations
 Analytics
 Apps
Apps Integrations
 Property management
 Human resources
 Customer management
 Information technology


Earlier this year we compared planner sisters Trello and Asana. But if you’re the owner of an Office 365 subscription, Microsoft has rolled out its own project management tool with kanban cards into your account for free.
It’s called Microsoft Planner and claims to “take the chaos out of teamwork.” Let’s see.
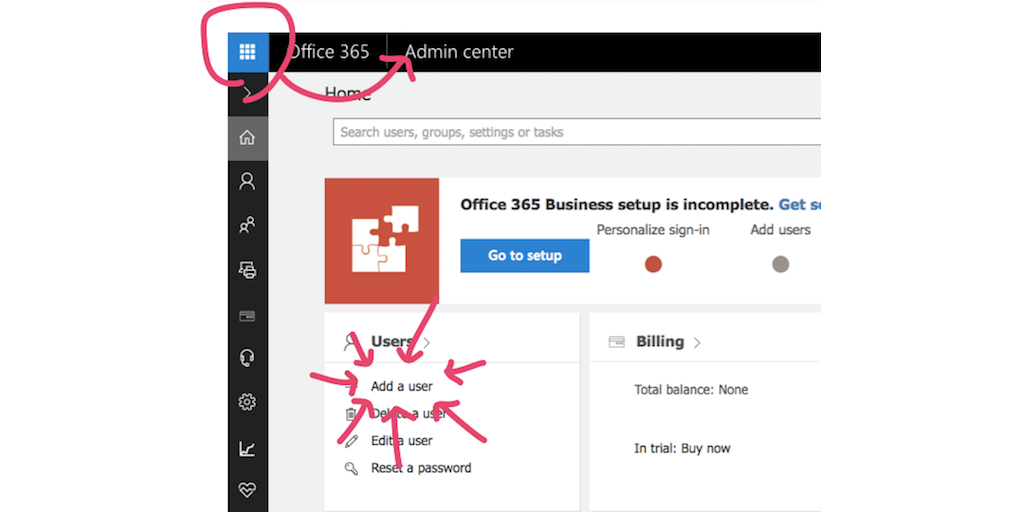
Sign in to Office 365 with your work or school email, and go to the app launcher by clicking on the Rubik’s cube menu in the top left corner. There you’ll see this friendly Planner logo:
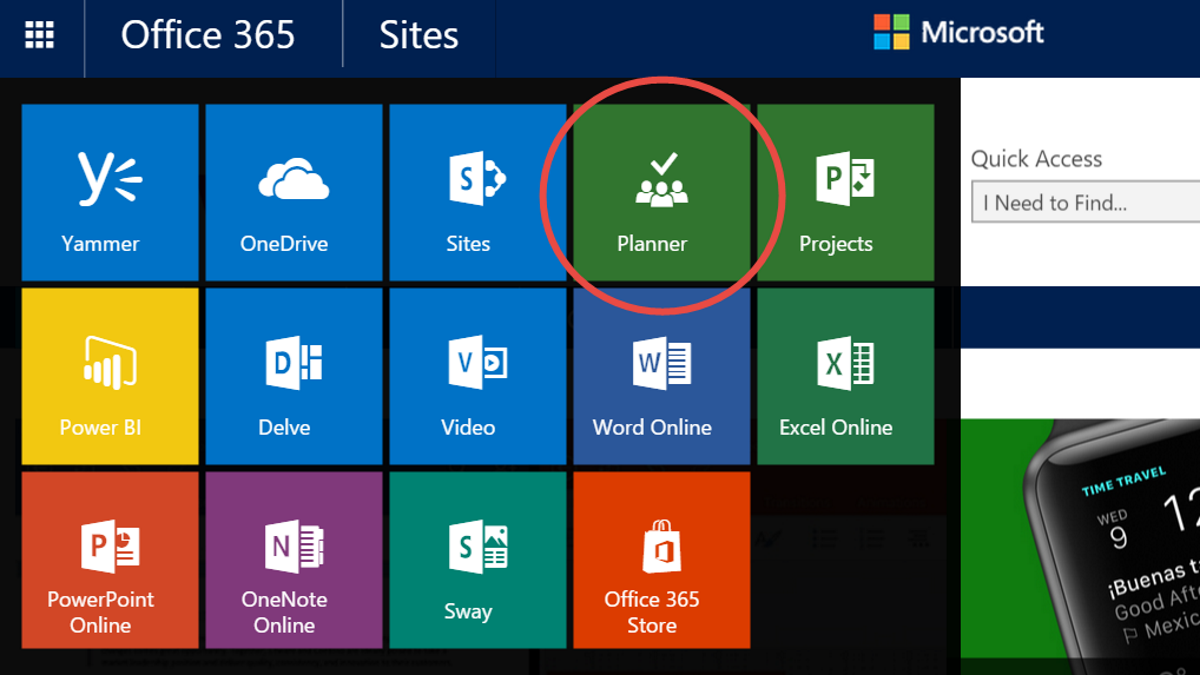
Here’s our take on Microsoft Planner, including some tips and tricks for becoming a super user, and our take on how it differs from the other tools out there:
1. A digital organizer your grandma could use
Microsoft Planner has learned how to make a very intuitive kanban board from competitors who’ve already done it. Is Planner any more refined than those tools? No, not really, but it does the job. And there are some nice bells and whistles that might give it the edge for your team.
It’s just “plans” and “tasks” and “buckets”
These are the three main units you’re working with in Microsoft Planner:
Plan. Your plan is your project. When you choose “New Plan” from the side menu, you’ll have the chance to title your new plan, describe it, decide whether it’ll be private or public, and give it an email address.

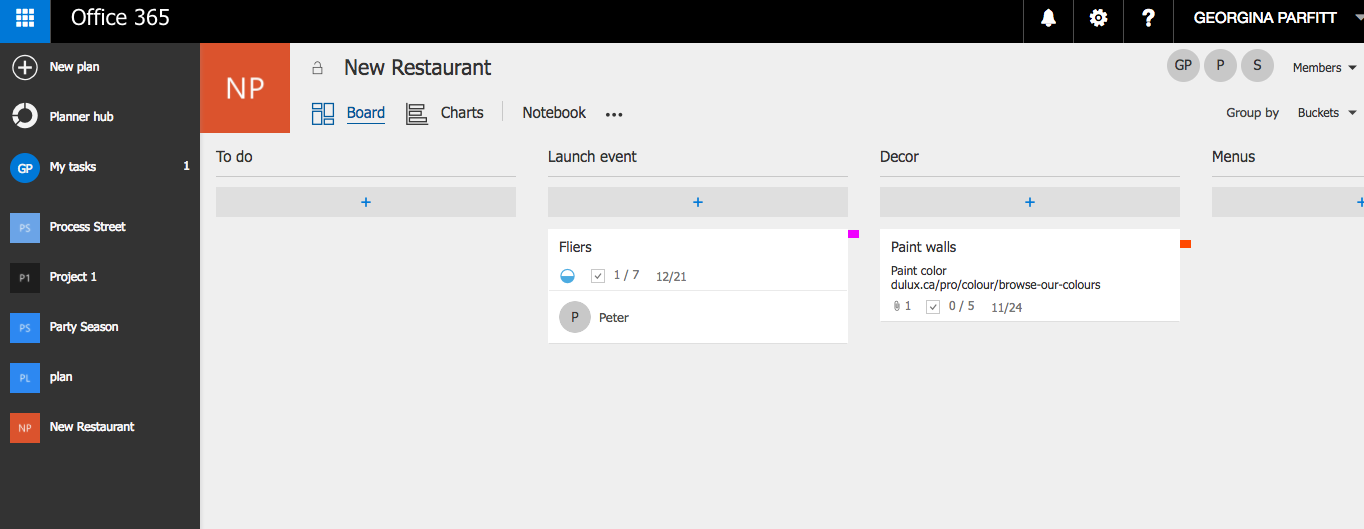
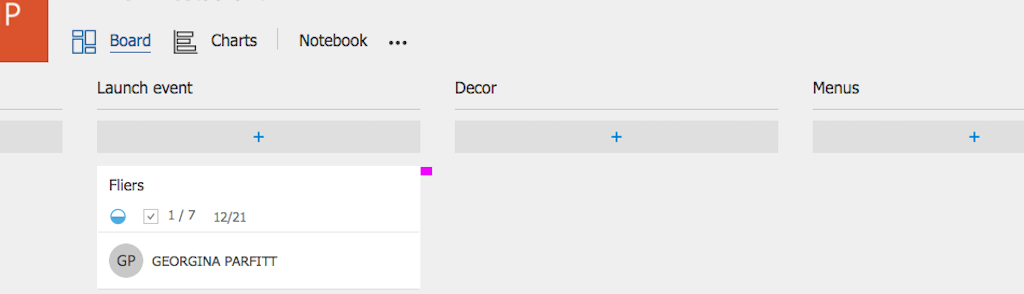
Once you’re in your new plan, you’ll see a view like this. This is the main “Board” view in Microsoft Planner. As you can see, you can also choose to view by “Charts” or you can transition to “Notebook” and other tools via the ellipses symbol. More on that treasure chest later.
Task. Tasks are your currency in Planner. Each task is an item on your to-do list and resides in a neat little card. On this card you can add a title for your task, a due date, and you can assign it to a member of your team.
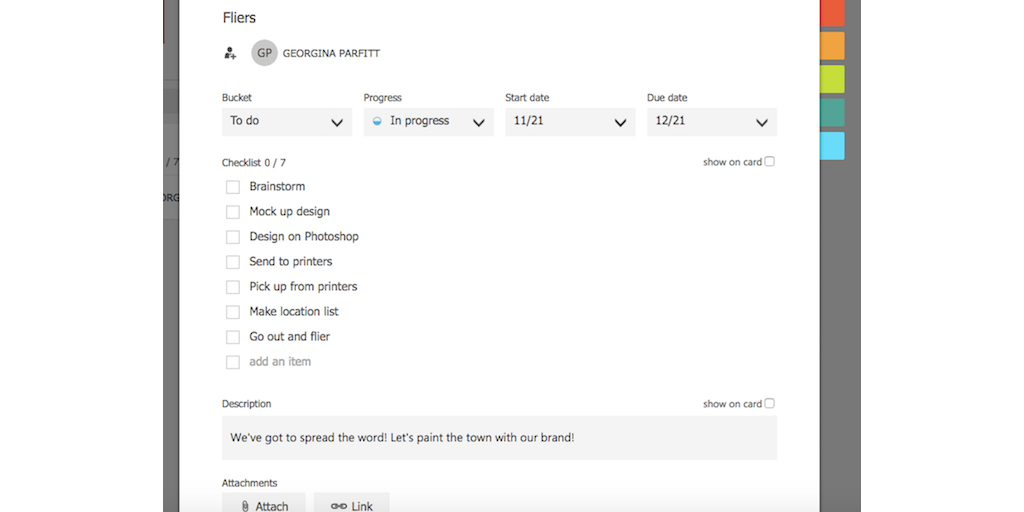
Click on a task card to open it up so you can see all its intimate details.
Bucket. Your buckets in Planner are your columns. Move a task card along from bucket to bucket to organize it. I’ve put my “Fliers” task in the “Launch Event” bucket.
Tips and tricks
Helpful links. Add a link inside a task to give your team members all the info and resources they need to get the job done. For example, see how I’ve added a link to the color I want for the restaurant in my “Paint walls” card.

Labels. You can also see that I’ve put a red label on the card. Use labels to color-code your tasks according to themes, priority level, or make up your own code.

Checklists within checklists. And for those who want to be beyond organized, there’s a handy checklist within each task card.
2. It will help you collaborate… sort of
While it’s clear so far that Microsoft Planner is a pretty functional organizer, collaboration is the real test. Planner supports internal teamwork well, but at the moment it isn’t set up well for customer sharing. If a collaborator isn’t on Office 365, they can’t see your plan.
Bring your team onboard
Add members. To start talking, add members to your team in Microsoft Planner. If you’re the administrator, you can add members by visiting the Office 365 admin center located in that Rubik’s cube menu. Here you’ll see the option to “Add a user.” Just enter your teammate’s name and your company name and they’ll receive a [email protected] email.
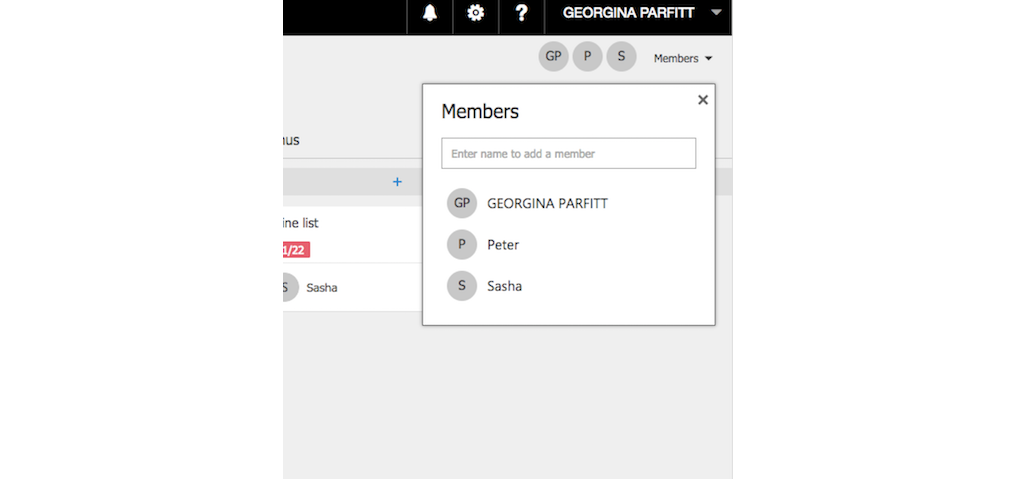
Start talking. Once you’ve added your team members, you can go back to Planner and click on “Members” to add them to a particular plan.
Open up a task card to assign the task to a team member.
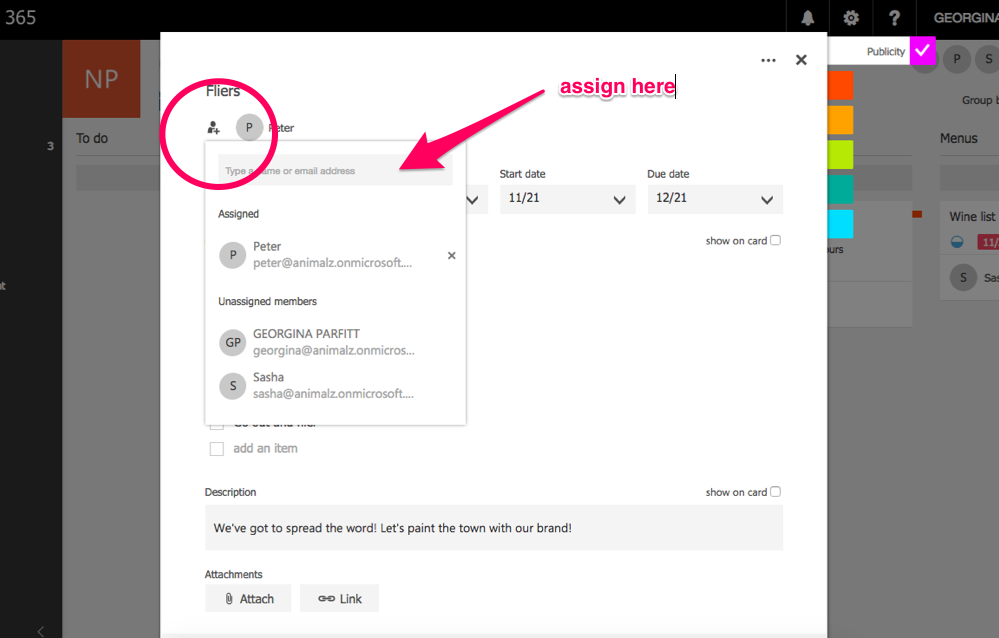
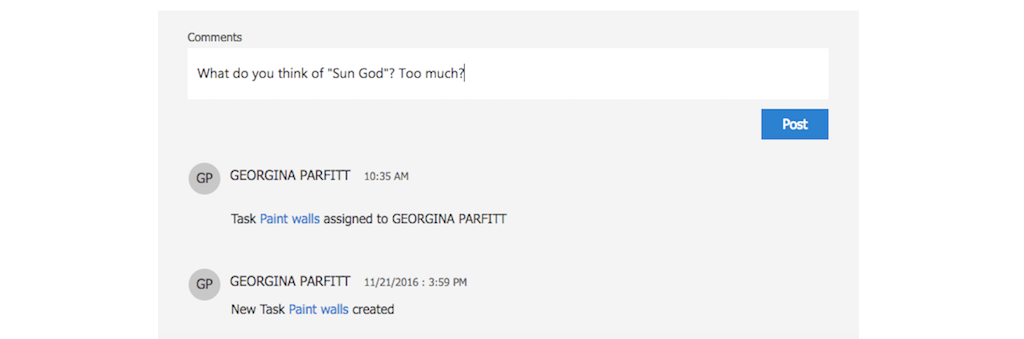
Use the comments section at the bottom of each task card to talk to your team as you work together.
Your big plans might have to wait. Unfortunately, it isn’t yet possible to assign a task to multiple team members, so you will need a point person to lead each task, at least nominally. In the “How Can We Improve Planner” section of Microsoft’s feedback forum, the most up-voted suggestions are about multiple users and templates. People want to be able to scale what they’re doing. Check out the Office 365 Roadmap to see that both of these features are currently in development — seems that Microsoft is listening to its users.
Tips and tricks
Faces are aces. Bug everybody to add a picture to their account. See how much easier it is to find your colleagues in a hurry?

3. It wants you to succeed
One of the ways Microsoft has differentiated Planner is with its progress-tracking features. They’re smart, easy, and visual, so you only need to glance at your plan to see how well you’re doing.
Green donuts for good behavior
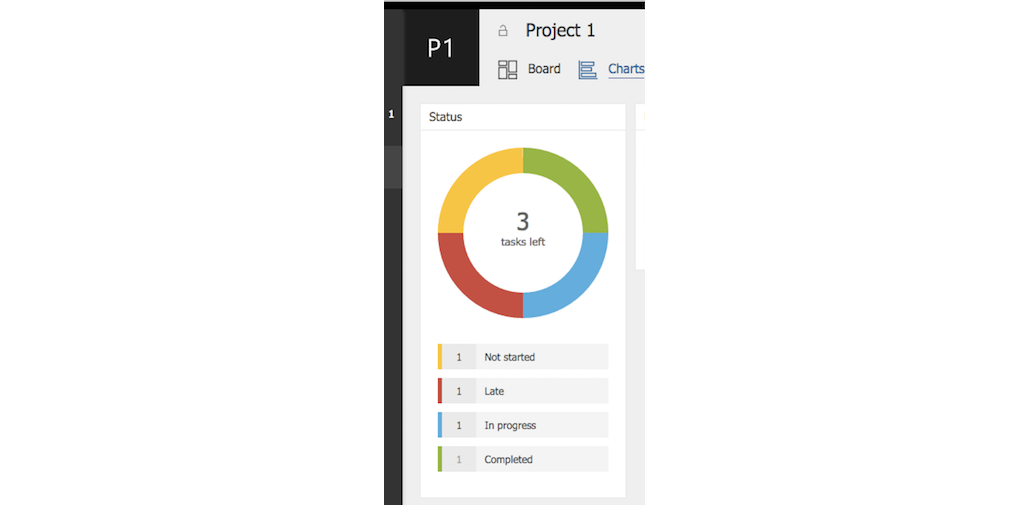
View progress in Charts. “Boards” is your main task view, but the Robin to its Batman is “Charts.” Here you can see a visual breakdown of your progress in the form of donut graphs. Red sections are running late, blue sections are in progress, yellows haven’t been started yet, and greens are done.
Planner cares if you’re late. After all, if you run late on all your projects you’re probably not going to give the tool a rave review.

Deadlines are visible on the front of each card. If you’re running late, that deadline will be red-flagged. There’s also a mini chart to show when a task is in progress, so you don’t have to go delving into charts if you’re in a hurry.
Tips and tricks
Sit tight for timelines. At the moment there’s no timeline or calendar view in Microsoft Planner, but you can “group by progress” or “group by plan.” This allows you to increase or decrease the pressure as you work. And by the look of Microsoft’s Roadmap, timeline and calendar views are on their way.
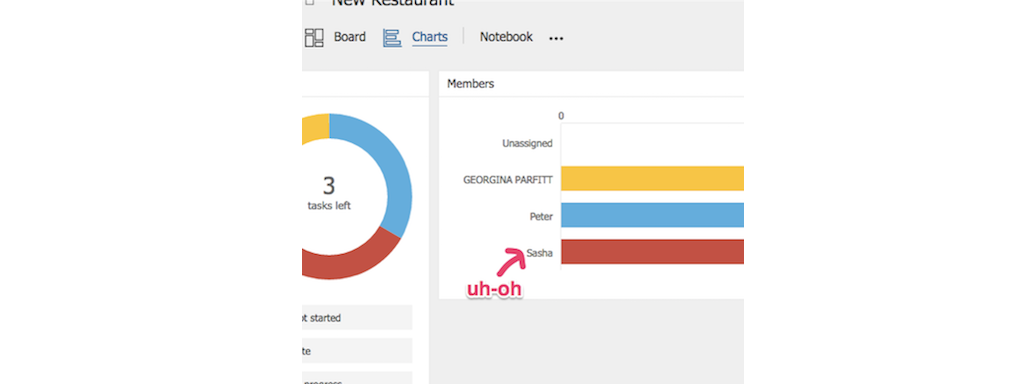
Keep people accountable. You can view your progress charts by member, so you can see instantly if Sasha’s letting the side down or if Peter’s finding things too easy and needs to be given more tasks.
Our Take On Microsoft Planner
A functional to-do list, true, but the main draw of Planner is the collection of tools that surrounds it.
There’s a whole suite back there
If you’re an Office 365 Business subscriber, you pay somewhere between $5 and $12.50 per user to access the Office 365 toolbox. On Microsoft Planner you can make the most of those tools as they relate to your project, here:
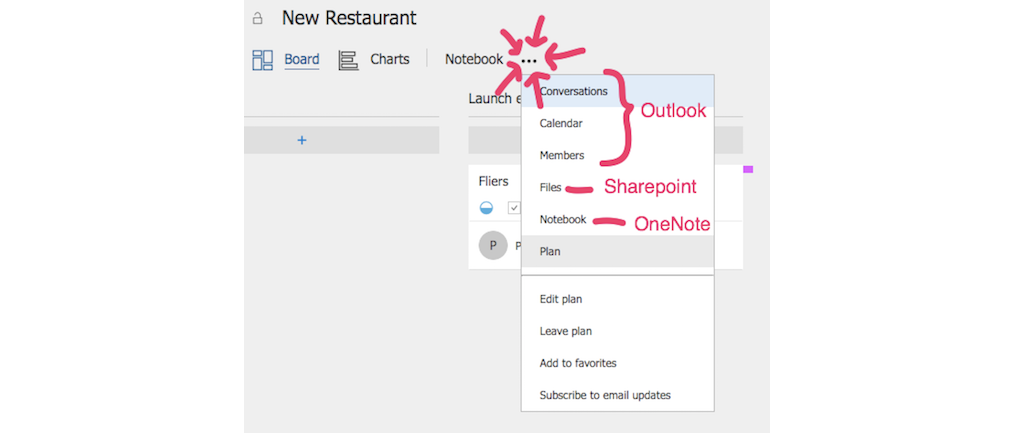
If you’re a regular Office 365 user it’s likely these tools are a big part of your working day. Using them alongside Planner will allow your team to connect email conversations, events, and docs to your to-do-list and increase its effectiveness.
Break the office 365 bubble
If you want to go further with integrations beyond Office 365, there is plenty you can do with a little research. Many tricks are for other parts of the suite (like using Zapier to turn Facebook friends into Outlook contacts) but these easily impact Microsoft Planner too. For example use Office Lens to capture whiteboards and meeting notes and then upload to Planner and see those pics within a task.
The future of Microsoft Planner is chatty
Life as an Office 365 user is getting more exciting. Microsoft is rolling out a bunch of stuff this year that’s making Microsoft Planner better. For example, earlier this month they announced Microsoft Teams, a Slack-like “chat-based work space,” which will make the whole Office suite much more collaborative.
We’d love to hear about the different ways you use Microsoft Planner in the comments. Who knows? You may even get featured in an upcoming Process Street article!
Vinay Patankar
CEO and Co-Founder of Process Street. Sign-up for his free systems masterclass or find him on Twitter and LinkedIn.