Cloudflare Redirects: How to Setup 301 Redirects (URL Forwarding) Using CloudFlare's DNS & Page Rules
The process of setting up redirects using Cloudflare’s DNS is pretty simple. You add your domain, point the CloudFlare DNS records (A record & CNAME record) to Cloudflare’s server, and then setup a URL forwarding rule. That’s pretty much it.
The first two steps of this walkthrough have nothing to do with the actual CloudFlare 301 setup. They are the things you need to do before any of this works. So, if you’ve already added your domain to your CF account and pointed your domain registrar’s nameservers to it – you can skip them.
1. Add Domain to CloudFlare
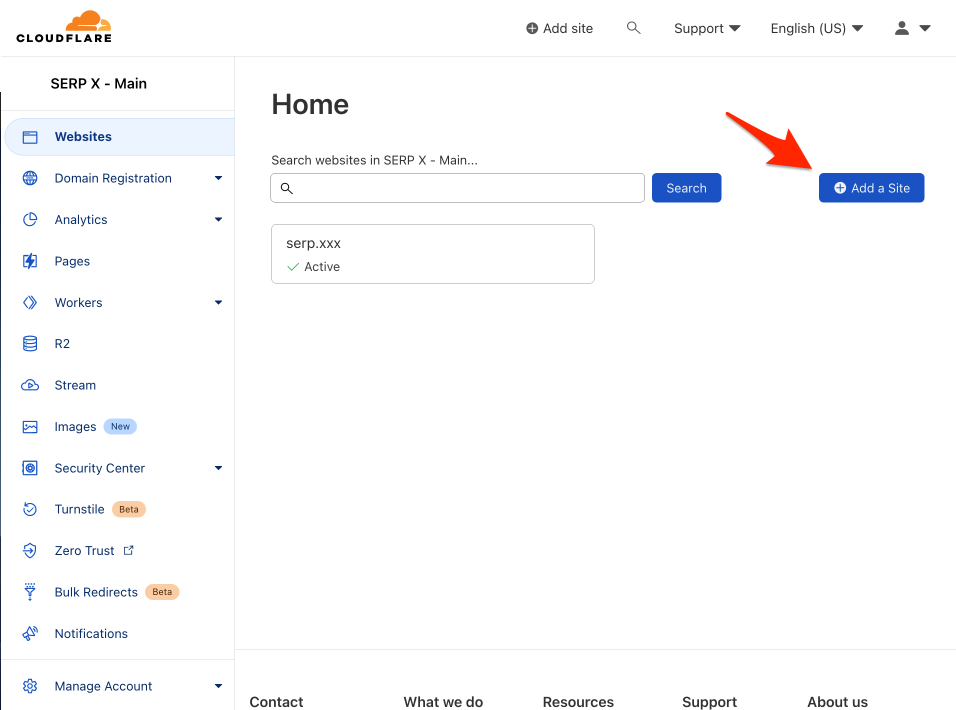
At the dashboard (dash.cloudflare.com) of your CloudFlare account click the “Add a site” button, and enter your domain on the next screen.
Once you do that, you’ll be presented with pricing options. Just choose the free one (bottom of screen) and move on.
Cloudflare will scan for existing DNS records and bring them over.
Keep them or delete them – the choice is yours (and depends on what you’re trying to do).
Click continue, and you’ll get your account’s nameservers.
You’ll need to update your current domain’s nameservers, which you can find at the domain registrar – aka the place where you login to see your domain, and probably where you purchased it.
2. Update NameServers
I can’t make a tutorial for updating nameservers at every web hosting company, because there’s like a trillion of them.
But you’ll just need to go to your account > select your domain > choose ‘edit nameservers’ or something similar > paste in the nameservers that Cloudflare gave you in the last step.
Now, it will take anywhere from 10 minutes to 48 hours for those changes to take effect. This is called propagation.
But you don’t have to wait for that to continue. You will have to wait for it for all the things you do next to work, however.
3. Update CloudFlare DNS
This is where the actual process starts.
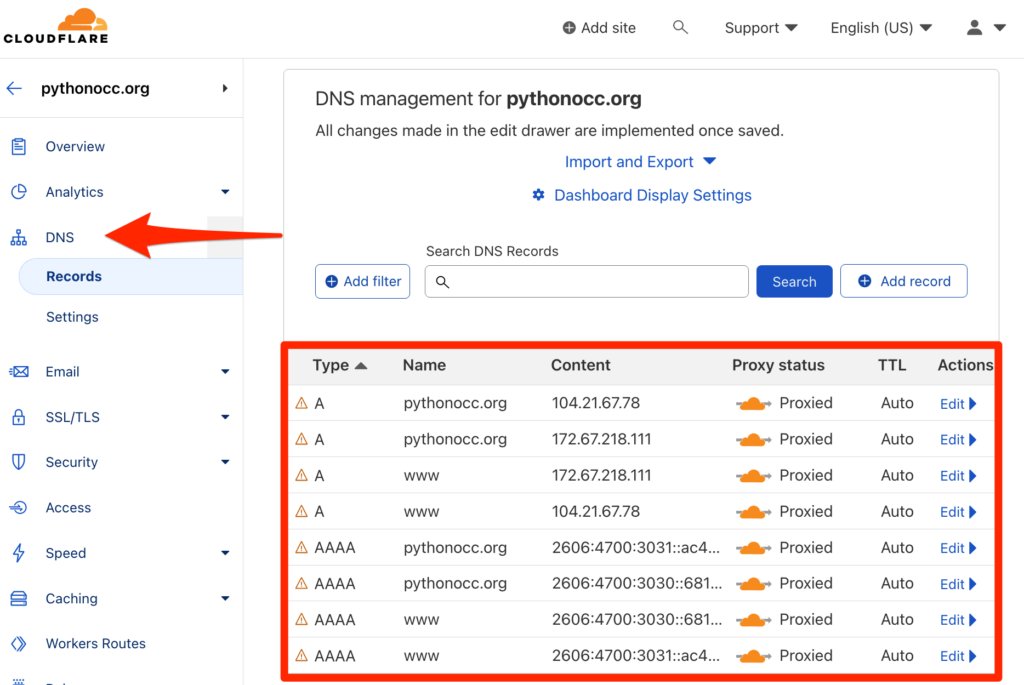
Go to your domain settings in CloudFlare and choose “DNS”.
If redirecting the whole domain I usually start with deleting the current DNS records that CloudFlare ported over. Don’t do that if you have records in there you need.
Yes, captain obvious I know but… Common sense isn’t always so common in these extremely tense IT settings…
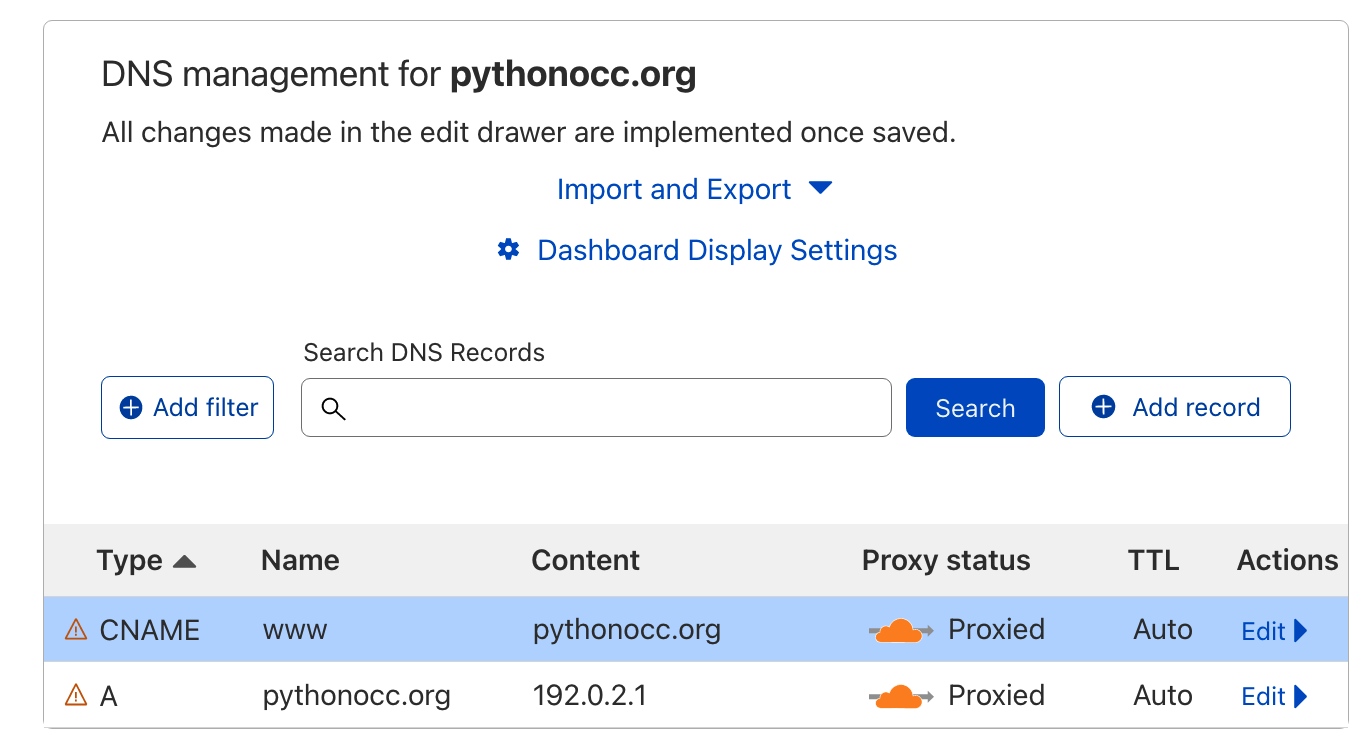
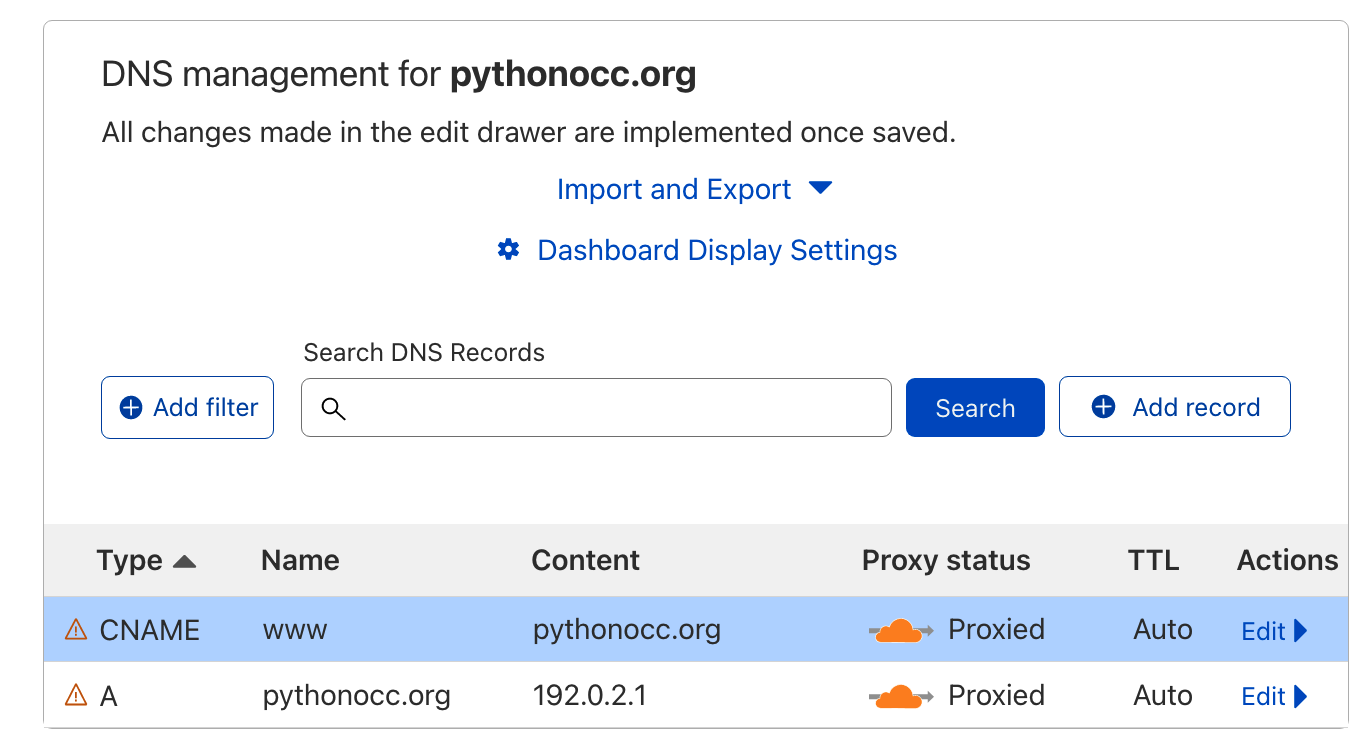
Next, we’re going to add in the CloudFlare DNS records you need for your URL Forwarding to work.
Click ‘Add record’ and add the following information, and click the ‘Save’ button:
- Type: A
- Name: @
- IPv4 Address: 192.0.2.1
Now, click the ‘Add record’ button again, add the following information, and click the ‘Save’ button:
- Type: CNAME
- Name: www
- Target: @
4. Setup Page Rules for URL Forwarding
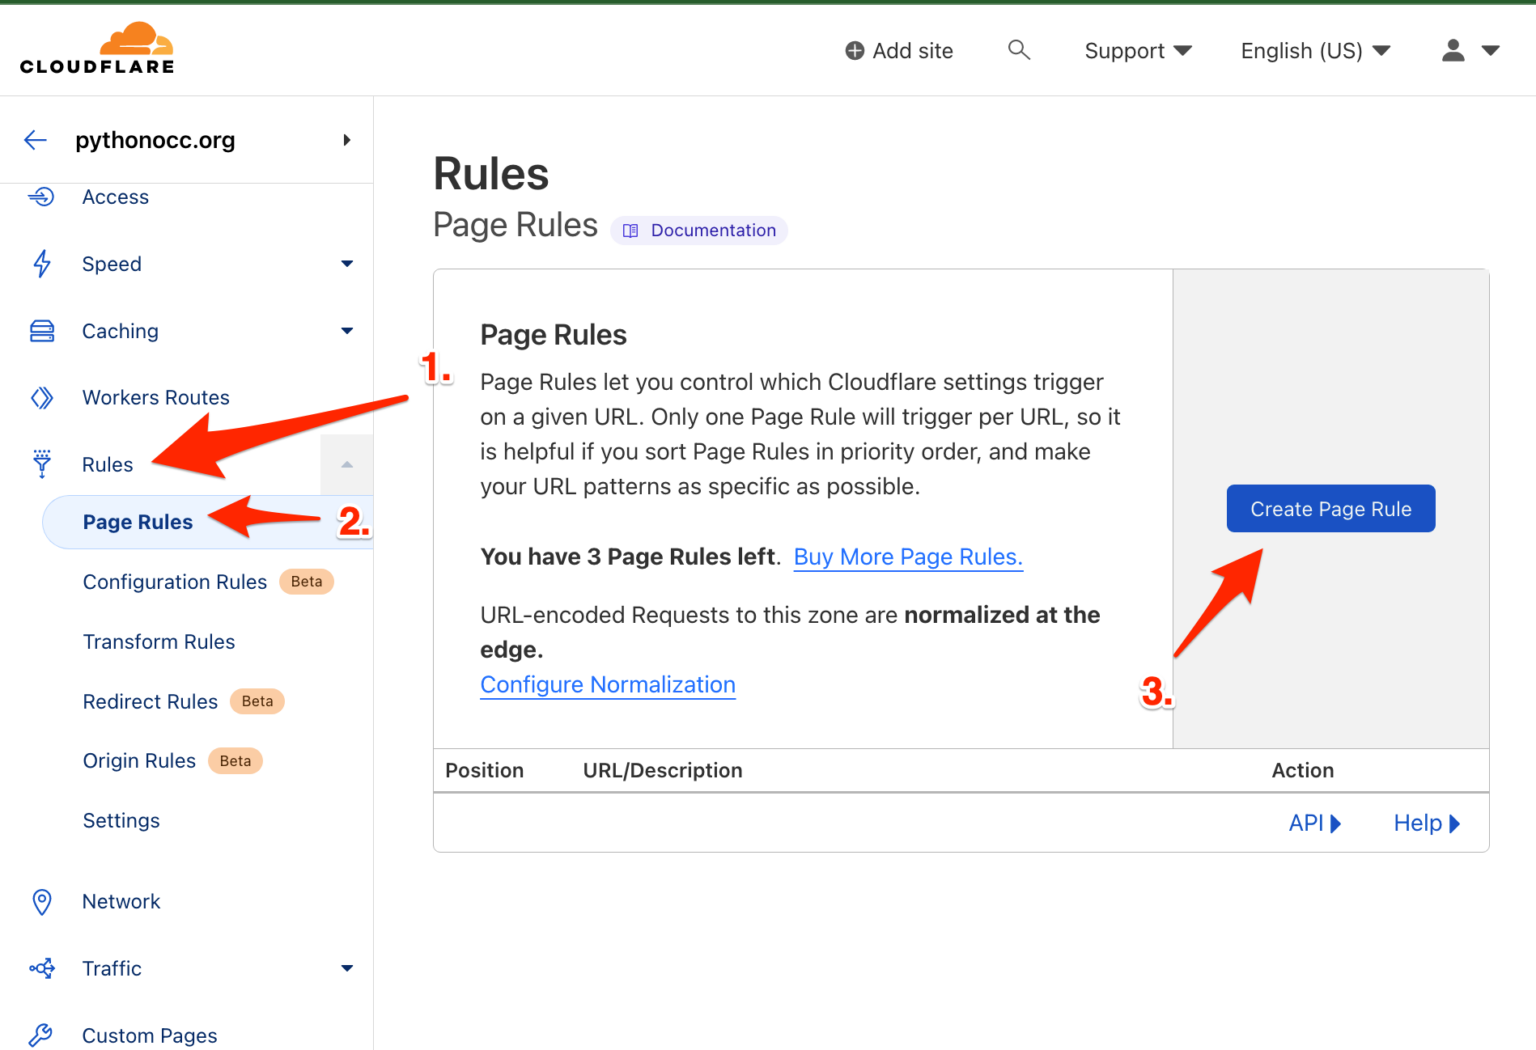
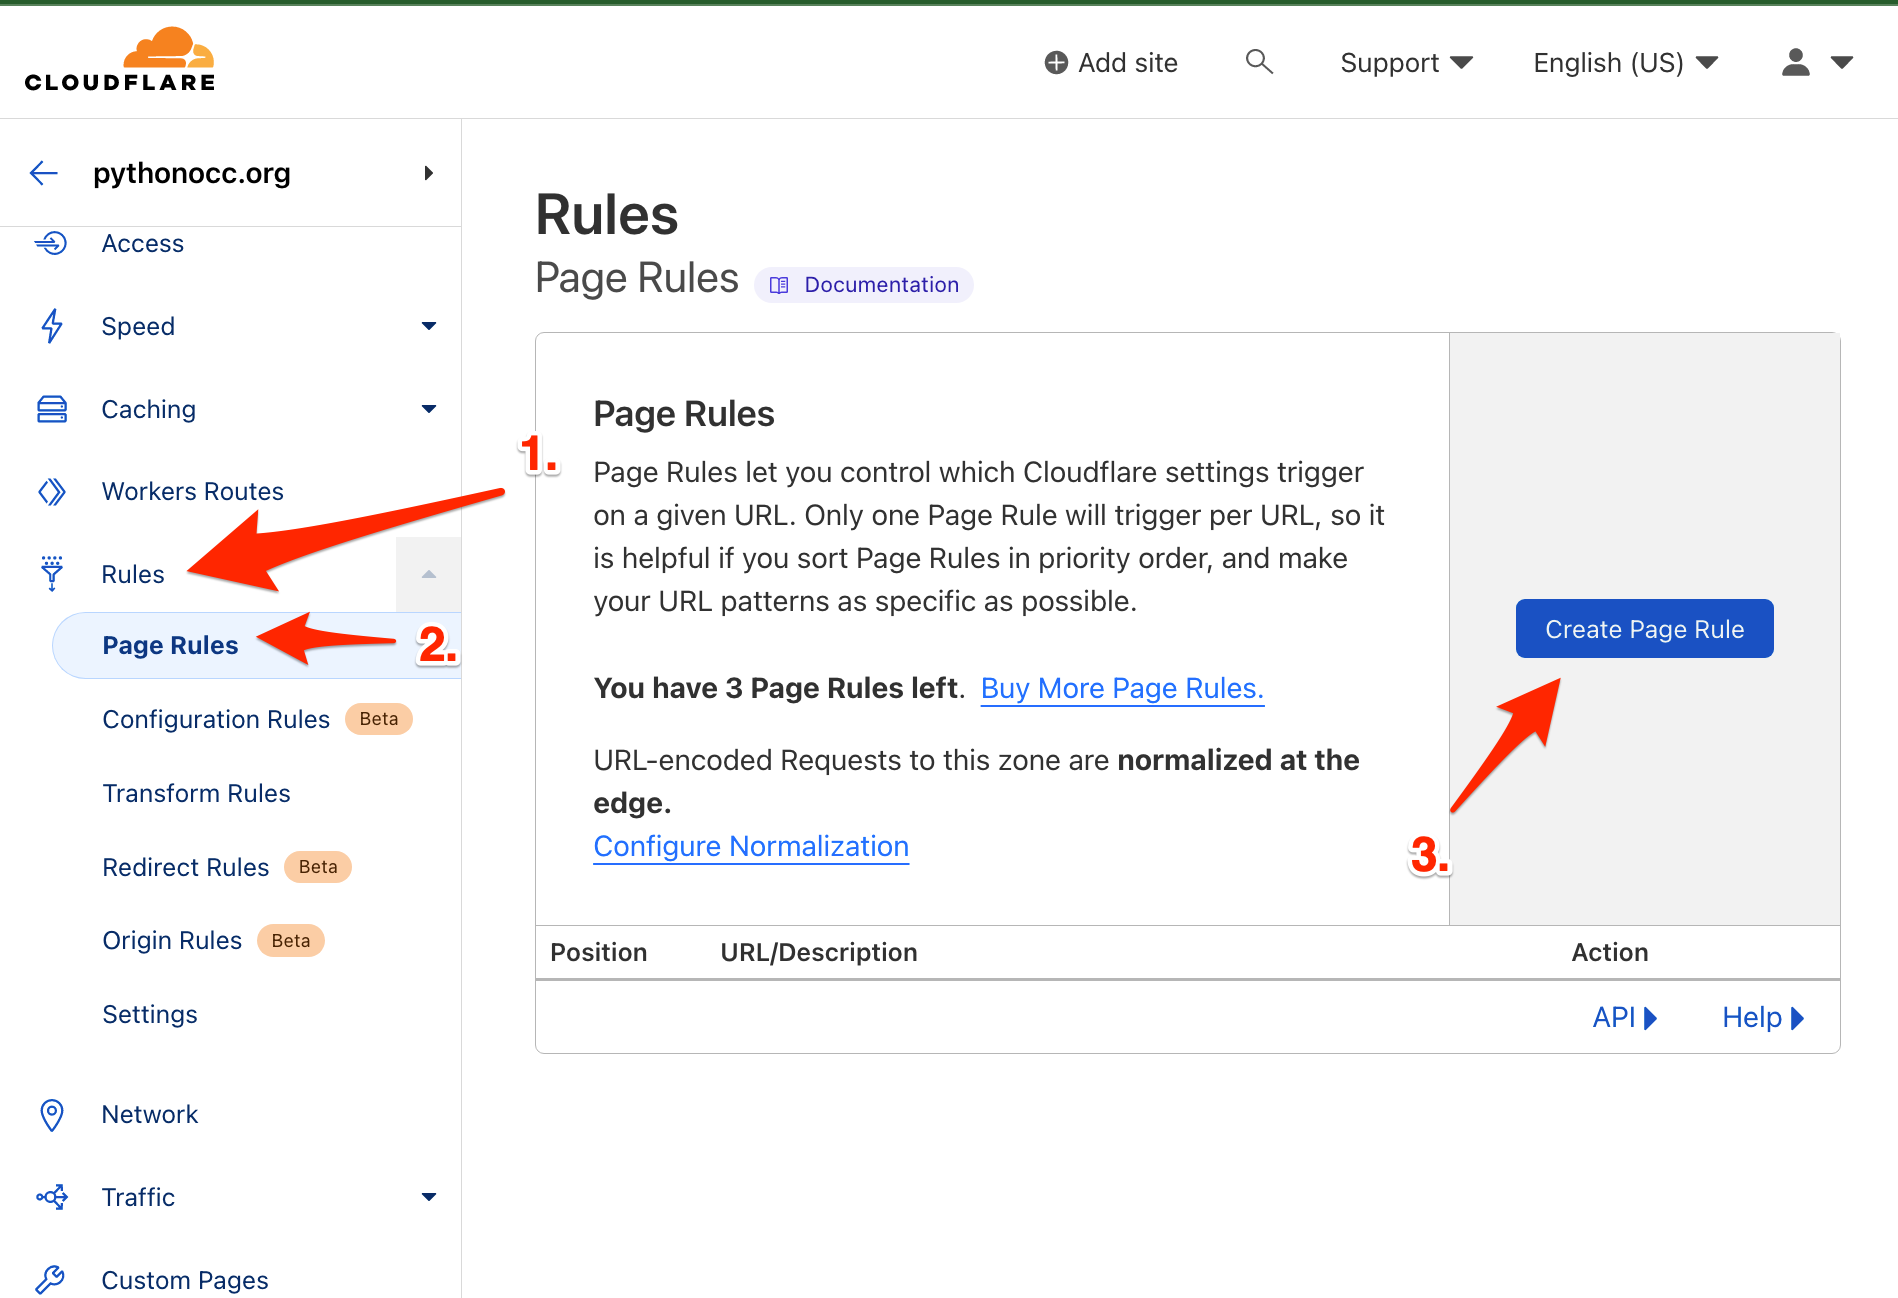
Navigate to the “Rules” area on the sidebar, then click “Page Rules” and click the ‘Create Page Rule` button.
Now it’s time to set your 301s!
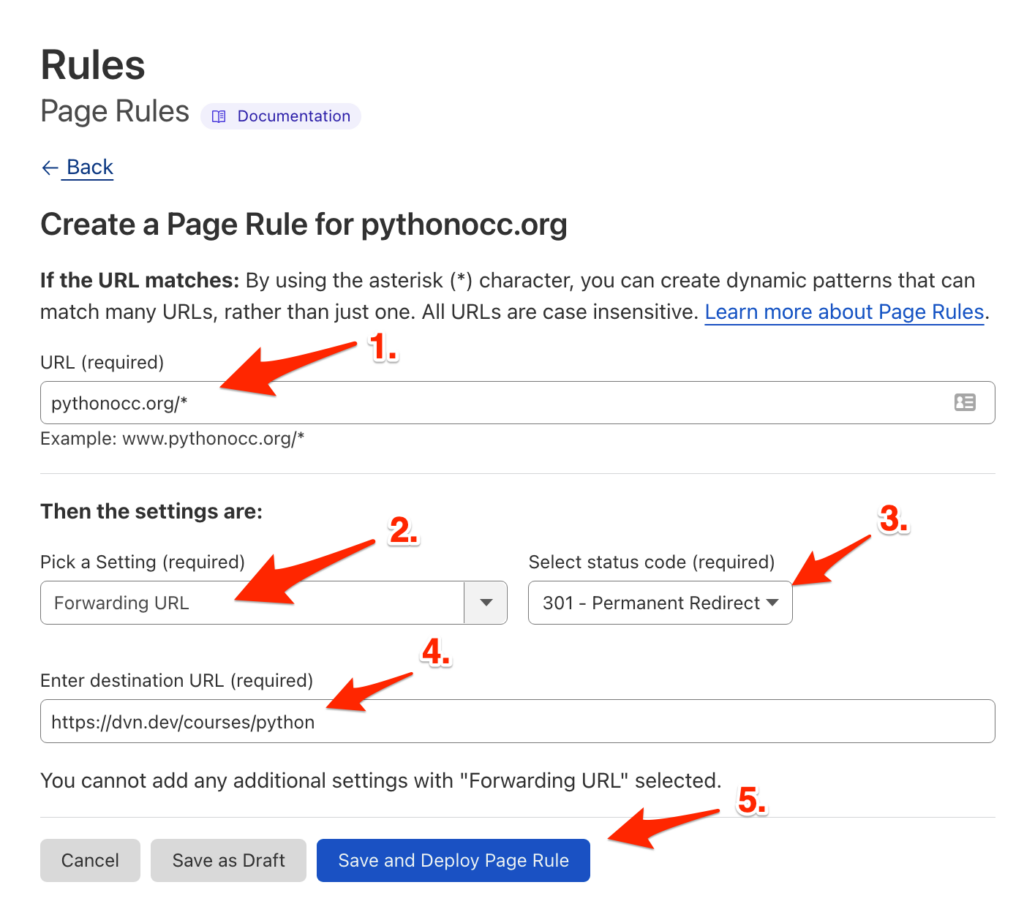
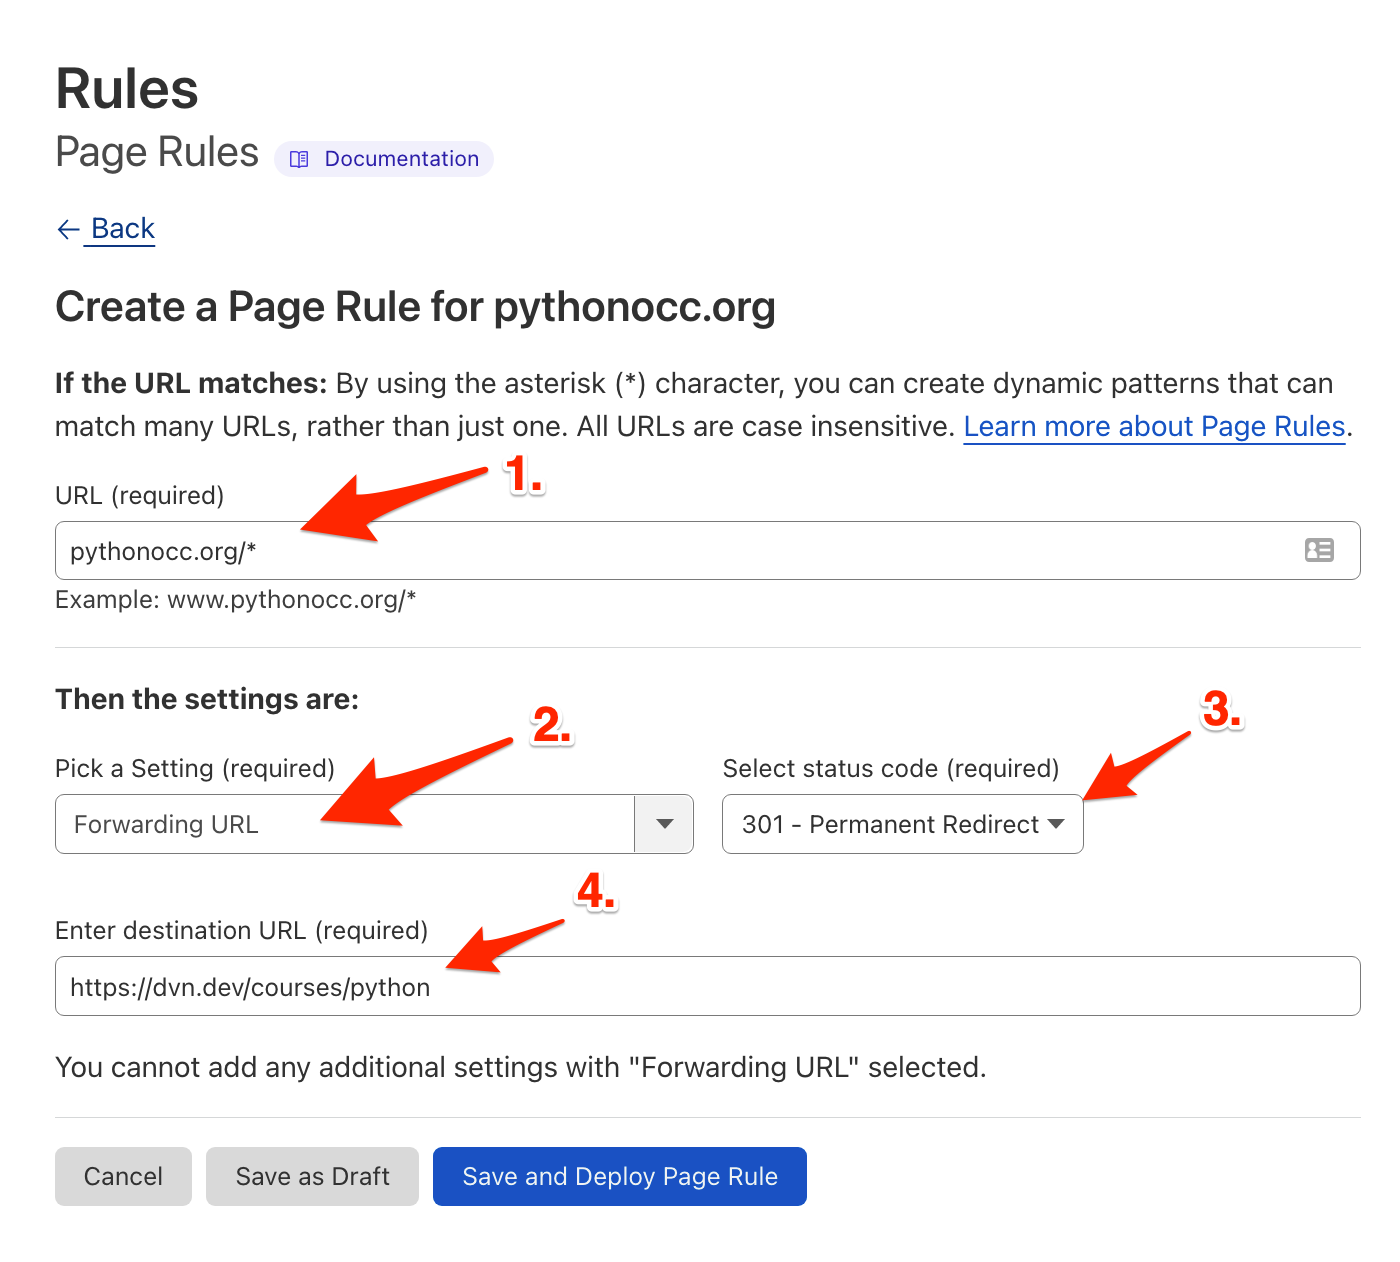
I’m going to setup a 301 redirect to forward all traffic coming to ‘domain A’ to ‘domain B’, but you can easily just change the URL & destination to fit your needs.
Follow these steps:
- Enter the URL pattern you want 301ing
- Click the dropdown and choose ‘URL Forwarding’
- Select your ‘Status Code’ from the drop down (probably 301)
- Enter the destination
- Click ‘Save and Deploy Page Rule’
I entered the root domain, and put an asterisk ( * ) at the end, which means that if anyone goes to an inner url, like “domain.com/whatever-asdfadf” it will also get redirected.
You can setup inner URL specific 301s too.
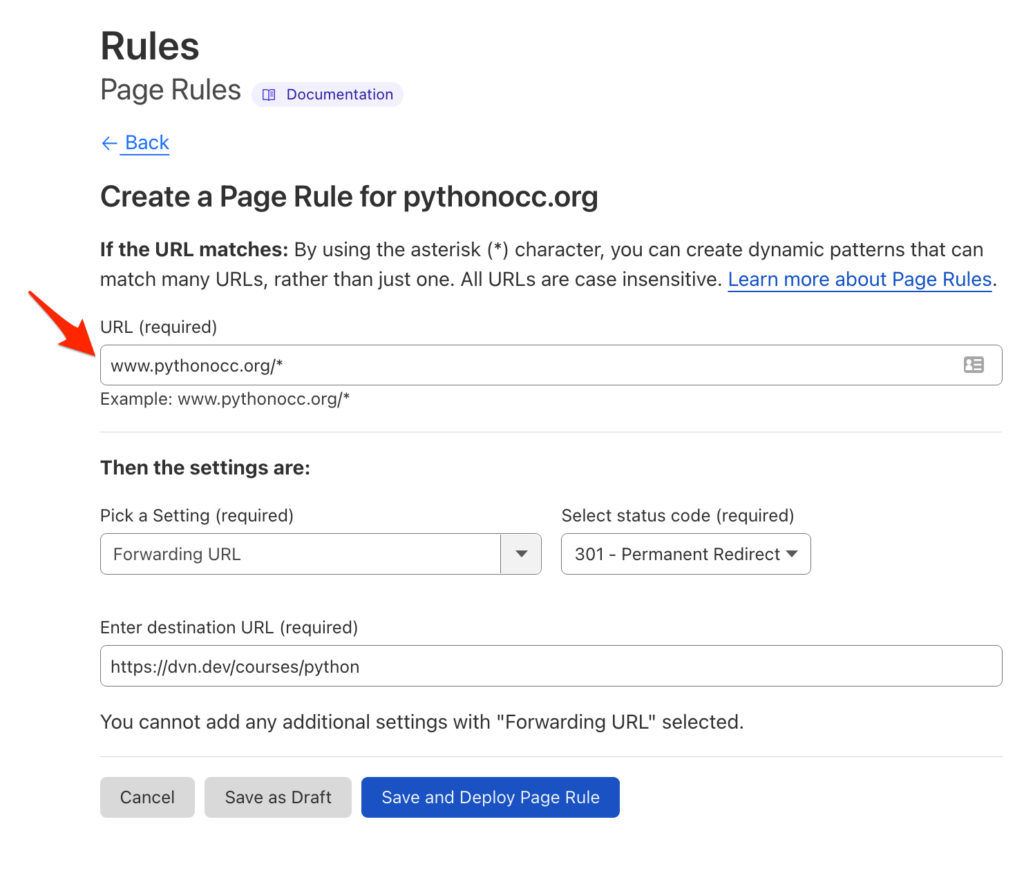
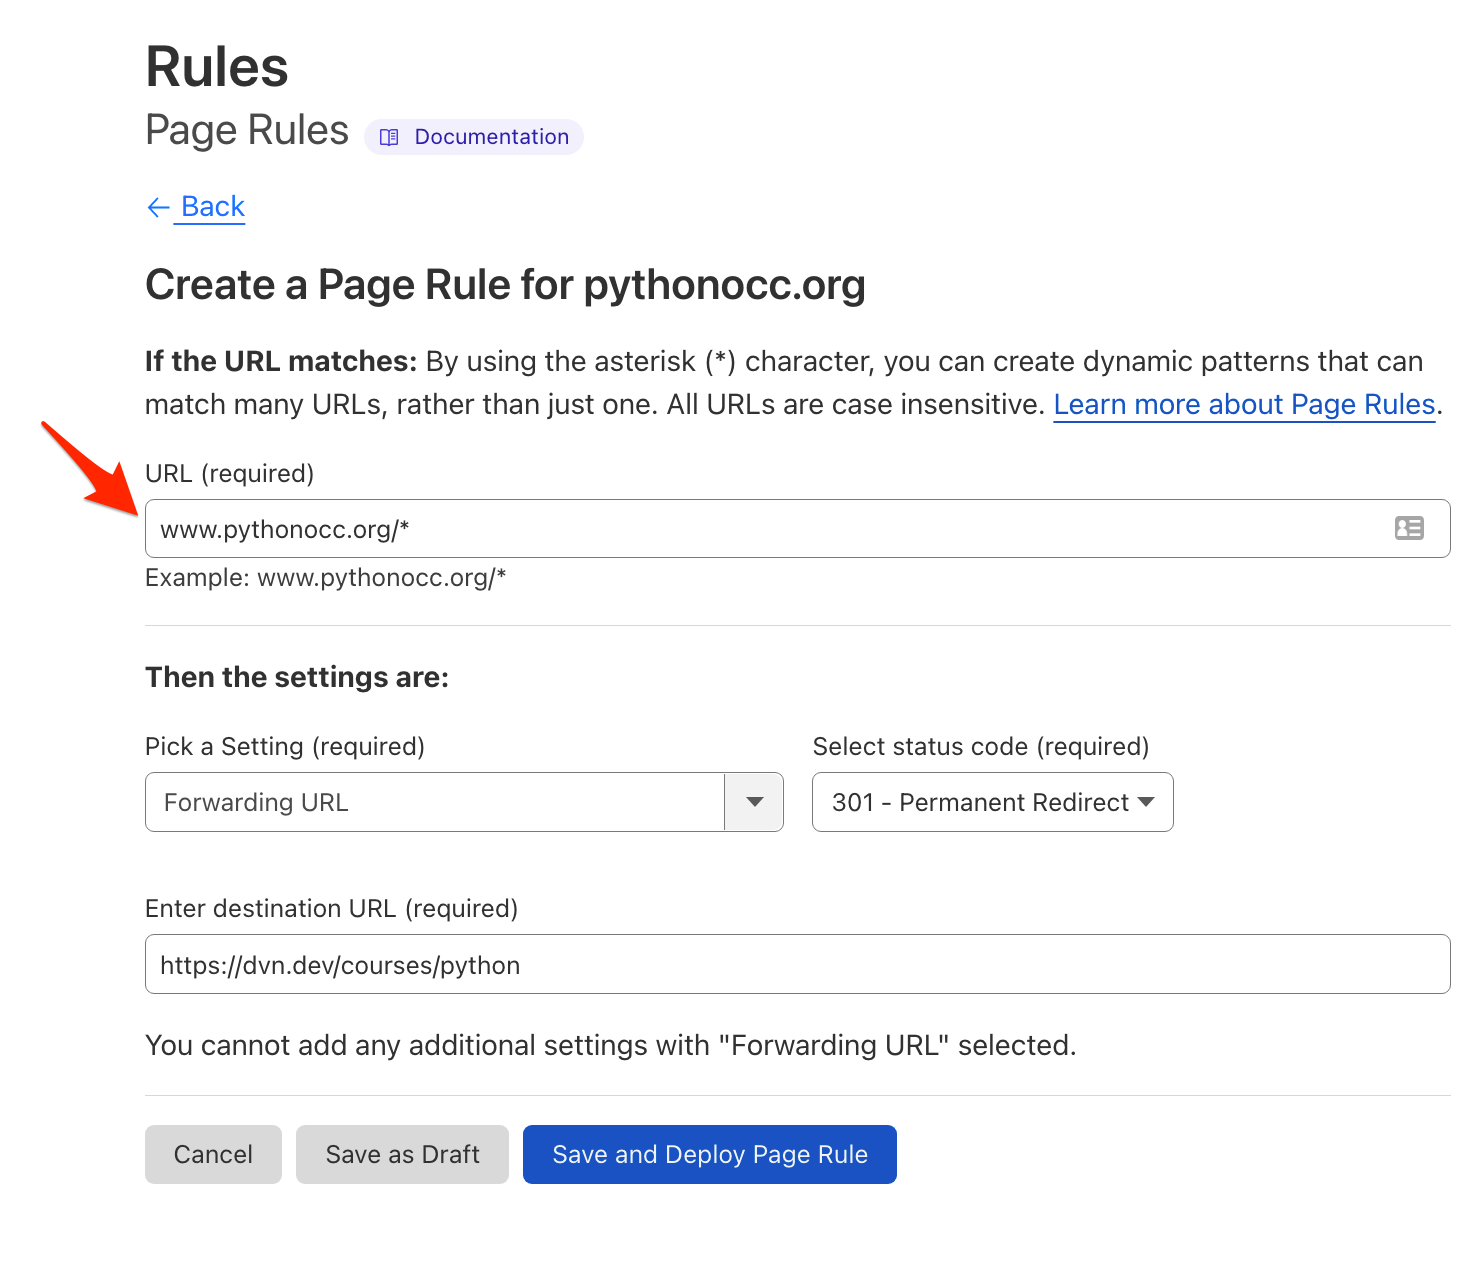
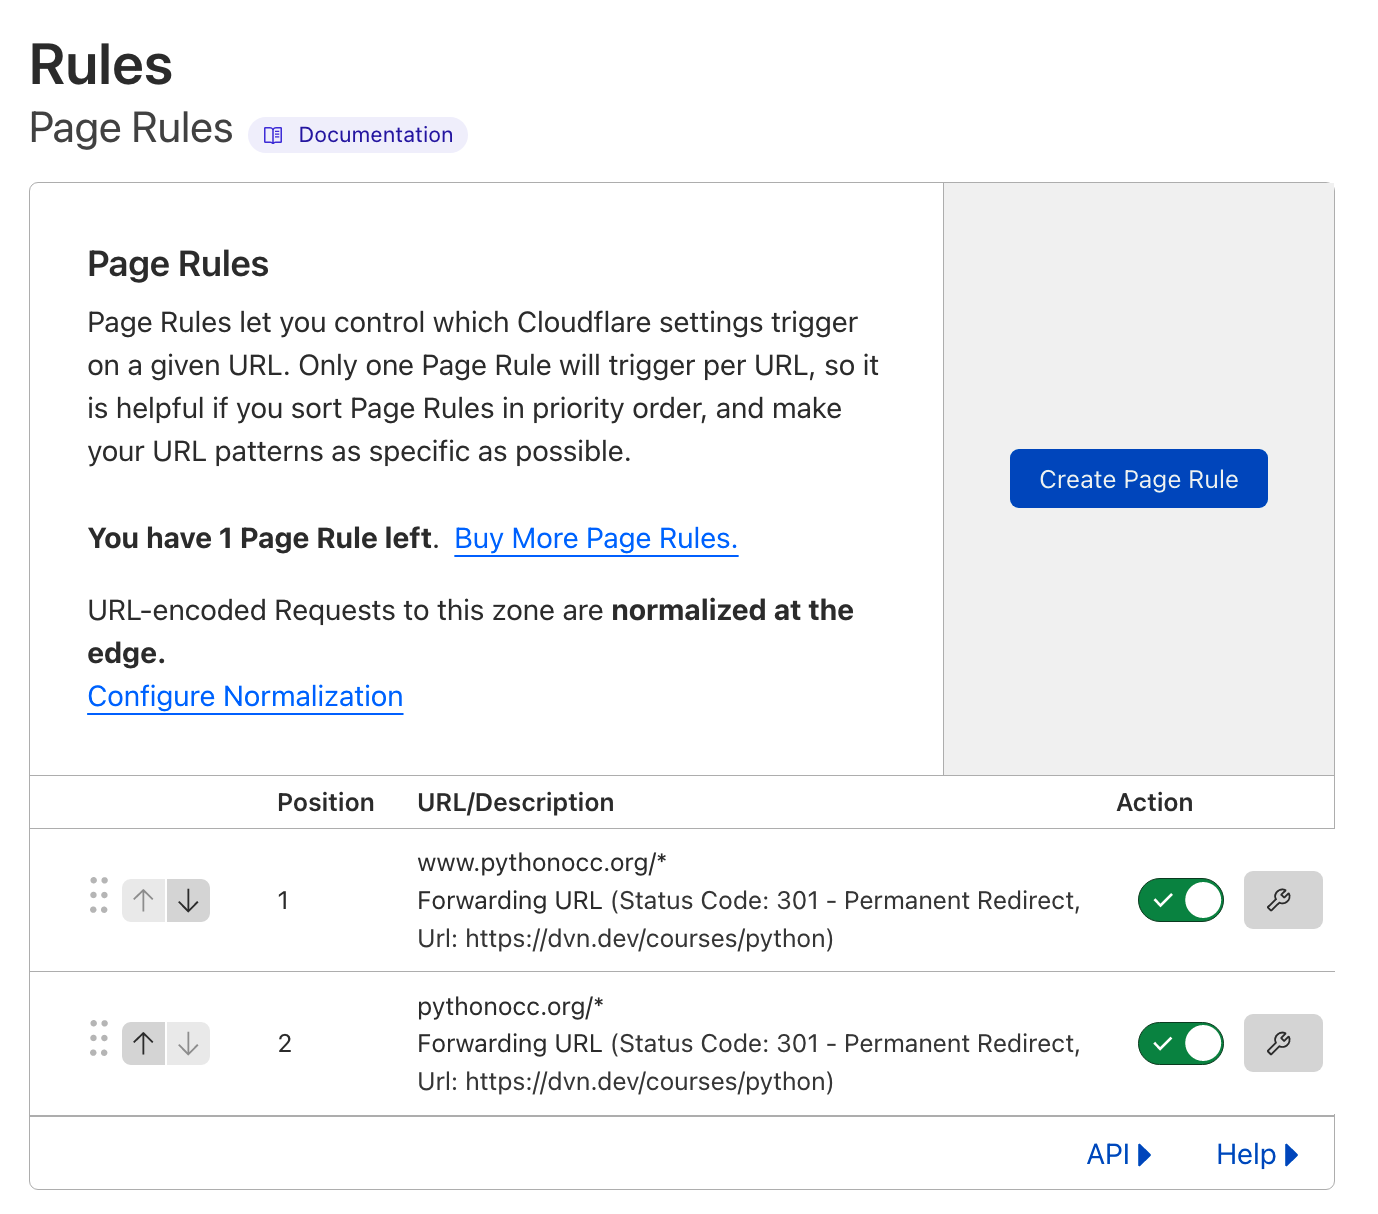
Now, I’m simply going to do the exact same thing again – but this time add the www. version.
Follow these steps:
- Enter the URL pattern you want 301ing
- Click the dropdown and choose ‘URL Forwarding’
- Select your ‘Status Code’ from the drop down (probably 301)
- Enter the destination
- Click ‘Save and Deploy Page Rule’

