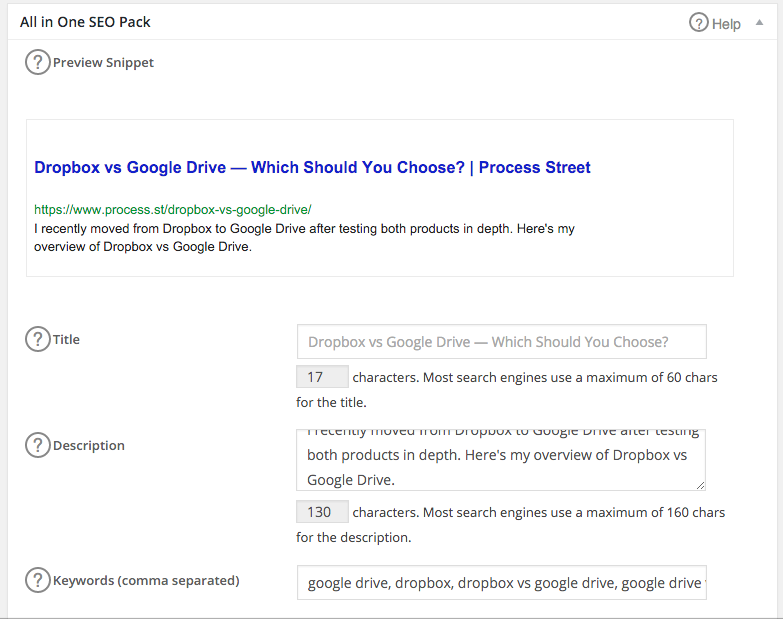
Templates /
Updating Old Blog Content for SEO (Checklist)

Updating Old Blog Content for SEO (Checklist)

Run this to stop your old pages falling off the face of the Earth.
1
Record the old post's details
2
Rewrite out-of-date paragraphs
3
Add links to your new content
4
Update the title to include the keyword
5
Update the slug to include the keyword
6
Include the keyword in the first 100 words
7
Mention the keyword in at least one sub-heading
8
Edit your metadata to include your target keyword
9
Change the publishing date to today
10
Bump it up onto the first page of your blog
11
Email it to your subscribers
12
Run your promotion process
13
Track the rank for a week

Record the old post’s details

When updating old blog content for SEO, the first step should always be to record the old post’s details. Use the form fields below (and add any if necessary) to do so easily.

Rewrite out-of-date paragraphs

Now you need to rewrite out-of-date paragraphs. Use (and expand) the sub-checklist below to record your progress.

  • 1

    Eliminate non-evergreen language (‘last week’, ‘until recently’)
  • 2

    Change broken links
  • 3

    Expand on points you now know more about

Update the title to include the keyword

There’s no point in updating old content for SEO if you don’t update the title to include the keyword. Record the new title in the form field below.

Putting the target keyword in the post’s title is the single biggest thing you can do to signal to Google you’ve written about that exact thing the searcher is looking for.

Update the slug to include the keyword

There’s also no point in updating old blog content for SEO if the slug for the post is an unwieldy mess – you now need to make sure that the slug for the post is nothing but the keyword. Record the new post address in the form field below.

If you don’t use custom slugs, your URLs will look like this:

/why-i-moved-from-dropbox-to-google-drive

Not only is it unwieldy, if it doesn’t include your keyword you’re not doing your SEO any good.

Update it to be ONLY your keyword, and have it looking like this:

/dropbox-vs-google-drive

Include the keyword in the first 100 words

This is pretty self-explanatory, but you need to include the keyword of the post in the first 100 words.

Mention the keyword in at least one sub-heading

Again, self-explanatory. This time, you must ensure that the keyword is specifically stated in at least one of the post’s sub-headings.

Edit your metadata to include your target keyword

Now you need to edit your metadata to include your target keyword

We use All in One SEO for this:

Change the publishing date to today

Now you need to edit the publish date of your post to the current date. Remember to record the new date using the form field below.

As an example of editing the date in WordPress:

Bump it up onto the first page of your blog

The next step in updating your old blog content for SEO is to ensure that the post has now been bumped up to the first page of your blog.

Depending on your blog’s setup, this may have automatically occurred when you edited the publish date. If this is the case, you need to at least check that the change has taken place.

Email it to your subscribers

Now that the content is entirely updated and has reclaimed the first page of your blog, you need to email it once again to your subscribers.

Make sure that the email is also updated to reflect the new content – no subscriber enjoys old, irrelevant content pushed into their inbox.

Run your promotion process

It’s once again time to run your promotion process on the post in question. Record the status of the promotion process using the dropdown form field below.

If you don’t have a promotion process, get it here.

Track the rank for a week

The final step in updating your old blog content for SEO is to track the new search ranking for at least a week.

You can use the Ahrefs Rank Tracker to get daily, weekly or monthly emails on the rise and fall of your keyword positions:

Congratulations! You’re finished updating old blog content for SEO.

Or, at least, you’re done with this post. On to the next one!

Take control of your workflows today.