Templates /
New Facebook Ads Creation Checklist

New Facebook Ads Creation Checklist

Run this checklist to create a new Facebook Ads campaign.
1
Introduction:
2
Record setup
3
Facebook Setup:
4
Validate if there is a Facebook page
5
Create Facebook page
6
Check if a Business Manager account is created
7
Create Business Manager account
8
Make sure Facebook ad account is created
9
Setup ad account
10
Input payment method
11
Facebook Pixel & Configuration:
12
Make sure Facebook pixel is setup
13
Install Facebook pixel
14
Test and ensure pixel is installed properly
15
Audience Creation:
16
Uploaded customer/subscriber list
17
Create your website custom audience and/or engagement custom audience
18
Create Lookalike Audience based on the above lists/audiences
19
Dynamic Product Ads:
20
Create your product catalog(s)
21
Connect your pixel to product catalogs
22
Ensure events show up in Ads Manager
23
Ad Copy:
24
Write ad copy tailored to your audience
25
Ensure ad copy is compliant with Facebook's rules
26
Review ad text amount
27
Campaign Creatives:
28
Create ad creative assets
29
Check size of creative assets (images, banners, videos, etc…)
30
Budget Checklist:
31
Review current budget
32
Output:
33
Send completion email
34
Sources:
35
Related Checklists:

Introduction:

This checklist will walk you through the steps needed to create, target, and implement a new Facebook ads campaign. This process should be gone through every time you take on a new client and need to build their Facebook marketing and paid ads from scratch.

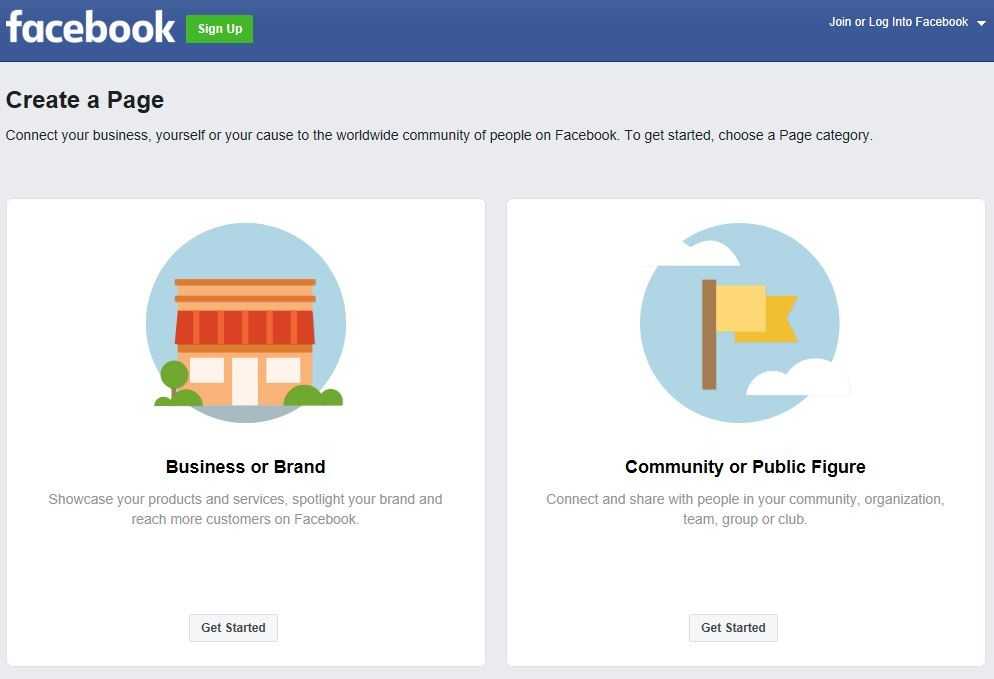
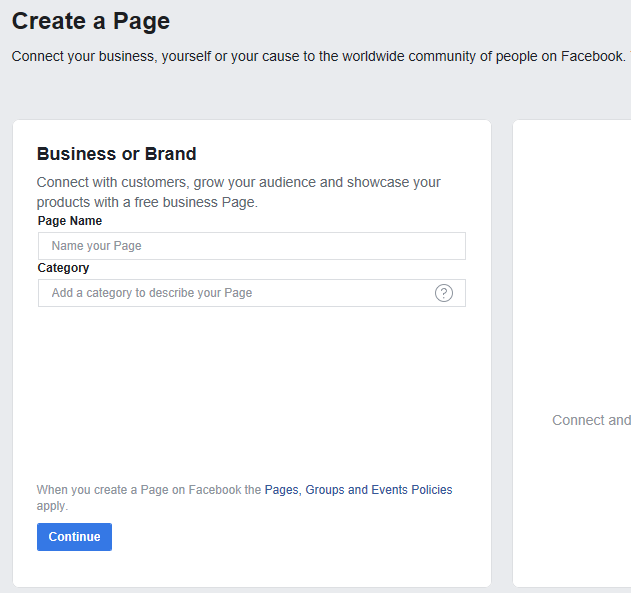
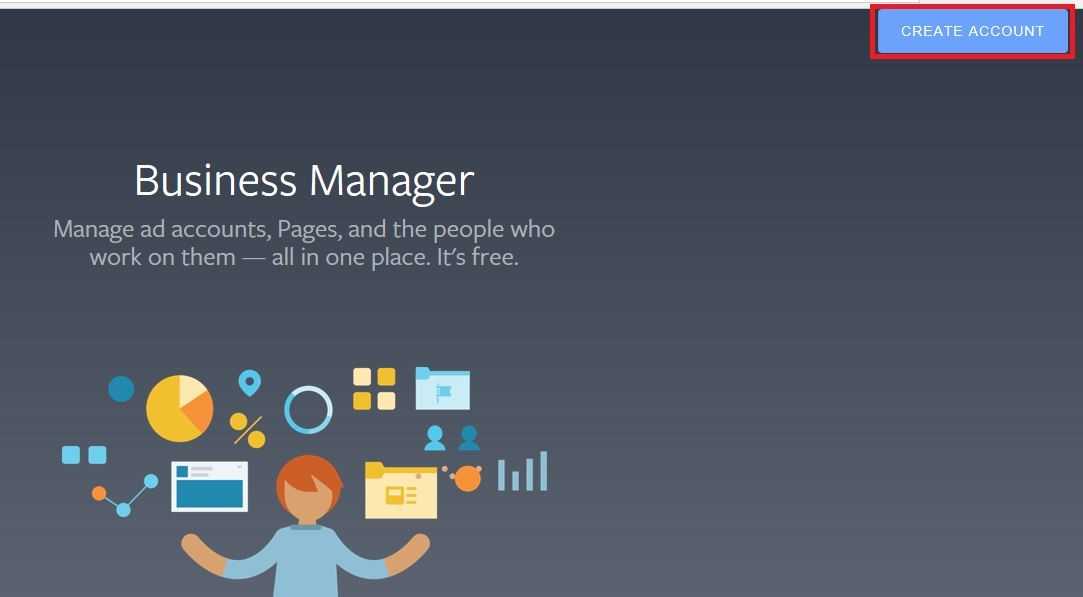
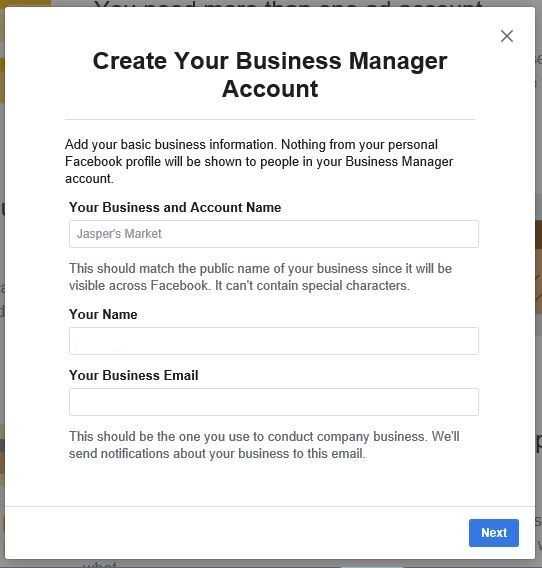
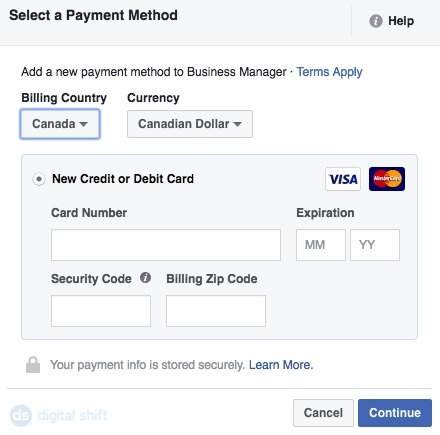
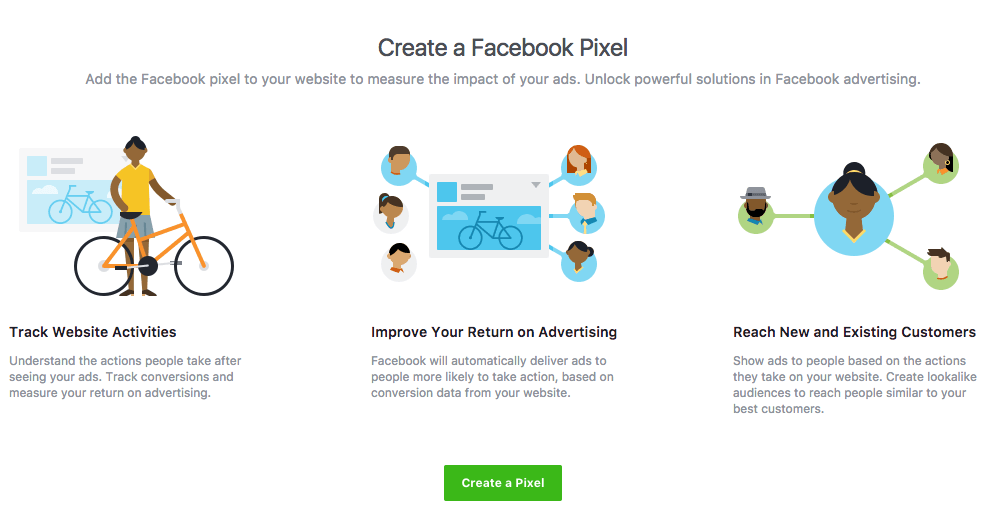
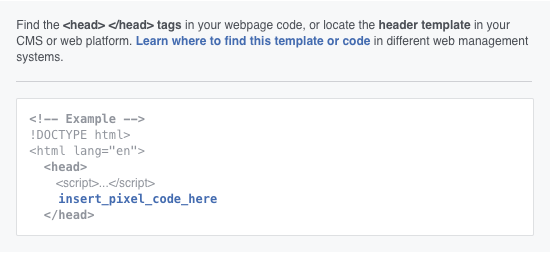
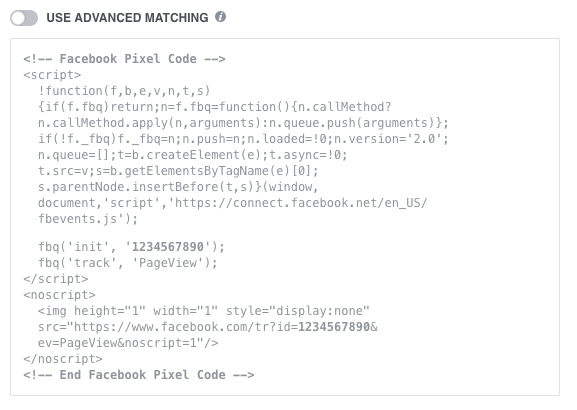
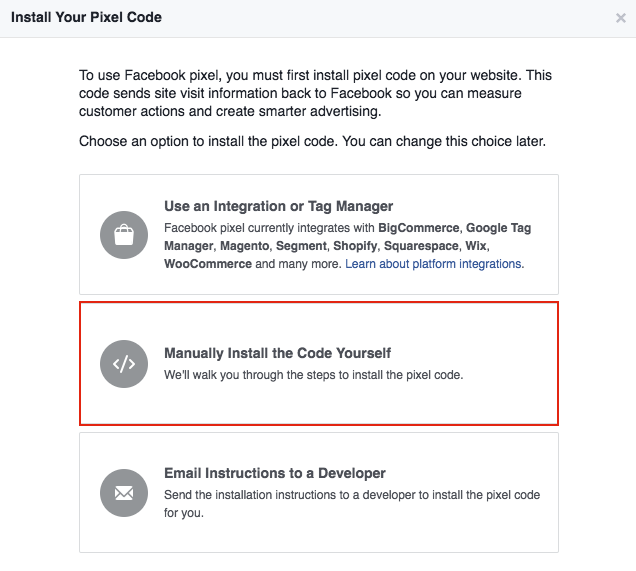
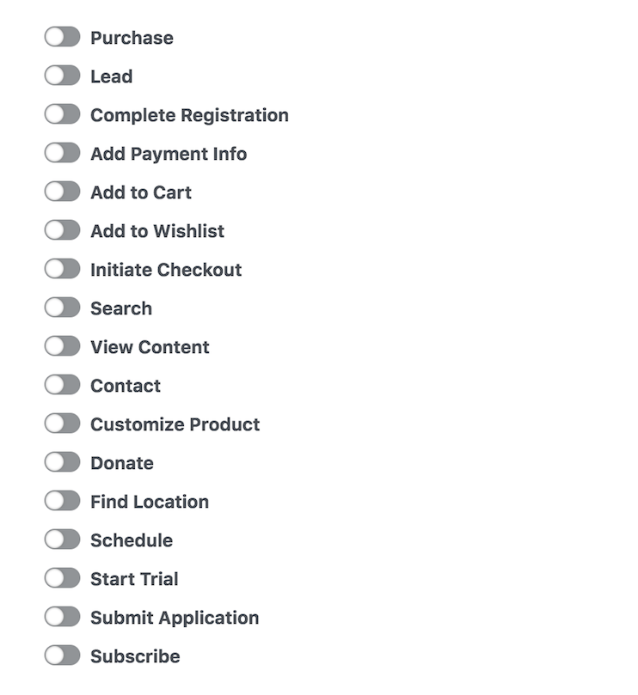
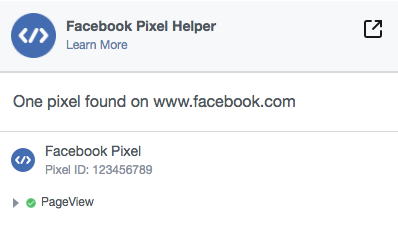
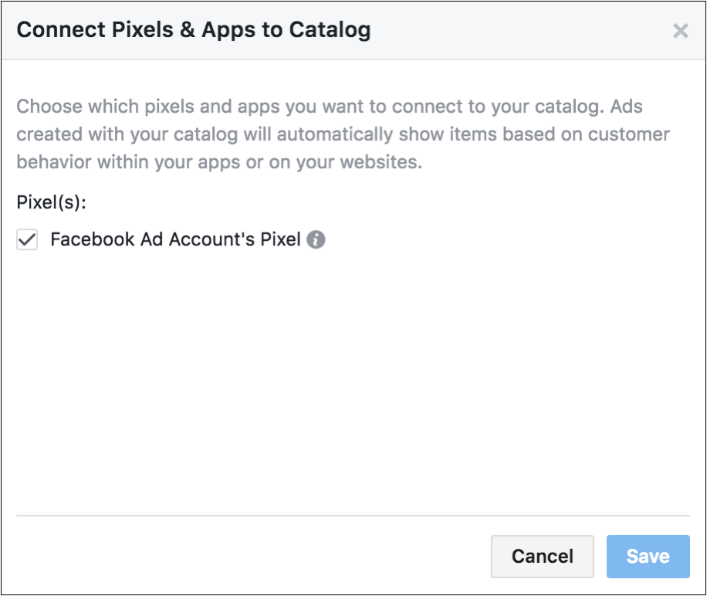
We start with making sure all the basics are complete. This means ensuring there is a Facebook page, a business manager account, and validating tracking pixels are properly configured.

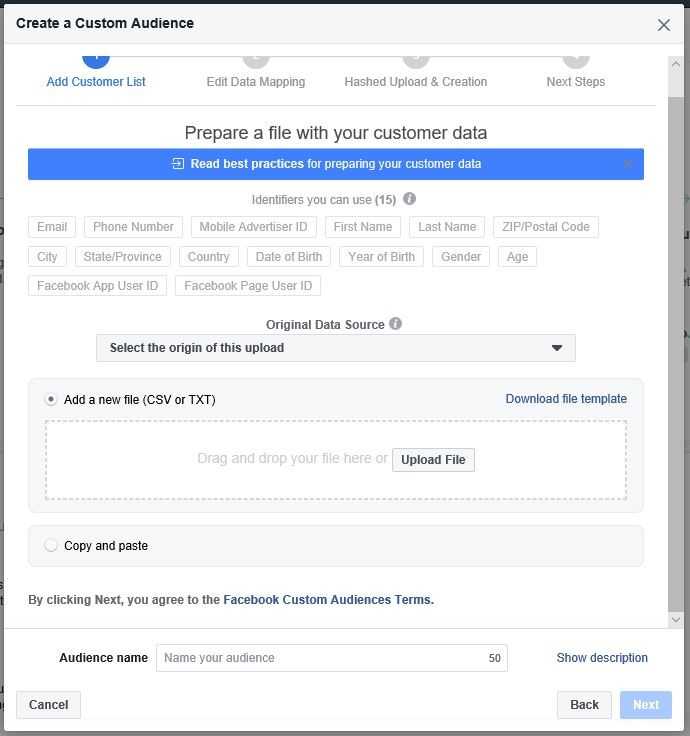
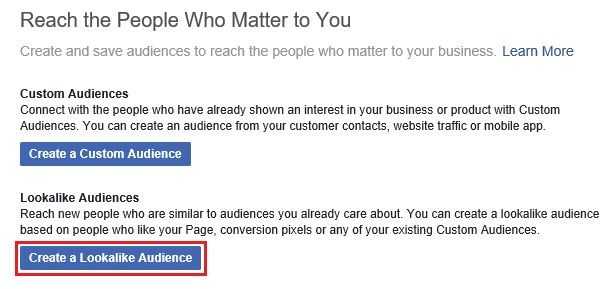
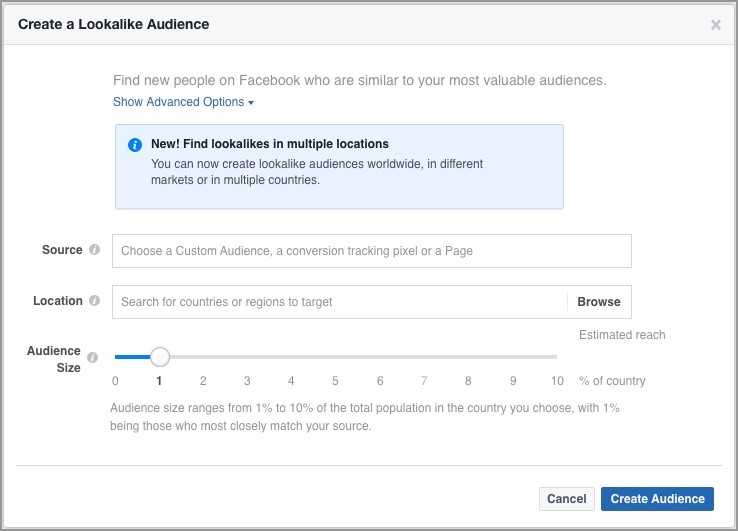
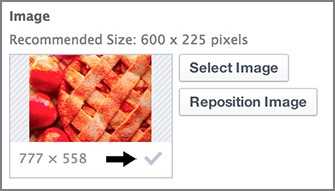
After that, we will go through uploading your customer list, creating a custom audience and then building Lookalike Audiences. Finally, we will touch on best practices for building ad copy and your campaign creatives.     

Record setup

The first step is to keep track of what account this checklist was run on, who performed these duties, and when. 

Fill out the form fields below.


Facebook Setup:

Validate if there is a Facebook page

Review the account and determine if a new Facebook page needs to be created


Create Facebook page

Creating a Page is the first step in building a business and advertising successfully to an audience. To create a Page, first, go to facebook.com/pages/create. Next, choose a page type:

Make sure you already have your own private Facebook page so that you can log in with your credentials to prove your identity. Once you have selected your page type, fill in the required information:

Finally, click “Continue” and follow the simple on-screen instructions that will be provided.

Check if a Business Manager account is created

Check if there is a Business Manager account already created. 


Create Business Manager account

Create a Business Manager account.

Business Manager is a free tool that Facebook provides to help you organize and manage your business. To get started, you need to be logged into your personal Facebook account because you will need this to create your Business Manager account.

Step one, go to https://business.facebook.com/overview and click “Create Account”:

Next, enter the required information in the boxes that subsequently pop-up on your screen.
(This includes your name, business and account name, business email, and other business details):

By pressing “Submit” you will be redirected to your new account.

Make sure Facebook ad account is created

Make sure a Facebook ad account has been created. 


Setup ad account

Create a Facebook ad account.

Having a Facebook Ad Account is a great way to advertise on Facebook and manage your ads. First, log into your Business Manager account and go into the Ad Accounts settings under the “Add New” tab.

The next step is to enter the name you want for your ad account and link it to an advertising profile. You will also want to select your time zone and currency:

You will then need to confirm that you just created the ad account by clicking “OK”.  After you you click “OK” you will be taken to a confirmation page with a reminder to select a Payment Method.

Input payment method

You are required to set up a payment method for your new ad account. To do so, just go to the ad account you created and click “Add Payment Method”:

The payment method will be added to your Facebook account, secured and encrypted.

Then enter your payment details and you’re good to go.

Facebook Pixel & Configuration:

Make sure Facebook pixel is setup

Make sure the Facebook pixel has been setup for this account.


Install Facebook pixel

Install the Facebook pixel on your website.

The Facebook pixel is a tool tracking cookie that analyzes the actions people take on your website. The pixel supplies the data to help measure the effectiveness of your advertising. To create a Facebook pixel you will need to go to the Pixels tab in Events Manager, then click “Create a Pixel”:

Next, add the Facebook pixel code to your website. You can do this by jumping into your website’s code and finding the header tags section.

Then you want to copy the entire code and paste it in the header of your website:

Make sure that your code is working properly by clicking “Send Test Traffic” after placing the code on your website. If the status says “Active” then that means the code installed correctly.

You then want to add events to track specific actions people take on your website. To do this, go to the Pixels tab in Events Manager, click Set Up Pixel, then click Manually Install the Code Yourself:

Click Continue then click Install Events. Select an event you want to track:

Test and ensure pixel is installed properly

Test that the Facebook pixel is properly installed.

To make sure your pixel is working correctly, install the Pixel Helper to your Google Chrome browser. To install it, first find Facebook Pixel Helper in the Chrome web store:

Then add the extension:

Once you have installed it, click the Pixel Helper icon in the address bar. Check the popup to see any pixels found on that page, and whether they’ve been set up successfully.

If the Pixel Helper finds a pixel on your site and there are no errors, that means the pixel was installed correctly.

Audience Creation:

Uploaded customer/subscriber list

Upload your customer/subscriber list to Ads Manager.

To create an audience the first step is to upload your current customers or subscribers

To upload, create a list of either email addresses or phone numbers using your customer data. Then:

  • Save your list in CSV or TXT format
  • Go to the Audiences tab in Ads Manager
  • Click the Create Audience button
  • Select the Custom Audience option and then choose Customer List.

Finally, upload the CSV or TXT file list you previously saved.

Create your website custom audience and/or engagement custom audience

Create a custom audience.

Custom Audiences from your website is a targeting option that tracks which people from Facebook viewed your website. To create your Website Custom audience, return once again to Create Custom Audience (shown in the last step).

Next, choose a pixel and set a rule section. You have to start with an inclusive one and later you can add more as desired.

Finally, give your audience a name and click Create Audience.

Create Lookalike Audience based on the above lists/audiences

Create a Lookalike Audience.

A Lookalike Audience is a way to reach new people who are similar to your best existing customers. You want to target this group because the likelihood of them converting is high. 

To create a Lookalike Audience, go to your Audiences and select Create a Lookalike Audience:

Then choose your source, the country/countries where you’d like to find a similar set of people, and your desired audience size.

Finally, click Create Audience.

Dynamic Product Ads:

Create your product catalog(s)

Create a catalog for your products.

A catalog holds all the items you want to promote across Facebook. You can use it for different business use cases, like displaying products in a collection ad. To create your product catalog, go to Catalog Manager and click Create Catalog. Then select the catalog type and click Next.

After that, you can select the ad account and enter a name for your catalog:

Finally, click Create.

Connect your pixel to product catalogs

Connect your pixel to the product catalog.

After you create your product catalog you need to setup pixel tracking for that catalog

Connecting your pixel to your catalog allows you to build a retargeting audience of people from items in your inventory. To do so, go to Business Manager Settings and select your business. Next, click Catalogs and select the name of your catalog. Then click Associate Sources

Select your Facebook pixel and click Save.

Ensure events show up in Ads Manager

Make sure events are showing up in Ads Manager for your products.

Each product in your catalog needs to be matched with an event. Go to Catalog Manager to view interactions with your products when people perform certain actions on your website, and see how ready your products are for dynamic ads.

Ad Copy:

Write ad copy tailored to your audience

Write copy for your ads.

Make sure your ad copy is written with your audience in mind. You can review copywriting examples on our blog.

It is always a good idea to create different ads for different types of audiences. The ad needs to target your specific audience, so you want to try deciding on a person who characterizes the audience you’re going for and write like you’re speaking to that person.

You want to decide on the main thing you want your audience to know and make sure that message resonates with them.

It’s important that your ad keeps the audience’s interest. A good way to do this is to include time frames, utilize words like “today only” or “buy now,” to indicate a sense of urgency and encourage the audience to buy the product or service.

Create a word document, Google doc, or some sort of text document to write your copy. You can put a link to the file or upload it below.

Ensure ad copy is compliant with Facebook’s rules

Review your ad against Facebook’s ad policy to ensure compliance. You can see the policy here.

Before your ad can show up on Facebook, it needs to be reviewed to make sure it meets Facebook’s Advertising Policies. The ad will be reviewed within about 24 hours. Facebook will check your ad’s images, text, targeting, and positioning.  The content on your ad’s landing page will be taken into consideration as well.

If your ad is disapproved, you will receive an email detailing what you need to fix. From there, you can edit your ad to make sure it complies with the Advertising Policies and then resubmit it.

Review ad text amount

Check the amount of text you are using in your ad. Too much text distracts from your main point.

To create a better experience for the viewers and the advertiser, it’s good to check the amount of text in your ad image. Images with less than 20% text tend to perform better as Facebook ads. To check if your image has too much text, first go to Facebook’s Text Overlay Tool and upload your image.

Once your image is uploaded, a new box will pop up underneath, indicating the image text rating:

The rating OK means your ad will run normally. The other ratings range from Low to High, high indicating there is too much image text and the ad may not run.

Campaign Creatives:

Create ad creative assets

Create creative assets for ads.

The image or video that you use for your ad should support the copy that was written earlier. Make sure that each image used helps tell a story and makes sense. One of the worst things an ad can do is utilize an irrelevant image. This distracts the prospect and will decrease conversion rates.

Additionally, make sure that you have the proper legal rights to use any image or visual in your ad. 

Include a link or upload your creatives below.

Check size of creative assets (images, banners, videos, etc…)

Ensure that the size used for your ads are correct.

It’s important to make sure your visual content is the right size for your Facebook ad. To figure this out, first select the ad you created or are interested in and go to “Image” in the workspace:

You will see a preview of your image as well as the recommended size in pixels. The symbol on the lower right corner of your displayed image will indicate whether or not the current size will work well.

Budget Checklist:

Review current budget

Make sure your budget is being properly spent.

Maintaining and properly allocating a budget is an effective cost control tool. There are two types of budgets: daily budgets and lifetime budgets. Daily budgets are the average amount you’re willing to spend on an ad set or campaign every day, while lifetime budgets are the amount you’re willing to spend over the entire run-time of your ad set or campaign.

Two ways to approach spending your budget are: standard delivery and accelerated delivery. If you choose standard delivery then your budget will be spent evenly over the course of the ad campaign. This is recommended. And if you choose accelerated delivery, your budget will be spent as quickly as possible.


Output:

Send completion email

Send completion email to primary account contact.

If you created this Facebook campaign for a client or a direct supervisor it is recommended that you inform them when it is complete. Modify the below email to include your specific update message. 

After the email has been sent be sure to go through this checklist every time a new Facebook Ads account needs to be created. You can also reference this document in the future to review the campaigns initial creatives and ad copy.

Sources:

Take control of your workflows today.