Templates /
Brand Identity Design

Brand Identity Design

Run the Brand Identity Design process when you are crafting a corporate branding strategy with a client, or run it for your own startup.
1
Introduction to Brand Identity Design
2
Record client details
3
Hold a meeting with the client to establish the fundamentals
4
Review the designs and branding which the client likes
5
Research the market they are entering
6
Investigate the key demographic
7
Collect options for typography
8
Choose potential color palettes
9
Sketch out initial logo ideas
10
Create 5 alternative branding styles
11
Assess the client's feedback on initial concepts
12
Bring the ideas together to create 3 potential branding styles
13
Design the final materials
14
Send the completed project to the client
15
Generate your invoice
16
Related Checklists:
17
Sources:

Introduction to Brand Identity Design

Brand Identity Design

This brand identity design checklist is designed to take you through the necessary steps to build a total branding package for a company. 

Throughout this process, we’ll look at some of the deliverables which are normally expected to be included within a brand identity package and walk through the typical methods used to formulate them. 

Brand identity is a crucial way of conveying information about a company in as short a time as possible. The initial interaction with the brand will shape how a customer perceives the company. This is your opportunity to make sure that first impression is not a wasted one

A successful branding process creates a final strategy which everyone in the company can contribute to in their own way.

Check out these two videos below to gain different perspectives on brand identity design. The first one is short, and the second is more in-depth. 

How to Design a Brand Identity – Creative Design

Identity Design: Branding – The Futur

Record client details

Use this space to record important contact information for future reference.


Hold a meeting with the client to establish the fundamentals

Your initial meeting with the client is an important one. This is your opportunity to learn as much about the company as possible before you venture into your process. 

Use the subchecklist below as a rough agenda to help you direct the meetings

You can record the results of your questioning in the form fields provided beneath. 

  • 1

    Determine the value proposition of the company
  • 2

    Outline 5 values the company wish to be associated with
  • 3

    Work out the aims of the company moving forward
  • 4

    Make sure there is clear agreement on deliverables and expectations
  • 5

    Ask the client to send all related materials which they like


Review the designs and branding which the client likes

As part of your initial research, review the materials the client has sent to you for inspiration. 

These documents should help you understand what the client is looking for and should inform the direction you take. 

Use the subchecklist to help guide your investigation, and upload your notes below.

  • 1

    Establish common themes between the designs
  • 2

    Understand what audiences these examples are targeting
  • 3

    Assess the weaknesses of these materials
  • 4

    Record these notes and send your assessments to the client

Research the market they are entering

In order to better understand where your client’s company can find their niche, you need to have a strong understanding of the industry they are either working in or entering into.

You can read this article from Chron about best practices when conducting industry research – what to look for, and how to look for it. 

Use the subchecklist below to help guide your research. 

  • 1

    Understand their competition and the different branding approaches employed
  • 2

    Assess which approaches have been most successful so far
  • 3

    Determine how the client’s value proposition differentiates them from competition

You can also watch this video from Purdue School of Management to help frame your research in context. 

Introduction to Industry Analysis – PurdueLibraries

Investigate the key demographic

Understanding who your key demographic is will help you tremendously in constructing a brand identity which can effectively target the right customers. 

The subchecklist below provides a short series of steps to consider when assessing the demographic in the context of the construction of a branding strategy.

  • 1

    Determine who the key demographic are
  • 2

    Research how the key demographic interact with existing products or services in the field
  • 3

    Gather a small representative sample who you can use as a testing group

You can consider some of the points made in this video about how to research your target demographics.

How to Research Your Target Demographic – Firefly Store Solutions

Watch this video below from Shopify which discusses your target market. They dispute the idea that you should target demographics, and should instead target psychographics. Check it out.

How to Determine your Target Market – Shopify

Collect options for typography

How you choose your typography is more of an art than a science. 

Nonetheless, you should gather a series of options which can help direct your branding concepts. Try choosing 5 approaches to give yourself and your client some options for review. 

Check out this article from Creative Bloq for 15 tips for choosing the right font.

Or, watch this video below from the California Institute of Arts.

Introduction to Typography: Choosing a Typeface – Extended Studies at CalArts

Choose potential color palettes

Choosing colors for your branding can define what initial emotions a customer calls to mind when first interacting with it. 

Bright, bold colors can give a playful edge, pastel shades can create a nostalgic feel, and monochrome can be used to convey a feeling of class or premium service.

You can read more about this from Big Brand System, who look at different palettes and what they convey.

Or you can watch the video below for inspiration. 

The Power of Color; How to Choose a Color for your Brand – Skyberry Studio

Sketch out initial logo ideas

Sketch out some initial ideas for the logo. These can be done with paper and pencil. 

There are no wrong answers in the ideation process and all avenues can be explored. 

You can use our Logo Design Process checklist to help you.

Alternatively, check out this thumbnail process shown in the video below to give you inspiration.

Upload your initial ideas and concepts using the form field below.

Sketching Logos in Thumbnails: Logo Design Course – Good Creative Academy

Create 5 alternative branding styles

For all the research you do, the final direction you choose to go in will be determined by the client. 

It is important to provide the client with a series of options for them to consider and select. This stage is your opportunity to present branding approaches to the client which are varied and cover different angles. 

Use the subchecklist below to help guide your deliverables for this section. Use the file upload to save a copy of the work to the checklist, and use the email widget to send these options to the client. 

  • 1

    Make sure some of the styles are in line with the industry’s norms
  • 2

    Include more radical options to broaden the scope of conversation
  • 3

    Assess strengths and weaknesses of the different drafts
  • 4

    Send initial approaches to the client along with your notes
  • 5

    Send the approaches to your testing group for extra feedback
  • 6

    Arrange a meeting to review first concepts with the client

Assess the client’s feedback on initial concepts

Review the client’s feedback on the concepts you have provided and the analysis you sent with them.

Consider what themes are present in the client’s feedback and what connections you can draw between concepts they liked and ones they opted not to move forward with. 

Use the file upload below to store the client’s feedback for reference.

Bring the ideas together to create 3 potential branding styles

It is now time to refine your concepts and determine the direction of the branding strategy. 

From your analysis of the feedback provided on previous materials, choose 3 brand identity ideas to create in more detail. These will likely have less variety than the last deliverables you provided and may simply be three iterations of the same theme. 

The purpose of this step is to choose the concept and use your design skills to refine the designs to demonstrate what the final product may look like. The client will choose one of these options to be their final brand identity, so make them look good!

Use the subchecklist below to guide your approach and use the email widget to send them over to the client. 

  • 1

    Create polished looking logos
  • 2

    Provide an example promotional design for each concept
  • 3

    Include the materials together in a PDF for presentation
  • 4

    Send the 3 options to the client and ask which they would like to move forward with

Design the final materials

Once the client has chosen the refined concept they wish to use to represent their brand, you can begin to expand that approach across the other deliverables

What materials you design for the client will have been defined at the beginning of the project. You can use the subchecklist below as an example of the normally expected deliverables for a brand identity project. 

  • 1

    Logo in multiple formats and styles
  • 2

    Tagline and extra promotional copy
  • 3

    Letterheads and envelope designs
  • 4

    Business card designs
  • 5

    Mailing label
  • 6

    The color palette with the relevant RGB and CMYK codes
  • 7

    Any agreed promotional materials
  • 8

    A report explaining the branding style and approach with justifications and research

Send the completed project to the client

Once you have completed the design work for the final materials, you can upload the work below or link to a shared cloud storage folder and use the email widget to send the finished project to the client. 

Generate your invoice

Congratulations on a successful design project. 

The designer can use the Process Street invoice generator template to send their invoice to the client. 

This invoice can be sent automatically from this checklist by clicking to complete the task. 

You can use Zapier to connect this task in this template to your invoice so that you can automate the sending process. 

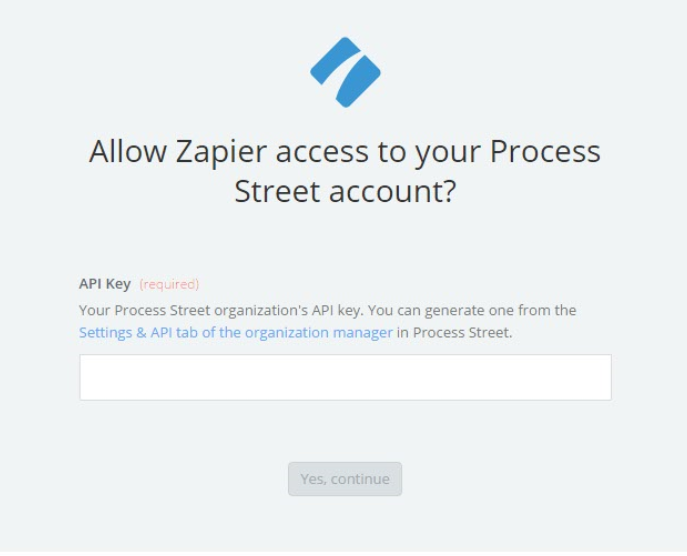
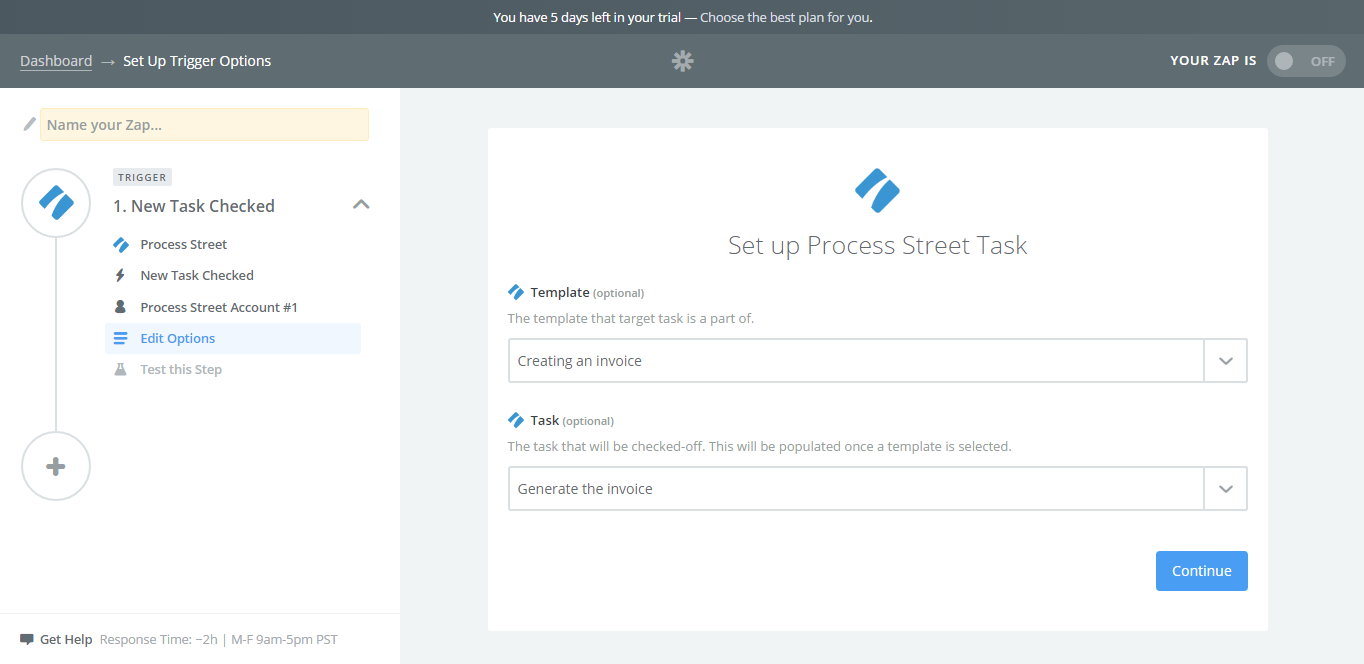
In Zapier, select "Make a Zap" and search for Process Street. It will prompt you to create a trigger – select "New Task Checked". It should then prompt you to connect your Process Street account to your Zapier one. You simply follow the link Settings & API tab of the organization manager on the pop-up.

Follow the steps provided by Zapier and it should connect the two accounts together. From here it will let you search for the template you want to run the Zap from, and choose the task you want to hook it up to.

After you’ve selected those options you can test that step and your trigger should be set. 

Next, you can create the action to be initiated by your trigger. You can use a third party system like WebMerge or you can use Zapier’s built-in email service to generate HTML emails. Either of these solutions can be used to generate and send your invoice.

To read more about these steps and how to create the invoice check out this article

Sources:

Take control of your workflows today.