If you haven't already done so, you can create a GMass account here.
Before sending emails, you will need to login to the correct Gmail account for whom you will be sending emails for.
If you haven't already done so, you can create a GMass account here.
Before sending emails, you will need to login to the correct Gmail account for whom you will be sending emails for.
If you haven't already done so, you can create a GMass account here.
Before sending emails, you will need to login to the correct Gmail account for whom you will be sending emails for.
HIT THE GMASS BUTTON NOT THE SEND BUTTON.
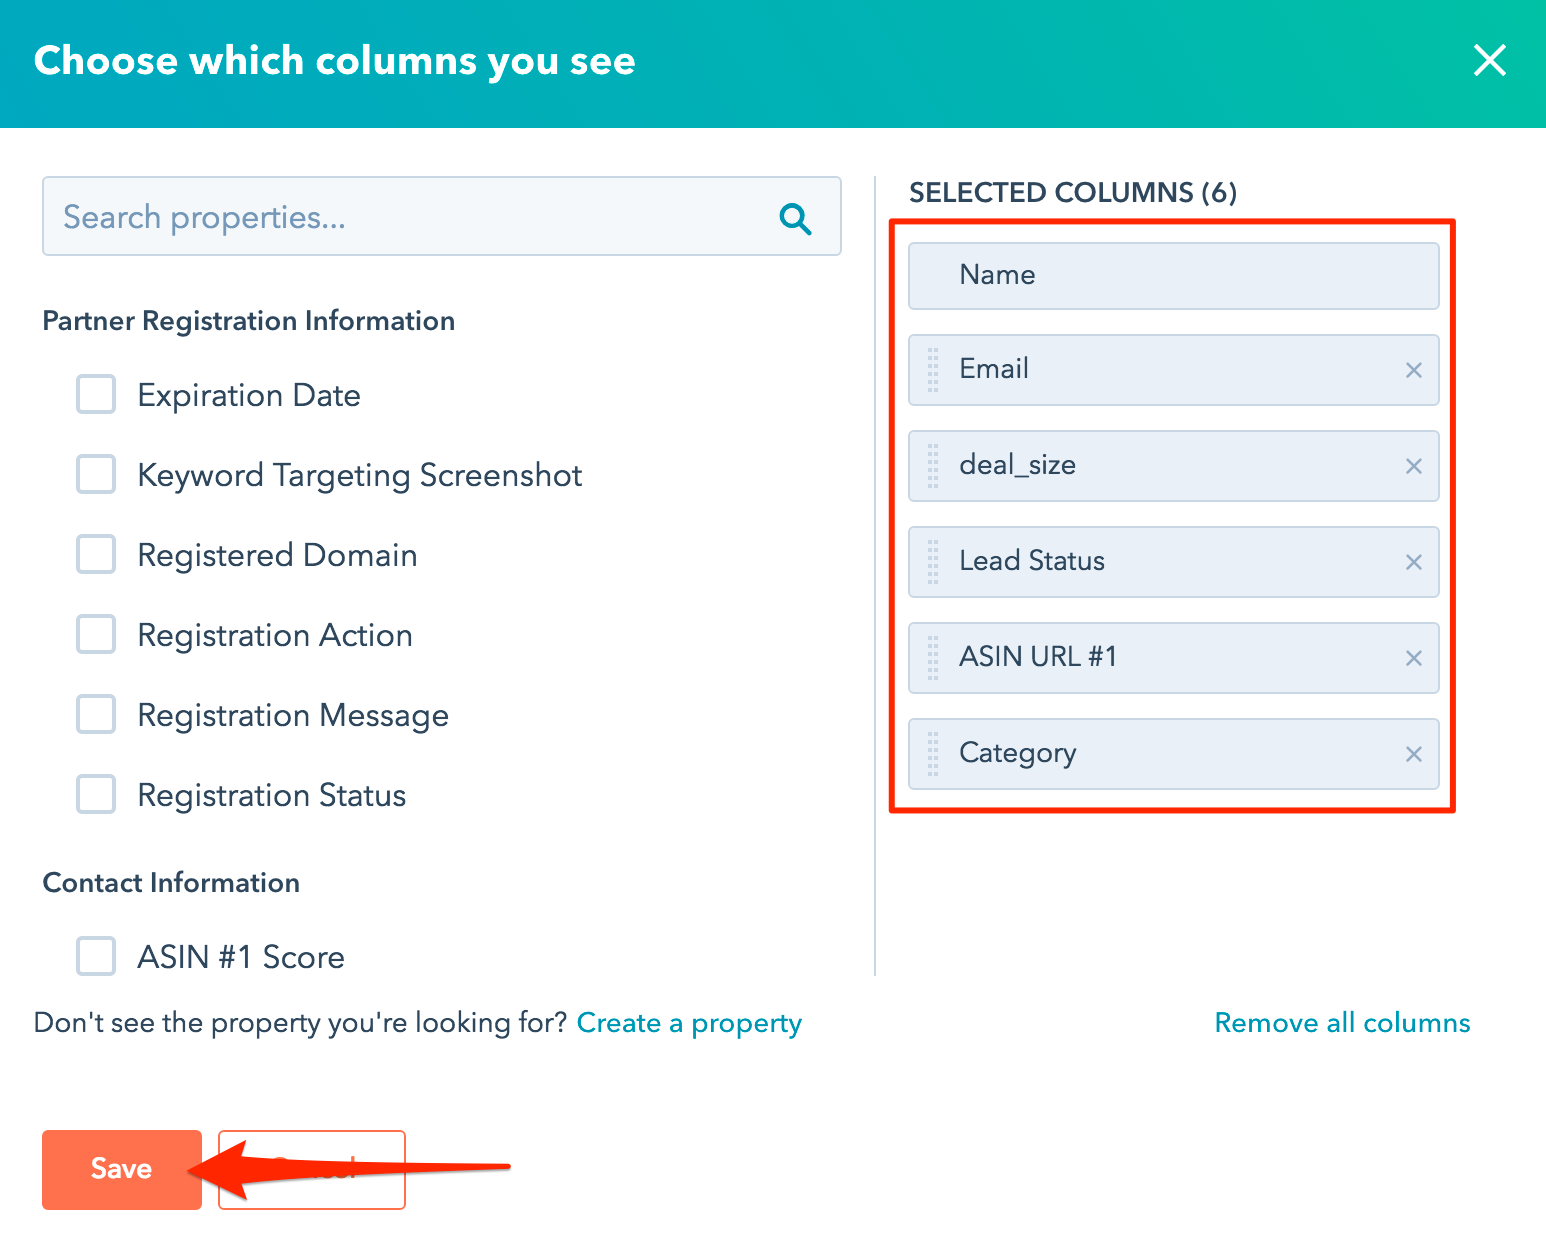
Create a new contact column view in HubSpot by selecting Contacts > Customize > Edit columns.

Select the properties below:
Select Save
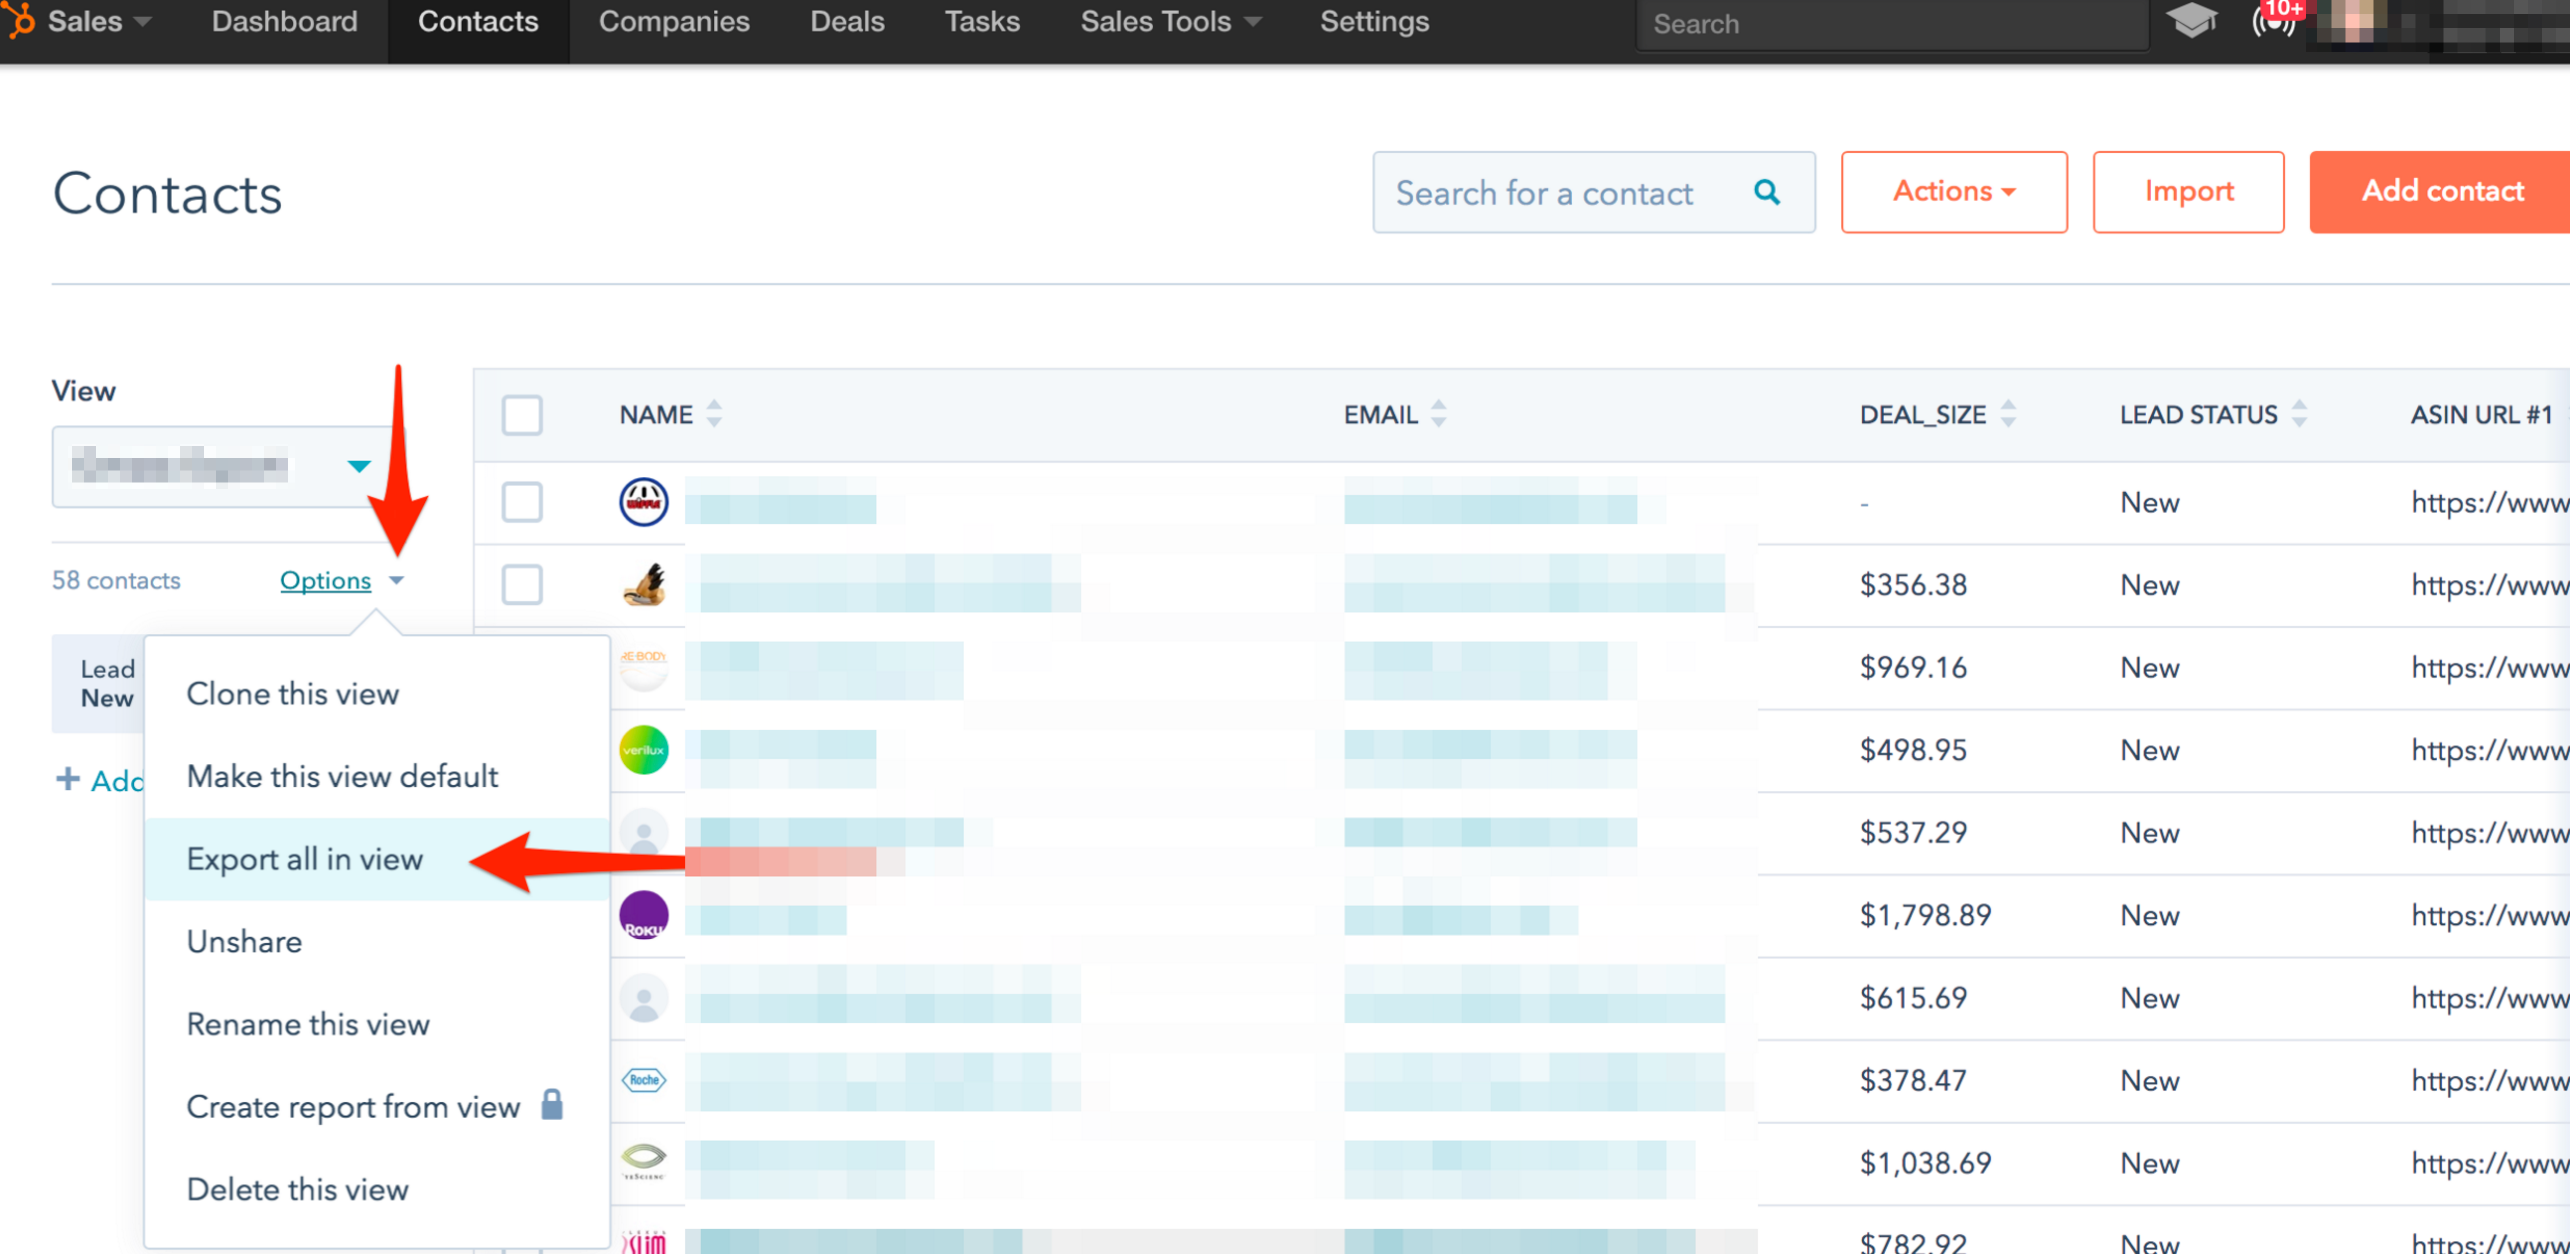
Select "Options" (underneath the view dropdown) > select "Export all in view".
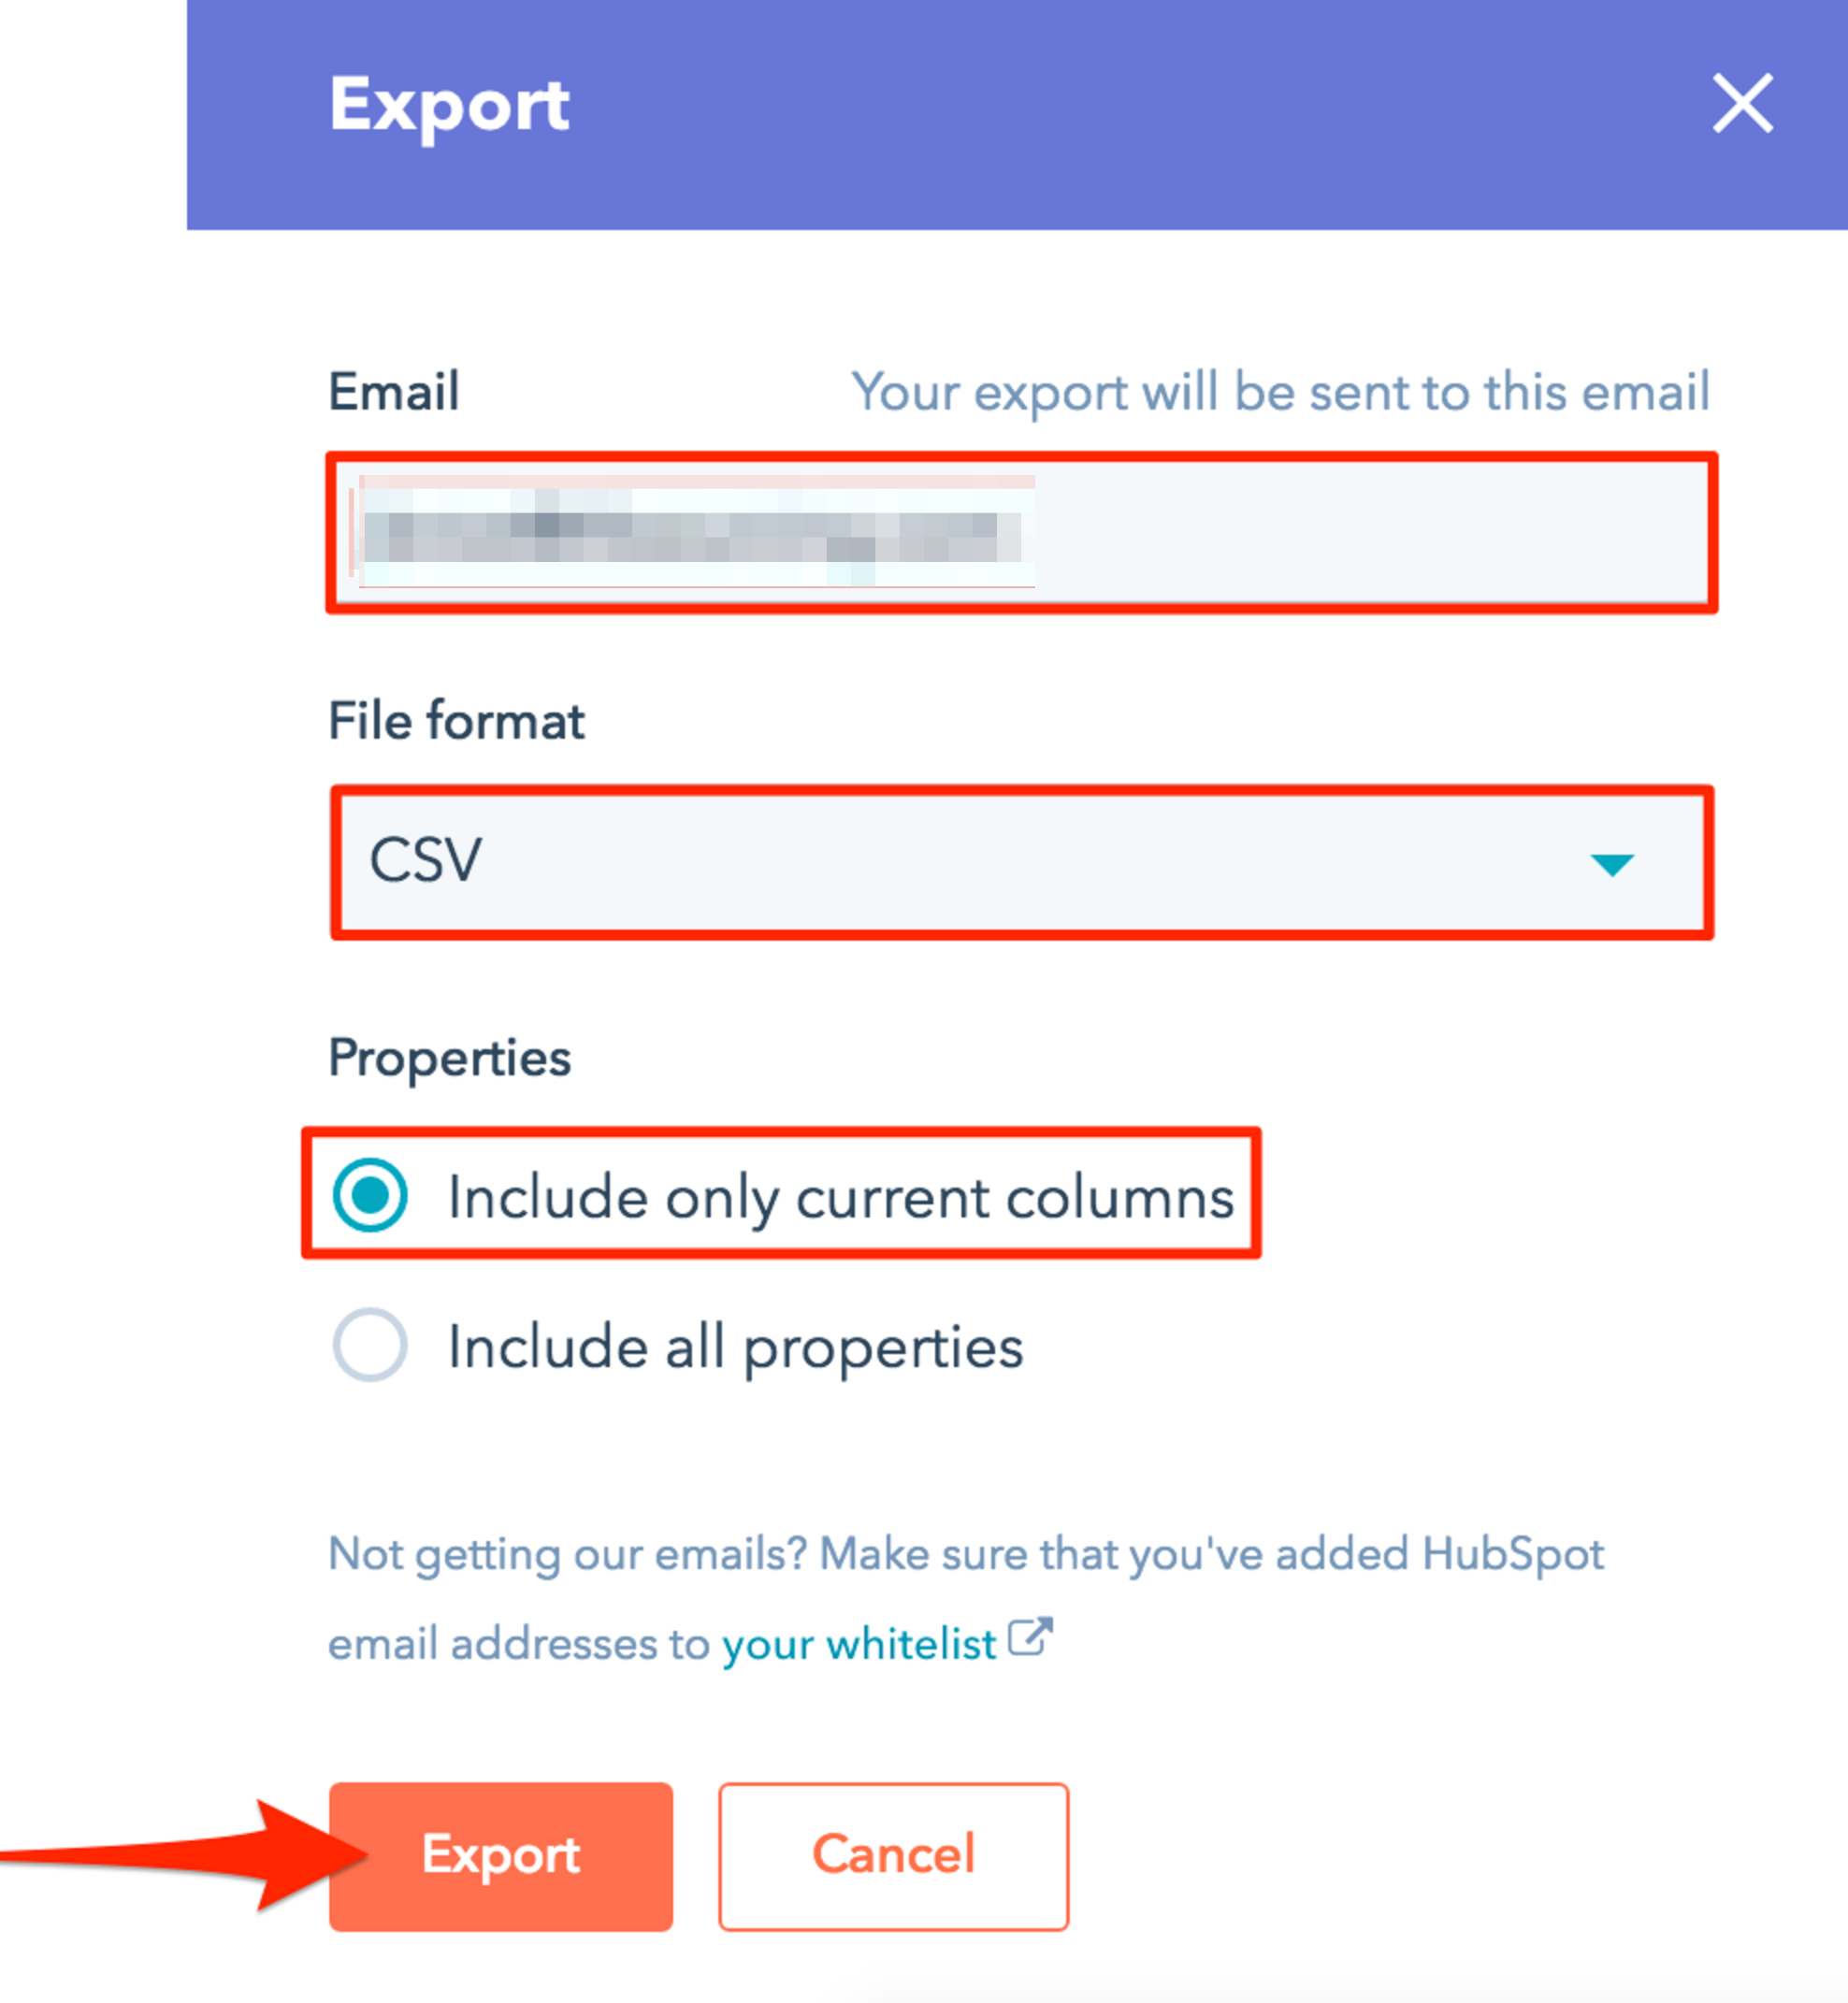
In the Export dialogue box:
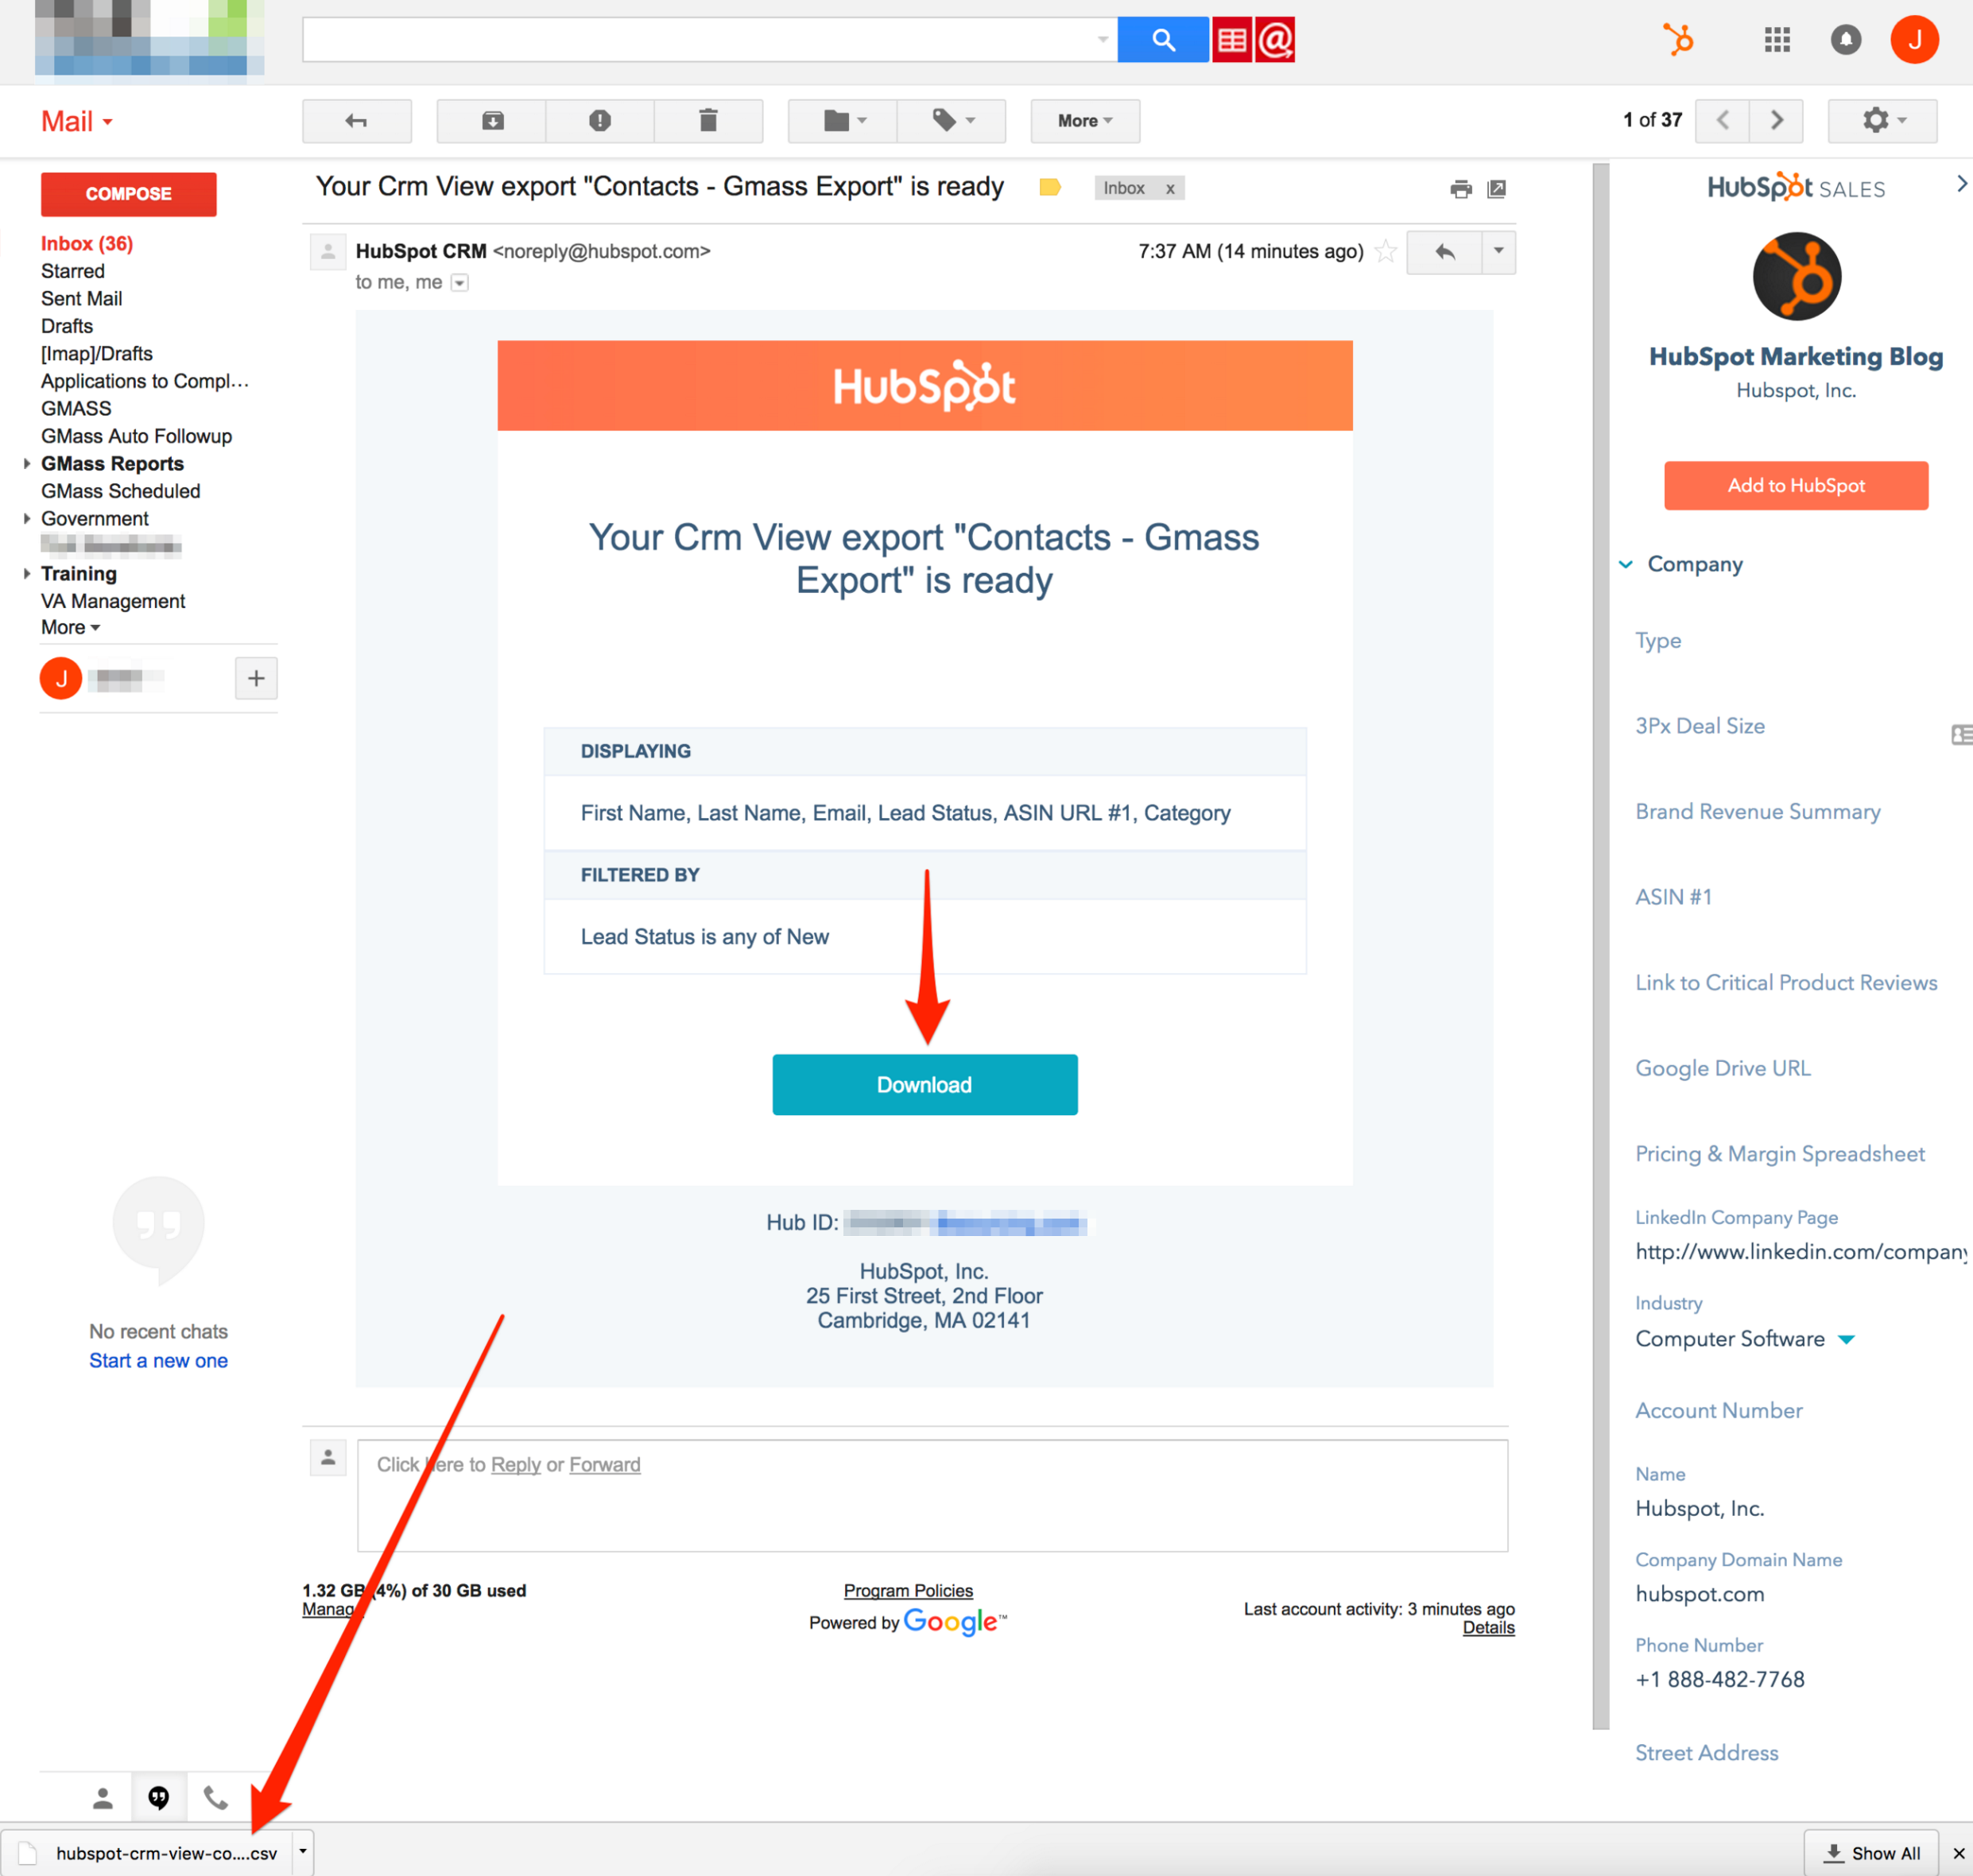
After you've completed Step 2, you will need to revert back to the Gmail account you logged into in Step 1 and open the export email from HubSpot. The export will be labeled as below:
From: HubSpot CRM
Subject: Your CRM View export "Contacts - Gmass Export" is ready

Open the email and select "Download".
Your download will appear on the bottom left of the screen.
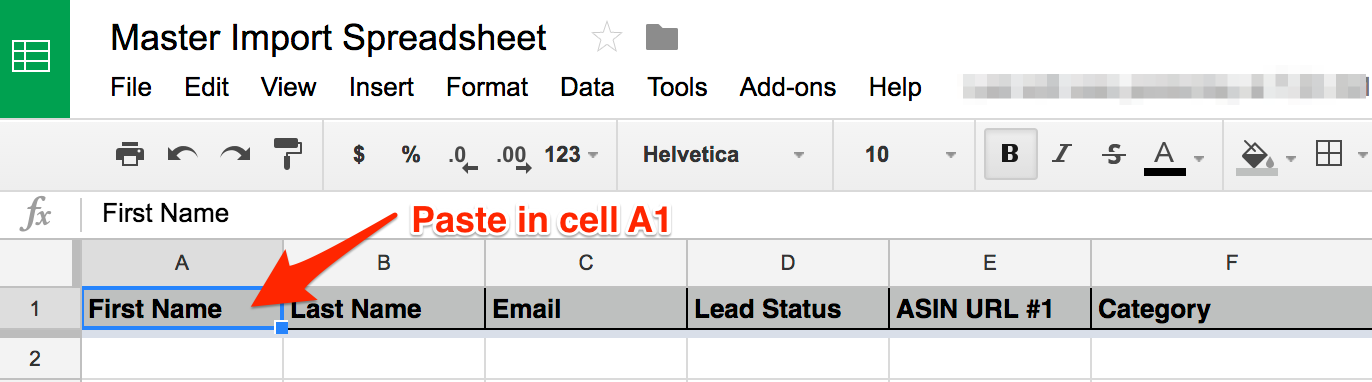
Open the download and copy the entire spreadsheet (ctrl A then ctrl C). Open the Master Import Spreadsheet and select the HubSpot Export Tab.

Paste the copied spreadsheet into cell A1 (click into cell A1 and press ctrl V).
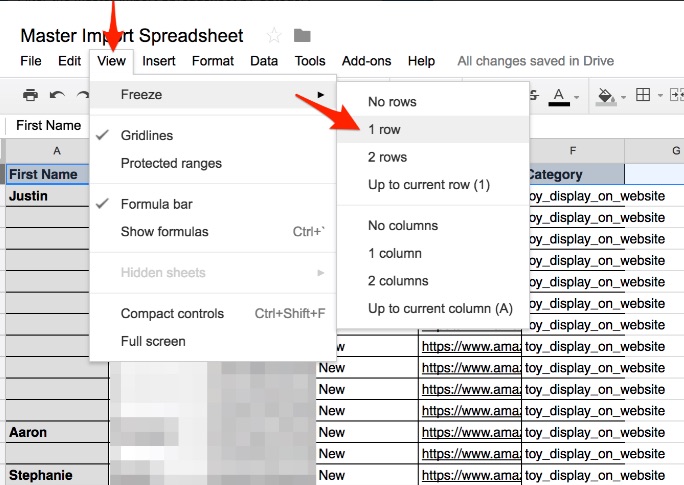
Before filtering the spreadsheet, you will need to Freeze Row 1.
Highlight Row 1 > select View from the toolbar > hover over Freeze > then select 1 Row.
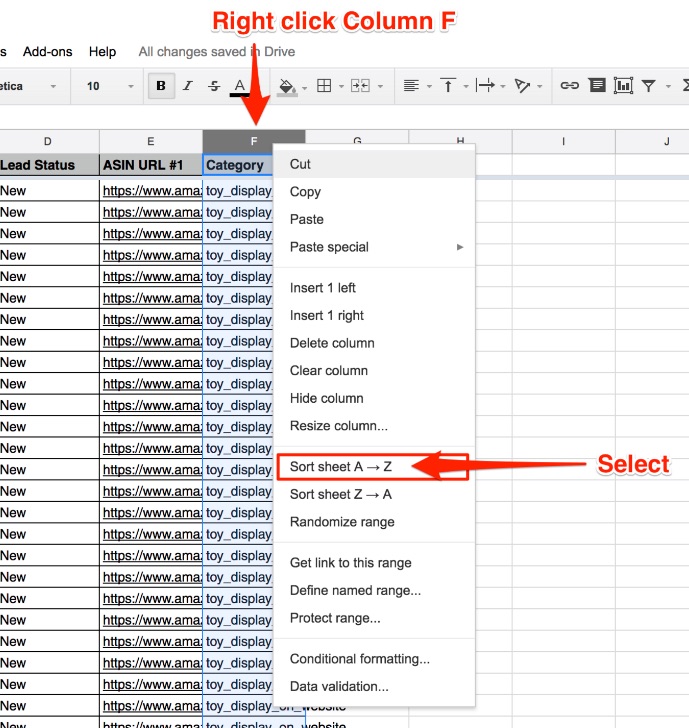
You will now need to sort the the sheet by the Category column.
Right click Category (Column F) > select "Sort sheet A - Z".
You will need to revert back to Gmail and, from within the inbox, select the "Spreadsheet Icon" next to the search bar.

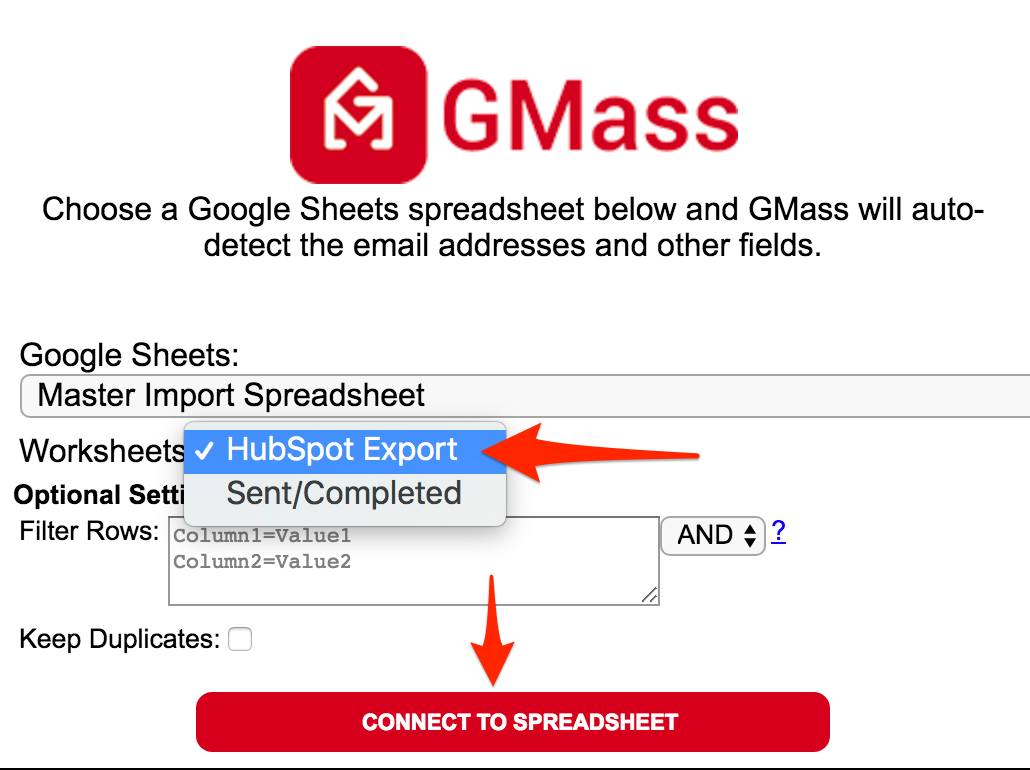
You'll be prompted to select a Google Sheet. Click the dropdown menu and select the "Master Import Spreadsheet".

Select the desired worksheet from within the Master Import Spreadsheet. This will be the individual page with the contact information, in our example below it is titles Hubspot Export.
Ensure "Keep Duplicates" is NOT selected.
Select "Connect to Spreadsheet".
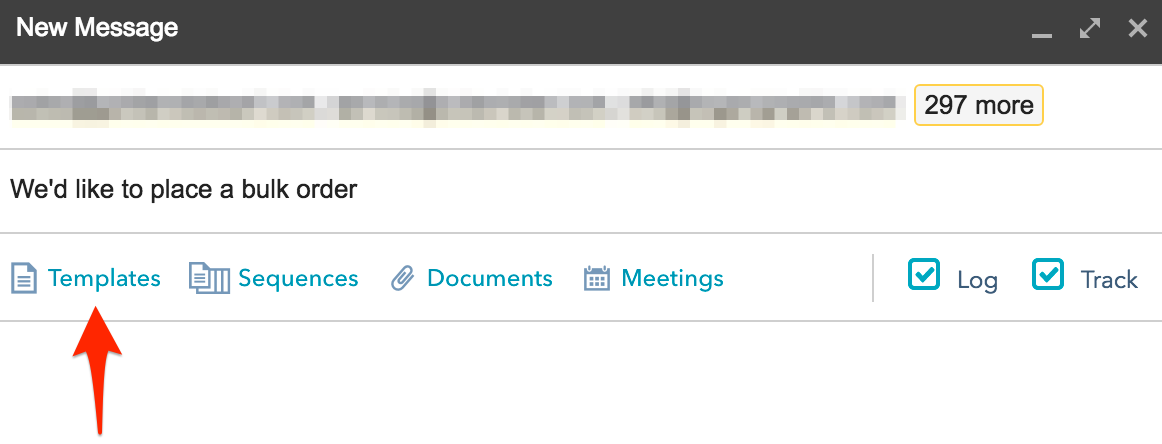
A New Message will be created in Gmail containing each contact from the specified worksheet.
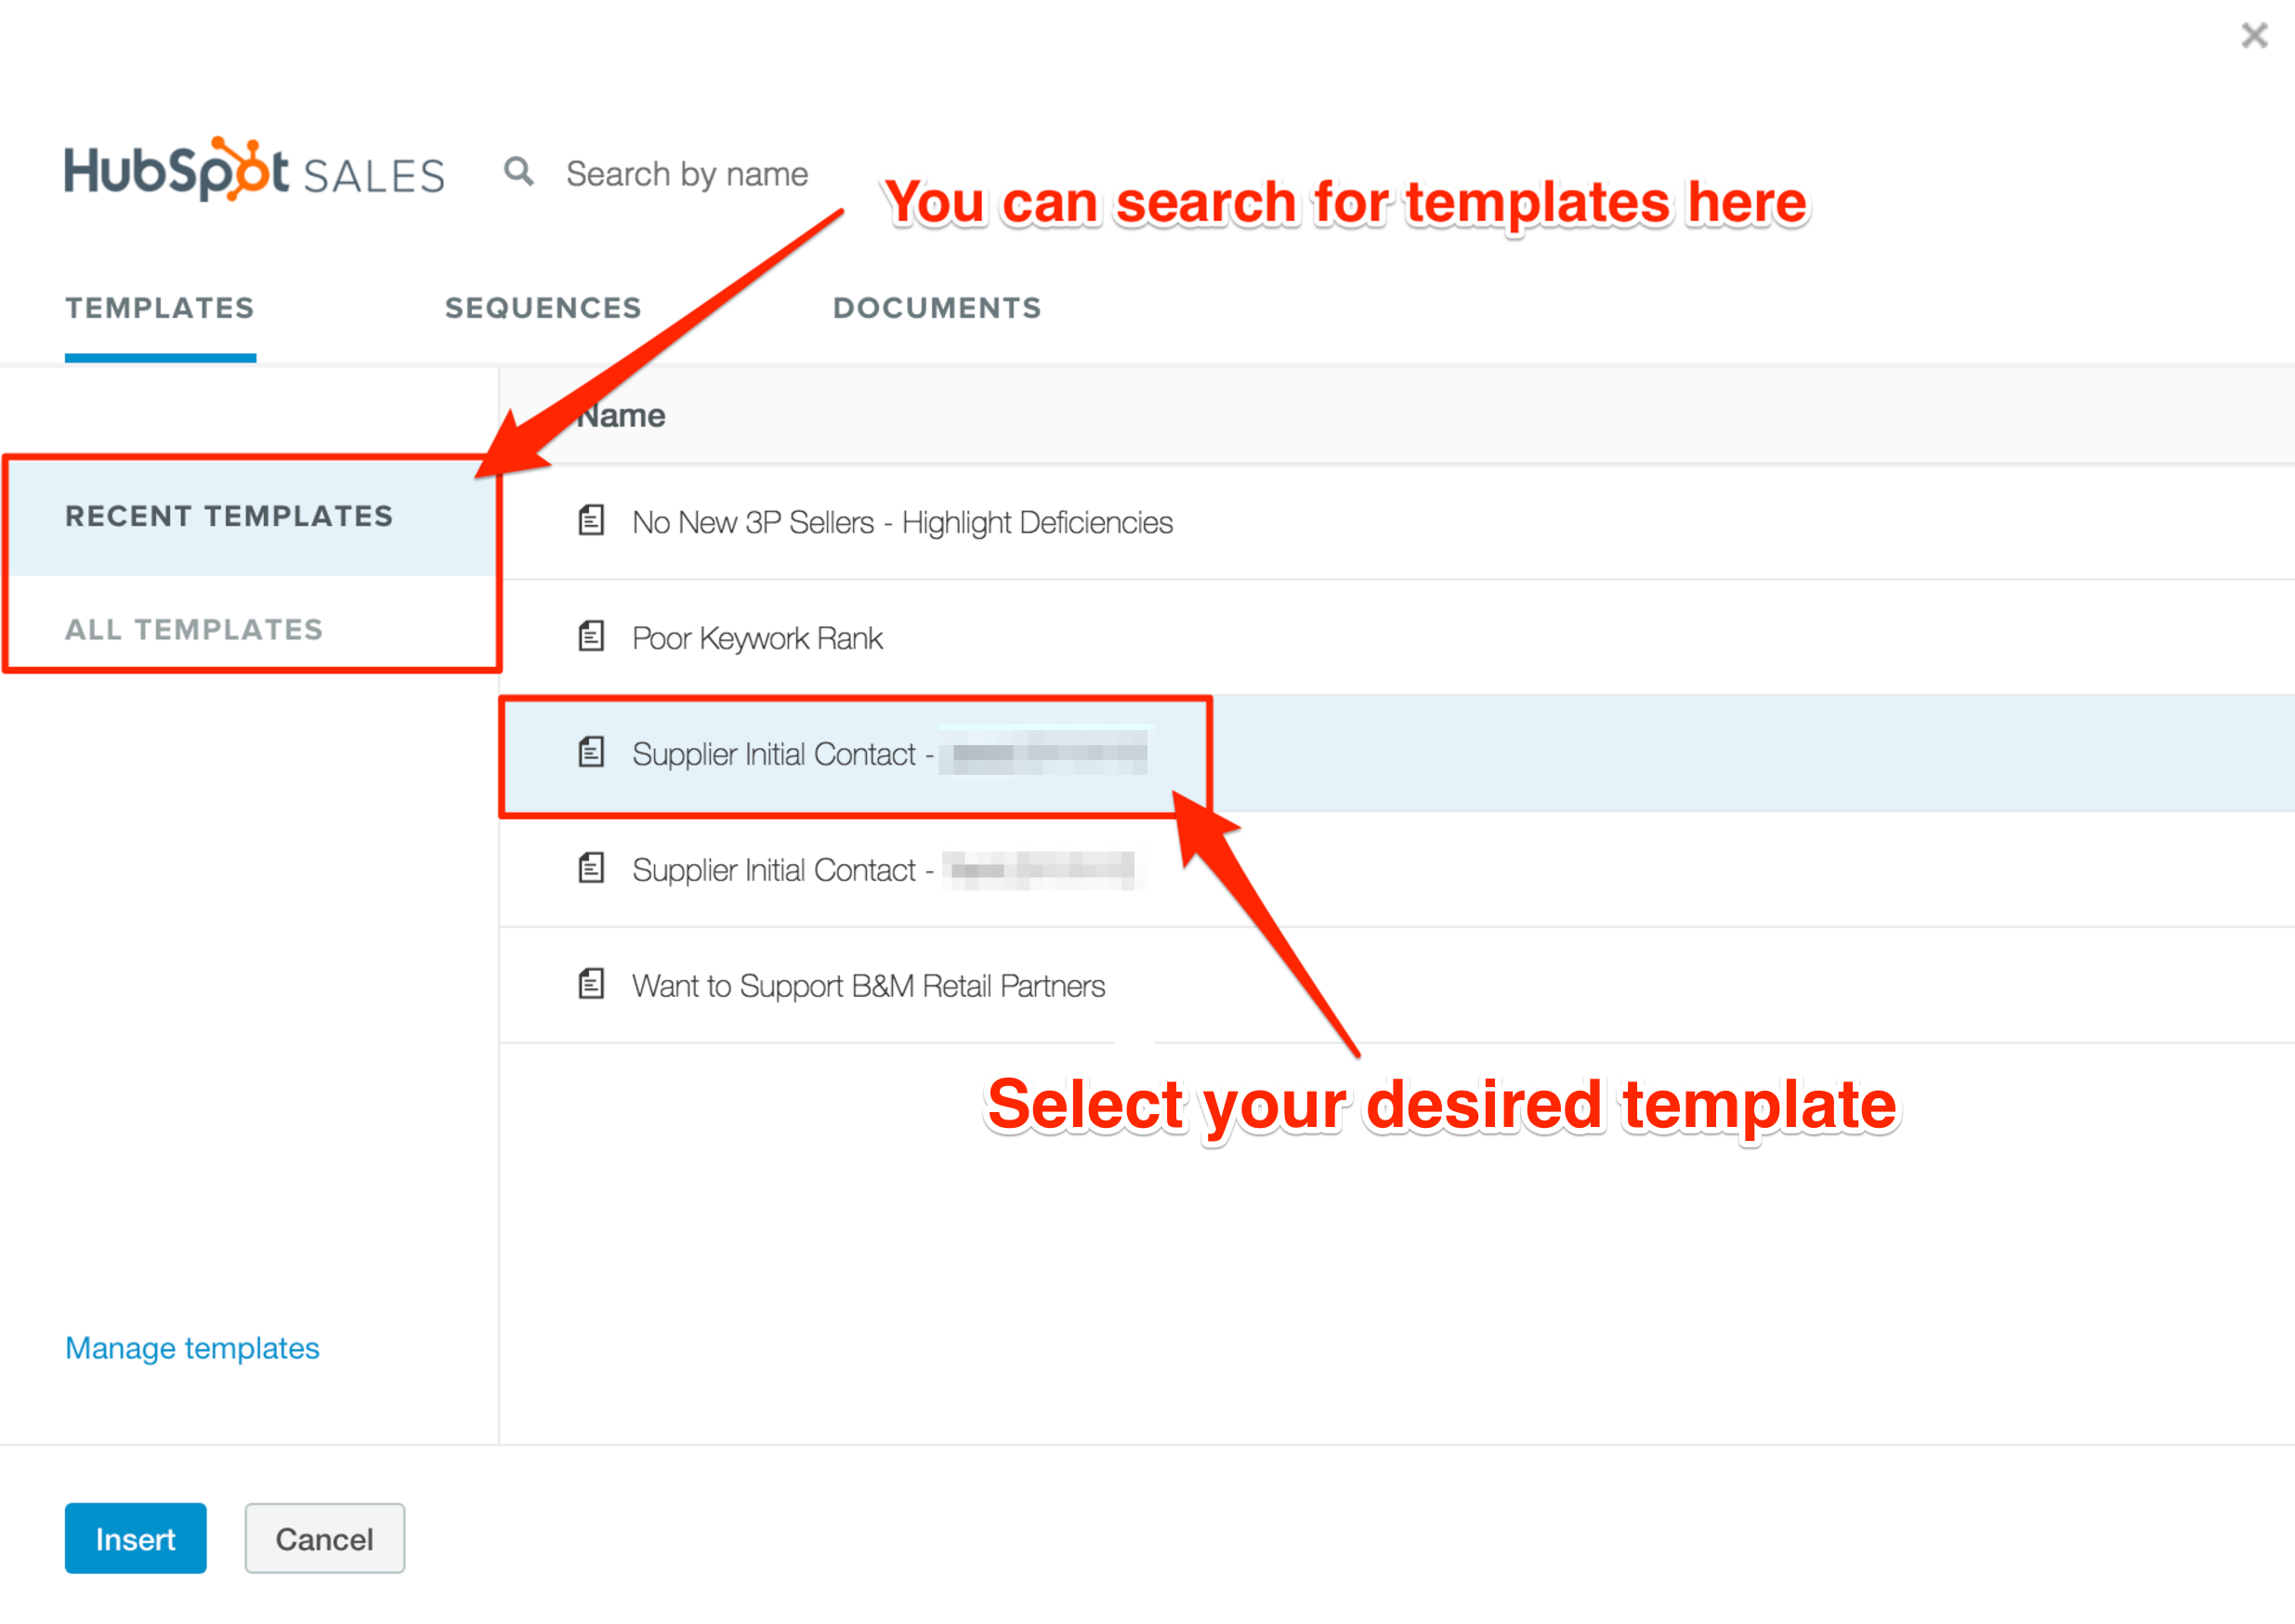
Select "Templates" from below the subject line.
Select your desired template.
Once you've found the correct template, double click it and it will autofill into the new message.
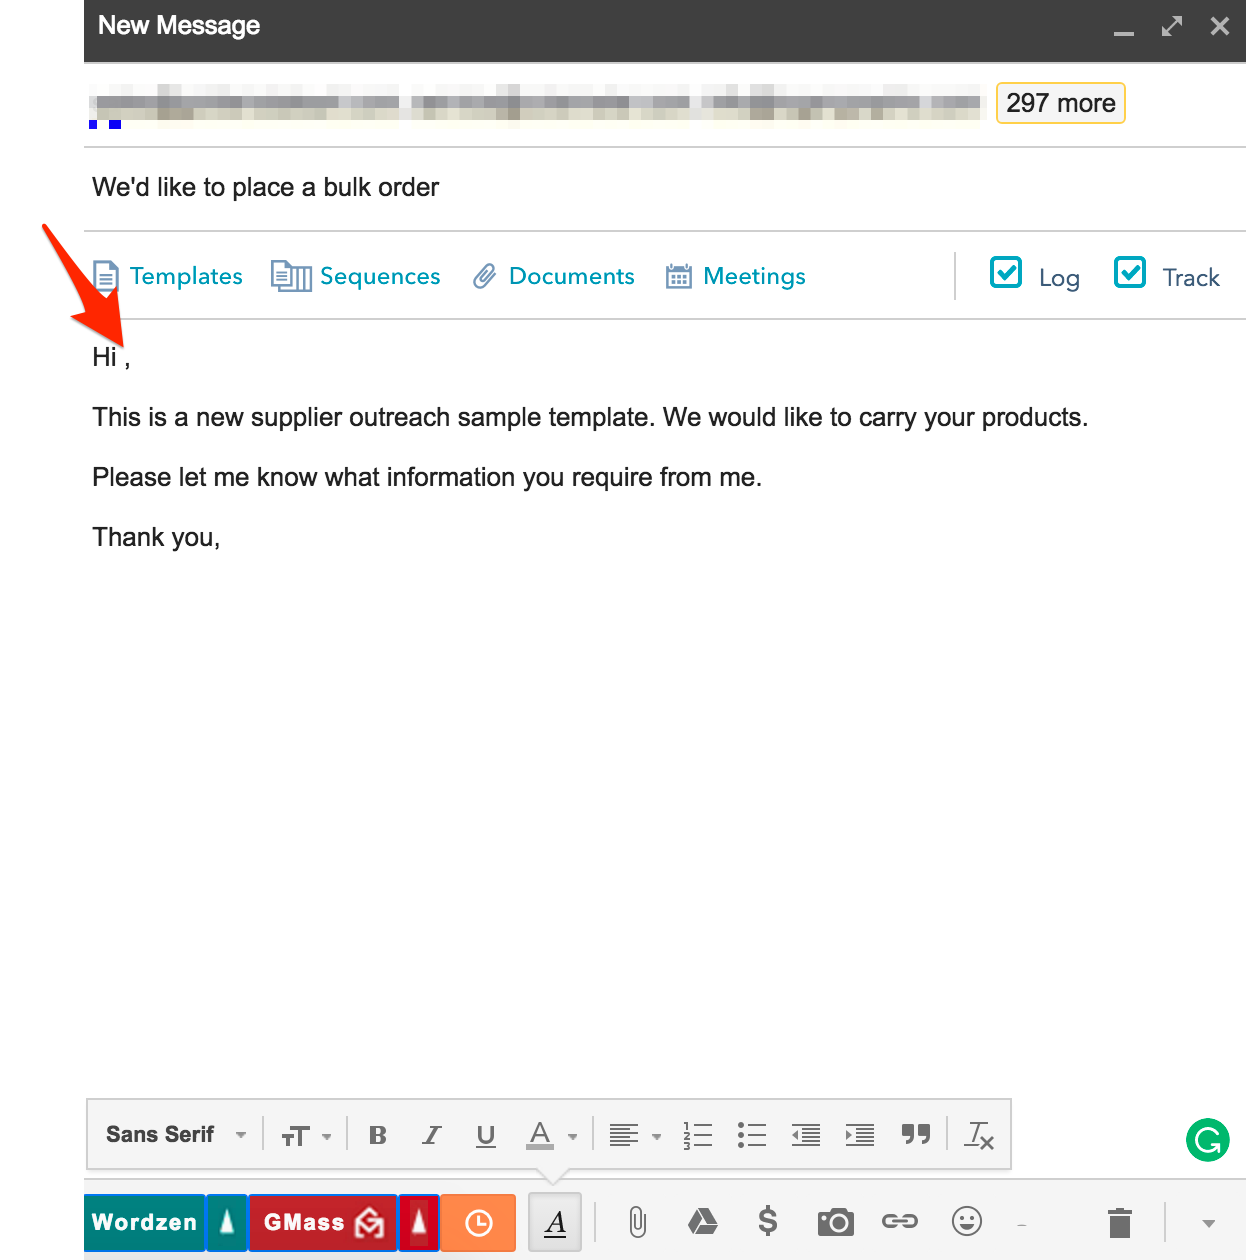
Ensure that a name has not autofilled in the greeting. In the case that one has, simply delete it and leave a space between the greeting and the comma.
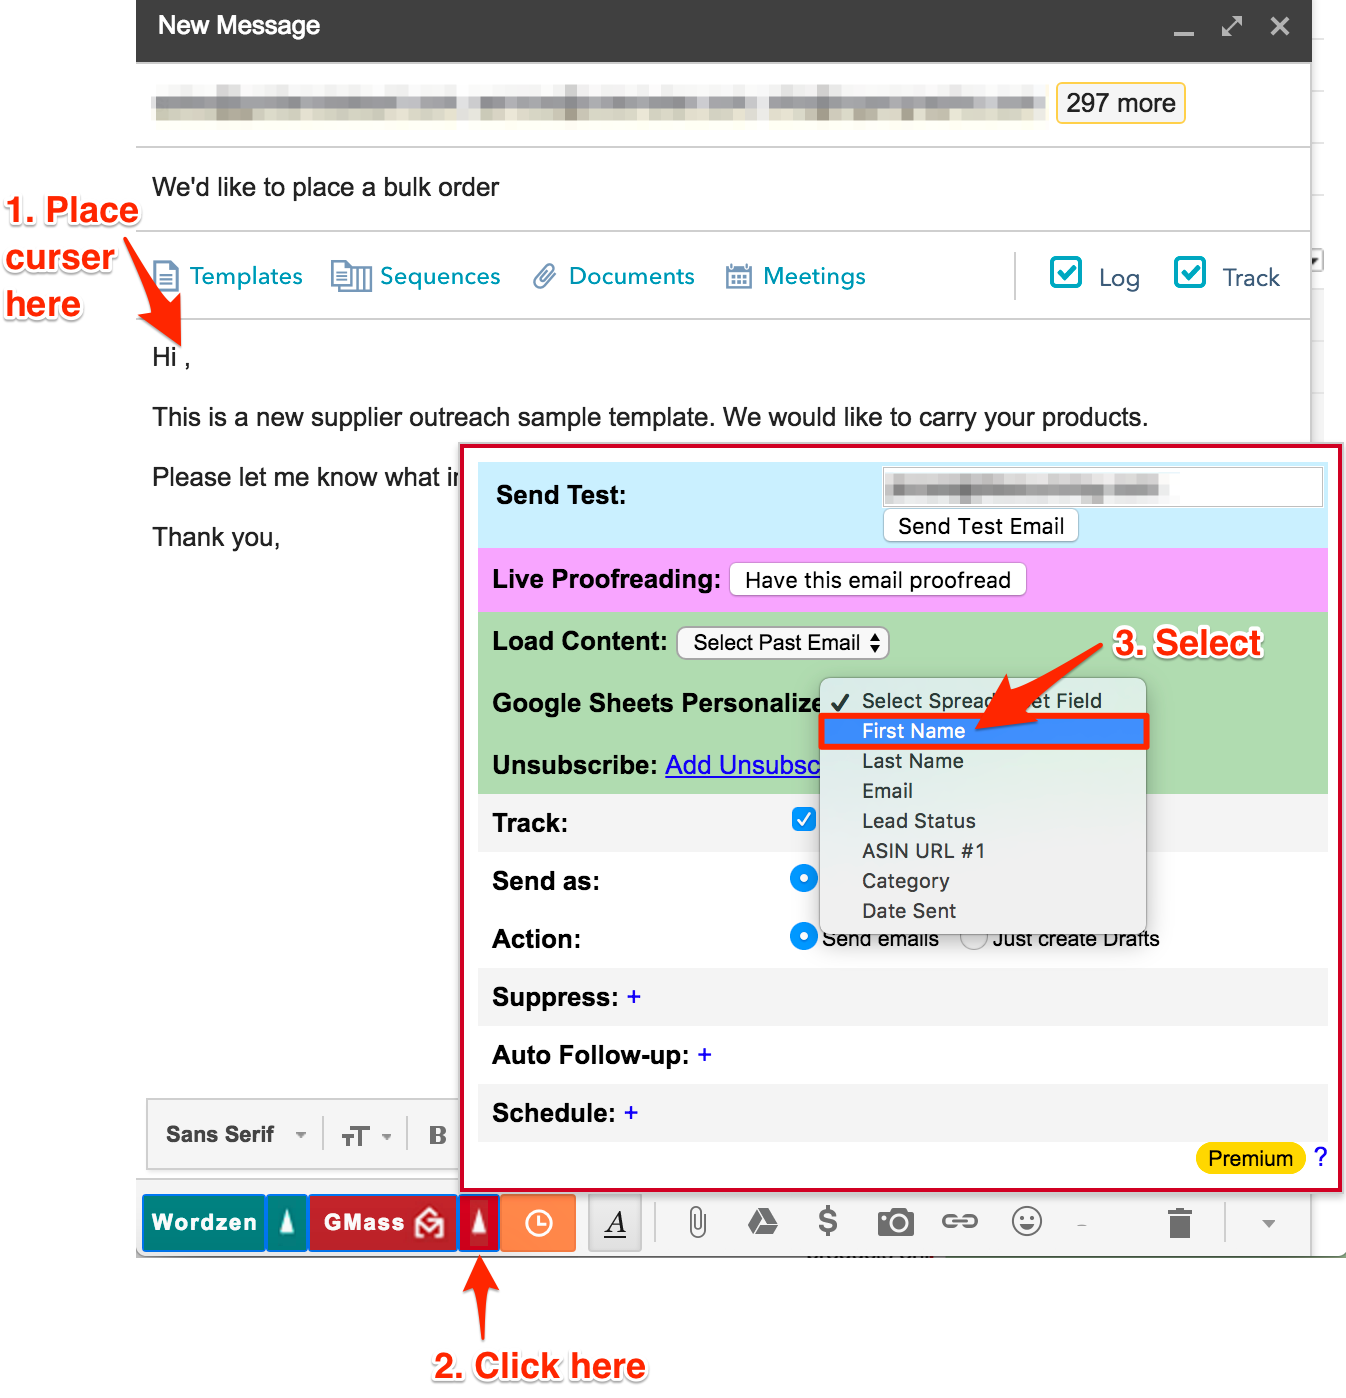
Follow the instructions below to personalize the email per contact:
1. Place your curser next to the greeting (make sure that there's a space between the greeting and your curser)
2. Click the up arrow next to the GMass button on the lower left of the message
3. Select the First Name short code from the Google Sheets Personalize section
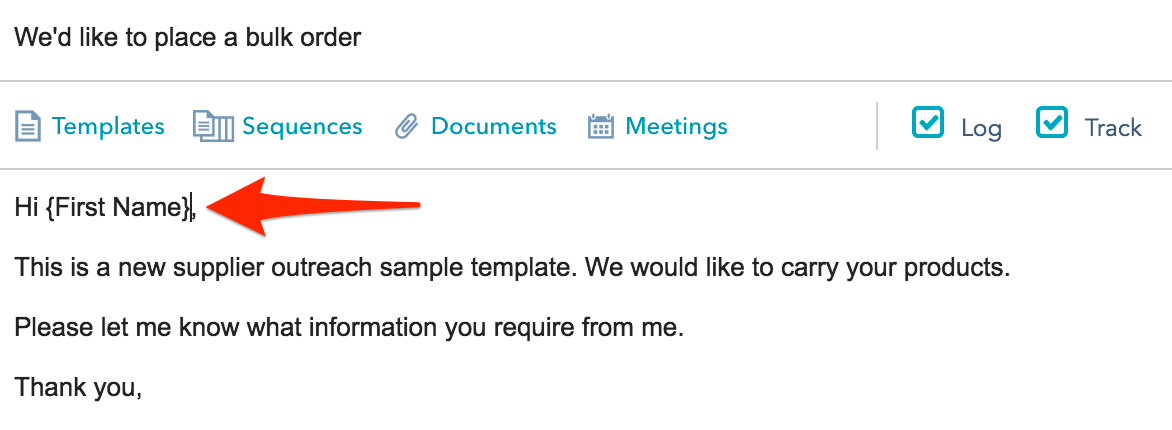
Once you have added these filters, then your greeting should look similar to the screenshot below.
You will need to copy and paster your email signature into the template as GMass will not auto populate your standard signature.
Before sending the email campaign, review the template one last time for any grammatical errors and ensure your short code(s) have been properly set.
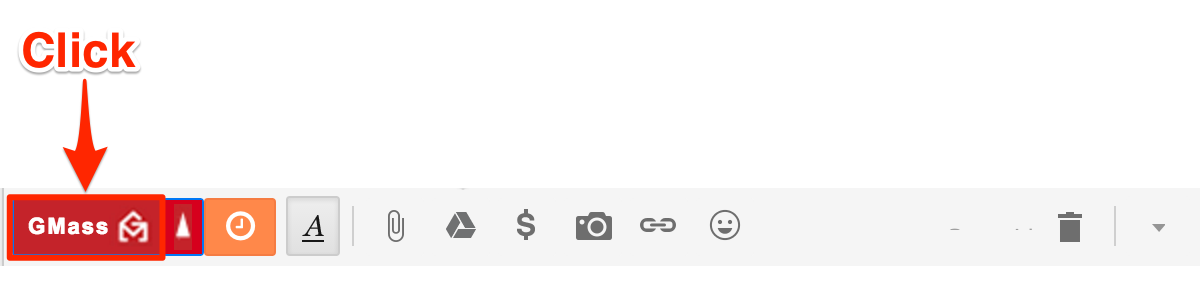
After reviewing, click the red GMass button on the lower left of the email.
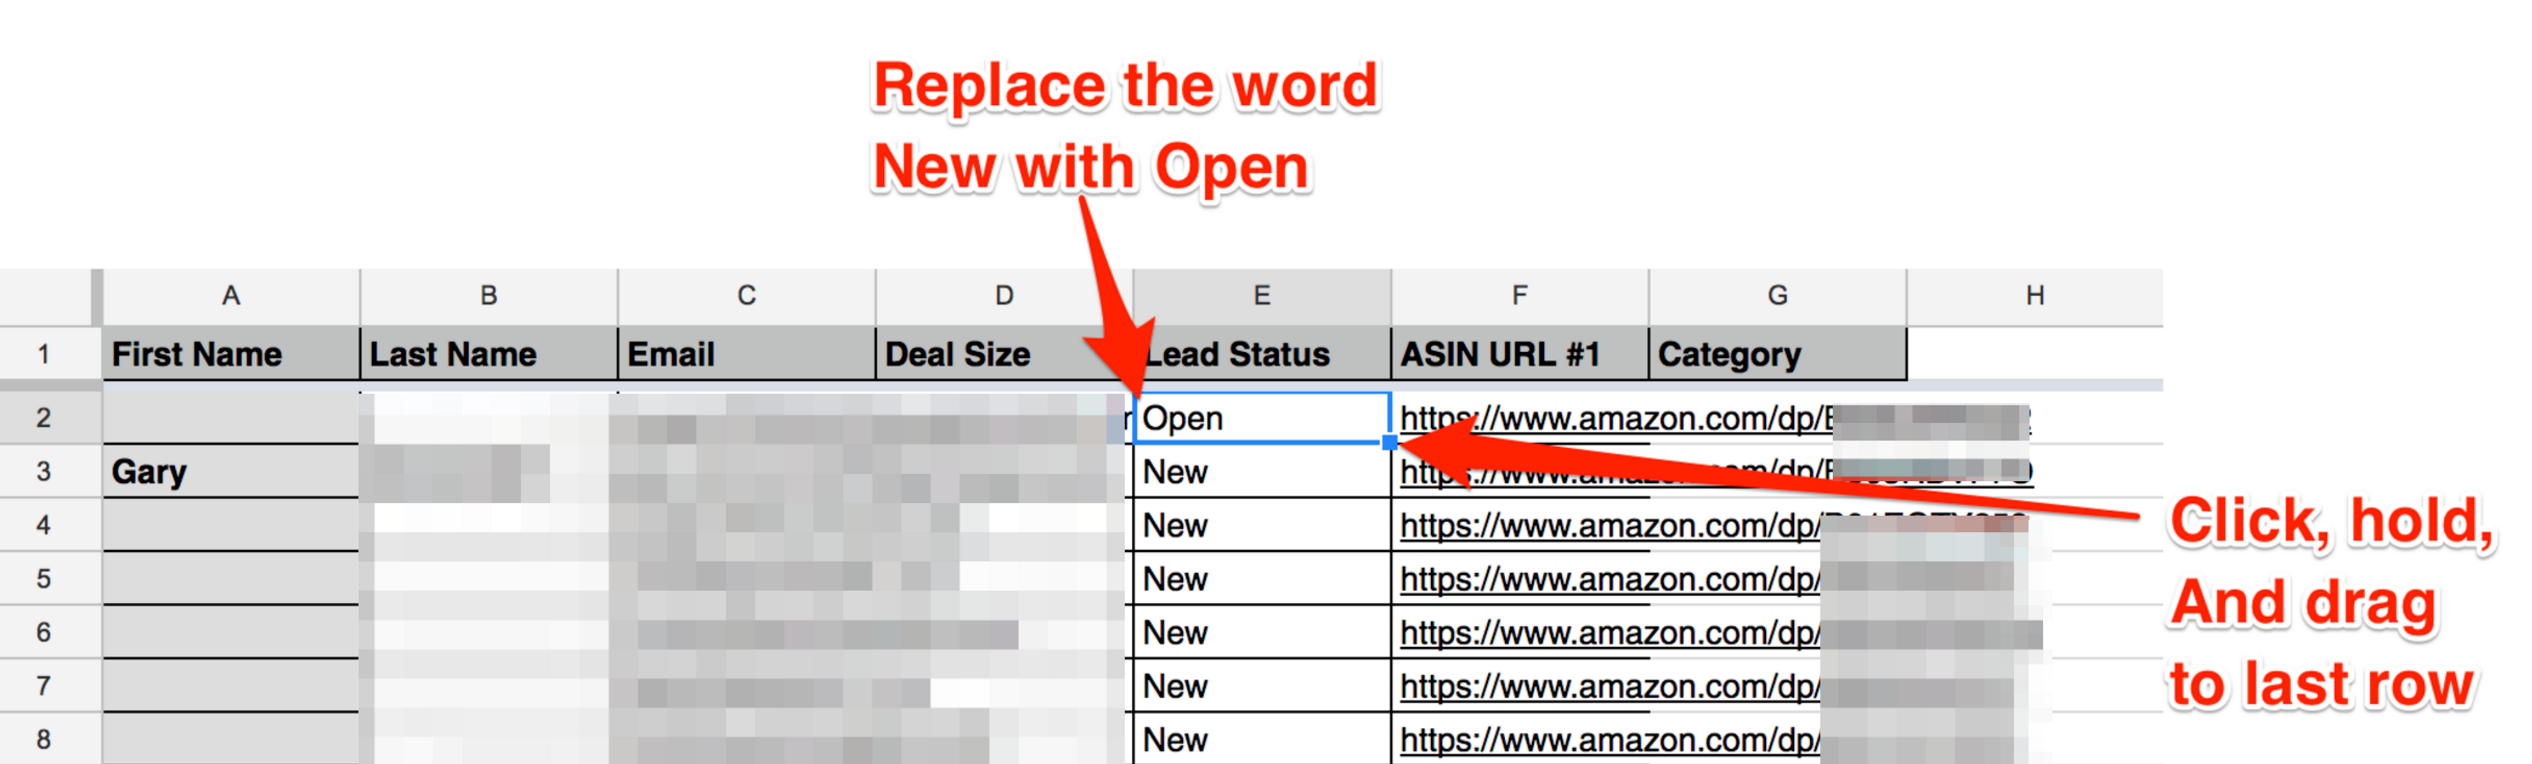
Once you have completed steps 1-5, you will need to change the Lead Status from New to Open.
Revert back to the Master Import Spreadsheet and select the tab for the user you sent the emails for.
Click into cell E2 (Lead Status) and replace the word "New" with "Open".
While still clicked into the cell, click and hold the small blue square in the the lower right corner of the cell. Drag the square down Column E to the last row containing contact information.
Go back to HubSpot and select Contacts from the top toolbar.
Once in Contacts, select Import.

This will take you to the import page. Select Start a new import.

Select the Contacts option.
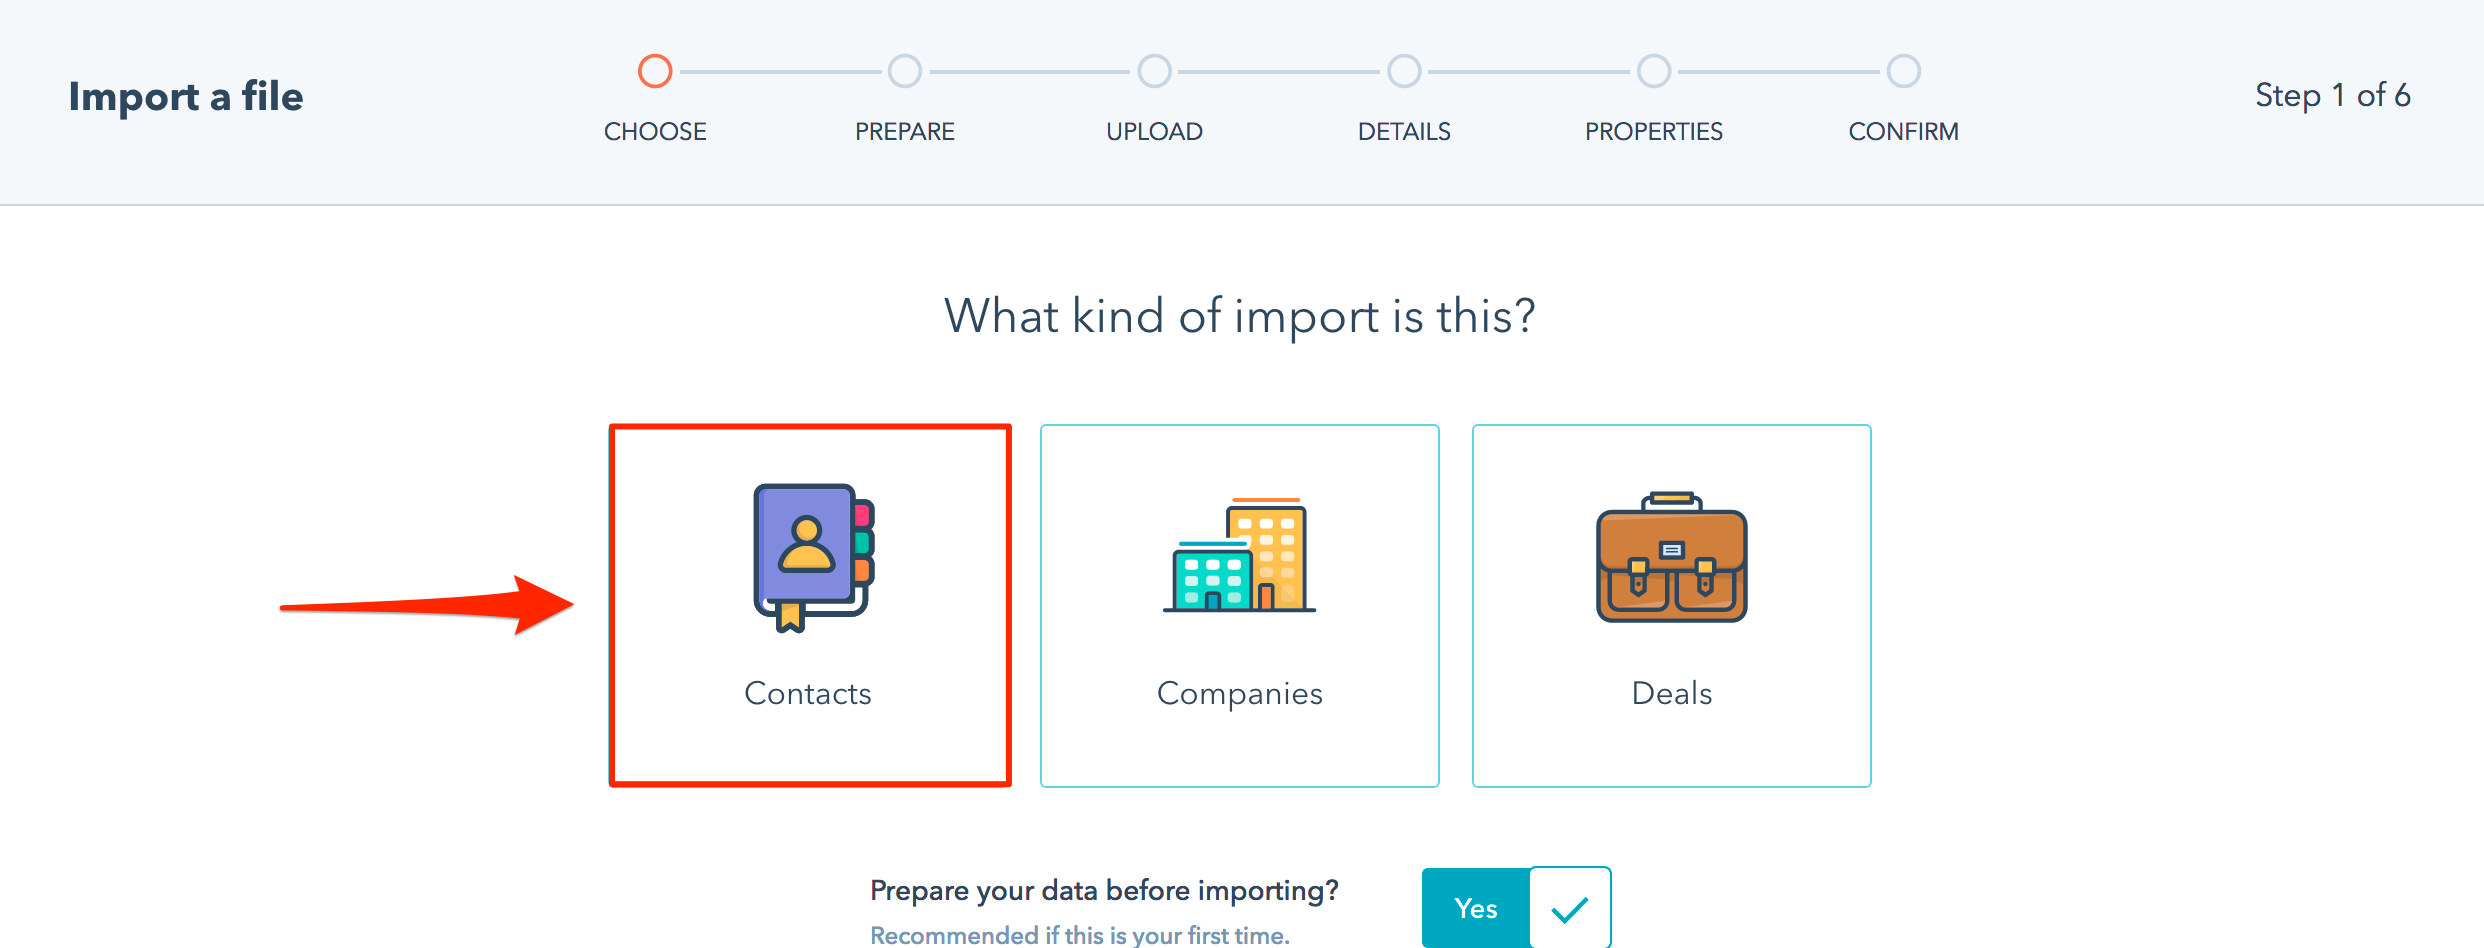
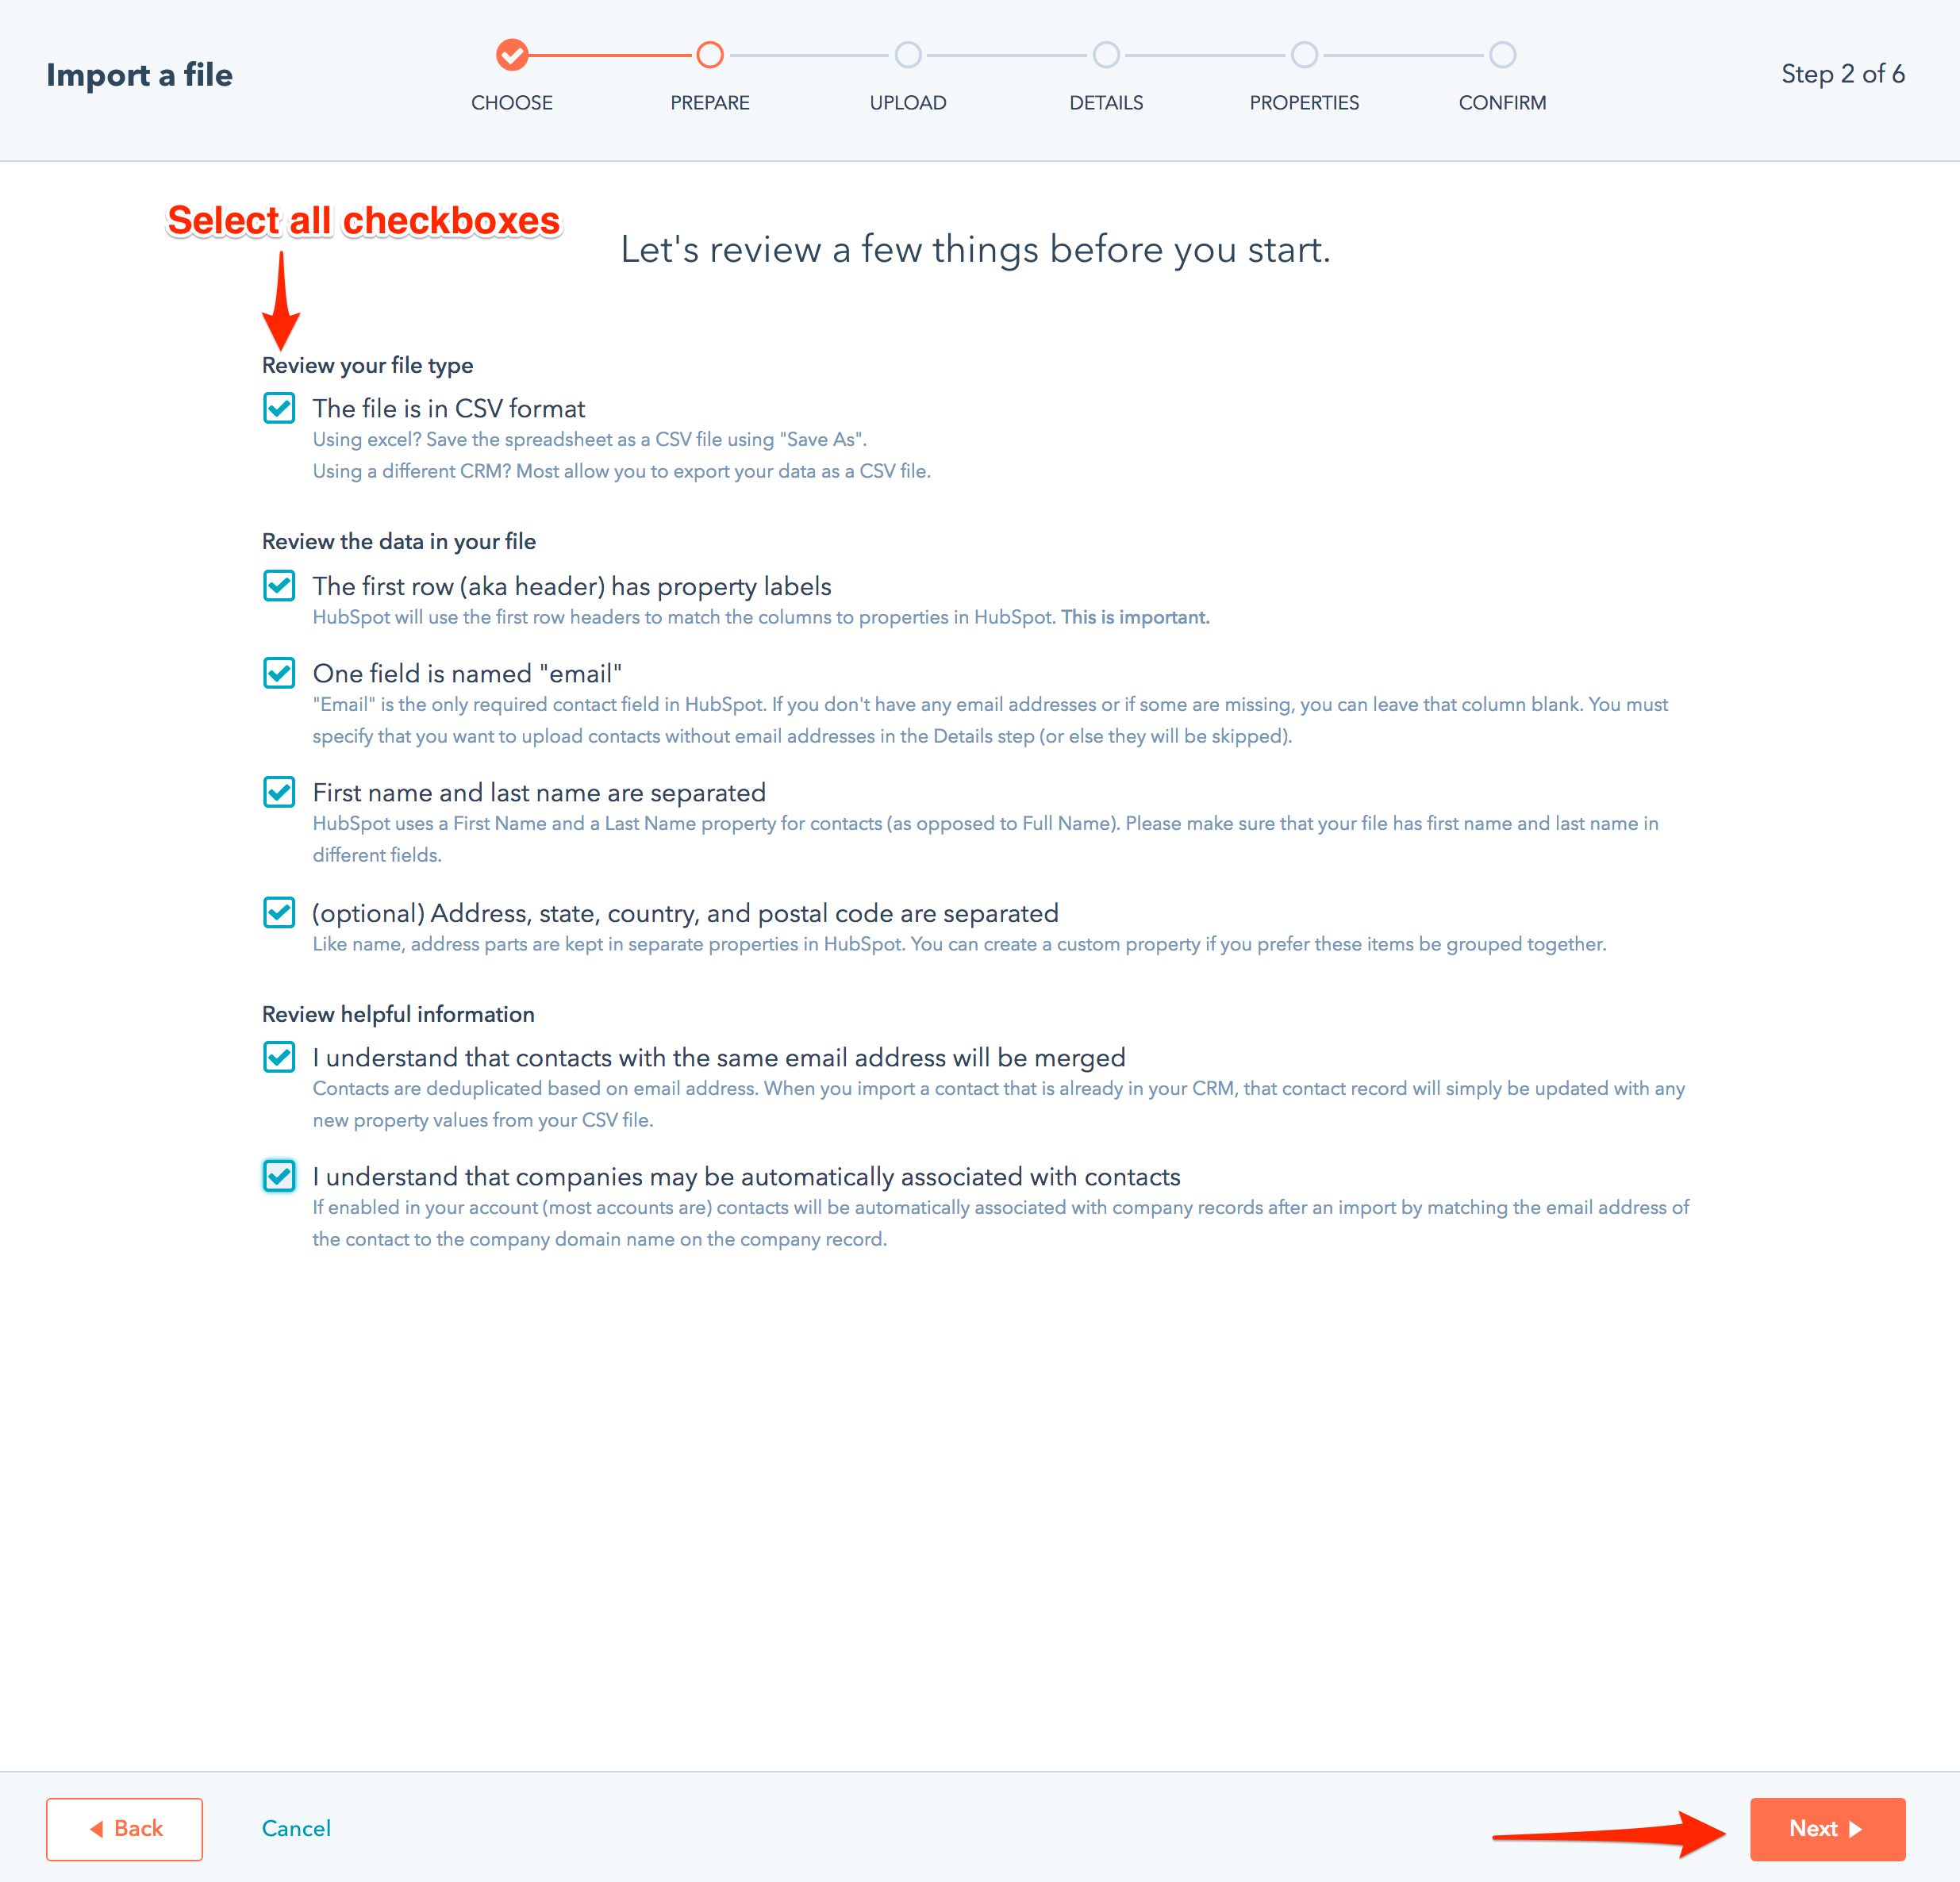
Select all checkboxes on this screen, as the spreadsheet is already properly formatted.
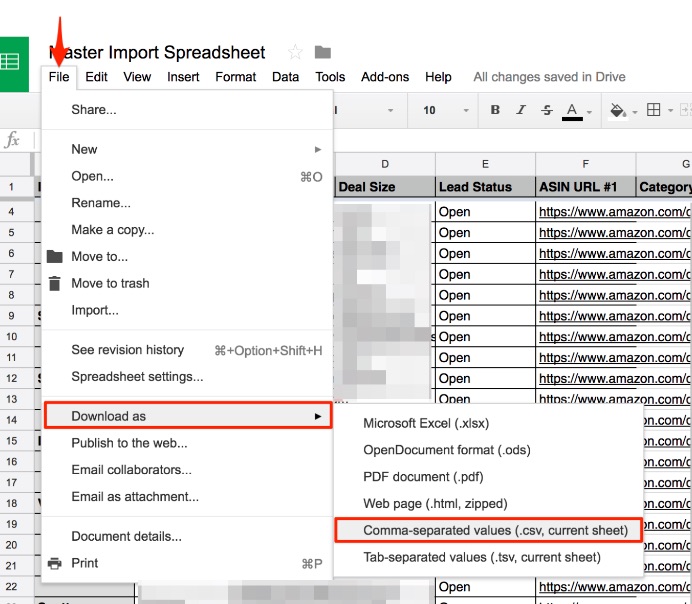
Revert back to the Master Import Spreadsheet and select File > Download as > Comma-separated values (.csv, current sheet).
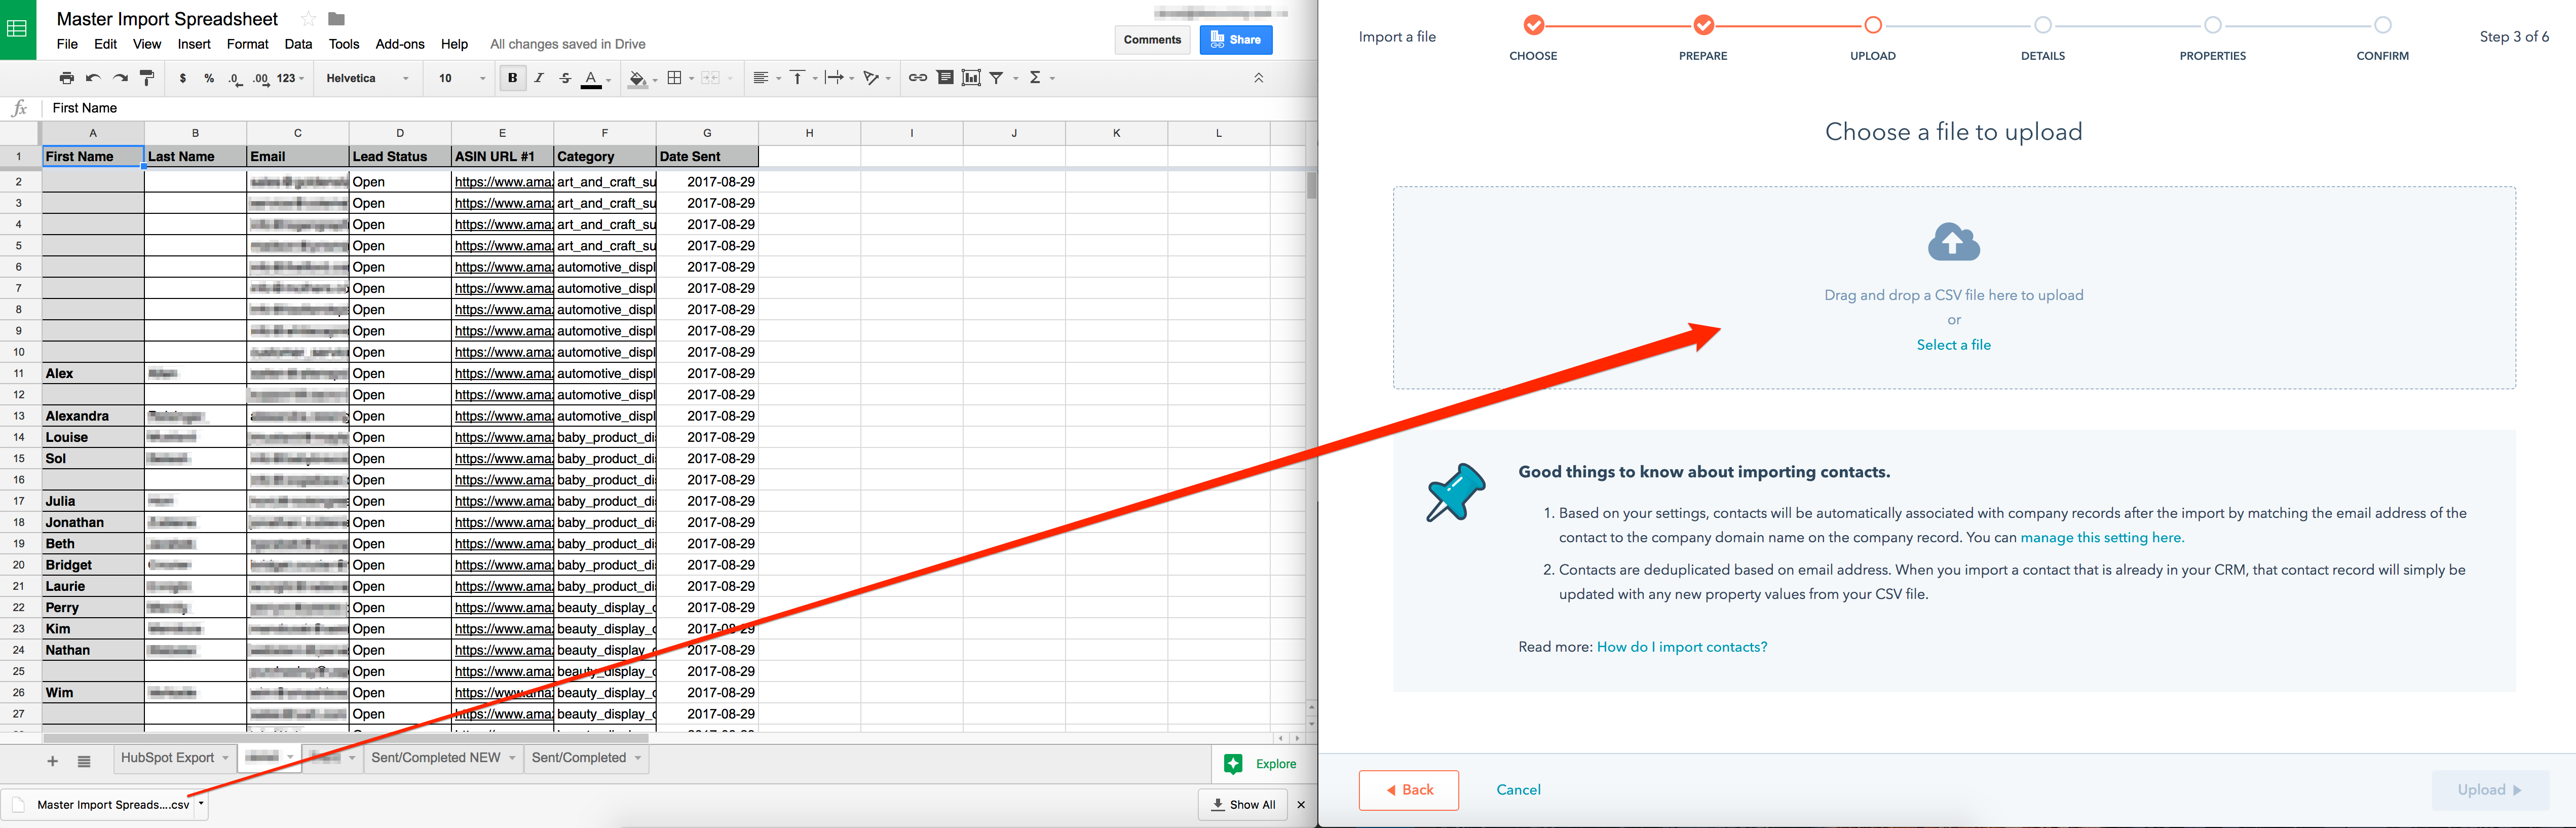
Your download will appear as a file in the lower left of your screen. Simply drag & drop the file into HubSpot.
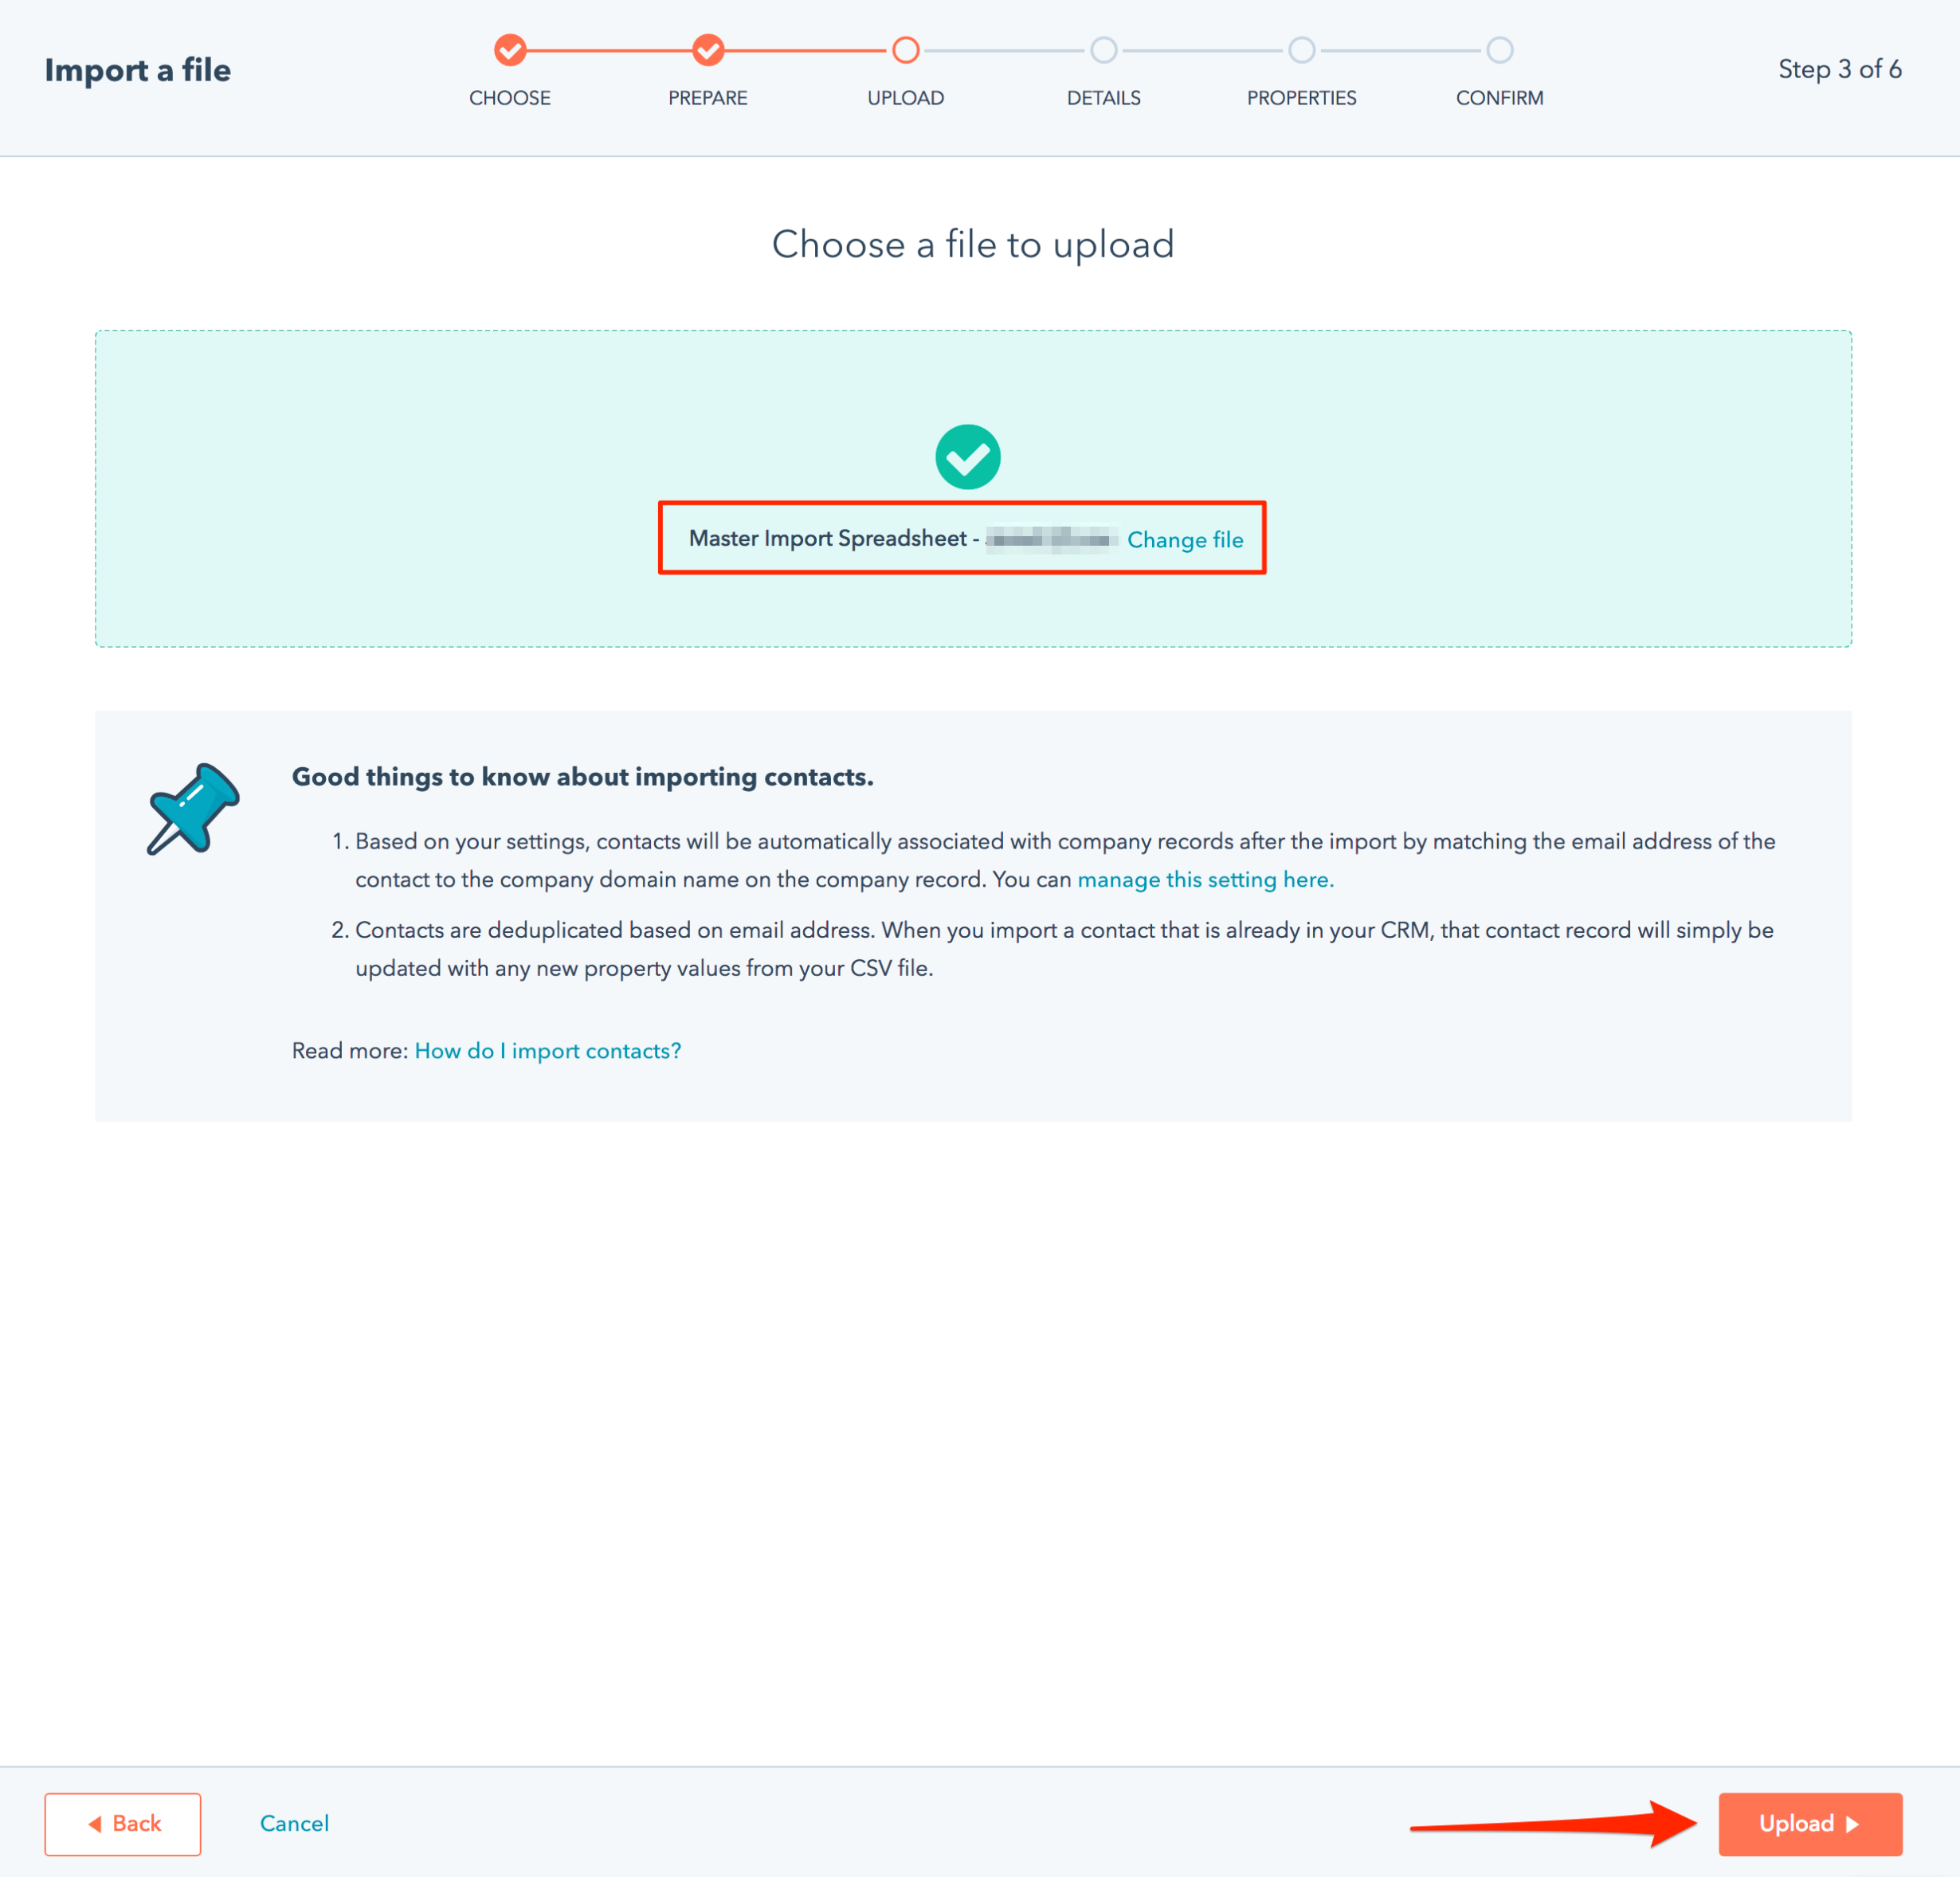
If you have successfully uploaded the file into HubSpot, you the upload area will turn green and you'll see the title of your file.
Once you have confirmed that you've uploaded the correct file, select Upload from the bottom right of the page.
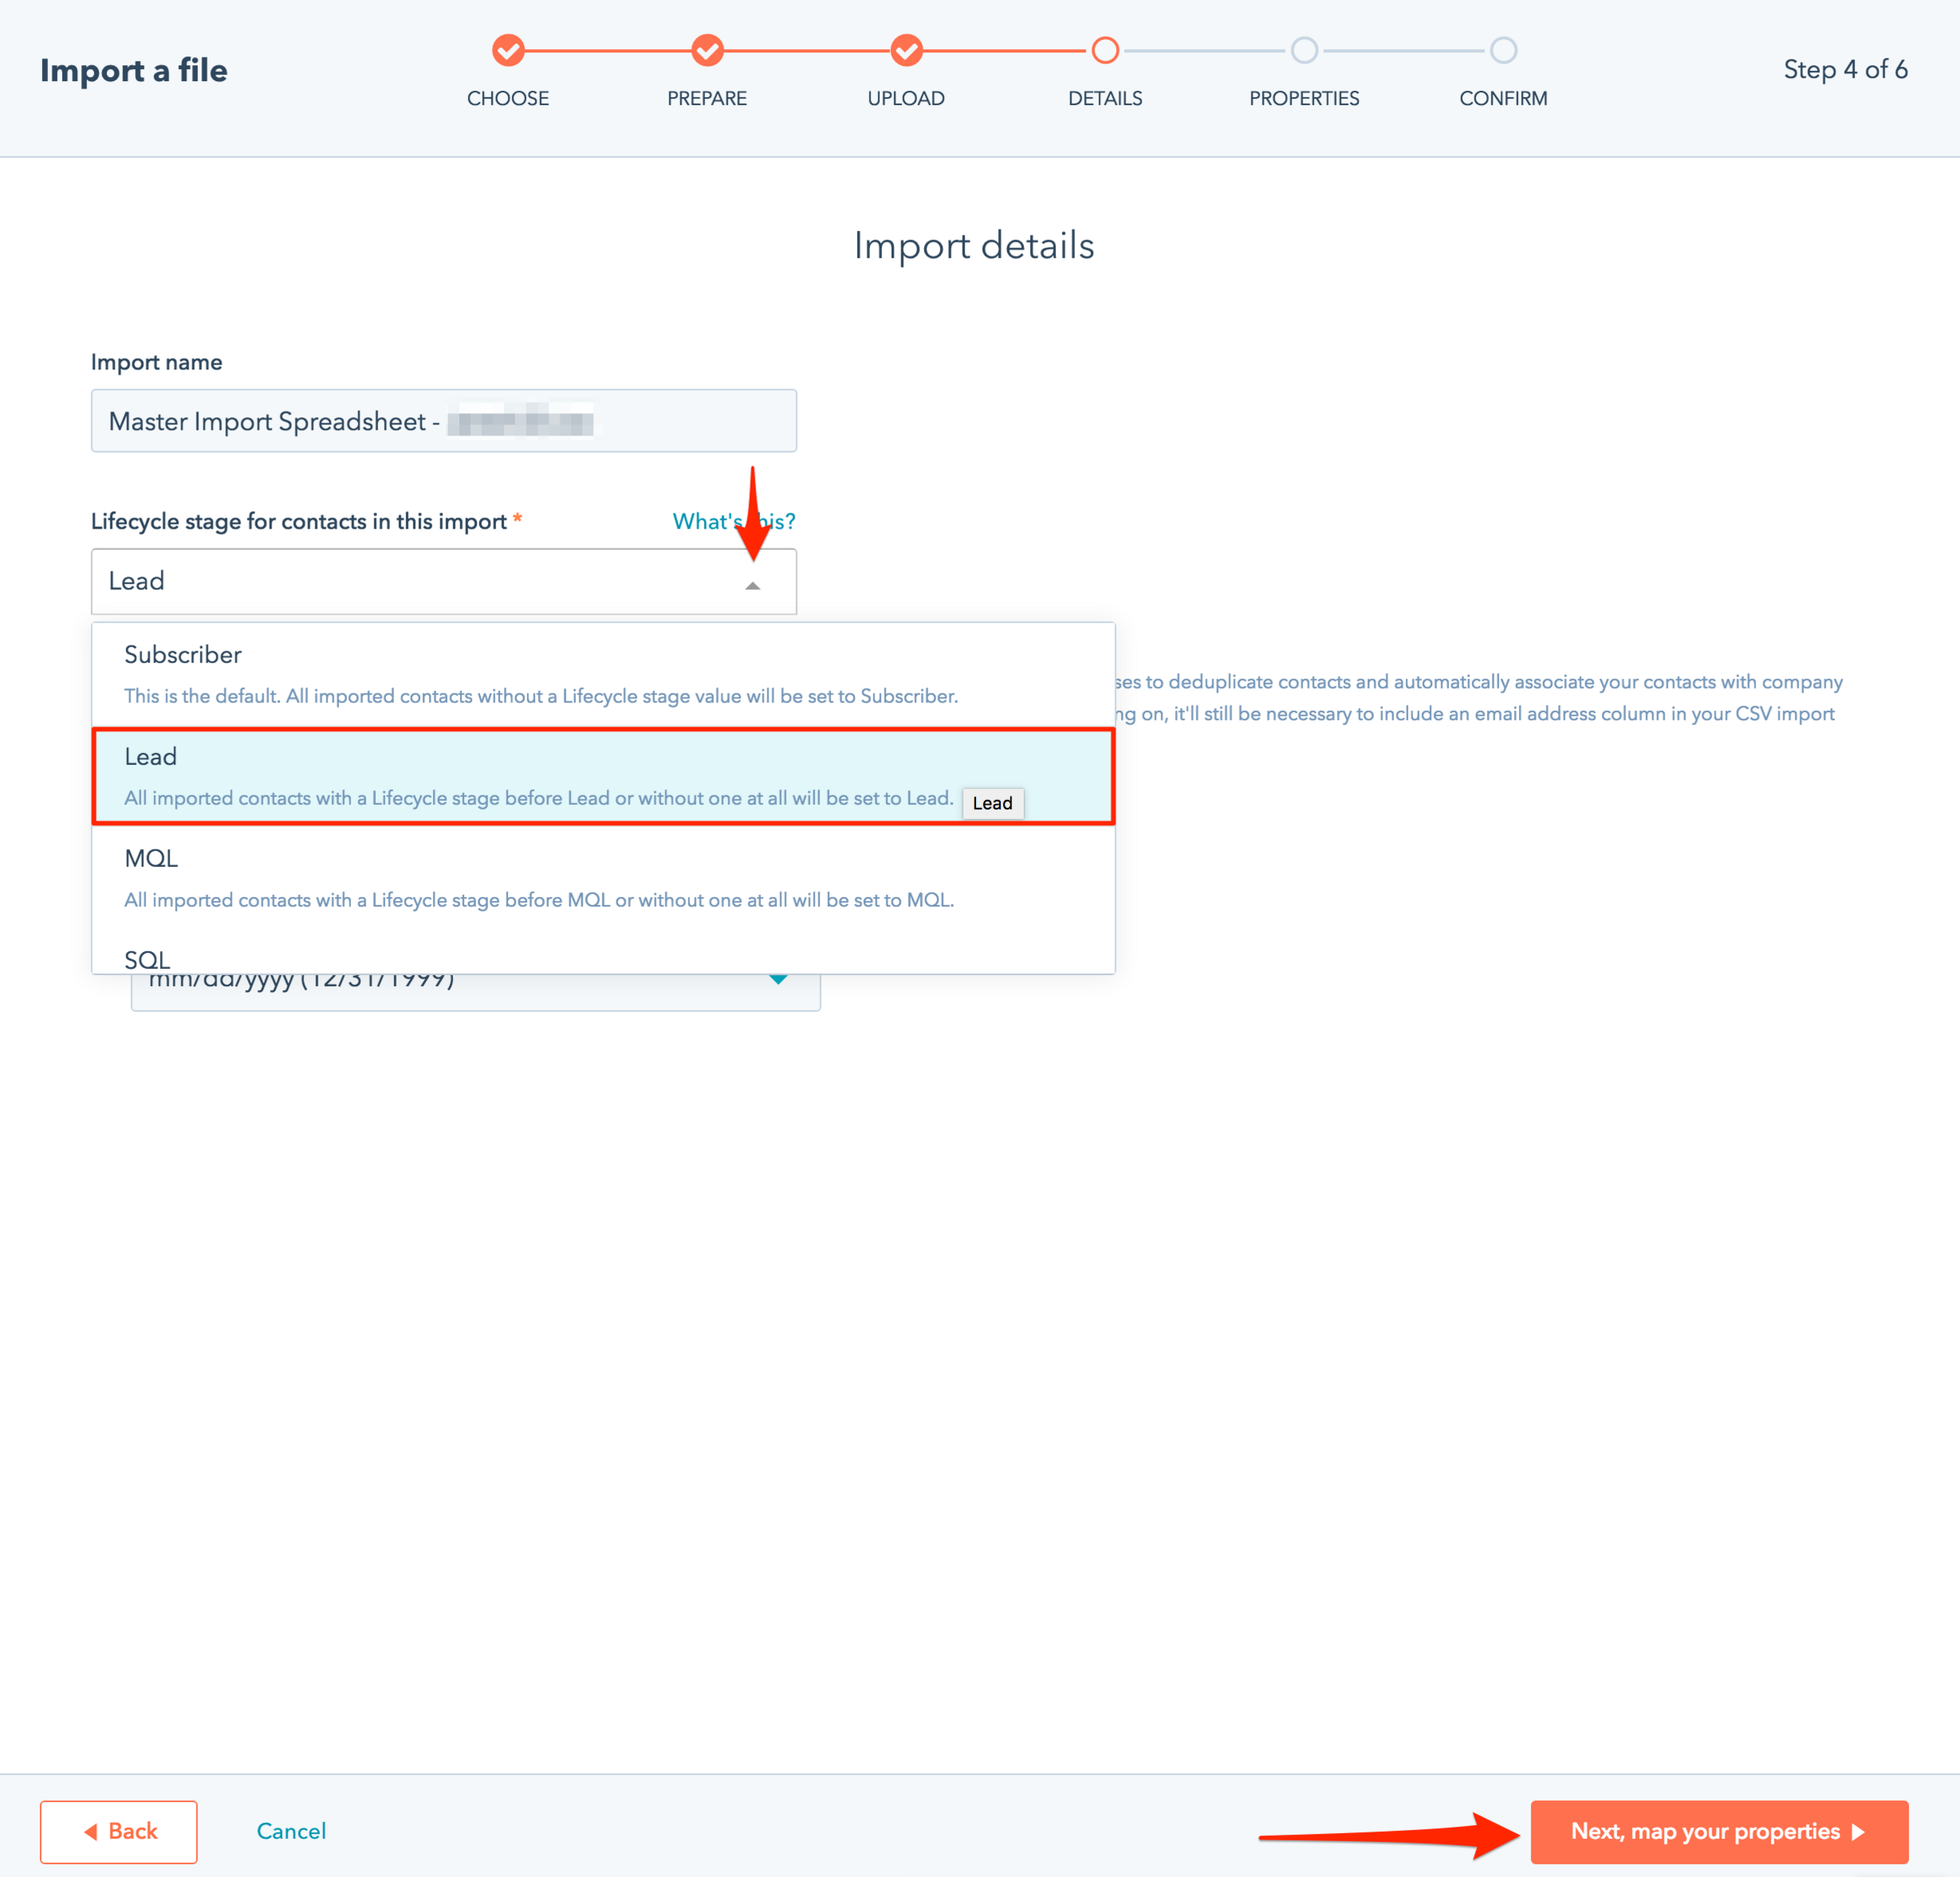
In the next page, select Lead from the "Lifecycle stage for contacts in this import" dropdown menu. Choose the Next, map your properties found at the lower right corner of the page to continue.
Please leave the rest of the page as is, you will not need to change any other information on this screen.
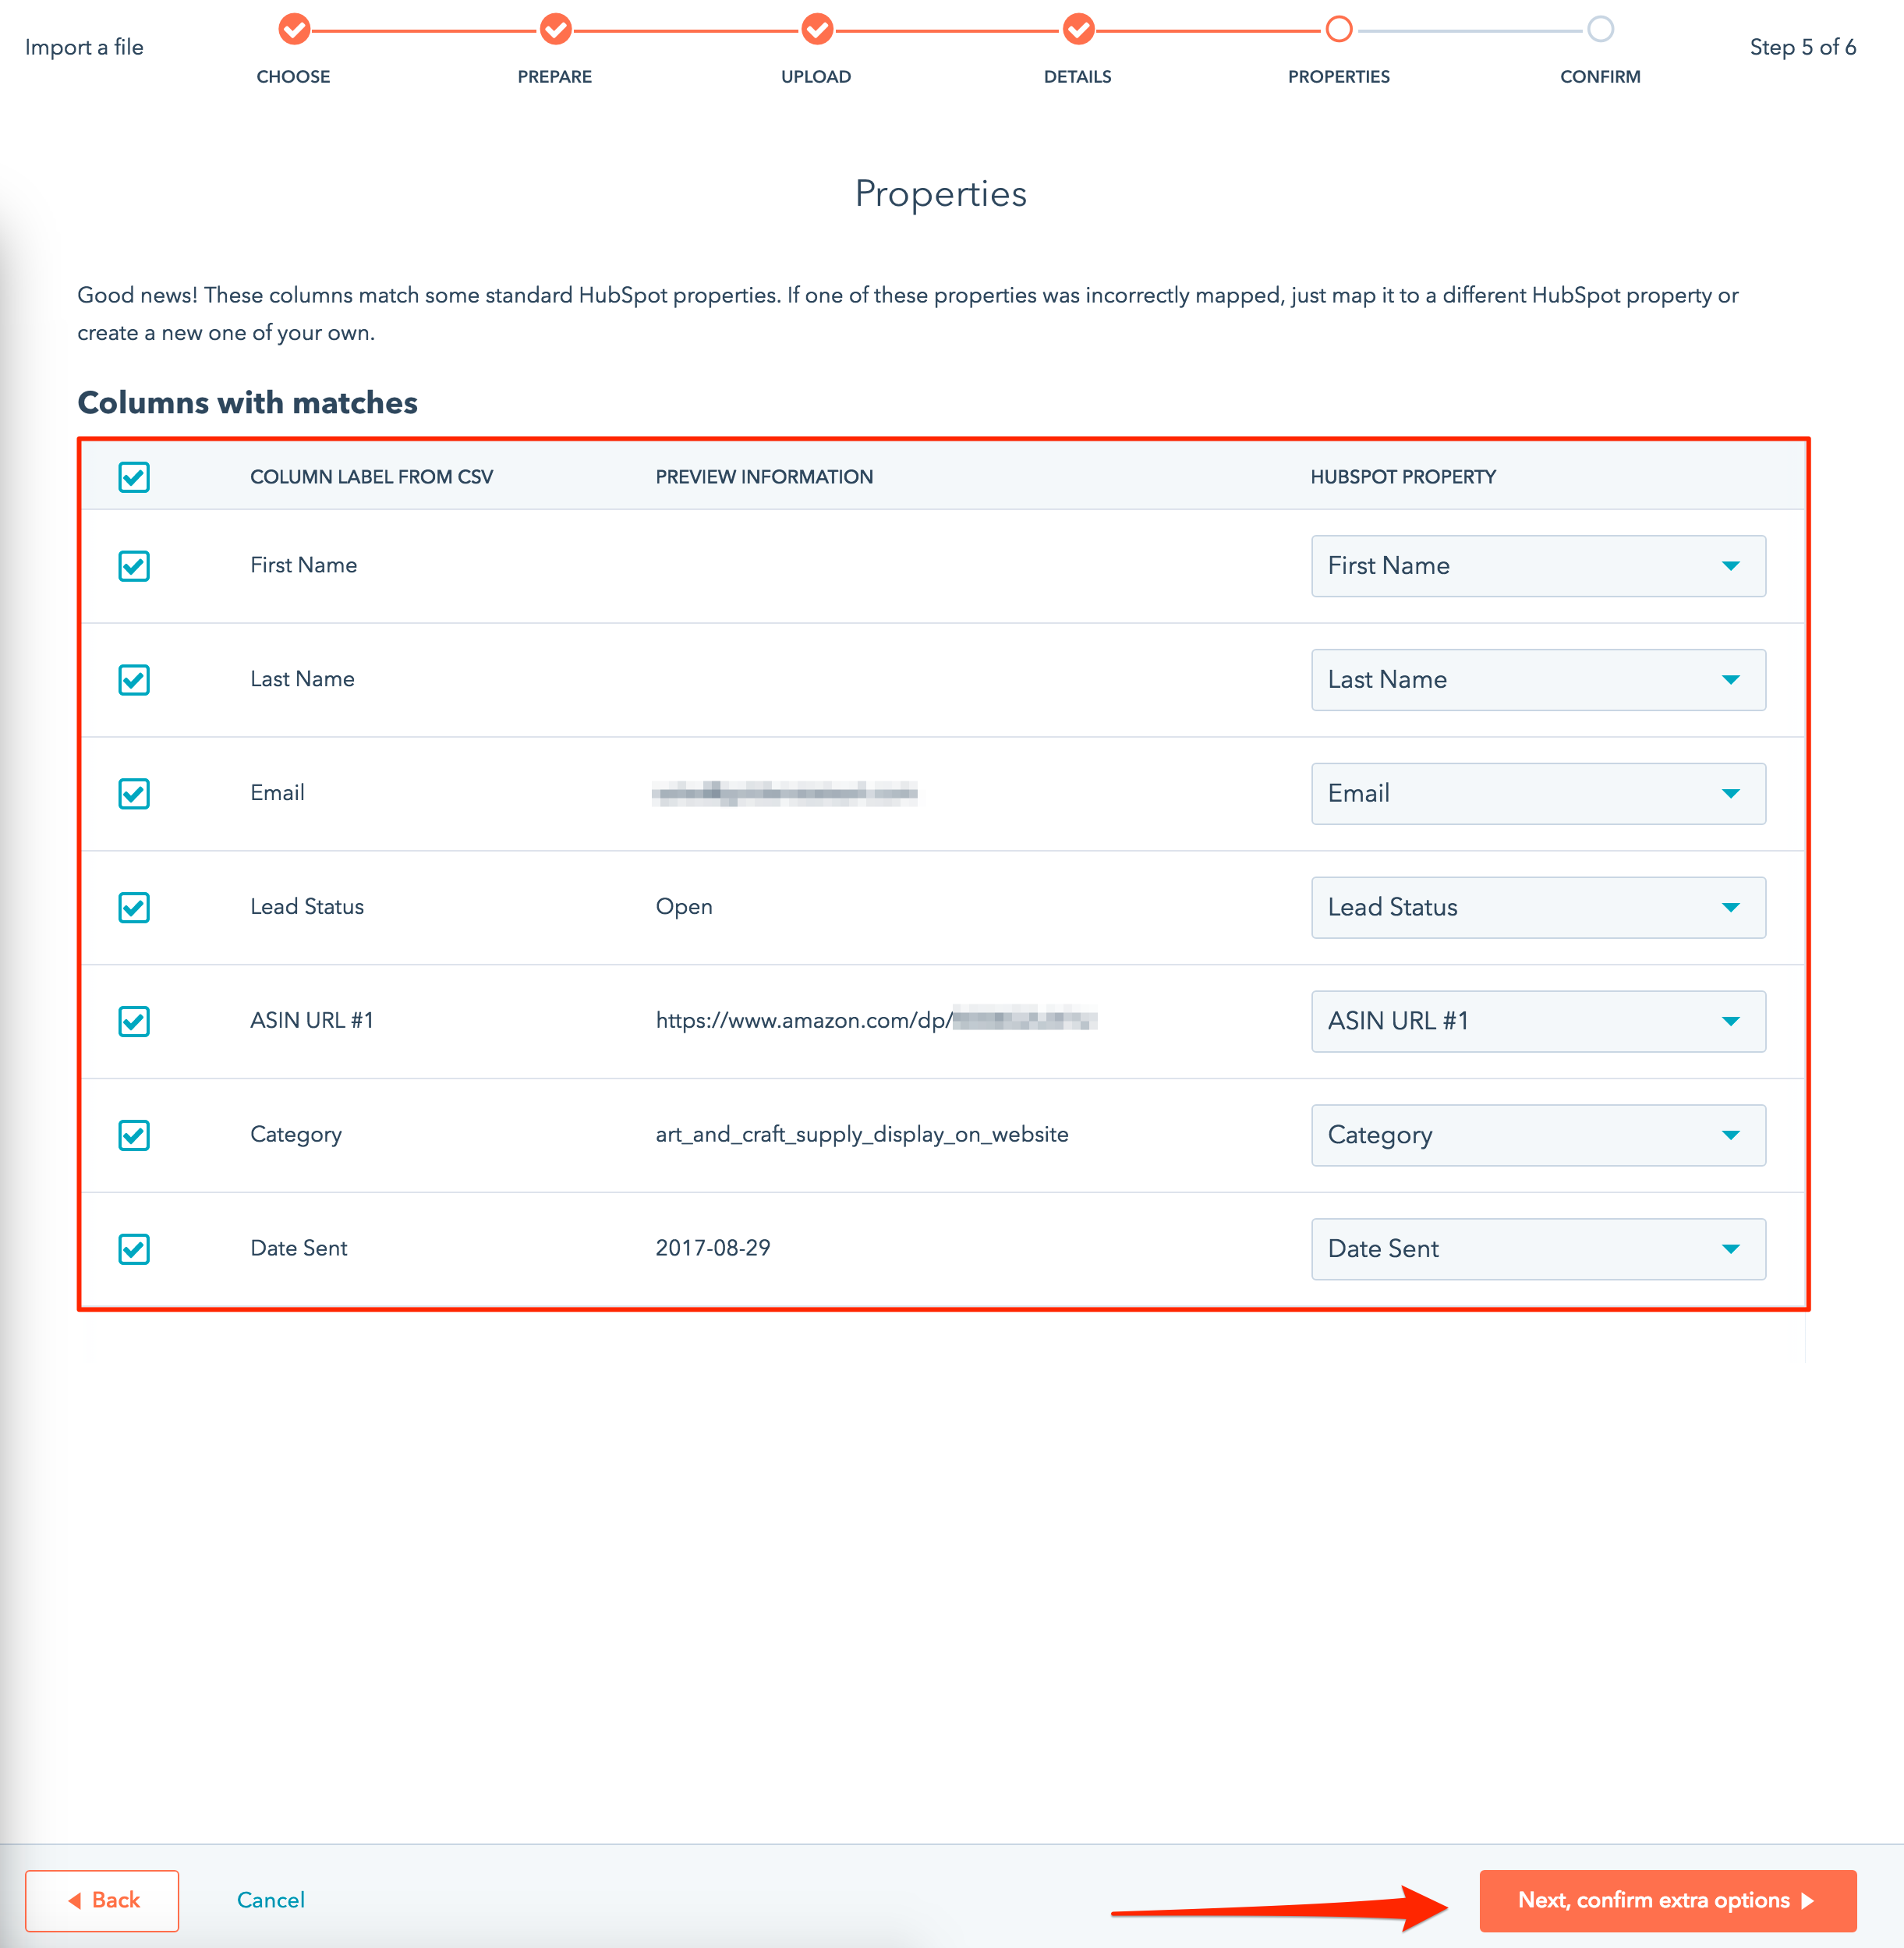
Now you will need to confirm your column labels from the .csv are mapped properly to the HubSpot property.
Once confirmed, select Next, confirm extra options.
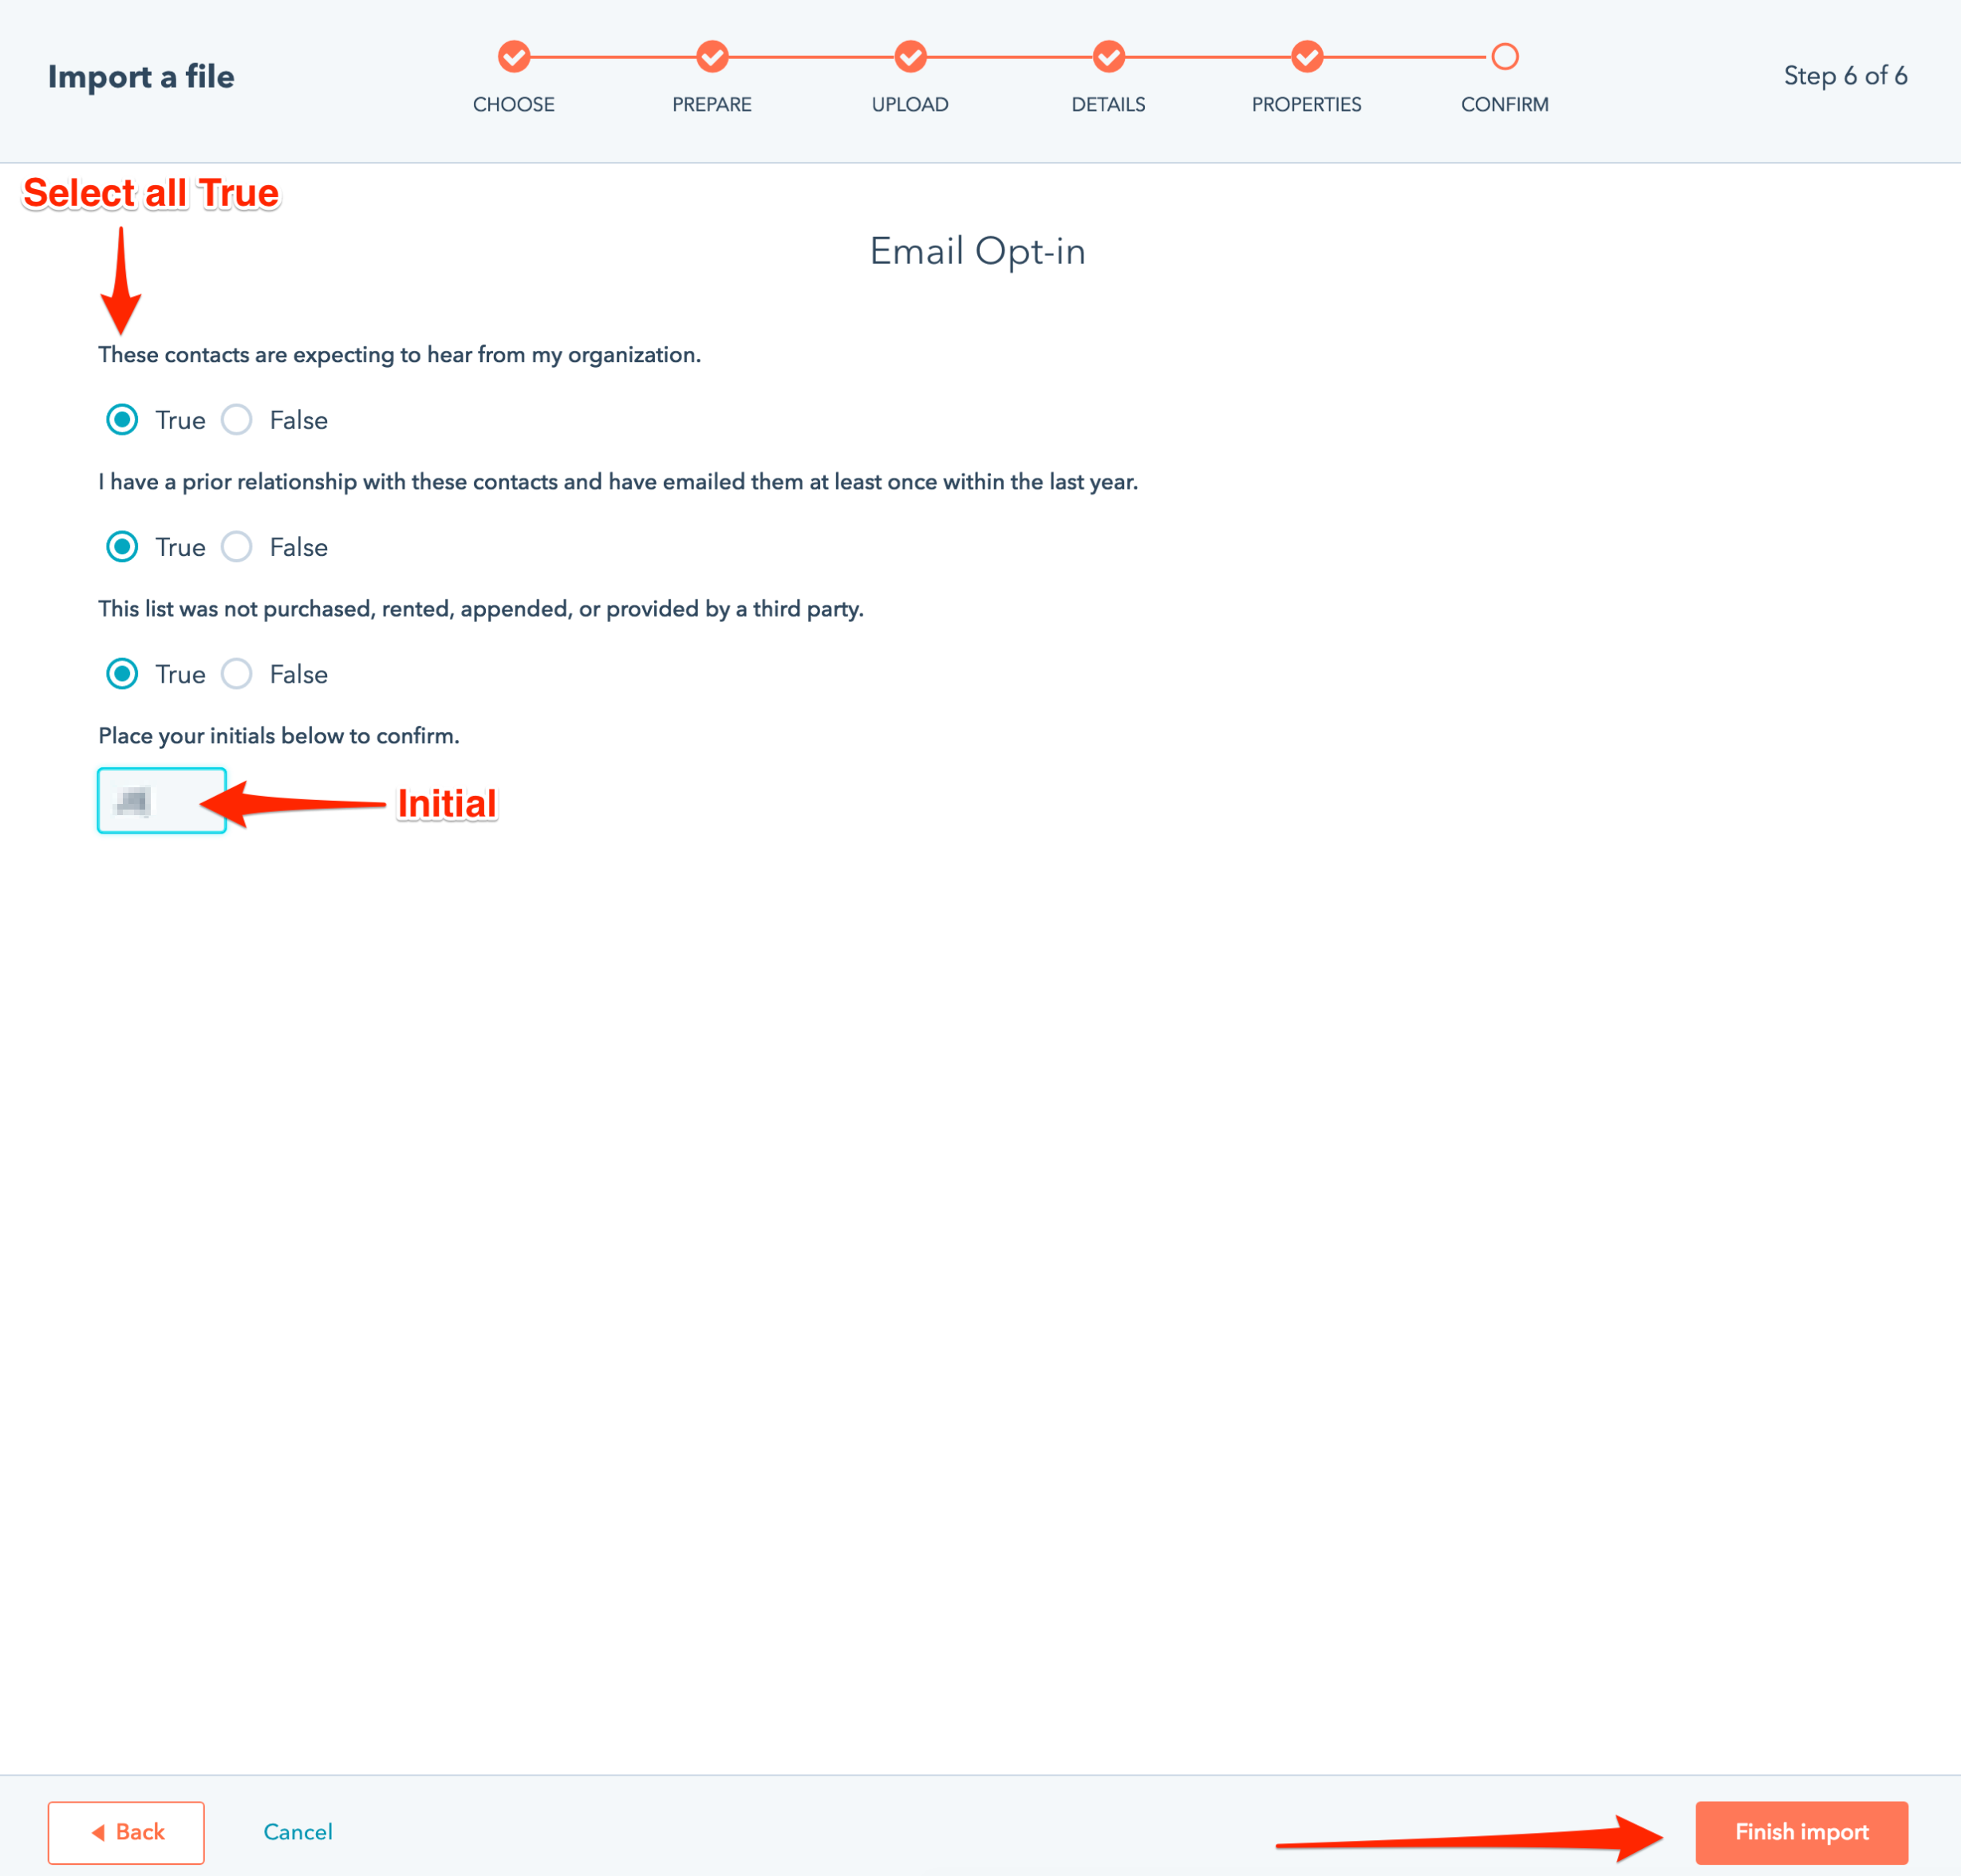
On the Email Opt-in page, select all statements as True then place your initials below in the "Place your initials below to confirm" box.
Select Finish import.