Templates /
Engineering Design Process

Engineering Design Process

Run this Engineering Design Process when beginning a project for building and testing new products.
1
Introduction to Engineering Design Process
2
Record client details
3
Identify the need
4
Research the problem
5
Develop possible solutions
6
Select the most promising solution
7
Construct a prototype
8
Test and evaluate the prototype
9
Communicate the design
10
Implement and optimize
11
Generate invoice
12
Related Checklists:
13
Sources:

Introduction to Engineering Design Process

Engineering Design Process

This Engineering Design Process checklist is constructed to take you through the different steps required to develop a product for a specific need

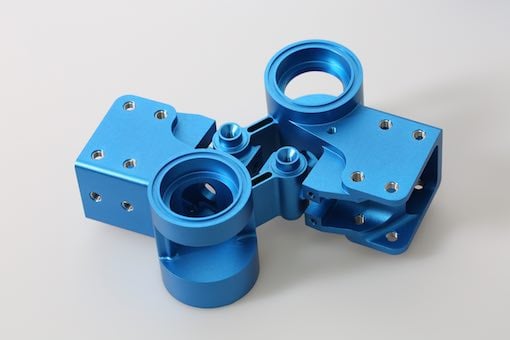
The engineering design process is a general methodology which helps uncover problems and create appropriate solutions. In this checklist, we’re going to take a case study of designing a specific part to aid in a manufacturing process.

The checklist is written from the perspective of a third part company tasked with designing this part for the manufacturer.  

You can edit this template to fit your specific needs and adapt it to add further steps or further detail in each step. This can act as both a series of best practices and an interactive process which guides activities. 

Throughout the checklist, you will find form fields where you can enter and record information. All information recorded within these form fields when a checklist is run will be compiled in the template overview tab.

If you want to see more about the engineering design process, you can watch this video below. Look out for the surprise poem!

An Overview of the Engineering Design Process – Kridnix

Record client details

Use this space to record important contact information for future reference.


Identify the need

The first step in the engineering design process is to identify the need which has prompted this process to begin. 

The person who will know most about what this need is and how this need has arisen is the client themselves. 

Use the email widget below to schedule a meeting with the client to discuss in detail the need they have.

Depending on the nature of the design work you will need to do, your questions will change. However, there are a few key pieces of information which can be gathered in order to inform the design process.

Use the subchecklist below as a guide.

  • 1

    What solution was being used previously?
  • 2

    What event occurred to identify the problem which needs remedying?
  • 3

    What are the performance metrics of the current solution?
  • 4

    What are the specific limitations of the current solution?
  • 5

    What is the financial impact of the current solution?
  • 6

    What targets would be set for an improved solution?
  • 7

    What limitations exist which could impact on an improved solution? – Size, cost, etc

Research the problem

Researching the problem can be approached in multiple ways. 

There are two key forms of innovation which could be employed:

  • Developing something new
  • Adapting existing external solutions to the project parameters

For most engineering design projects it is likely that other solutions are in place within the industry – within other manufacturing plants, in this case – which perform the same or similar jobs

The first step is to identify where else other similar problems have been managed and how they have been developed and implemented. This industry research will most likely provide you with the framework from which to develop a tailored solution to the existing problem.

Use the upload field below to store your industry research.

Now you can employ the information gathered in task 3.

Take the existing solutions from across the industry and investigate how they are affected by the limitations of the project. These limitations could include the available space or the cost of implementation.

Investigate also whether they would reasonably perform significantly better than the existing solution used by the client’s company. This requires the understanding gathered in the previous task in regards to the client’s goals and aims.

Use the upload field below to record this further analysis.

Develop possible solutions

Once your research has been completed, you can begin to theorize and develop different potential solutions.

Try to come up with a wide variety of options. This could include:

  • Different approaches to the problem
  • Ways in which the problem can be interpreted differently within the process
  • Alternative materials which could be employed

Use the form fields below to record a summary of each solution plus an upload of any supporting design materials. 

We’ve included 5 fields but you can include more or less depending on the project. 


Select the most promising solution

The next step is to analyze the potential solutions you have developed. 

If you’re working as a team, try to sit down together to attempt to argue for and against the different solutions. Try to pull them apart and break them by questioning their effectiveness. 

There are a couple of considerations to bear in mind. You can use the checklist for inspiration.

  • 1

    What is the predicted cost per unit?
  • 2

    How would this solution fare under stress testing?
  • 3

    How easily would this solution integrate with the existing infrastructure
  • 4

    Would further training be required for the operation of this equipment?
  • 5

    Is it possible to predict performance metrics?

One technique you can employ to review these options side by side is to create a binary weighting matrix to determine the importance of different metrics the solutions can be measured by. Then you can input the binary decisions where applicable to help understand relative achievement.

When you feel comfortable that you have chosen the most promising solution, prepare a report on that solution and upload it below.

You can send this report to the client to demonstrate the work you have done so far and to gain their approval and feedback before developing a prototype. 

Construct a prototype

When constructing the prototype, you’re most likely testing the core concept and the materials which could be used in the final design. 

The prototype should be the closest representation of the final product you can create in order to give you the most accurate data. 

Your prototype does not have to be perfect. It can be simple as long as it works. 

Test and evaluate the prototype

When testing the prototype it is important to remember the information gained in task 3: what the company needs.  

This will inform what performance metrics you set your prototype. If you cannot meet these, then you will need to iterate the prototype until you do.  

For most products, it is important to test the prototypes until breaking point. This will show you the upper limits of your design’s performance. This can be vital when understanding safety parameters as well as assisting you in making your design as effective as possible.

When working for large level manufacturing clients you should always make sure your work can meet with overarching standards of production and safety, ISO or industry equivalent. 

Upload your prototype performance report below.

If the prototype appears to have passed the tests you set for it, then it should be ready to be passed to the client with all your research and reporting. 

Watch this video of prototype testing set to funky music to celebrate.

Testing Production Prototype: March 2017 – Psix Technologies

Communicate the design

It’s time to pass on all the deliverables to the client. 

This will include all your initial research, your evaluation of that research, your reports, your prototype and designs, and your prototype’s performance reports. 

Upload this material below or share a link to where this material is stored in the cloud online. 

Now use the email widget below to send this off to the client. 

If you want to send them a functional prototype you may want to consider a different route than email…

Implement and optimize

Before you finish your process, it is important that we help turn the final prototype into a final product. 

You may want to be present for the implementation of the product so that you can perform the testing, or you may request the client sends you the performance results themselves for you and your team to analyze from afar. 

It is important to develop a clear methodology and process for this optimization. The details of this process will be specific to the product you have created.

Upload your optimization report outlining the short and long term optimization strategy for the product in the form field below.

Use the email widget to send this report to the client.

Generate invoice

Congratulations on a successful design project. 

The designer can use the Process Street invoice generator template to send their invoice to the client. 

This invoice can be sent automatically from this checklist by clicking to complete the task. 

You can use Zapier to connect this task in this template to your invoice so that you can automate the sending process. 

In Zapier, select "Make a Zap" and search for Process Street. It will prompt you to create a trigger – select "New Task Checked". It should then prompt you to connect your Process Street account to your Zapier one. You simply follow the link Settings & API tab of the organization manager on the pop-up.

Follow the steps provided by Zapier and it should connect the two accounts together. From here it will let you search for the template you want to run the Zap from, and choose the task you want to hook it up to.

After you’ve selected those options you can test that step and your trigger should be set. 

Next, you can create the action to be initiated by your trigger. You can use a third party system like WebMerge or you can use Zapier’s built-in email service to generate HTML emails. Either of these solutions can be used to generate and send your invoice.

To read more about these steps and how to create the invoice check out this article

Sources:

Take control of your workflows today.