Templates /
Install SaaSquatch for Salesforce (Public)

Install SaaSquatch for Salesforce (Public)

Referral SaaSquatch for Salesforce is a managed package that provides a one-way synchronization of referral data from Referral SaaSquatch into Salesforce. This install guide will walk you through the step to correctly install and configure the package.
1
Introduction:
2
Install the Package and Enable Sync:
3
Login to your Salesforce organization
4
Configure the Integration in the SaaSquatch Portal
5
Configure your Salesforce Organization:
6
Configure Page Layouts
7
Toggle Optional Triggers (Optional)

Introduction:

SaaSquatch is what Salesforce calls a “Composite Application” because it consists of two parts:

  • A Managed Package consisting of Custom Objects, Custom Fields, Triggers, Reports and other Force.com components that will be installed into your Salesforce organization
  • A synchronization service that automatically syncs information from SaaSquatch into Salesforce

Install the Package and Enable Sync:

SaaSquatch’s Salesforce integration can be configured from the Integrations page within the SaaSquatch Portal. The configuration walks you through all the steps required to install the Managed Package and configuring the synchronization service.

What to expect:

  • You’ll need to be a Salesforce Administrator to complete these steps
  • You may way to use your Salesforce Sandbox
  • The user that completes these steps will be the default owner of SaaSquatch custom objects
  • You should have a base understanding of Salesforce and SaaSquatch to complete these steps
  • You’ll be able to configure the data you wish to sync from SaaSquatch into Salesforce

What is not covered:

  • How to setup your SaaSquatch account — Talk to your account manager
  • How to configure Salesforce page layouts — That’s in the next step
  • How to setup a Salesforce Sandbox — Complete the Salesforce Trailhead Trails for Admins

Login to your Salesforce organization

SaaSquatch works with both sandbox and production Salesforce organizations.

In most cases we recommend you install SaaSquatch’s Salesforce integration into your sandbox organization first before installing it into your production organization. This lets you confirm that your Triggers, Validation Rules and Process Builder flows work seamlessly with SaaSquatch before turning it on for all your users.

  • 1

    Login to your Salesforce Organization

Configure the Integration in the SaaSquatch Portal

SaaSquatch’s Salesforce integration can be configured from the Integrations page within the SaaSquatch Portal. The configuration walks you through all the steps required to install and configure the Managed Package and synchronization service. If you’re comfortable with installing Salesforce packages, or if you’ve installed SaaSquatch for Salesforce before, then many of these steps will be familiar.

Authorize the Salesforce App

Login with your credentials to authorize SaaSquatch’s Connected Application.

  • 1

    Login to the SaaSquatch Portal at https://app.referralsaasquatch.com
  • 2

    Switch to either your Test or Live tenant depending on whether you wish to test the Salesforce integration in a sandbox or want to configure it in your live tenant
  • 3

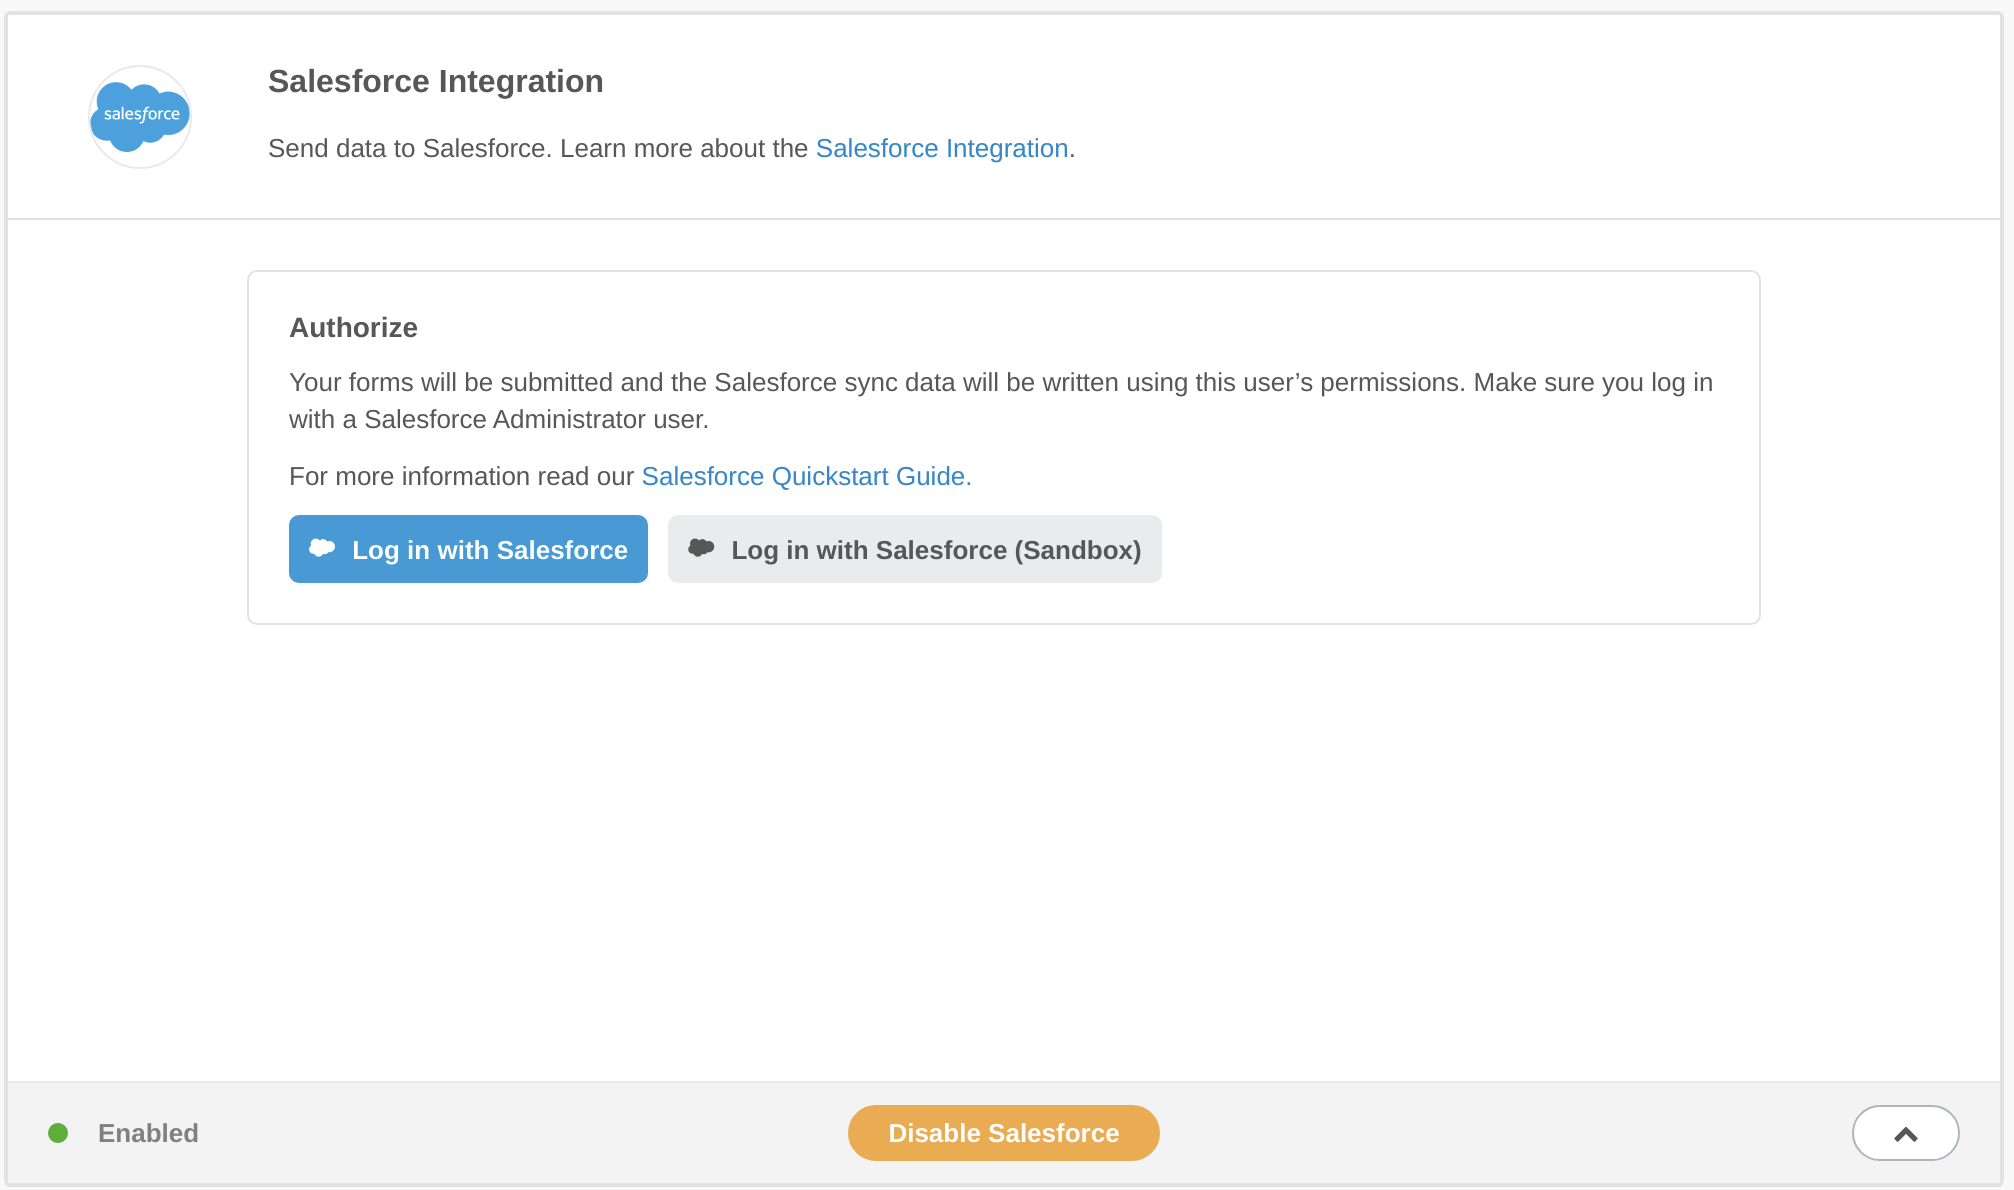
    Go to Settings -> Integrations, find the “Salesforce Integration” and click “Enable Salesforce”
  • 4

    Depending on whether you would like to connect your integration to a sandbox Salesforce organization, click “Log in with Salesforce” or “Log in with Salesforce (sandbox)”
  • 5

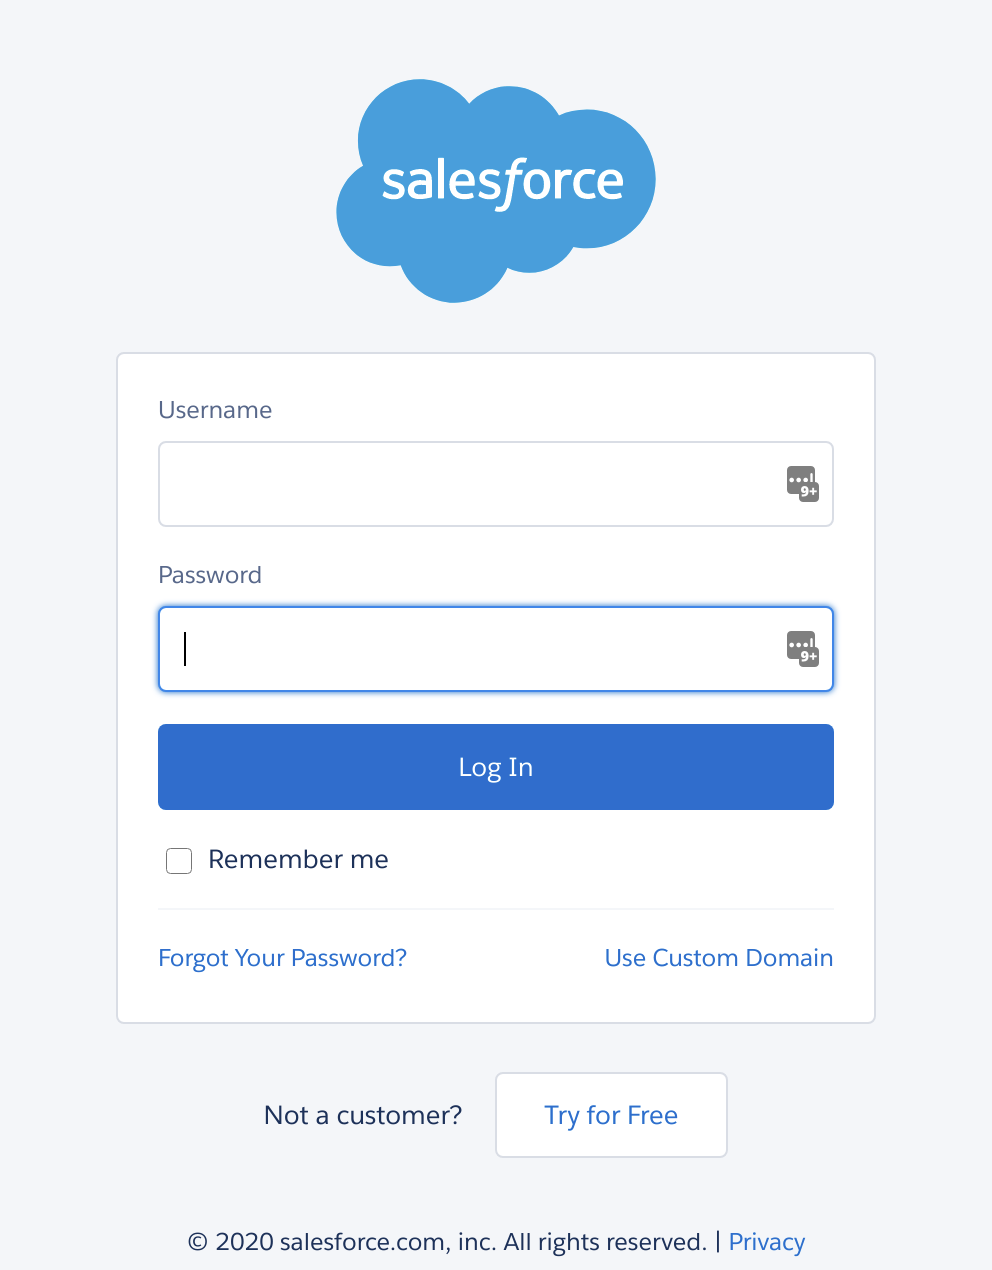
    Login with your Salesforce credentials
  • 6

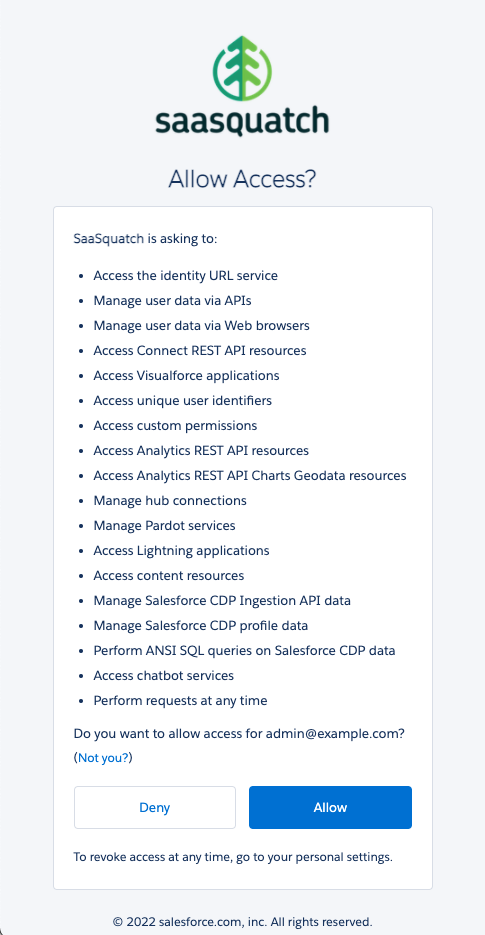
    Authorize the SaaSquatch application
Click Enable Salesforce to enable the integration

Login to a live or a sandbox Salesforce organization

If you haven’t previously logged into your Salesforce organisation, you will see a popup requesting your Salesforce login details – don’t worry, these credentials are not seen or stored by SaaSquatch in anyway as we use the Salesforce OAuth2 flow for providing authentication and authorization to your Salesforce instance.

Allow SaaSquatch to access to your Salesforce organization

Install the Managed Package

Once you’ve authorized your Salesforce organization, you will be able to install the SaaSquatch Managed Package.

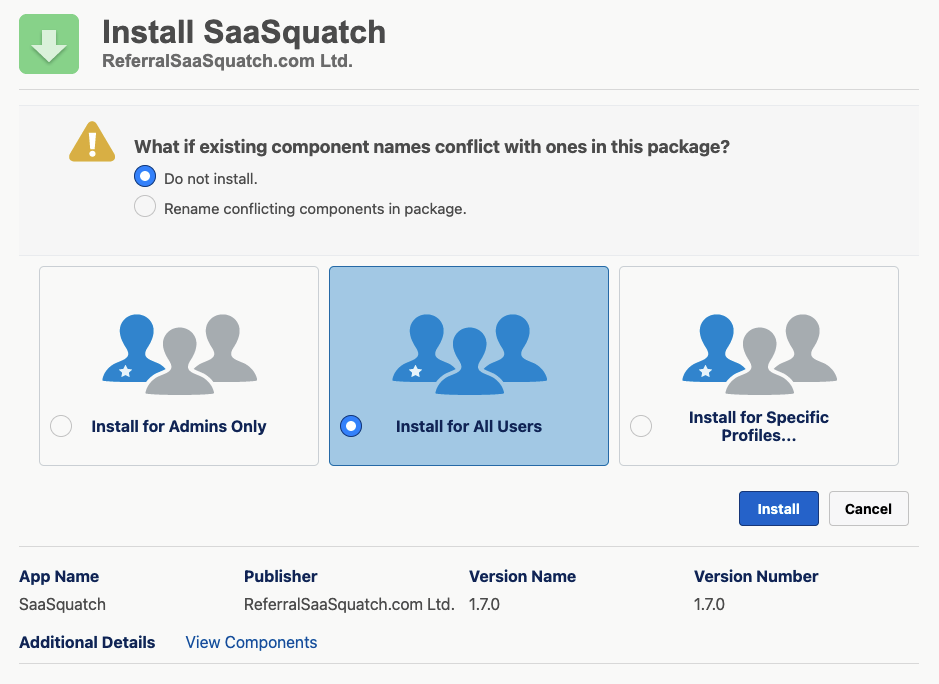
If you’ve installed other Salesforce Managed Packages then these steps will be familiar to you. The install process will guide you through installing the package for all users.

Remember: Come back here to the Portal integration configuration after you have installed the Managed Package in Salesforce.

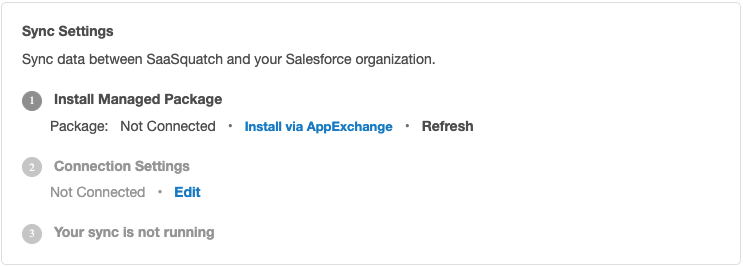
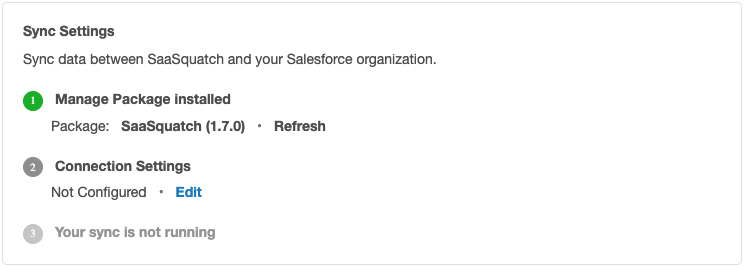
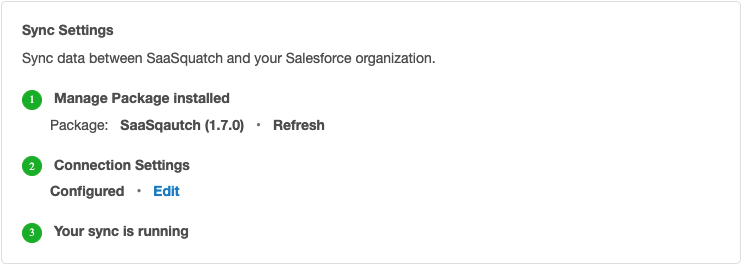
The Sync Settings dashboard will show you the progress of your synchronization service setup

  • 1

    Click “Install via AppExchange”
  • 2

    Make sure to choose “Install for All Users” — Important!
  • 3

    Click “Install”
  • 4

    You will get an email from Salesforce when the package has finished installing
  • 5

    Return to the Portal integration configuration
  • 6

    Click “Refresh” to validate your package install
Install the Managed Package for All Users

After installing the Managed Package, Refresh to see that it has been installed and detected

Configure the Connection Settings

Once the managed package has been installed, then you must configure the synchronization service. Once your configuration is saved, users, referrals, and reward balances will sync with your Salesforce organization. Remember:

  • If you’ve installed the managed package in sandbox then use your test tenant.
  • If you’ve installed the managed package in production then use your live tenant.

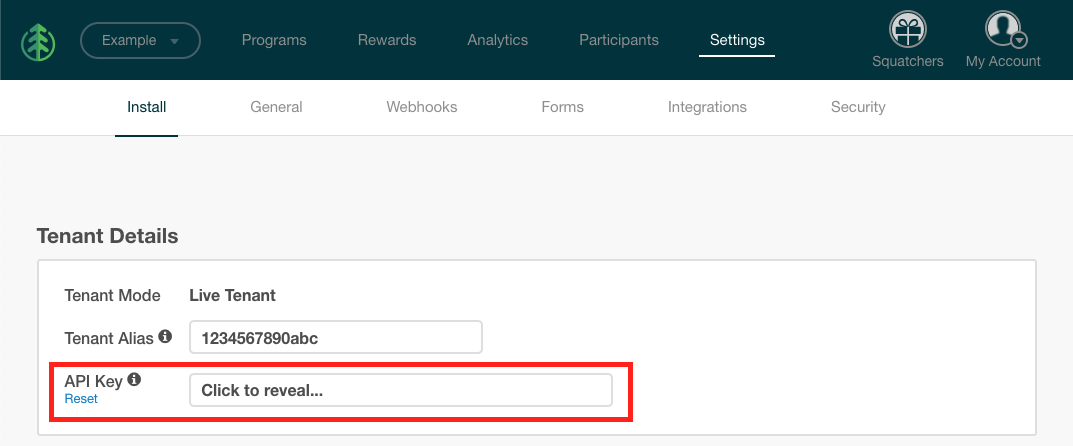
You will need your Tenant API Key, which you can find in the SaaSquatch Portal at https://app.referralsaasquatch.com by going to the page labelled “Install”

Find your Tenant API Key on the Install page of the Settings in the portal

  • 1

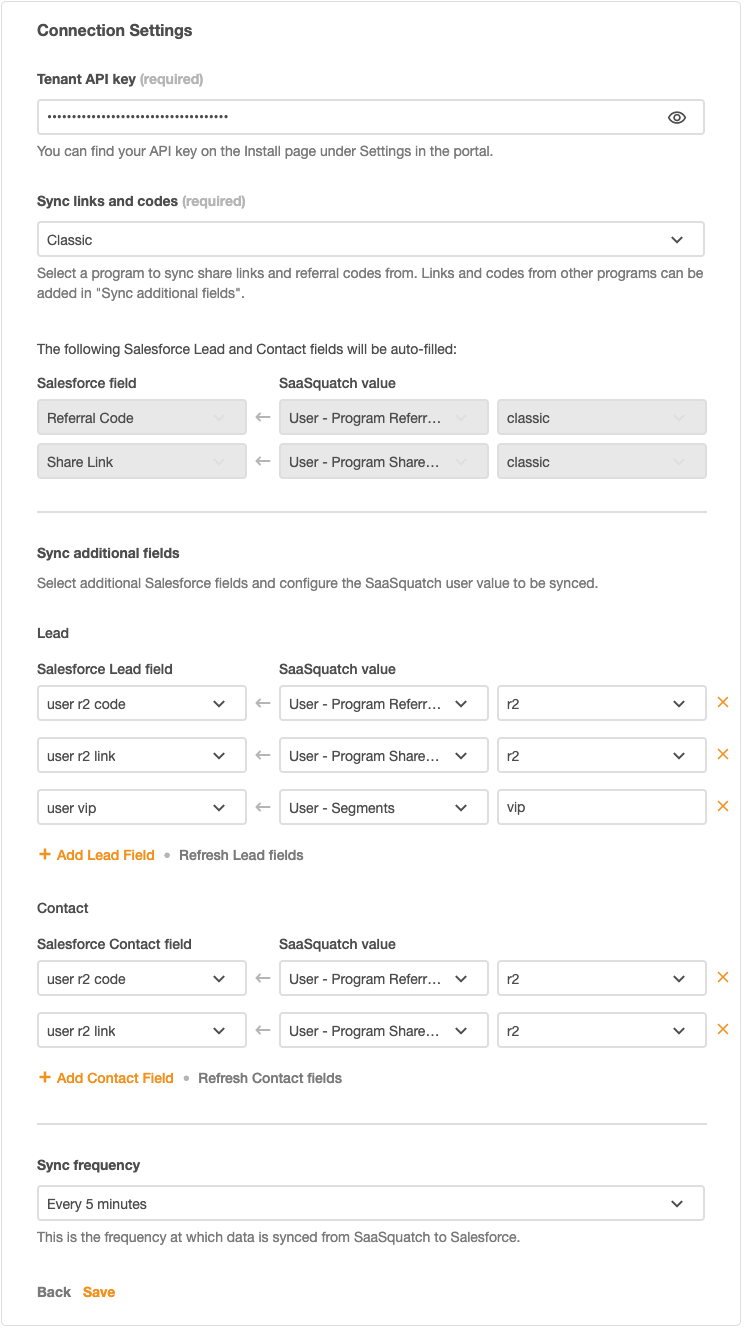
    Click “Edit” under “Connection Settings”
  • 2

    Find your Tenant API Key and paste it into the form
  • 3

    Select the program you wish to synchronize the links and codes from – all of your active programs will be available to choose from, including the Classic program. You can sync links and codes from other programs in the “Additional Fields”* section.
  • 4

    Under “Sync additional fields” you can configure custom Contact and Lead fields to sync with SaaSquatch values
  • 5

    Choose your desired Sync frequency (defaults to every 5 minutes)
  • 6

    Click “Save”

*You can learn more about Additional Fields here.

Configure your sync settings

Congratulations! Your Salesforce integration has been setup and the synchronization service will begin processing your data from SaaSquatch into Salesforce.

Configure your Salesforce Organization:

If you’ve reached this step, then you have done everything necessary for SaaSquatch for Salesforce to be fully functional. That said, if you’re a Salesforce power user then you know that there are a lot of UI tweaks that can be done with an application.

In this section we’ll cover:

  • Including custom fields on Page Layouts for Leads and Contacts
  • Adding Related Lists to Leads and Contacts
  • Enabling optional features of SaaSquatch

Configure Page Layouts

There are more than a million ways to customize a page layout for your organization. In this section we provide some best practices for including custom fields and related lists, but we also recognize that you might want to customize these in your own way.

We recommend that you get started with these default layouts and then evolve them as need be.

Remember that these page layouts have no effect on the actual functionality of your program.

Lead – Page Layout Customization

The easiest way to edit a page layout for a lead is to open a lead record in Salesforce classic and clicking the Edit Layout button in the top right. Since there can be so many lead page layouts in your organization, this makes sure you’re getting the right one.

  • Add custom fields
  • Add related lists
  • Customize related lists
  • 1

    Open a Lead record and click “Edit Layout”

Add the SaaSquatch custom fields to the Lead Page Layout

  • 1

    Add a Section to the page and name it “SaaSquatch”
  • 2

    Add the “Referral Link” custom field
  • 3

    Add the “Referral Code” custom field
  • 4

    Add the “SaaSquatch Linked User” custom field

Add the SaaSquatch Related Lists to the Lead Page Layout

  • 1

    Add the “Referred By” related list
  • 2

    Add the “Referrals” related list
  • 3

    Add the “SaaSquatch Users” related list
  • 4

    Add the “Reward Balance” related list

Customize the related lists
  • 1

    Customize the “Referred By” related list. Useful fields are “From Lead”, “From Contact” and “ReferrerUser”. Hide the “New” button.
  • 2

    Customize the “Referral” related list. Useful fields are “To Lead”, “To Contact” and “ReferredUser”. Hide the “New” button.
  • 3

    Customize the “SaaSquatch Users” related list. Useful fields are “Email”, “First Name” and “Last Name”. Hide the “New” button.
  • 4

    Customize the “Reward Balance” related list. Useful fields are “Amount”, “Unit” and “Type”. Hide the “New” button.

Contact – Page Layout customization

The easiest way to edit a page layout for a contact is to open a lead record in Salesforce classic and clicking the Edit Layout button in the top right. Since there can be so many contact page layouts in your organization, this makes sure you’re getting the right one.

  • 1

    Open a Contact record and click “Edit Layout”

Add the Referral SaaSquatch custom fields to the Contact Page Layout

  • 1

    Add a Section to the page and name it “SaaSquatch”
  • 2

    Add the “Referral Link” custom field
  • 3

    Add the “Referral Code” custom field
  • 4

    Add the “SaaSquatch Linked User” custom field

Add the Referral SaaSquatch Related Lists to the Contact Page Layout

  • 1

    Add the “Referred By” related list
  • 2

    Add the “Referrals” related list
  • 3

    Add the “SaaSquatch Users” related list
  • 4

    Add the “Reward Balance” related list

Customize the related lists
  • 1

    Customize the “Referred By” related list. Useful fields are “From Lead”, “From Contact” and “ReferrerUser”. Hide the “New” button.
  • 2

    Customize the “Referral” related list. Useful fields are “To Lead”, “To Contact” and “ReferredUser”. Hide the “New” button.
  • 3

    Customize the “SaaSquatch Users” related list. Useful fields are “Email”, “First Name” and “Last Name”. Hide the “New” button.
  • 4

    Customize the “Reward Balance” related list. Useful fields are “Amount”, “Unit” and “Type”. Hide the “New” button.

Toggle Optional Triggers (Optional)

In SaaSquatch it’s possible to manually enable or disable any individual trigger so you can modify, disable or extend the core functionality of the managed package.

Most users will never have to modify these settings, but some users may want to opt-in to using the built-in trigger for firing referral conversions when an Opportunity is marked won. 

To enable the OpportunityConversionTrigger

  • 1

    Go to Setup > Custom Metadata Types
  • 2

    Click “Manage Records” next to “Referral SaaSquatch Trigger”
  • 3

    Click “Edit” next to “OpportunityConversionTrigger”
  • 4

    Check the “IsEnabled” checkbox, and press Save

After this trigger is enabled, then when an Opportunity is marked Won, it will fire a callout to the SaaSquatch API to convert the attached Referral object. If an opportunity is not referred, it will have no effect. If an opportunity has an attached Referral, then the status of that referral will be “Converted” inside the SaaSquatch Portal, and will get synced back to Salesforce during the next sync.

Take control of your workflows today.