Templates /
New Facebook Ads Client Onboarding Guide

New Facebook Ads Client Onboarding Guide

In this guide, the goal is to support the client in being able to effectively give us access to the assets we need.

Though there are many ways to give access, this process will minimize errors and issues.

This guide now includes Domain Verification.
1
Step 0: What we need
2
Step 1: Ask client to give you access as Business Manager Admin
3
Step 2: Check if all assets are complete
4
Step 3: Give your BM access as Business Manager Partner
5
Step 4: Start the domain verification process
6
Step 5: Additional Checks
7
Step 7: Remove yourself as admin
8
Contingencies: What if the client does not want to give you BM Admin Access?

Step 0: What we need

For this guide to be effective we need the following to be in place.

  • The client needs to have a Business Manager account
  • You need to have a Business Manager account

If you or your client does not have a Business Manager account, check this guide: 

Step 1: Ask client to give you access as Business Manager Admin

Have client go to his/her Business Manager settings and add you as and admin by entering your e-mail address.

Click on the blue “Add” button

Have them enter your e-mail address, select “Admin Access” and click next

Have them pick any page, select “Publish content” and click “Invite”. Don’t worry about which page or asset to select, you can update this later.

Once done, you should receive an e-mail inviting you to your client’s Business Manager account.

Click on the button there, enter your name and you will be asked to enter your Facebook password.

Once done, you’re good with this step.

Step 2: Check if all assets are complete

Clients don’t always have their assets connected with their Business Manager accounts.

The most basic thing to check is whether they have their Facebook Page(s) and an active ad account(s) connected.

You will find this under the Accounts section under Business Settings.

If your client has an Instagram account, check if it is there. Having it here will allow you to easily use it for your ads.

If your client uses a Facebook Pixel, check if it is under “Data Sources”.

If your client uses a catalog, check if it is under “Data Sources”.

Step 3: Give your BM access as Business Manager Partner

Step 4: Start the domain verification process

If your client has not yet verified their domain(s), you may do so for them.

Check the guide below:

Step 5: Additional Checks

Other additional checks you can do include:

  • Making sure all admins have 2-Factor Authentication in place
  • Removing any disabled ad accounts that are no longer being used
  • Make sure there is no outstanding payments on the owned ad accounts
  • Check if the client is elligible for business verification under Security Center

Step 7: Remove yourself as admin

You can do this at the People’s section of the Business Manager settings.

Note: You don’t need to do it if the client is fine with you as Business Manager Admin.

Contingencies: What if the client does not want to give you BM Admin Access?

In case the client does not want to give you Business Manager access as Admin, here are some other things you can do.

If your client has a Business Manager account but you don’t:

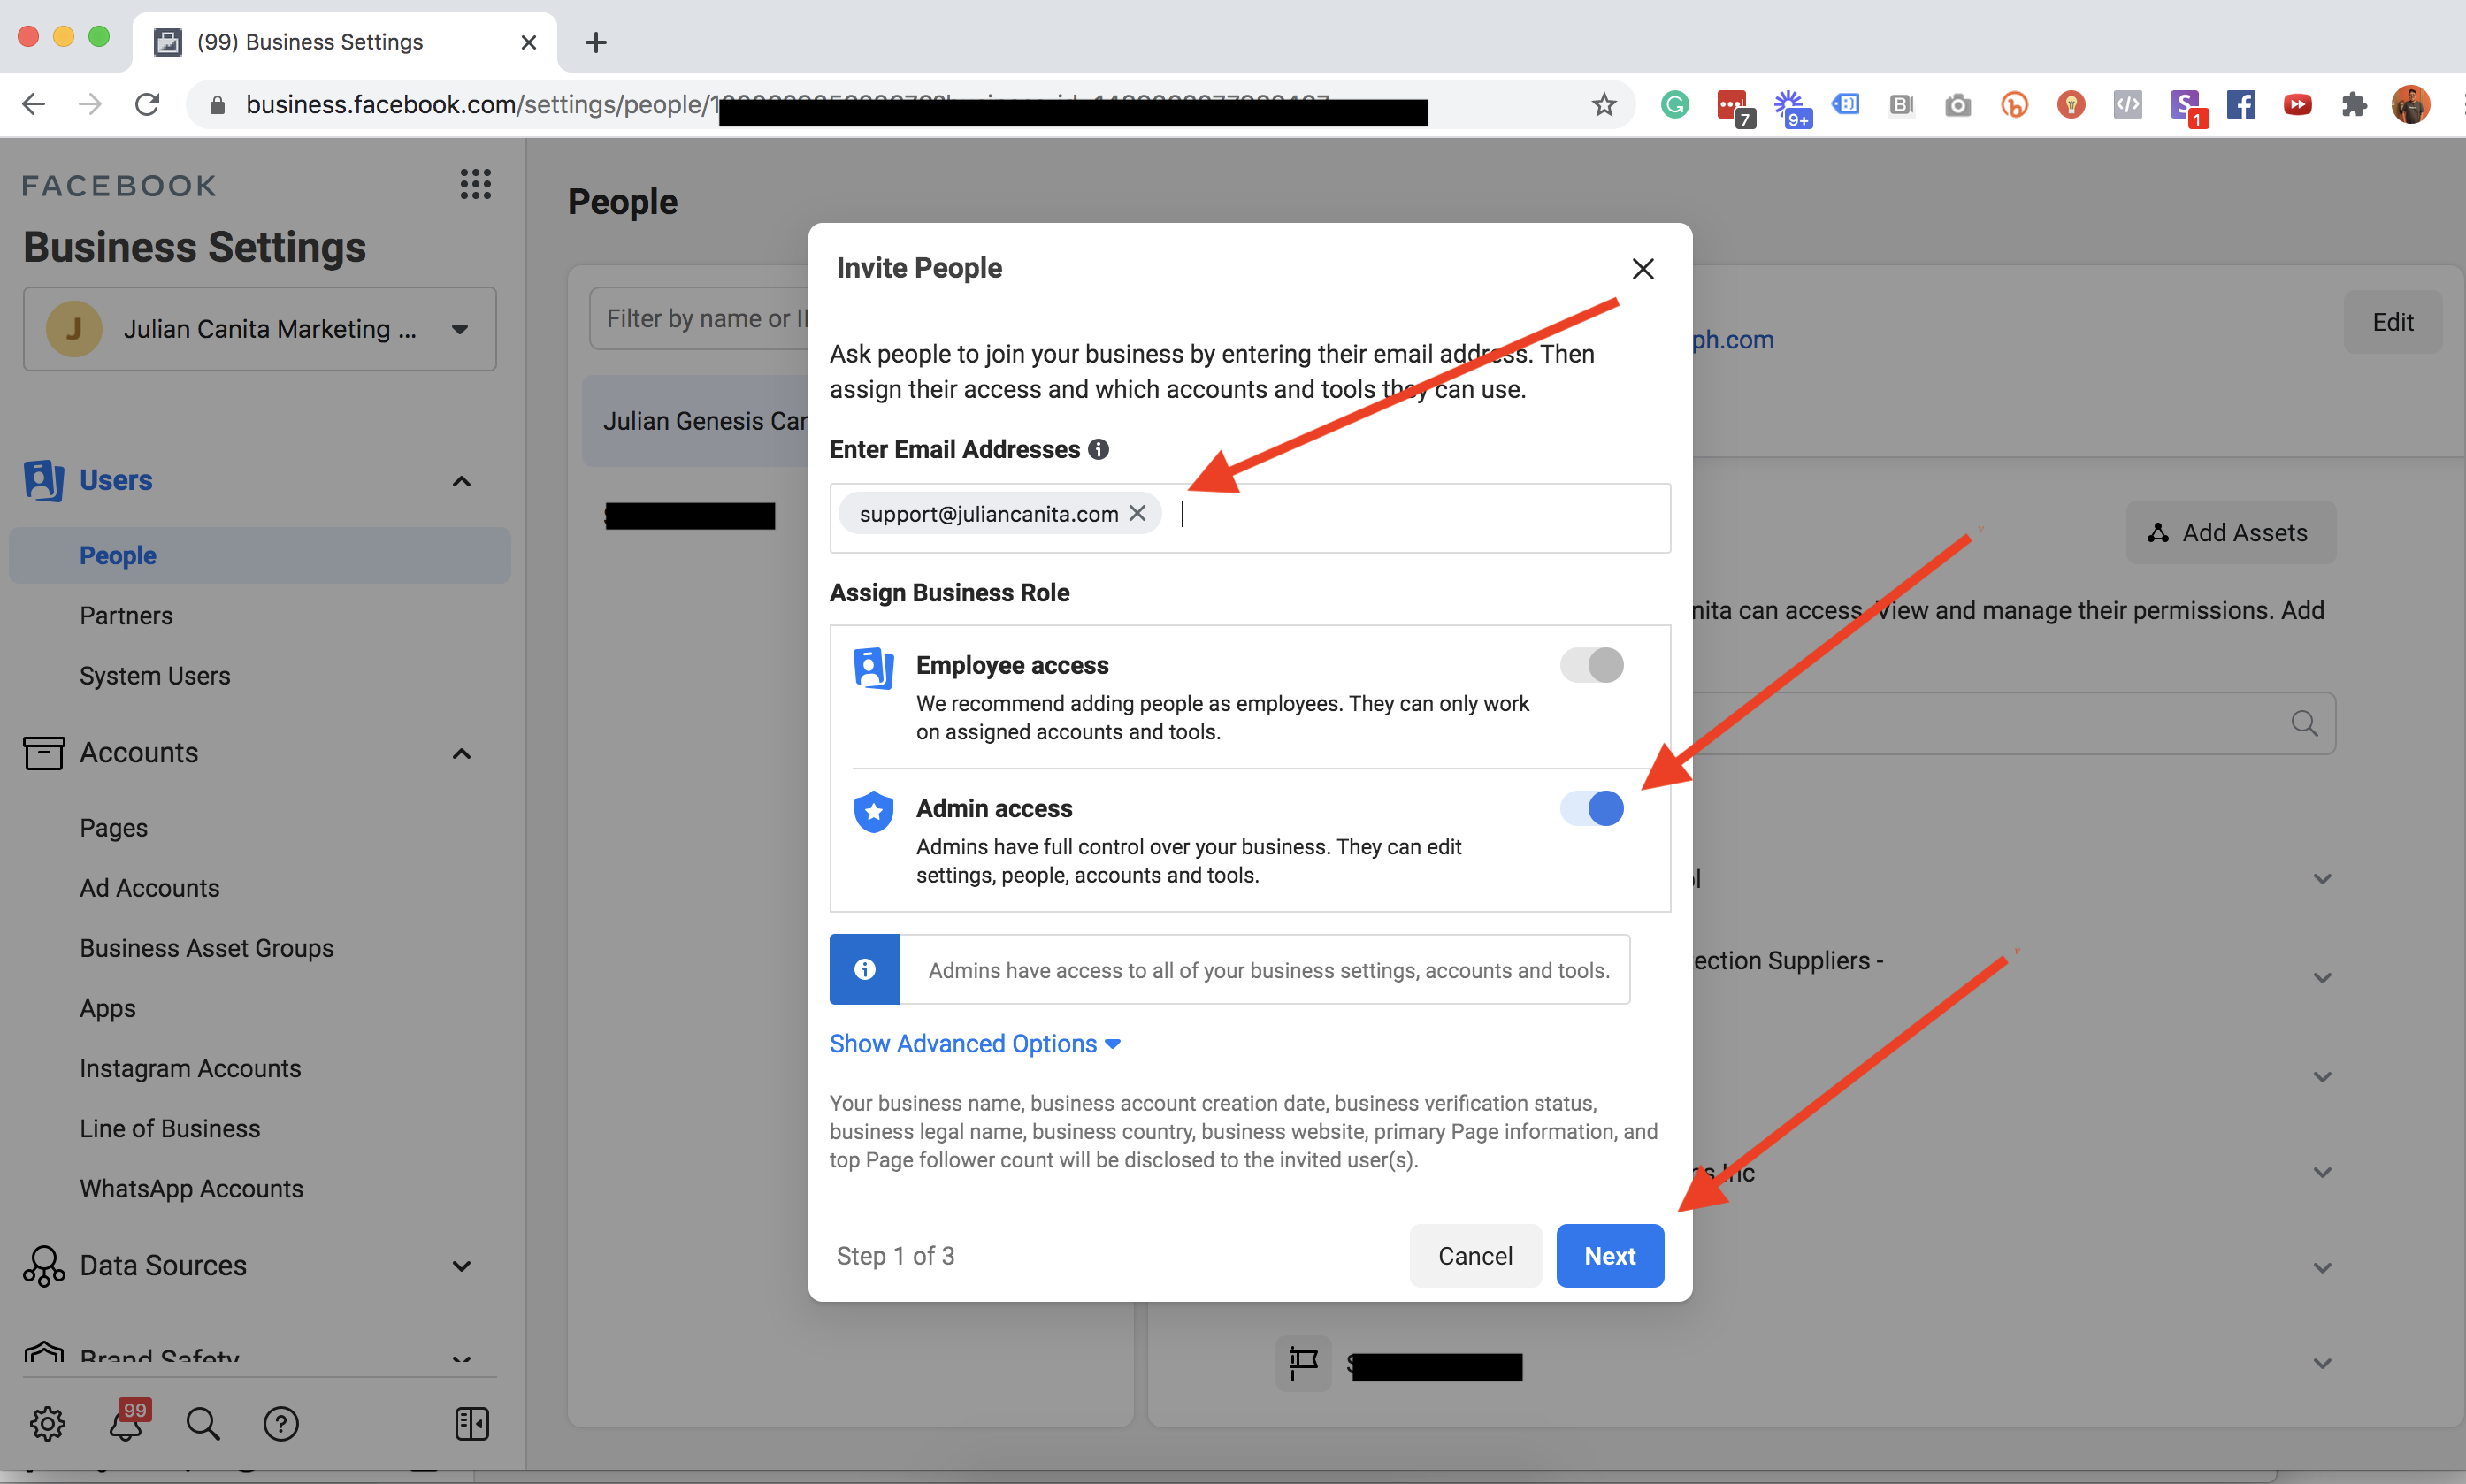
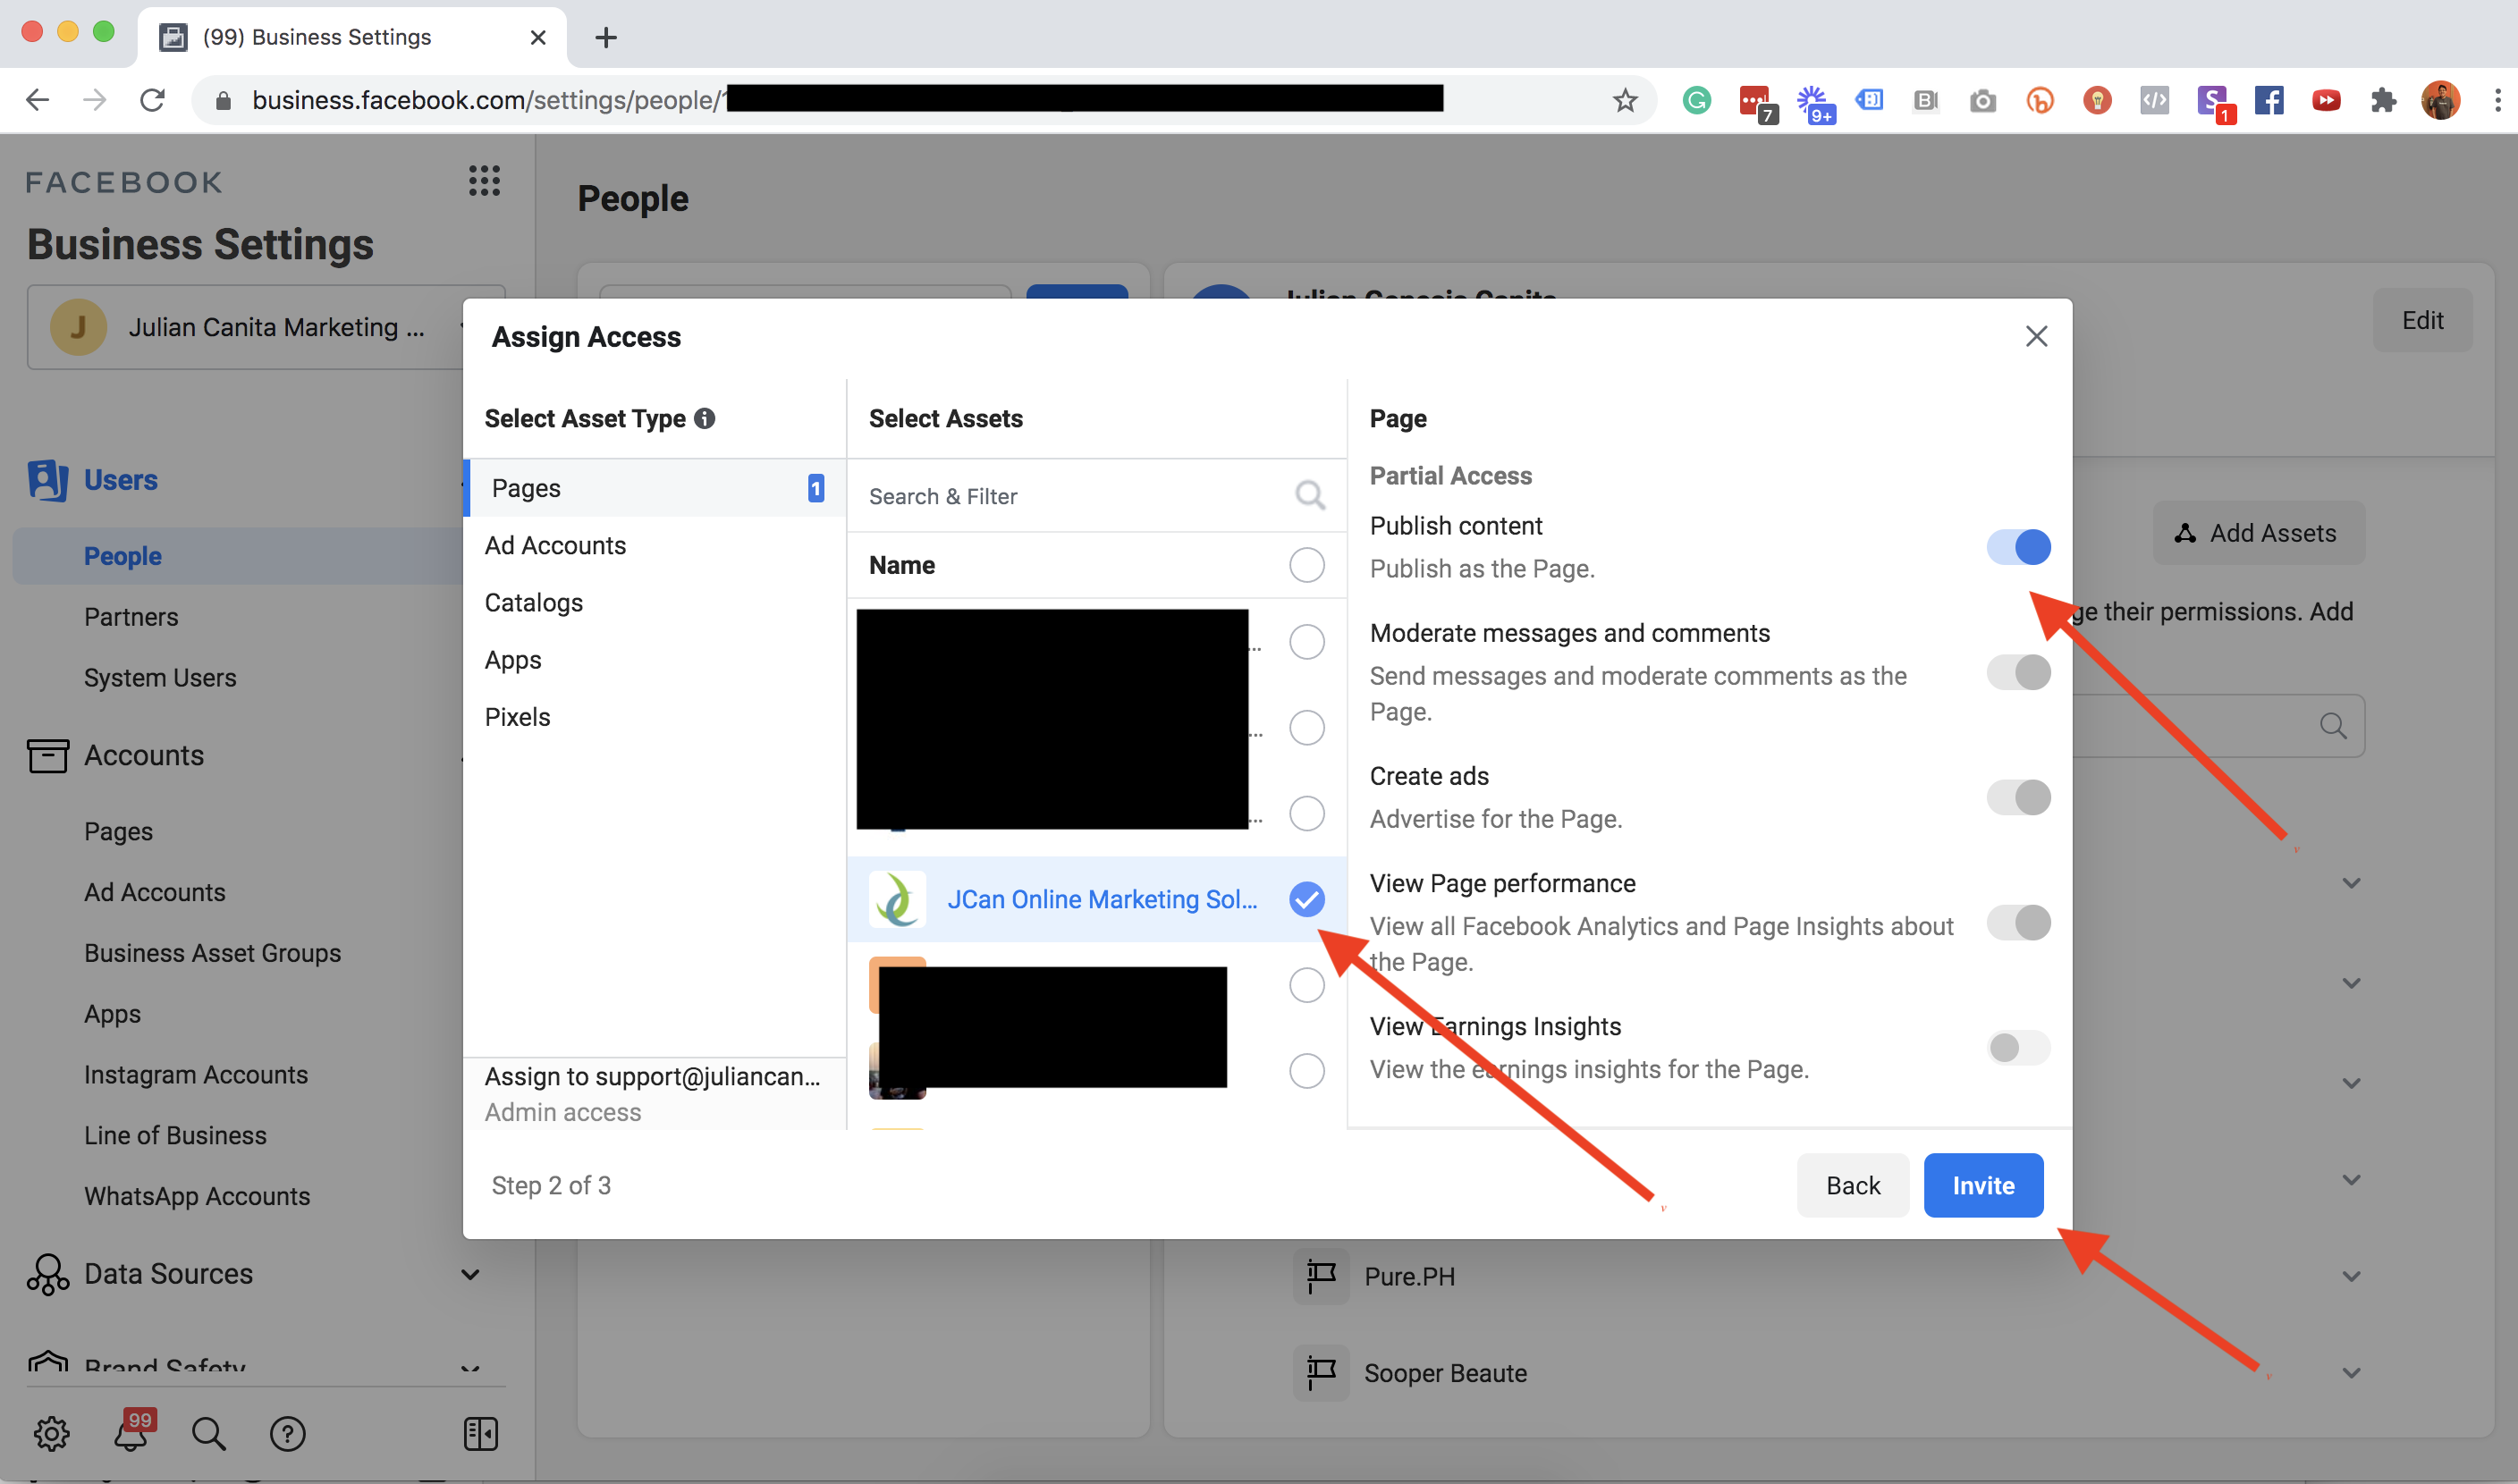
You can do the same process in Step 1 but instead of Admin access, your client can select “Employee access” but your client would need to select all the assets you will have access to as you will no longer be able to do it as shown in step 3.

If you have a Business Manager but your client doesn’t:

You’ll need to request for advertiser access for both the page and the ad account.

You will ask your client for his/her Ad Account ID and FB Page url.

Once you have it, follow the instructions below.

If neither of you has Business Manager accounts:

Your client will need to add you manually. Refer to the guide below:

Take control of your workflows today.