Templates /
PPC Weekly Campaign Review Checklist

PPC Weekly Campaign Review Checklist

Run this weekly PPC checklist for each account under management
1
Introduction:
2
Input campaign data
3
Review key metrics
4
Check display network placements
5
Make sure budget is being utilized
6
Check & optimize bids
7
Analyze keyword performance
8
Review negative keywords
9
Report/Action items:
10
Summarize findings
11
Create a report
12
Approval: Weekly campaign report
13
Print or email report
14
Sources:
15
Related checklists:

Introduction:

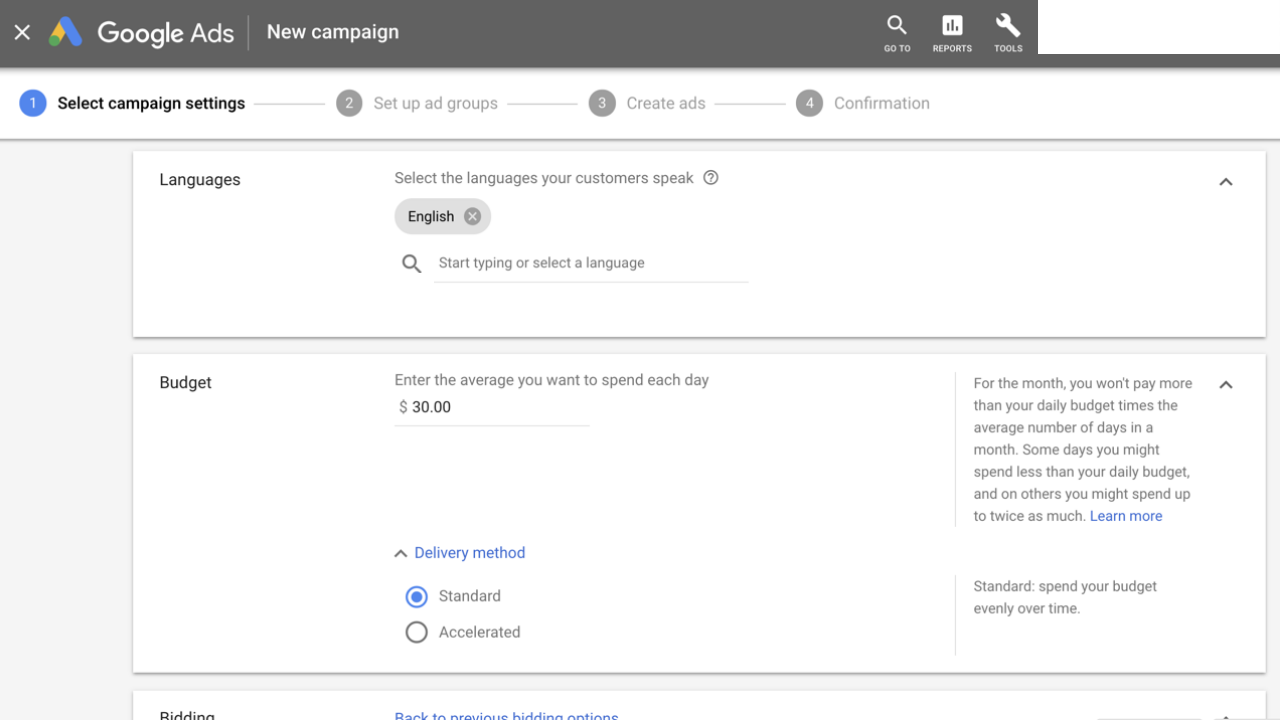
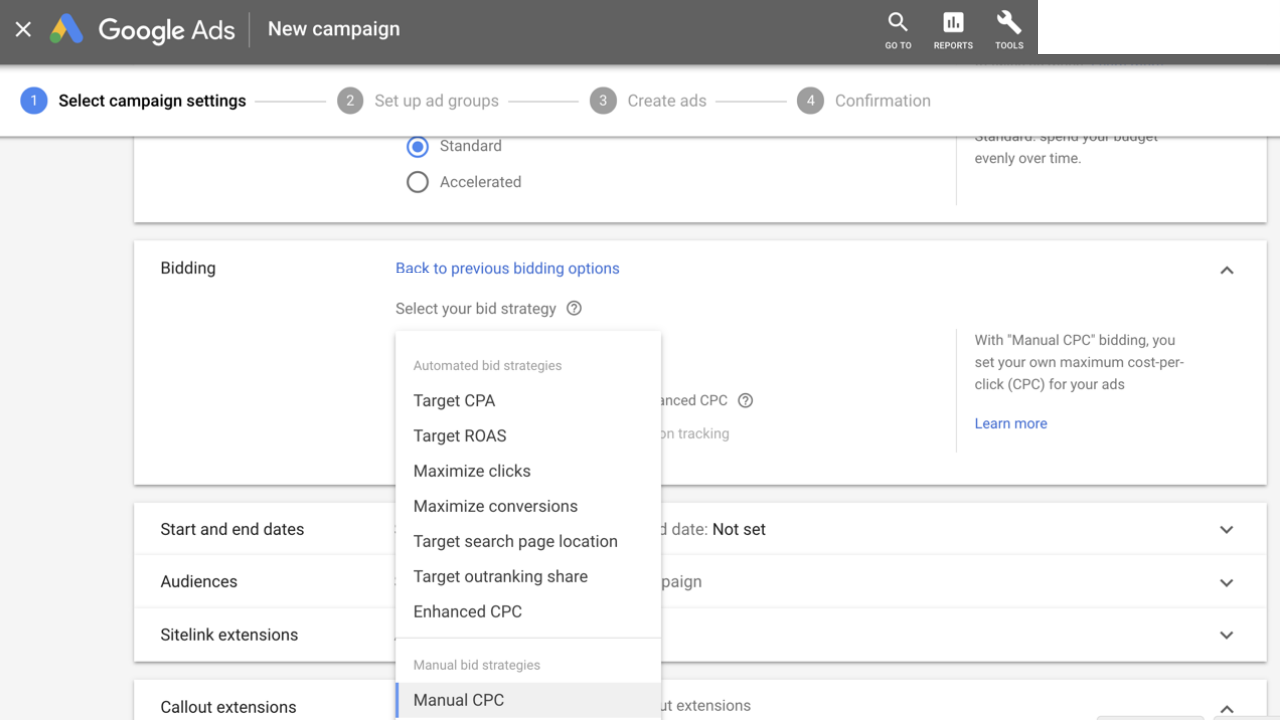
This PPC weekly checklist should be run for each account under management. The examples and instructions are primarily focused on the Google Ads platform. The main tasks covered will be reviewing key performance metrics, optimizing bidding strategies, analyzing keyword performance, and summarizing insights gained. 

Going through a weekly campaign checklist will make sure that you are fully aware of any changes that happen to your account. A week can also start revealing early insights on conversion rates and potentially validate tests. 

Additionally, most organizations require some sort of reporting frequency. This is usually dependent on the size of the account and can be weekly or monthly. Even if you don’t use this PPC campaign checklist to create a report it will help you stay on top of accounts that you manage. You can then pull insights gained from your weekly reports and include them in your monthly report.

Input campaign data

Input your campaign data. You want to be sure to track your efforts for each managed account. Fill out the relevant sections below to keep a record.


Review key metrics

The first place to start is to review all key metrics.

This will help you clearly track the impact of your campaigns. If you are not achieving your expected metrics then this is a good time to investigate further to try and find out why. We have listed some of the most typical metrics reviewed for active accounts. 

Select all the apply:


  • 1

    Average Position
  • 2

    CTR (Click Through Rate)
  • 3

    CPC (Cost Per Click)
  • 4

    CPA (Cost Per Conversion/ Acquisition)
  • 5

    CVR (Conversion Rate)
  • 6

    CPM (Cost Per Impression)
  • 7

    Other

After reviewing the account metrics you should write out any notes below.


Check display network placements

Review currently selected display network placements for your Google Ads accounts. This can be viewed in the +targeting option under the campaign tab. 

Be sure to exclude any placements (apps/websites/etc…) that are utilizing a lot of budget without showing conversions. If you do have placements that are converting at a good cost-per-lead you could consider switching them over to managed placements to set bids specifically for them. 

Note: The display network tab can only be seen on campaigns that run ads specifically on the Google Display Network.  

While checking display settings you will also want to ensure that you have setup proper site category exclusions. This will make sure that your ads do not run on unwanted sites that could position your brand next to sensitive social issue content or sexually suggestive websites.

The overview panel will allow you to easily access all this information.

Note any changes below:


Make sure budget is being utilized

Review your campaign budget and make sure it is being fully utilized.


Below are a few questions you should be asking yourself:

  • Is the budget allocated for the campaign enough to achieve your traffic or conversion goals?
  • Are the keywords you have selected for the campaign bringing the right audience or is it wasted spend? 

Be sure to spend time reviewing your budget and determining if it will be sufficient.


Check & optimize bids

Check your current biding strategies. Update if needed.

Automated and Manual CPC strategies have positives and negatives associated with them. It is up to you to decide what bid strategy works best for your managed accounts.

As I quick reference you change your bidding strategy by following these steps:

  1. Sign in to your Google Ads account.
  2. In the page menu on the left, click Campaigns.
  3. Select the campaign you want to edit.
  4. Click Settings in the page menu for this campaign.
  5. Open Bidding and then click Change bid strategy.
  6. Select your new bid strategy from the drop-down menu.
  7. Click Save.

Google also put together a great article on how to determine your bid strategy. It can be seen by clicking here

Keep track of the bidding strategy you are using on the campaign. If you have made any changes or want to include additional notes please do so below.


As a refresher we have included a video on understanding Google Ad bidding strategies. 

Analyze keyword performance

Analyze the performance of each keyword associated with the campaign.

If your ad has been running for at least a week you should be able to go to the Keywords page and start determining how your keywords are performing. The relevancy of the keyword to the ad copy you are running will impact your Quality Score. Be sure you eliminate irrelevant keywords to maintain a high Quality Score. 

To check Quality Score follow these steps:

  1. Sign in to your Google Ads account.
  2. In the page menu on the left, click Keywords. 
  3. Hover over a keyword’s status in the “Status” column. You’ll be able to see ratings for expected clickthrough rate, ad relevance, and landing page experience.

We recommend building an excel spreadsheet to track keyword quality score. With accounts that have a lot of keywords it is easier to organize inside a spreadsheet. You should then upload the spreadsheet below to keep track of changes over time.


Review negative keywords

Check currently utilized negative keywords. If applicable, update the list.

Negative keywords help you exclude search terms from your campaigns so that your ads are shown to the most targeted customers possible. This customization helps to improve the overall ROI of the ad spend. 

NOTE: If you need to conduct comprehensive keyword research then you should utilize the Process Street Keyword Research Checklist

Follow the below steps to add negative keywords.

  1. Sign in to your Google Ads account.
  2. From the page menu on the left, click Keywords.
  3. Click Search terms at the top.

  4. To see search terms for only a select group of keywords, click Search keywords, and check the boxes next to the keywords you’d like to see search terms for. Then click Search terms in the menu that appears above the table.

  5. Check the boxes next to the search terms that you’d like to add as negative keywords, then click Add as negative keyword. By default, negative keywords that are added to a Search campaign from the search terms report are added as exact match.

If you have made any updates to your negative keyword list you should keep track of the changes.


Report/Action items:

Summarize findings

After reviewing the ad campaign you should summarize the positives, negatives, and list any action items.

Your findings should be focused on three main areas. The first form field to focus on is labeled “Positives.” This is the area to list any upticks in conversion rate, impressions, or other KPI’s. This will be important to record so that it can be relayed to stakeholders. It also gives insight on potential areas you can increase spend while lowering CAC.

The second form is called “Negatives.” List any concerns or downward trends that you notice. One example of a negative could be a decrease in impressions and increase CTR cost. 

The last form field is to list next steps. Take the positive and negative items and describe what you are going to do to improve the account. These are your action items.


Create a report

Create a weekly summary report.

If you need to create a weekly report make sure that the data is easy to read and includes visuals. Ensure that the major KPI’s associated with the account can be easily identified by someone who is skimming the report. There are hundreds of data visualization and reporting tools that integrate with Google Ads, Facebook, etc… If you’re interested in some of these tools Zapier put together a research article that can be seen here.   


To learn more about Zapier integrations and advances features checkout the video below.

Using the Members form field below, assign the individual who will approve the PPC report.

Approval: Weekly campaign report

Will be submitted for approval:

  • Create a report

    Will be submitted

Sources:

Take control of your workflows today.