Templates /
Web Design Process

Web Design Process

Run this checklist for a designer and client to collaborate easily throughout the web design process.
1
Introduction to Web Design Process
2
Record client details
3
Hold initial briefing meeting
4
Prepare a project charter
5
Finalize contracts so that work can begin
6
Formulate the structure of the website
7
Design initial mockups
8
Host a meeting to discuss the mockups
9
Begin to draw up refined designs
10
Prepare the final designs
11
Approve the final designs
12
Deliver the final work
13
Generate invoice
14
Related Checklists:
15
Sources:

Introduction to Web Design Process

Web Design Process

Web Design Process Purpose

The purpose of the web design process detailed in this template is to provide a common space for the designer and the client to work through the project

Throughout this checklist, you will be presented with form fields and file uploads. Utilizing these features allows you to record all the information pertaining to the project in one place.

Tips and tricks

When you run this checklist, make sure it is assigned to all the necessary persons involved in the project. The template is designed to accommodate a designer and a product manager, but other people can be added in also.

If you determine the timeline of the project and set dates for delivery of different stages, you can assign these to individual tasks. If you click on a task in the editing screen, you will notice there are two options underneath the title: Assign and Due after. You can use this setting to place deadlines on different tasks. 

Check out this video below for 5 key things you should be aware of and keep in mind when tackling the web design process:


Navigate Your Web Design Process in 5 Steps by SyneCore Tech

Record client details

Use this space to record important contact information for future reference.


Hold initial briefing meeting

The initial planning meeting will serve as a crucial reference point for the project

This meeting allows for the scope to be defined and understood so that subsequent outline documents can be prepared.

Use the subchecklist below to define the meeting’s agenda, and use the form fields to collect that information.

  • 1

    Discuss company branding strategy
  • 2

    Outline the scope of the project
  • 3

    List websites to take inspiration from
  • 4

    Determine the purpose of the website
  • 5

    Clarify the budget and timeframe


Enter 5 websites to take inspiration from in the form fields below


Prepare a project charter

The project charter should record the key information gathered from the previous meeting in the form of a report.

This document can be referenced within the contracting stage as an agreed upon overview of the project. 

Use the form field below to upload the project charter.

If the client agrees with the charter, click to complete the task. 

Finalize contracts so that work can begin

A good contract protects both the client and the designer

You can find a series of example contracts and templates here with an explanation from Smashing Magazine about the purpose and scope of each contract.

The designer should prepare the contract and upload it into the first form field. 


Alternatively, you can use digital signatures to speed up the process and save on printing. 

Services like DocuSign and HelloSign can speed up your contracting processes. 

If you have used one of these services to conduct your signing, upload the final agreement in the form field below.

Formulate the structure of the website

The most foundational document for a website is the sitemap. This determines the information architecture and will define the base from which the wireframes are built. 

Use the form field below to upload a sitemap.

You can begin working on the wireframes in order to present a basic overview of how the website may look. 

Initial wireframes could be done on paper or mocked up digitally. These should represent the skeleton of the website upon which further design work will be based. 

You can also consult our UX Design Process checklist if necessary for an in-depth approach to user experience design. 

Upload the initial wireframes in the form field below and seek approval from the client. Notes and thoughts about the wireframes can be recorded by the client in the final form field.


Design initial mockups

Take the information gained in the initial briefing meeting and the feedback on the initial wireframes and create a first iteration of site mockups. 

While still formulating the look and feel of the site, it is important to provide options and variety

Choose 3 key screens and make 3 variations of each. This is an opportunity to present different typefaces, color palettes, and icons. 

Use the form field below to upload a presentation PDF detailing the different options formulated ready for further discussion. 

Use the email widget below to send the initial mockups to any other key stakeholders who might not be participating in this checklist.

Host a meeting to discuss the mockups

The discussion of the initial mockups and how they can be improved is a very important moment in the ideation process. This is the first point where the client can see what the designer thinks about what the final product should look and feel like. 

It is important to be open and honest in this meeting to find positives in the work and to formulate constructive criticisms which can improve the mockups. 

Use the form fields below to record the details of the discussion.


Begin to draw up refined designs

Once there is a clear direction inspired by the initial mockups, it is possible to move forward and begin fleshing out a single concept. 

Clark Wimberly, writing for Invision, argues that designers now should think differently to designers of only a few years ago. The adage Mobile First has been popular for a significant amount of time, but it is only recently that mobile traffic has begun to outstrip desktop traffic

This is an important consideration for any designer and means that your designs must not see mobile as an afterthought. 

Build out the design concept you have chosen and upload the different layouts below.

Use the email widget below to send these files to any other key stakeholders who are not participating in this checklist.

Prepare the final designs

Once the look and feel of the website have been established and the different layouts have been approved, it is possible to begin finalizing the web design process

Once you have built the different pages you can either present them to the client in a PDF or you can create a clickable prototype

You can use a platform like Invision to turn your designs into clickable prototypes which can allow your client to experience the product in action. 

Using Invision, the client can leave comments on each screen and can understand the user flows. This detail can help allow for any last minute tweaks to be simple and successful. 

Either use the form field below to upload a PDF or use the web address field to link the Invision prototype.

Approve the final designs

If the final designs are approved, simply click to complete this task. 

If there are further comments or amendments to be made, record these in the form field below.


Deliver the final work

When delivering the final product it is important to understand what format the client hopes to receive the work in. 

The best way to pass on the designs would be to send the Photoshop – or equivalent – files associated with the product. This allows for front end developers to much more easily bring the designs to life. 

Upload the final PSDs in the form field below or add a shareable link to another place they can be accessed. 

When the client receives these files, use the dropdown form below to confirm this. 


Generate invoice

Congratulations on a successful design project. 

The designer can use the Process Street invoice generator template to send their invoice to the client. 

This invoice can be sent automatically from this checklist by clicking to complete the task. 

You can use Zapier to connect this task in this template to your invoice so that you can automate the sending process. 

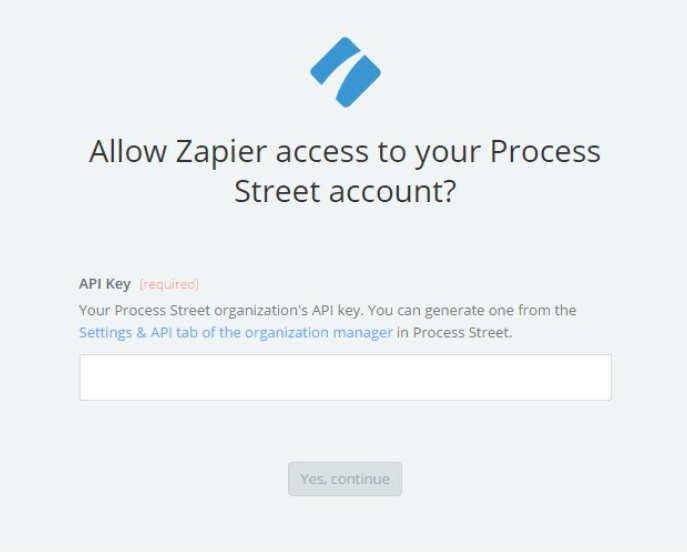
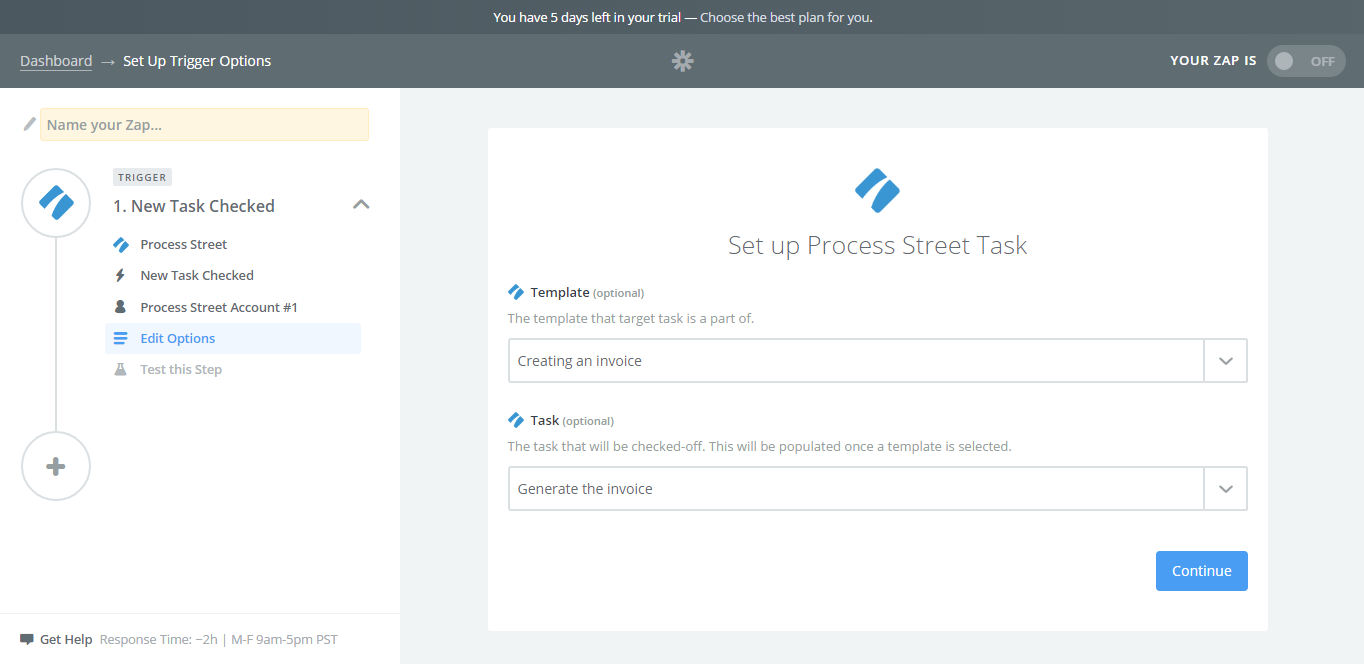
In Zapier, select "Make a Zap" and search for Process Street. It will prompt you to create a trigger – select "New Task Checked". It should then prompt you to connect your Process Street account to your Zapier one. You simply follow the link Settings & API tab of the organization manager on the pop-up.

Follow the steps provided by Zapier and it should connect the two accounts together. From here it will let you search for the template you want to run the Zap from, and choose the task you want to hook it up to. 

After you’ve selected those options you can test that step and your trigger should be set. 

Next, you can create the action to be initiated by your trigger. You can use a third party system like WebMerge or you can use Zapier’s built-in email service to generate HTML emails. Either of these solutions can be used to generate and send your invoice.

To read more about these steps and how to create the invoice check out this article

Sources:

Take control of your workflows today.