1.2 Select "Standard Landing Page" or upload an Instapage template file.
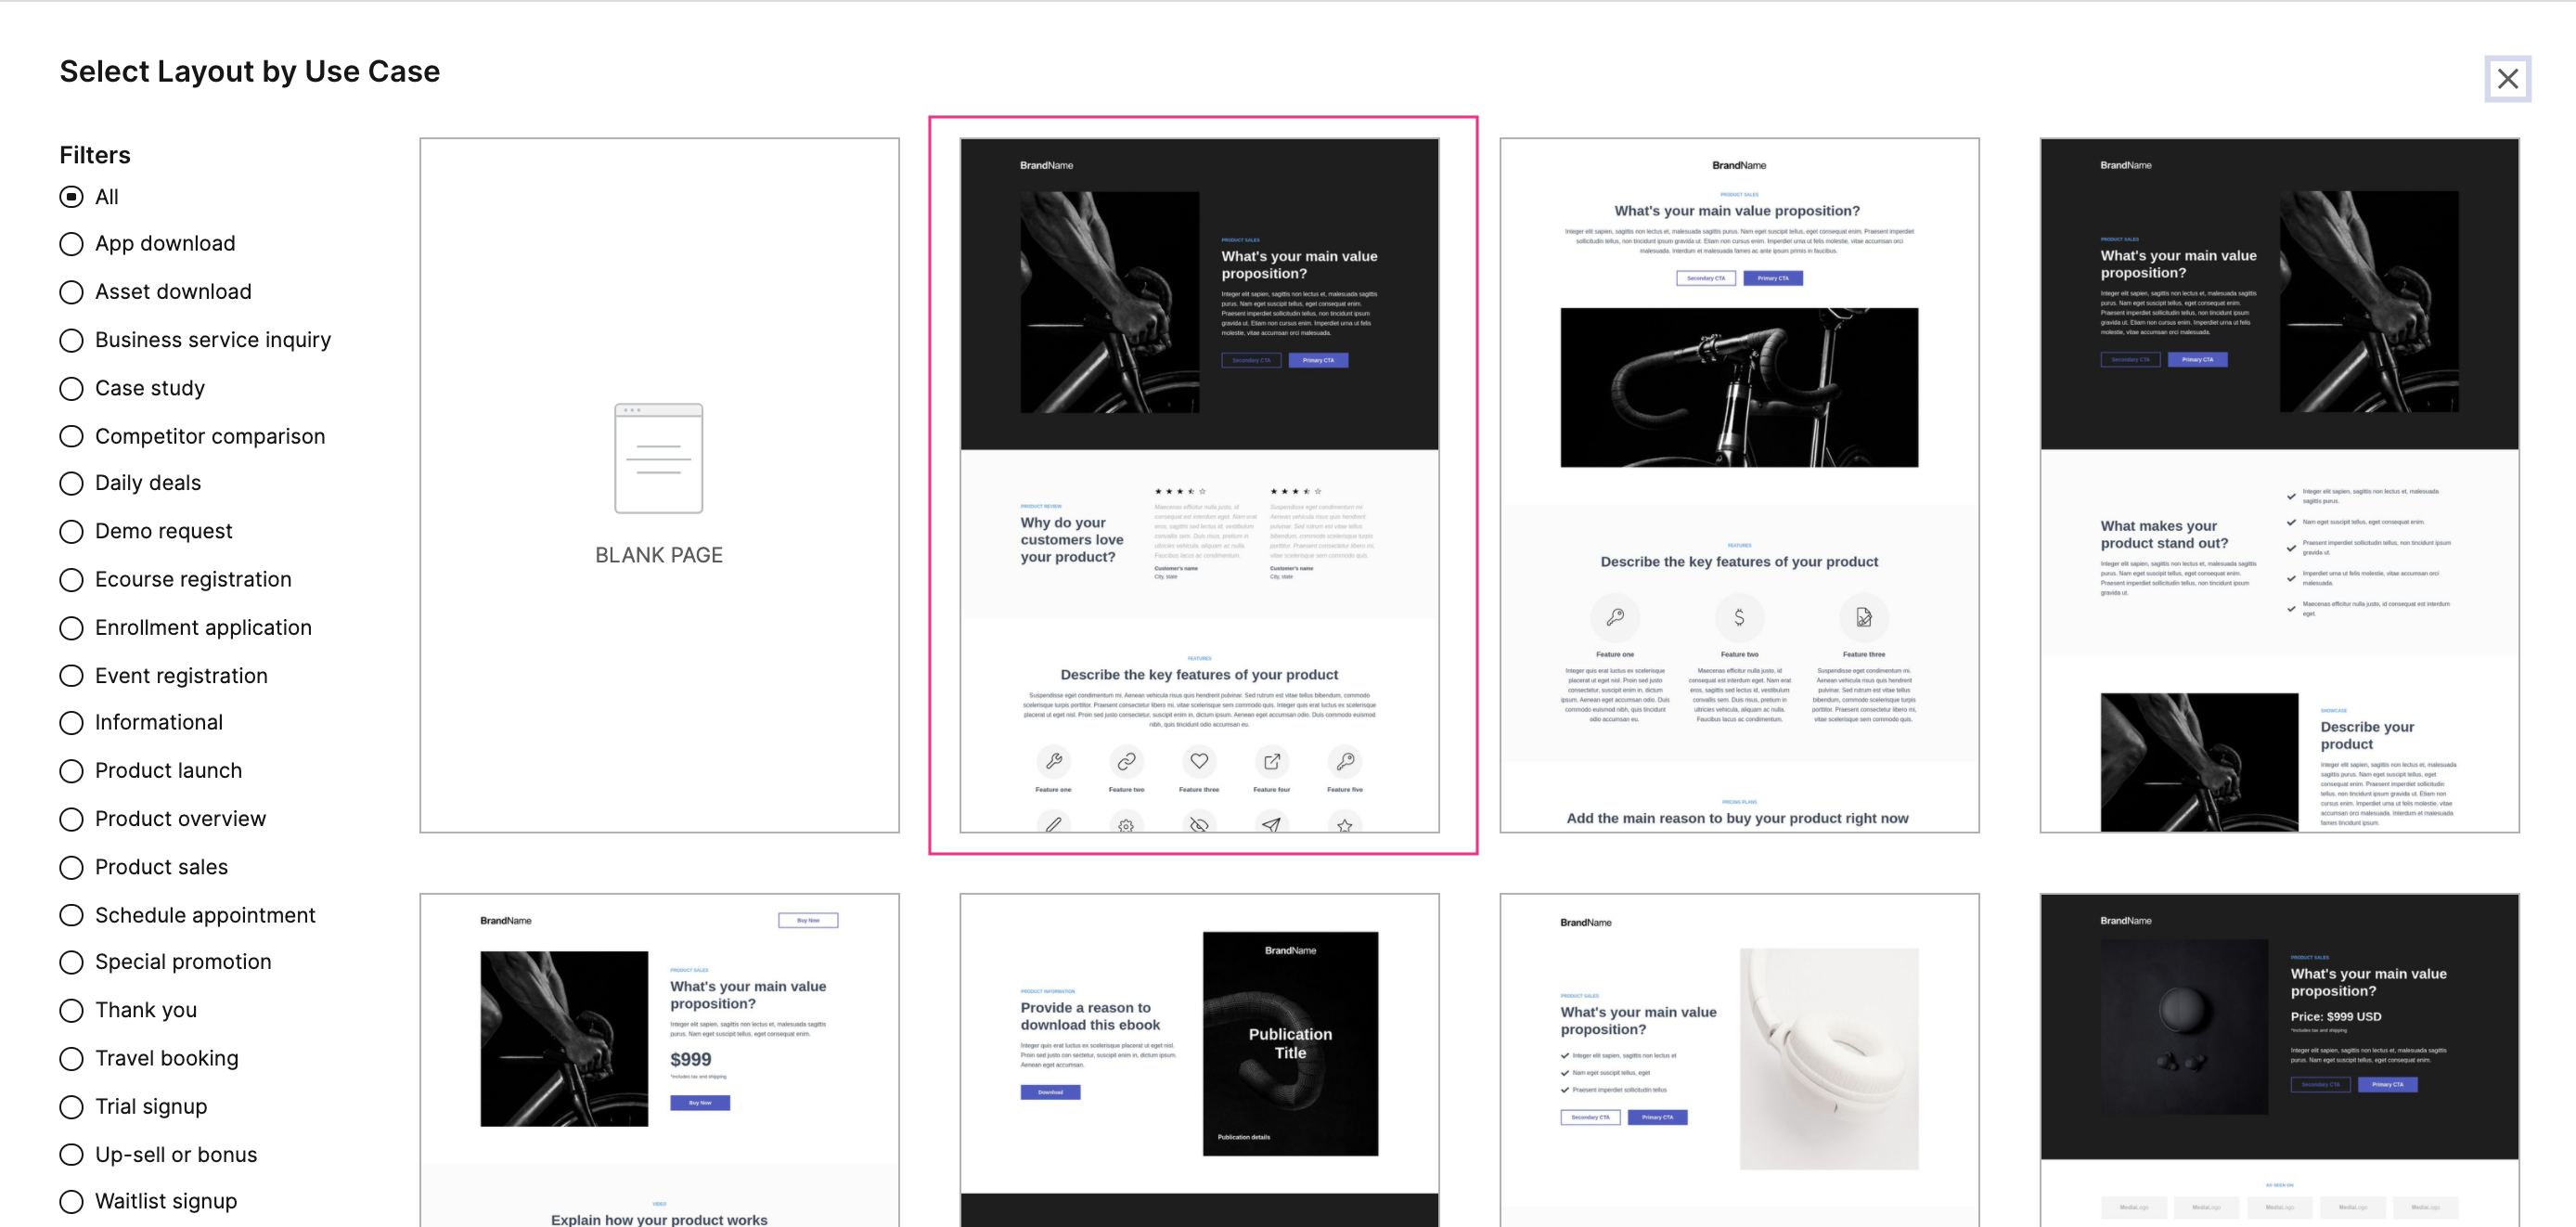
2. Select Your Template for the Waitlist Landing Page
2.1 Select an appropriate template... I've pointed out the one we have used for BBD.
2.2 Name your landing page and click "create".
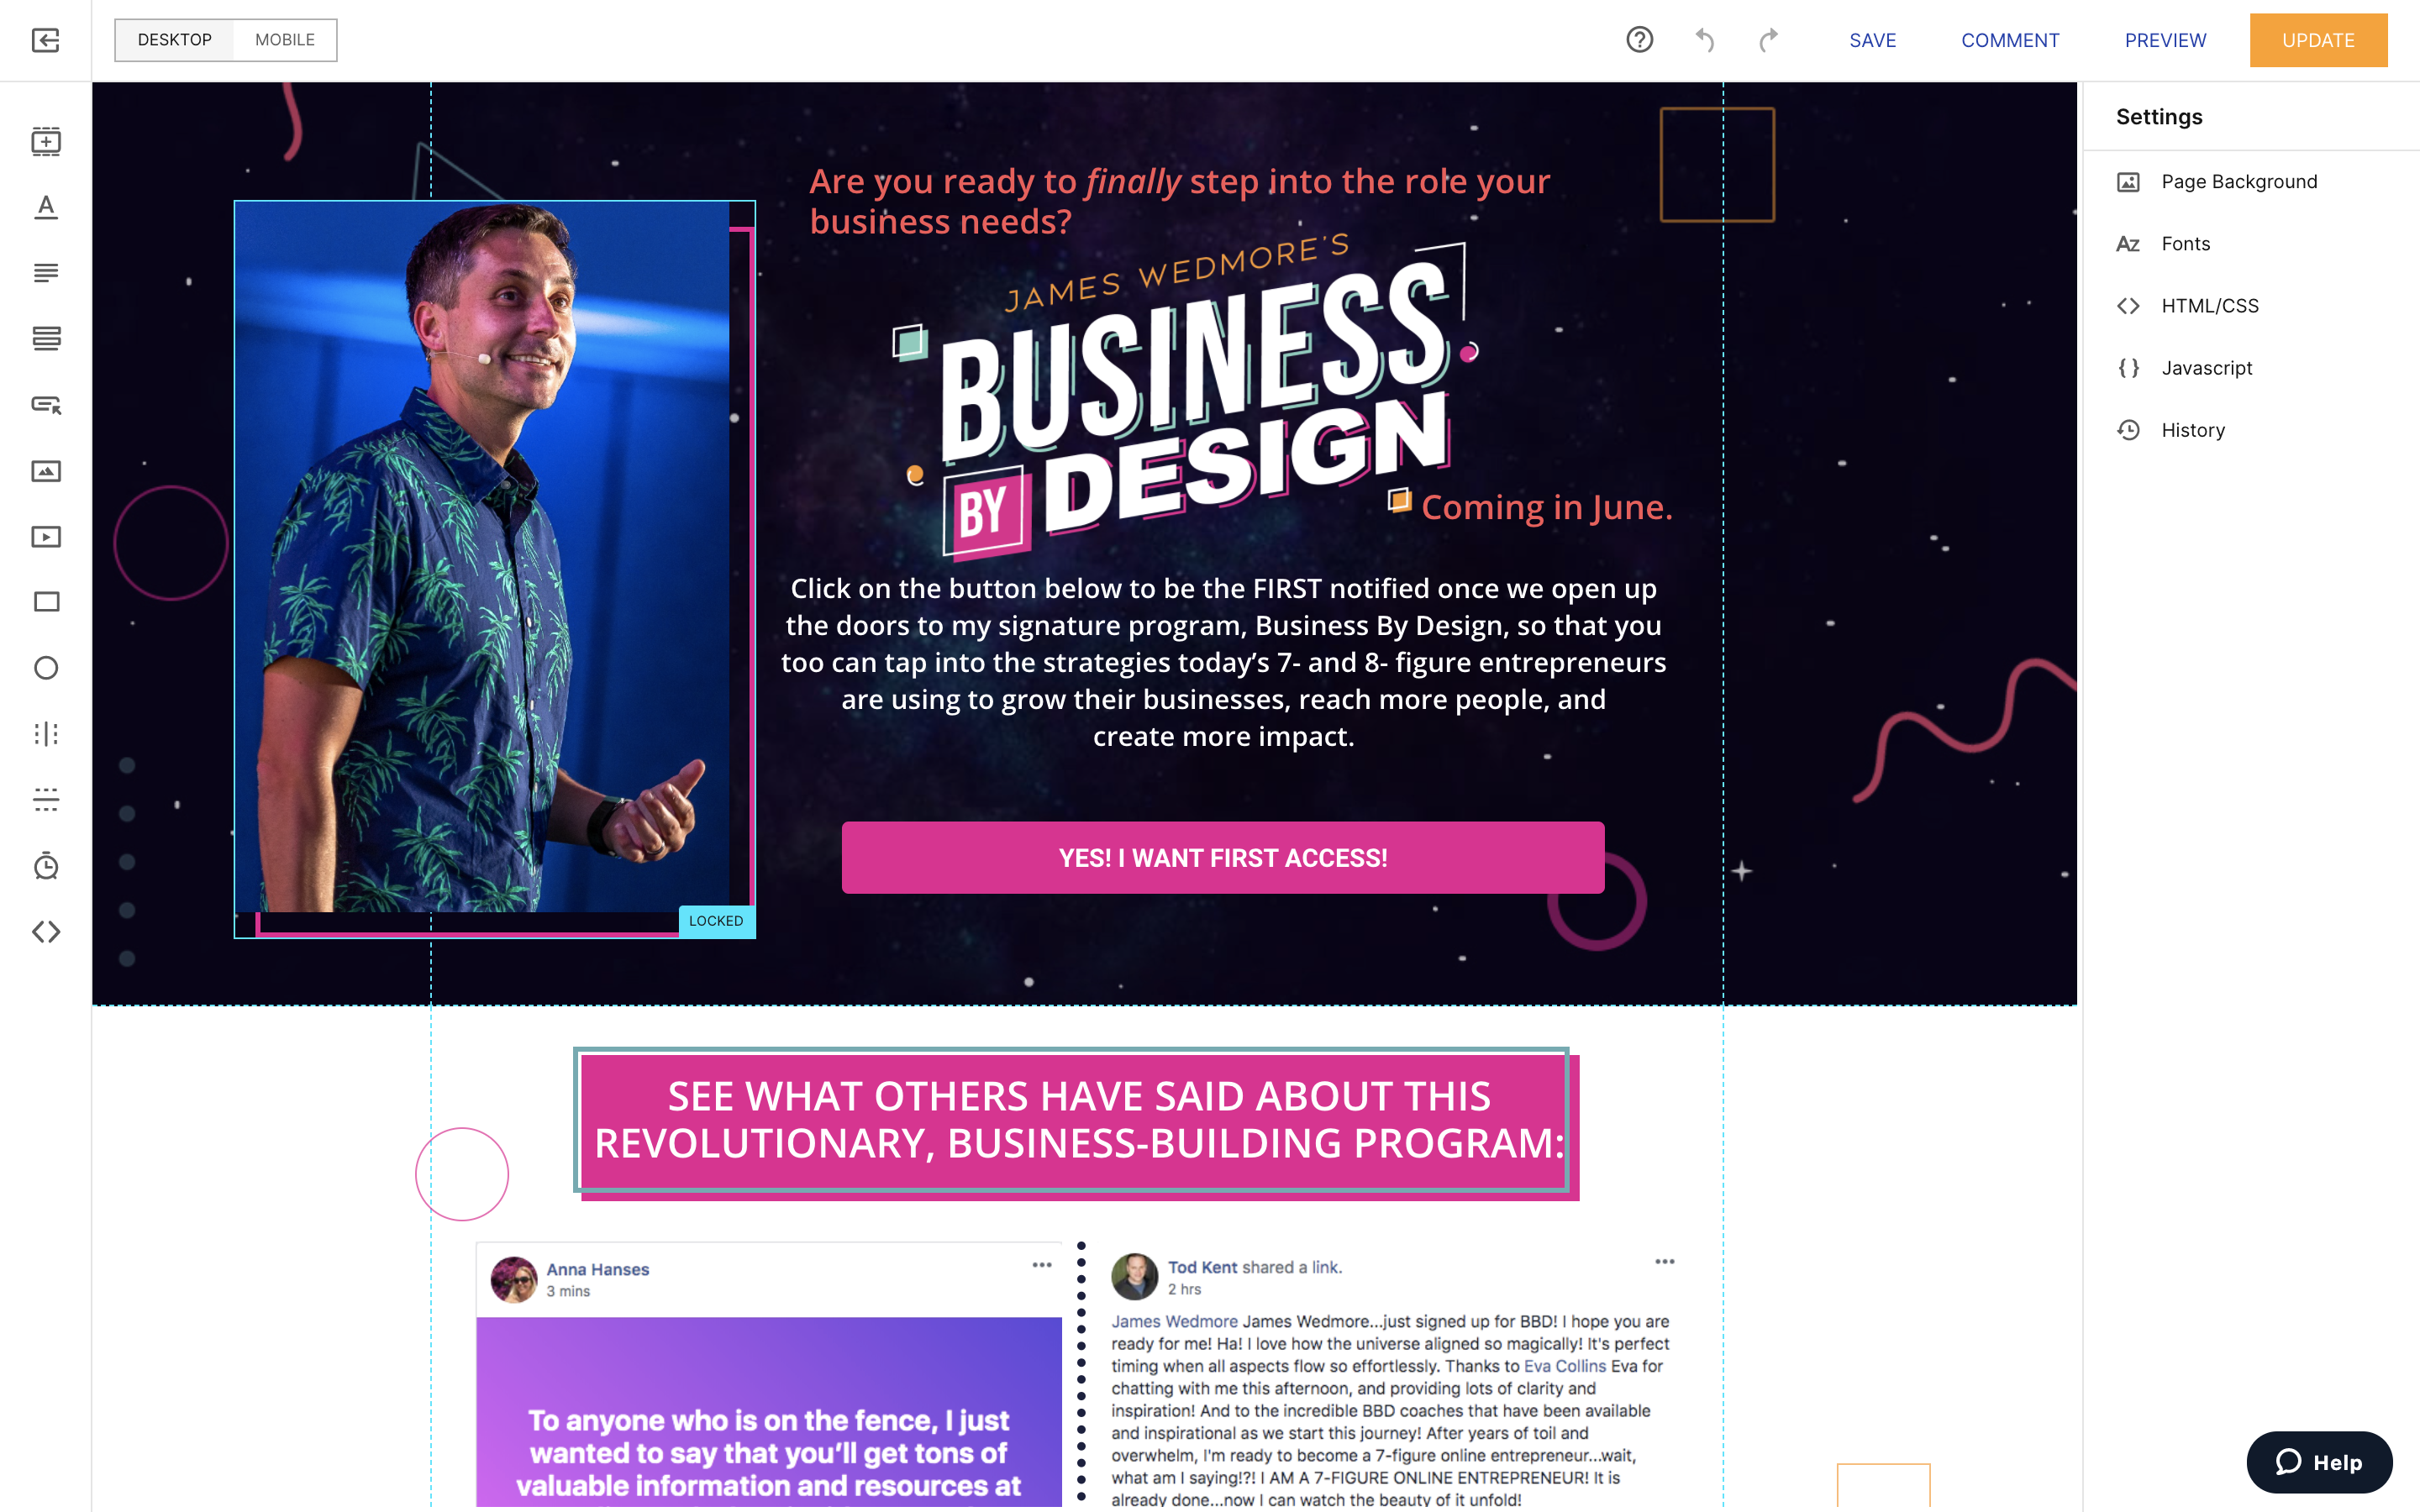
3. Edit and Customize the Copy/Text/Images
3.1. Customize and edit the copy 3.2. Add or hide any images/text, if they are unnecessary ...and anything else that you think needs editing/adjusting
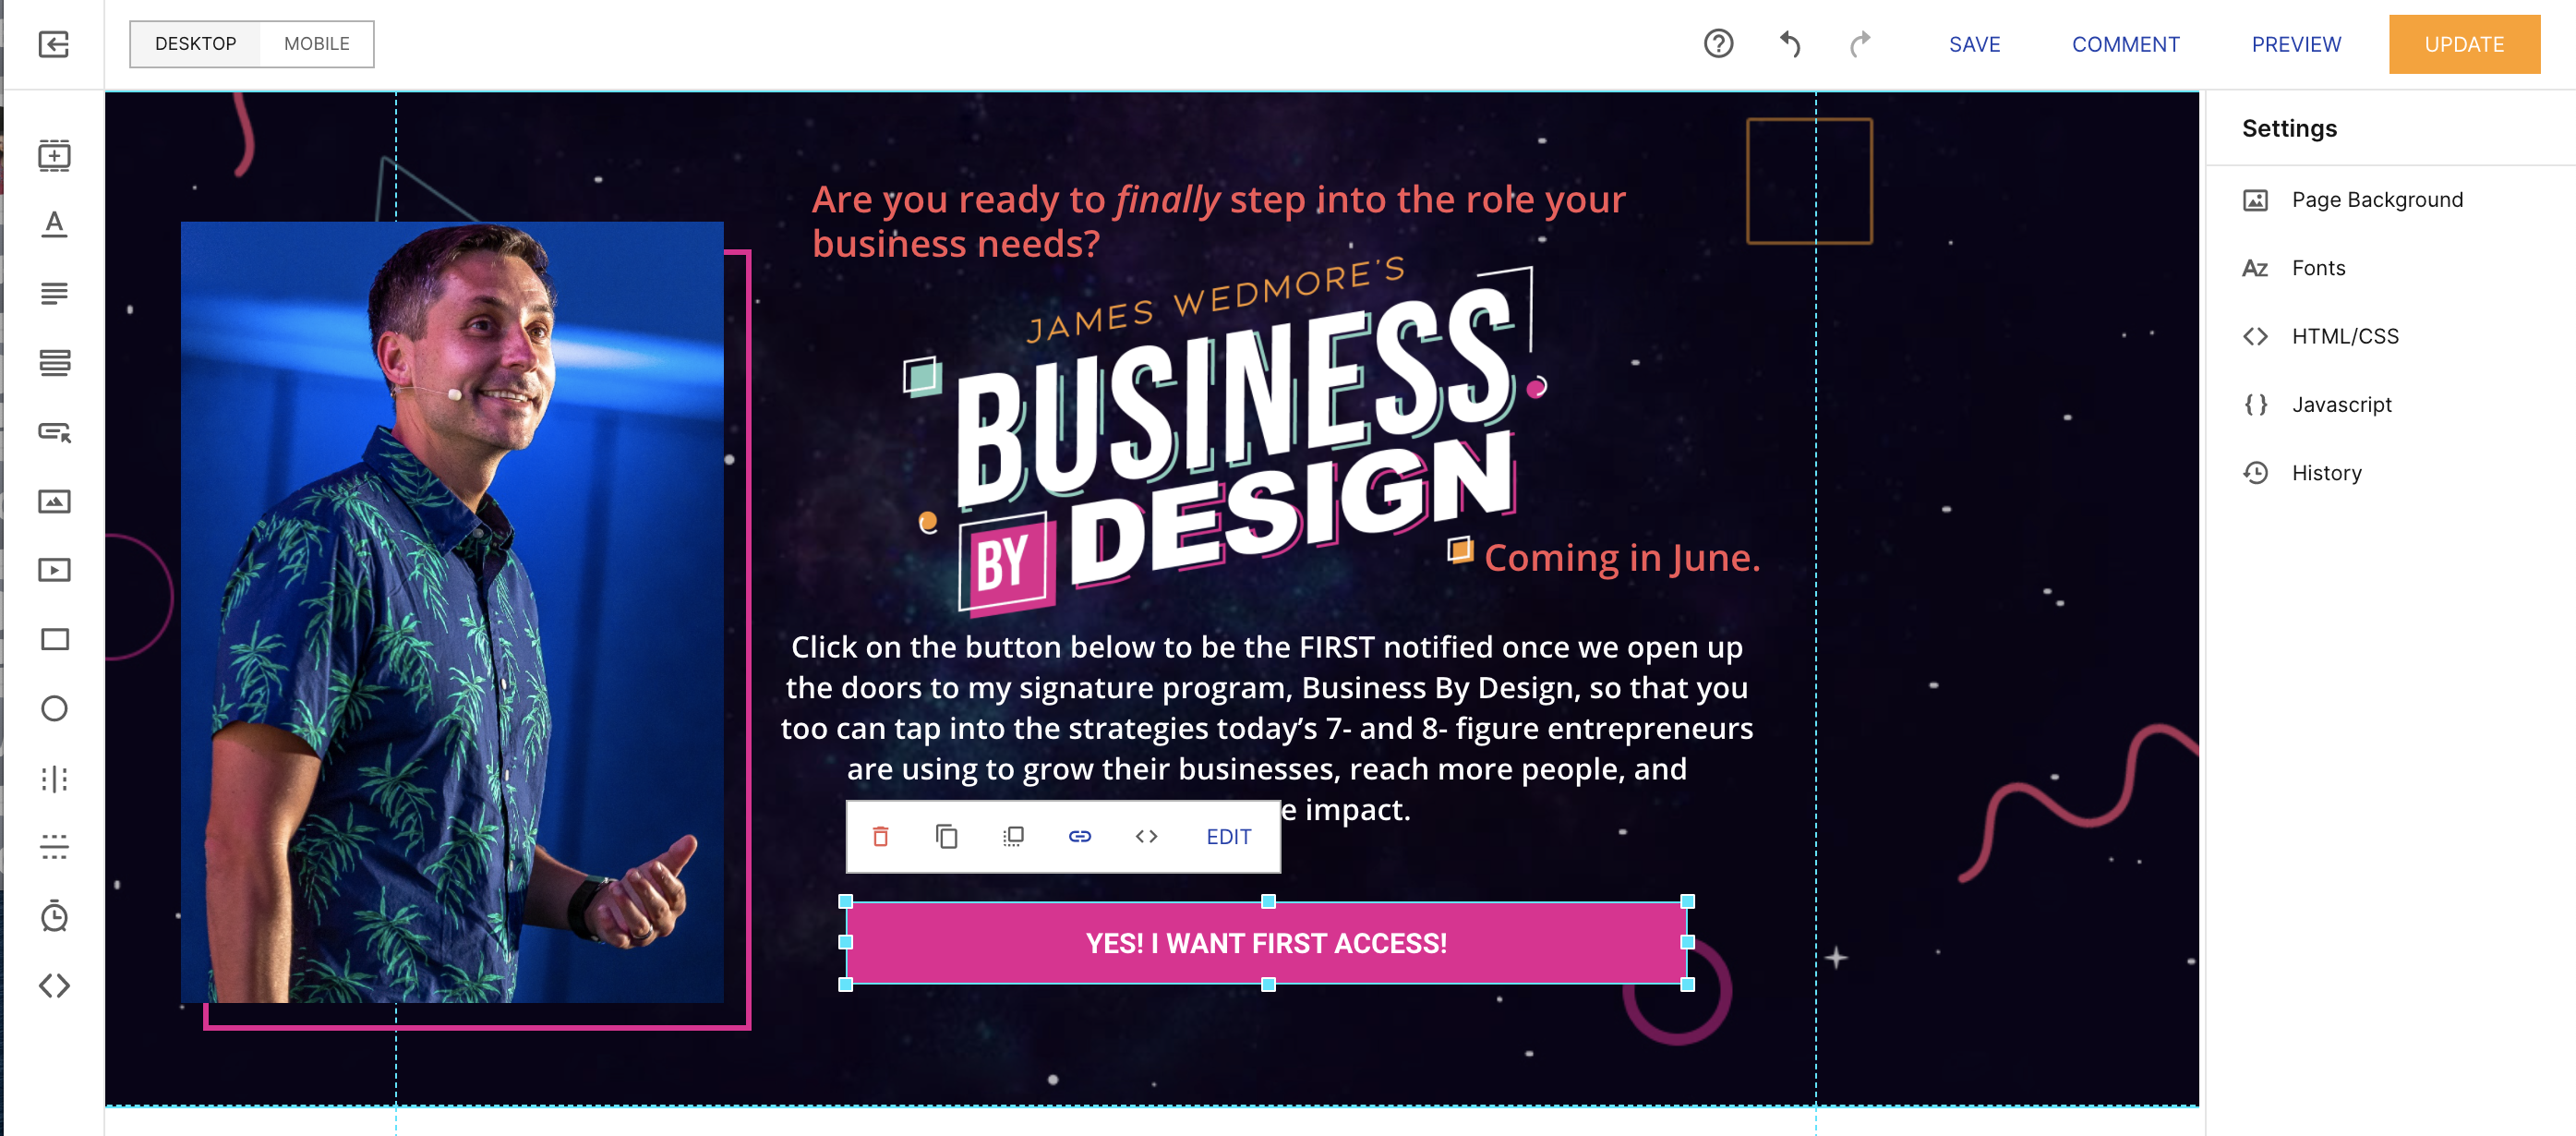
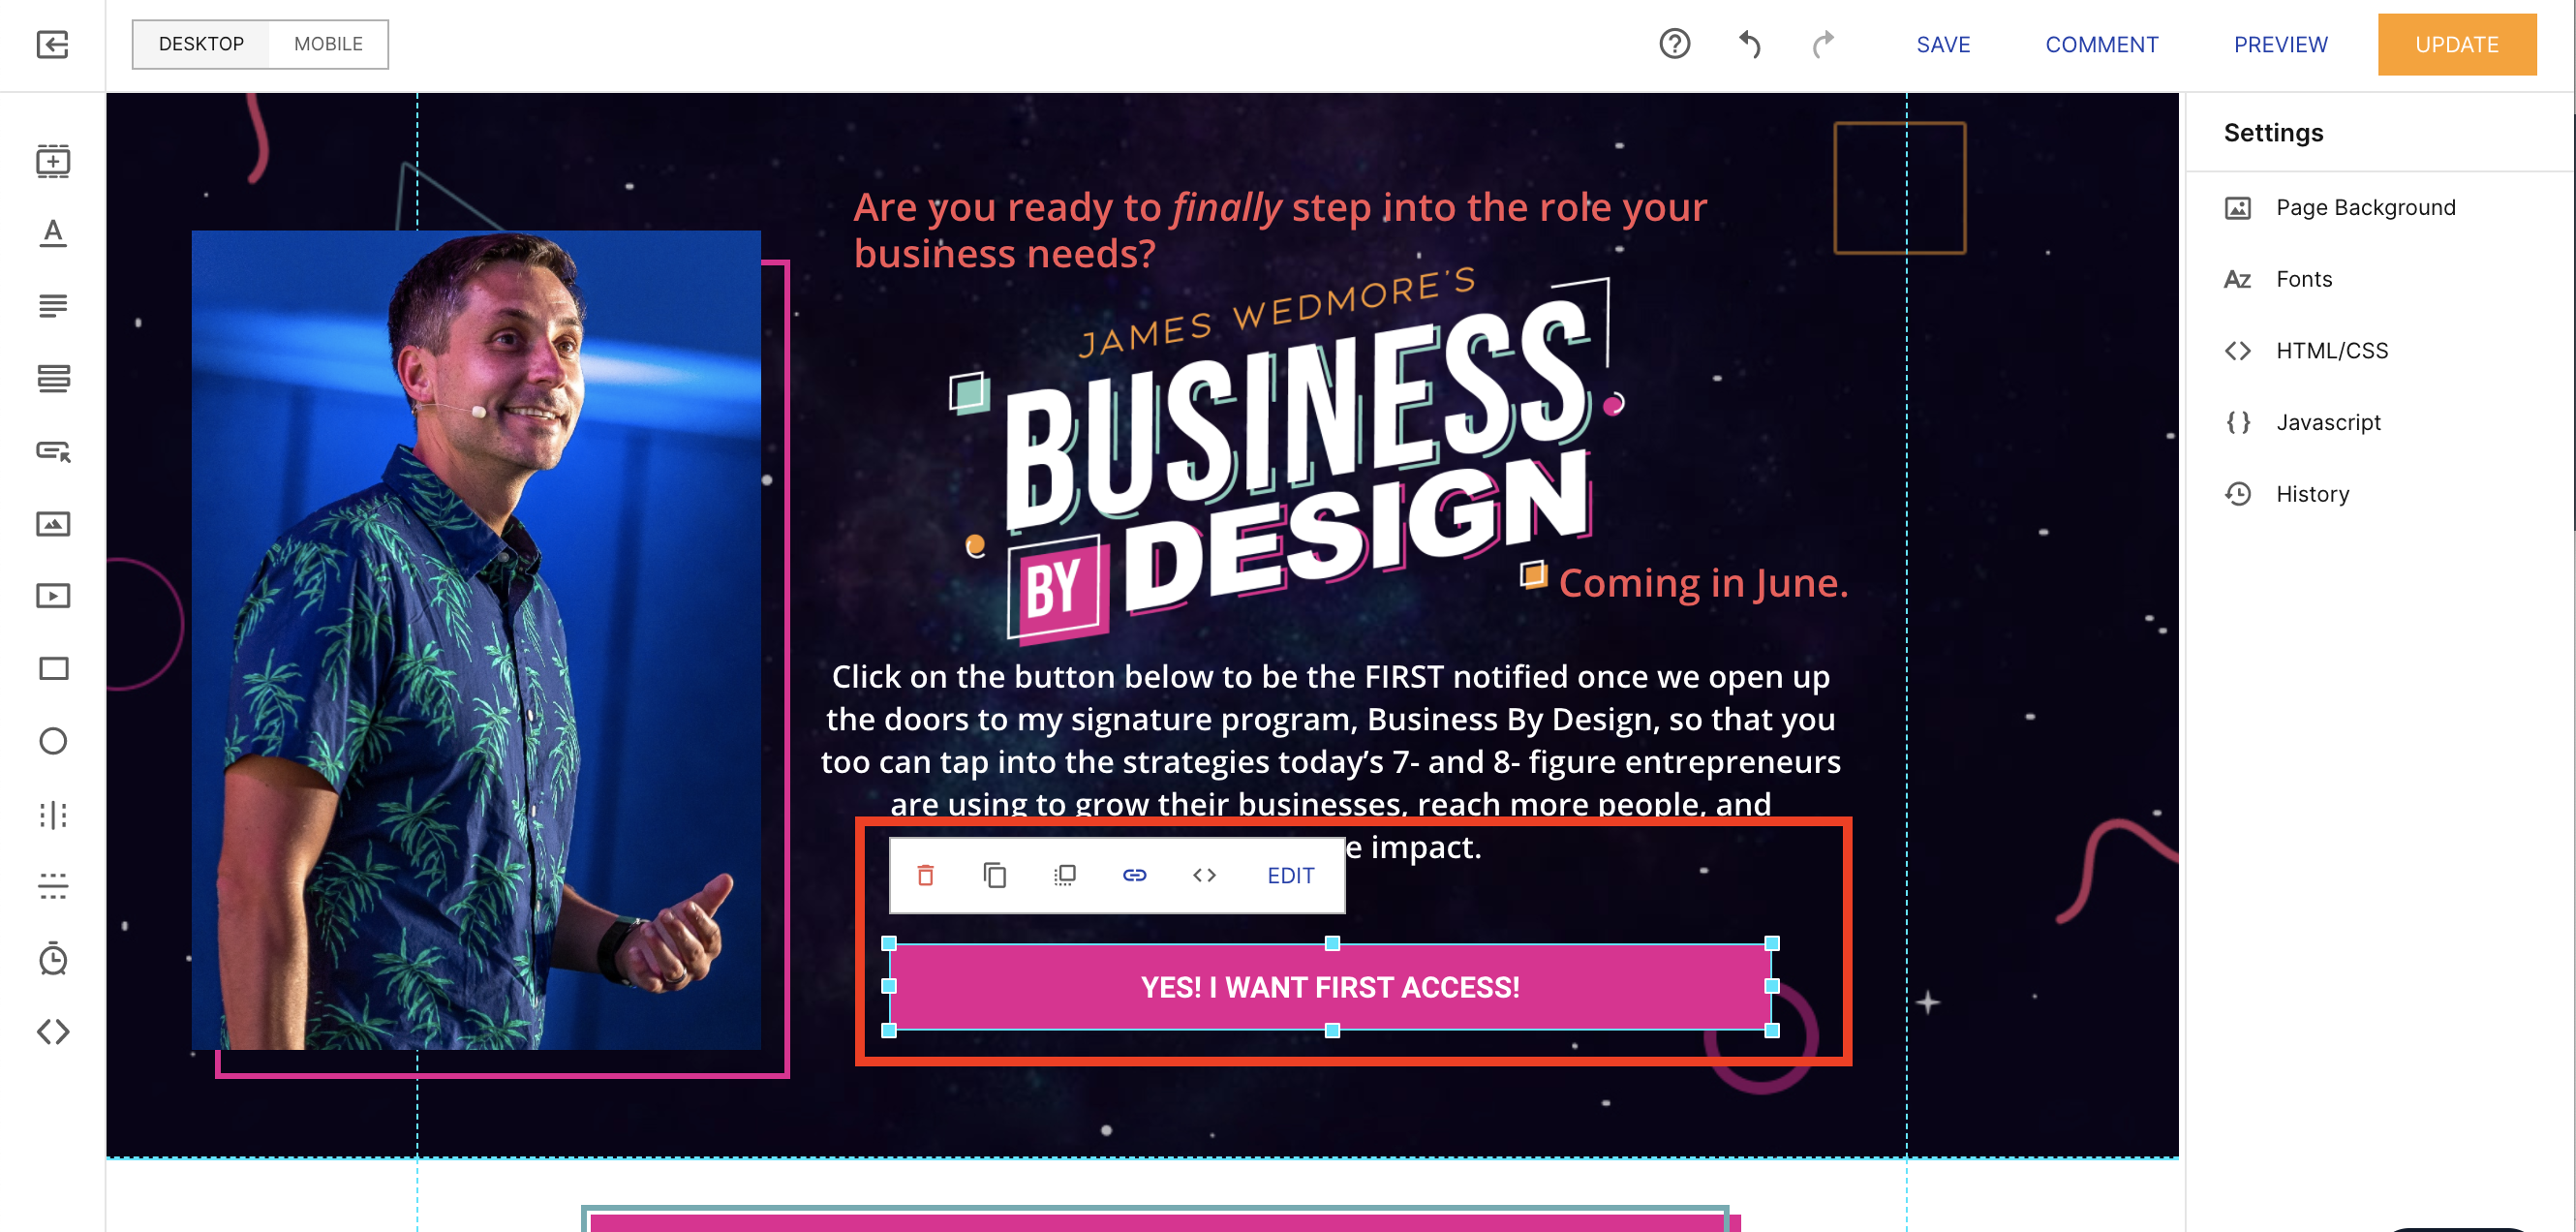
4. Click the Call To Action Button to Open Editing
Every page will have a big Call To Action button. Click the button to display the editing functions. The middle icon on the edit bar will allow you to open up the link settings for your Call To Action Button.
If you want to add a new button anywhere on your waitlist page, select the 5th button from the top, on the menu bar on the far left side.
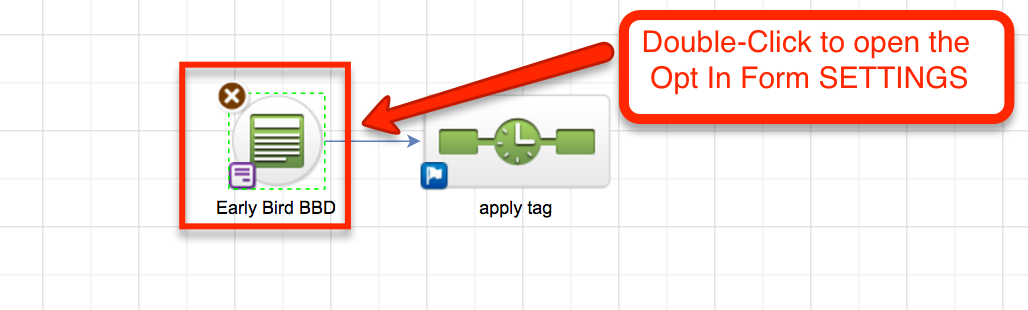
5. Edit the Opt-In Form Integration Settings
1. After clicking on your CTA button, select the link icon in the middle, then select "Pop Out"
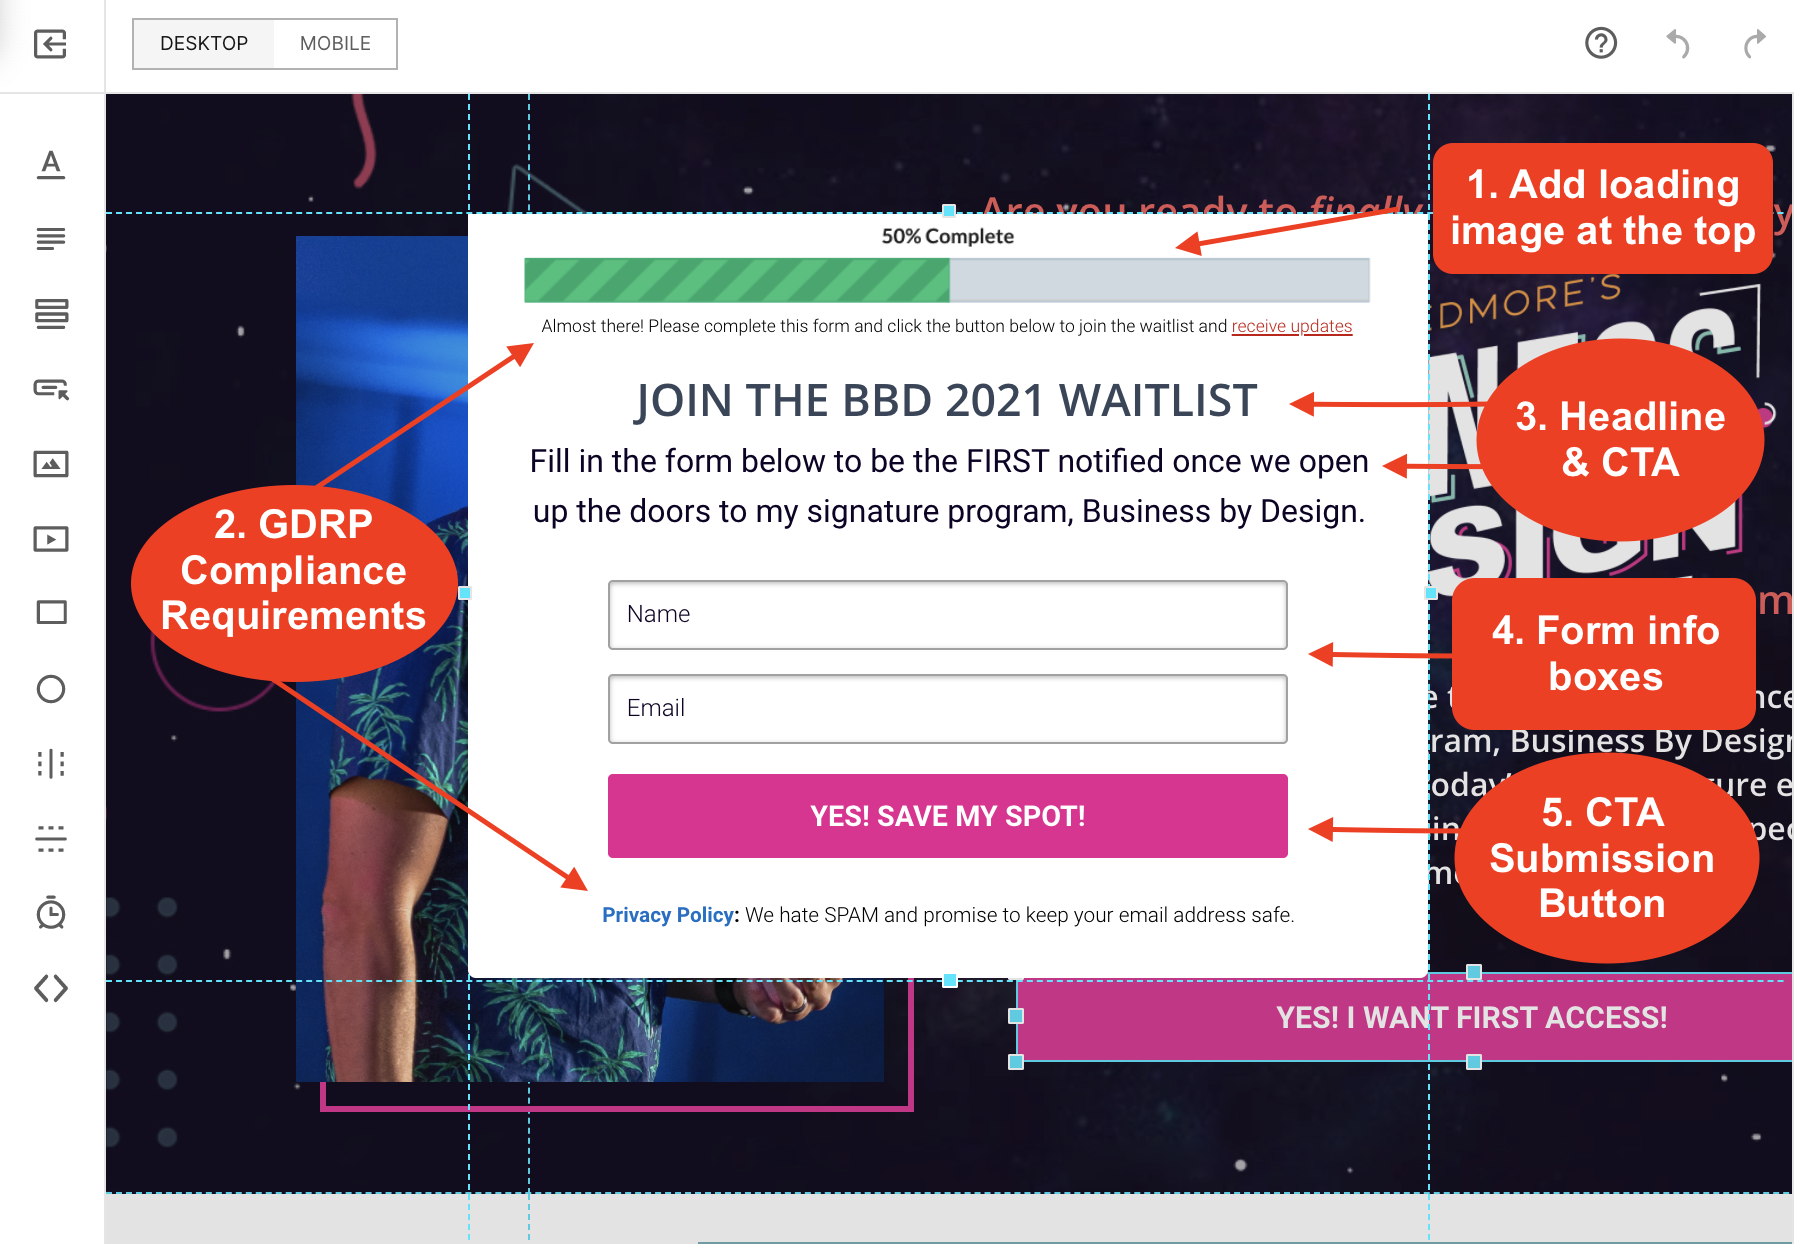
5.2. Edit your pop-up form.
We recommend having some sort of "loading" or "50% complete" image at the top.
Your pop-up form will need to include a few essential ingredients...
- GDRP compliance statements. (Please be sure to do your own research and consult with a law professional to ensure your opt-in pages are meeting General Data Protection Regulation rules)
- A headline that tells the person exactly what they are opting in for along with another clear Call To Action.
- A form section for them to enter their name and email address.
- A Submission button.
6. Check and Adjust Mobile Formatting
On the top left you will see "Desktop/Mobile". Selecting either one will let you toggle between what each view looks like.
YOU MUST ALWAYS CHECK MOBILE FORMATTING!
Many of your customers will be opting into your waitlist from a mobile devise, which is why it is so important for mobile formatting.
7. Save and Publish both Mobile and Desktop Versions
2. Integrate With Your Email Marketing Software
We use ActiveCampaign for our Email Marketing Software, so the example below outlines that process.
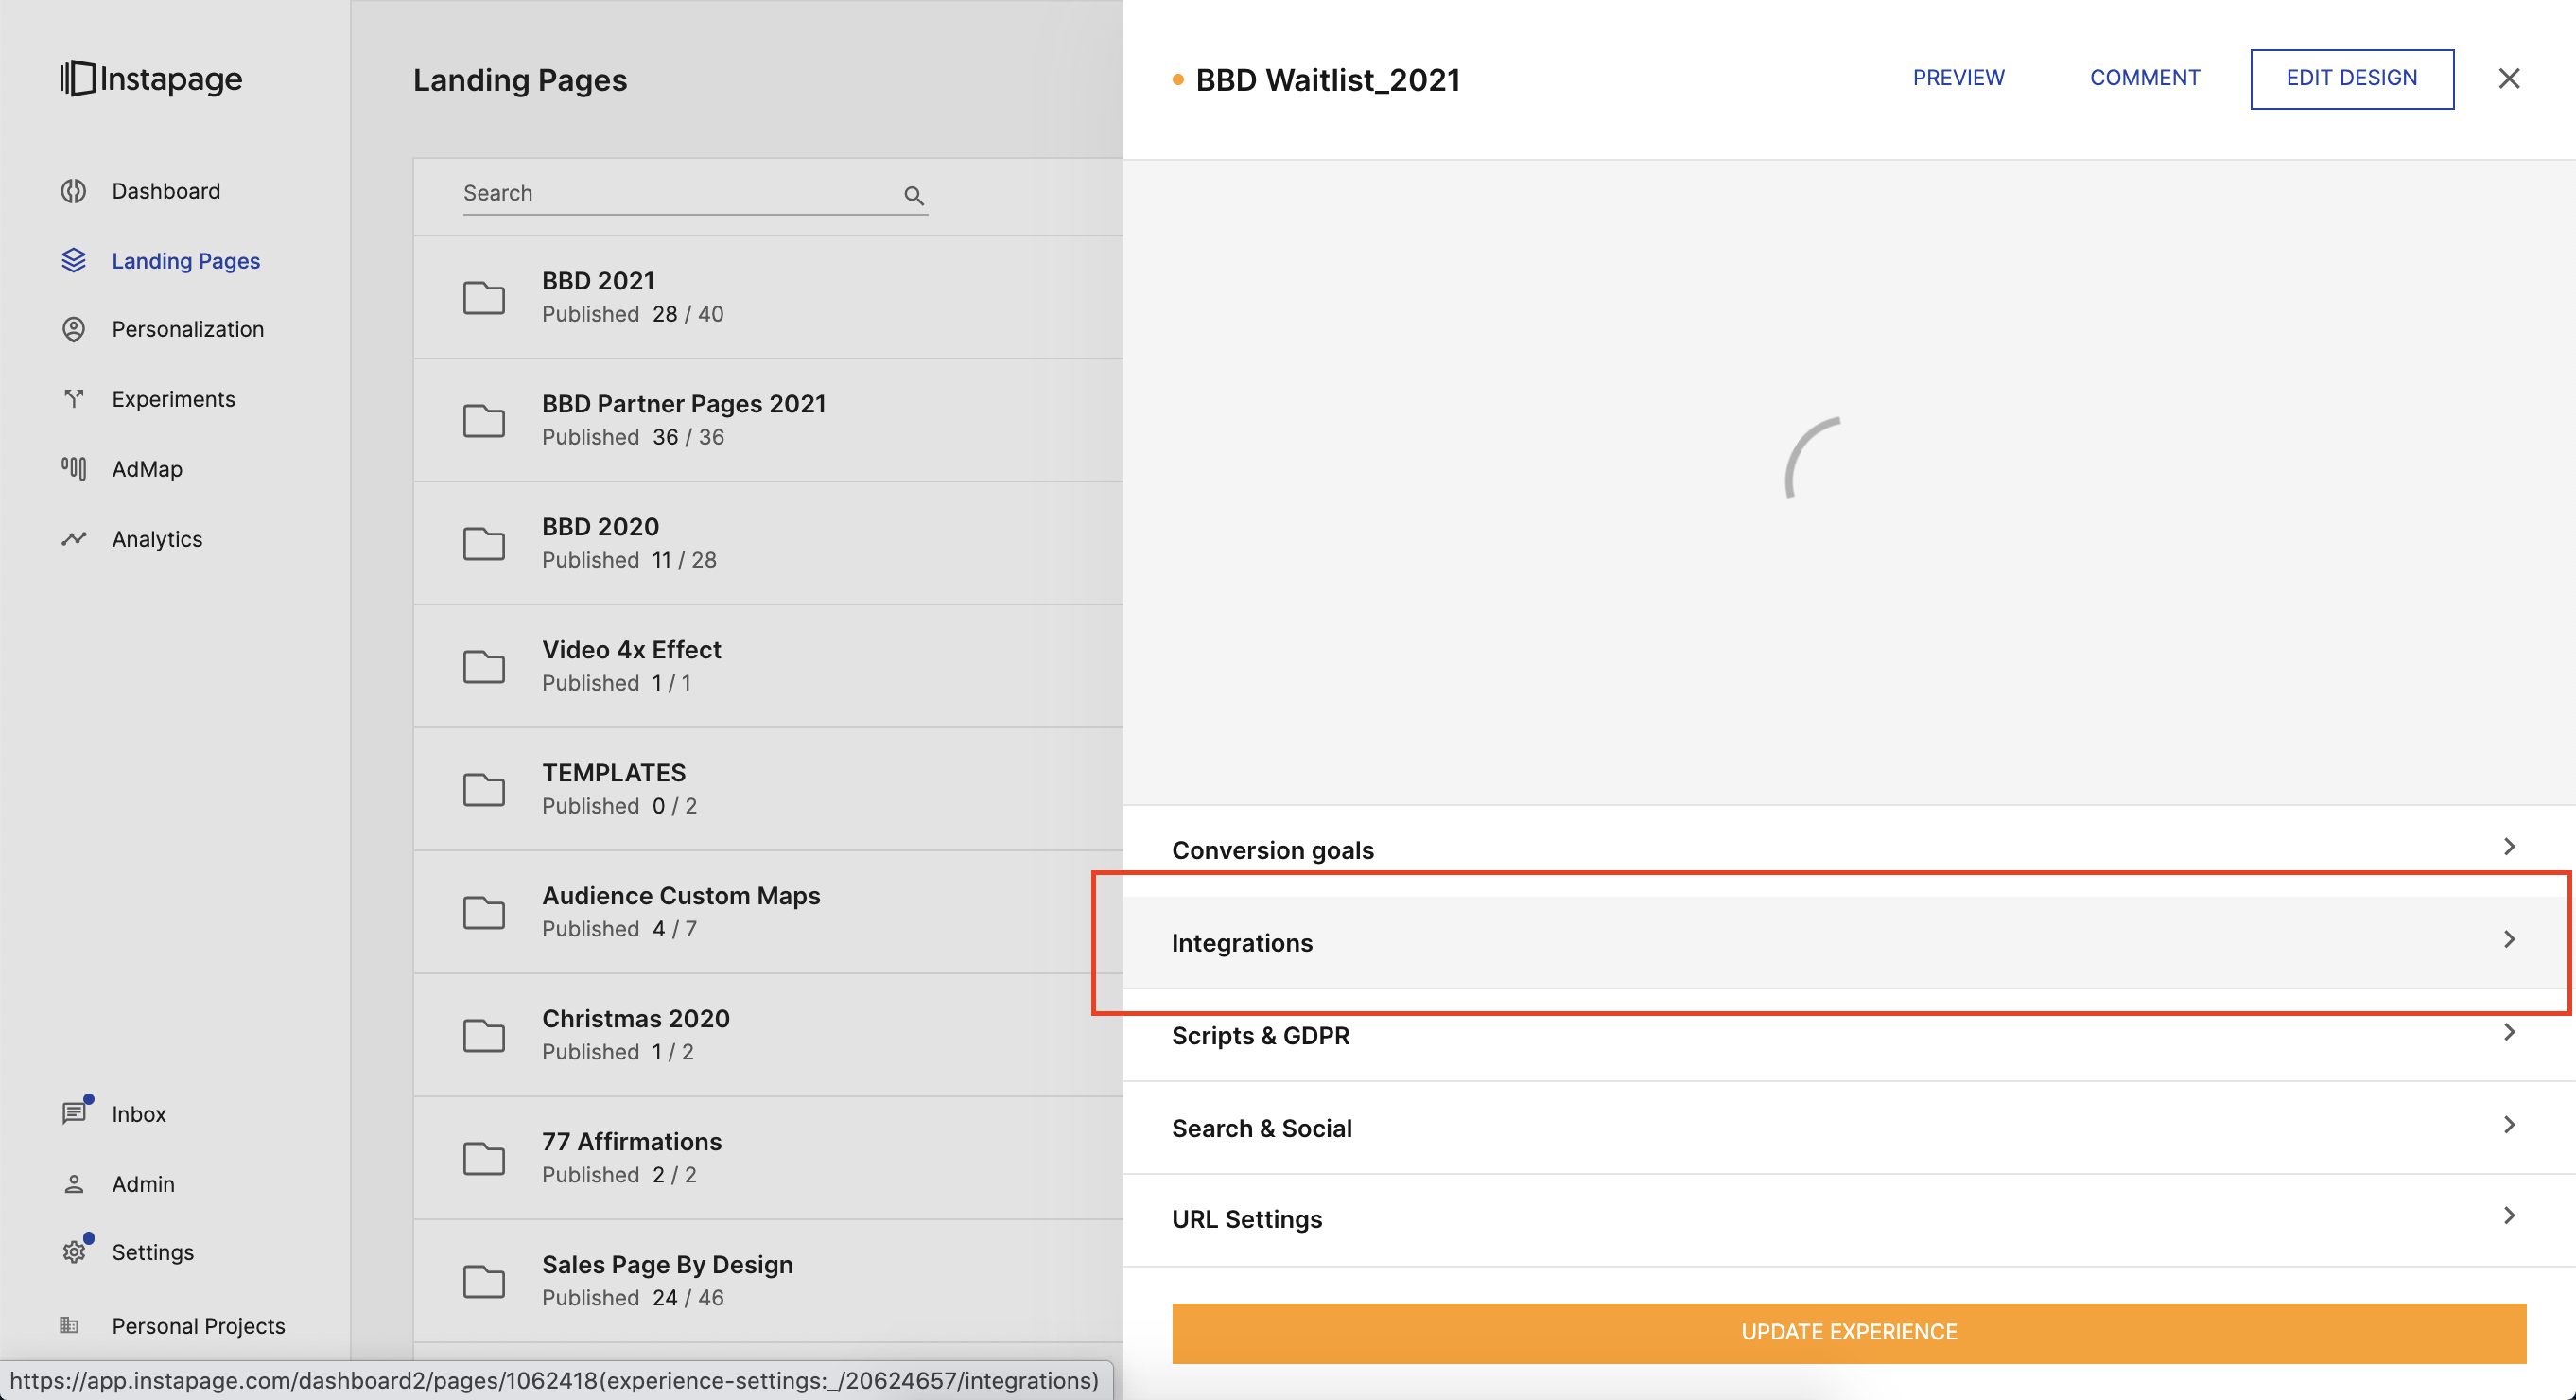
1. Select Integration Settings for the landing page you want to integrate.
To change the integration settings on your landing page, you will exit the "builder page" and return to the home page with all your landing pages.
Select the landing page you were working on, then select "integrations".
1. Integrate Your Page with ActiveCampaign & Your Pop-up Opt-in Form.
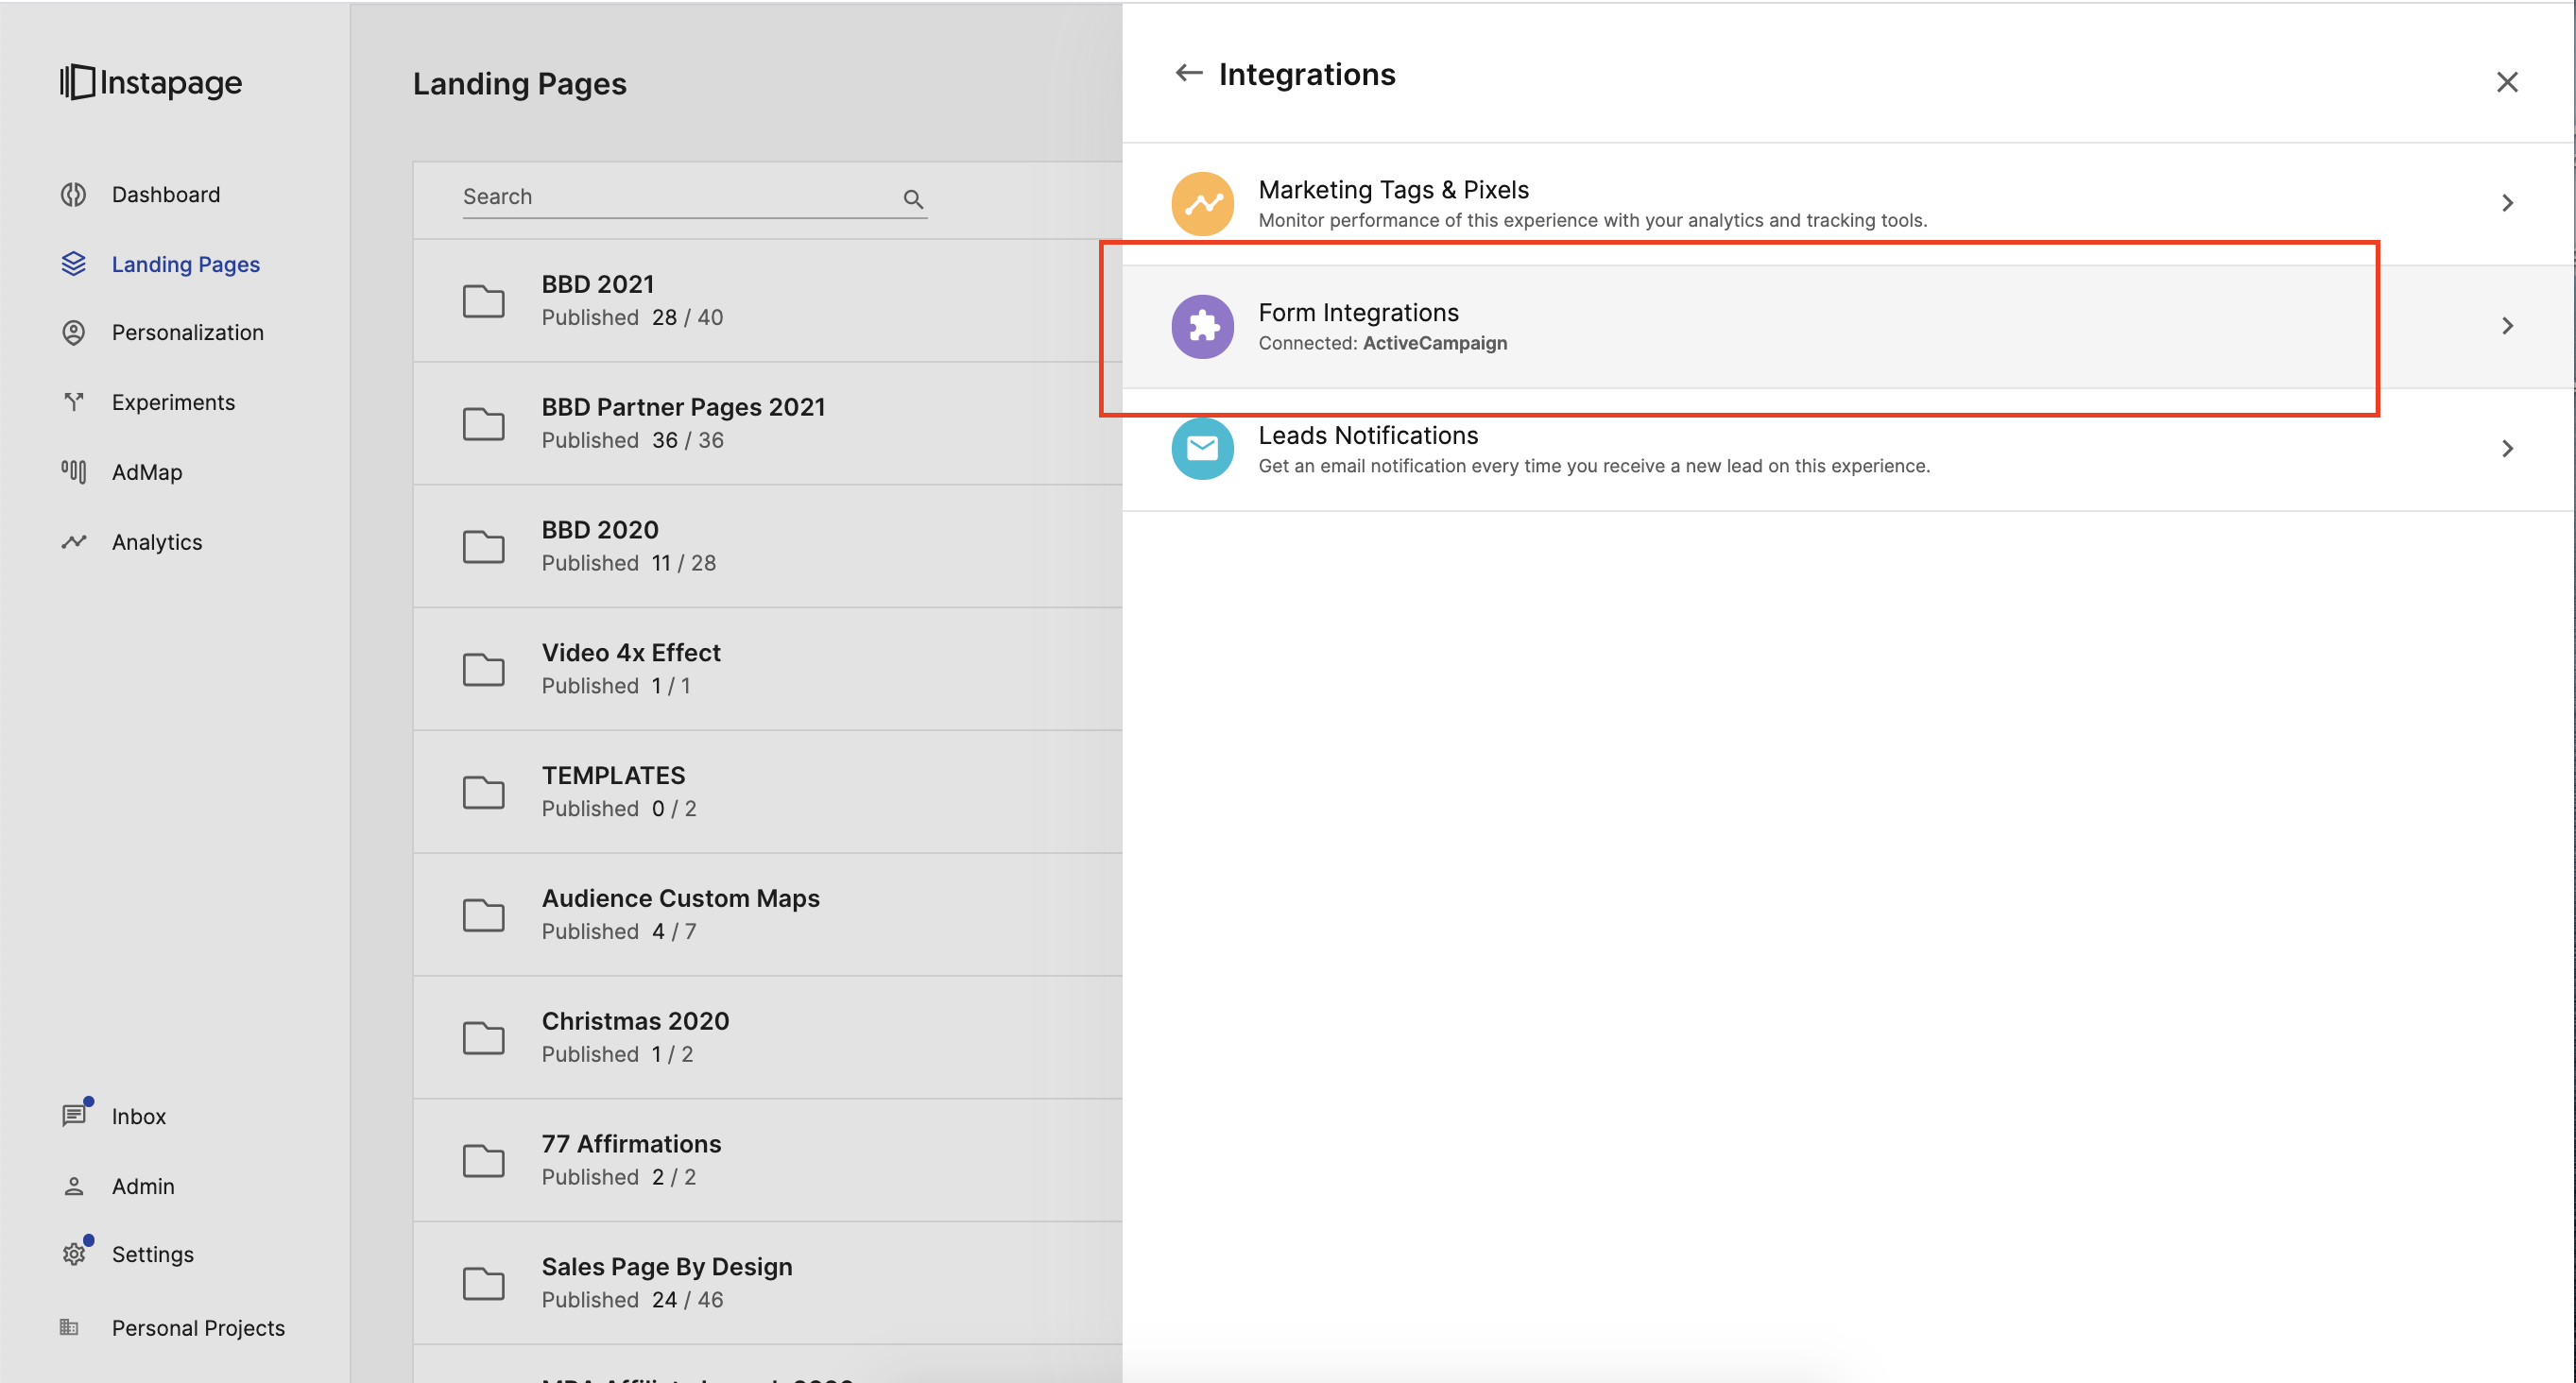
1. Select Form Integrations
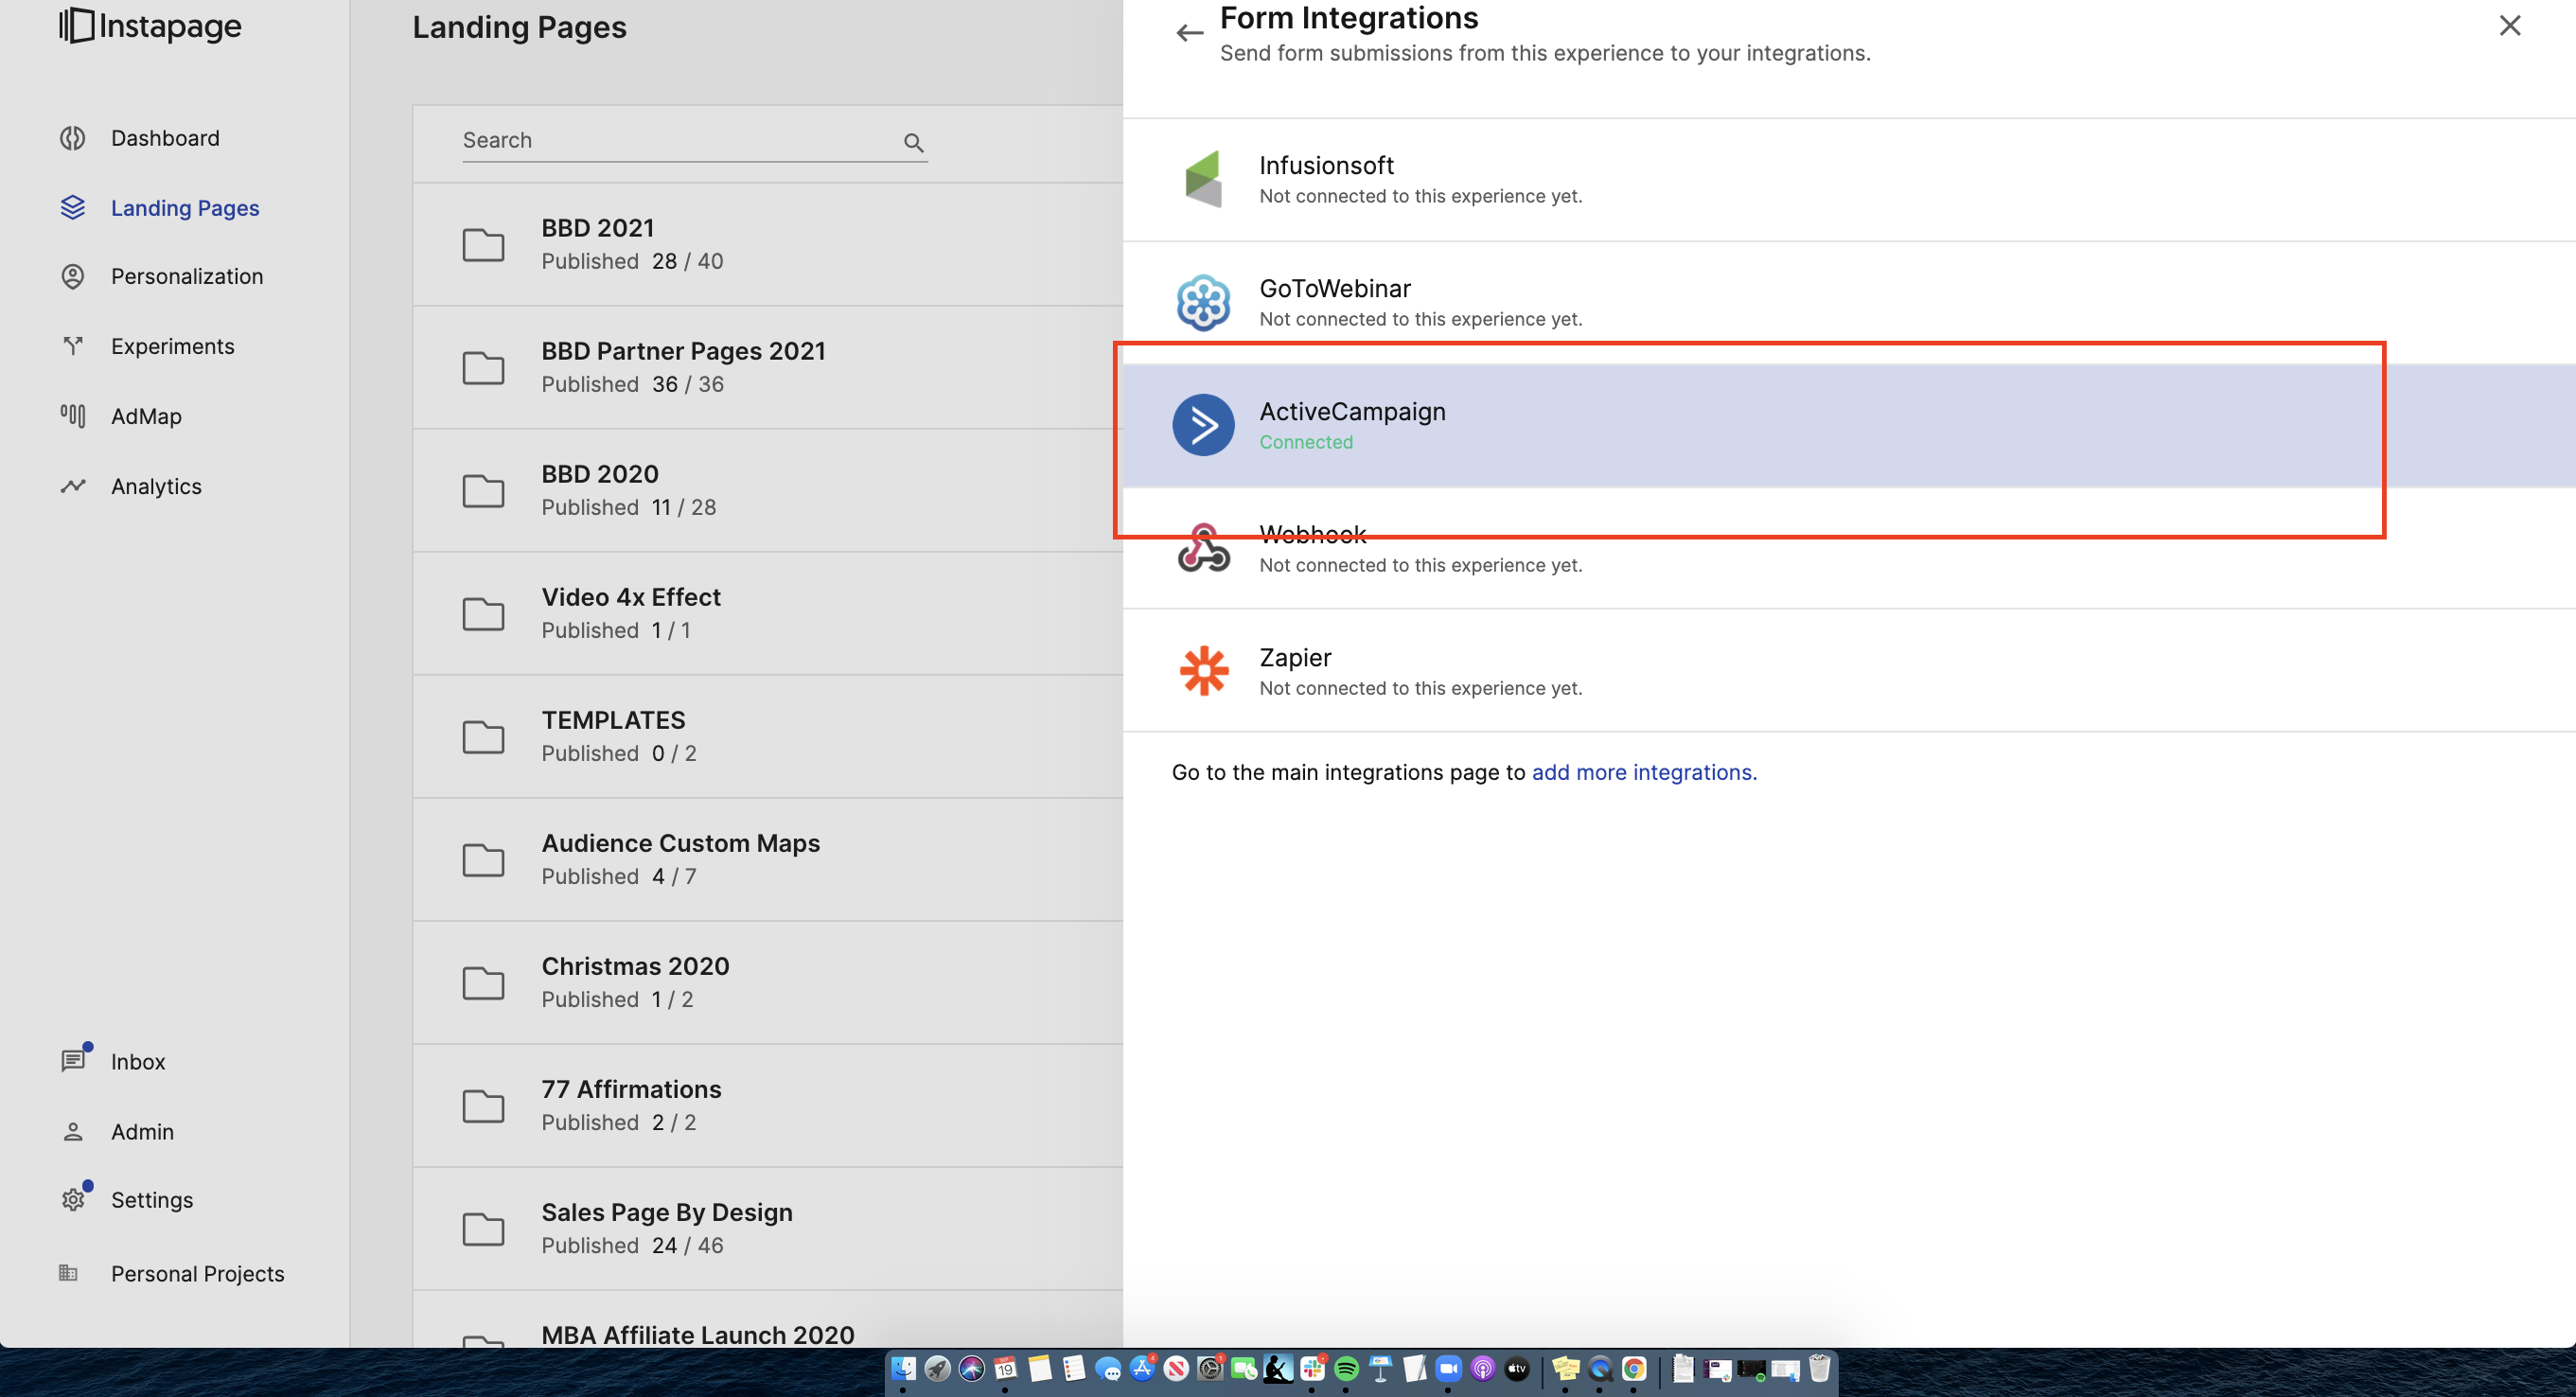
2. Select ActiveCampaign from the list.
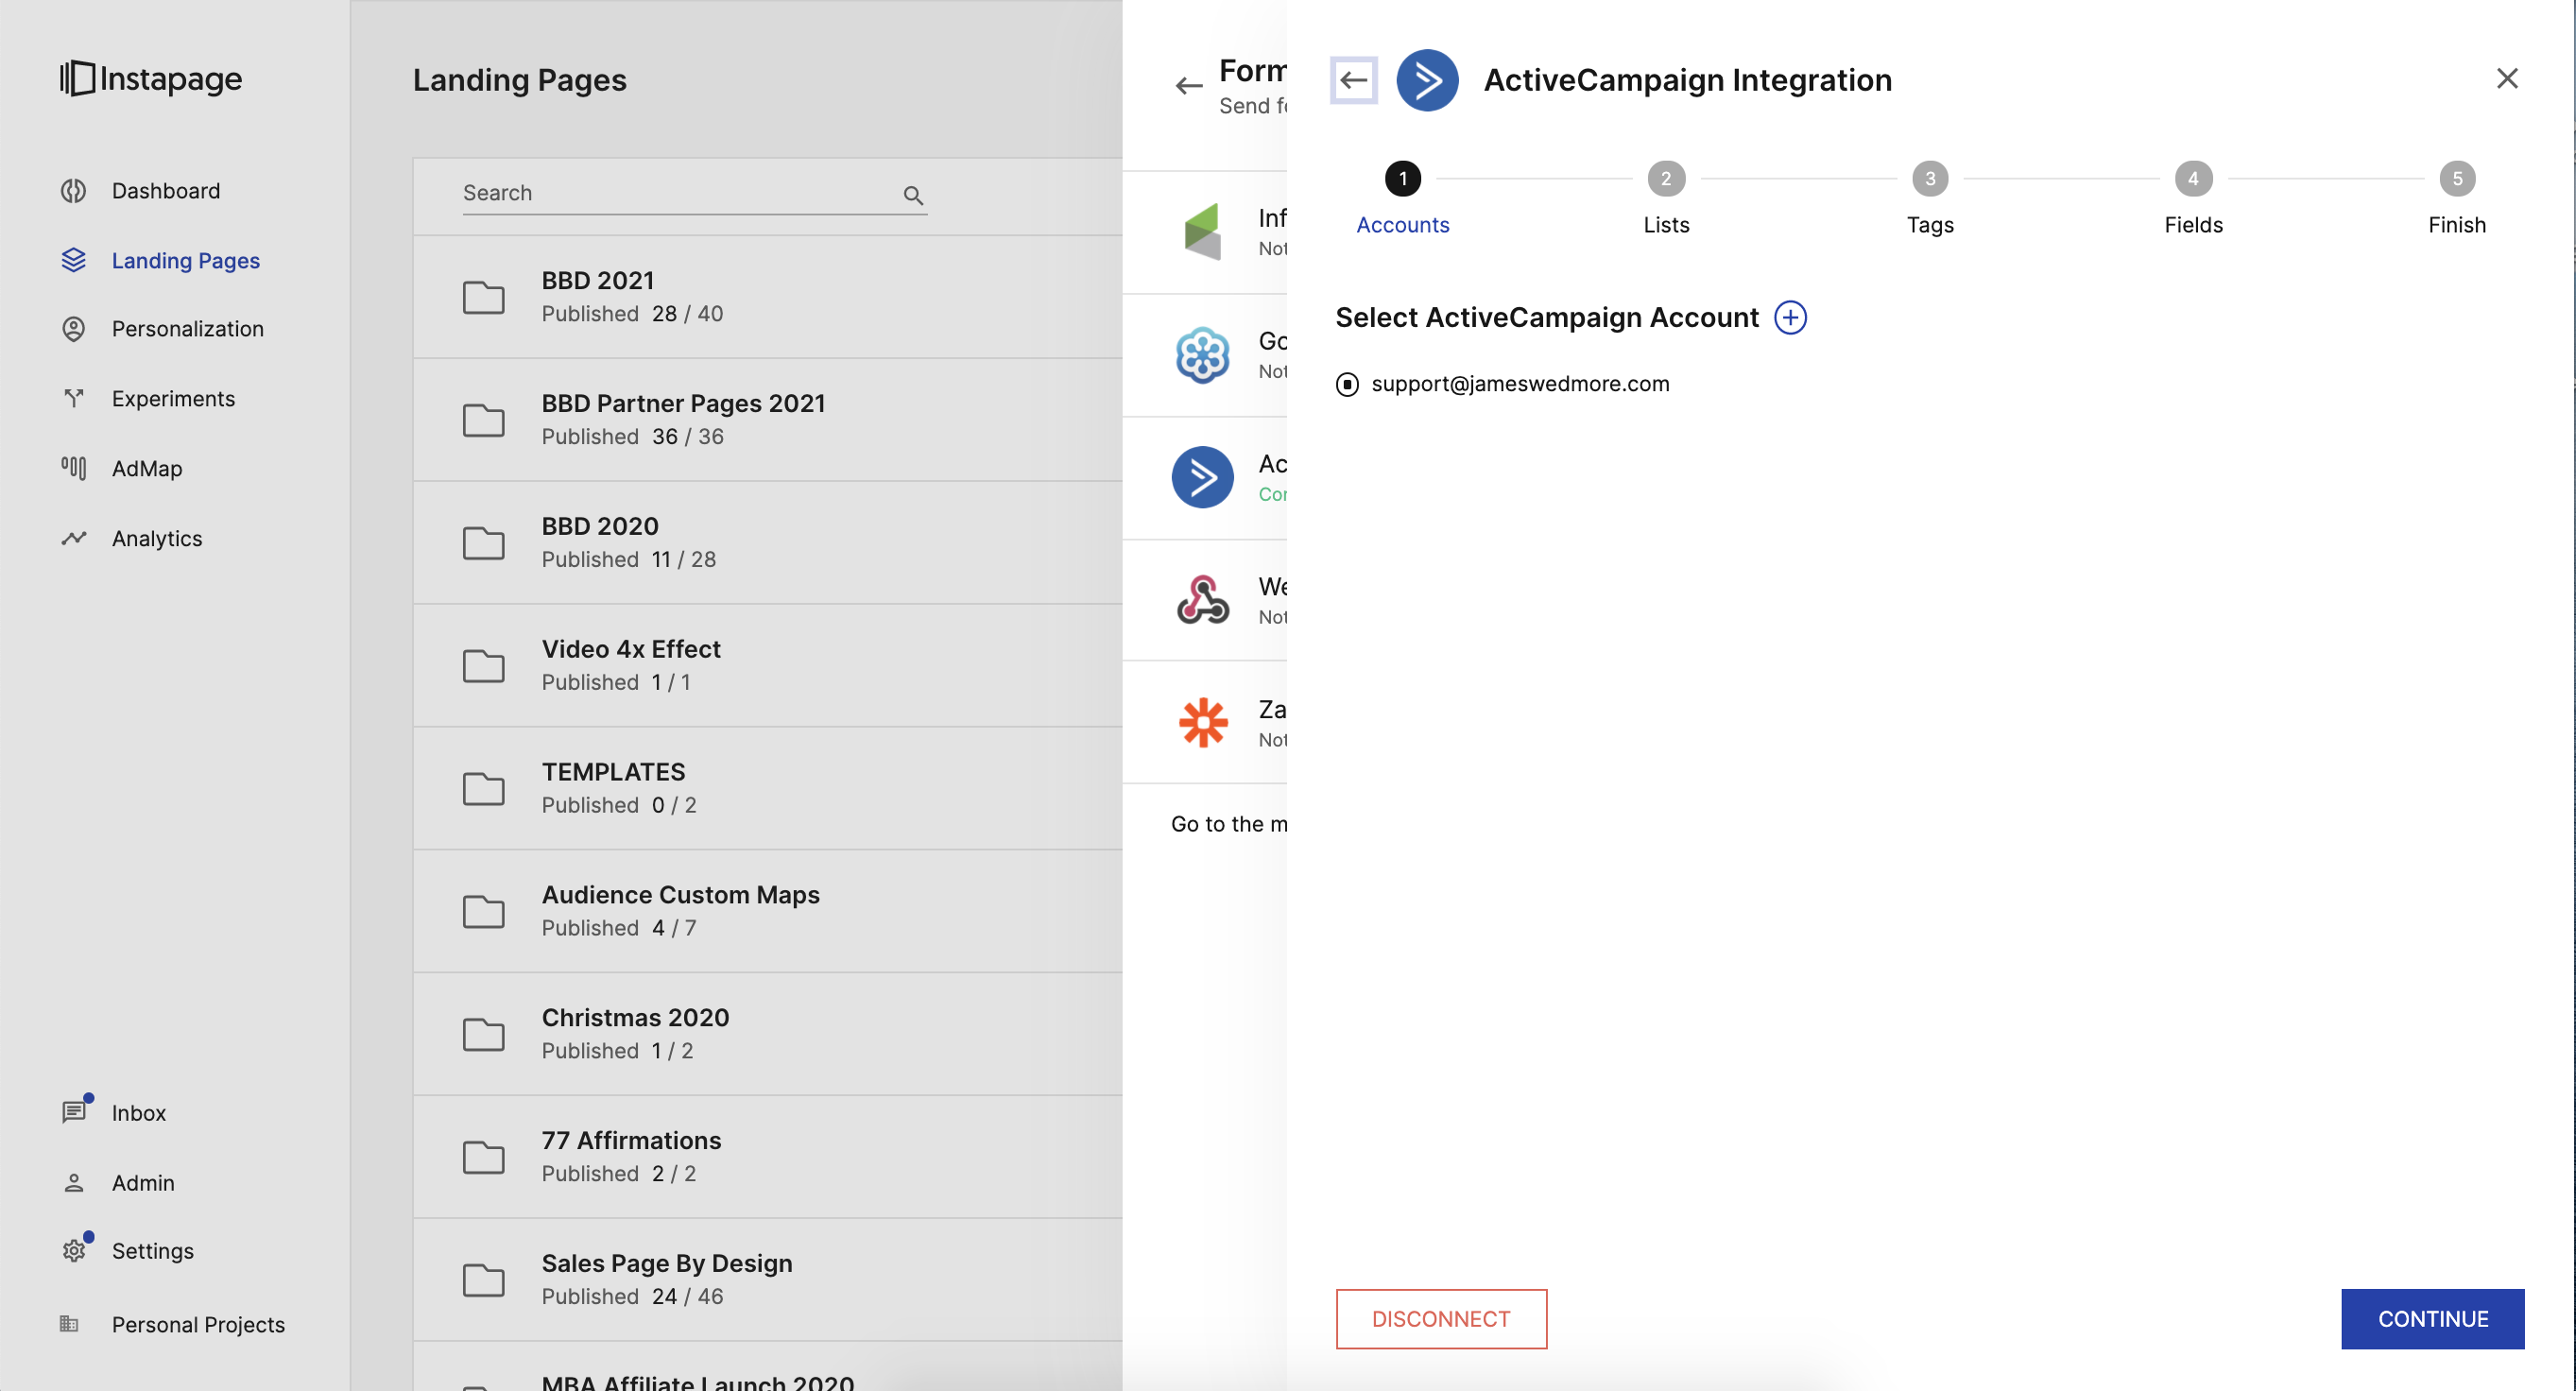
3. Select or Add your ActiveCampaign account.
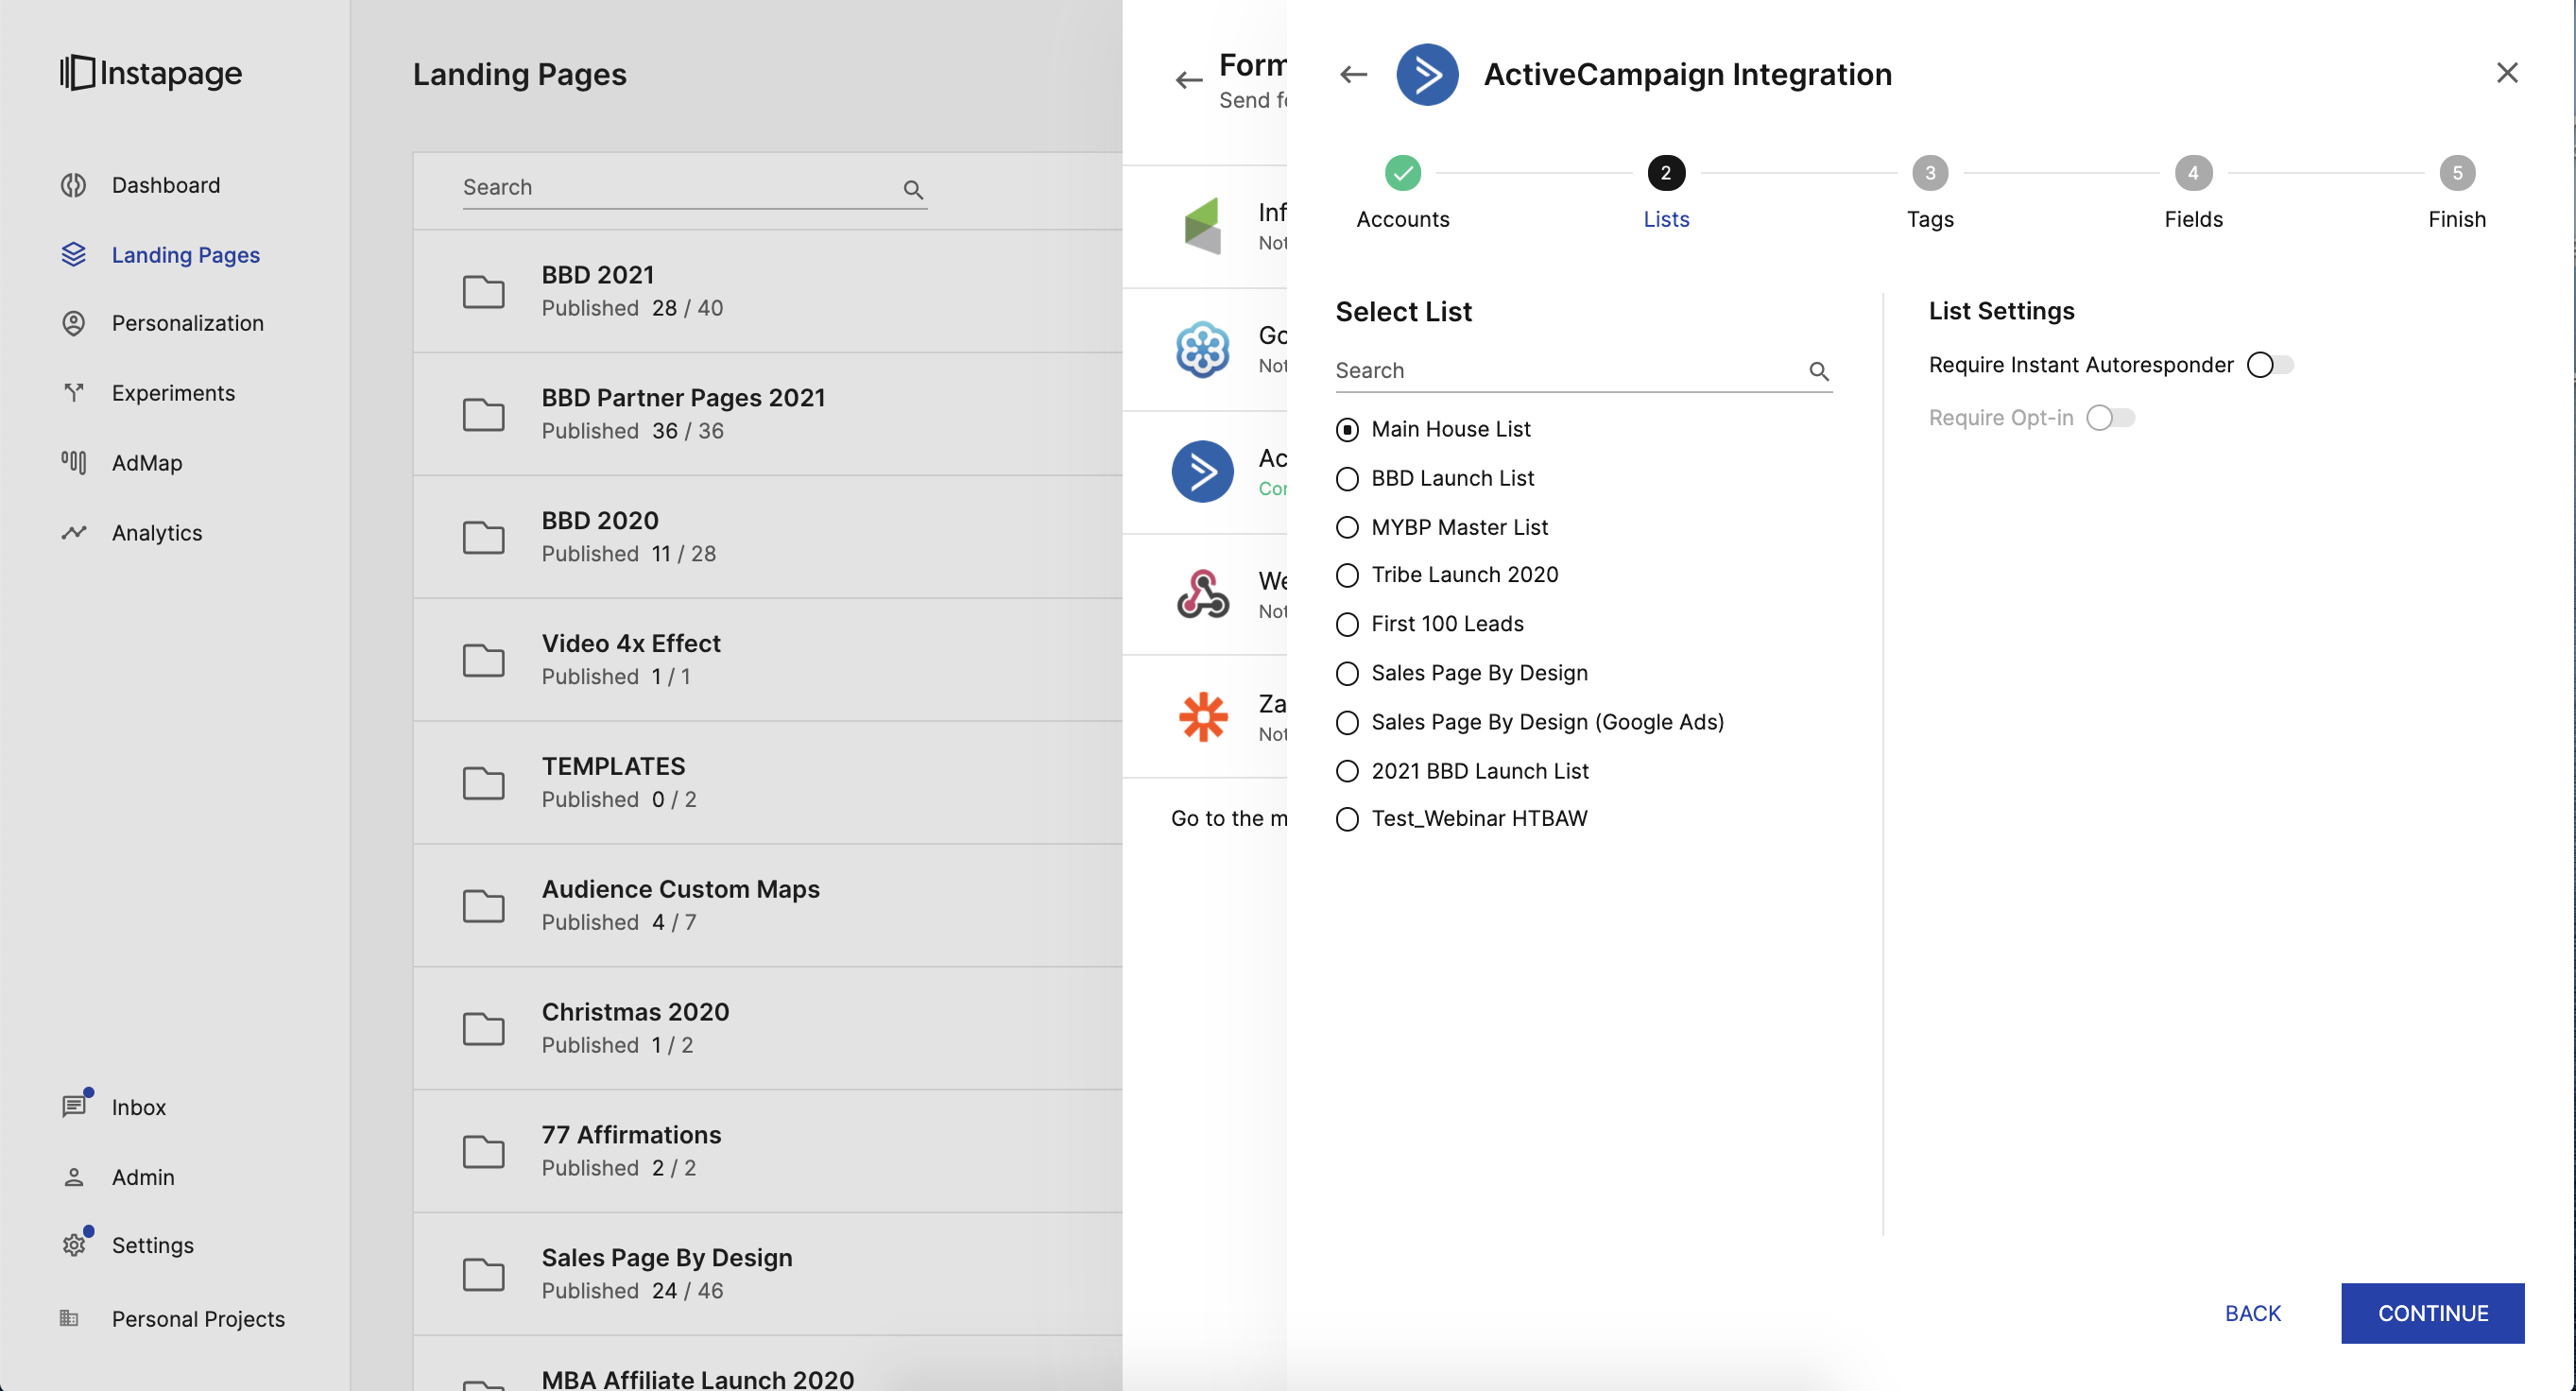
4. Select the list you want the new contact to be added to. For example, we add our new waitlist members to our main house list.
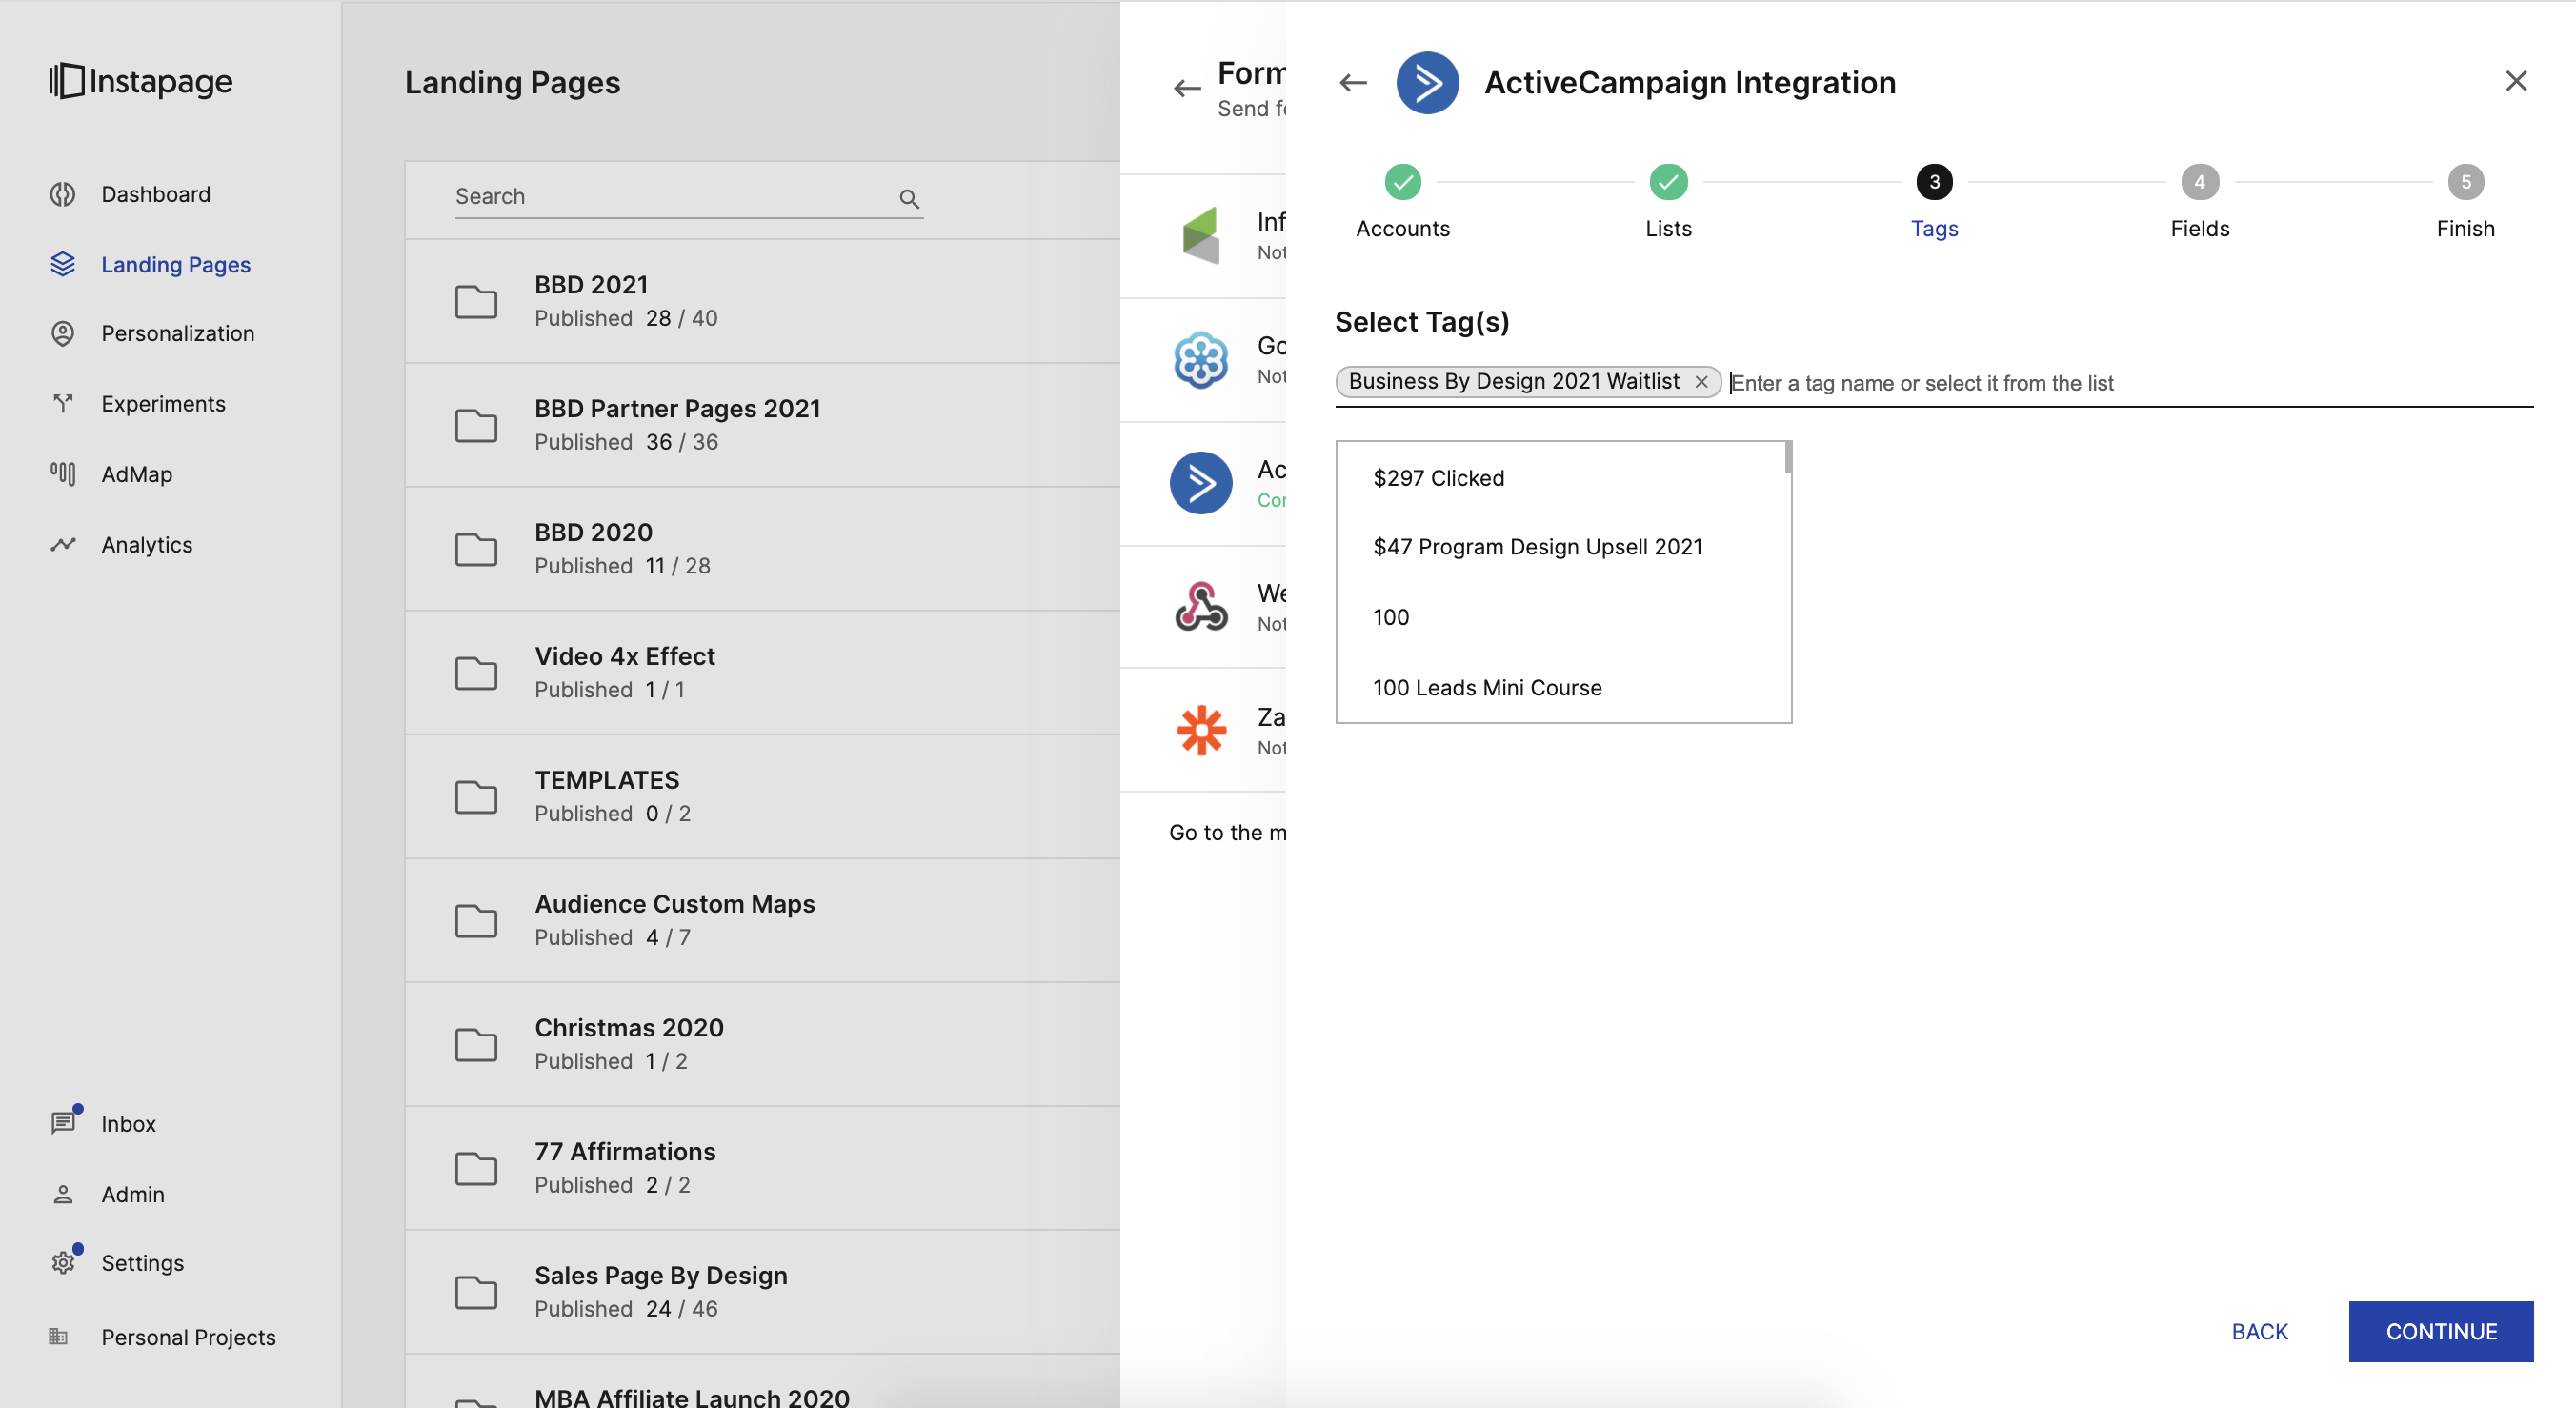
5. Add the tag you want to be applied when someone joins the waitlist. Note: The tag must be created inside of ActiveCampaign first. See
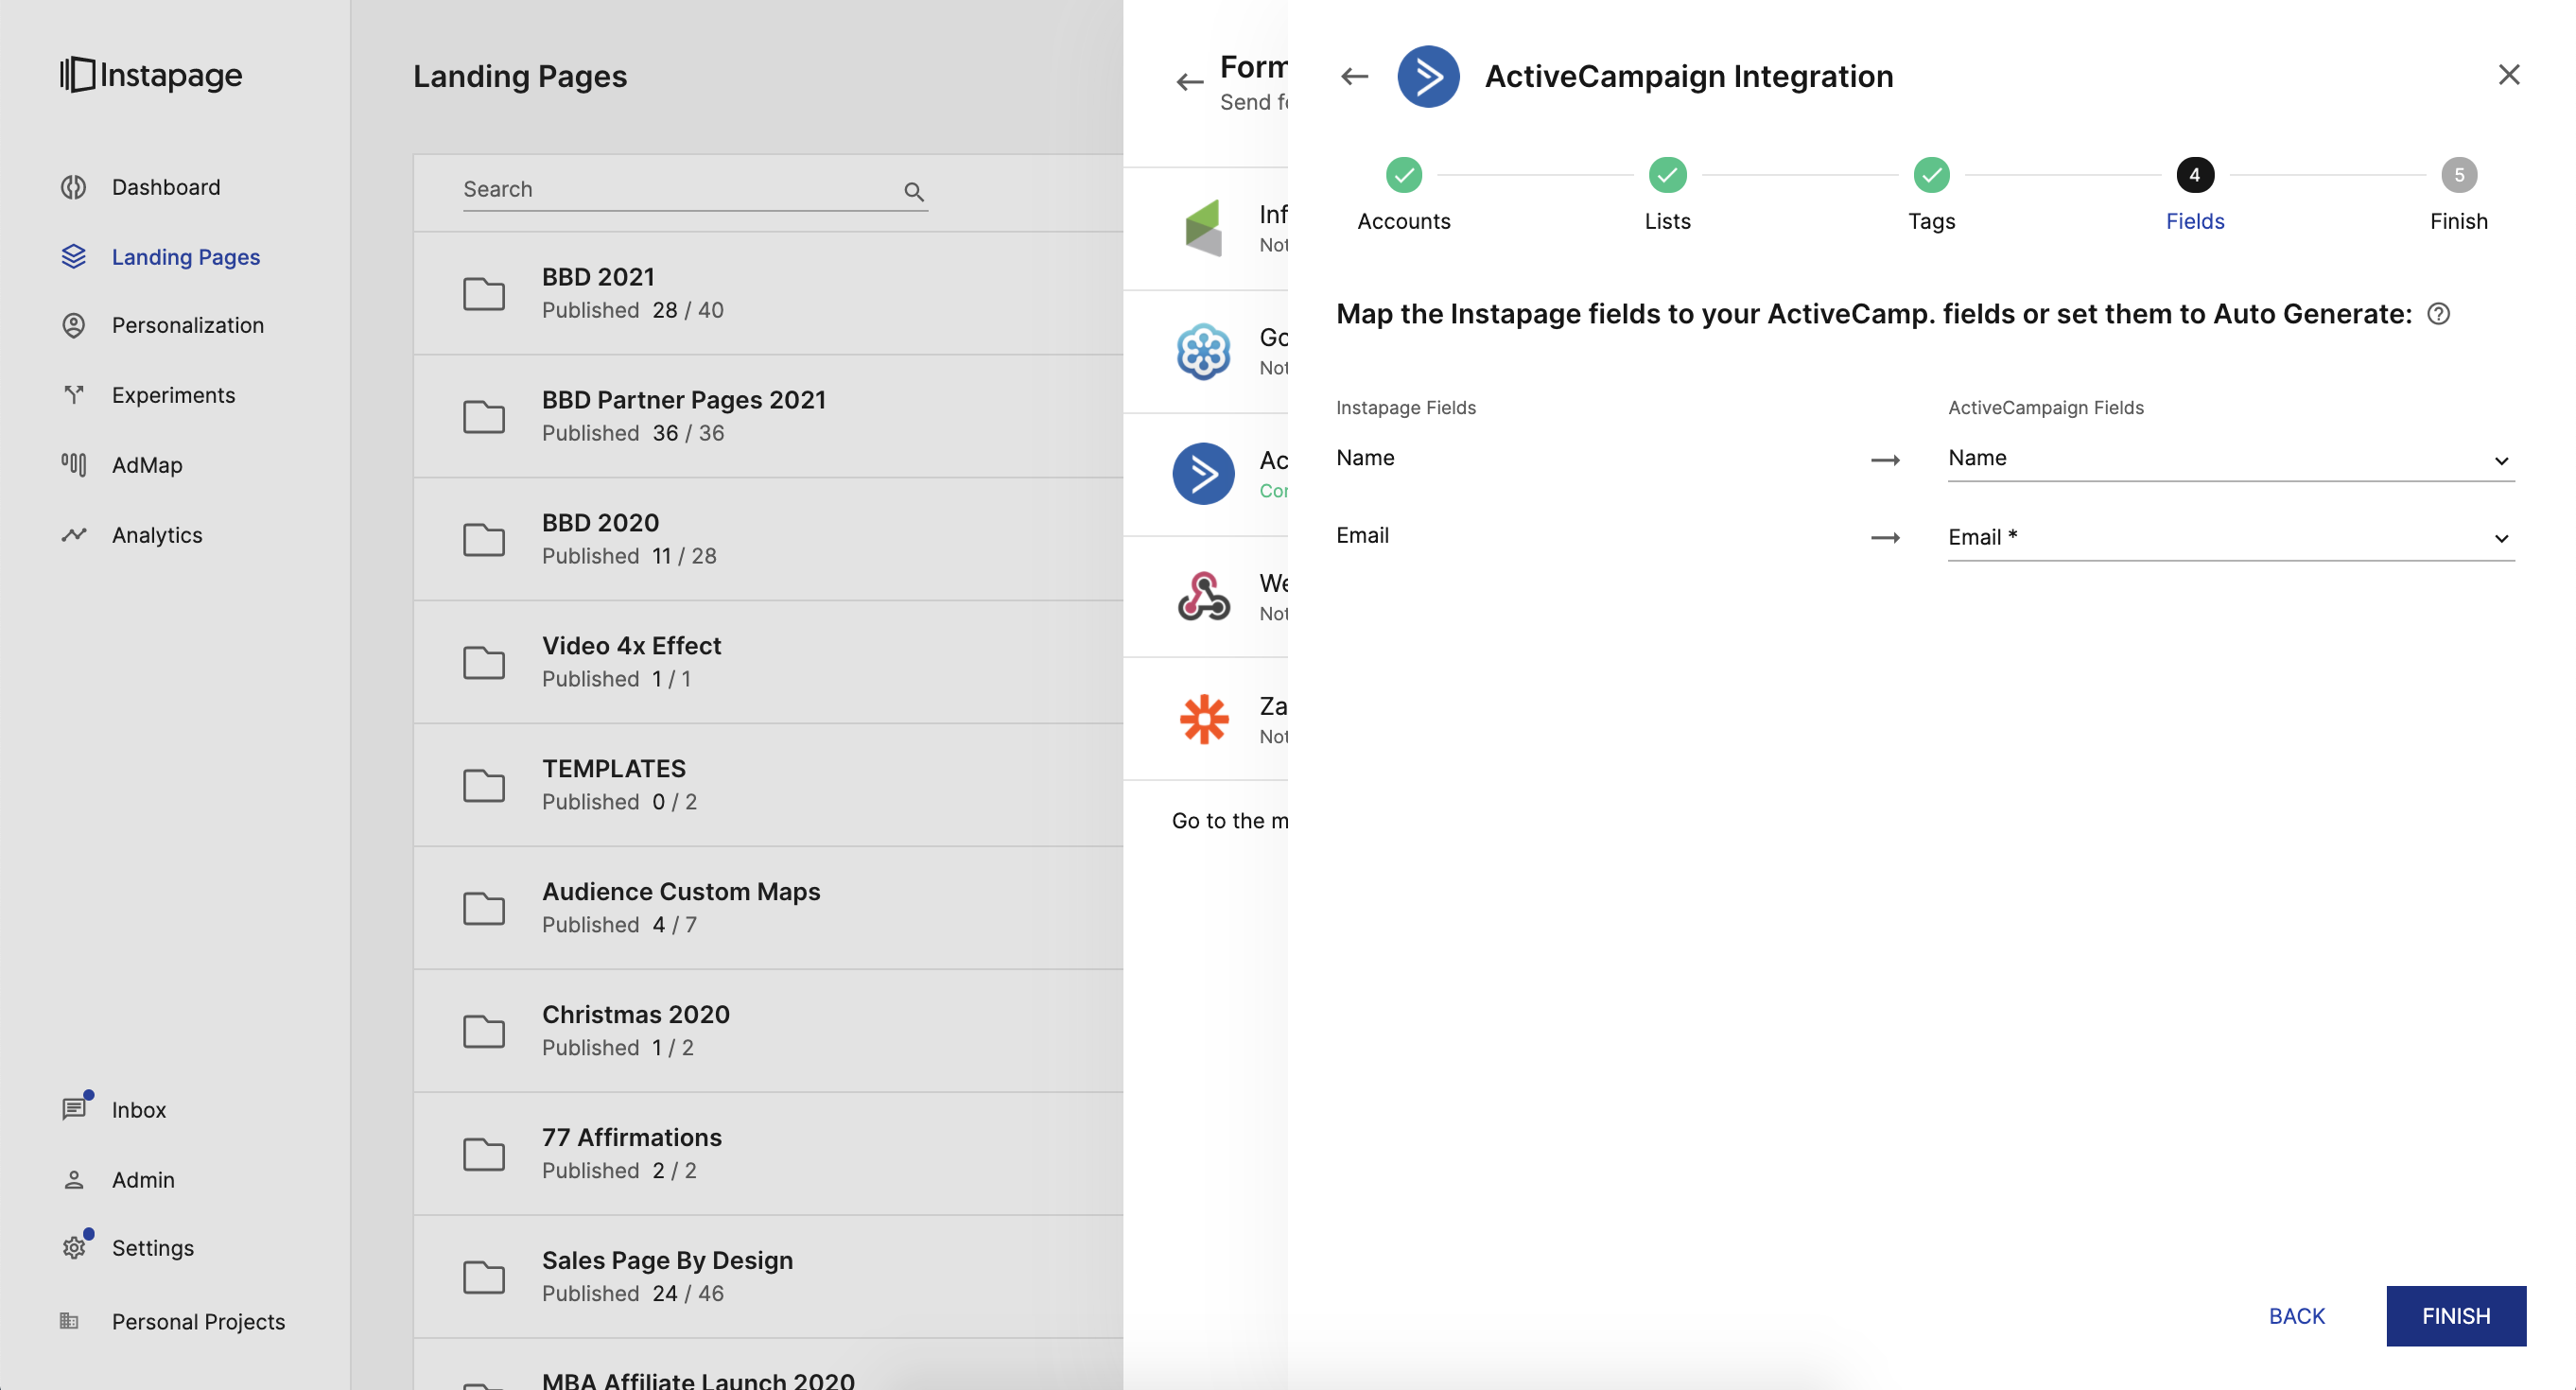
6. Ensure the fields on the form will be transferred correctly into ActiveCampaign.
Below are images of each step to integrate your waitlist opt-in form with ActiveCampaign.
Step 1.
Step 2.
Step 3.
Step 4.
Step .
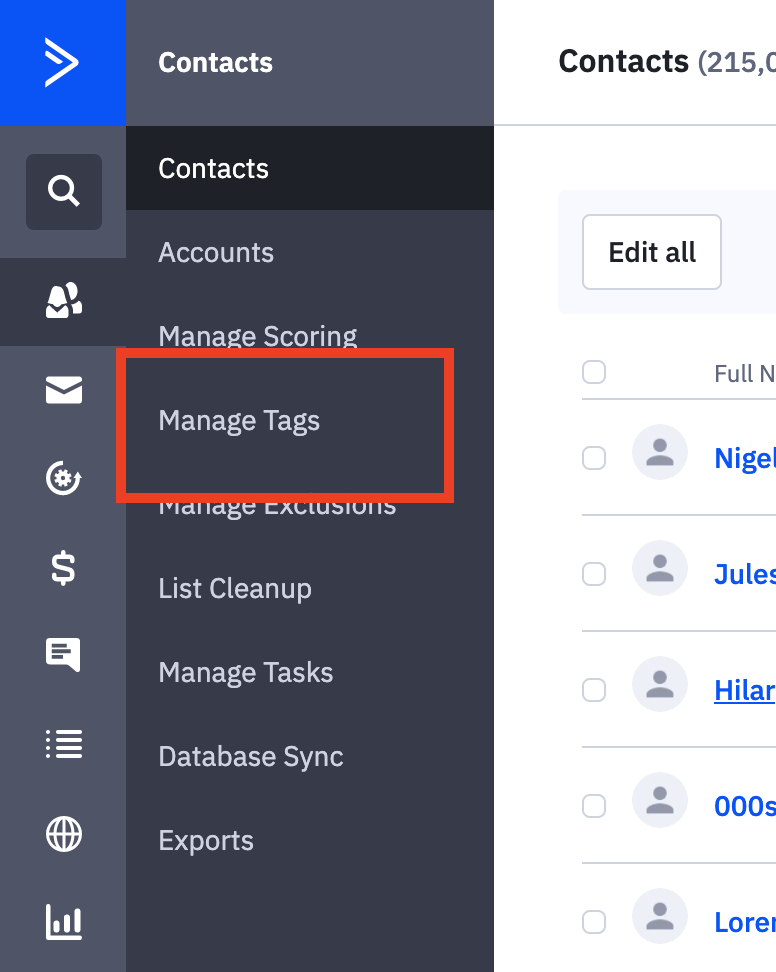
BONUS: How To Create a Tag in ActiveCampaign in order to complete Step 5.
1. Select Contacts
2. Select Manage Tags
3. Type the Tag You Want to Create
4. Click Add Tags
Step 7.
3. Publish Your Waitlist Page
1. Publish Your Waitlist
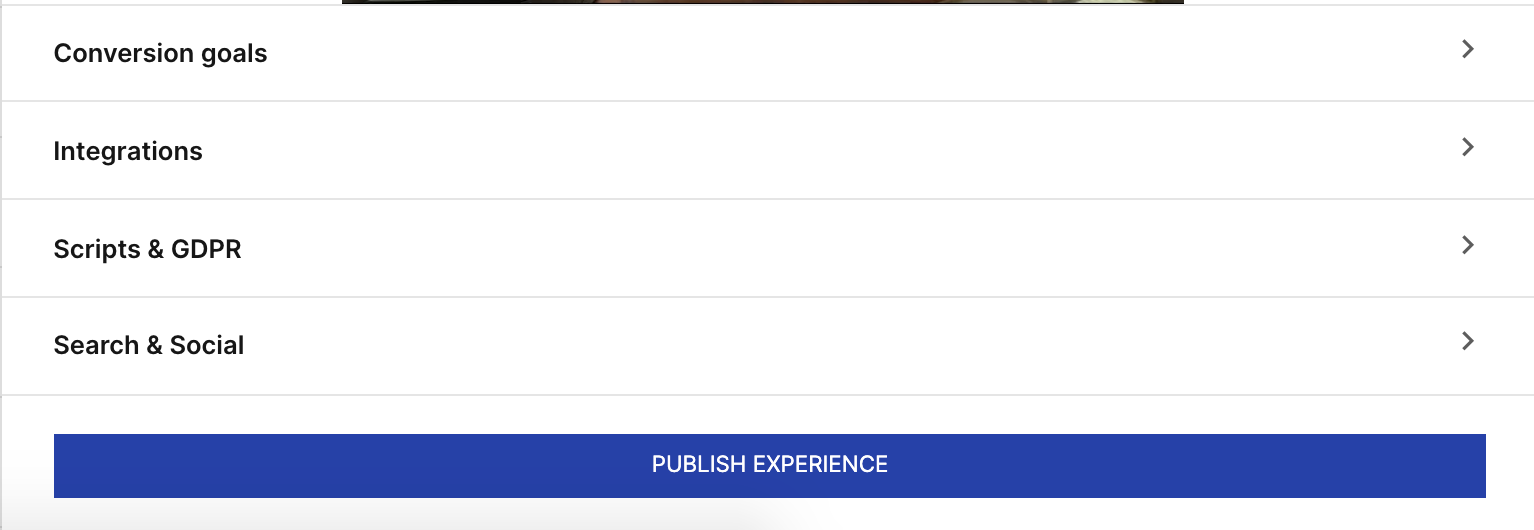
Once you are happy with all the edits you have made, be sure to hit SAVE at the top of the editing page. Now you are ready to publish the page!
In the same settings area of your page, you will select the "Publish Experience" button.
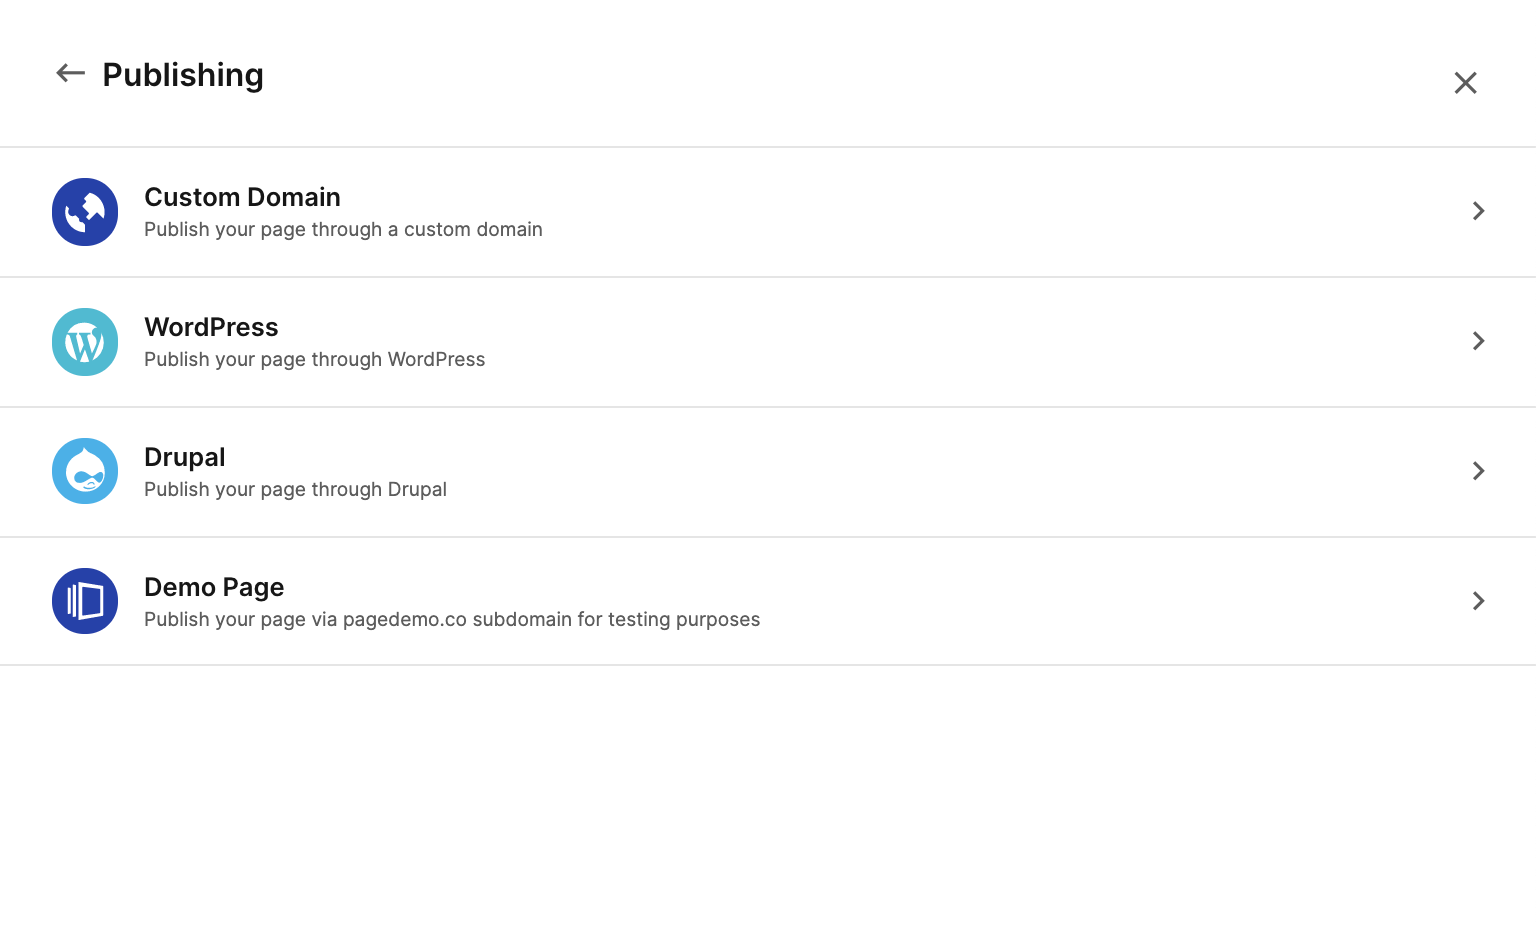
2. Select the Domain You Want For Your Waitlist
If you have a custom domain, you can select "custom domain."
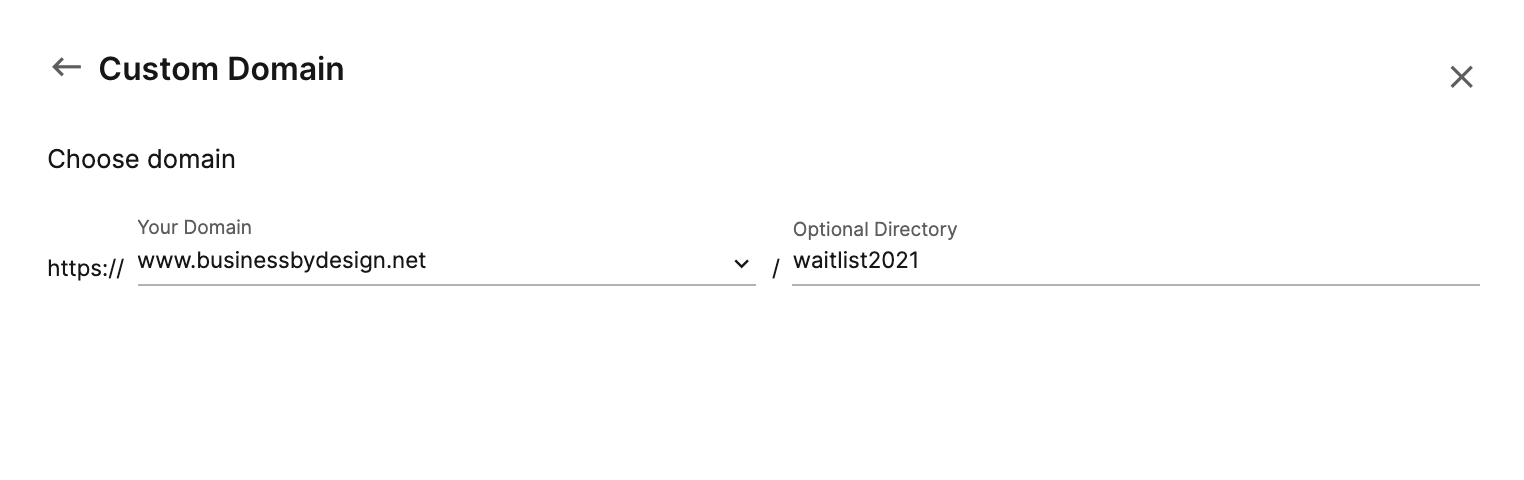
3. Customize your URL for your Waitlist
4. Create Thank You Page
Before finalizing your Waitlist Confirmation Page, you'll need to create a Thank You Page. This is the page your Opt-Ins will be directed to AFTER they submit their contact details!
2. Duplicate an Existing "Thank You Page" TEMPLATE (if you have one)
Follow the steps below to DUPLICATE the existing template.
Find the page you want to duplicate and select the three dots on the far right-hand side and select "duplicate".
Note: Do not edit or change the original template. You must DUPLICATE the page and edit the new page you create. This allows you to always have the original and prevent you from recreating the wheel each time you need a Thank You Page.
3. Make Changes to NEW Thank You Page
4. Save and Publish the Page and Integrate the Pag
Click the SAVE page to save the page and any changes, then click Publish.
You'll need to create a Page Name and URL...
The best practice is to use the name:
"Thank You-Product Waitlist"
Example:
"Thank You-BBD Waitlist"
5. Integrate Thank You Page With ActiveCampaign
1. Intergrate Thank You Page with ActiveCampaign
In this step, you'll integrate the Form in the settings of the page exactly how you did when you integrated the Waitlist Page with ActiveCampaign.
2. Publish the Campaign
Make sure to hit the blue "PUBLISH" button to publish the campaign and update it!!!!!
6. Integrate Thank You Page With Your Lead Box
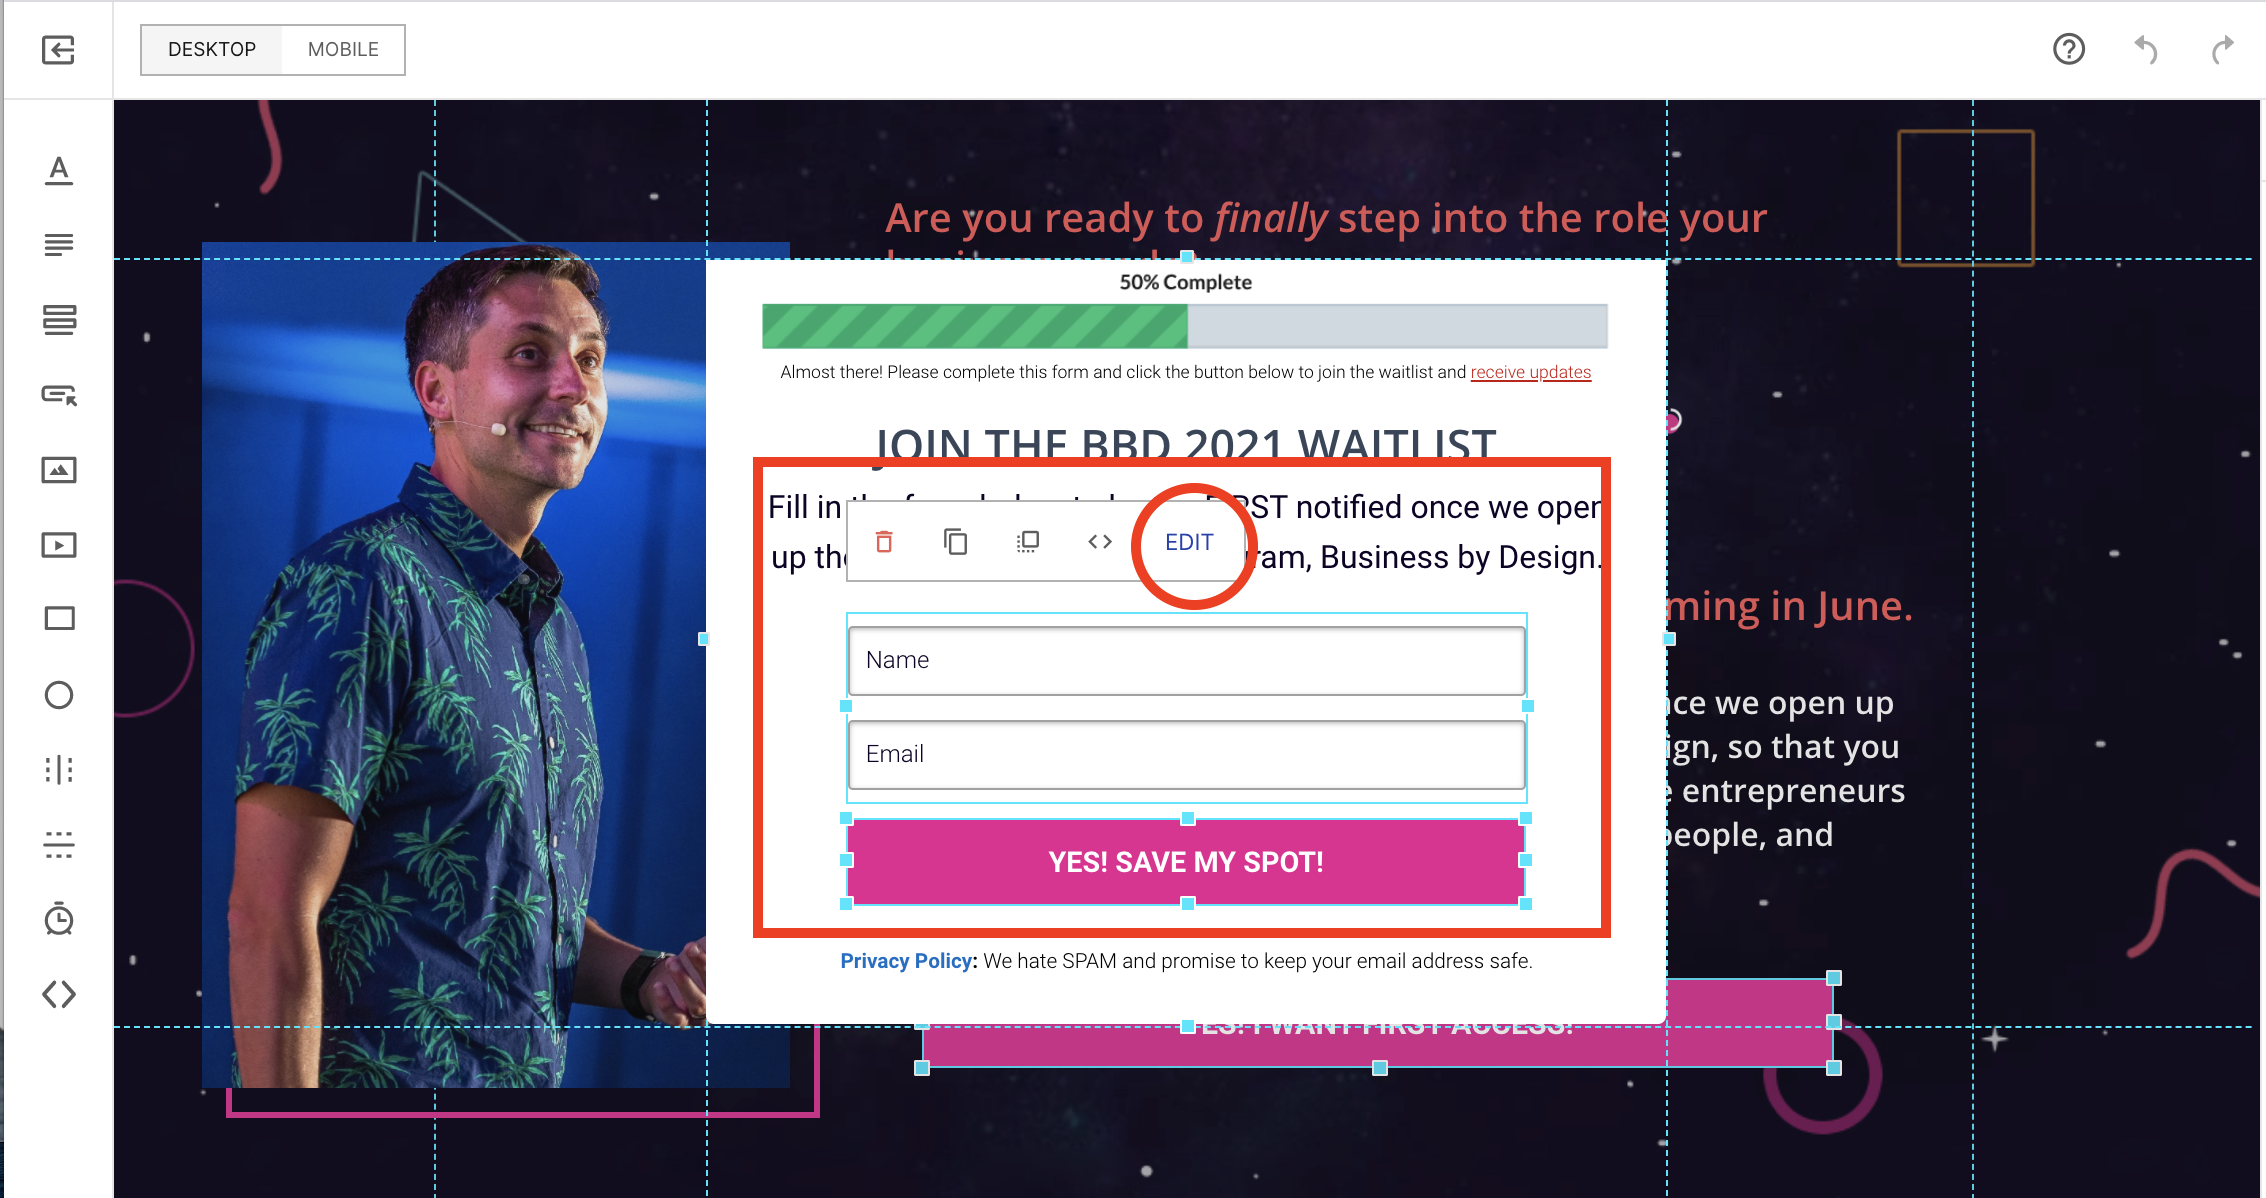
1. Return to Your Waitlist Page and Edit the Form
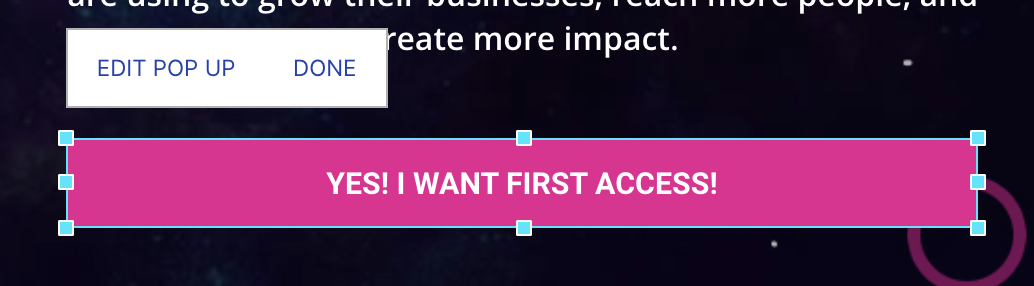
1. Click on your opt-in button. 2. Select Edit.
3. Select Edit Pop Up.
4. Click on the "Name and Email" Form Fields
5. Click Edit.
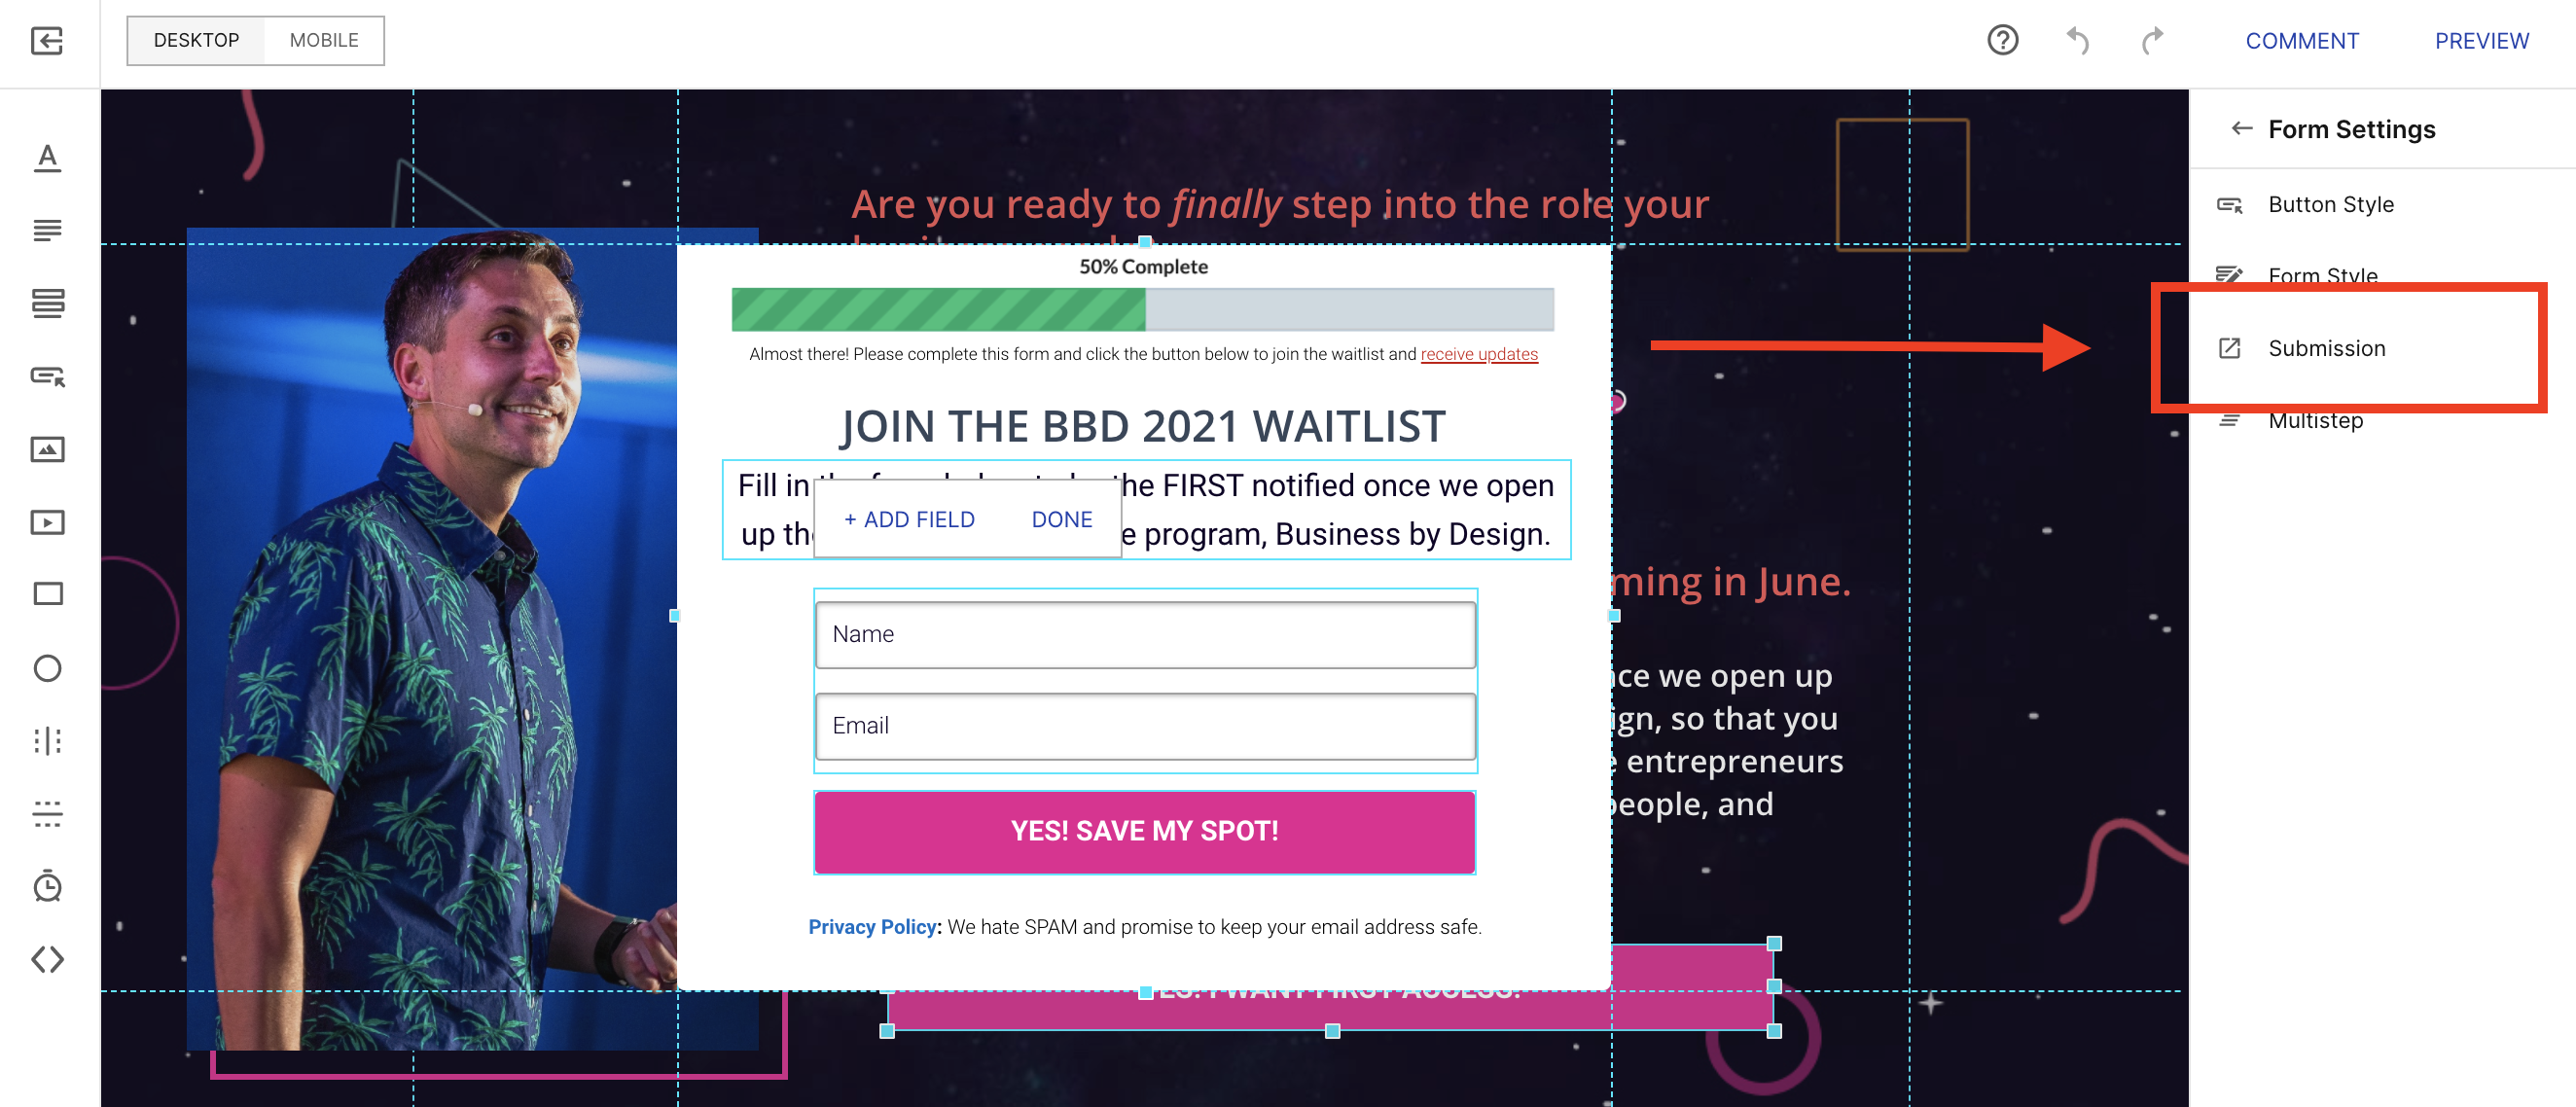
6. Select "Submissions" from the right side menu bar.
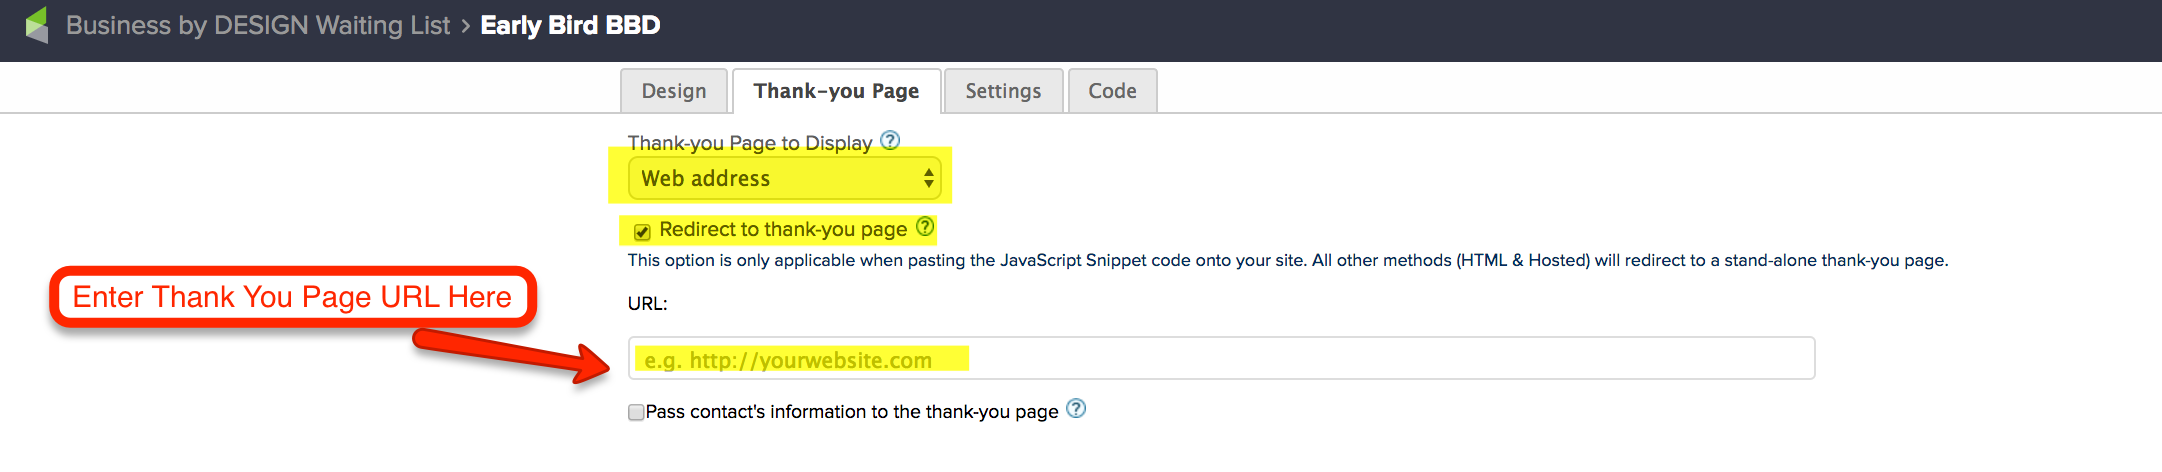
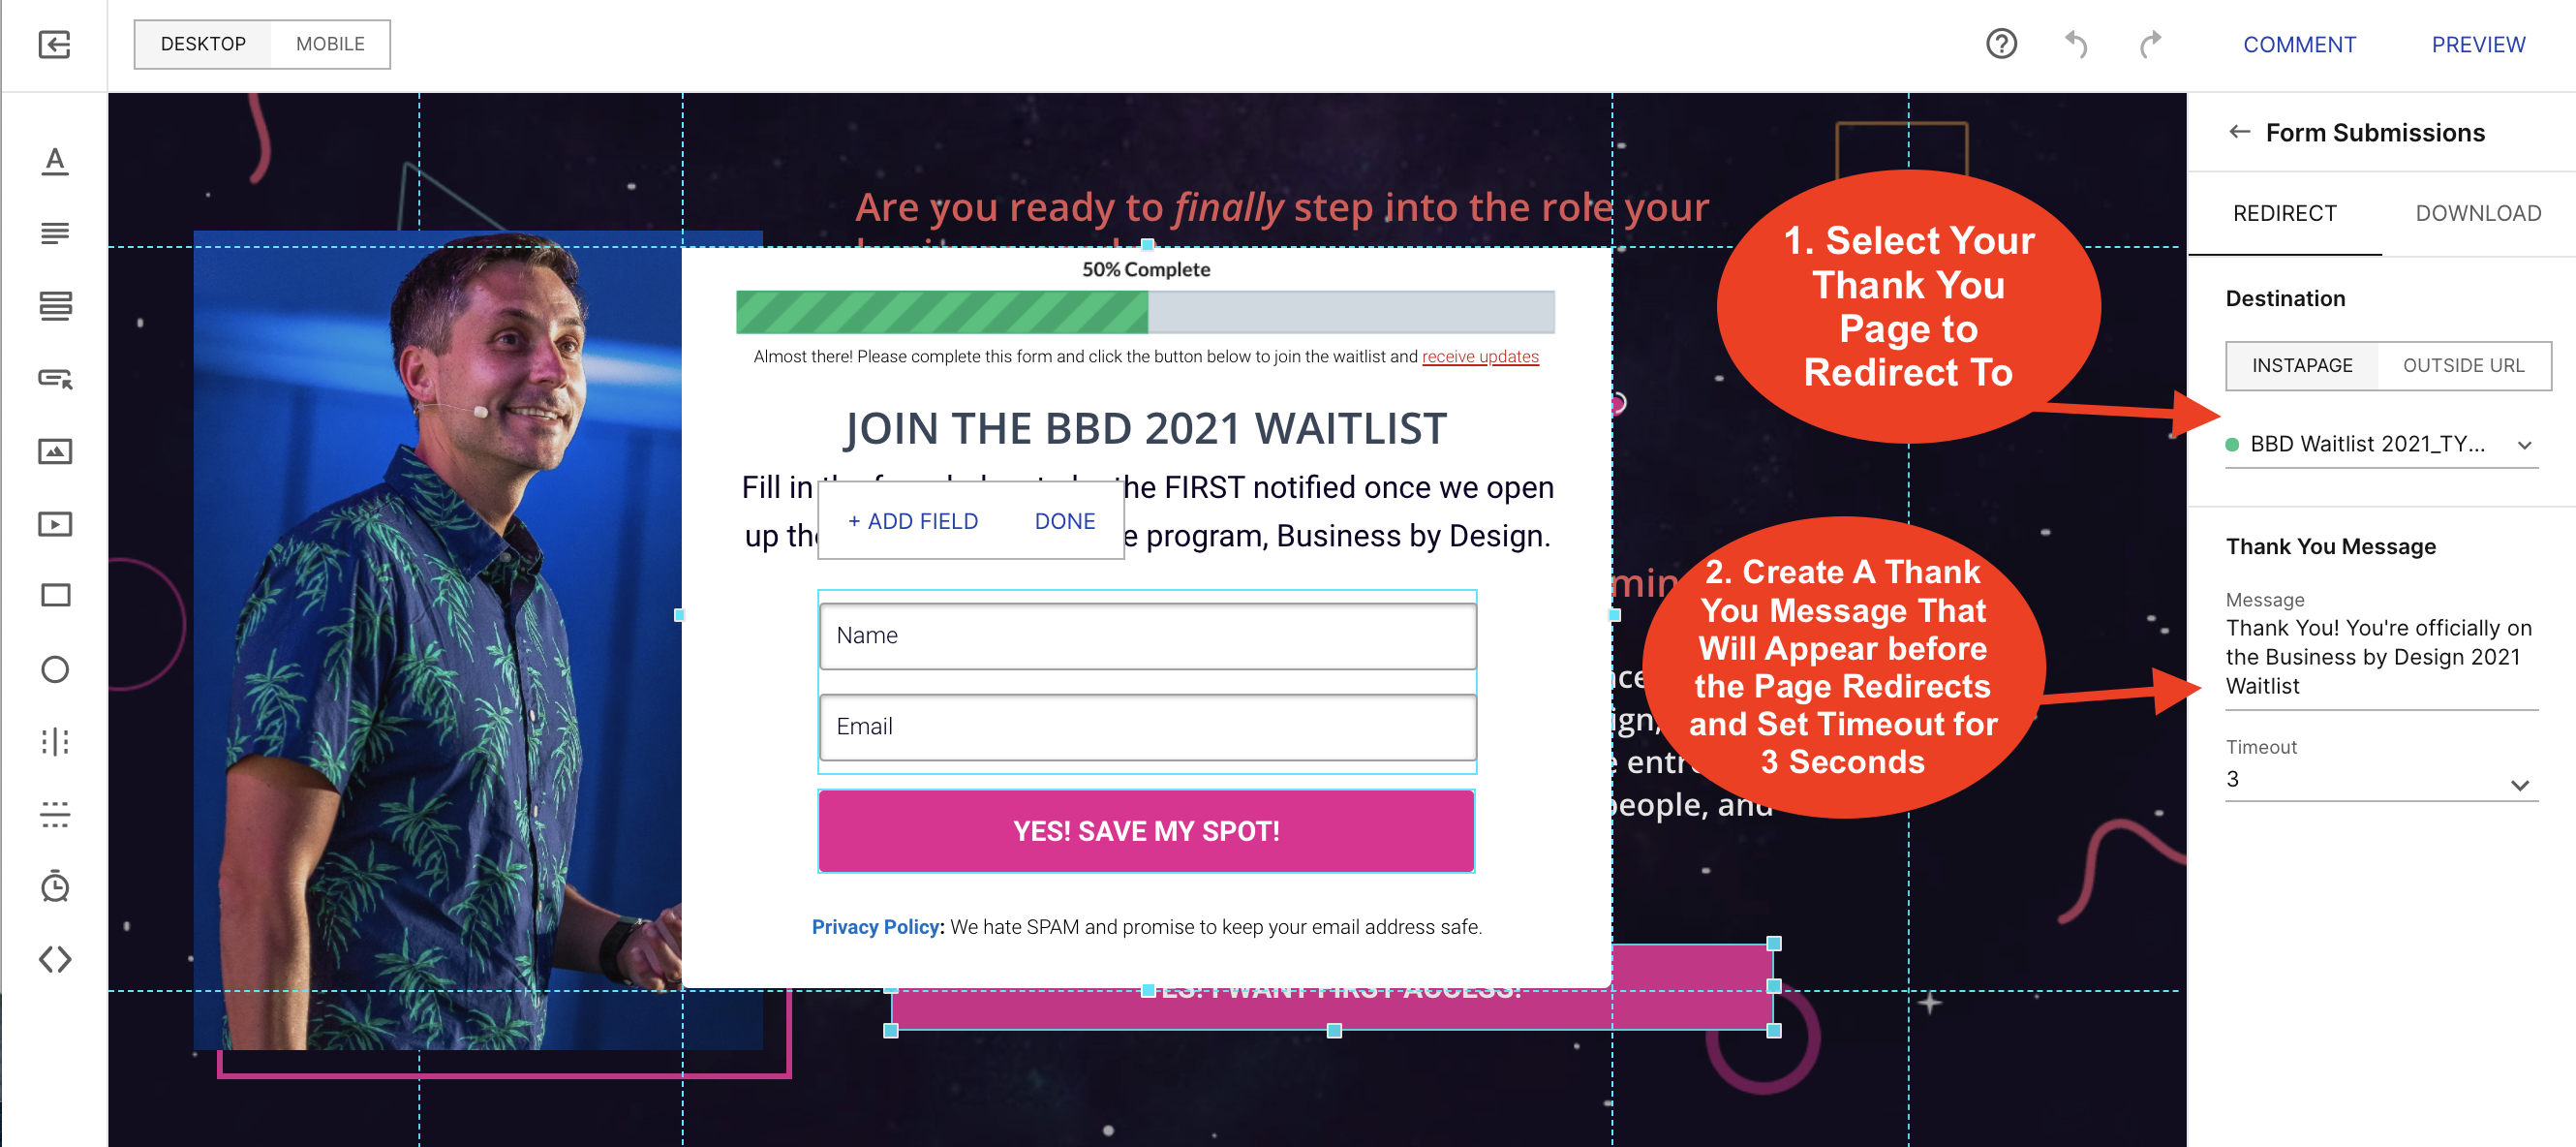
7. Select the Instapage Thank You Page to redirect to (or another URL).
8. Create a short Thank You Message that will appear in the pop-up box before the Opt-in page redirects to the Thank You page.
9. Set the time out to 3 seconds.
3. Save and Re-Publish Your Page
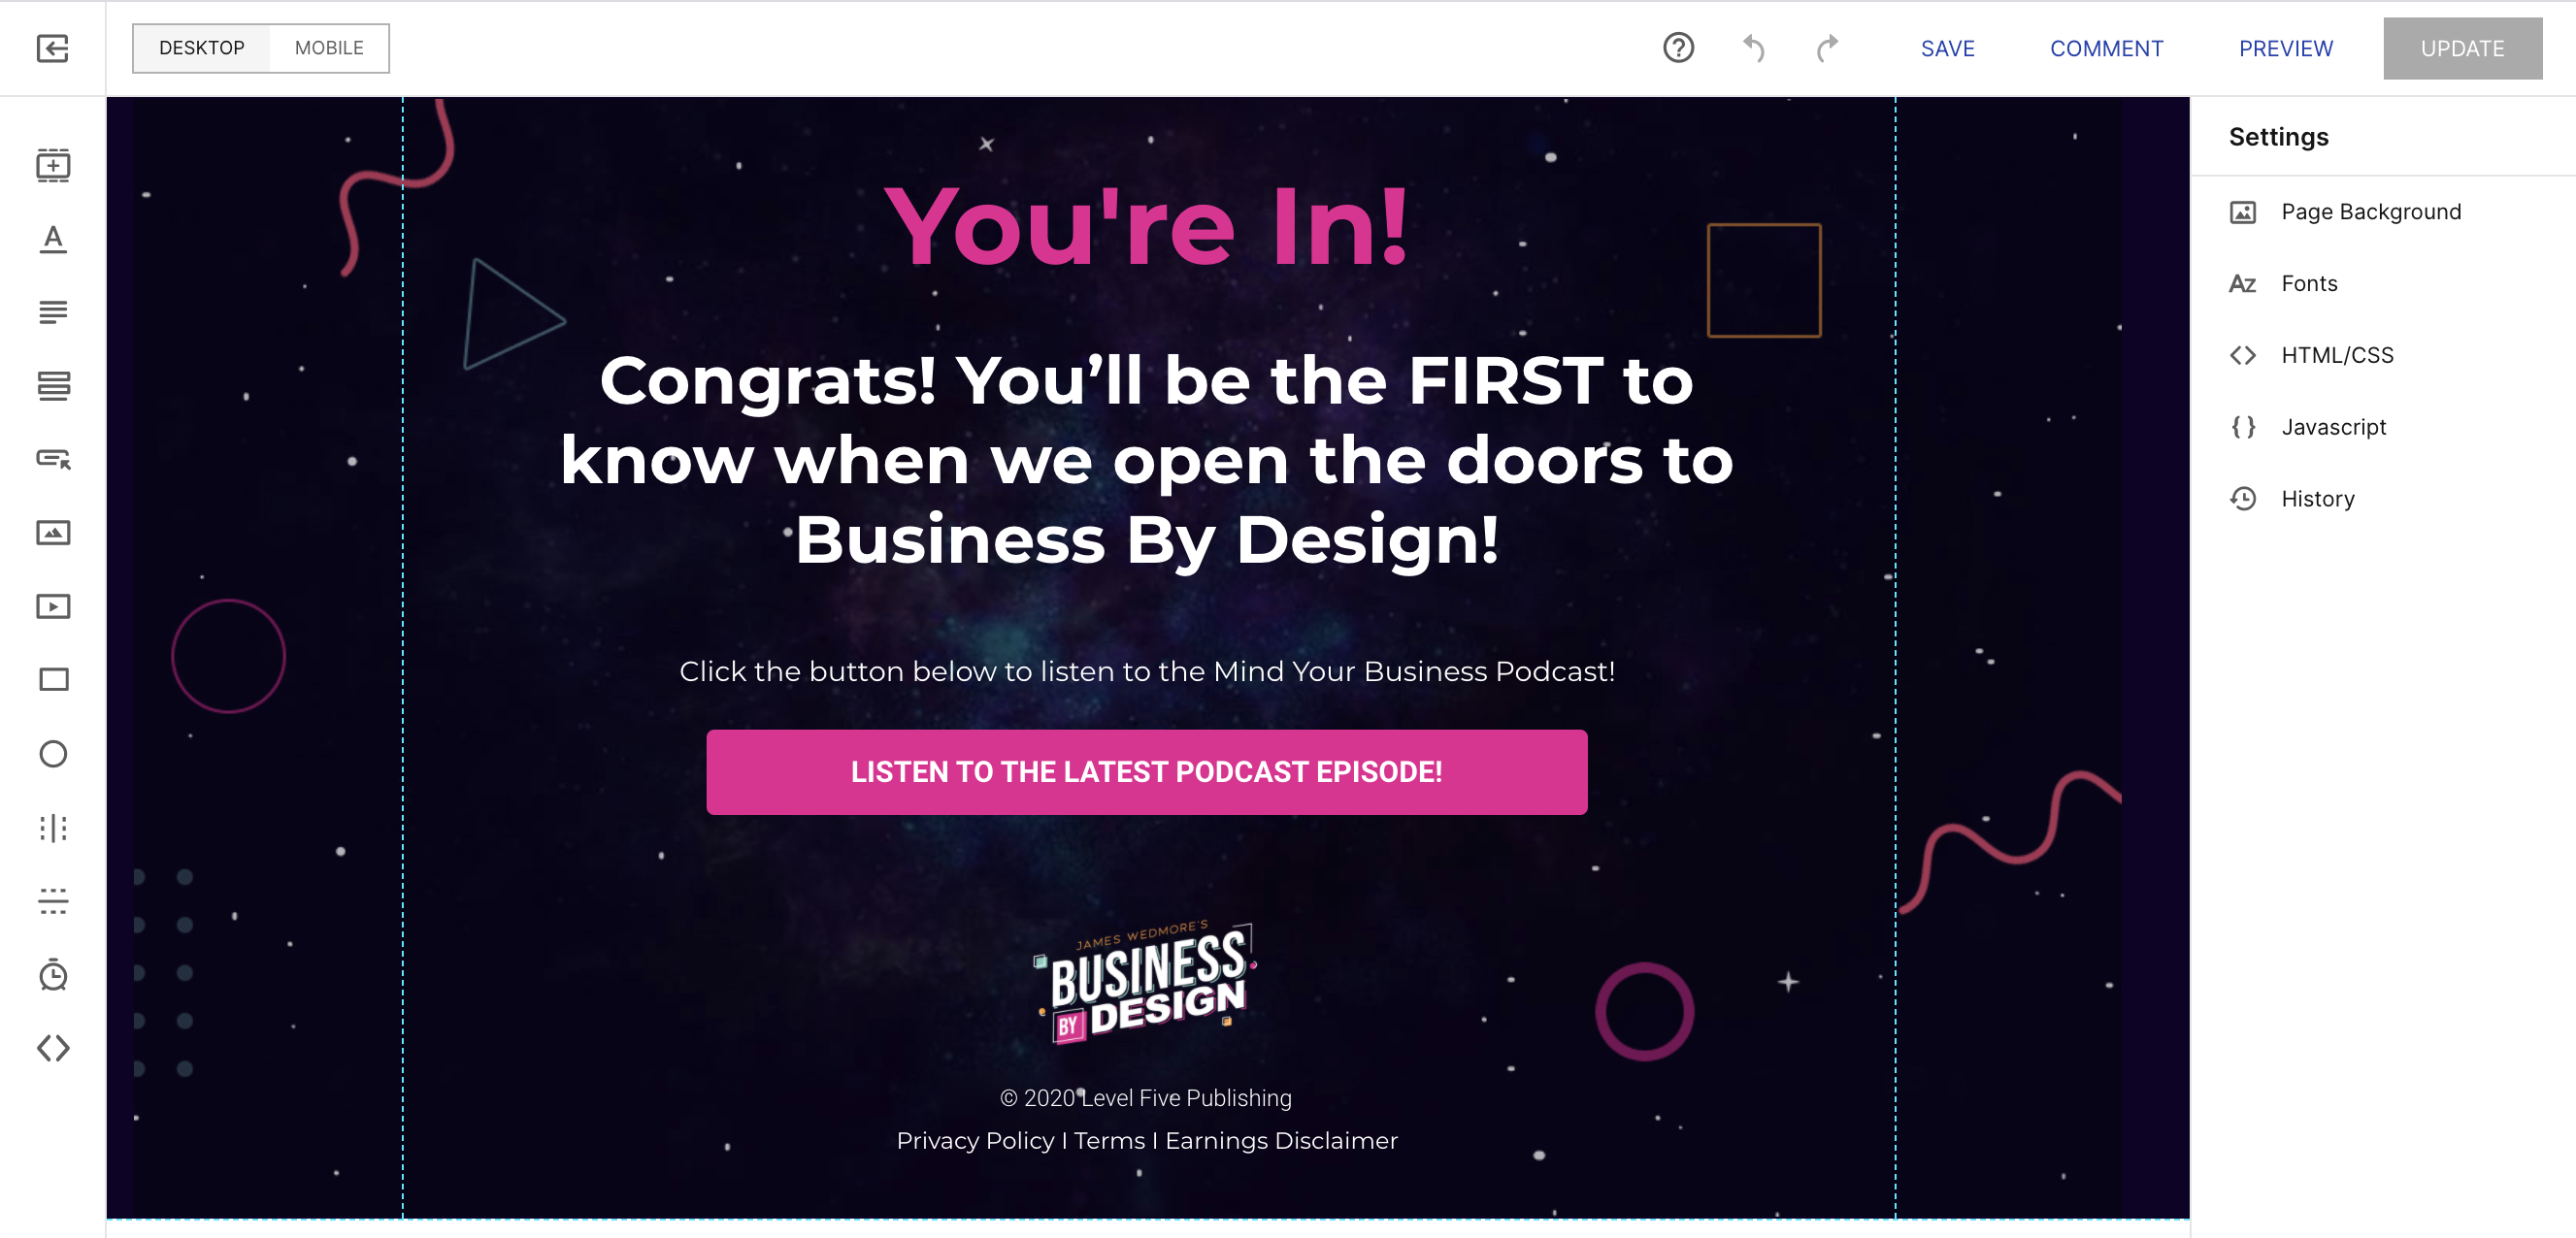
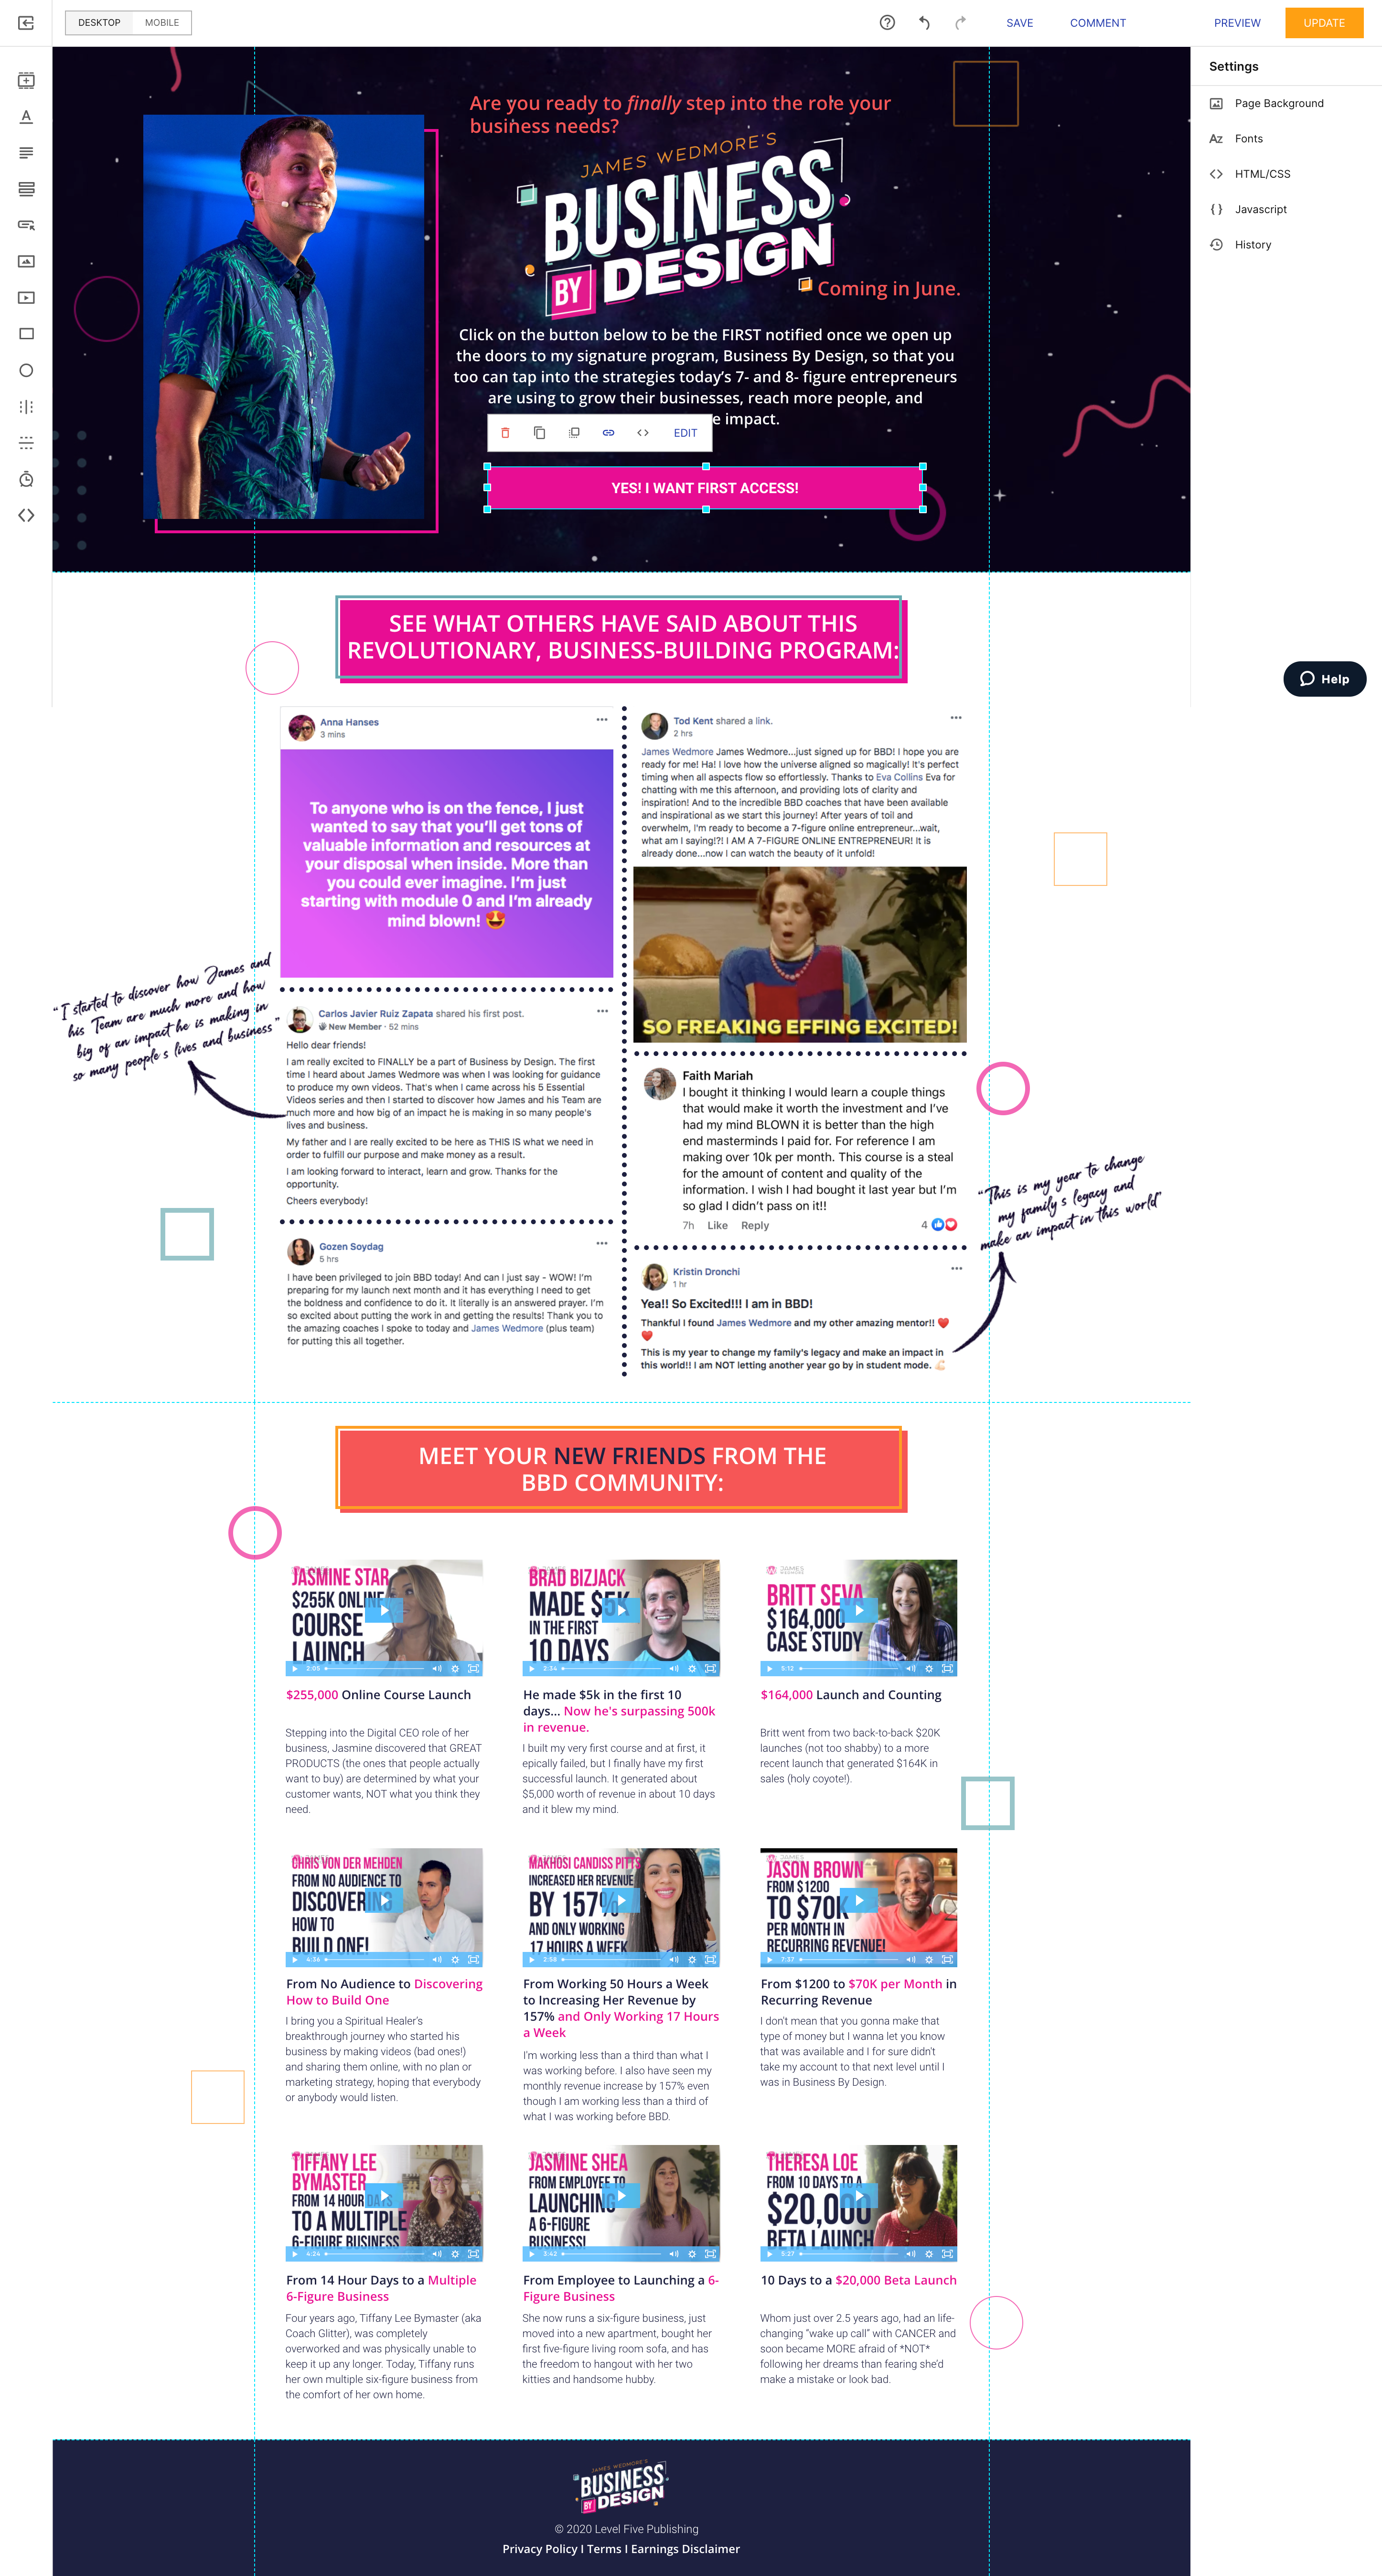
7. BBD Waitlist Page Example
Here is an example of the Business By Design Waitlist Page below. You can download the BBD Waitlist Instapage file and upload it into your Instapage account HERE. NOTE: This file will NOT open on your computer, it will only open inside of Instapage.