Templates /
Computer Maintenance Guide

Computer Maintenance Guide

Run this checklist every week to make sure that your computer maintenance schedule keeps your equipment alive!
1
Introduction
2
Preparation:
3
Ensure that the maintenance is recorded
4
Software:
5
Update your software
6
Clear out browser files
7
Configure your startup programs
8
Security:
9
Scan for viruses
10
Run anti-malware
11
Physical Computer Maintenance:
12
Clean your keyboard
13
Dust the computer unit
14
Wipe down the monitor
15
Organize your cables
16
General Computer Maintenance:
17
Run disk cleanup
18
Defragment the hard drive
19
Empty the recycle bin
20
Uninstall unused programs
21
Perform a full system backup
22
Reboot your system to complete the computer maintenance
23
Sources:
24
Relevant Checklists:

Introduction

From catching up on the latest in social media or news, to running your entire company, computers are here to stay. Incredible amounts of work and sensitive data is carried out by these machines every day both automatically and through human manipulation.

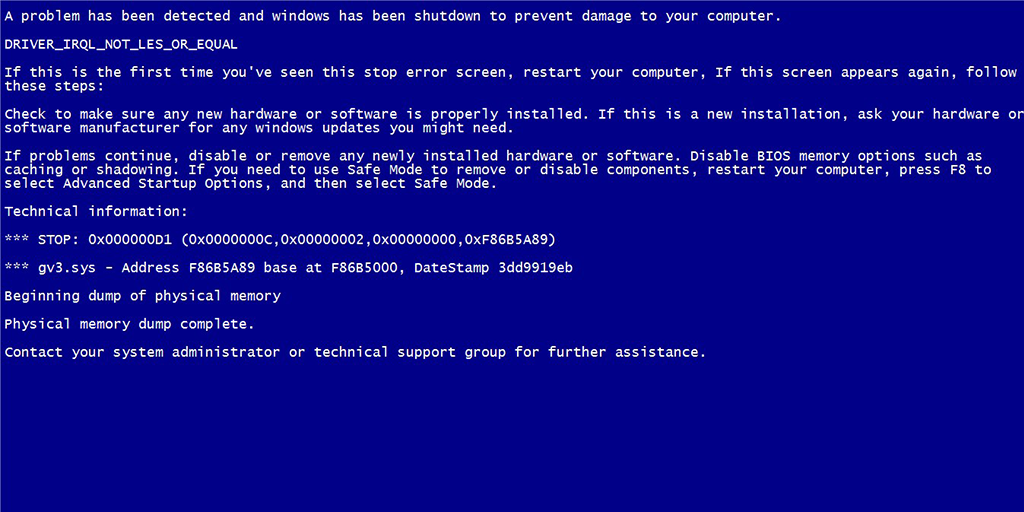
So what would happen if your computer broke down right this second?

Considering the mass hysteria which occurs when a large-scale computer failure such as Y2K was found, likely nothing good. The amount of time spent replacing the unit, or travelling to a working computer could seriously affect a person or company, and that’s before factoring in the price of repairs or a new computer.

However, we here at Process Street love finding little tips and tricks to maximize your success and minimize the impact of when the proverbial hits the fan.

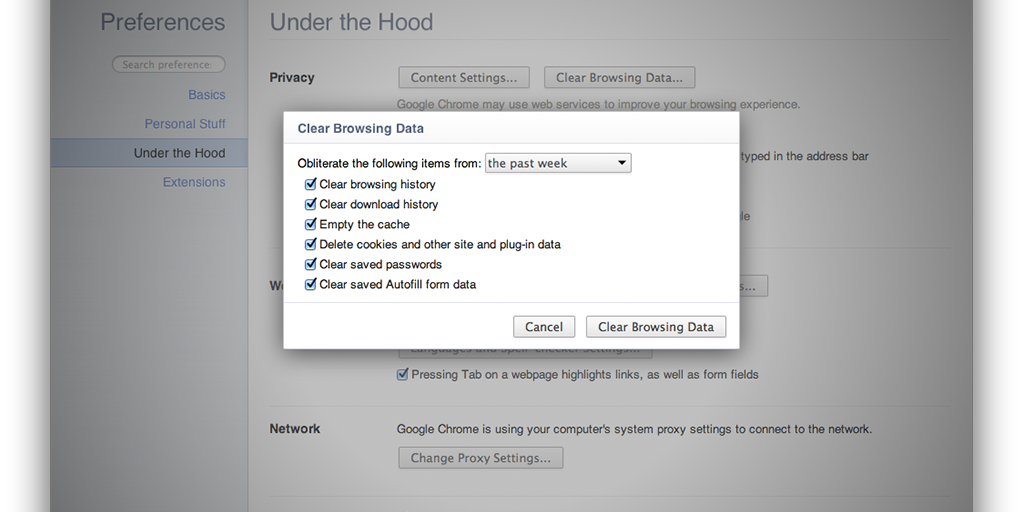
By running this computer maintenance guide every week, you can negate these potential disasters as much as humanly possible; you’ll be taken through the best method for keeping your machine alive, from updating your software and security, to cleaning the dust out of your system (literally and figuratively).

Read on if you’re ready to improve the lifespan and performance of your computer for free

Preparation:

Ensure that the maintenance is recorded

Before we start with the meat of the process, you need to ensure that all vital information is recorded in the form fields below for later reference.


This is primarily to ensure that you have a consistent record of when each computer last had maintenance run, along with the person who was responsible for that session.

If you wish to record more or different information, just add or edit the appropriate form fields.

Software:

Update your software

The first step in any good computer maintenance schedule is to update everything. Seriously, we mean everything you can.

Use the form fields below to record what you have updated, or at least have checked for updates.

  • 1

    OS
  • 2

    Security programs (firewall, antivirus, etc.)
  • 3

    Software (Adobe Flash Player, Adobe Reader, Java, etc.)
  • 4

    Plugins (Grammarly, Evernote Web Clipper, etc.)
  • 5

    Drivers (Graphics drivers, sound drivers, etc.)

Be aware that some systems may automatically download updates to their OS, but you need to check anyway. Almost all of the important updates for each system (including OS and driver updates) are included in the respective system updater application, so read on to install all of your updates in one fell swoop!

Windows

To check for system updates on a Windows device, first load up your Settings app by either navigating to it from your start menu, then your "All apps" list, or by typing it into your search bar. Then follow this path:

  • Update & Security
  • Windows Update
  • Install now

If your machine is running pre-Windows 10, all that changes is your navigation to Windows Update, which should be available through either a glance at the program list from the start menu, or by typing "Windows Update" into your search bar.

Mac

Macs are simple to update everything possible, as all you need to do is load up your App Store, navigate to the Updates tab and click on Update All. If you do not wish to update a specific item, you can also choose to update your programs one by one instead.

Linux (Ubuntu)

Navigate to the System menu, then to the Administration sub-menu and finally click the Update Manager entry. Once the manager loads, click "Check" to check for updates, select the ones you wish to install, click "Install Updates" and enter your user (sudo) password to confirm.

Jack Wallen provides fantastic advice for updating your Linux system in more detail (including Fedora Linux), which we highly recommend taking a look at.

Clear out browser files

Next up in the maintenance blitz is the task of clearing out unnecessary browser files.

Primarily this will include deleting both your browsing history and cookies to ensure that nothing is glueing up your system or flagging you as a target for spam. This will also help to improve the security of your system by getting rid of temporary files created by the sites you visit.

Chrome

First up, open the Chrome Menu by clicking the small button in the top right of your browser; the one that looks like 3 horizontal lines and sits just below the "Close Window" button. Next click on "History", or you can just press Ctrl+H to avoid navigating the menu entirely.

Now select the "Clear Browsing Data" option and select the time since your last browser file exodus. If you’ve run this weekly computer maintenance checklist before, just select "the past week". If not, best be thorough and go for "the beginning of time"; feel free to do your best Brian Blessed impression whilst saying this as you click the button.

Make sure that you’ve selected what data you wish to clear (we recommend at least selecting your browsing and download history, cache and cookies) and then click "Clear Browsing Data".

Firefox

The method to clearing your firefox files is very similar to that of Chrome; open the menu, choose History, Clear Recent History, select the timescale and the files you wish to clear and then hit "Clear Now".

Most browsers have a similar method to clear their files, but if you’re uncertain then look up the method to your particular browser.

Configure your startup programs

Have you ever had the experience of sitting down in the morning, fresh and raring to go, only to fall asleep again whilst you wait the requisite 30 minutes for your computer load? Well, it’s time to tackle the most likely culprit of that terror by configuring your startup programs.

Windows (10)

In Windows you can choose your startup programs from your Task Manager. Either right-click your Start icon and select Task Manager, or just hit Ctrl+Shift+Esc (a handy tip for if a full-screen program becomes unresponsive too).

Once the program is open, navigate to the Start-Up tab and take a look at the programs within. You need to be brutal with your choices to make your computer as efficient as possible – ask yourself if you really need each program to load up as soon as you turn on.

Change the status of a startup program (enabled or disabled) by right clicking on the item within the Task Manager.

Mac

Load up your System Preferences and go to the Users & Groups pane. Now click on "Login Items" and you will be greeted with a list of all of the applications which boot up upon your login. Remove or add programs as necessary with the plus and minus symbols.

Macs usually run programs which boot us when you log in, rather than when the system starts up – if you can’t find the program you wish to deactivate in you Login Items, read this post by Joe Kissell to delve into the older Startup system.

Linux (Ubuntu)

Ubuntu is ever easier than the previous two operating systems, as all you need to do is navigate to your System, then to Preferences and then finally to Startup Applications. Edit with extreme prejudice, and enjoy your faster boot times!

Security:

Scan for viruses

Whether you’re rich enough to afford the most premium of antivirus software, or just make do with free services such as AVG, you now need to utilize these tools to scan your computer for viruses.

Record the results of this virus scan using the form fields below.


This can be as easy as loading up your antivirus software and starting a full computer scan for dangerous files or applications. If any are detected, either quarantine or destroy them as you choose (unless the infected file is vitally important and one-of-a-kind, we would always recommend destroying the source of each security alert).

Run anti-malware

No matter what anti-virus software you are running it is always worth getting a second opinion, and so you need to run an anti-malware application.

Malwarebytes Anti-Malware is completely free and does the job splendidly; head to their site and download it now.

Once you have Malwarebytes (or your program of choice), run it and once again make sure that your entire system is included in the scan. This can also take a hefty chunk of time depending on the size of your system, so make yourself a coffee and get comfortable while you wait.

Physical Computer Maintenance:

Clean your keyboard

Many users forget that computer maintenance isn’t all about the digital side of the system; you also need to maintain your physical components, starting with your keyboard and mouse.

Both of these components can be easily cleaned by purchasing a can of compressed air from any good PC shop (most supermarkets will also stock them). Attach a fine nozzle to the can and use it to get into the nooks and crannies of your keyboard and mouse to blow out any residing dust or grime.

Whilst this is true of desktops, laptops can be especially prone to gummed-up keyboards due to their portable nature, so take extra care if cleaning a laptop keyboard.

Whatever you do, never use a vacuum cleaner to clean your physical components. The potential damage to a keyboard or mouse is small, however it’s best to break the habit before moving on to cleaning your tower, as the static generated by a vacuum cleaner can damage your electrical components.

Dust the computer unit

Your keyboard and mouse are spick and span, so now it’s time to tackle your computer unit directly.

Towers or laptop cases can be easily dusted down with a dry, clean cloth, but remember to stay away from any electrical components to avoid static damage. If you can see that your desktop fan is gummed up with dust bunnies, spray a little compressed air to dislodge them (make sure your machine is off first).

Wipe down the monitor

You’re almost done with the physical components, so now it’s time to clean your monitor screen! After all, there’s no point in investing in a good display if you can draw a visible smiley face on the screen with your finger.

Spray the (powered down) monitor or laptop screen with screen cleaner and wipe away with a dry, clean cloth. If you do not own any screen cleaner, a moist paper towel or cloth will do, but be sure that you’re not squeezing water into your electrics.

Organize your cables

The final stage in the physical side of your computer maintenance is to organize the jungle of cables going to and from your machine.

Buy reusable velcro ties, or if you can’t find any then some bobbles or scrunchies (maintain with style), to tie your cables together and keep them out of the way. If your desk has holes for your cables to go into you can take this one step further and tie them together inside your desk to hide them from sight.

This will both make your workstation look a lot better, and make it far less likely for you (or anyone walking near your computer) to trip over a cable and break either a piece of equipment or a bone.

General Computer Maintenance:

Run disk cleanup

To start off our general maintenance tasks you need to run your disk cleanup program.

This will essentially remove all junk and temporary files on your computer, akin to earlier when we deleted our browsing history and cache.

Windows

To perform a disk cleanup on Windows, start by searching "Disk Cleanup" in your task bar and clicking the resulting program. Select the drive you wish to clean up, then click "OK".

Disk Cleanup will then run on your chosen drive, presenting you with the options of what you can delete. Select what you wish to clear away and click "OK".

Mac

See the video below by Meditational State for a quick guide on disk cleanup in your Mac.

Defragment the hard drive

Defragmenting your drives isn’t something the average user thinks to do, but can pay huge dividends if done regularly – it’s time to make sure that you’re not the average user and defragment your drives.

Windows

You can defragment your drives on Windows by typing "Defragment and Optimize Drives" into your search bar and selecting the resulting program.

With the program loaded you need to analyze each and every drive on the list by selecting it and clicking "Analyze". If any come back with the slightest level of fragmentation, select that drive once again and click "Optimize".

Mac and Linux

Both of these operating systems do not require manual defragmentation.

Empty the recycle bin

Yes, this is hardly rocket science, but remembering to empty the recycle bin regularly can work wonders for keeping your machine running smoothly.

Just right click on your recycle bin icon from the desktop and select "Empty". Alternatively, if you don’t have a desktop icon for the bin or wish to check the files in there for potential restores, navigate to and open the recycle bin and check the contained files.

If you wish to restore any files, right-click on them and select "Restore". Otherwise, right-click on empty space within the bin and select "Empty the recycle bin".

Macs require you to right click the Trash icon at the end of your Dock and select "Empty Trash".

Uninstall unused programs

Every little helps, and even when not in use an abundance of programs can clog up your computer’s processing power – now you’ve got to uninstall any programs which you do not use or need anymore.

Windows

To uninstall an unnecessary program within Windows, type "Programs and Features" into your search bar, or follow the following file path:

  • Control Panel
  • Programs
  • Programs and Features

From this screen you can sort your installed programs by criteria such as date installed, size and when it was last used. To uninstall a program, click on it and then on "Uninstall" which should appear next to "Organize" above the program list.

Mac

To remove an app from your Mac, all you need to do is drag the application in question to your Trash and then empty the bin.

Linux (Ubuntu)

Follow this file path to open the GUI Package Management Tool, which allows you to remove unwanted software packages:

  • System
  • Administration
  • Synaptic Package Manager

Now just select any package you wish to be rid of and click on "Mark for Removal". GUI can also be launched from the command line by entering "$ synaptic &".

Perform a full system backup

Although this can be done once a month rather than every week, you need to make regular backups for your system in the event of a large-scale failure. Record a copy of (or link to) the most recent backup using the appropriate form field below.


Windows (10)

Windows is one of the easiest platforms to backup, as once you’ve set a location for the new files you can simply allow the automatic backup feature to run on a timescale of your choosing in the background.

First you need to set where your backup is going to go. Start off by opening your Start menu and opening your Settings. From here, click on "Update & Security", "Backup" and then on "Add a drive".

Once you have selected the drive (or any location on your network) to backup to, click on "More options" to change the frequency of the backups, or pick specific folders to include.

Mac (OSX El Capitan)

To backup the data on your Mac, first connect your external storage device of choice. If prompted by Time Machine, choose "Use as Backup Disk".

If no prompt from Time Machine appears, navigate to your Time Machine preferences, select "Backup Disk", choose your storage device and click "Use Disk". One this is set up, Time Machine will make backups, phasing out the oldest once the storage is full.

If your wish to force a backup, go to Time Machine’s menu and select "Back Up Now". If you do not wish to use Time Machine to backup your Mac, take a look at the other options here.

Linux (Ubuntu)

Linux can be backed up by using the TAR command. Start off by opening a terminal from the Accessories section of the Applications Menu.

Now enter the correct variation of the following command for your situation:

tar -cvpzf backup.tar.gz --exclude=/backup.tar.gz --one-file-system / 

Remember to alter this sample command by replacing both instances of "backup.tar.gz" with the location you wish to save your backup. The first replacement will state where the backup is saved, whilst the second is to ensure that all is backed up except for the backup location.

Other methods of backup recovery on Linux can be found here on the Ubuntu community help wiki.

Reboot your system to complete the computer maintenance

Although some previous tasks such as OS updates will have required a system reset to complete, you need to restart your computer one final time.

This is mainly to ensure that your maintenance measures have taken effect, but it can also be an experiment in how your machine’s performance has been affected. For example, after this final reboot, pay attention to your new system boot time; if you have disabled any number of startup programs or even just removed a chunk of temporary files, you should be able to see a noticeable improvement already in the setup time.

Congratulations, your weekly computer maintenance checklist is complete! Enjoy your new and improved computer for its extended lifespan.

Sources:

Relevant Checklists:

Take control of your workflows today.