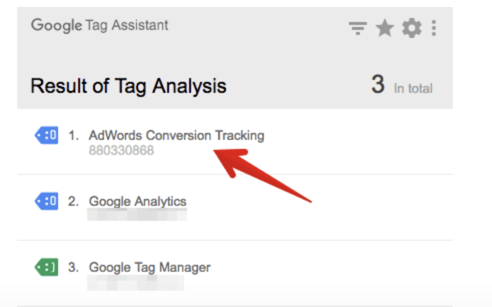
Verify AdWords tracking code is added to your site
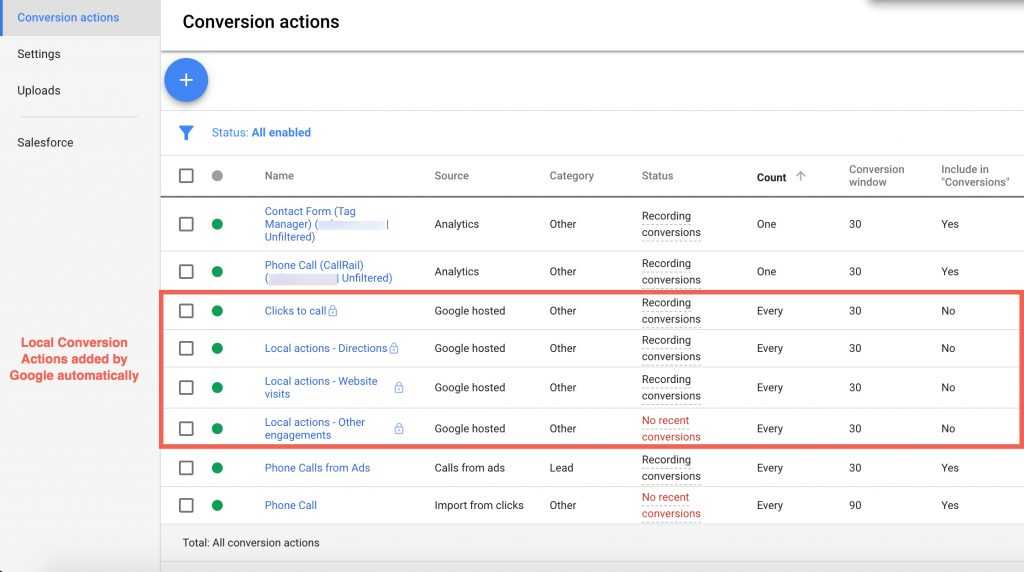
Ensure conversion actions have been defined appropriately
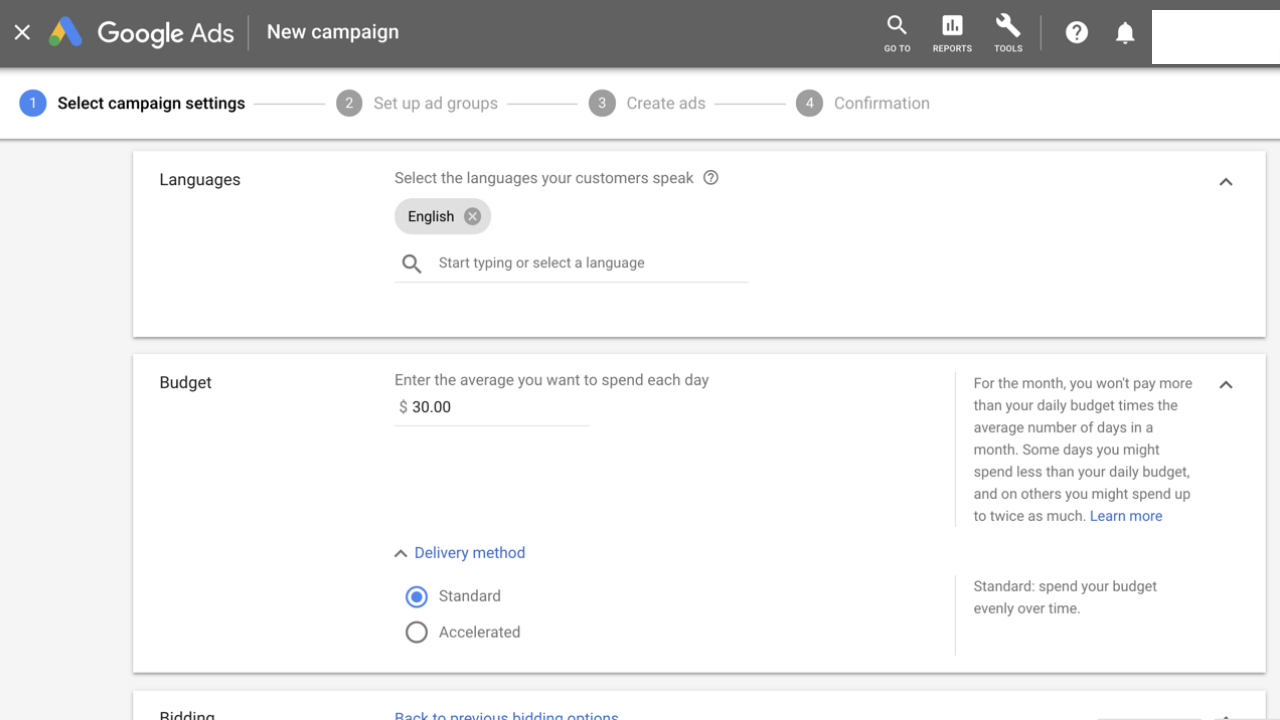
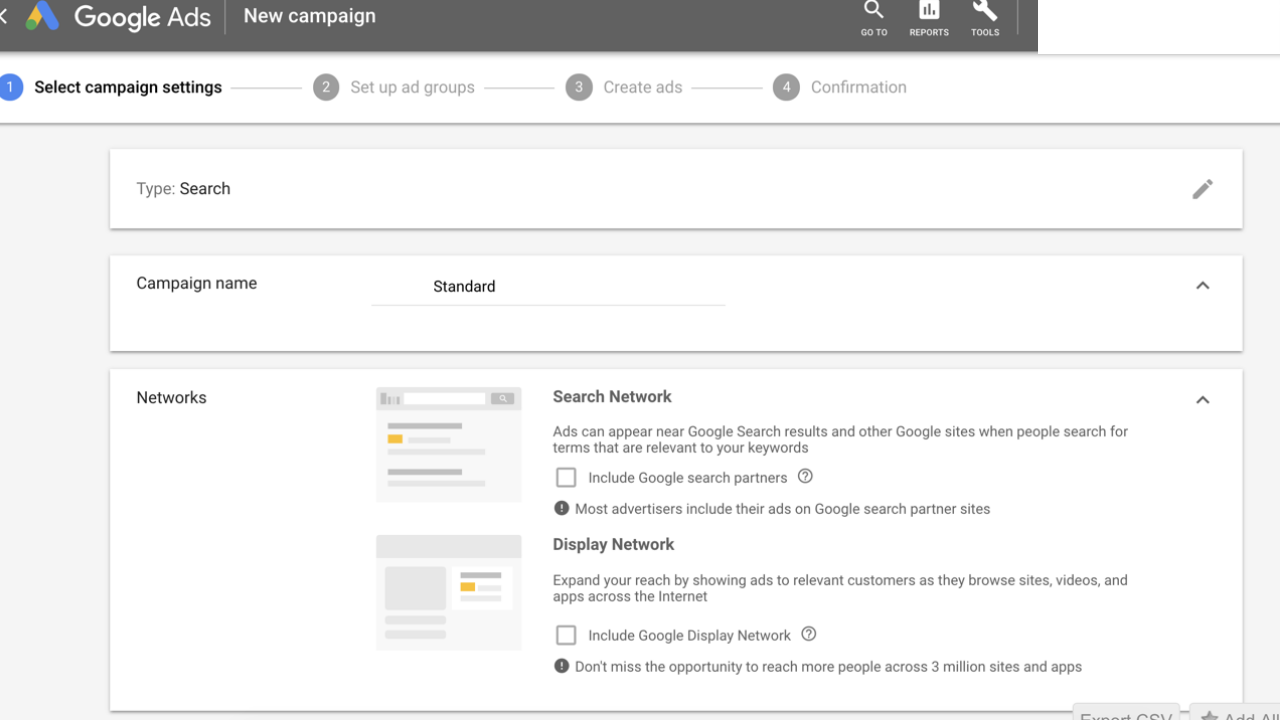
Verify the ‘Delivery Method’ selected
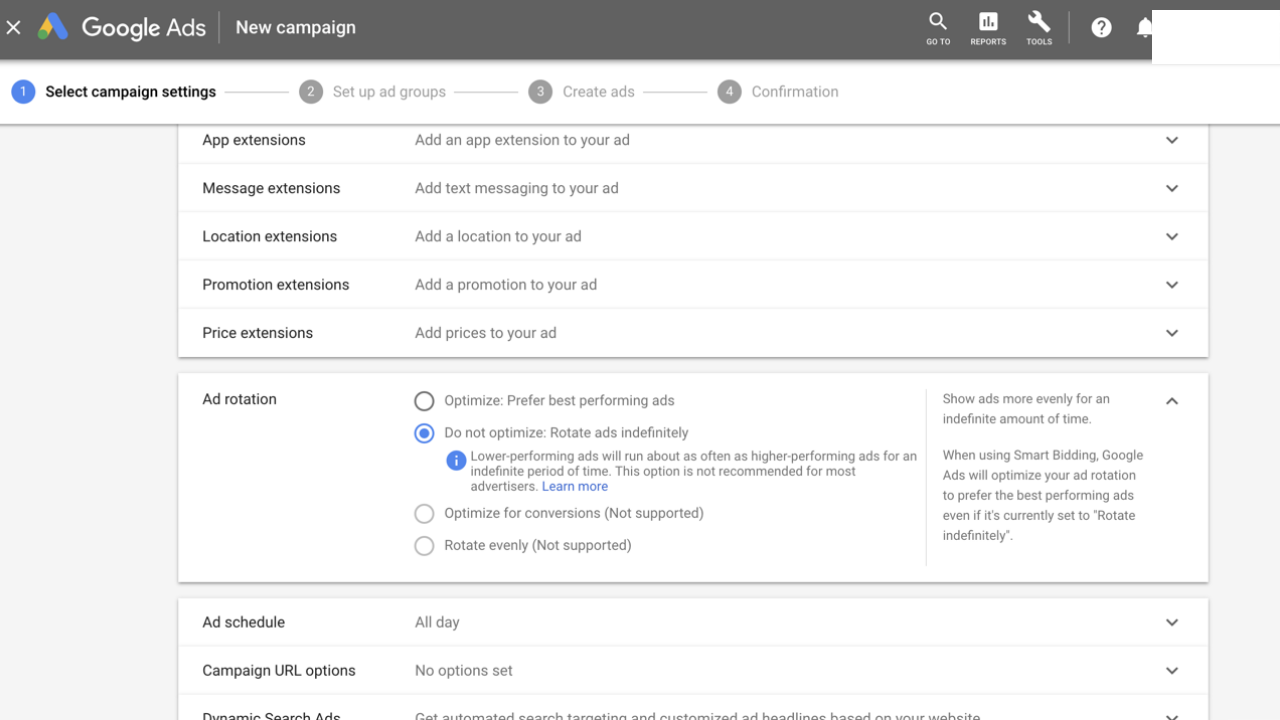
Verify the ‘Ad Rotation’ option selected
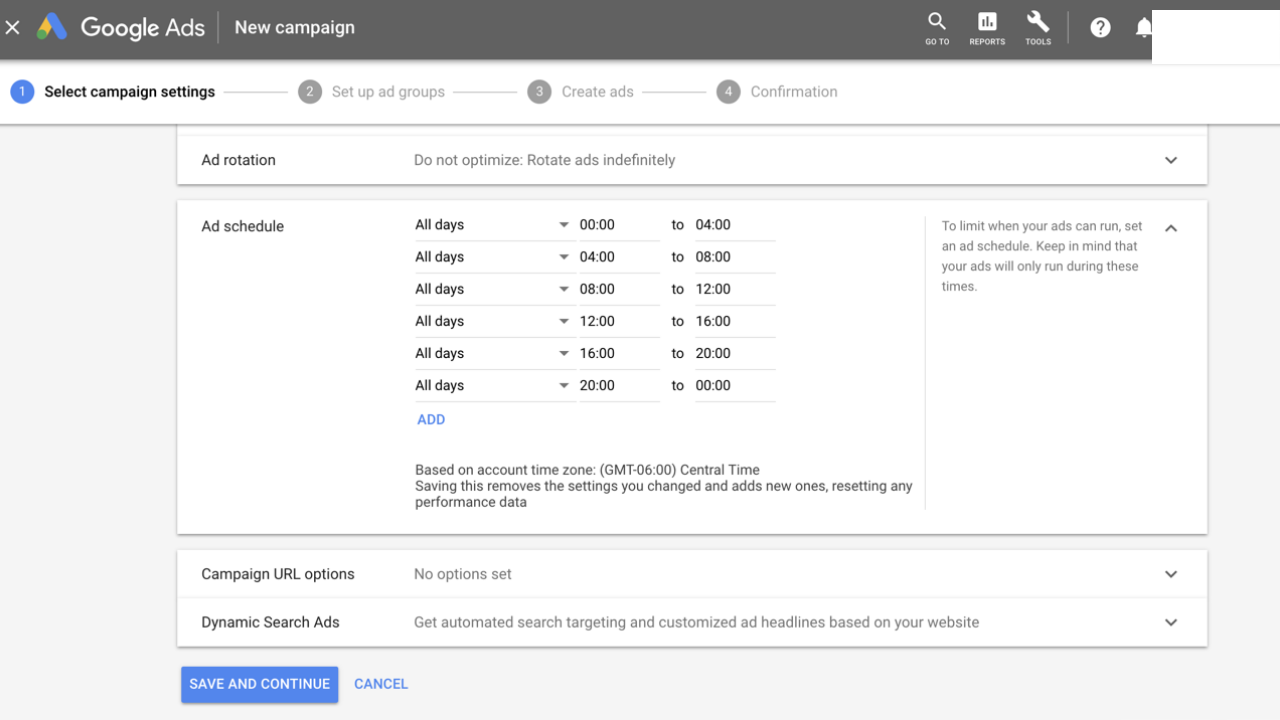
Verify your Ad Schedule settings
Check if ‘All Features’ has been selected for your campaign
Verify if you want to opt for ‘Search partners’ from Search Network
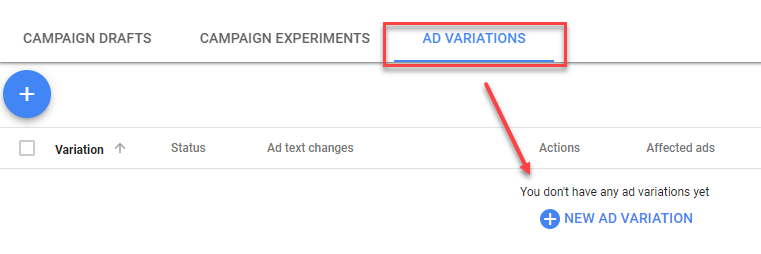
Check the number of ad variations per ad group
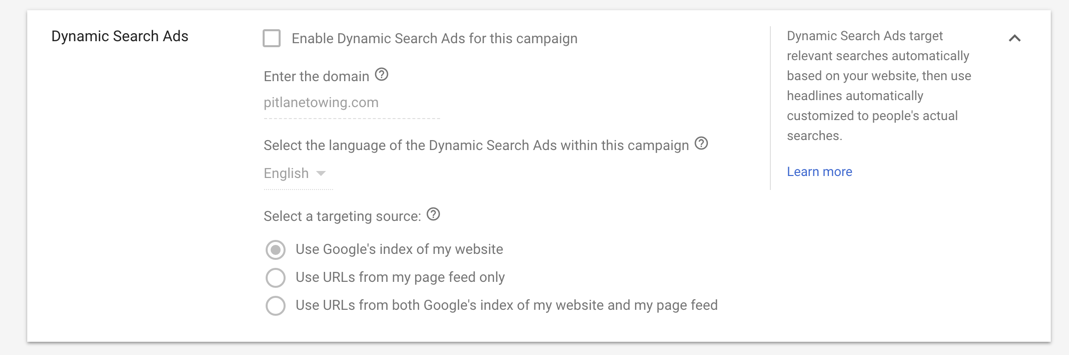
Determine if dynamic keyword insertion (DKI) should be used
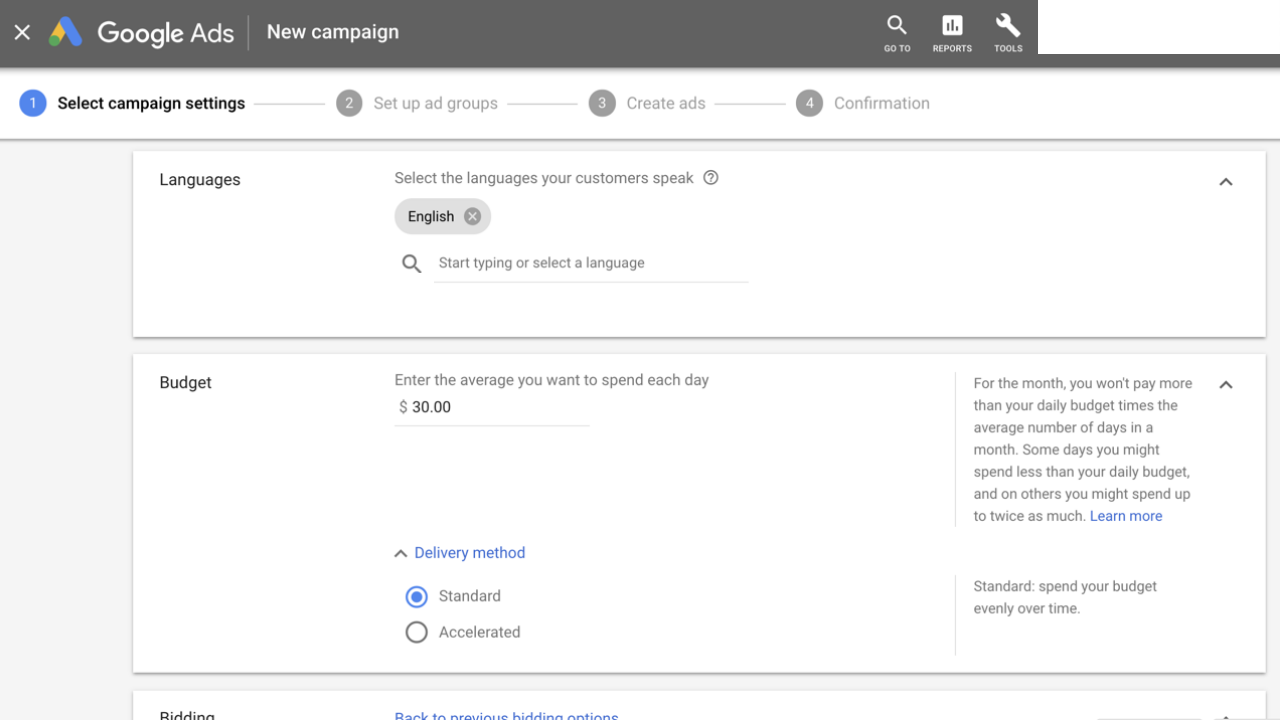
Check that budget is sufficient
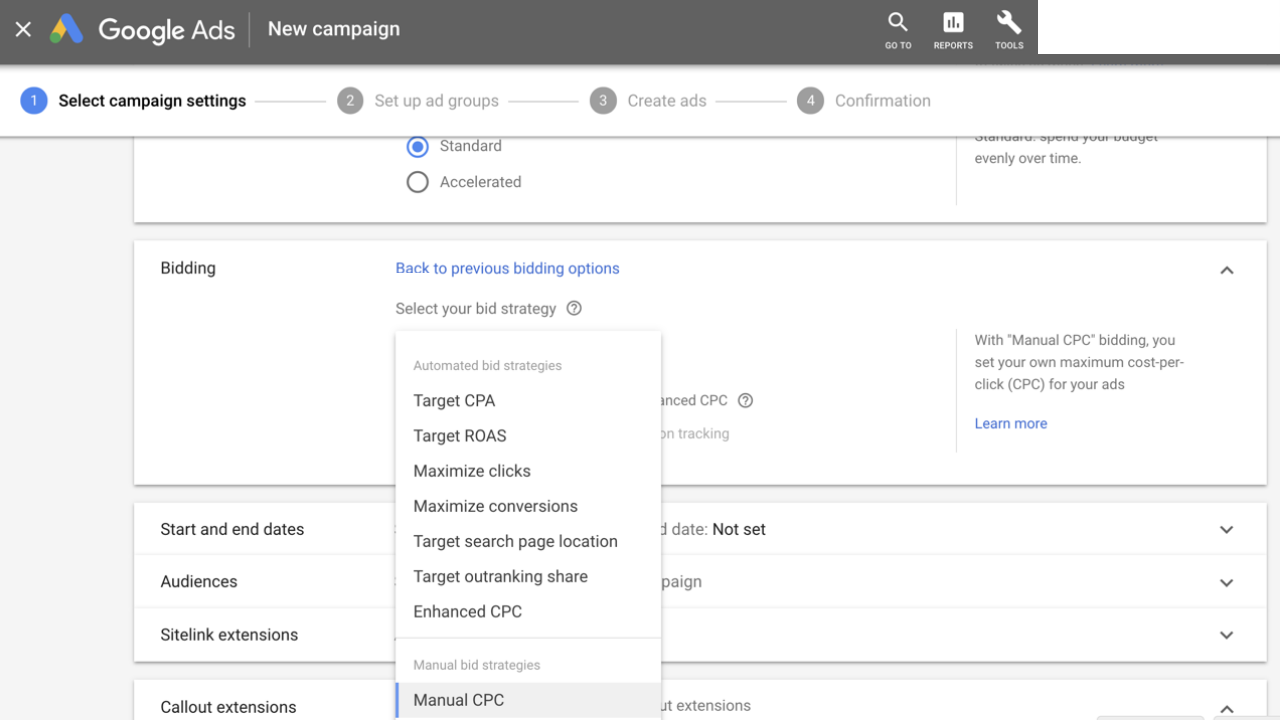
Validate your bidding strategy
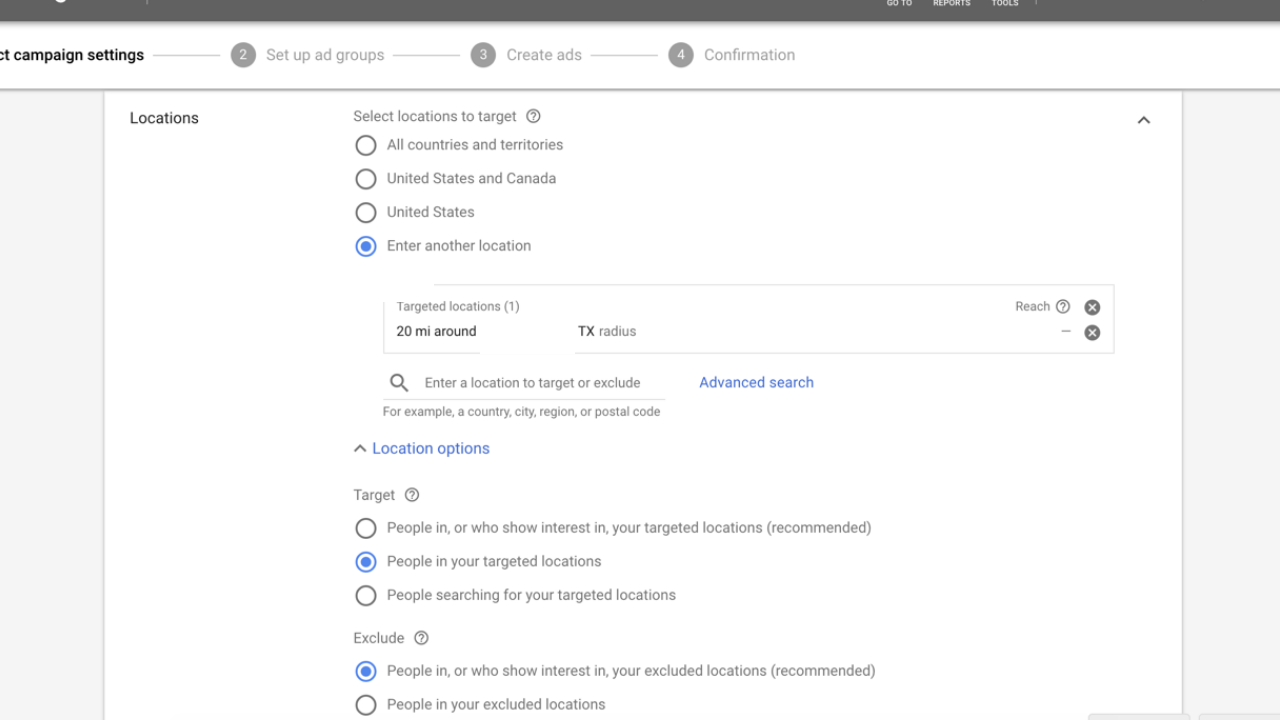
Set proper device performance and targeting
Ensure proper demographic specifications, if any
Check the display ad placements for inappropriate websites
Verify ad guidelines are followed
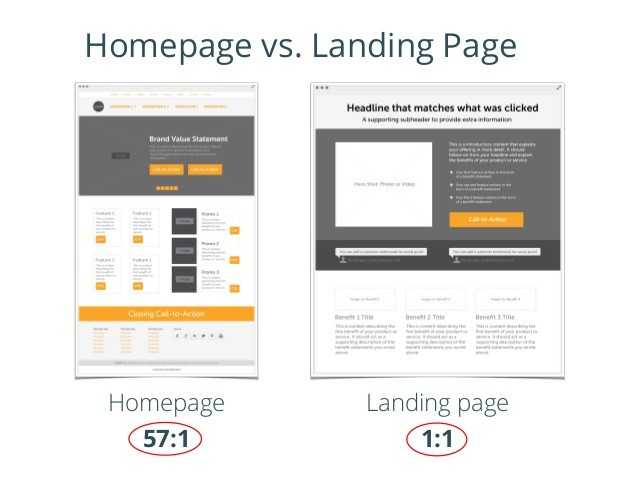
Ensure the landing page is appropriate
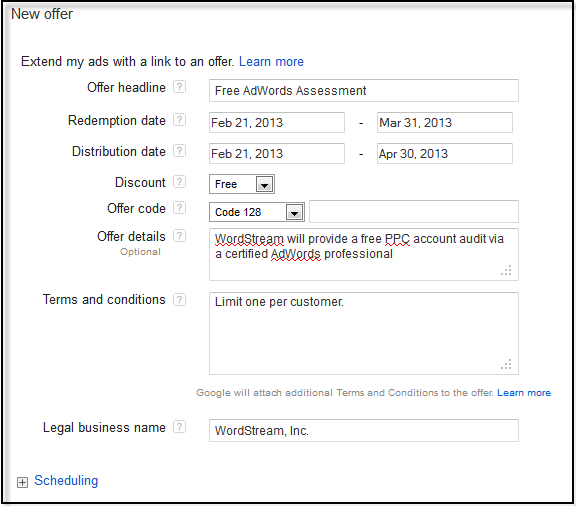
Check for any offer or time-bound messaging
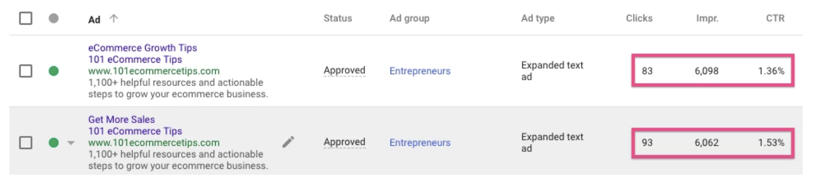
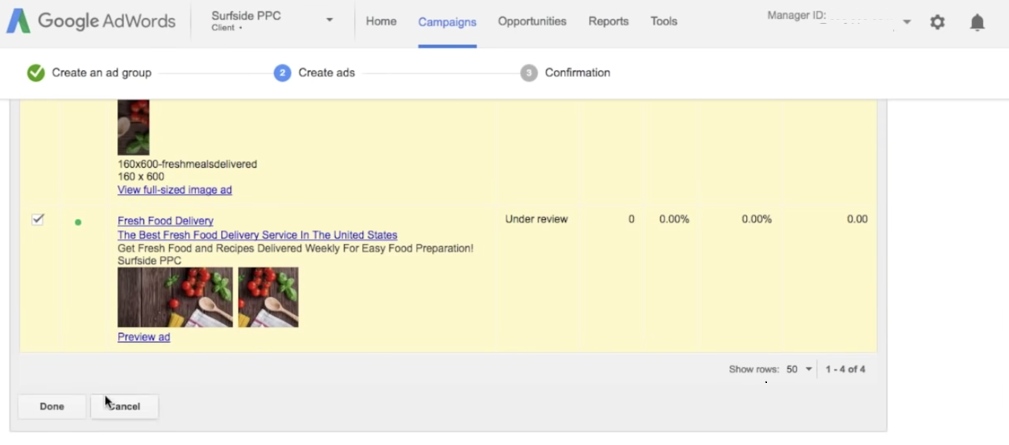
Check your ads for grammatical or spelling mistakes
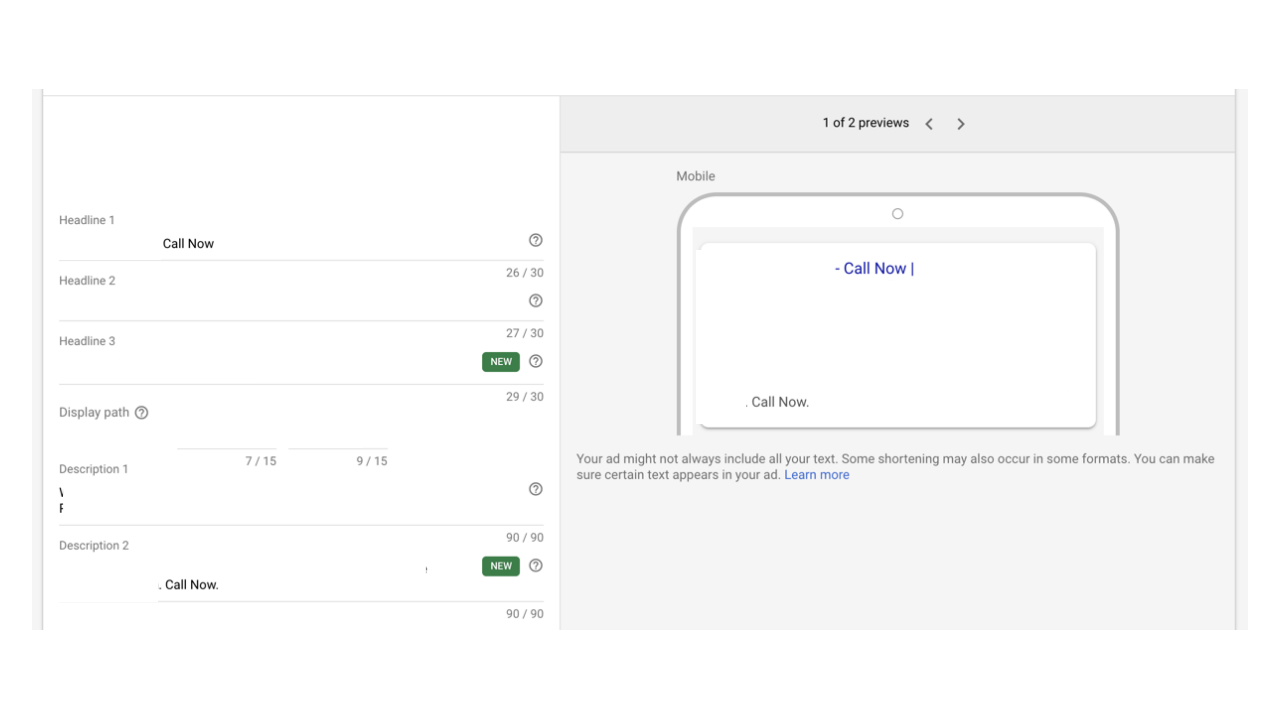
Make sure ad has clear call-to-action
Verify display campaigns are using both image and text ads
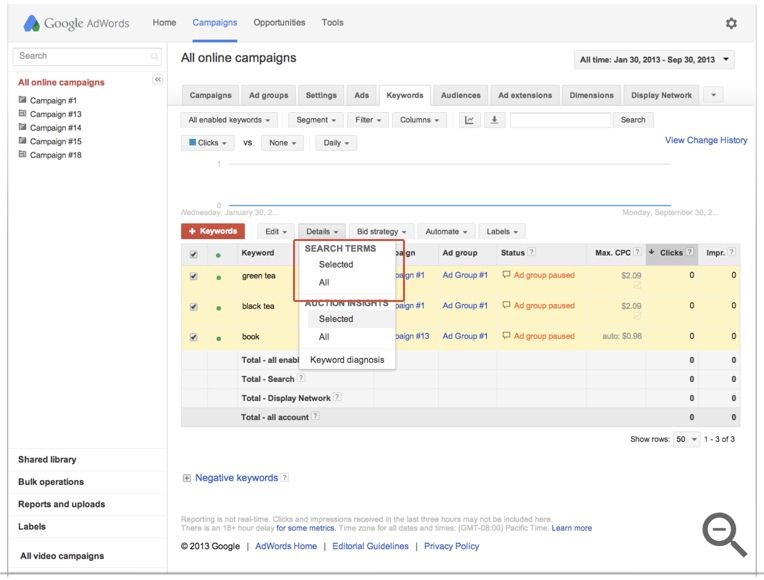
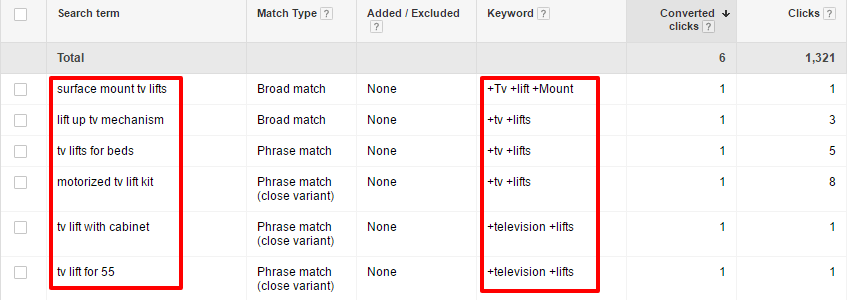
Check your search terms for negative keywords
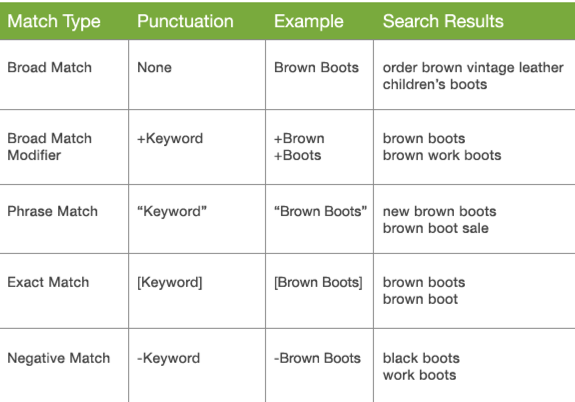
Check keyword match types
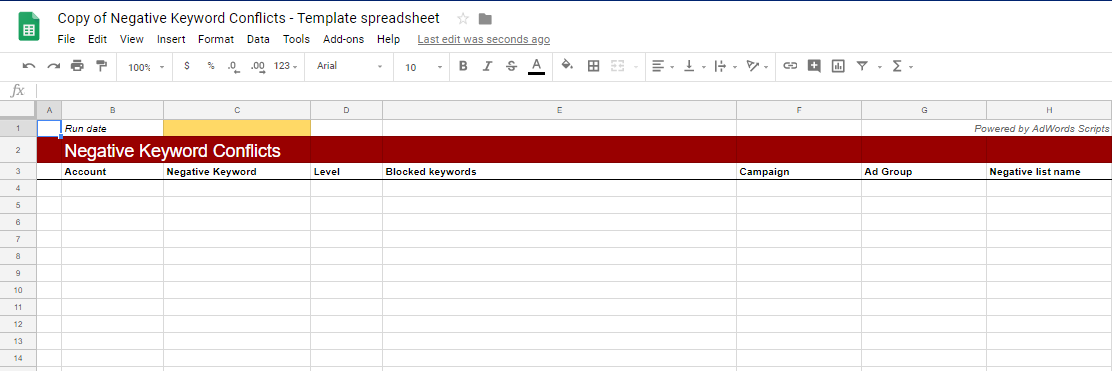
Ensure there are no keyword conflicts
Identify new search query opportunities
Verify proper search query triggered keyword results
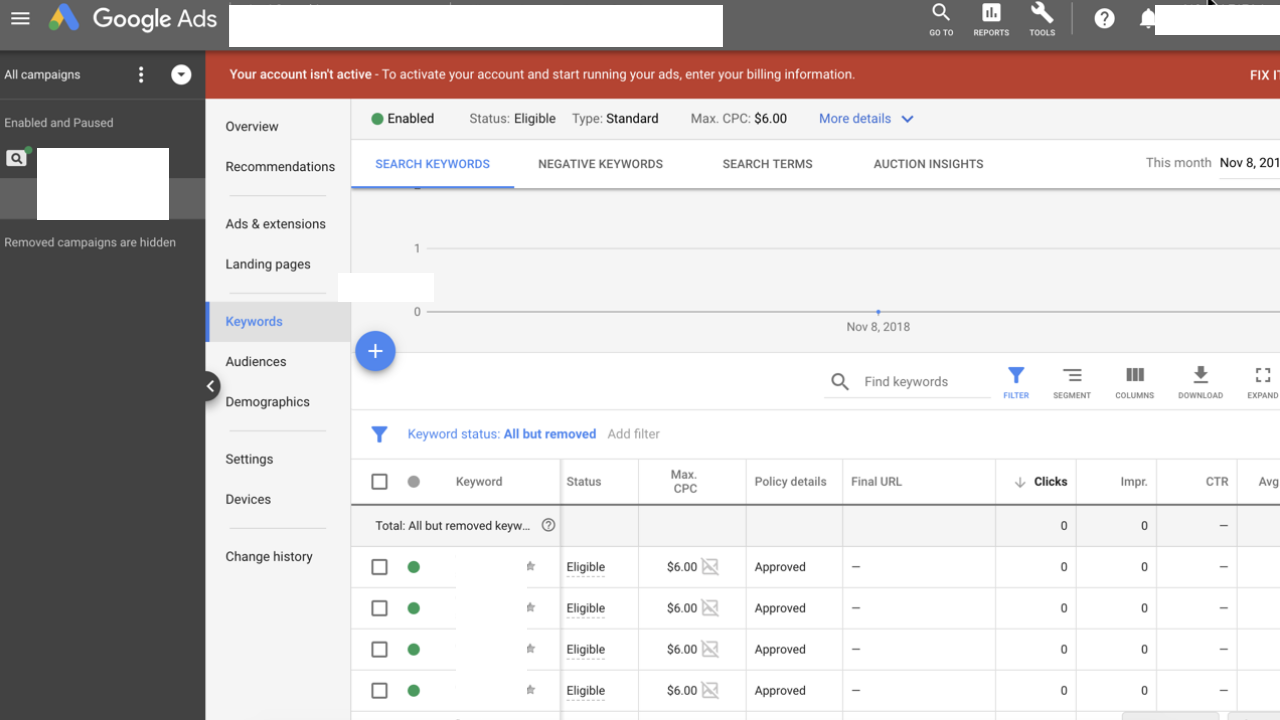
Check the number of keywords per ad group
Remove keywords with zero impressions
Check your keyword's quality score performance
Eliminate keywords with poor quality score
Ensure GMB is linked to your Ads account to enable location extensions (if applicable)
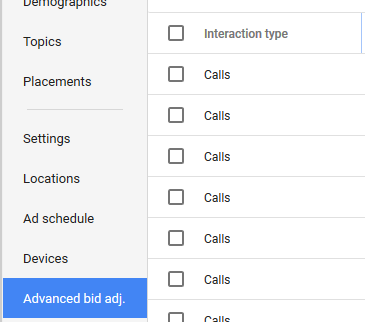
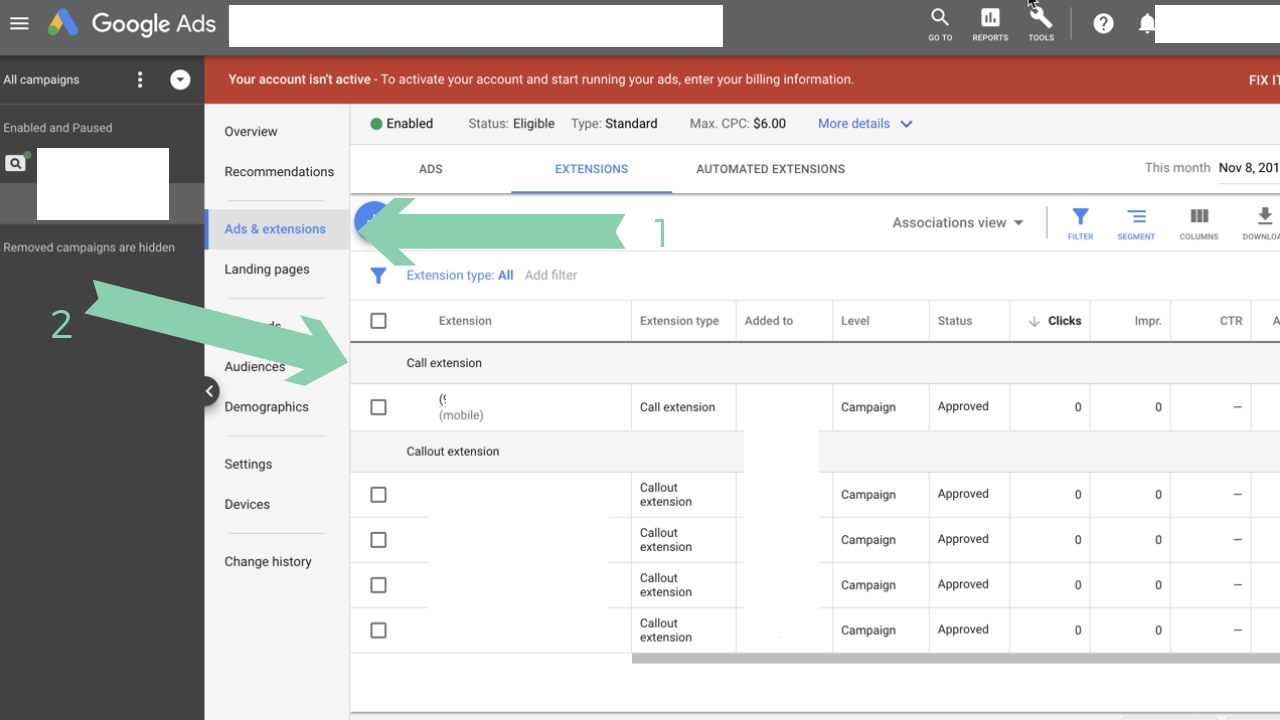
Check for campaigns with missing ad extensions
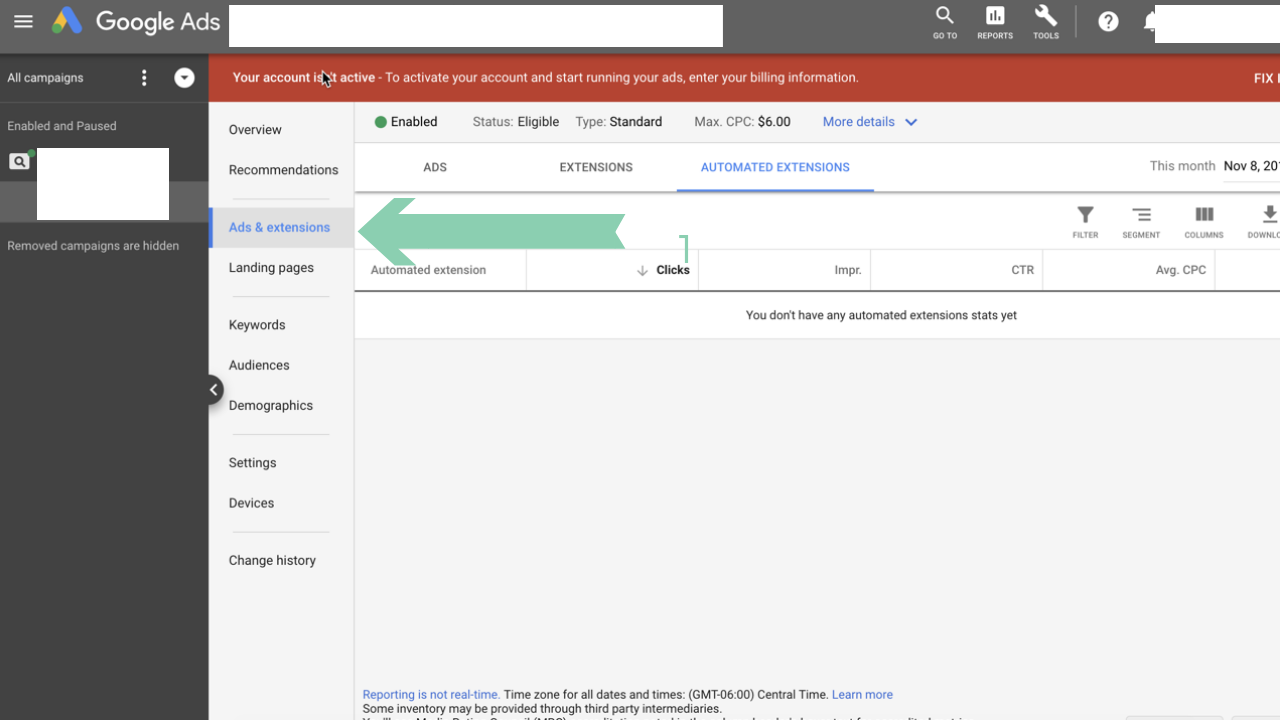
Remove any non-performing automated extensions
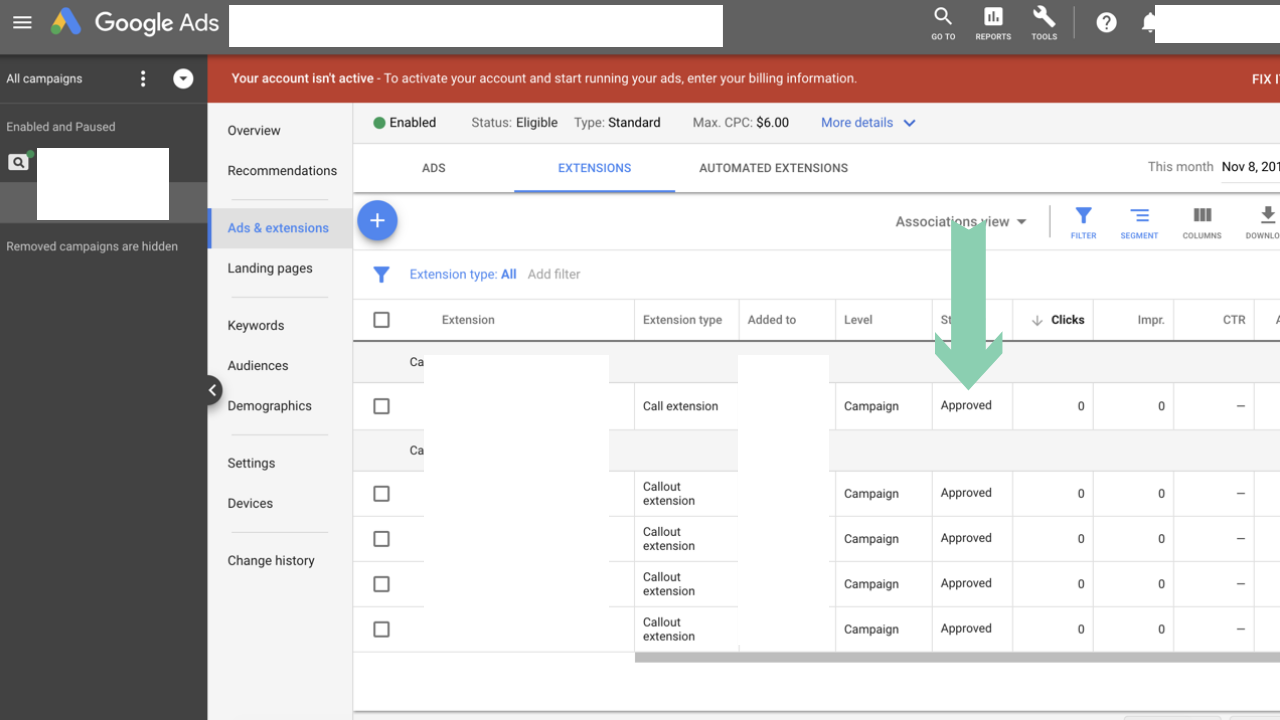
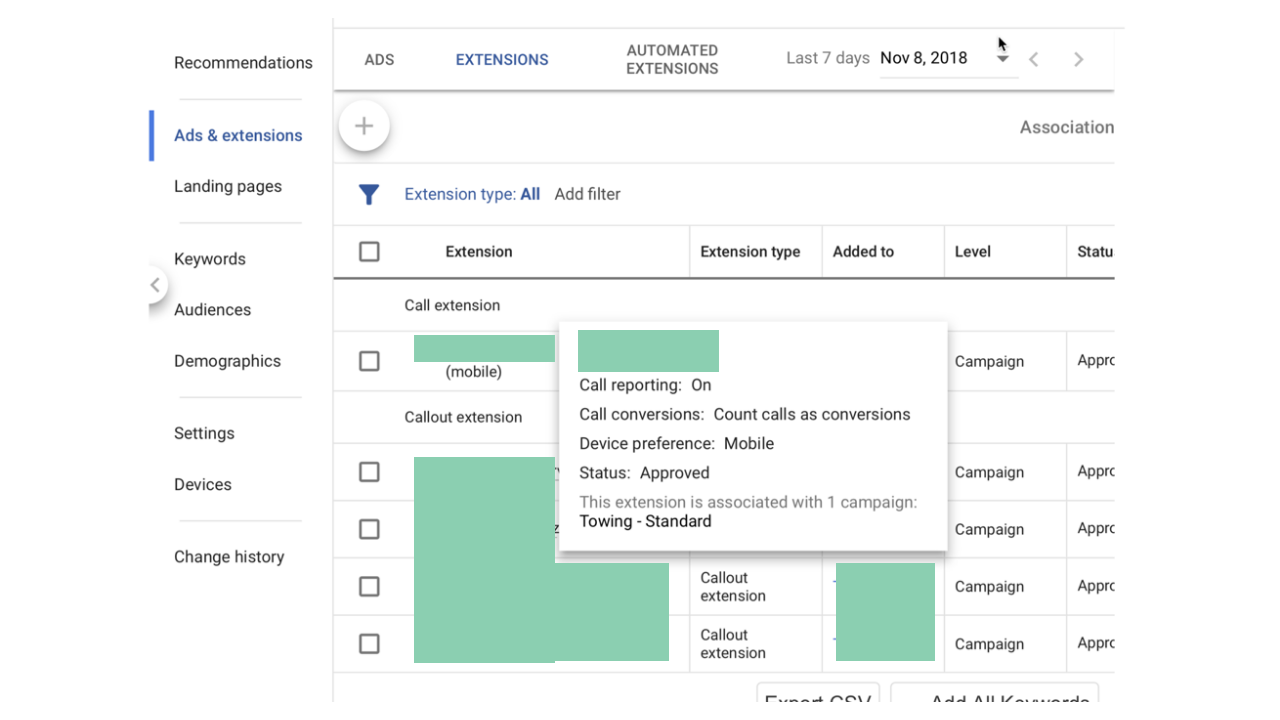
Check the status of ad extension (approved or disapproved)
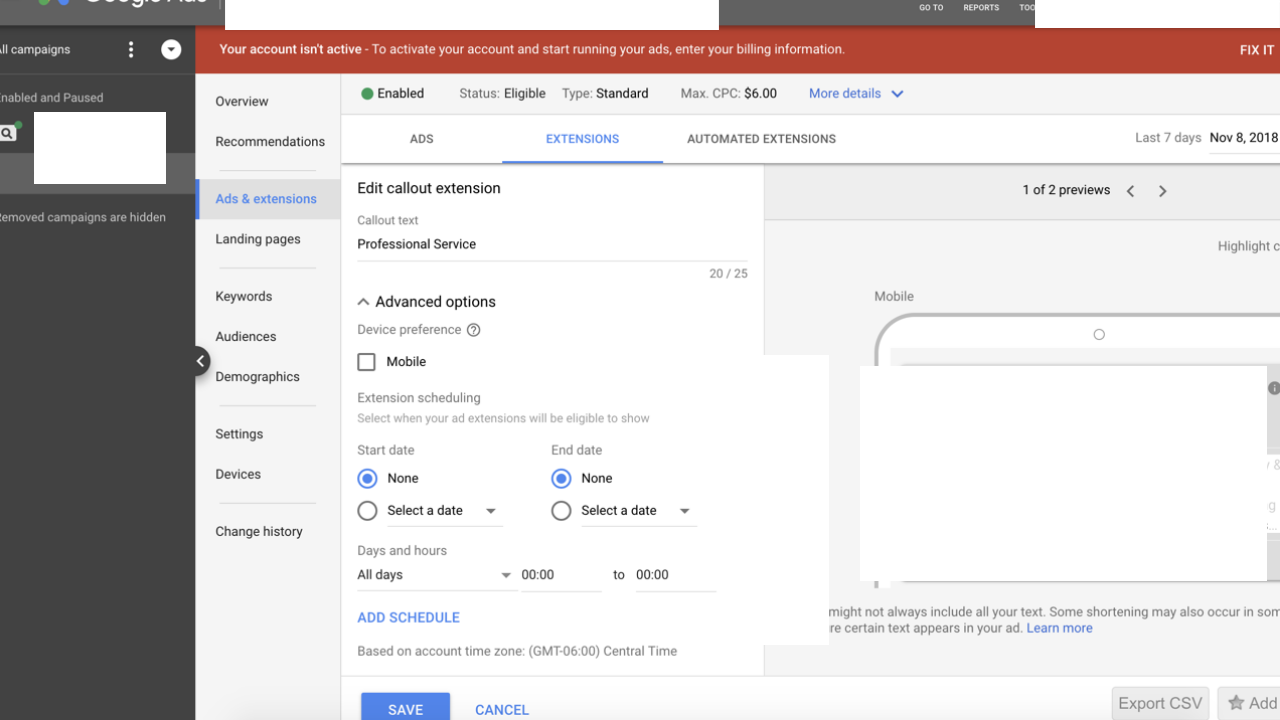
Ensure sitelinks have relevant descriptions
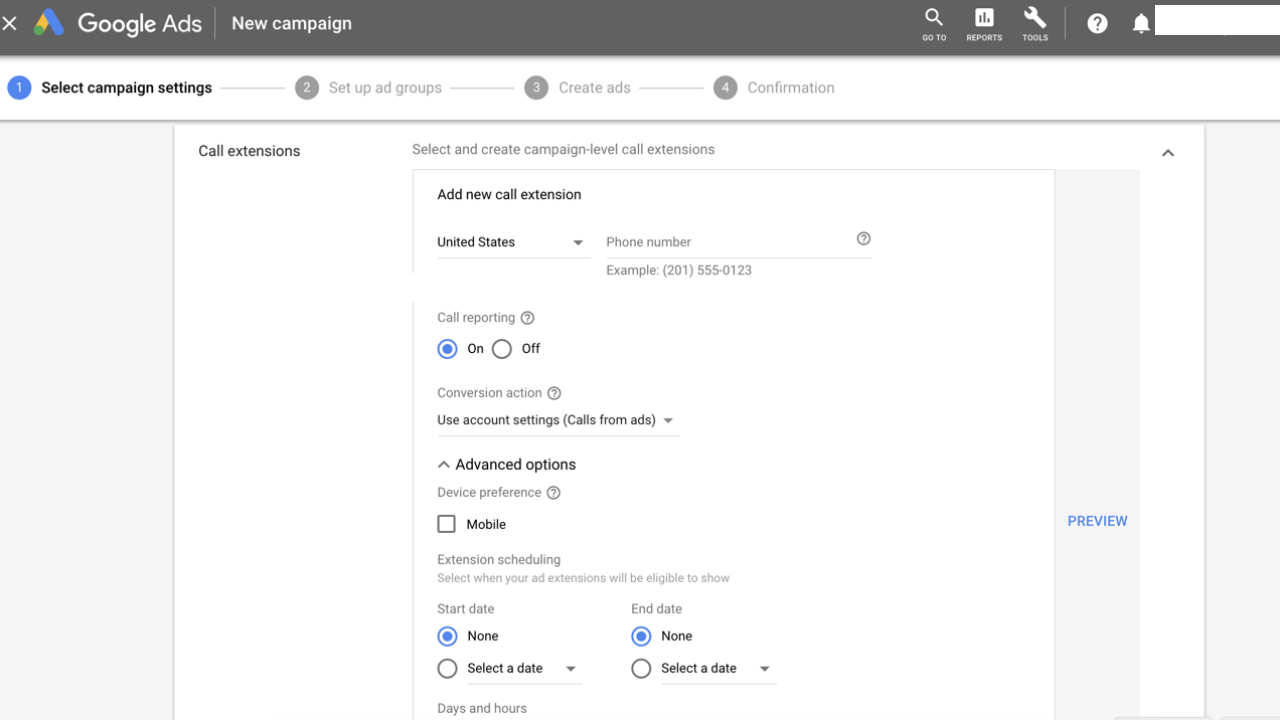
Make sure your call extension is scheduled during operational hours
Check if ‘call reporting’ is enabled to track conversions from your call extensions
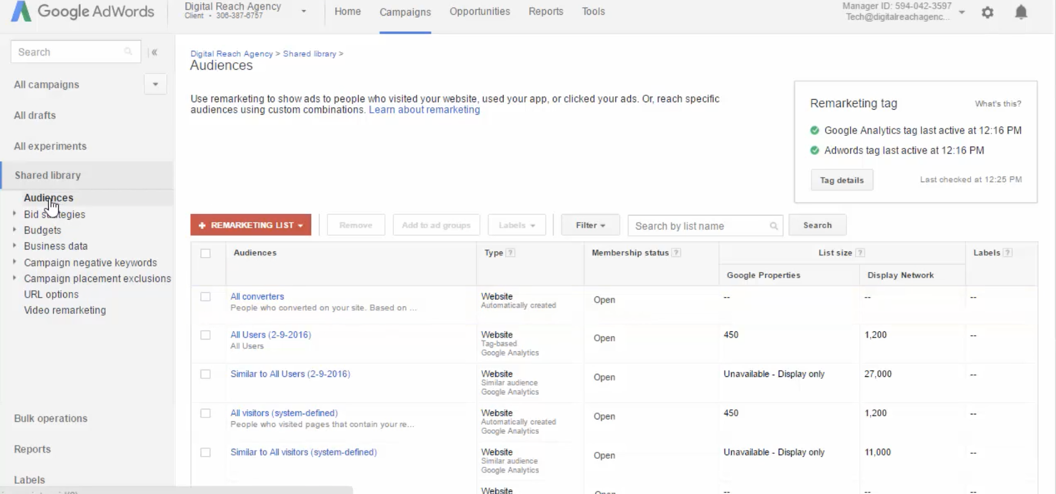
Validate remarketing code has been added correctly
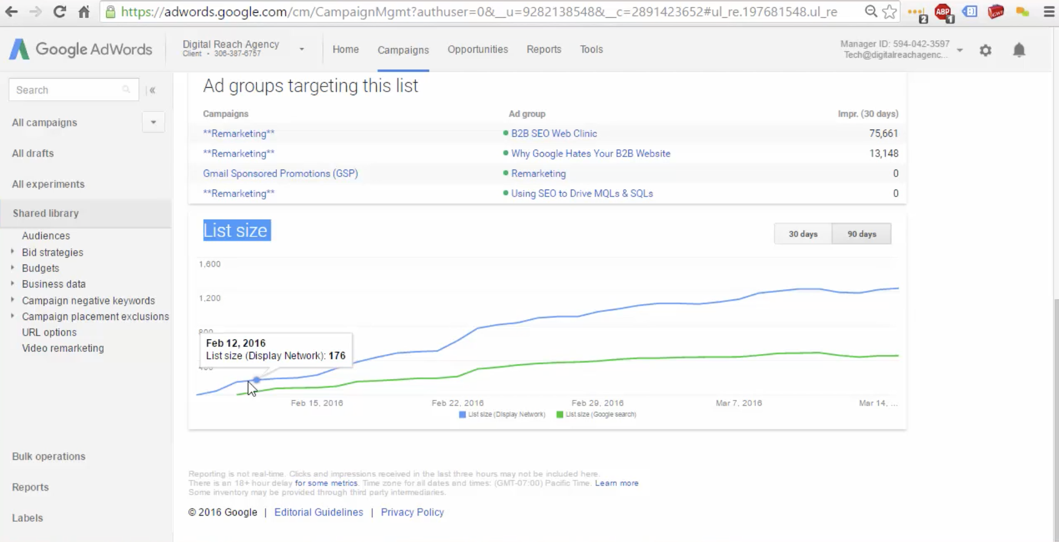
Validate remarketing lists are properly collecting visitors
Verify the remarketing lists created
Validate budget utilization
Create a report (if needed)
Prepare report for review