Templates /
Graphic Design Process

Graphic Design Process

Run this Graphic Design Process checklist when you start a new project with a client to provide images or designs.
1
Introduction to Graphic Design Process
2
Record client details
3
Hold a briefing meeting with the client
4
Research your client's ecosystem
5
Mindmap the concept
6
Create initial mockups
7
Approval: Mockups
8
Create your first draft designs
9
Approval: First designs
10
Refine your work
11
Pass the final work to the client
12
Approval: Completed project
13
Generate invoice
14
Related Checklists:
15
Sources:

Introduction to Graphic Design Process

Graphic Design Process

In this Graphic Design Process checklist, we’re going to walk through the steps from meeting with a client in the ideation stage to delivering the images and designs the client requires.

The specific use case in mind when formulating this process was a company which required some visual promotional materials to represent their brand in an upcoming marketing push.  

However, the checklist could alternatively be used as a UI checklist and could follow on from another design checklist of ours like the UX Design Process.  

You can edit this template and customize it to suit your specific needs. We’ll provide a series of visual resources throughout the checklist to help give you inspiration. 

Use the form fields in each task to record your work and store the information gathered. All data entered into the form fields from every time this checklist is run can be seen in the template overview section. 

Watch this short video introduction below to get your juices flowing.

Introduction to Graphic Design: Design Process – JFT

Record client details

Use this space to record important contact information for future reference.


Hold a briefing meeting with the client

Your initial meeting with the client will define the rest of the project. 

This is your opportunity to explore the client’s thoughts and expectations. This is also the moment where you need to determine deliverables and project scope. 

You can use the subchecklist below to help guide your meeting – asking the right questions about the design and the structure of the project. 

Use the form fields beneath to record the notes of this conversation. 

  • 1

    Understand client’s expectations
  • 2

    See the company’s vision
  • 3

    Ask about the company’s goals
  • 4

    Get them to explain in detail their products or services
  • 5

    Check if they have existing design materials to maintain consistency with
  • 6

    Discuss the timeframe
  • 7

    Establish the review processes
  • 8

    Clarify the budget


Research your client’s ecosystem

To understand how your design concepts are going to form, it is important to understand the client’s market and industry. 

This article from Entrepreneur provides a detailed breakdown of where you should look when you start your market research. 

You can use the subchecklist below to help guide you through this research and understand the research in relation to your client’s needs. 

  • 1

    Learn about the competitors
  • 2

    Establish their point of differentiation
  • 3

    Research the broader market they operate in
  • 4

    Define their target audience
  • 5

    Identify current industry trends
  • 6

    Investigate future prospects within the industry

Consider checking out the video below for some thoughts on conducting market research.

How to do Basic Market Research – Getaheadinbusiness

Mindmap the concept

Mind mapping is a useful technique for concepting and pulling together different ideas. 

We can use the mindmap to identify different approaches and to locate themes. You can review the mind mapping process of The Graphic Design School in this article here. They discuss their process from jotting first ideas to formulating design materials, looking at each step and consideration along the way.

You can use the subchecklist provided to help inspire your mind mapping process.

  • 1

    Pick some appropriate ideas for the typography
  • 2

    Determine potential color palettes
  • 3

    Assess the key messages to convey
  • 4

    Consider how different tagline wordings could impact on the design
  • 5

    Sketch out symbols and icons
  • 6

    Prepare variations on each theme
How to Make a Mind Map – UkBrainTrainer

Create initial mockups

Once you’ve formulated the ideas you’re going to explore, draft a series of potential directions the designs could take. 

You can do this simply with sketches which will provide you with concepts to show the client without taking too much time. 

Pick a few different versions to provide the client with options.

Use the file upload below to save a copy of these sketches to the checklist. Once this task has been checked, the next task (task #7) is an approval task, meaning the client will review and approve, reject, or reject the mockups with comments.

If they reject with comments, use the comments provided to create mockups more in line with their vision.

As you already noted the client’s email in task #2, they’ve been automatically assigned to all approval tasks due to role assignments.

  • 1

    Pick a couple of concepts
  • 2

    Sketch out the ideas with paper and pen

Approval: Mockups

Will be submitted for approval:

  • Create initial mockups

    Will be submitted

Create your first draft designs

Once the client has approved the mockups, you can begin to formalize these ideas and professionalize them in your design software. 

These will be your first drafts of the final product and should give the client an opportunity to pick the final concept. 

Upload your drafts in the field below before the next approval task (task #9), where the client will approve, reject, or reject the first draft designs with comments.

  • 1

    Select your preferred sketches
  • 2

    Recreate them within your design software
  • 3

    Create 4 variations of each, changing color and typography

Approval: First designs

Will be submitted for approval:

  • Create your first draft designs

    Will be submitted

Refine your work

Now that the client has given you direction for the final product based upon your previous work, you can refine and finalize the designs. 

Use the subchecklist below to guide you through the steps to prepare for delivery.

  • 1

    Create the initial final designs
  • 2

    Double check for errors including spelling
  • 3

    Save the files in the format(s) requested by the client
  • 4

    Consider creating an exhibition PDF for cleaner presentation of multiple images

Pass the final work to the client

Pass your completed project to the client for approval. 

Now that the project has been completed, it’s time to pass the final work to the client via the upcoming approval task (task #12). 

Use the form fields below to make sure the materials are up to scratch before checking this task off to send the completed project for approval. 

  • 1

    Make any small iterations to the designs if necessary
  • 2

    Compile all the design files in the ways most convenient for the client

Approval: Completed project

Will be submitted for approval:

  • Pass the final work to the client

    Will be submitted

Generate invoice

Congratulations on a successful design project. 

The designer can use the Process Street invoice generator template to send their invoice to the client. 

This invoice can be sent automatically from this checklist by clicking to complete the task. 

You can use Zapier to connect this task in this template to your invoice so that you can automate the sending process. 

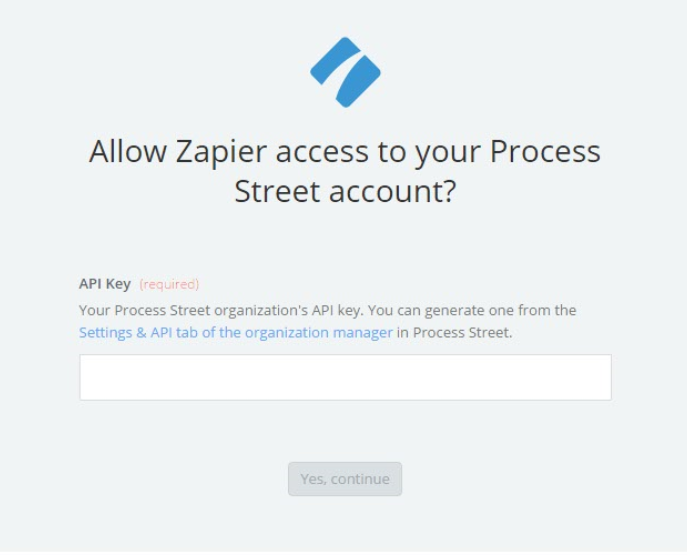
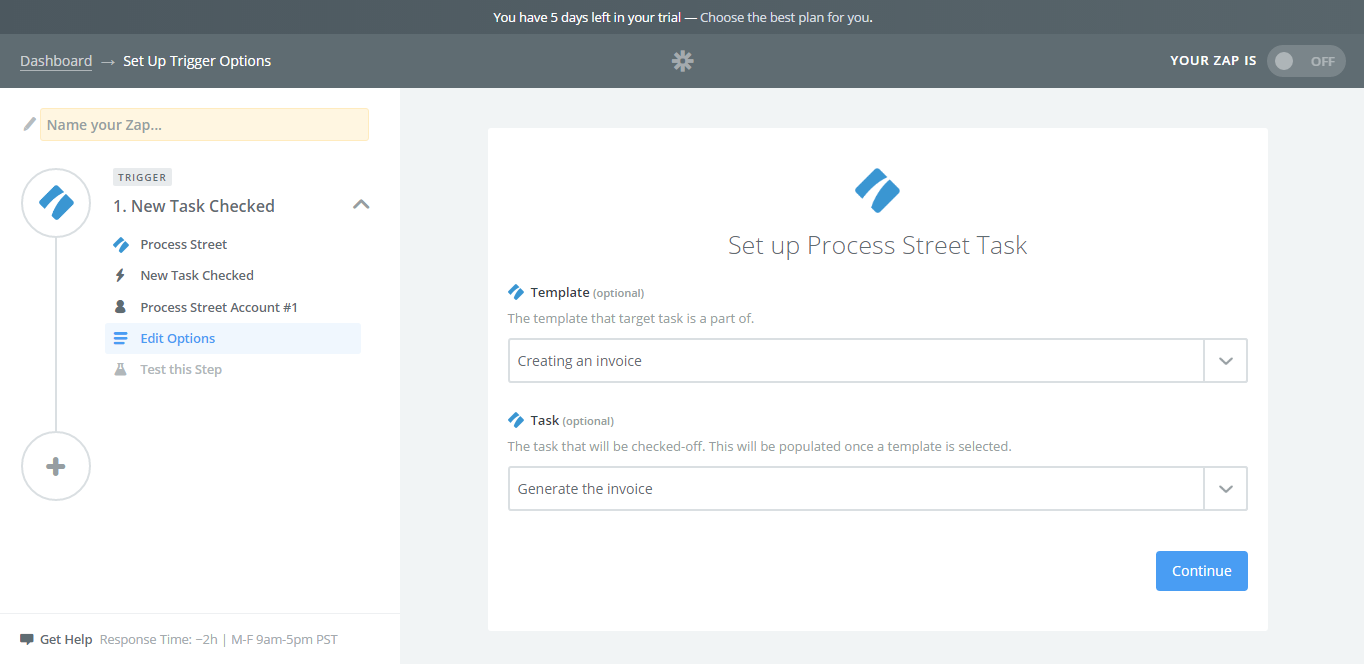
In Zapier, select “Make a Zap” and search for Process Street. It will prompt you to create a trigger – select “New Task Checked”. It should then prompt you to connect your Process Street account to your Zapier one. You simply follow the link Settings & API tab of the organization manager on the pop-up.

Follow the steps provided by Zapier and it should connect the two accounts together. From here it will let you search for the template you want to run the Zap from, and choose the task you want to hook it up to.

After you’ve selected those options you can test that step and your trigger should be set. 

Next, you can create the action to be initiated by your trigger. You can use a third party system like WebMerge or you can use Zapier’s built-in email service to generate HTML emails. Either of these solutions can be used to generate and send your invoice.

To read more about these steps and how to create the invoice check out this article

Sources:

Take control of your workflows today.