Templates /
Shopify Setup

Shopify Setup

Run this Shopify setup checklist to easily create your online store
1
Introduction:
2
Store setup:
3
Sign up for Shopify
4
Say whether you're already selling
5
Fill in personal information
6
Products:
7
Add a new product in the "Products" section
8
Fill in your product information
9
Product collections:
10
Create a new collection
11
Enter collection details
12
Save the collection
13
Store customization:
14
Choose a theme
15
Customize your theme layout
16
Choose your theme's settings
17
Domain setup:
18
Choose a new or existing domain
19
Payment methods:
20
Set up your payment method(s)
21
Sources:
22
Relevant checklists:

Introduction:

Ecommerce is big business. With estimated online sales reaching $4.5 trillion (by 2021) it’s easy to see why so many people are setting up shops to break into the market.

That’s why we made this Shopify setup checklist.

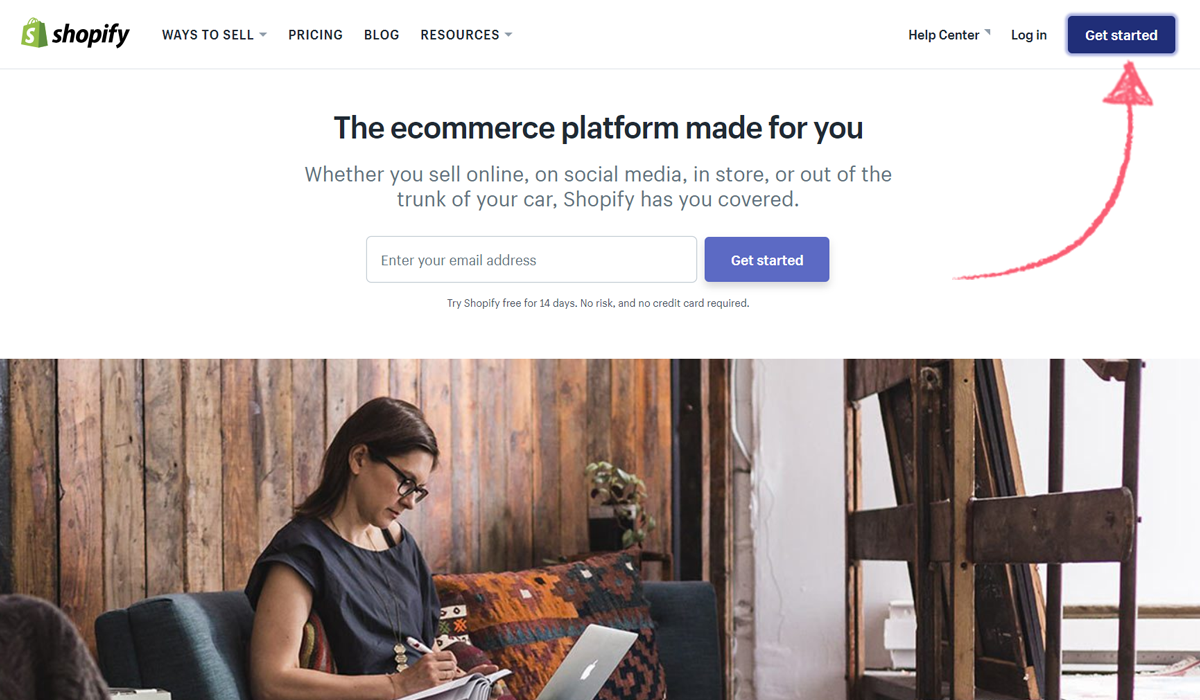
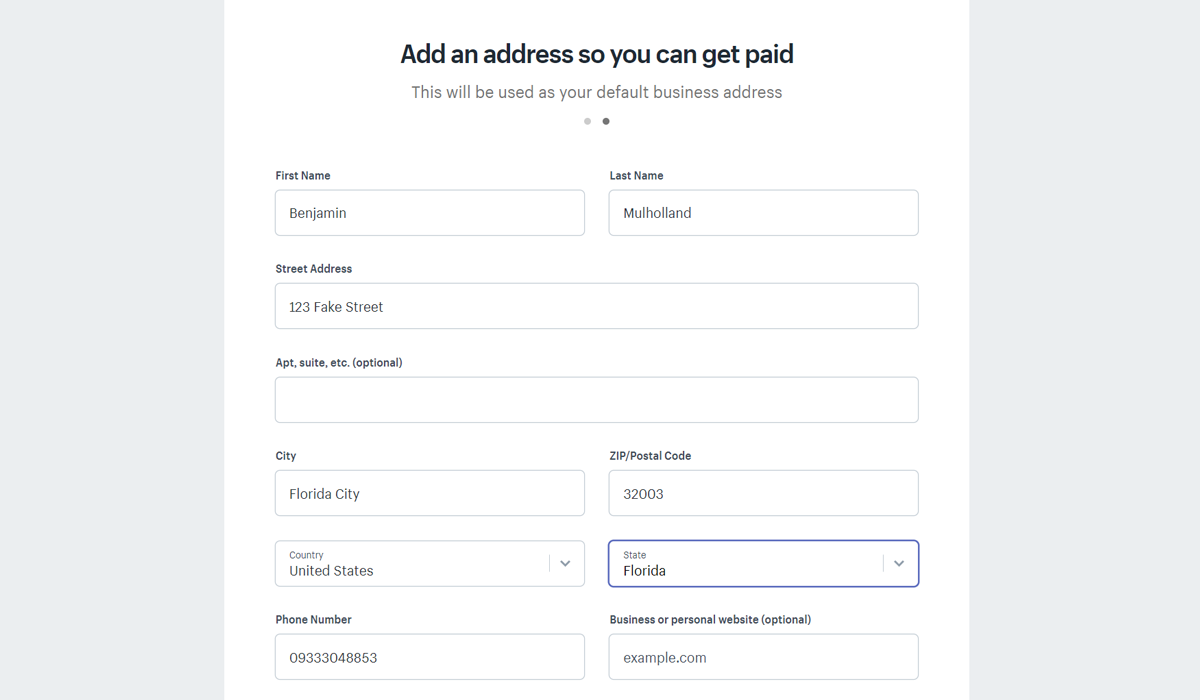
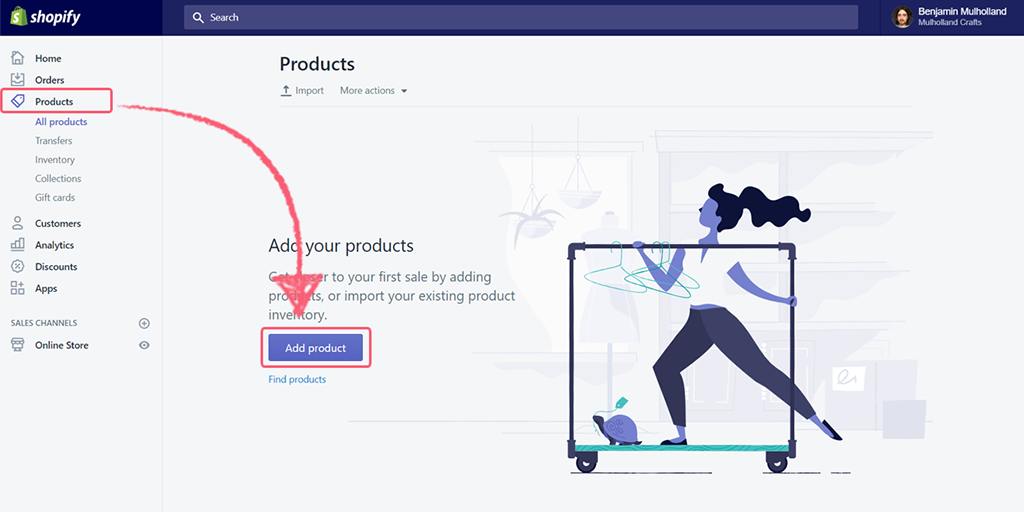
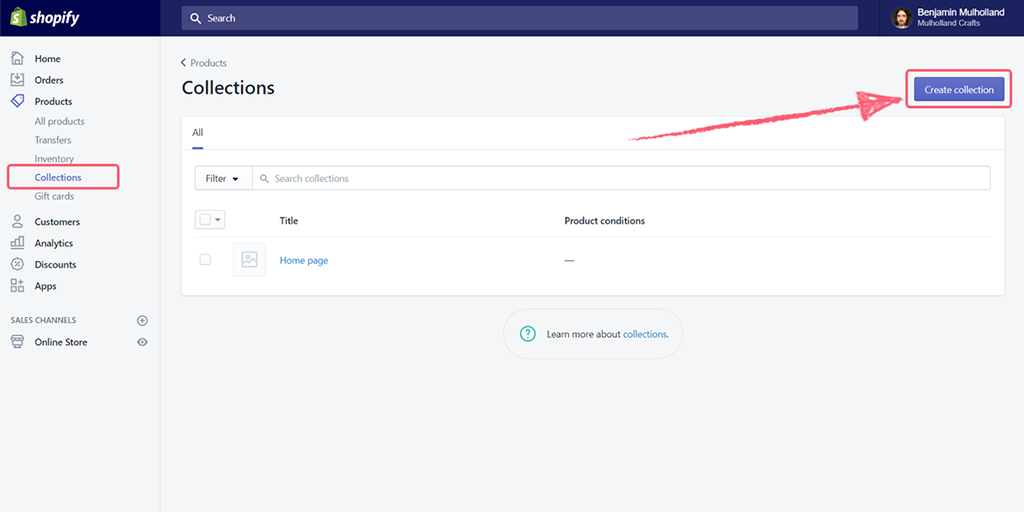
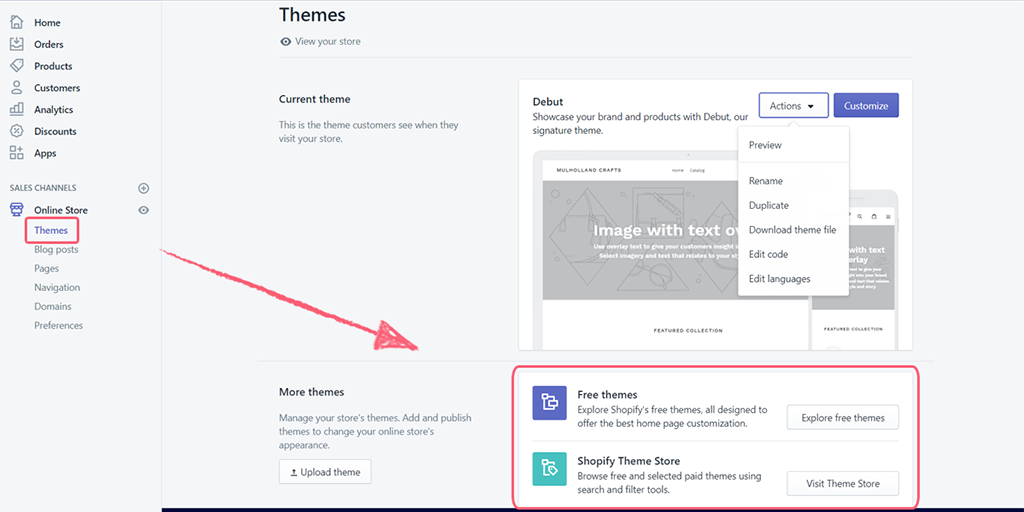
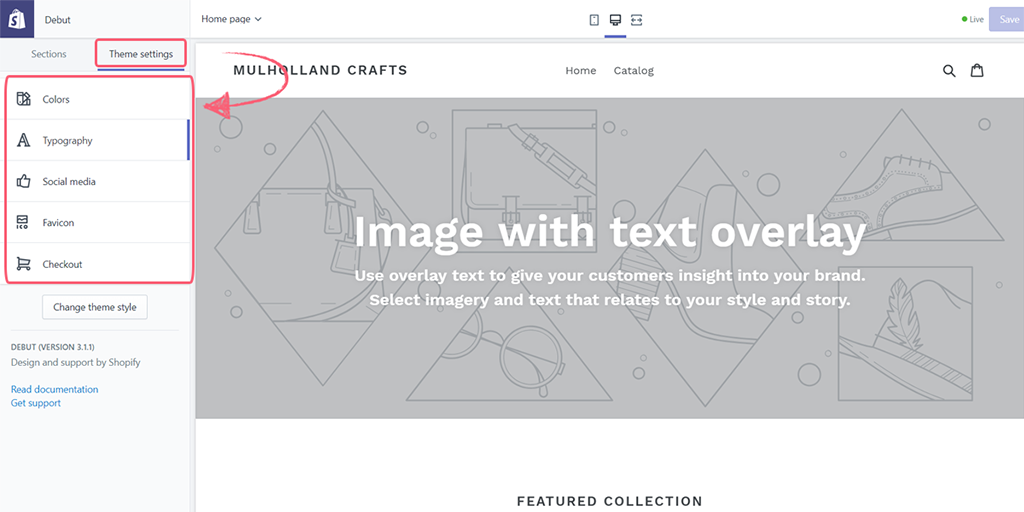
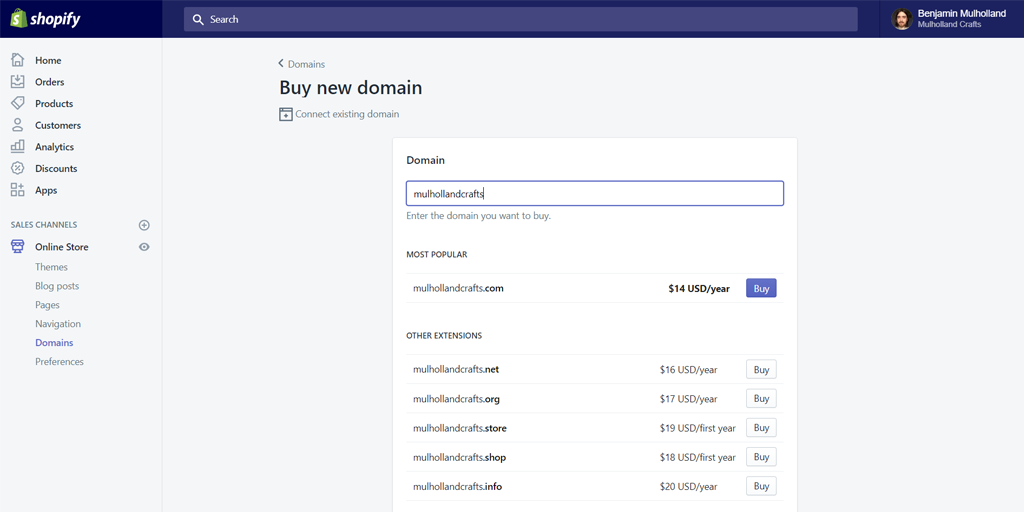
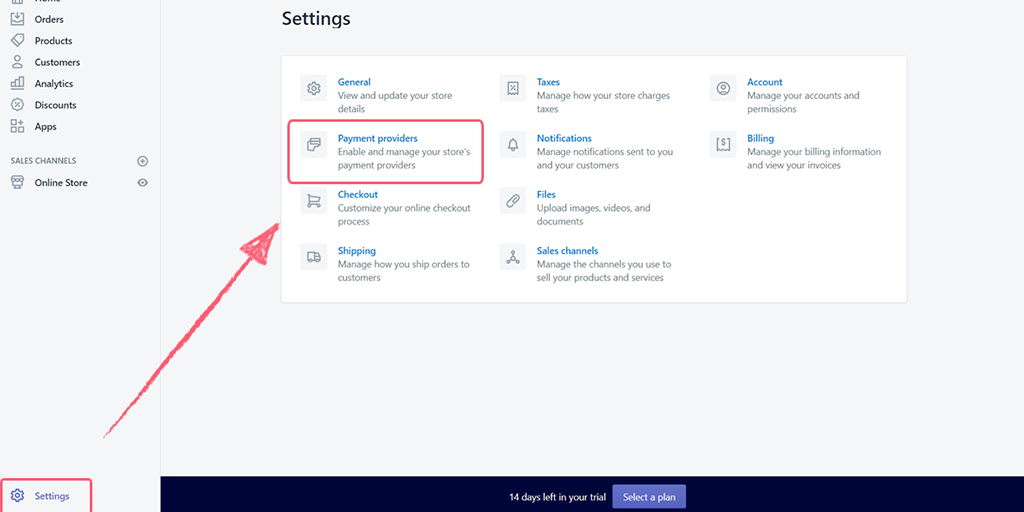
Setting up an online store can be overwhelming, but in this checklist we’ll guide you through the process of setting up your own online store with Shopify. From signing up, all the way through to customizing your site’s look, listing products, and sorting out your payment methods, everything is here with detailed instructions.

So, what are you waiting for? Let’s get started with your own online store!

Store setup:

Sign up for Shopify

First things first; you need to sign up for Shopify.

To do this, go to the Shopify home page and click on "Get started". Fill in your email address, desired password, and store name in the fields provided, and also in the form fields below for safe keeping.

After all, the last thing you want is to forget the password to your new online store.


Say whether you’re already selling

Once Shopify has processed your request, you need to say whether you’re already selling products and what your estimated yearly revenue is.

As with your login details, use the form fields below to record your responses so that you can easily refer back to them later.


  • 1

    Yes
  • 2

    No

Fill in personal information

Fill in your personal information to complete the next step. This includes your address, country (and state) of operation, phone number and (if you already have one) website.

As always, record a copy of this information using the form fields below.


Products:

Add a new product in the "Products" section

Now that your store is set up, you’ll want to add your first product in order to get the ball rolling. Doing this before customizing the look of your site will let you see the design in action, making it easier to judge what the best options will be in practice.

To do this, click on the "Products" menu from your Shopify dashboard, then on the "Add product" button.

Fill in your product information

After setting up your product you’ll need to fill in its information, including the product’s name, description, any images you have of it, and so on.

As with previous steps, fill in the form fields below with the same information so that it can be easily referenced for later viewing.


Once you’re finished, don’t forget to hit "Save"!

Product collections:

Create a new collection

Once your first product is set up you’ll need to create a collection to house it. These allow you to group products together to make them easy to find (eg, "Men’s Clothes").

Do this by going into the "Collections" subsection of the "Products" menu, then clicking on "Create collection" in the top right of your view.

Enter collection details

Much like when creating a product, the next step is to enter the details of the collection you’ve just created. This includes the name, description, and image – be sure to note these down in the form fields below too!

The only detail which will need a little thought is how products will be added to the collection. This selection can’t be changed later, so think this through carefully and record your choice using the dropdown form field below.

If "Manually" is picked then (no surprise) all products will have to be manually assigned to be part of the collection.

"Automatically" adding new products to the collection will require you to set parameters (eg, product title must contain "T-Shirt") for this to happen. For a full list of the criteria for products to be added, click here.


Save the collection

While it may seem like a needless reminder, don’t forget to click "Save collection" in order to finalize its creation.

Store customization:

Choose a theme

Next you need to choose the theme for your store by going into the "Themes" section of your dashboard. From here you can view your current theme and, if desired, explore a selection of free and paid themes which you can use instead.

The success of your site will often rely on its appearance – with the right theme, layout, and color scheme, you can help to attract more customers and make sure those that land on your site won’t immediately bounce.

Once you’ve chosen your theme, record its name and (if possible) the URL you downloaded it from using the form fields below.


Customize your theme layout

While it can be a little overwhelming at first, now its time to edit the layout of your chosen theme to suit your needs. To do this, click the "Customize" button next to your theme in the "Themes" section of Shopify.

Once you’re editing the theme, click and drag elements in the left-hand menu to shift their order on the store page, and double-click any item you want to edit (eg, change the text or size of).

There’s no cut-and-dry answer as to how your page should be formatted or what tone to use in your language. The best advice here is to think about your products, what their appeal is, who your target audience is, and how you can appeal to their specific tastes and wants.

Choose your theme’s settings

Next up, you need to choose your theme’s settings, such as the color palette, fonts, social media buttons, and favicon options. This is all done by clicking through to the "Theme settings" menu in the upper left section of your view.

Once again, there is no easy answer or guide as to the right choices for your business. Try out different color and font combinations, then go with whatever works. Remember, you can always come back to change and optimize this – the important thing is to have a solid base to start from.

After you’ve finished, don’t forget to hit "Save" to apply your changes!

Domain setup:

Choose a new or existing domain

Your store can’t go live without being attached to a domain, and so that’s your next task. Do this using the "Domains" sub-menu in Shopify.

If you already own a domain that you want to connect, use the "Connect existing domain" option to find your website, then follow the instructions provided to change your settings appropriately.

Otherwise, use the "Buy new domain" button to search for and purchase your domain.

Once you have done either of these things, record the domain you have linked using the form field below.

Payment methods:

Set up your payment method(s)

Finally, in order to earn money through your store your customers need to have payment avenues. Thus the final stage in our basic Shopify setup process is to sort out the payment methods your store will accept.

To do this, click on the "Settings" button in the bottom left of your dashboard, then go to the "Payment providers" section.

From here, simply select (and follow the provided instructions to activate) the payment methods you want to accept for your products. This includes options such as PayPal and 

Sources:

Relevant checklists:

Take control of your workflows today.