Templates /
Animation Design Process

Animation Design Process

Run this checklist to create an animation
1
Introduction:
2
Record client details
3
Arrange a design meeting
4
Research the client's company
5
Design meeting:
6
Gather notes and materials for the meeting
7
Take notes during the meeting
8
Record project details
9
Scripting:
10
Make notes on the script
11
Write the initial script
12
Create three variations
13
Send initial script for approval
14
Record initial script client feedback
15
Record script approval status
16
Make script iterations as required
17
Voiceover:
18
Make notes on the voiceover
19
Decide who will do the voiceover
20
Check recording equipment
21
Let everyone nearby know you're recording
22
Record the raw voiceover
23
Make voiceover basic edits
24
Send voiceover for approval
25
Record voiceover client feedback
26
Record initial voiceover approval status
27
Make voiceover iterations as required
28
Animation:
29
Record ideas for animation
30
Create storyboard
31
Make keyframes
32
Send keyframes for approval
33
Record keyframe client feedback
34
Record keyframe approval status
35
Make keyframe iterations as required
36
Create main animation
37
Send animation for approval
38
Record animation client feedback
39
Record animation approval status
40
Make animation iterations as required
41
Audio mixing:
42
Remove unnecessary noise
43
Match the audio to the animation
44
Add sound effects
45
Add music
46
Check volume levels
47
Send initial audio mix for approval
48
Record initial audio mix feedback
49
Record initial audio mix approval status
50
Make audio mix iterations as required
51
Closing out the project:
52
Mark the project as closed
53
Mark the project as finished
54
Sources:
55
Related checklists:

Introduction:

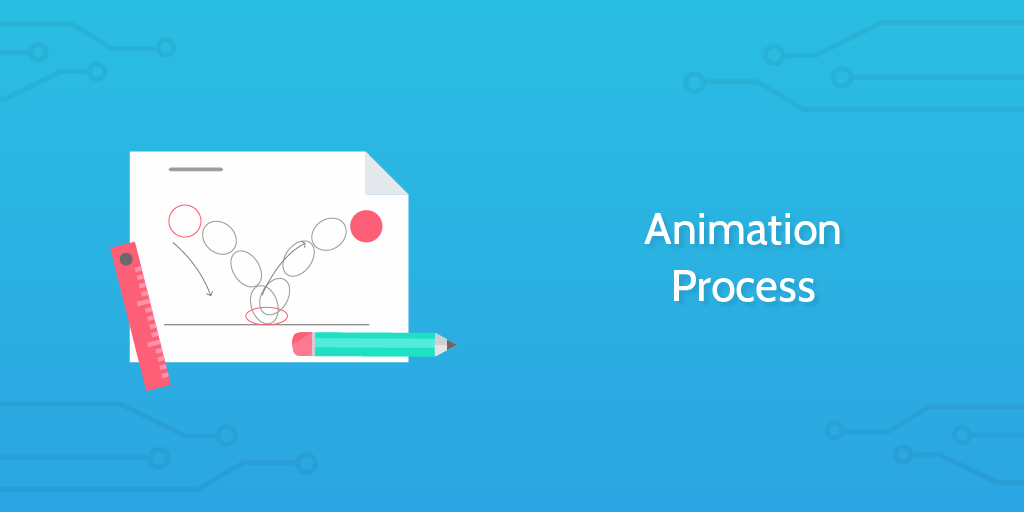
There are as many ways to design an animation as there are animations to design – trying to tell you how to make an animation from start to finish would simply crush creativity and confuse both you and your client.

Instead, this animation design process will guide you through the technical elements of creating an animation.

Whether you’re responsible for every element (scripting, the voiceover, etc) or just the animation itself, this checklist has everything you need to work with your client and produce results they’re happy with without wasting time on needless revisions.

Let’s get started.

Record client details

Start by recording the details of your client in the form fields below.

This will make it easy to identify which client and animation this checklist is following when looking back on it. These details can also be automatically filled in by integrating Process Street with your CRM.

For more details, check out our help articles on integration links and Zapier, along with our free ebooks on business process automation and small business automation.


Arrange a design meeting

Next you need to arrange a design meeting with your client. This will allow you to get an initial idea of what the animation will be and what their expectations are while making sure they know what the project will entail and cover.

Record the date of the design meeting using the form field below.

Research the client’s company

(Source: https://www.flickr.com/photos/ruben9/1460266814)

The only thing left to do before the design meeting is to research the client’s company. This doesn’t have to be exhaustive – you just need to get an idea of their brand elements and what they already have.

Primarily you should familiarize yourself with their common branding elements and any consistent factors in their existing videos (if they have any). Record your notes on these aspects using the form fields below.


Design meeting:

Gather notes and materials for the meeting

Get your notes together in preparation for the design meeting. At the very least this should include the research you’ve done on the client’s company, along with the meeting’s schedule (if it has anything set) and any details that the client has already given.

Use the sub-checklist below to make sure that you have everything you might need.

  • 1

    Notes on the client company
  • 2

    Notes on existing client videos/animation
  • 3

    Details already given by the client
  • 4

    Client branding notes
  • 5

    Meeting schedule
  • 6

    Notes / links to relevant material you’ve produced

Take notes during the meeting

Once you’re in the meeting you need to take notes of the important things said during the meeting, such as the client’s expectations of the animation, any details they give of what they want to see, and so on.


It’s also a good idea (albeit entirely optional) to record the meeting so that you can play it back later in case any details are missed. If you do this, upload the recording to the form field below.

Record project details

Once the meeting is over it’s time to write up your notes and define the project itself.

Using your meeting notes and/or recording (which we’ve pulled into this task using variables), record aspects such as the purpose of the animation, its estimated length, whether it will have a voice over and what parts of the animation you’ll be responsible for.

Design meeting notes: {{form.Design_meeting_notes}}

Design meeting recording: {{form.Design_meeting_recording}}


  • 1

    Scripting
  • 2

    Voice over
  • 3

    Animation
  • 4

    Audio mixing

Tasks in this checklist will display based on the “what tasks are required” form field. For example, if you need to take care of the voice over and animation but nothing else, the voice over and animation tasks will be displayed while keeping the others hidden.

Scripting:

Make notes on the script

(Source: https://commons.wikimedia.org/wiki/File:Media_Producer_%26_Marketer_-_Tommy_Swanhaus_doing_a_voiceover_for_book.jpg)

From initial project outline in meeting and material given by client need to rough out an initial script.

Use the form fields below to record the key points or features that need to be covered, any existing version of the script provided by the client, and any input from the client during the design meeting on things like the tone of the video.


Write the initial script

Now it’s time to write the initial script.

The main things to keep in mind with this task are:

Purpose of the animation: {{form.Purpose_of_the_animation}}

Estimated animation length: {{form.Estimated_animation_length}}

Key script points to cover: {{form.Key_script_points_to_cover}}

Client design meeting script input: {{form.Client_design_meeting_script_input}}


Create three variations

Write the script into three different versions to provide the client with variations that they can choose from.

These don’t have to be completely different – you should use the same structure but vary the terms and phrases so that you have a better chance of hitting something that resonates with the client and their audience.

Initial script: {{form.Initial_script_2}}

Record your three variations using the form fields below.


For example:

Variation 1. We all know that scaling your sales team can be hard. That’s why you need to have the right software for the job.

Variation 2. It’s difficult to scale a sales team efficiently. That’s why you need the right software for the job.

Variation3. With the right software, scaling your sales team is easy.

Send initial script for approval

Send the initial script and your variations to the client for approval.

These should be noted as various options on the same script – the client can pick and choose elements from each variation that they like for you to combine.

Record initial script client feedback

(Source: https://pixabay.com/en/microphone-voice-over-music-759587/)

After they’ve replied to your script pitch, record your client’s feedback using the form field below.

You don’t have to apply it yet – just take note of what they say.


Record script approval status

Now you need to record whether the initial script (or any variations) were approved to be the final thing, whether there need to be interations or whether the project’s scope has been reached and therefore is being closed without iterations.


For example, if the client approved the script or a variation of it to be used as the final script, this would be marked as “approved” and you’d move on to the next task.

“Requires iteration” means that the client hasn’t approved the script or a variation and so you need to work on a new version based on their feedback. These iterations are covered by the scope of the project, and so there’s no problem with you making them.

If the project is “not approved” and closed, this means that the iterations that are needed fall outside the limits of the project and either you or the client aren’t willing to extend it to include them. As such, the project will close without the iterations and you will need to bill the client for the work you’ve done so far.

Make script iterations as required

Using the client’s feedback on the initial script and its variations, create iterations on the script and submit them for approval until the project is either approved to move forwards or the scope is exceeded and the whole thing is closed.

Client script feedback: {{form.Client_script_feedback}}

Use the form fields below to record your script iteration(s) and its(/their) feedback, along with the final approval status of the script.


The key here is to consider the number of iterations you’re willing to do before either closing the project or re-adjusting the scope of the project (and the resulting price estimate). It’s a fine balance between giving the client what they pay for while not being taken for a ride yourself.

Complete this task only when the project is approved to either go further or be closed.

Voiceover:

Make notes on the voiceover

Start the voiceover tasks by making notes on the kind of voiceover you think will be suitable. Do so using the form field below.


These notes could (and mostly should) be based on input from the client during the animation design process meeting. Otherwise, check out similar videos from their site and competitors to get a sense of what will work for this one.

Try to pin down aspects such as the tone of voice, gender of the voice actor, the accent they should have, and so on.

Decide who will do the voiceover

(Source: https://twistedsifter.com/videos/hank-azaria-on-the-genius-of-mel-blanc/)

From your notes you need to make a decision on who is going to do the voiceover.

Ideally this would be yourself but, if you don’t fit the bill (or have enough experience), reach out to someone who does and book them for the gig. This could be anything from a friend to a professional voice actor contacted through services like Upwork.


If you hire someone outside of your Process Street organization to be the voice actor, invite them to work on this checklist as a guest to complete the next few steps (up to “Record the raw voiceover”).

Check recording equipment

It’s time to check your recording equipment to make sure that everything is in working order and that your environment is ready for recording. Use the sub-checklist below to keep track of the checks as you work through the individual elements of your setup.

  • 1

    Recording software
  • 2

    Microphone
  • 3

    Soundproofing
  • 4

    Background noise eliminated

Let everyone nearby know you’re recording

Take a moment to let everyone close by that you’re recording. While this isn’t always necessary (especially if you have decent soundproofing) it’s still a good habit to keep up, and ensures that no-one will interrupt you mid-session.

Note that you don’t have to both anyone outside of your immediate area. If you’re, say, recording the voiceover at home, you should tell your family but not have to worry about disturbing the neighbors. Chances are they won’t disturb you anyway.

If, however, preventable noise is being created outside your control, do what you can to limit it by telling those responsible that you’re recording. For example, if your neighbors are mowing the lawn you could politely ask them either to stop while you record or to let you know when they’re done so that you can get straight to business.

Record the raw voiceover

(Source: https://www.flickr.com/photos/vancouverfilmschool/3615479018)

It’s time to record the raw voiceover. This can be done in a couple of ways, namely:

  • Recording several takes all the way through
  • Recording several takes on each sentence/paragraph back-to-back

Choose which you want to go for, run through it a few times without recording to make sure you can say it without messing up, then record.

Once you’re finished, upload a copy of the raw voiceover to the form field below for safe keeping.

Remember – you don’t have to be perfect. The closer you are, the less editing will be required later (so do your best to give a clean recording) but don’t obsess to the point where improvements are more trouble than they’re worth.

Make voiceover basic edits

Now that you have the raw voiceover recording you need to make some basic edits to let the client more easily assess it and give feedback.

The main edits are to remove background noise, along with pauses and/or repetition in the voice actor’s speech. If several takes of each paragraph were recorded back-to-back, edit these up into several straight run-throughs of the script.

Don’t labor over these edits too much, however. The goal here is to give the client a good sense of what the final edit will sound like before the audio mixing stage.

Once edited, upload the recording to the form field below.

Send voiceover for approval

This task is exactly what it says on the tin – you need to send the voiceover to the client for approval. There’s no special method here, so just attach the file to an email or message requesting them to review it, approve or disapprove it, and give feedback.

Record voiceover client feedback

(Source: https://pixabay.com/en/client-business-marketing-website-3691435/)

After getting the client’s reply, use the form field below to record their feedback on the initial voiceover recording.


Record initial voiceover approval status

After recording their feedback, use the dropdown form field below to show whether the initial voiceover edit was approved to be used in the final audio mix.


If the recording was approved then continue through this checklist as planned. If the client wasn’t satisfied with it but the project and/or budget has scope to allow you to create iterations (via edits or new recordings) then select “Requires iteration” and move onto the next task.

If the recording wasn’t approved and the project has no room in its scope or budget for iterations, talk to the client about extending the scope and/or budget to account for this. If they (or you) can’t or don’t want to adjust the scope, the project will be closed, existing work delivered, and paid for by the client.

Make voiceover iterations as required

Create iterations for the voiceover based on the feedback the client gave and submit them for approval. This process of feedback and iterations will continue in this task until either the project is approved or the scope runs out and isn’t going to be extended further.

Initial voiceover feedback: {{form.Initial_voiceover_feedback}}

Based on the feedback, consider whether your iteration will require an entirely new recording (with the same person or otherwise) or whether it can be altered through editing alone.

Use the form fields below to record your iterations, the feedback from your iterations, and the final approval status of the voiceover.


As with other iterations (eg, for the script) you need to strike a balance between what the client wants and what you’re willing to do for the time you have and the amount you’re being paid.

Animation:

Record ideas for animation

(Source: https://de.wikipedia.org/wiki/Storyboard)

When working on the animation itself you need to start off by recording the ideas you have for the video. Do so using the form field below.


These ideas should include anything the client put forward during the initial design meeting, along with elements which will tie into the client’s existing videos and branding elements.

If you’ve had a chance to take a look at the script or listen to the voiceover yet then these can give you plenty of inspiration (although you shouldn’t just make images word-for-word from the script). Otherwise, take what you know of the animation’s purpose, contents, and length from the design meeting to think of suitable ideas.

Create storyboard

Now it’s time to create the storyboard for the animation. These are very rough sketches of keyframes in the animation along with the time stamps that they will appear.

Once created, upload your storyboard to the form field below.

Remember – these don’t have to be anything fancy. All you’re doing is sketching with enough detail and frequency that everyone can get a sense of what the animation will look like. Or, at least, what will happen in it.

Make keyframes

Next it’s time to make the keyframes of the animation. Once you’re done, upload them to the form field below.

Choose keyframes of the animation to create in full.

Don’t do transitions – go for the main images highlighting key points in the video. Should show the client what the main body of the animation will look like without any of the actual animation.

If you have access to the voice over try to match these up with time stamps so that the images match what’s being said. It’s not entirely vital (it can always be edited later) but better to make it fit where you can.

Think of the animation keyframes as detailed versions of your storyboards. You’re still not creating the whole animation or even using any of the transitions but there is enough to see what the final product will look like.

This is why the keyframes are being created as the first stage of the animation. That way the client can see what the final product will look like and give their feedback before the main body of work has been undertaken.

Send keyframes for approval

There’s not much to say here, as you simply need to send the keyframes you’ve created to the client for approval.

Record keyframe client feedback

(Source: https://www.pinterest.co.uk/pin/543106036305810832/?lp=true)

Once they’ve replied to your message, record the client’s feedback for the keyframes in the form field below. This is mostly for safe-keeping and future records but we will use this feedback if iterations are required.


Record keyframe approval status

Next, state whether the initial keyframes were approved by the client, not approved but iterations are required or not approved with no iterations planned.


As with other elements like the script and voiceover, if your initial pitch was accepted by the client then you can continue with the next few tasks as normal. If the client had some feedback and/or tips and wanted them applied (or an entirely new set of key frames made) and the project’s scope is enough to warrant iterations, then mark it as so and follow the task that will appear below.

If, however, the project wasn’t planned to include iterations then you’ll need to do some negotiation to find out whether the project will continue. Either the client will need to pay extra to increase the scope or you’ll have to work extra within the same time/money scale.

If neither of those things is possible or acceptable, the project will need to be closed out (as indicated below).

Make keyframe iterations as required

Now it’s time to make iterations for the keyframes based on the client’s feedback. Once you’ve made an iteration, send it to the client for feedback and repeat this process until either the key frames are approved or the project is closed due to the scope getting too large.

Initial keyframe feedback: {{form.Client_keyframe_feedback}}

Use the form fields below to log the keyframe iteration file(s), feedback, and final approval status.


As with other elements of the overall animation, consider how many iterations you’re willing to do before the project scope and/or price needs to be renegotiated.

Create main animation

Now it’s time for the namesake task of the animation design process – you need to create the actual animation. Bear in mind that everything from transitions to the shapes you use will affect the audience’s reaction and interest, so make sure that everything fits together nicely.

Once you’ve finished, upload the initial animation file to the form field below.

Note that this template is designed to be as widely applicable as possible, hence why there are no specific tips on creating the animation itself. There are so many different programs and methods for creating the animation that there is no one correct method, especially for the vast array of different purposes and subjects which can be portrayed.

If you have a consistent method, program, or process for this task then don’t hesitate to edit this template so that your checklists include that information.

Send animation for approval

Like with your keyframes, it’s now time to send the initial animation file to your client for approval.

There’s no trick here – just send them an email or message with the animation file attached, asking them for approval and/or feedback.

Record animation client feedback

(Source: https://www.youtube.com/watch?v=IJNR2EpS0jw)

Once you’ve heard back from the client, record their feedback for the initial animation using the form field below.

Again, like with the keyframes, this will be useful for any iterations you need to make but also for improving your craft when it comes to future projects.


Record animation approval status

Now you need to record the approval status of the initial animation file. Do so using the dropdown field below.


As with the keyframes approval section, if the animation was approved then move on as per usual with the checklist. If there is room for iteration in the project scope and the client wants some changes made then mark the approval as “Requires iteration” and move on.

If the animation is not approved, there is no room for iteration, and you or the client can’t agree on adjusting the project’s scope, mark the animation as “not approved – project closed”.

Make animation iterations as required

Create iterations of the animation and re-submit them for approval until either one is approved or the project’s scope is reached and you or the client aren’t willing to extend it.

Initial animation feedback: {{form.Initial_animation_client_feedback}}

Use the form fields below to record the animation iteration file(s), feedback, and final approval status.


Like with the keyframes, you’ll need to keep making iterations until either something gets approved or the project scope can’t be/isn’t extended to cover more work.

Audio mixing:

Remove unnecessary noise

(Source: https://www.maxpixel.net/Mixing-Panel-Sound-Dj-Music-Audio-Power-Table-1284507)

Start off the audio mixing part of the animation design process by removing unnecessary noises from the voice over. This includes things like breathing, any background noise that wasn’t previously dealt with, and so on.

As long as the recording was of decent quality (which it should be, considering the approval process) you should only need to listen to the record and mute any sections with noises that aren’t talking in them.

Once you’re done, upload the edited voice over using the form field below for safe keeping.

Match the audio to the animation

Here you need to add the audio track to the animation and make sure they match up. Upload the initial video file using the form field below.

This should be fairly simple, as the animation should have been created with using time stamps based on key sections of the voice over. All you need to do is paste the relevant voice clips into the corresponding sections of the animation.

Remember, you can always leave blank spaces between your voice clips – this isn’t the last layer of sound you’ll be adding.

Add sound effects

Next you need to add any sound effects that fit the animation. Use the form field below to upload the video with sound effects.

If you’re stuck for ideas, use the sub-checklist below to check for any elements which could do with sound effects. Remember – these aren’t necessary or even always suitable but use your own judgment to assess what is appropriate.

  • 1

    Transition animations (screen slides/wipes, etc)
  • 2

    Moving elements
  • 3

    Interaction elements (typing keyboards, people talking, etc)

Add music

(Source: https://www.minot.af.mil/News/Article-Display/Article/806962/music-for-morale/)

Once the sound effects are in you’ll need to add in music, if suitable. Upload both the video with music and the music track you’ve used with the form fields below.

As with sound effects, music isn’t always necessary, and you don’t want something that’s distracting enough to make the voice over hard to focus on. Also, remember to use music that you have the rights to – don’t grab any old track from Youtube and expect it to be free to use.

Check volume levels

Finally, check the volume levels of each element before the final approval stage. This should be fairly simple – all you need to do is make sure that nothing overpowers the voice over or is loud enough to distract from it.

Equally, the voice over shouldn’t be so loud that it becomes distorted or will surprise those listening to it.

Send initial audio mix for approval

After uploading it to the form field below, send the initial audio mix video to the client for approval and/or feedback.

Record initial audio mix feedback

Record any feedback from the client you get for the audio mixing on the final video using the form field below. This will make it easy to find should you ever need to refer back to it.


Record initial audio mix approval status

(Source: https://www.ramstein.af.mil/News/Photos/igphoto/2000257555/)

Now record the approval status of the initial audio mix. That is, whether the client was perfectly happy with it, whether they want (and the project scope covers) any iterations on it, or whether they don’t approve and want to cancel the rest of the project.


Make audio mix iterations as required

Using the feedback given by the client you need to make an iteration on the audio mix and send it back for approval once more. This process should repeat until either the client is happy with the result or you (or the client) isn’t happy extending the scope of the project to include more iterations.

Initial audio mix feedback: {{form.Initial_audio_mix_client_feedback}}

Use the form fields below to record the audio mix iterations, feedback, and final approval status.


Consider the number of iterations you’re willing to do before either closing the project or re-adjusting the scope of the project (and the resulting price estimate) and making more iterations.

Complete this task only when the project is approved to either go further or be closed.

Closing out the project:

Mark the project as closed

There comes a point where some projects just don’t work out – this is one of those times.

Remember to run your invoice checklist to bill the client for the work done and make a note of the project being closed in your project management software (if you use any).

Until next time, you’re finished with the animation design process!

Mark the project as finished

Congratulations! All that you’ve got left to do is mark the project as finished in whatever project management app you use.

Don’t forget to run your invoice generation checklist and bill the client. Once you’ve done that it’s time to celebrate another successful project completed!

Sources:

Take control of your workflows today.