Variables are an easy way of displaying ‘variable’ information that is unique to each of your workflow runs.
They effectively act as placeholders for information that you can push data into.
You can use them to cut down on data entry or copy-pasting information from one place to another, and use them to surface any information that might be required to complete a specific task. You can also use them to auto-fill form fields in your workflow runs.
Users: In order to create or edit workflows you must be an Administrator or a Member who has been given ‘edit’ access by your Administrator.
Here are some examples of how you can use variables:
The example in the video below shows how to use variables in an annual leave request process.
Variable information could include the name of a workflow run, a workflow run created date, or data that was inputted into a form field in that specific workflow run.
The available Variable list is distributed into Global Variables, Workflow Variables, and Data Set Variables.
These are generic variables independent of any aspect within your workflow.
These are the standard variables you can select in a workflow. Apart from these, most form fields that you create in your workflow, can also be used as variables, so the more you add the more you can use.
The email trigger variables are available when you run a workflow via email.
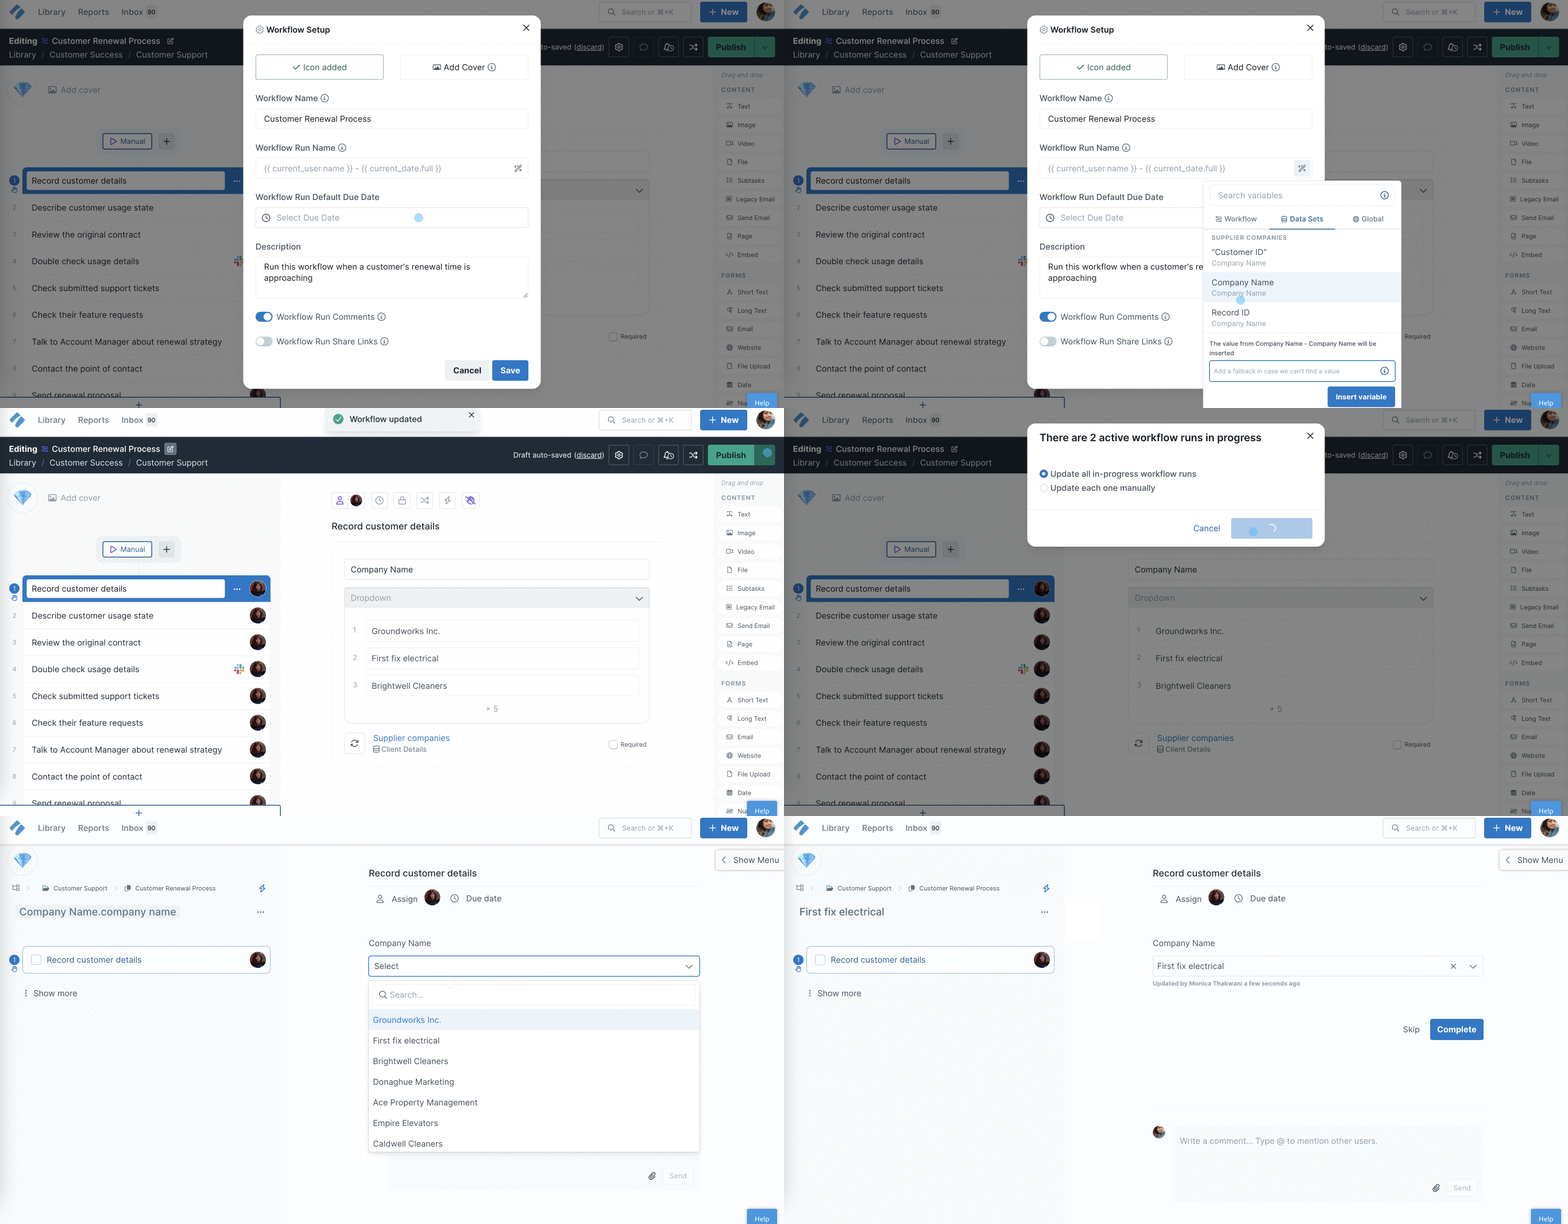
You can connect saved views from your Data Sets with your workflows and use the data columns as variables to populate your form fields.
In the example below, we have used a Data Set variable to name a workflow run.
If you run a workflow via Data Set automations, you can populate its form fields using the data set trigger variables.
Note: To populate your form fields with variables from a Data Set, you have to first connect the desired Data Set to your workflow.
First, locate the workflow in your library, to which you want to add variables. Click the workflow’s name then click “Edit“.
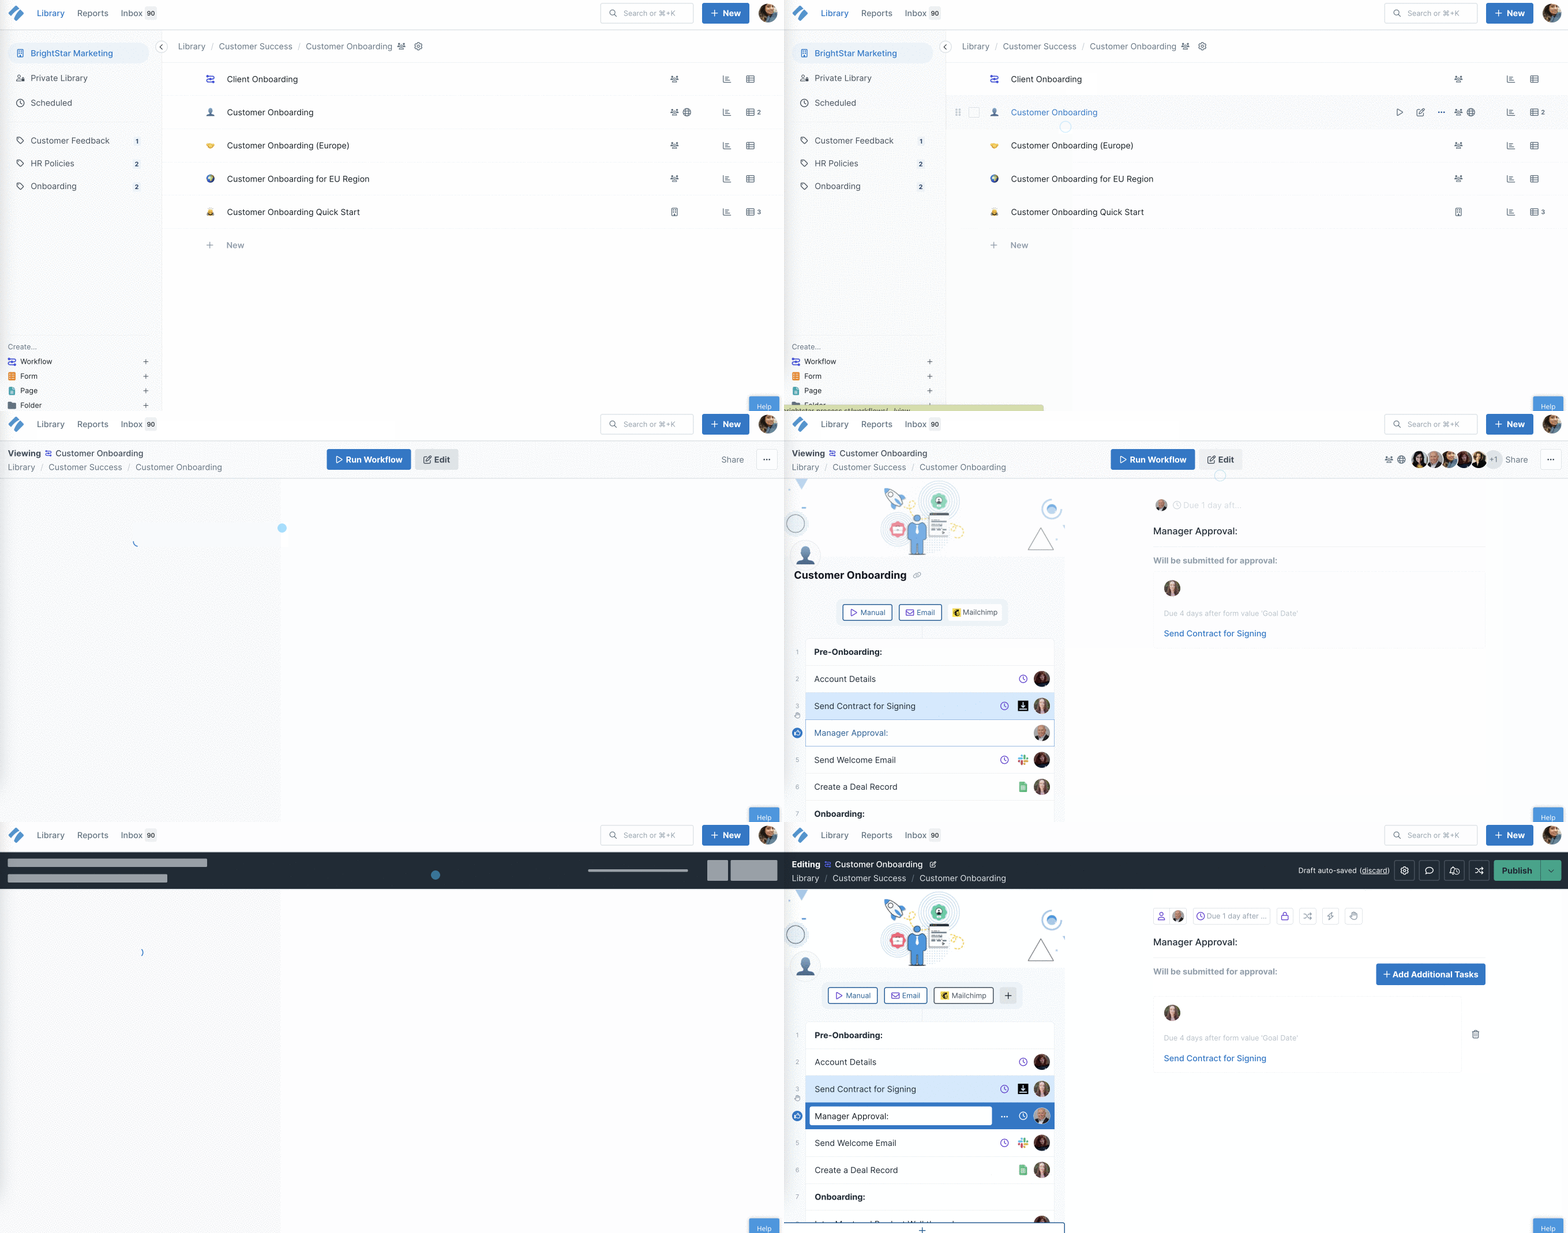
Note: To add variables, you need to first add some form fields in your workflow that will be used as variables.
Select the task you want to use and drag and drop a text widget into the center of your screen.
In the example below, we’re creating a summary using data from other parts of our workflow.
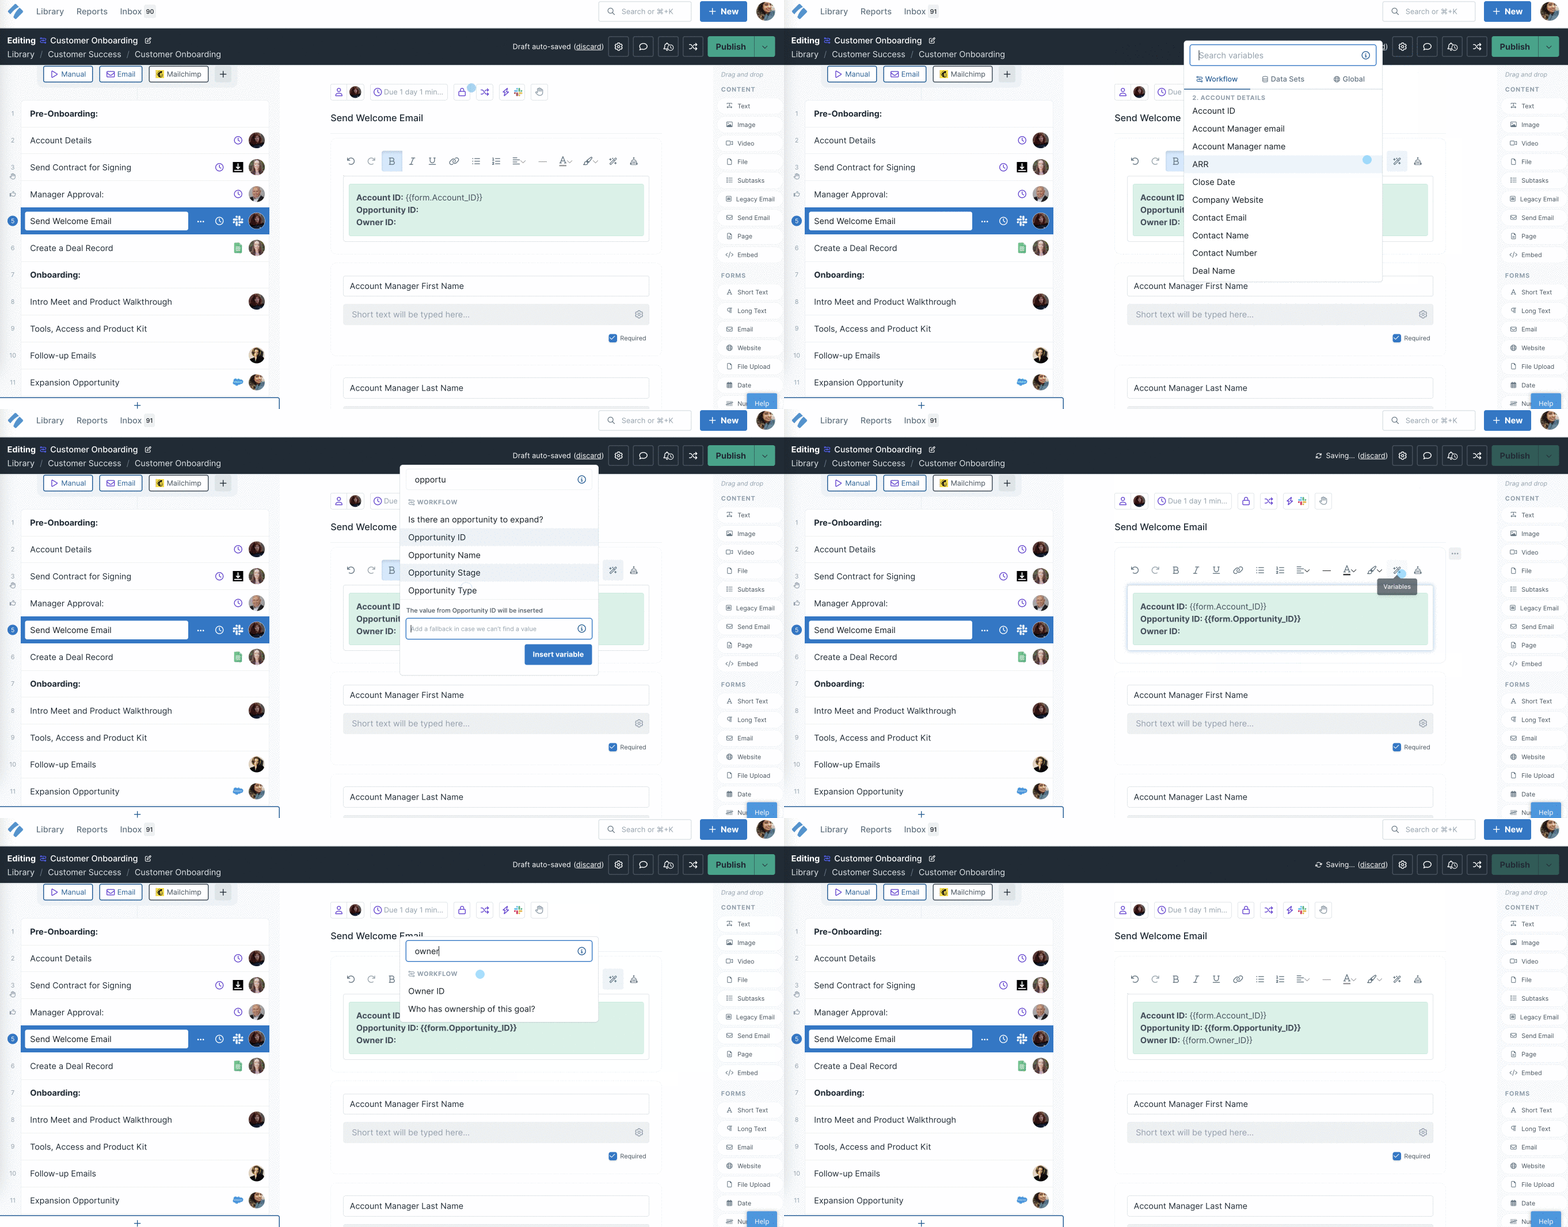
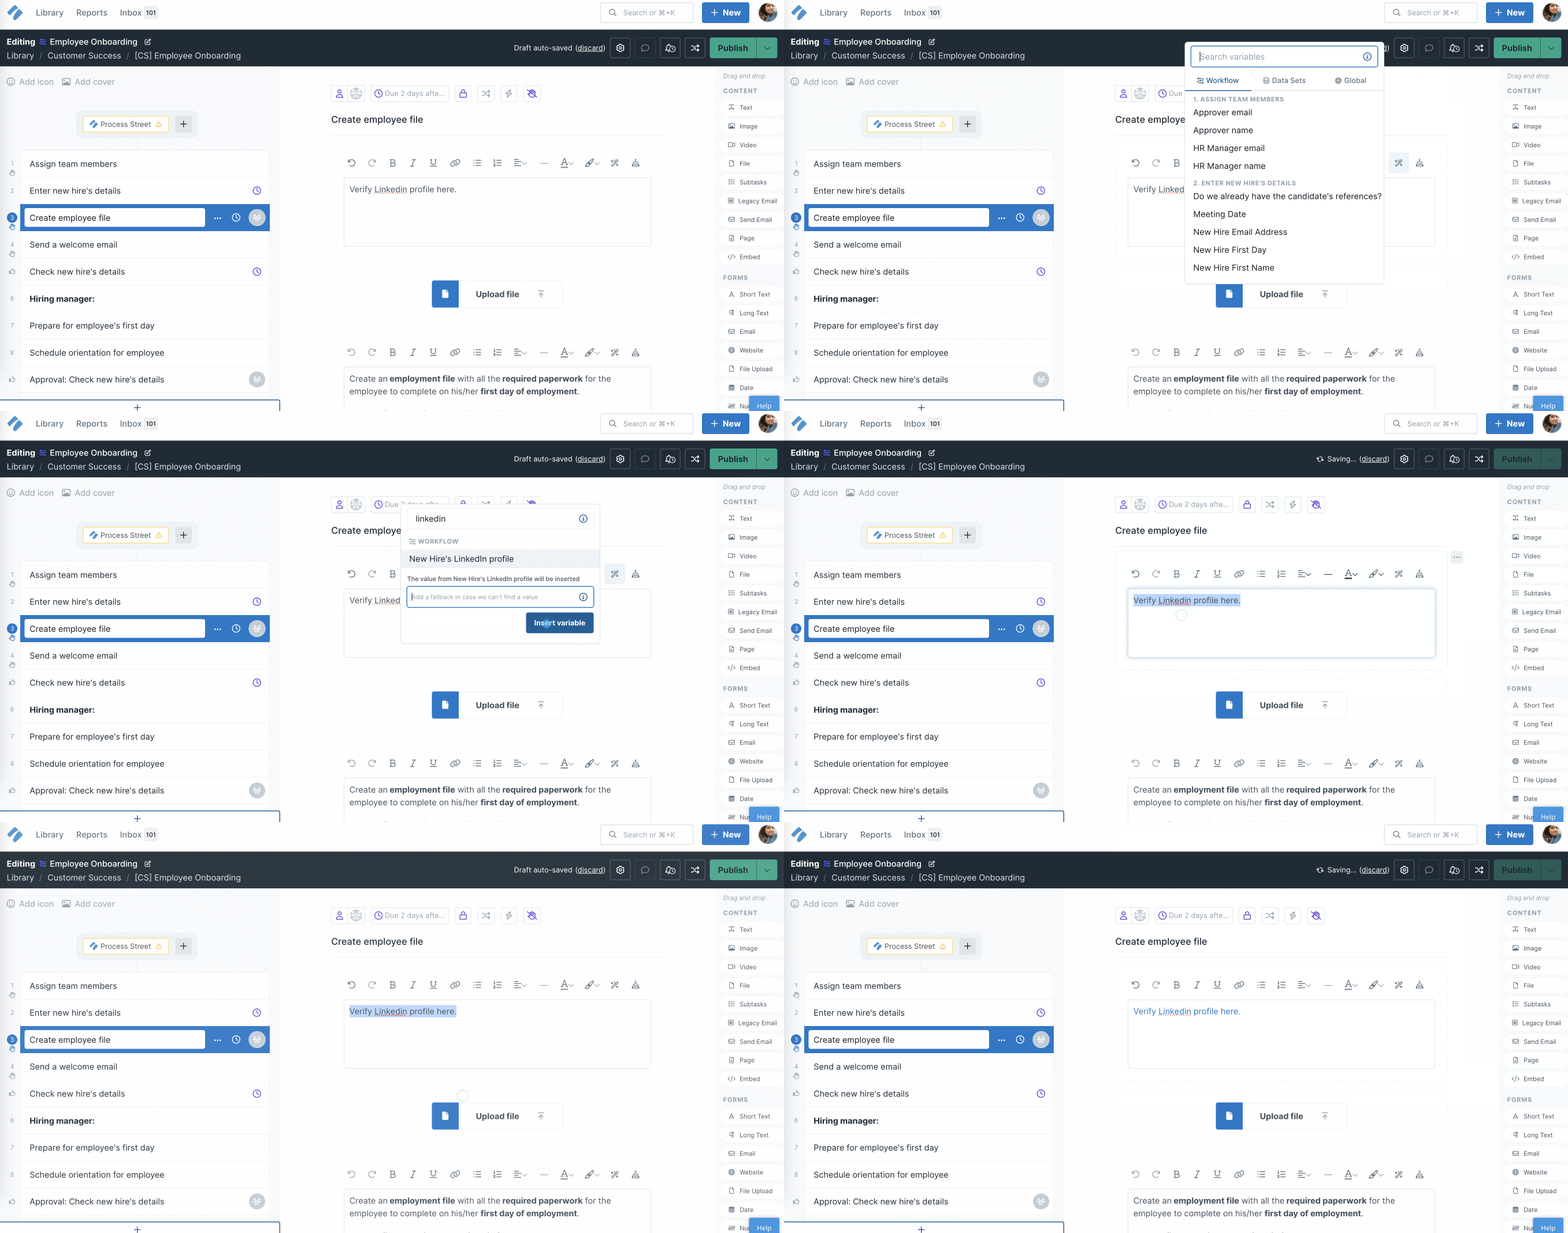
Click the magic wand icon in the top right of the widget and then select the variable/s you want to use from the list that appears.
You can use any variable in text widgets, so if you have a lot in your list, type the name of your form field into the search box or switch the tabs in the variable menu to narrow down your options.
When you’re finished editing, Publish and run your workflow to test that everything works as expected.
Pro tip: Once you have added a variable in a field, you can copy it (including the curly brackets) and use it elsewhere, such as in the body of an email widget or another text widget. For example: {{form.Employee_Email}} or {{form.Date_of_Birth}}
Select the task in which you want to use the variable, and drag and drop an email widget to the center of your screen.
In the example below, we’re using a variety of variables to fill out details in an email widget.
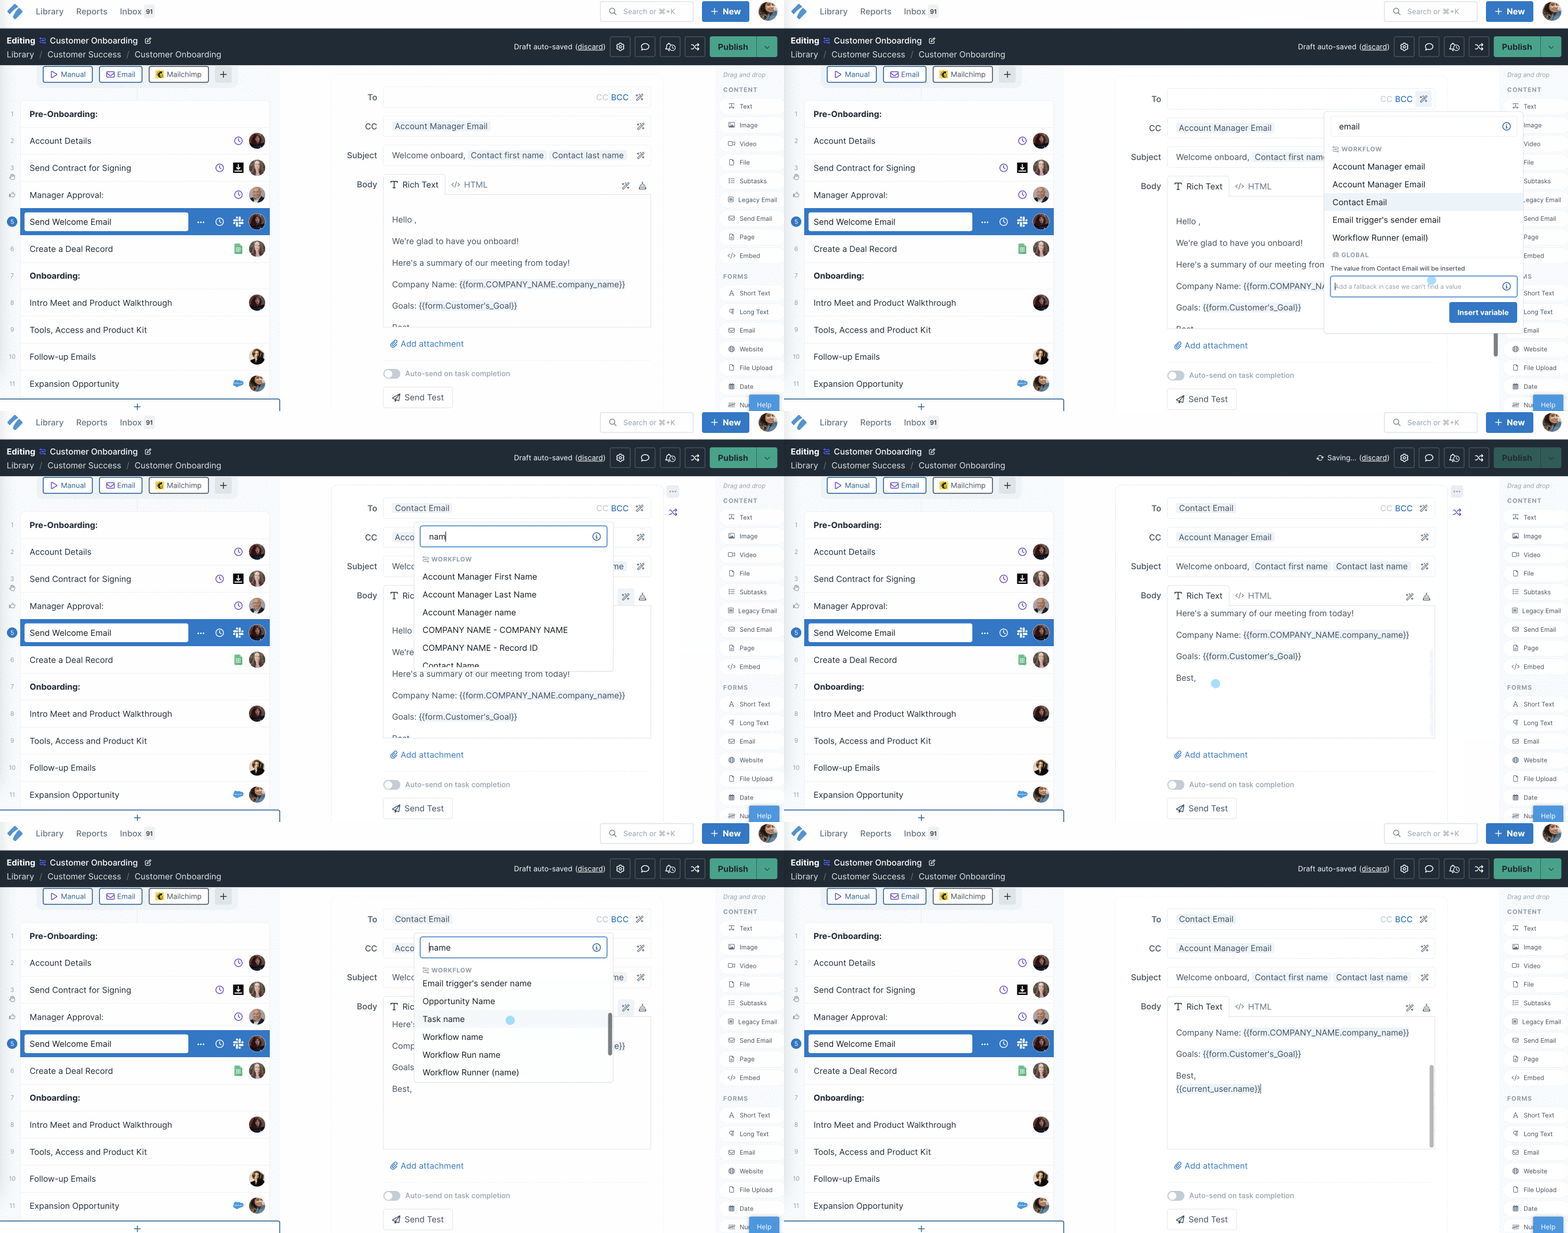
Much like in text widgets, you can click the magic wand next to the fields in an email widget, to push information (a variable) into it from elsewhere in the workflow run.
However, when putting a variable into the “To”, “Cc”, or “Bcc” fields on an email widget your options will be limited to pushing in information from:
When you’re finished editing, Publish and run your workflow to test that everything works as expected.
Select the task to which you want to add an embed widget with a variable then, drag and drop the embed widget into the center of your screen.
In the example below, we’re using a website form field variable to fill the embed widget.
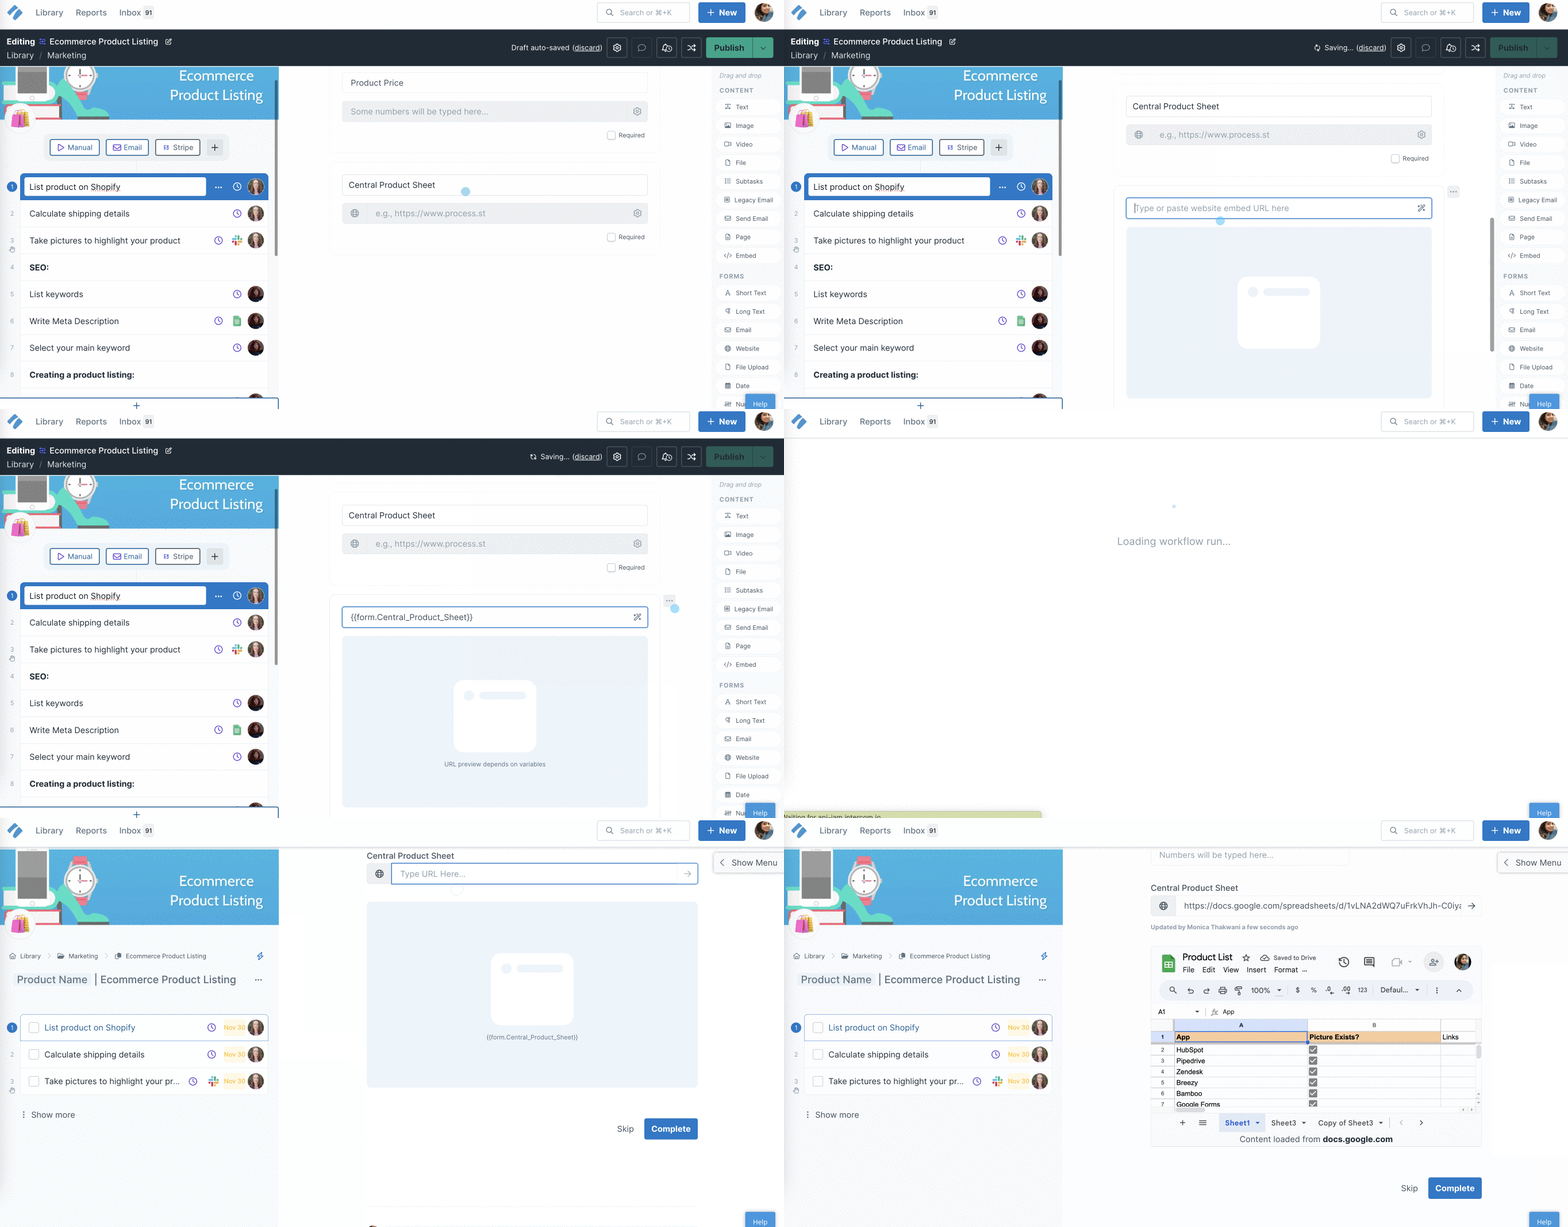
Much like in text widgets, you can click the magic wand next to the field in an embed widget, and look for the website form field to push a URL into it from elsewhere in the workflow run.
When you’re finished editing, Publish and run your workflow to test that everything works as expected.
Select the task to which you want to add a snippet field then, drag and drop a snippet field into the center of your screen.
In the example below, we’re using a variety of variables to fill out details in a snippet field.
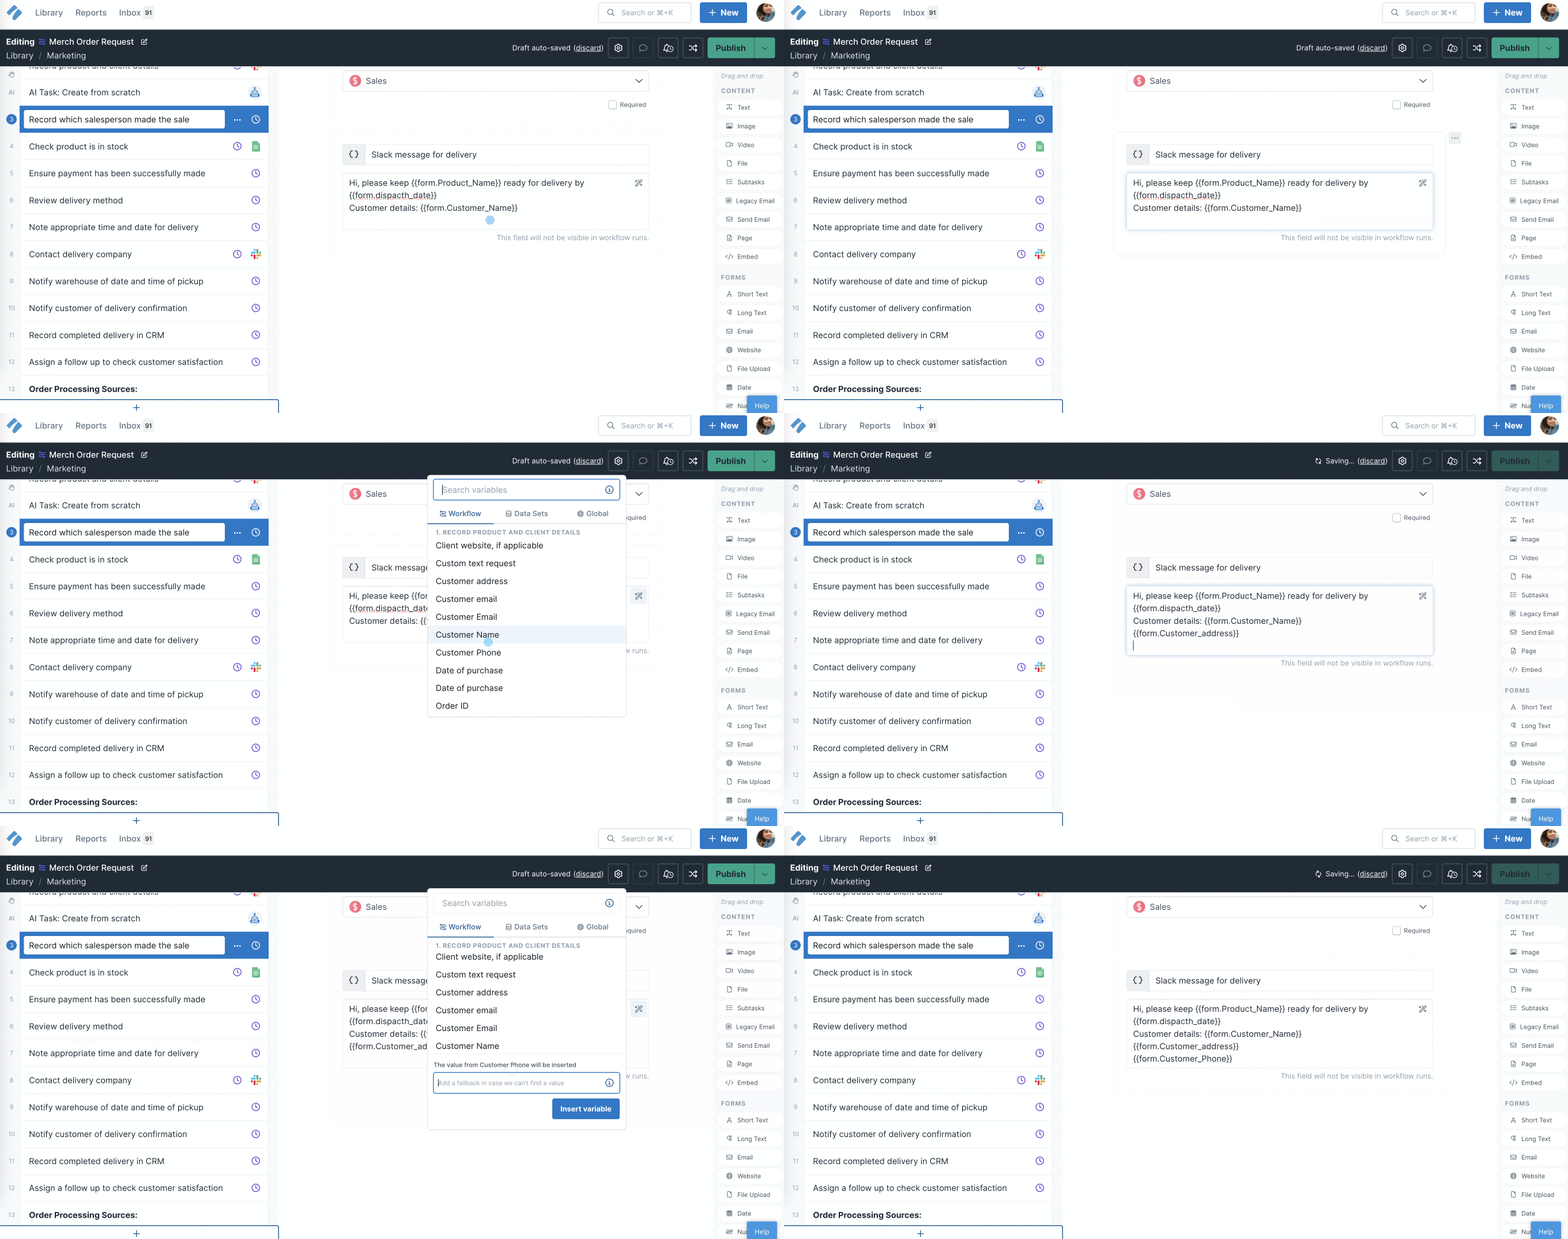
Much like in text widgets, you can click the magic wand next to the snippet field, to push information (a variable) into it from elsewhere in the workflow run.
When you’re finished editing, Publish and run your workflow to test that everything works as expected.
Select the task to which you want to add subtasks then, drag and drop subtasks into the center of your screen.
In the example below, we’re using a variety of variables to fill out details in subtasks.
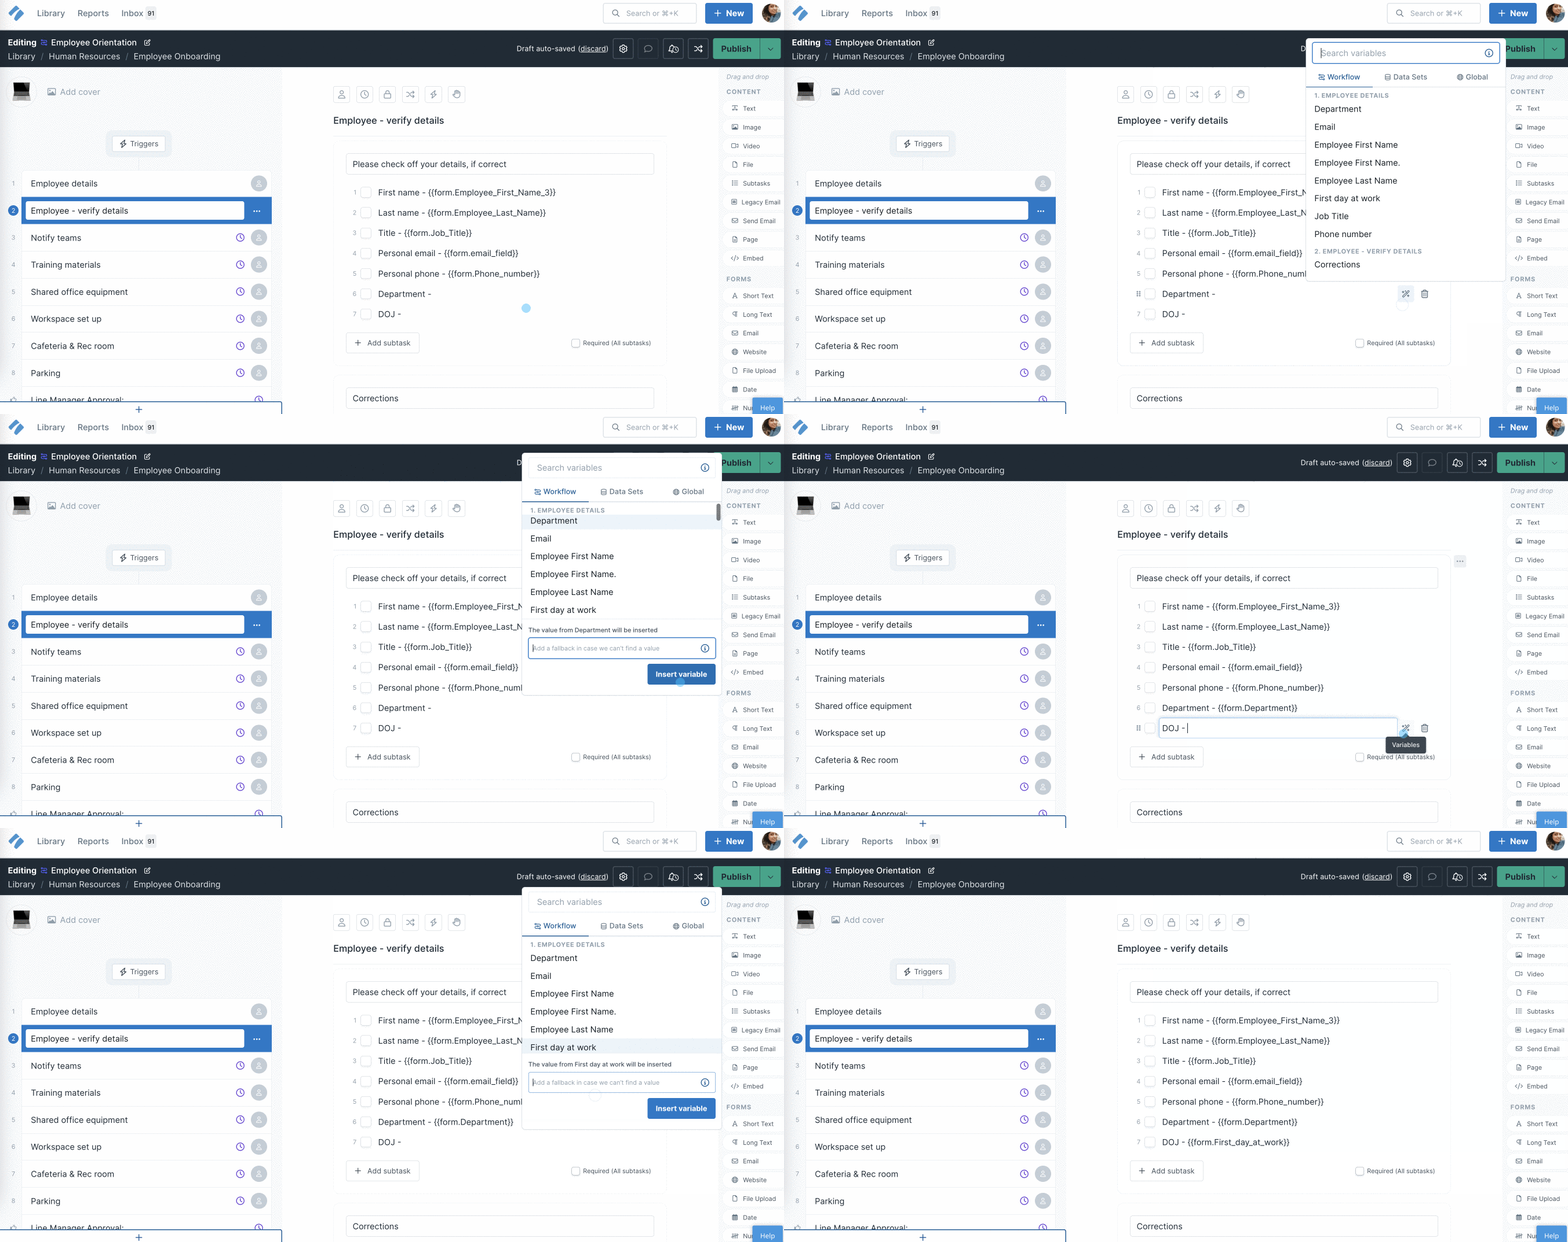
Much like in text widgets, you can click the magic wand next to the subtask fields, to push information (a variable) into it from elsewhere in the workflow run.
When you’re finished editing, Publish and run your workflow to test that everything works as expected.
Fallback values
Form fields can be auto-filled with answers that are populated as soon as the workflow runs. These answers are fallback values for variables if there is no manual input into that form field.
When you select a variable to use, you will be prompted to enter a fallback value for it, as shown below.
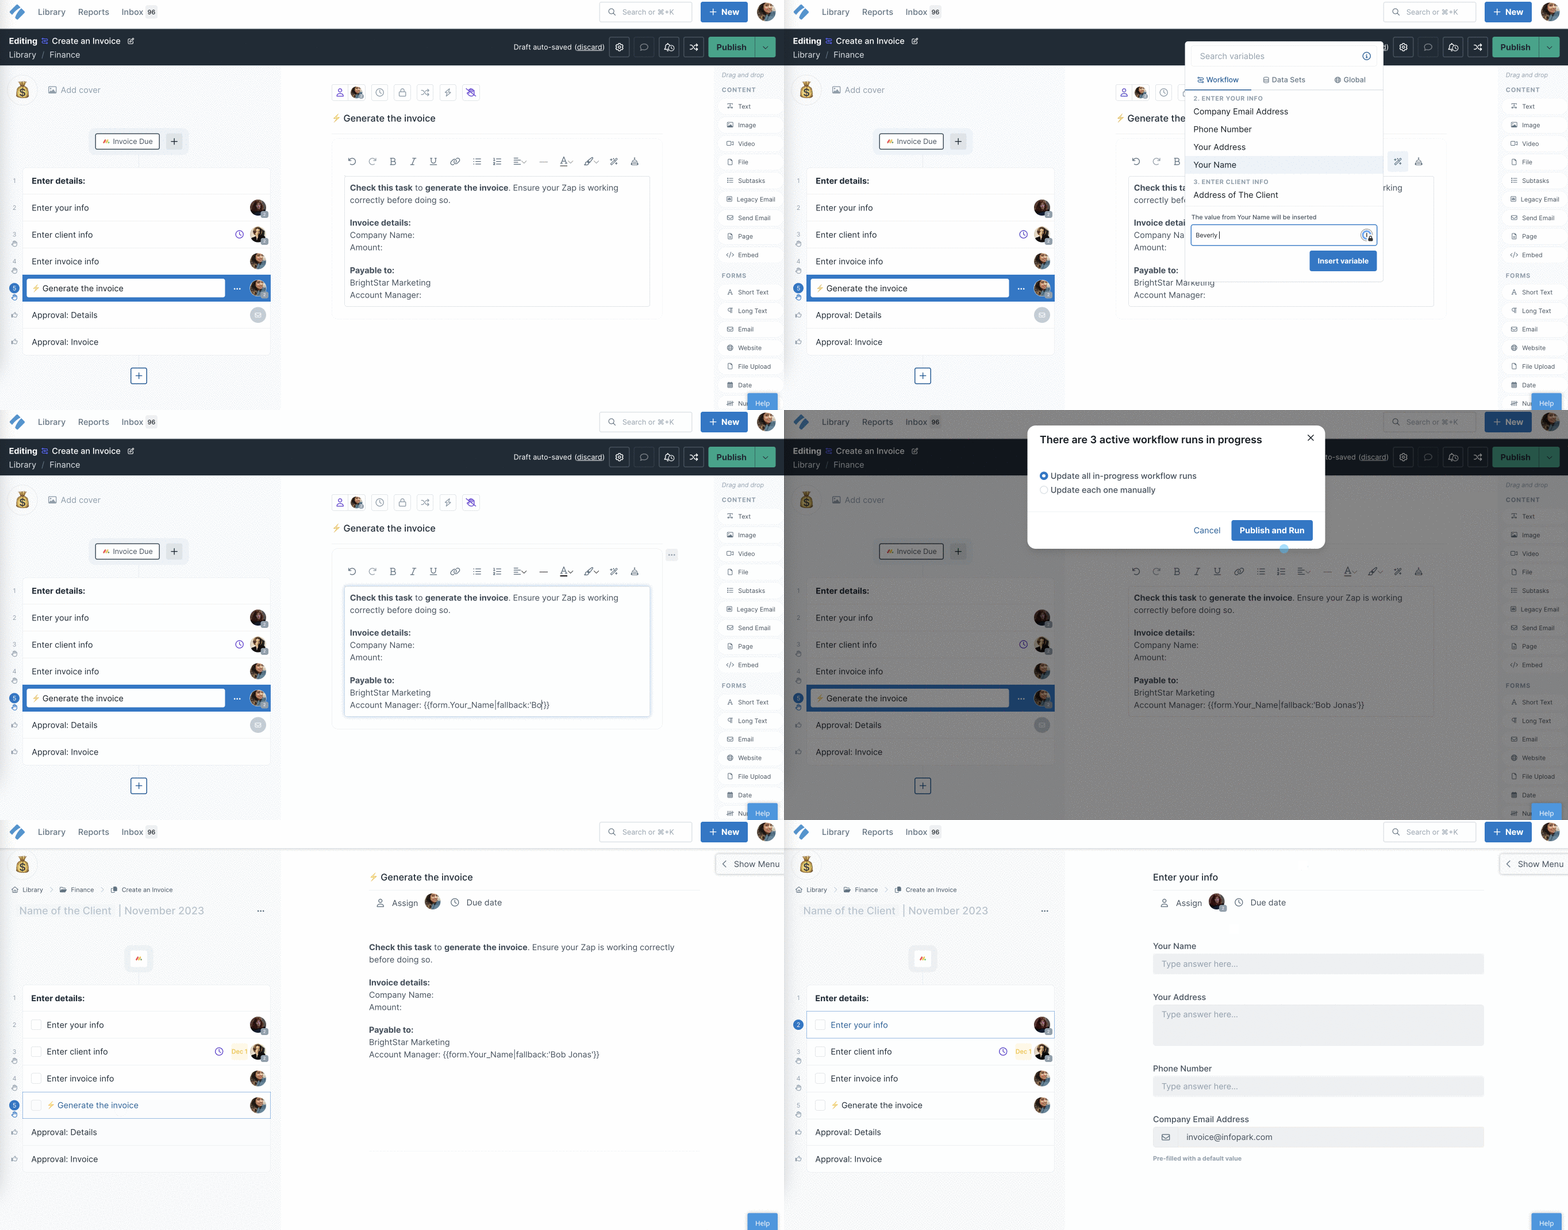
Once you insert a variable with a fallback value, you can still edit this value, as shown above.
Note: You can only insert a fallback value for your workflow variables, not your data set or global variables.
If you have not entered a fallback value while selecting a variable, you can add it once you have inserted the variable, as shown below.
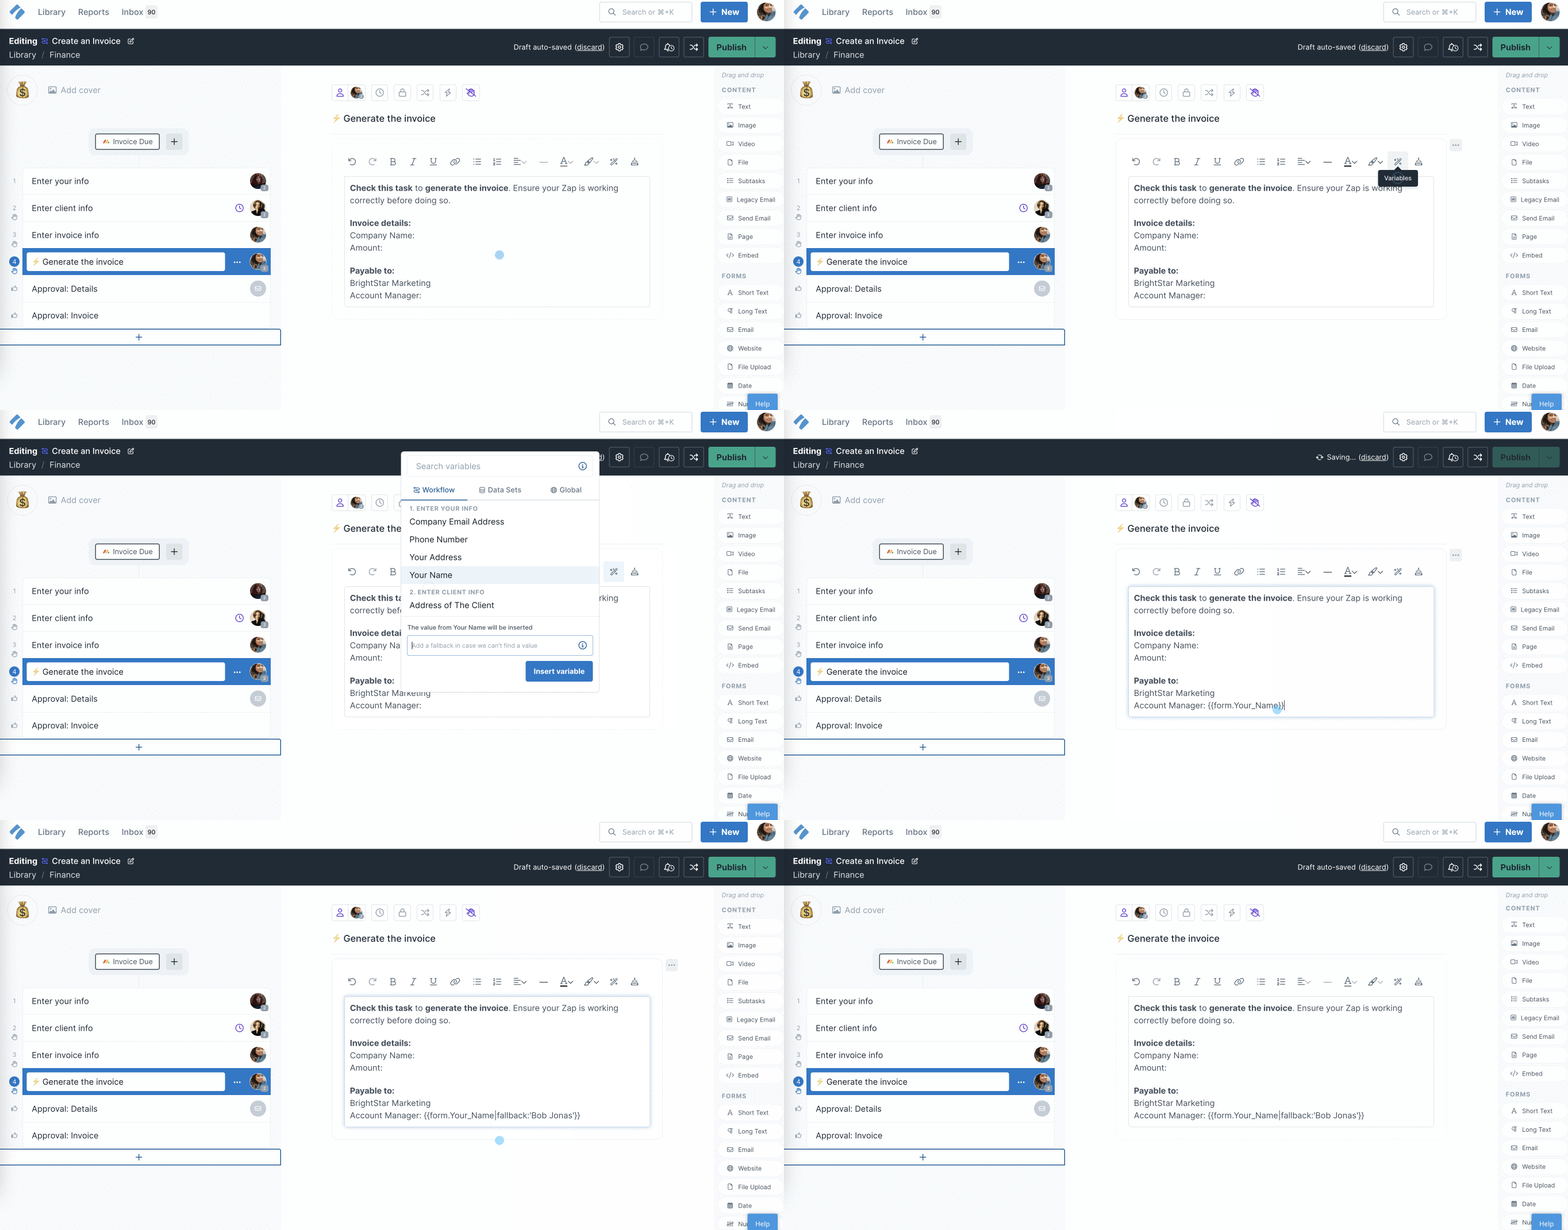
Note: The word ‘fallback’ is case-sensitive and only works when in lowercase. When using inverted commas, you need to use two separate ‘ ‘ instead of “.
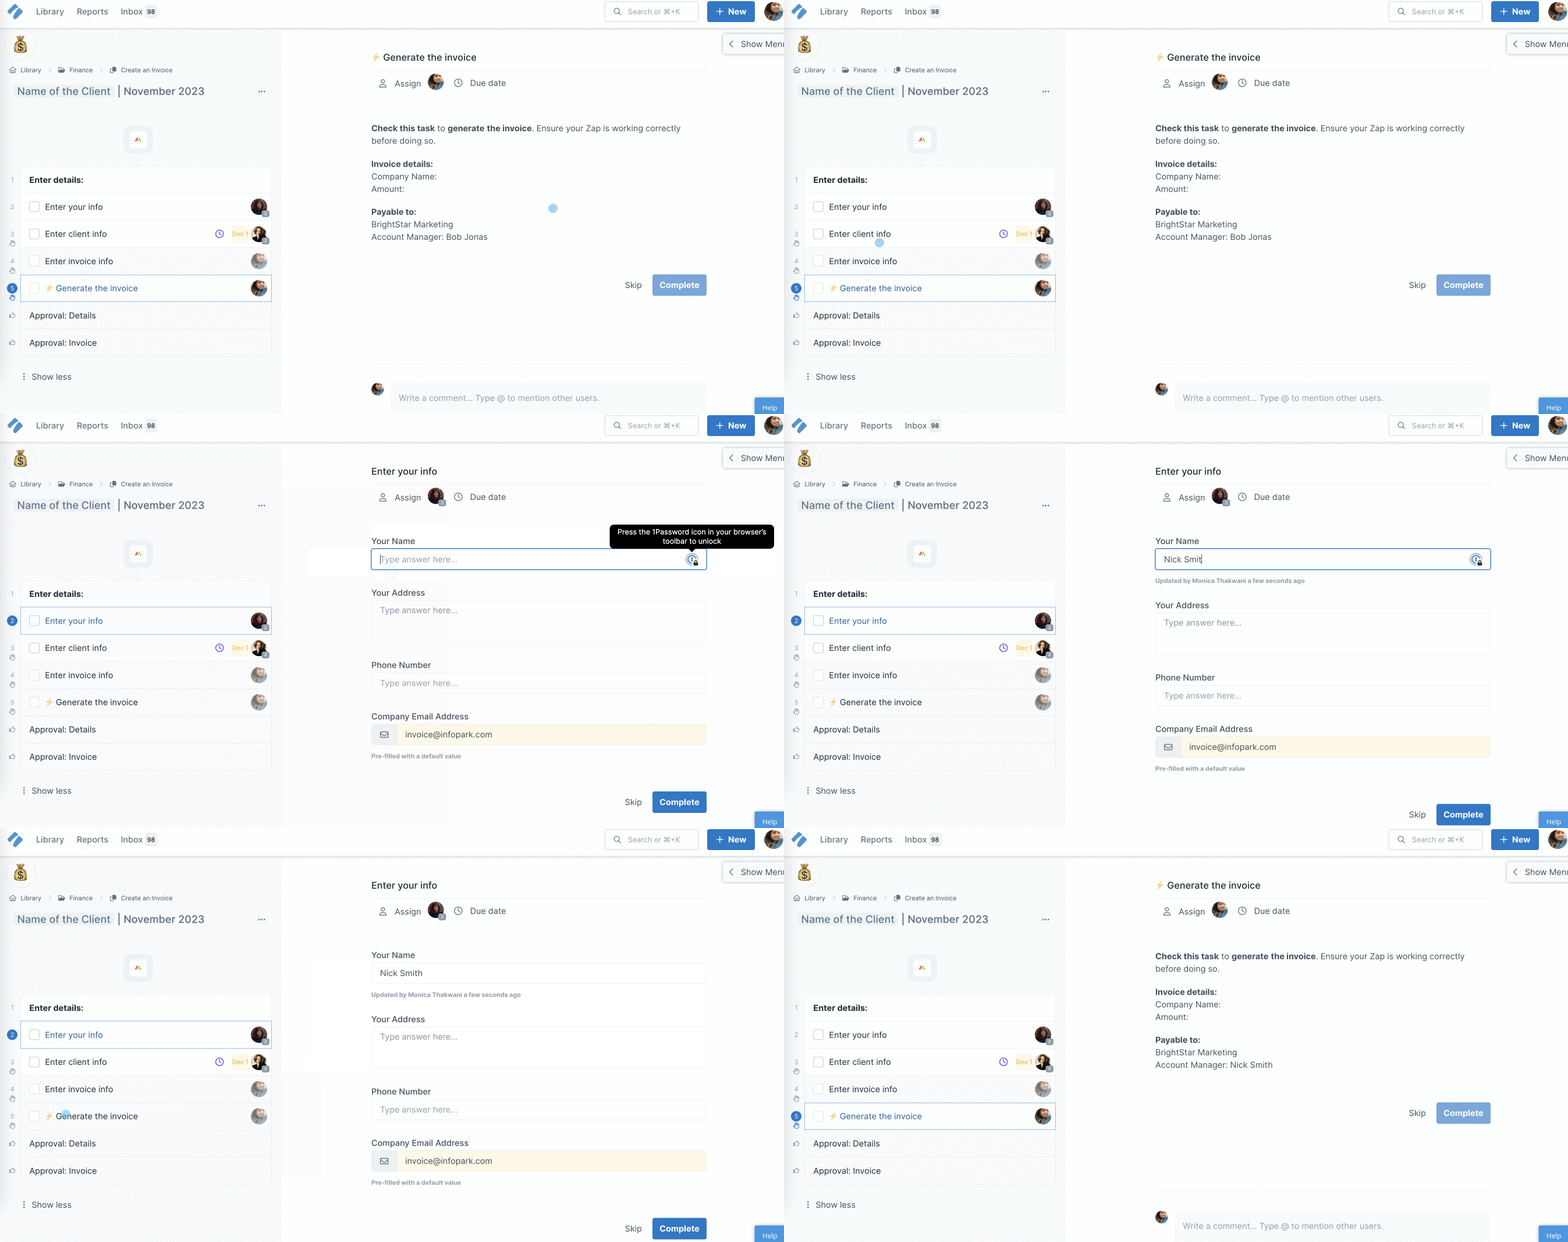
When a form field with an auto-filled fallback answer is edited, the manually added information becomes the variable value.
Uppercase and lowercase values
You can set a filter to ensure your variables are displayed only in uppercase or lowercase irrespective of how the form field has been populated.
Copy and paste the following code after your variable, within the curly brackets.
Uppercase: |upcase
For example, if you want a Name field variable to display in uppercase by default, your variable should read like- {{form.Name|upcase}}
Lowercase: |downcase
For example, if you want the email field variable to display only in lowercase, your variable should read like- {{form.Email|downcase}}
Spaces in variables
One final thing to note is that ‘spaces’ do not affect these filters.
{{form.Name|upcase}} works the same as {{form.Name |upcase}}
URL encode
You can use a URL encode on a variable to make symbols safe to use in a link or Send Email widget. Simply copy and paste this to the end of the existing variable text before the last two brackets (don’t forget the leading space at the beginning):
|url_encode
Your link containing a variable should look like this if followed properly:
http://google.com?q={{form.Name|url_encode}}
This will ensure your link will not break if your form fields have values with spaces or symbols inside such as “Name”, “Address”, or “Title”.
Spaces in variables
One final thing to note is that ‘spaces’ have no effect on variables when not used in a link.
Example:
{{Hey}} is the same as {{ Hey }} and also {{Hey }}
Note: You can use only one filter at a time. For example, if you use a fallback filter, you cannot use a lowercase or uppercase filter with it.
Hyperlink text with variables
You can hyperlink text with variables to create clickable links. Just type the text in a text field and pull in a variable into the same field. Then, copy the variable code, select the text you want to hyperlink and click on the hyperlink button. Now, paste the variable code in the URL field as shown below.
To use a variable you need to run the workflow from a workflow where you’ve set them up. Click your workflow’s name in your library, and then click “Run Workflow” on the top right corner of your screen.
Once the workflow run is open, fill out the form fields you are using as variables and then take a look at how the information is pulled through into your email or text widget.
You can set default run names while editing your workflows with either static text or variables. To use a variable in your default run name, edit your workflow then click on the Settings cog in the top right corner. Then go to Workflow Run Name, and choose from the list of variables.
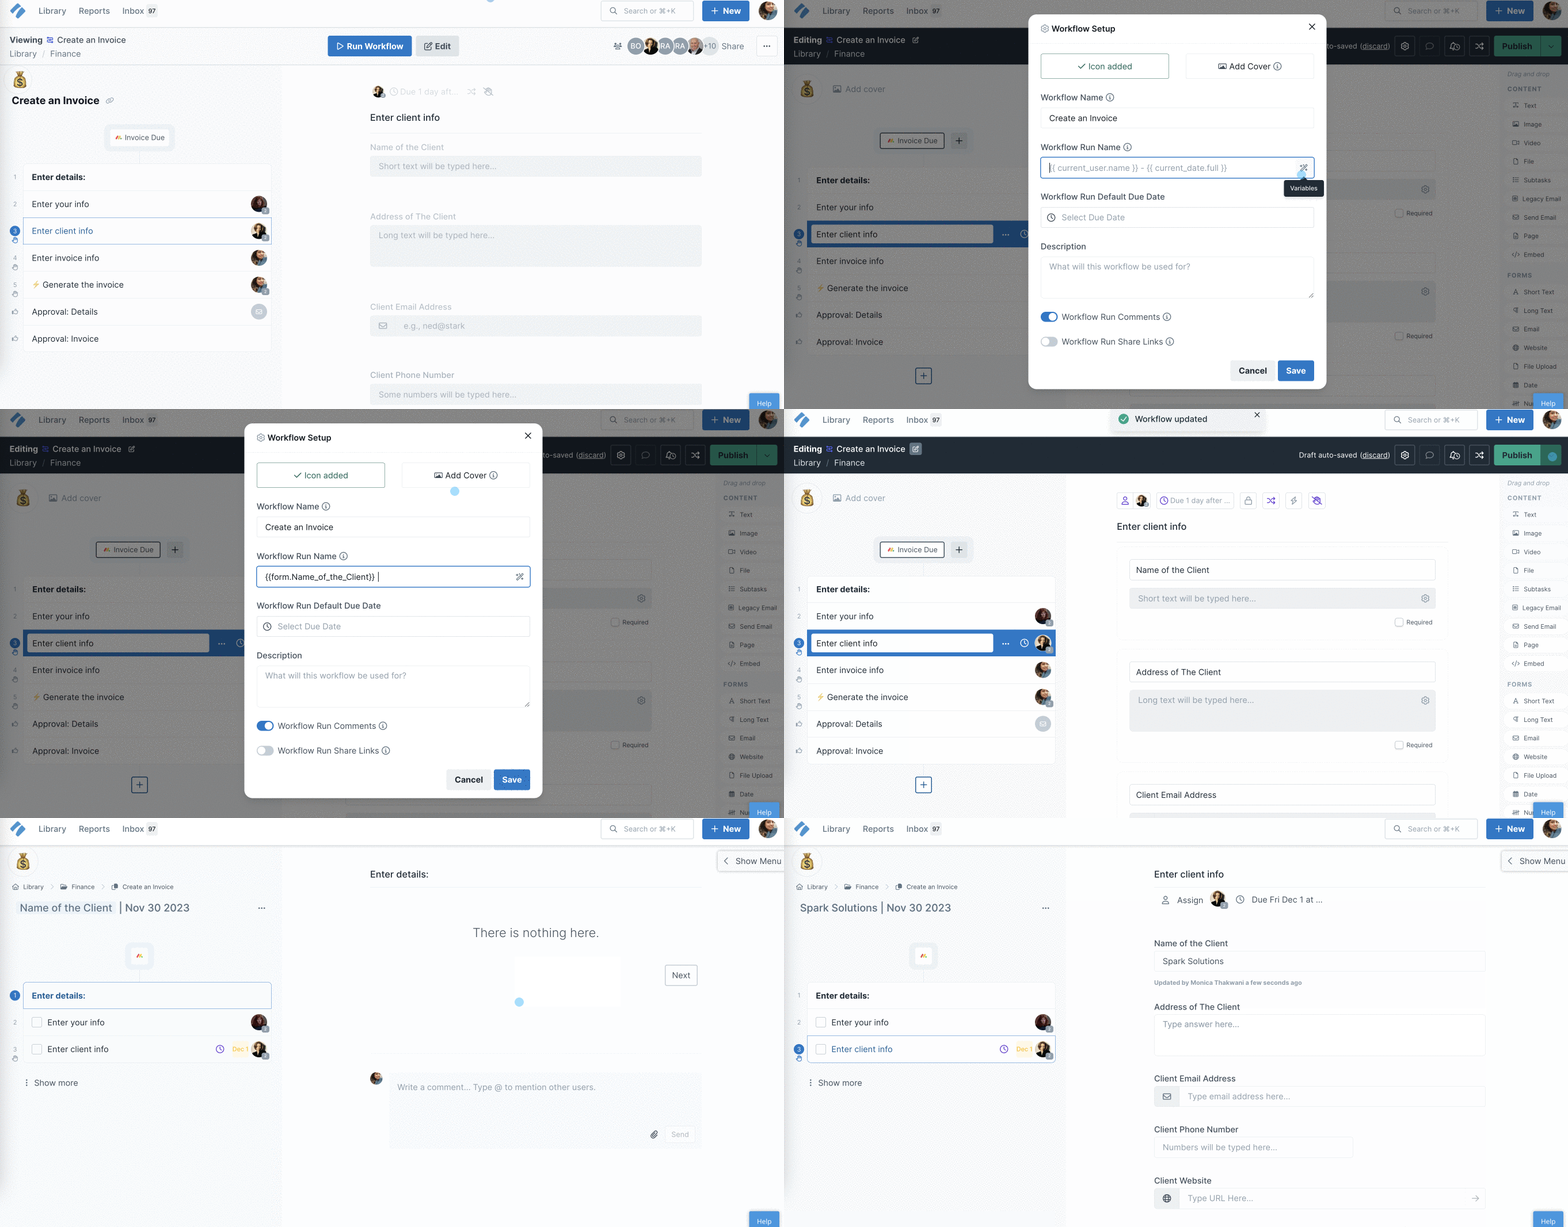
You can also use variables to name your workflow runs when you trigger them via email.
When you create a workflow run link, you have the option to add variables into the link, so that you can pull data from one place (for example another workflow run or a CRM) into your new workflow run.
Learn more about workflow run links, and also how to use variables in integrations links.