You can integrate Timely with Process Street workflow runs using Zapier.
When a new contact is added to Timely’s database, a client intake session workflow can be automatically created in Process Street. This means saving time on manual tasks every day.
Plan: This integration is available to customers on all plans.
Users: In order to create an API key for integrations, you must be an Administrator.
Let’s get started.
In this use case, you can use the “Client Intake Session” workflow. It’s a free workflow template made by the team at Process Street.
Add the workflow template to your Process Street Library by clicking “Edit Checklist“.
Zapier is a third-party tool that integrates over 2,000 apps together. By using it, you can create automations known as “Zaps”. A Zap consists of a trigger (“When this happens…”) and an action (“Do this…”).
To build a Zap, sign in to Zapier (or create an account) and then click “Make a Zap”.
Select Timely as the trigger app and “Customer Trigger” as the trigger event.
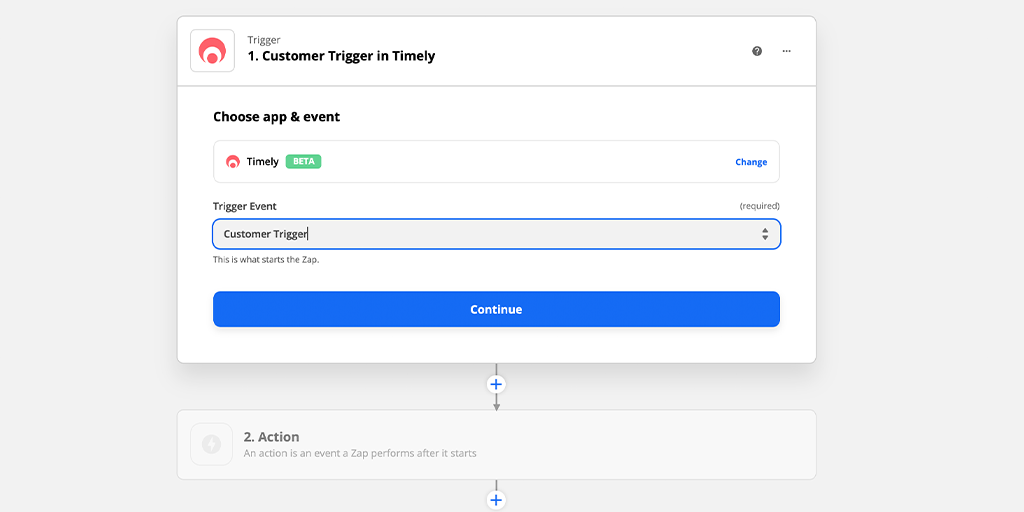
Click “Continue” and sign in to your Timely account.
A popup will then appear.
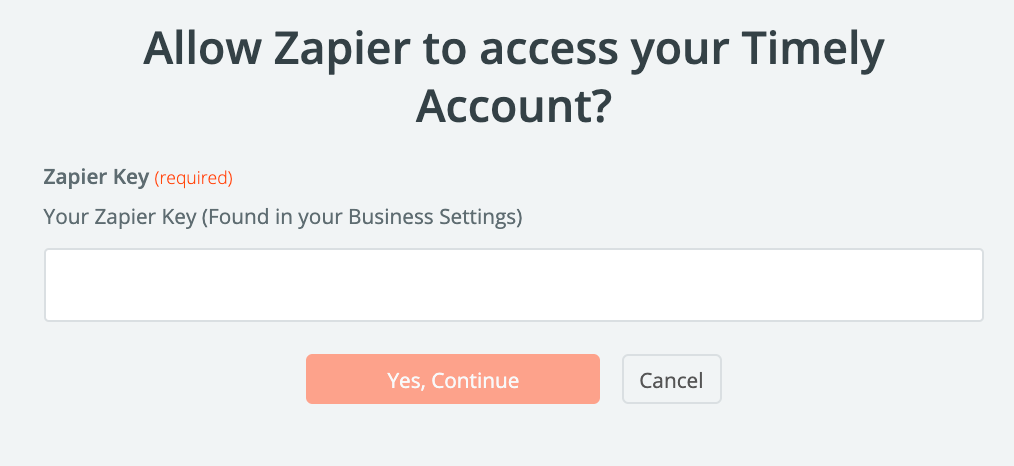
Paste your Zapier Key (found in your Timely dashboard > Setup > Business details > Addons) and click “Activate” to get your API key. Paste this into the field shown above.
Zapier will then have access to your Timely account. Click “Continue“.
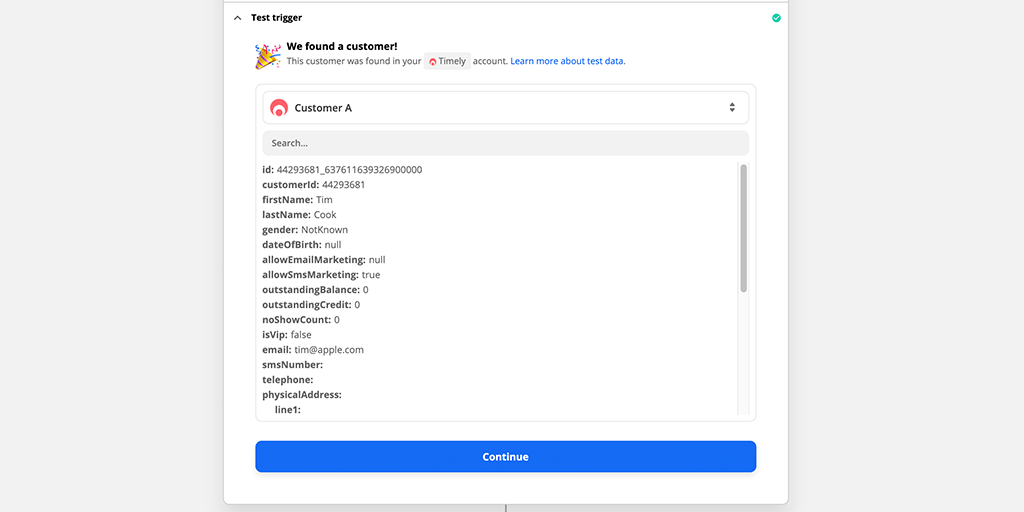
You’ll now want to pull in data (or sample data) from Timely. For this, you will need to have a least one customer’s details in your Timely account.
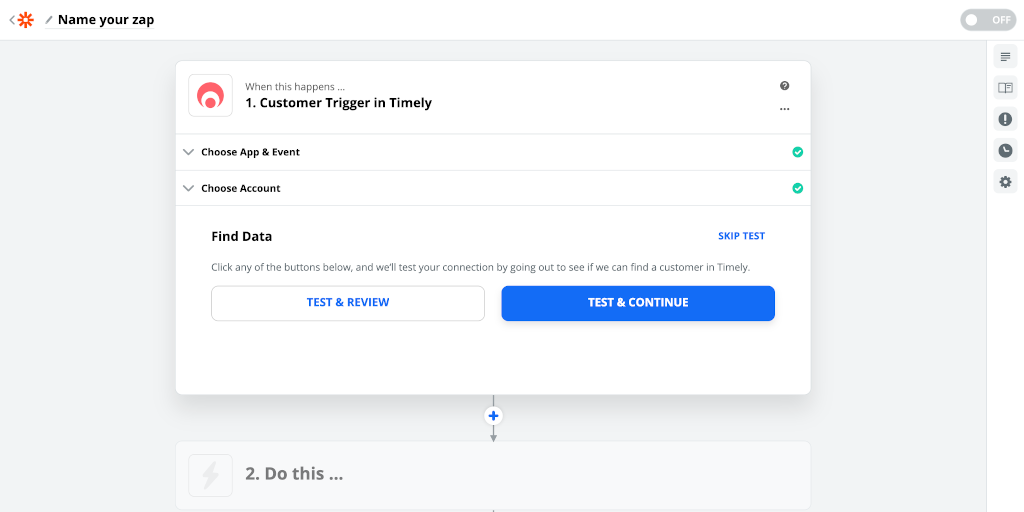
Click “Test & Continue“.
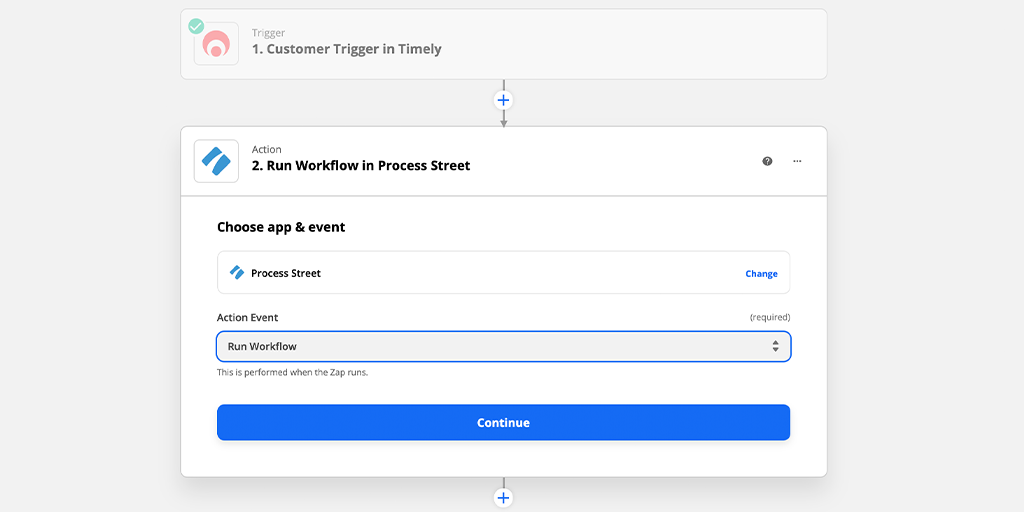
Click “Continue“. With the first half of the Zap set up, it’s time to focus on the second half – the action.
Select Process Street as the action app and “Run Workflow” as the action event.
Click “Continue” and provide Zapier access to your Process Street account.
Just as you provided Zapier with access to your Timely account, you’ll now want to do the same for Process Street.
Another popup will appear after pressing “Sign in to Process Street”.
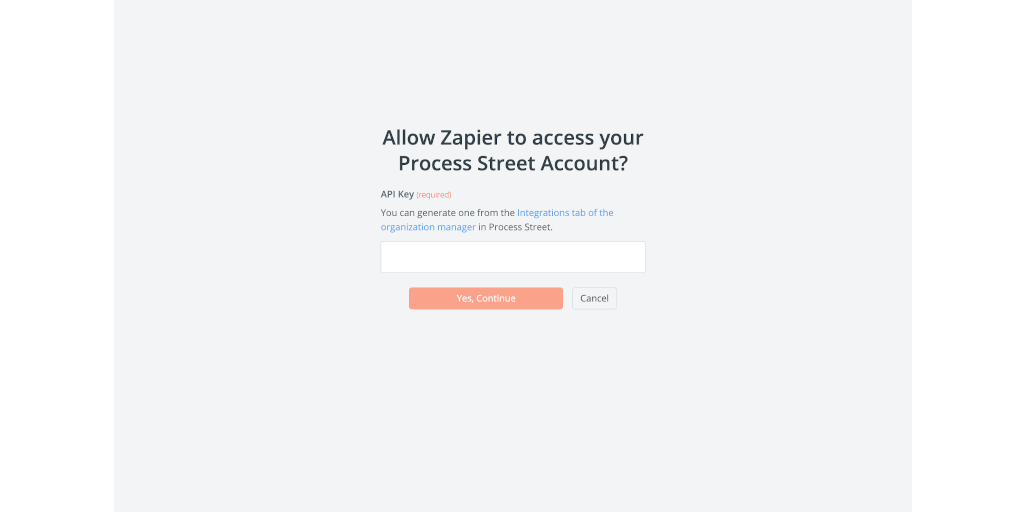
Paste the Process Street API (found by clicking on your organization’s name on the Process Street dashboard, then navigating to the “Integrations” tab) then click “Yes, Continue”.
Click “Continue“.
The next step is to choose which data you want to be pushed from Timely to Process Street.
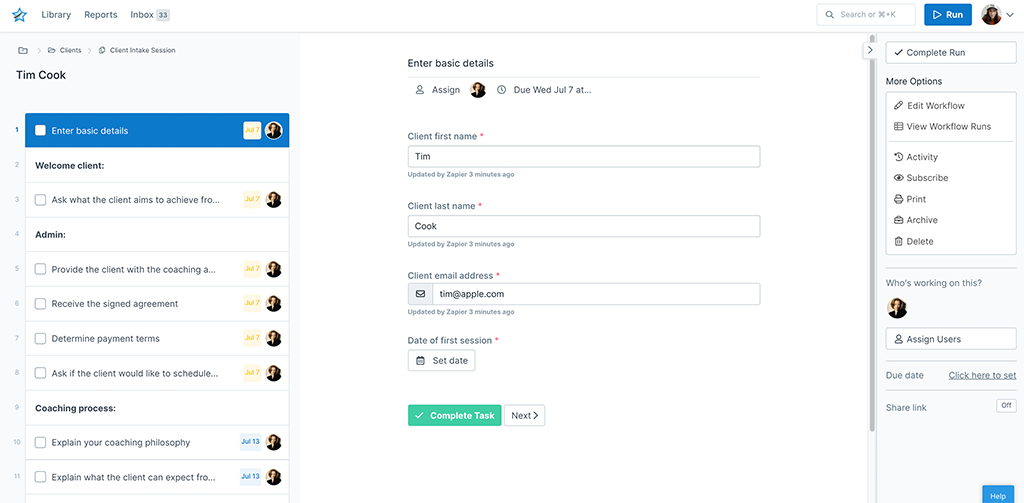
First, you’ll want to select “Client Intake Session” as the workflow from the dropdown.
Then choose what you want the workflow run’s name to be (you can set it up so the client’s first and last name is what appears).
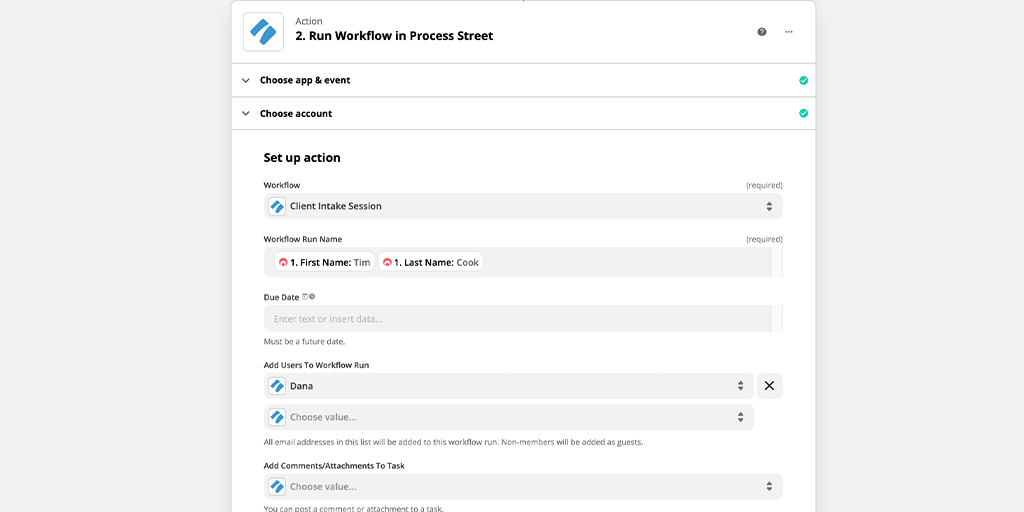
After that, choose the information – such as first name, last name, and email – you want to be pushed from Timely into Process Street.
Click “Continue” once you’re done mapping the fields.
To make sure everything’s working – and the workflow run appears how you want it to appear – click “Test & Continue“.
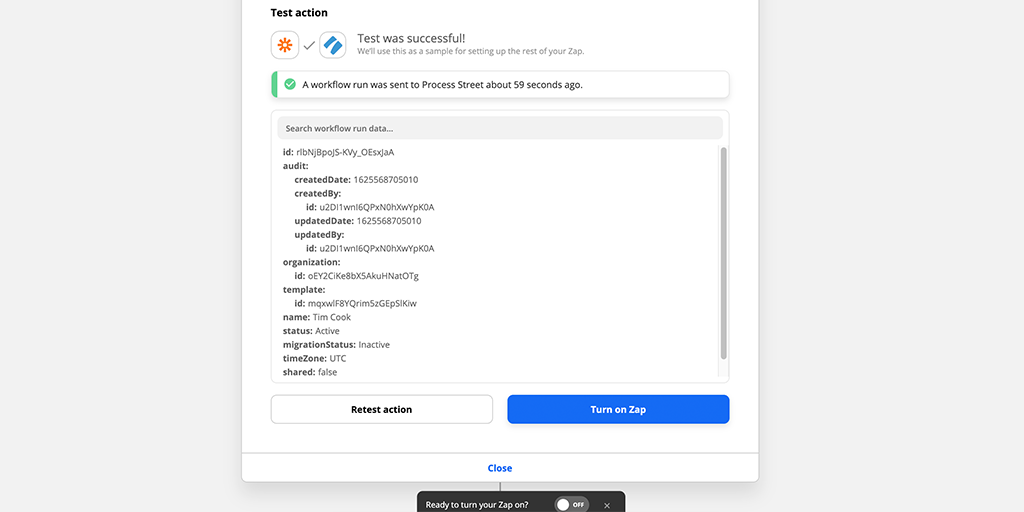
Navigate back to your Process Street Reports area to look for your workflow run.
When you click on the workflow run to open it, you’ll see that the data from Timely has been correctly pushed through into your form fields.
Once you’ve double-checked the workflow run was created correctly, head back to Zapier and turn on your zap.
The Zap will then run in the background, meaning whenever a new client is added to Timely, a client intake workflow run will be automatically created inside Process Street!
The final step is to name your Zap. This will help you remember what the Zap does.
I chose “Timely > Process Street Client Intake”, but what you call yours is your choice!
Help us improve this help center.


