
In a world where teams are increasingly embracing remote work, having a place to store and share your company’s process knowledge is becoming ever more important.
Process Street‘s Pages allow you to create living process documents that your teams can collaborate on, wherever they are in the world.
Users: To create, edit, or share Pages, you must be an Administrator, a Builder with “edit” permissions.
Users can create pages in their Private Library and edit pages within Folders to which they have “edit” permissions.
Pages are the best place to host your business’s knowledge base, SOPs, or training documentation. Essentially, any documents that you may not be ready (or may not need) to run as dynamic workflows.
You can collaborate with colleagues effectively and efficiently by sharing your pages with them, irrespective of the team or department they belong to. In fact, you can share your pages with your whole organization, wherever they are based.
You can enable Version control to track changes to Pages for auditing purposes.
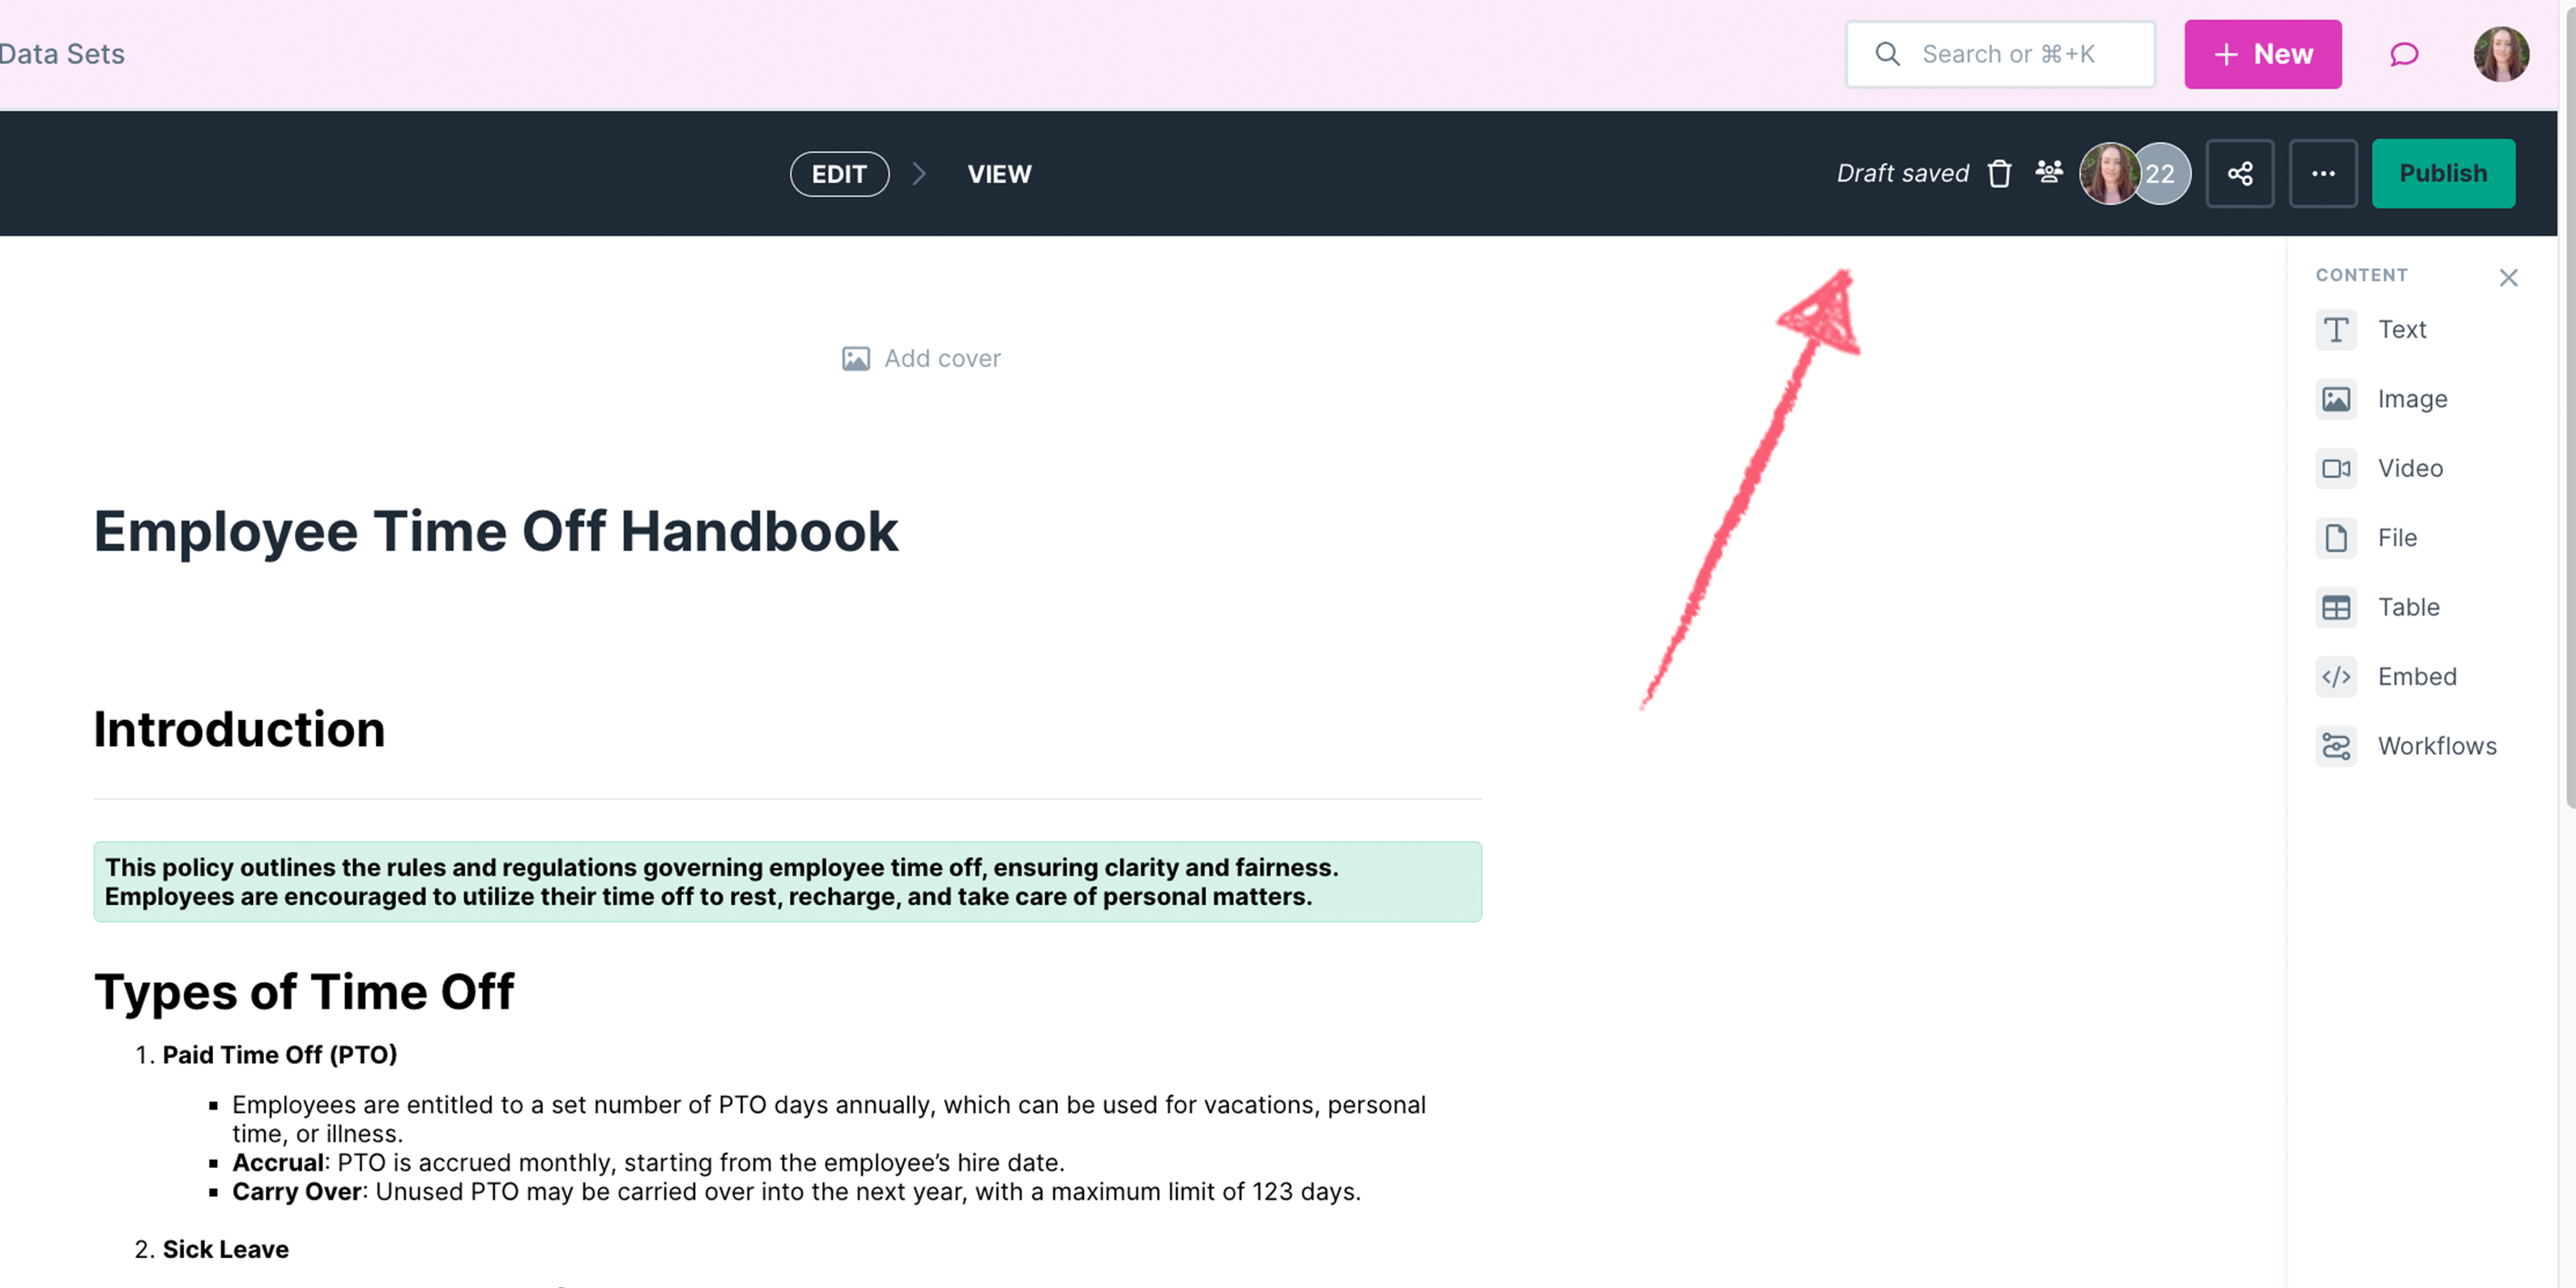
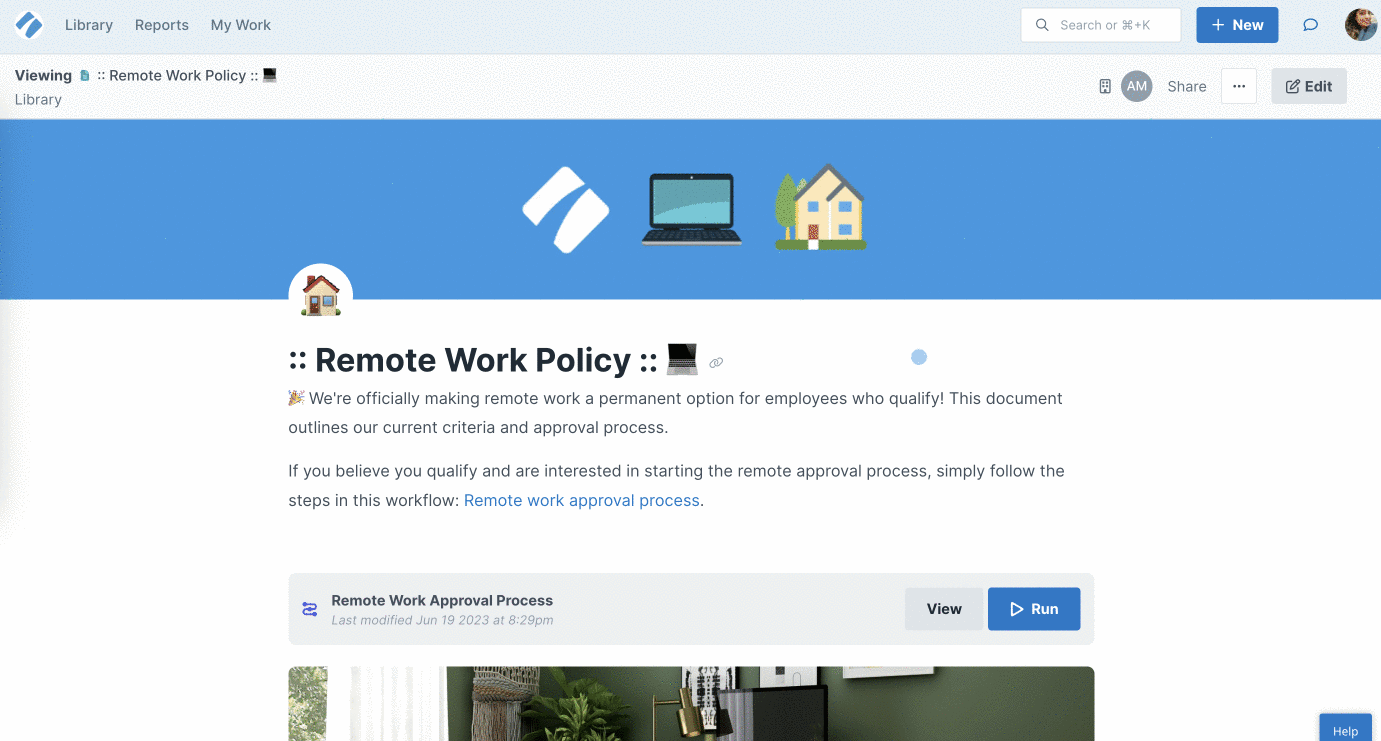
The pages editor contains all the great features you may already be familiar with such as creating rich text, adding images and file attachments.
Plus you can store your pages in folders to keep them organized.
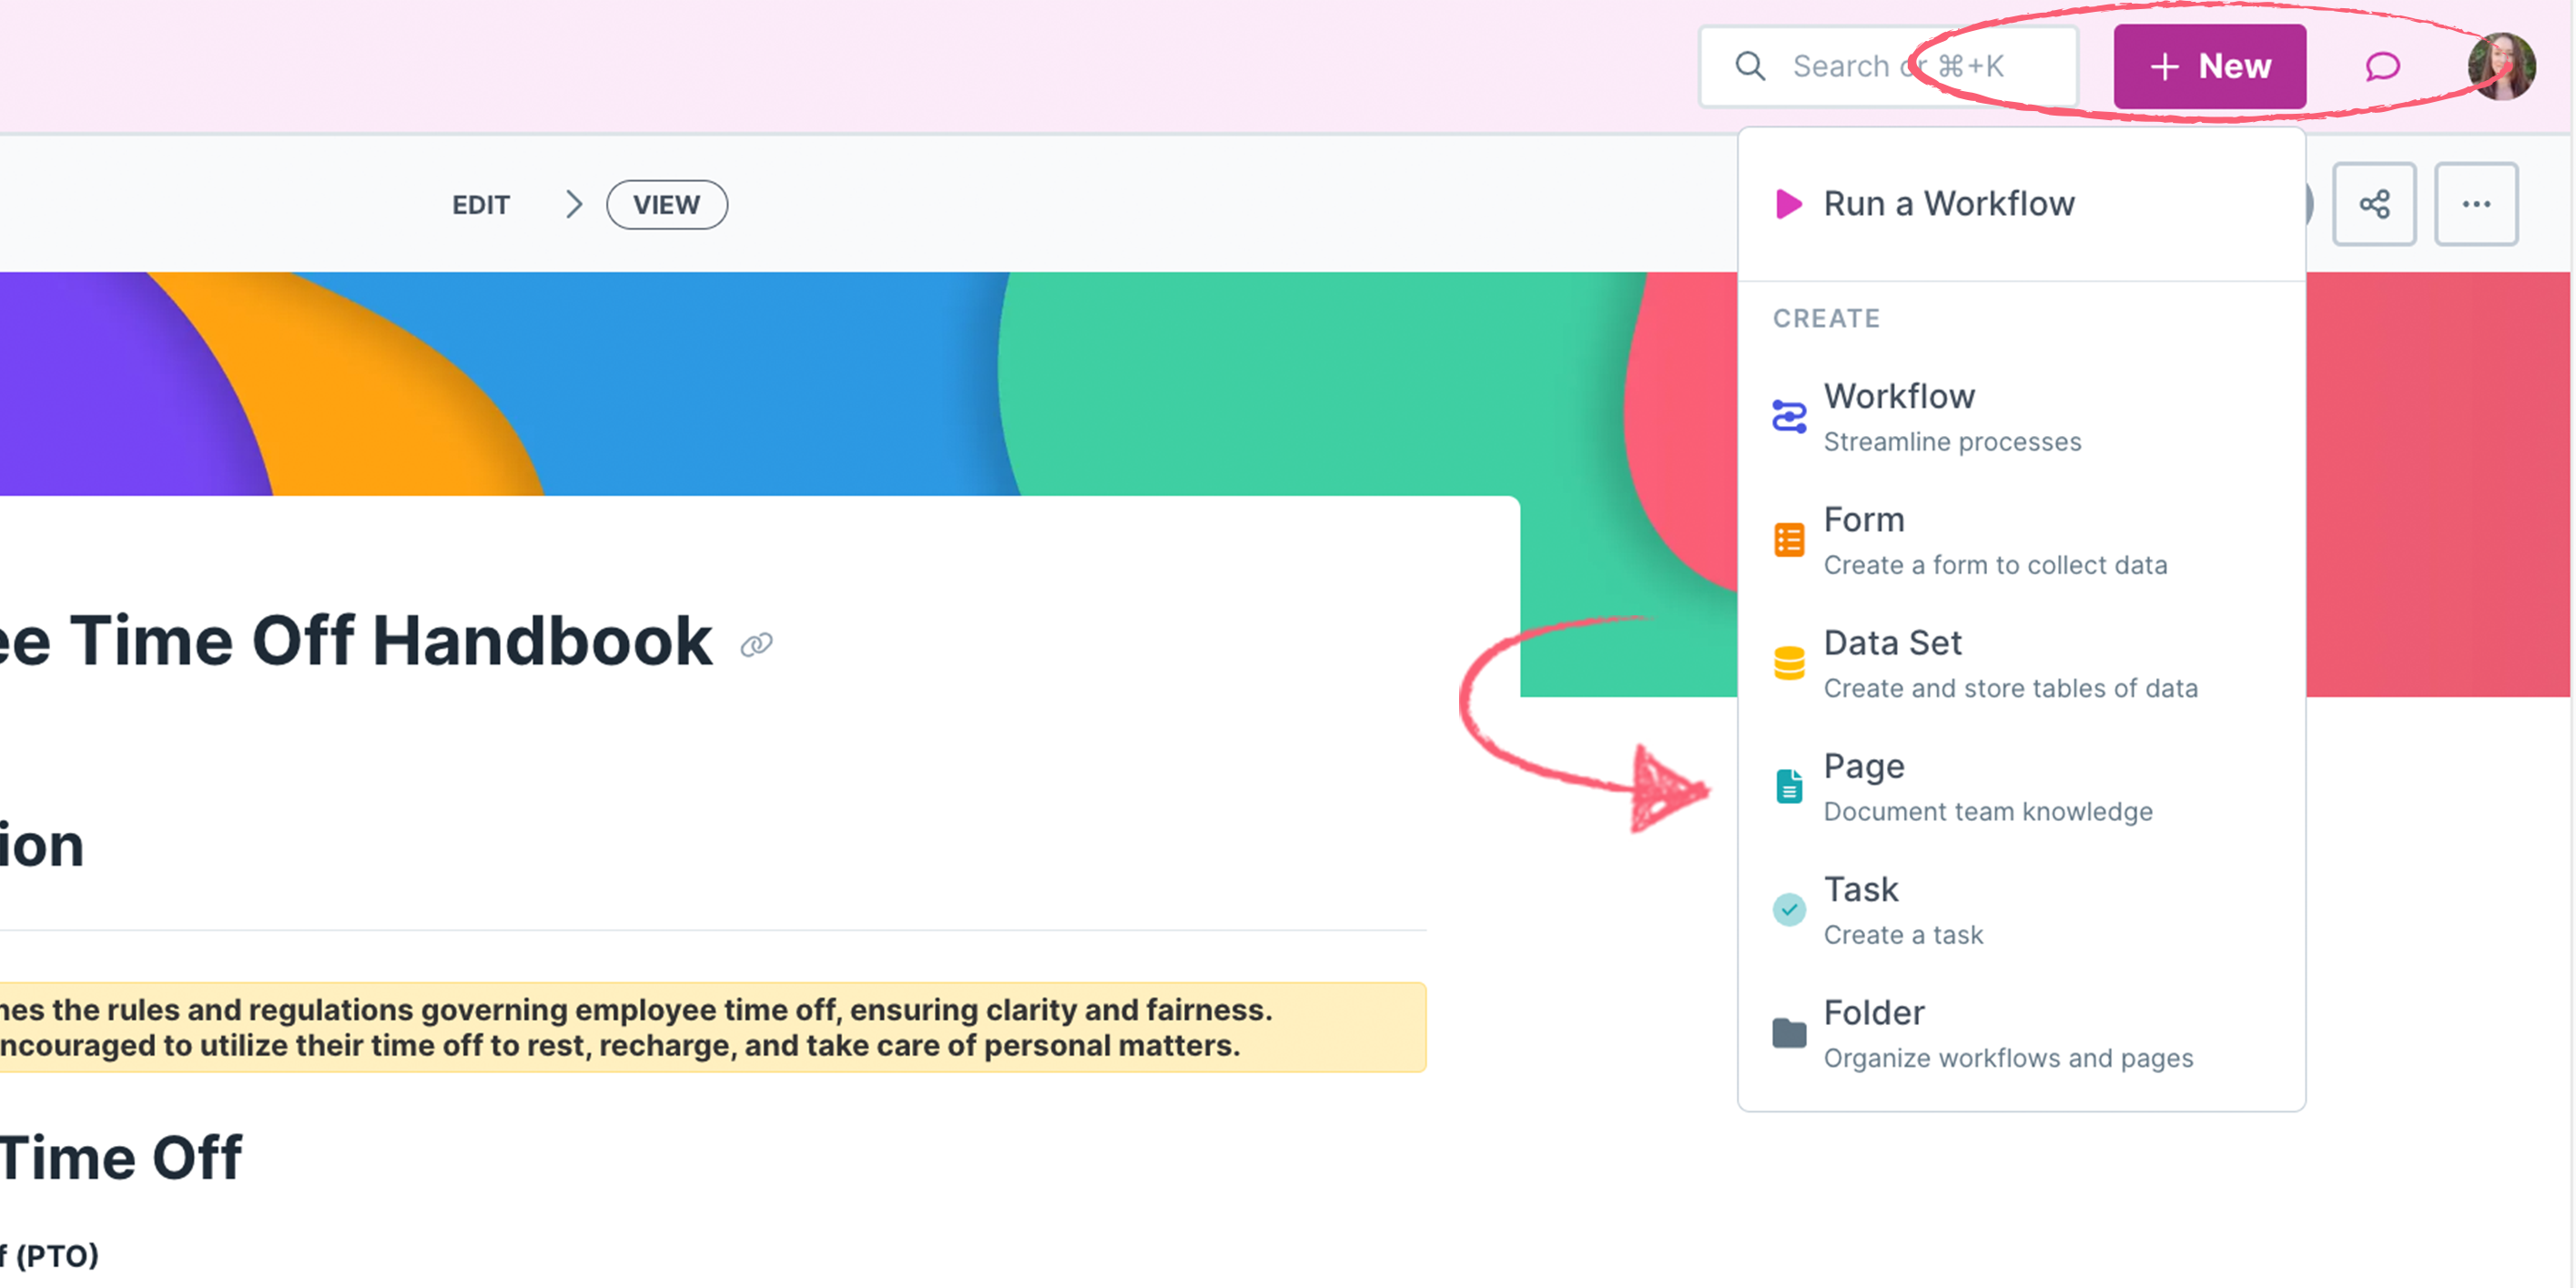
Click the new “+New” button in your header bar and then select “Page” from the dropdown shown below.
If you’re in your organization library when you click New, your page will be created there. If you’re in reports, inbox, or another part of the site when you add a new page, it will be created in your private library.
This creates a new page ready for you to start working on. Pages are really intuitive to create from scratch, so feel free to dive straight in!
Note: Only admins can create Pages on the home folder in your main organization Library. Builders and Users can create Pages in folders that you have granted them access to or in their private library.
If you’re not sure where to start, you’ll find some great tips to help you learn the basics below.

“Untitled” is where you can start typing your page’s title. Note that you will need to add a title to be able to publish your page.
The main body of your page starts from underneath the title. You can also copy/paste text from another source into your page, to add text quickly, as shown above.
To create a new paragraph or a new text block, click your enter or return key.
To create a soft line break, i.e. another line of text in the same paragraph or text block, hold your shift key and press enter.
The ideal size for cover images in Pages is a pixel size of 2048 × 457, or an aspect ratio of 4.48:1
Pages are packed full of all the widgets and tools you’ll need to create great content.
To change the style of your text or to show the content widget bar, highlight the text you’d like to change.

Use your cursor keys (up/down/left/right) to navigate through the content you’ve added at lightning speed.
You can also use the page breadcrumbs to navigate back to the folder you created your page in, or back to your library home screen.
As you work on building your page with content and text, your work will be auto-saved. This means that even if you navigate away from your page, your work won’t be lost.
 When navigating to your page from the Library or a folder, you’ll see “Edit draft” if you have un-published changes to your page.
When you’re done creating (or editing) your page click “Publish” to save your changes.
Once you’ve published your page you can view it and share it.
When you view your page, you can share it with other users.
Click your page to view it and from the top right corner of your screen, click “Share” which opens up the sharing and permissions modal. From here you can invite users, set permissions for those users, and create a share link for your page, as shown above.
You can also use the link icon next to your page title to share quickly.
Note: As a Guest (Internal), if you create pages in your Private Library you won’t have the option to share them. However, you can share the Pages you create or edit in a folder to which you have edit access.

You can create a share link to send your page to other users. Click on the “Share link” tab to open up the sharing options, or use the shortcut link shown above.
Here you can choose one of two sharing permission settings:
Once you have set the sharing permissions, copy the link and send it to whoever you’d like to share it with.
You can also add this share link into workflows so that users can access your pages from other processes in your organization. For example in your employee onboarding workflow, you can add links to your HR policy pages, which allows your new hires to read all the necessary HR documentation.
By default the “All Organization” group is assigned to all new pages with “Edit” permissions, meaning that anyone in your organization can edit your page and share it with others.
You can change this permission level to “View” if you don’t want anyone else to edit it.
If you would like to restrict access to your page, you can remove the All Organization group and invite only selected users or groups to edit or view it.
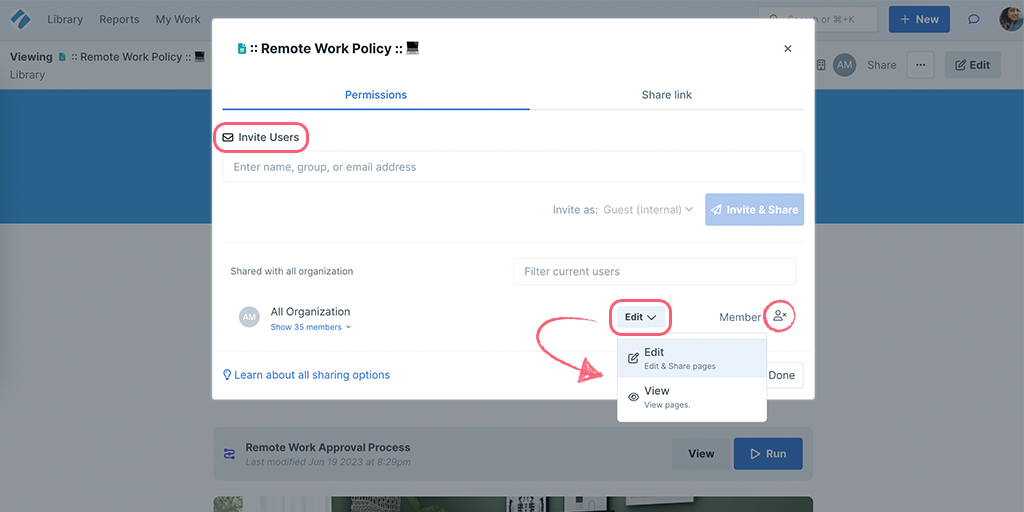
Click the remove user icon circled above to remove a group or user from your page.
You can invite other users or groups (who are already part of your organization) to access your page by typing their user name or group name into the “Invite Users” box shown above.
Alternatively, for those users who are not already part of your organization, you can invite them as a User by adding their email address and clicking “Invite“.
Once you have invited other users (or groups) to your page, you can set their permission level to either “Edit” or “View“.
Navigate to your page via your Library, a folder, or use the search box in your header bar to find it.
Click its name to view it and then click “Edit” in the top of your screen.
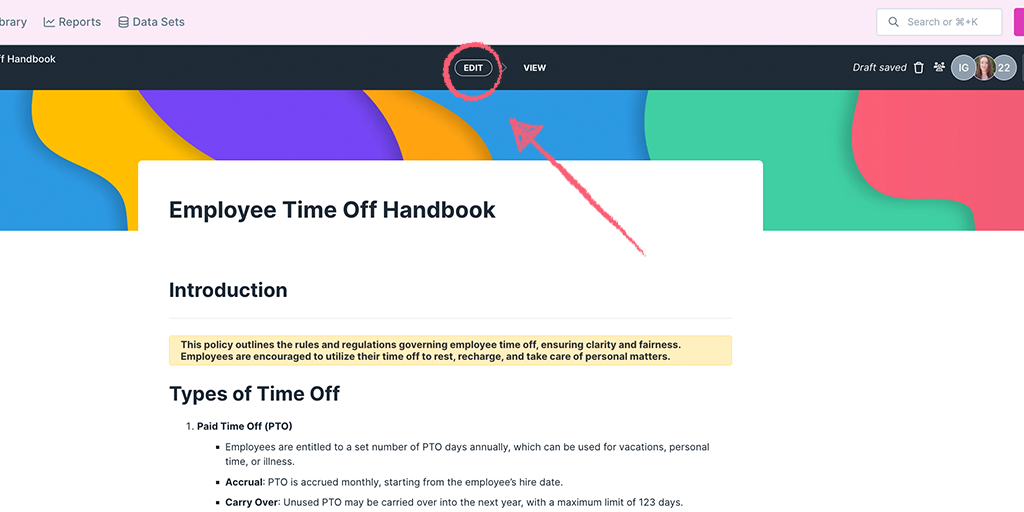
You can make as many edits to your pages as you need to keep your documentation fresh and up to date.
Make your edits, and click “Publish” to save your changes.
If you have made changes to your page and choose to “Discard” them, this will remove those changes and revert your page to the last version that you published.
If you have Version Control enabled, you’ll be able to add a Document owner and Reference ID from the settings cog in the editor.

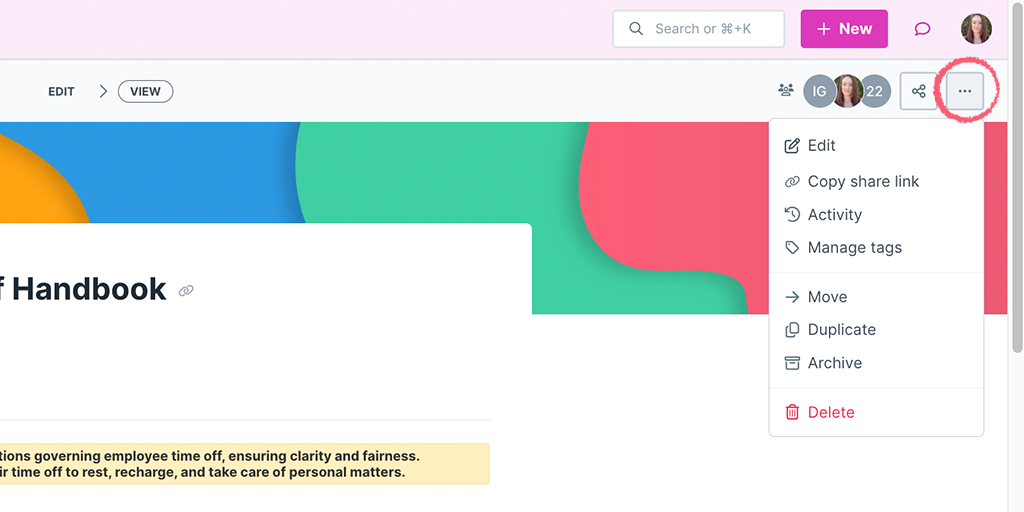
When viewing your published page, click the three dots shown below. From here you can move or copy your page to a folder, archive or delete it.
If you deleted a Page, you can follow these instructions on how to restore it.
You may want to move your page into a folder to help keep organized.
Click your page’s name to view it, then click the three dots at the top right of your screen.
Click “Move” and select the folder (or sub-folder) that you’d like to move your page into.
If you’d like to copy your page, you can select “Duplicate” from the menu shown above and then select a folder to move it into.
If you are an admin in more than one organization, you can also copy your page into another organization of your choosing.
If you want to remove a page from your library but you don’t want to fully delete it, you can archive it instead.
To view archived pages, or to unarchive a page, click the cog on your folder and select “Show inactive“.
Click your page’s name to view it, then click the three dots at the top of your page and select “Unarchive“. Your page will become active again.
Note: Users are not permitted to Archive or Move a Page.
View any changes or updates to your page by clicking on your Page’s name to view it. Then from the top right of your screen click the three dots, and select “Activity“.
If you’ve published changes but you no longer want them, you can revert to an earlier version of that page from its activity feed.
When viewing your Page, click the meatball menu and click Activity.
Scroll to the version to which you’d like to revert and click Restore.
You can add tags to your pages which help you navigate to them faster from your Library.
Click on your Page’s name to view it. Then from the top of your screen click the three dots, and select “Manage tags“.
Start typing your tag name into the box provided. Hit your enter key to add a new tag, or use an existing tag from the list that appears.
Once they appear in your library you can click your tag to take you to a list of any pages with that tag, as shown above.
If you have any questions about Pages, please reach out to our customer success team.
Help us improve this help center.


