You can integrate Factorial with Process Street via Zapier.
Factorial keeps all your HR processes in a single place, proving to be an essential people management tool for evolving teams. You can establish a connection between Factorial and Process Street to exchange information from your Workflow Runs to the database in Factorial and manage your HR processes without the manual work wherever possible.
Plan: This integration is available to customers on all plans.
Users: In order to create an API key for integrations, you must be an Administrator.
Let’s look at how you can do this.
Zapier is an integration platform that connects over 2000 different apps. Any action in any of the supported apps (like creating an employee forwarding an email or adding an attachment to a task) can trigger another app’s features automatically. Zapier integrates with both Factorial and Process Street. The whole “recipe” sequence is known as a Zap.
In this article, we’ll be walking you through how to set up a Zap that links Factorial and Process Street to trigger actions on both platforms.
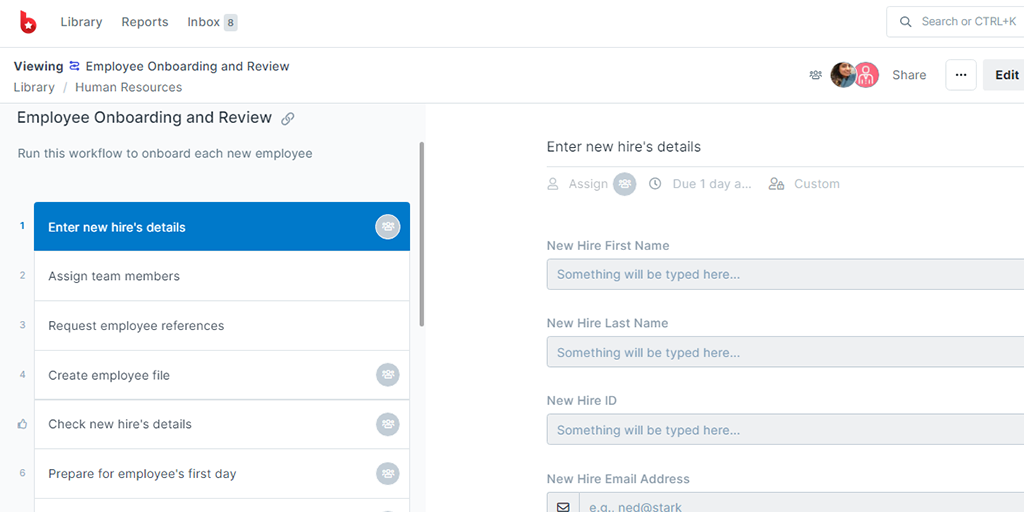
First, create a Workflow in Process Street, and ensure to add Form Fields that are the same as the data fields in Factorial. This will help you to map the relevant fields from both platforms together to push data from one to the other.
For example, you can use short text fields to store the employee’s first and last names, an email field for their email ID, and so on.
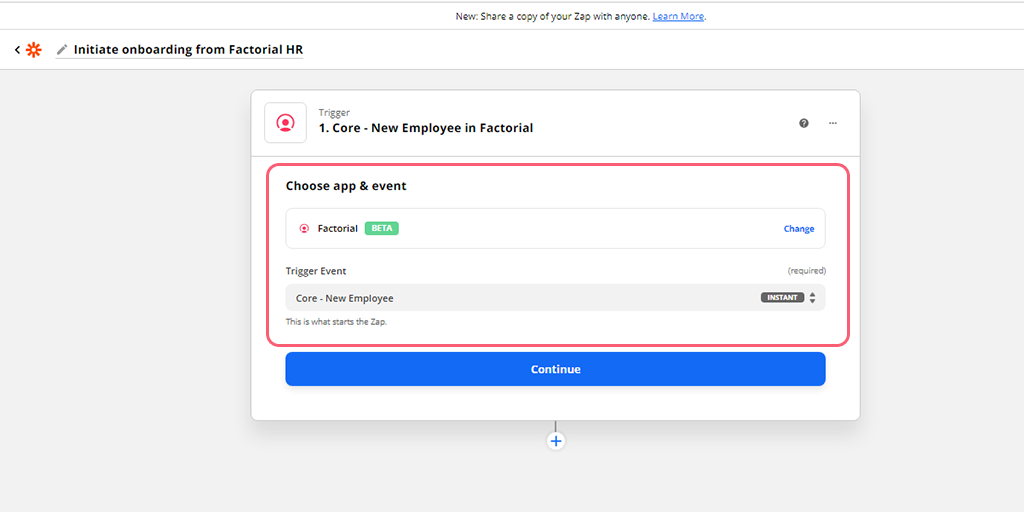
Log into Zapier or create an account, then click “Create Zap“. This will be your Zap to automatically run the Workflow in Process Street when you create a new employee in Factorial.
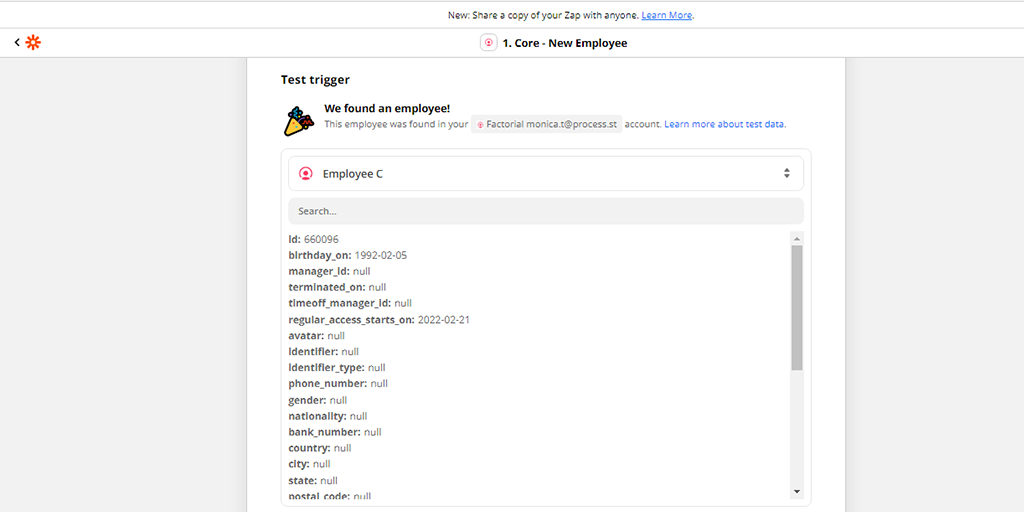
Choose Factorial as the Trigger and Core – New Employee as the Trigger Event.
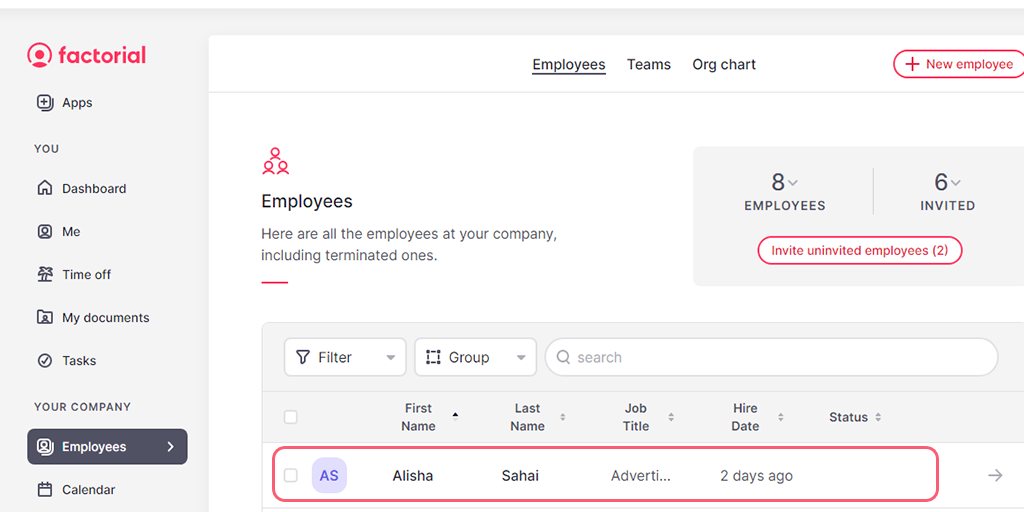
Choose your Factorial account or connect it and test the Trigger. Zapier will then find a recently added employee in your database – if you don’t have one you’ll need to create a sample employee in Factorial and fill out their details (remember, we want to push these into your Workflow in Process Street) before running the test.
A successfully returned test will look something like this:
Now set up the Action by choosing Process Street as the Action app. Now, select Run Workflow as the Action Event.
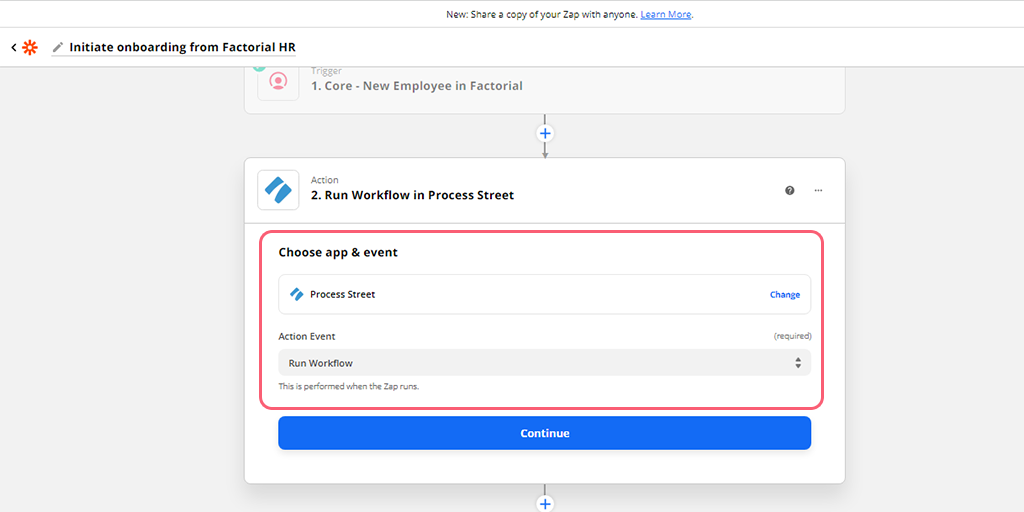
Choose your account on Process Street or connect one now. Then, select the Workflow you would like to run. In our case, this means selecting the Employee Onboarding and Review workflow.
Next, map the fields from Factorial to the Form Fields in the Workflow. These will be the fields you added in your Workflow to be filled with the data from Factorial. For example, you can see below that we’ve mapped the employee’s name to be used in the name of the Workflow Run. We’ve also linked Form Fields in the Workflow together to store information like their full name, email address, and so on.

Now, click Continue to test your Zap.
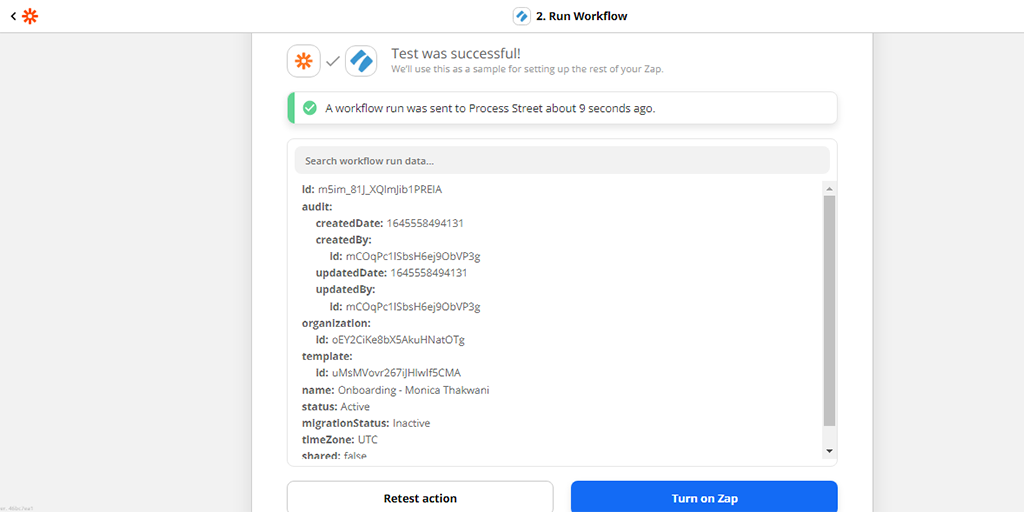
When your test returns successfully, remember to check your Process Street account to make sure that the Workflow was run successfully and populated with the right data in the correct locations. Then give it a name and turn it on.
Congratulations! You’ve now linked your Factorial account to Process Street to automate data transfer and Workflow creation.
You can also use information from Process Street to trigger an action in Factorial, such as completing your onboarding process.
As the Workflow Run progresses within Process Street, and you reach a stage where you’ve taken a decision about your new hire, you can update their employment status on Factorial by completing a task in the Workflow Run.
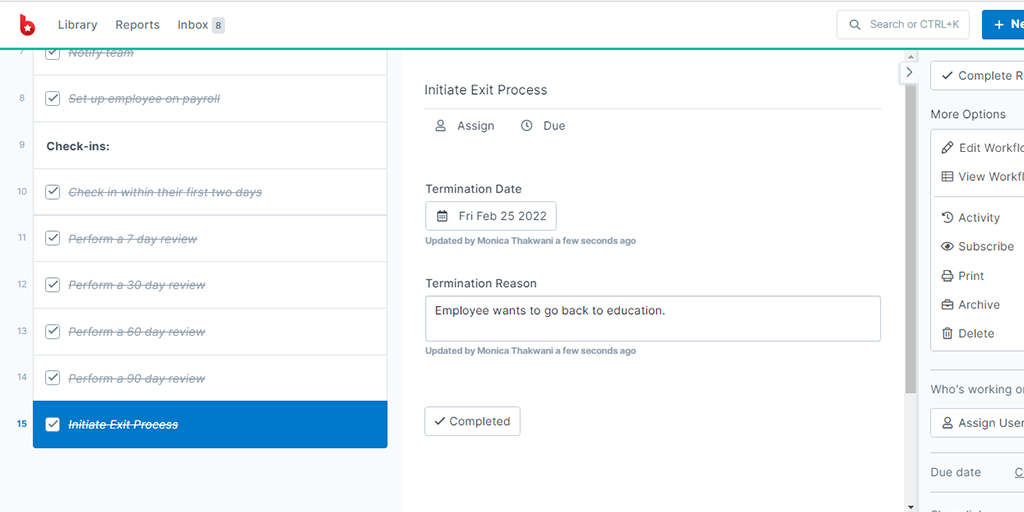
Here, let’s say the employee did not make it to the permanent employee list and you have to terminate them.
Let’s create a Zap to update their employment status as Terminated when the Initiate Exit Process task is checked off in Process Street.
As with the previous example, first, you need to set up a Workflow in Process Street. This will be what triggers the Zap to fire, so for this example, we’ll be using our Employee Onboarding and Review workflow.
Then you need to add Form Fields that are the same as the data fields in Factorial. This will help you to map the relevant fields from both platforms together to push data from one to the other.
For example, you can use short text fields to store the employee’s first and last names, an email field for their email ID, and so on.
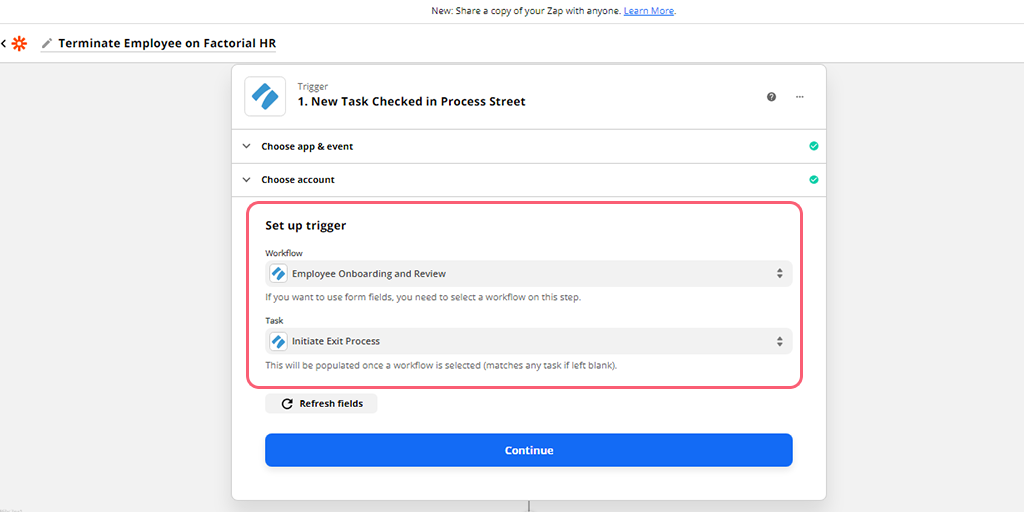
This time, click on Create Zap and select the Trigger app as Process Street and the Trigger Event as New Task Checked. This means every time you update the employee status as Terminated, this Zap will update the same status in Factorial.

Next, click on Continue and select your account in Process Street, the same one you chose the first time. Then you can set up the Trigger by selecting the Workflow and Task.
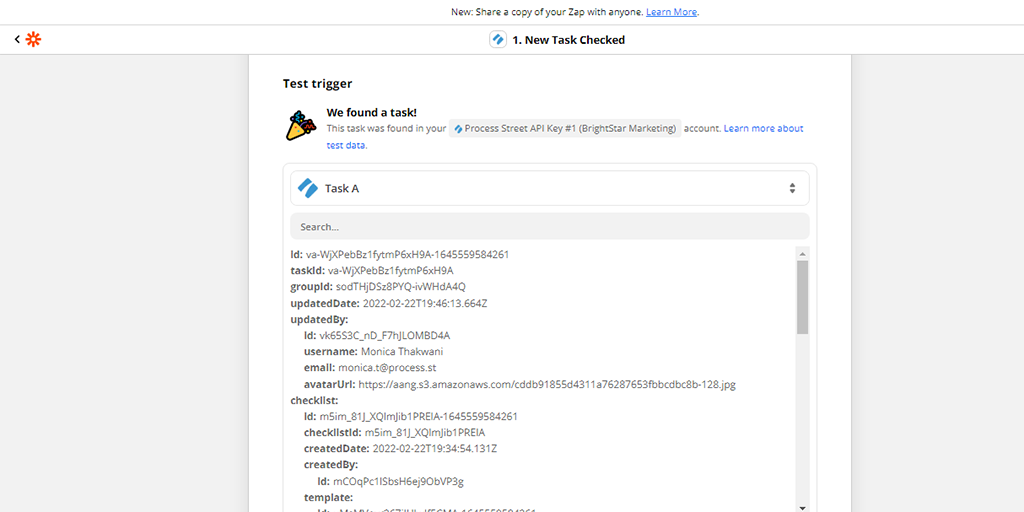
Now, you’ll want to test your trigger. For this to be successful, you need to have filled in the Form Fields in the ‘Initiate Exit Process’ task in your ongoing onboarding Workflow Run so Zapier can pull in some sample data.
If the task you checked off completes the Workflow Run, you need to ‘reactivate’ the run before running your test in Zapier. So, click the Reactivate button on the top right of the right-hand Workflow Run menu.
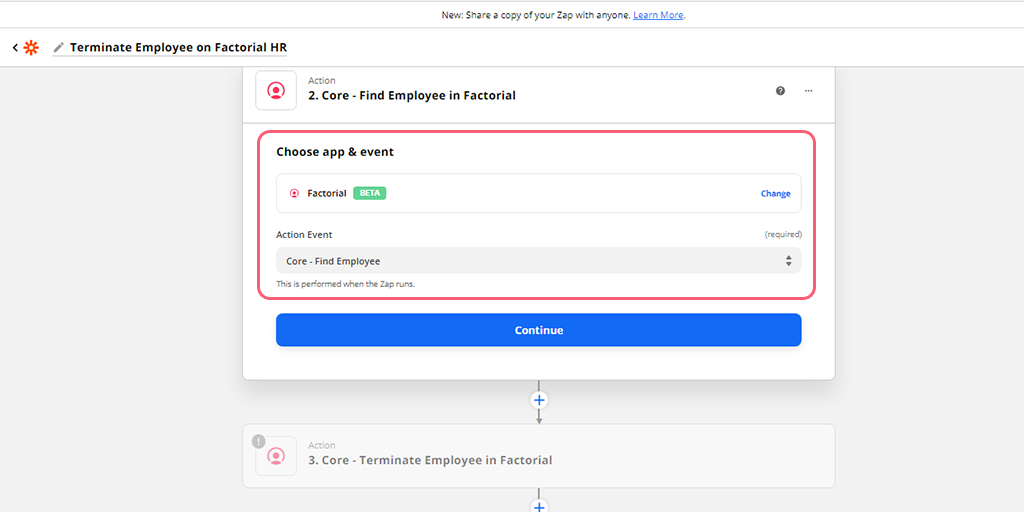
When your test returns successfully, start setting up Factorial as the Action app. Here you want Zapier to find the employee and then update their employment status.
So first, we choose the Action Event as Core – Find Employee.
Continue to set up your Action. Here you need to select an identifier for your employee which the Zap will use to locate the same employee in Factorial’s database.
This identifier can be their email address or their employee ID – either of which you should map through from the data in your Process Street workflow run. By doing this, you make sure that the correct employee is found in Factorial no matter who is entered in your workflow run.

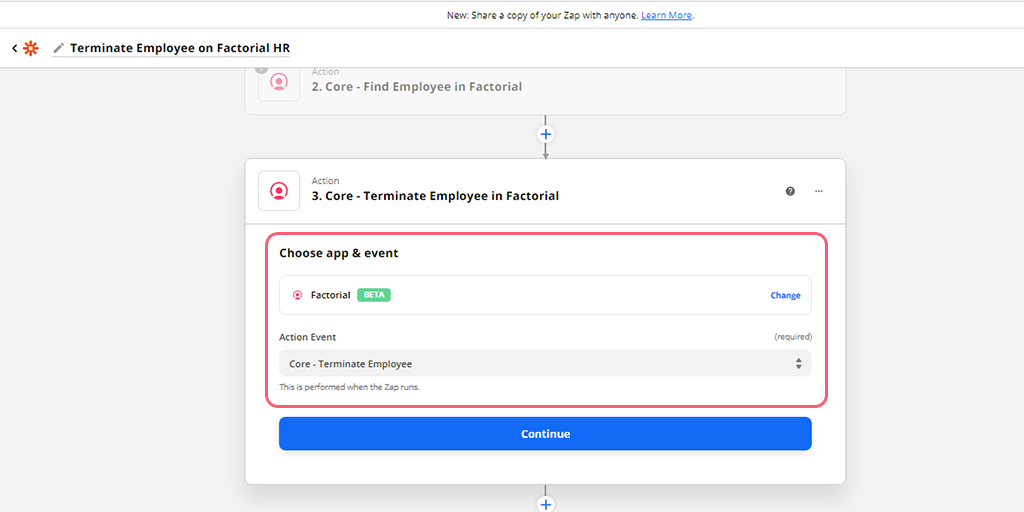
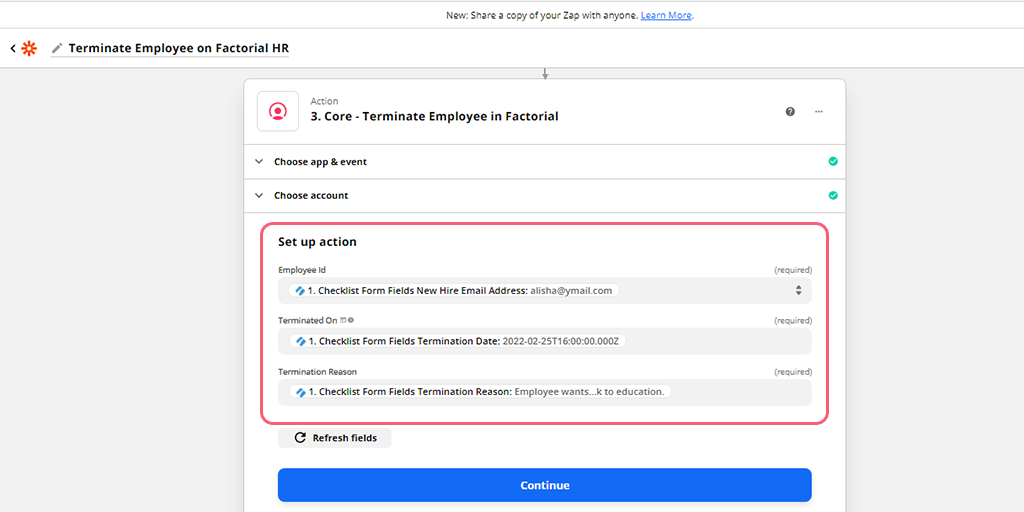
Once the test returns successfully, you can set up another Action to update their status. Select Factorial in the Action app then select the Action Event as Core – Terminate Employee.
Next, you click on continue then choose your account in Factoria, the same one as you chose the first time, and set up the Action. Here you’ll be mapping the fields from the Initiate Exit Task to Factorial’s fields by choosing the Employment Status, Termination Date, and Reason.
Now test your Zap!
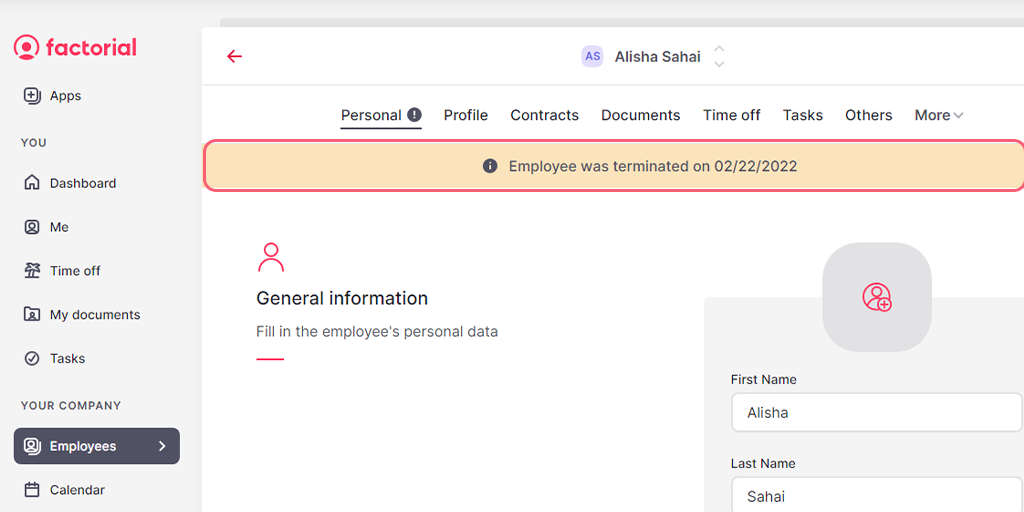
When your test is successful, double-check your Factorial account to make sure that the correct employee has been updated as being terminated.
Lastly, give your Zap a name and turn it on. Congratulations!
Zaps allow you to automate the busy work in your workflows, whether they’re HR-related or not. Try testing out the different Triggers and Actions yourself with Process Street and other apps to see what work you can wave goodbye to!
Help us improve this help center.


