Workflows are the foundation of all your future workflow runs. Think of your workflows as the master blueprint of your process, whilst workflow runs are single, dynamic instances that you run from your workflow.
For example, if you were hiring a few new team members, you would run a workflow for each new hire that you need to onboard, all based on the same new hire workflow.
Users: In order to create or edit workflows you must be an Administrator or a Builder who has been given ‘edit’ access by your Administrator.
You can enable Version control to track changes to Workflows for auditing purposes.
There are endless use cases for workflows including:
Essentially you can have workflows for every recurring task or SOP that you can imagine!
The above use cases are examples from our library of pre-made, ready-to-use workflows that you can copy and use in your organization. You can use these workflows as they are by, running or, sharing them, or edit them to suit your specific needs.
You can even assign users and due dates to specific tasks in your workflows, to make sure that everyone knows what they need to do and when once a workflow has been run.
To start from scratch and make a new blank workflow, click the “+ New” button in the top right corner of your screen and select “Workflow“.
You can create a New workflow either in your organization library or from any page that would send the workflow into your Private Library. Once you’ve finished working on it, you can move it to the desired folder.
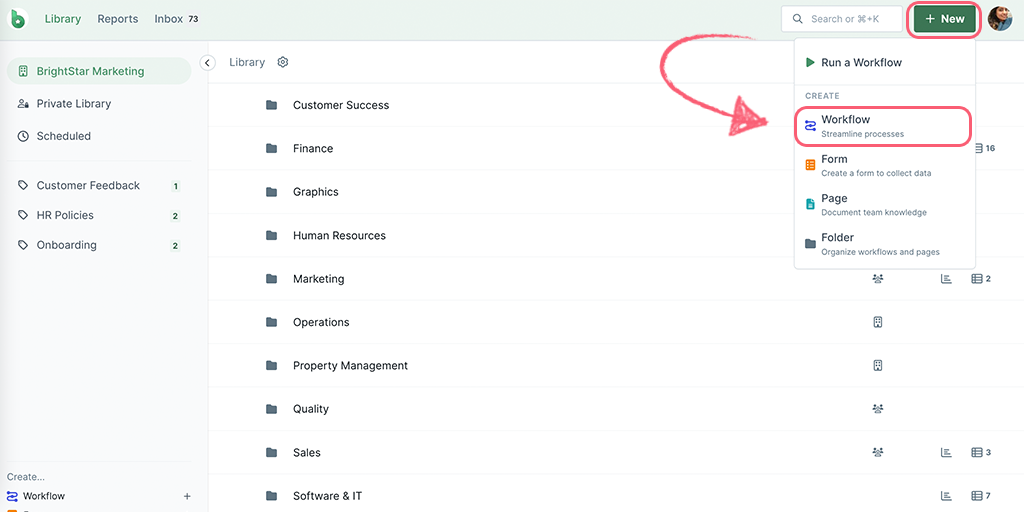
Note: If you aren’t able to create a new workflow, you may need to ask your Administrator for permission, or to grant you permission to a folder in which to create your new workflow. Only admins can create new workflows on the home screen of the Library.
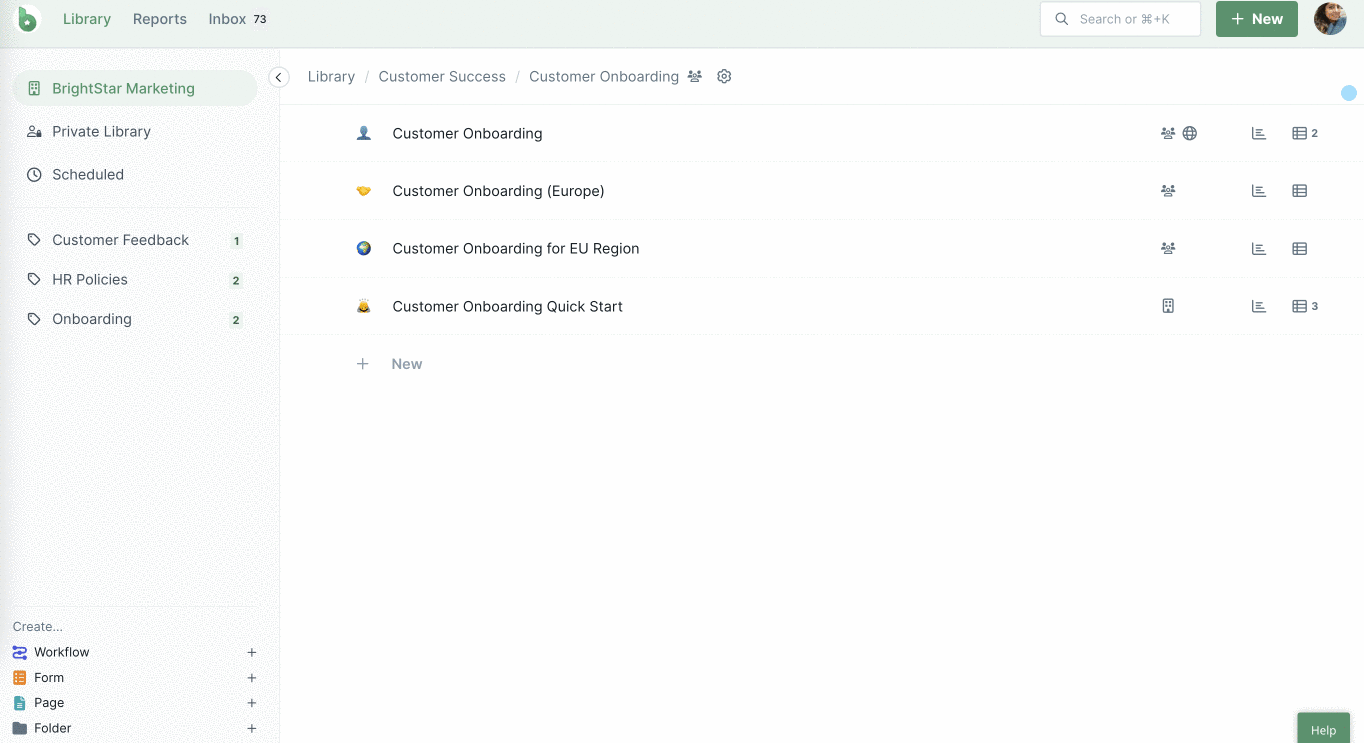
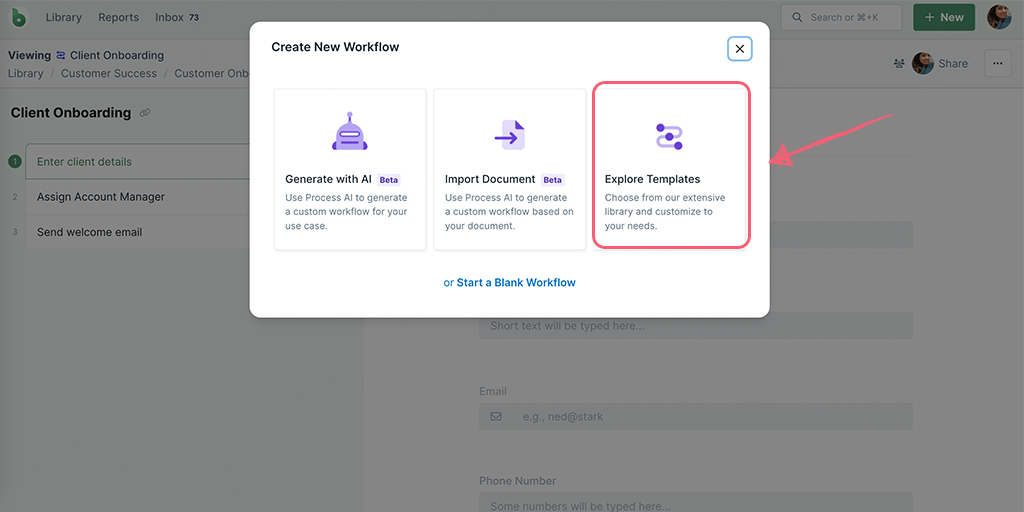
You can select Start a Blank Workflow or choose one of the options to create a new workflow.
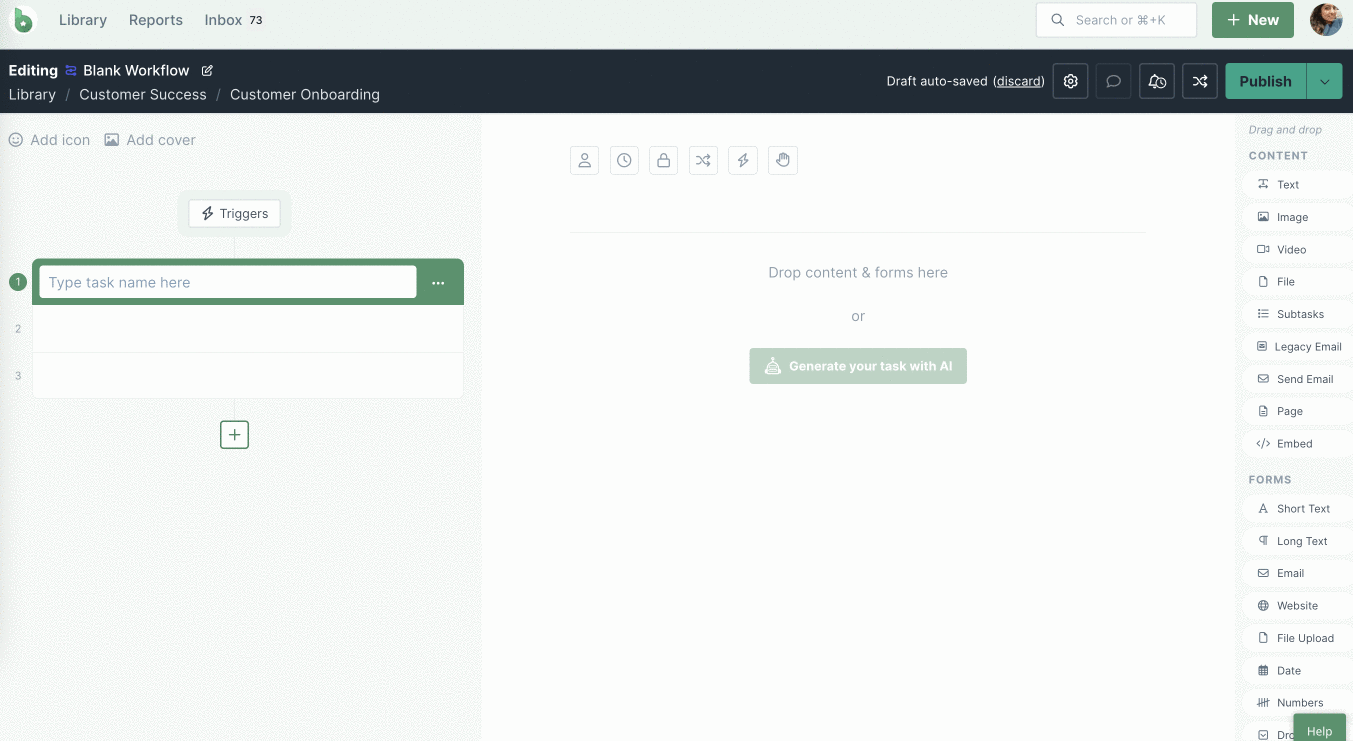
Once your blank workflow opens up, you can start in the Workflow Setup modal by giving it a name and adding your tasks.
Click on the edit icon next to Blank Workflow in the top left corner to rename your workflow.
You can also set a default run name which can include variables from within your workflow, as shown below.
Note: To use variables from your workflow in your default workflow run name, you first need to add some form fields in your workflow. You can also use global variables, as shown above.
You can also set up your workflow by clicking the Settings cog in the top right of your screen.
Add a description of your workflow is optional but it can be used to share an outline of what this particular workflow is used for. Start typing in the “Description” box as shown below.
Tasks are the actionable steps that are involved in implementing your workflow.
Headings are the main stages or segments of your workflow and can be used to separate groups of tasks.
At the bottom of your tasks, you will see a + icon. Click on it to view the tasks menu that allows you to create tasks, AI tasks, headings, approval, and automation.

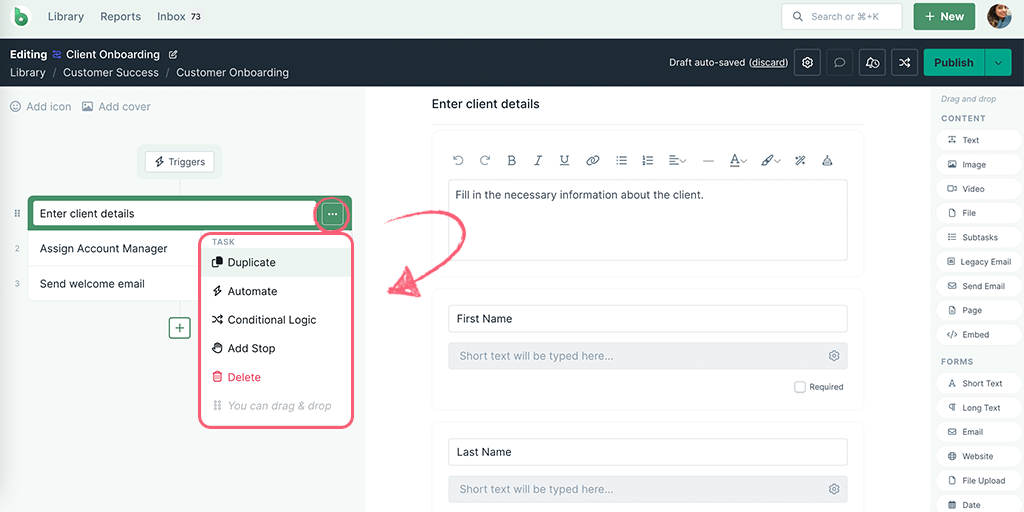
Use the three dots next to each task to duplicate it, add automation, conditional logic, a stop, or delete it.
Pro tips:
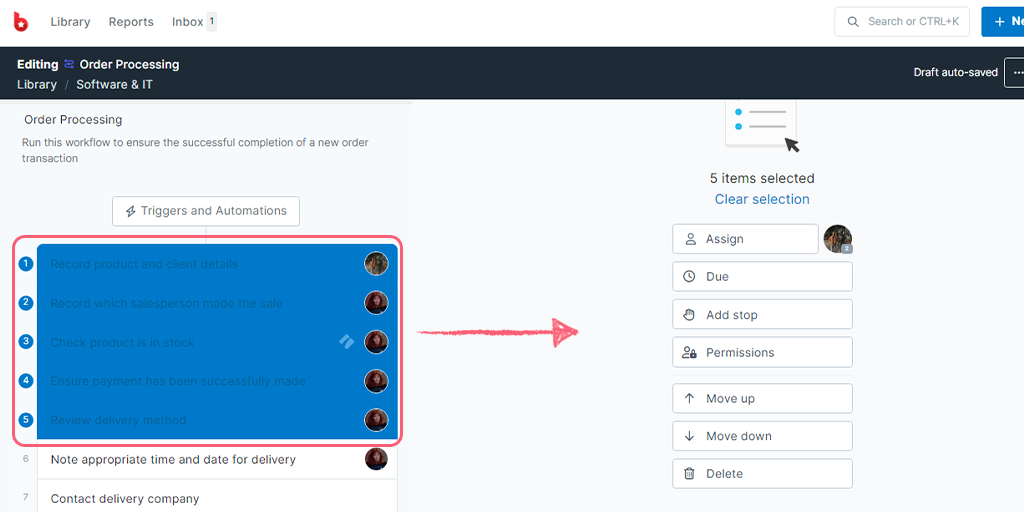
When you multi-select tasks, you can bulk-set Task Assignments, Dynamic Due dates, Stop Tasks and Task Permissions, as shown above.
You can also move this block of tasks up and down, or delete them by using the ‘Move up’ or ‘Move down’ arrows, or delete the block by clicking the ‘Delete’ button.
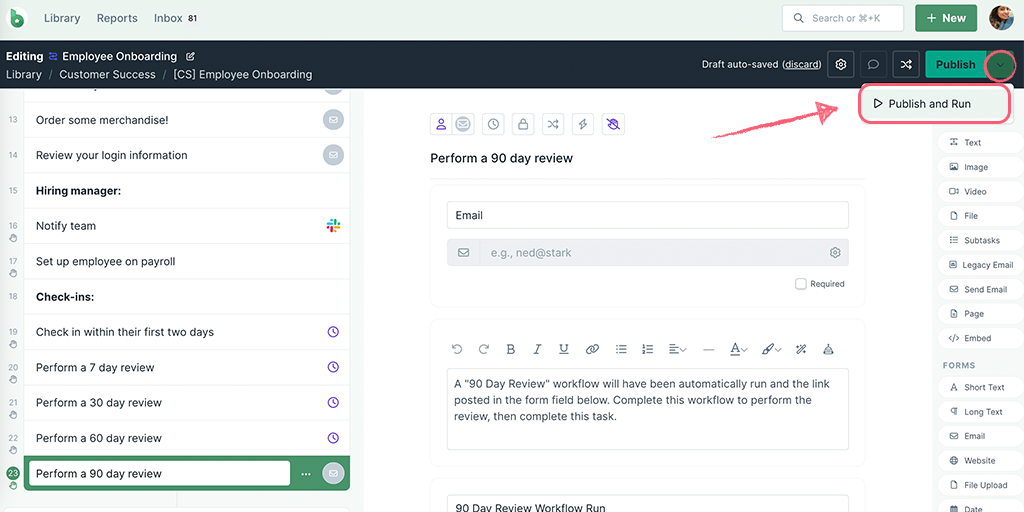
Click on Publish to save changes to your workflow when you have finished editing.
If you want to test your workflow right away, click the arrow next to Publish then click Publish and run.
Note: The workflow gets auto-saved every few minutes. However, you need to Publish changes to see the finished workflow and start using it.
Now you can run your workflow straight away if you choose, or add more features and functions into your workflow.
We’d recommend adding more to your workflow as this is where the real power of Process Street can be found 😉
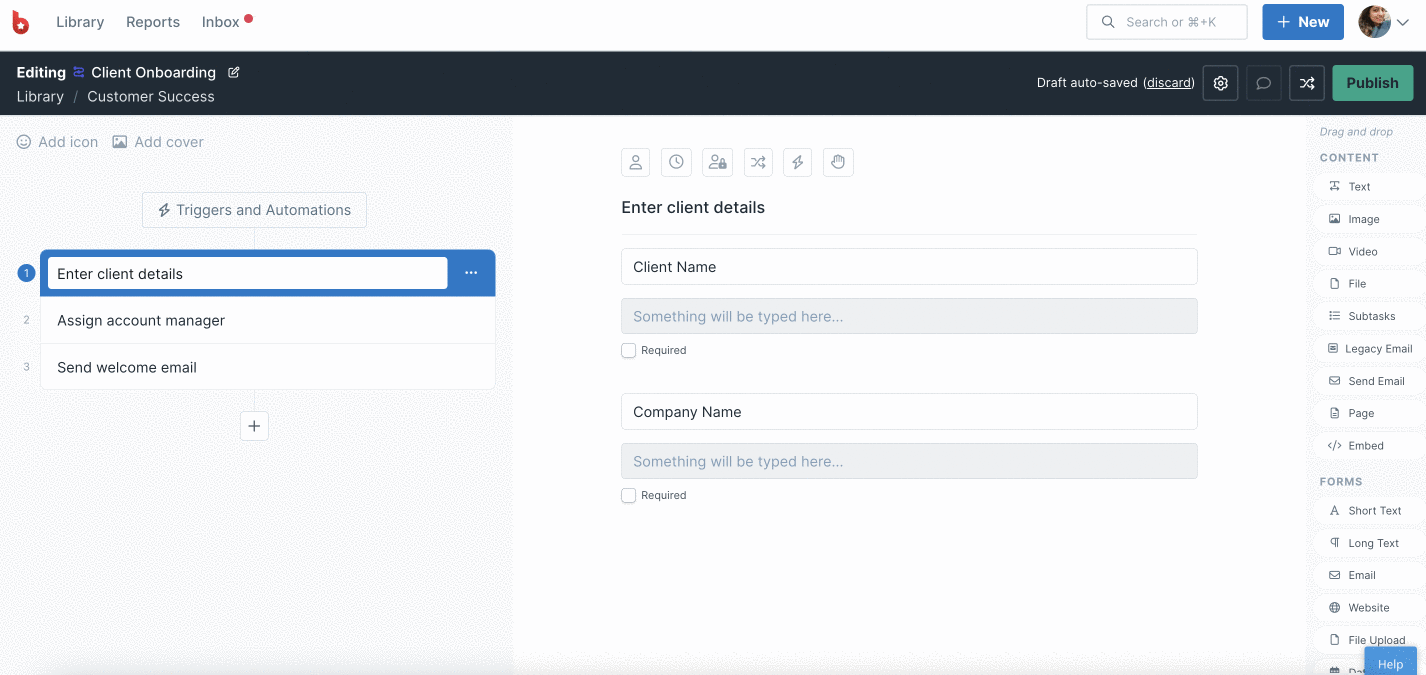
On the right-hand side of the editor, you’ll see two sections, “Content” and “Forms” as shown in the image above.
Content can be used to share information in your workflow, like an image, text or video. Whereas forms are used to collect or store information in your workflow runs.
Find out how to add the various content or form fields into your workflows:
And how to add and use these powerful workflow features:
Learn how to build out your workflows further, by following the 5 Stages of Process Building in our Getting Started Guide.
If you navigate away from your workflow without saving your changes, these changes will be auto-saved as a draft.
When you return to your workflow, you will see a warning icon in the ‘Edit Draft’ button, as shown below.
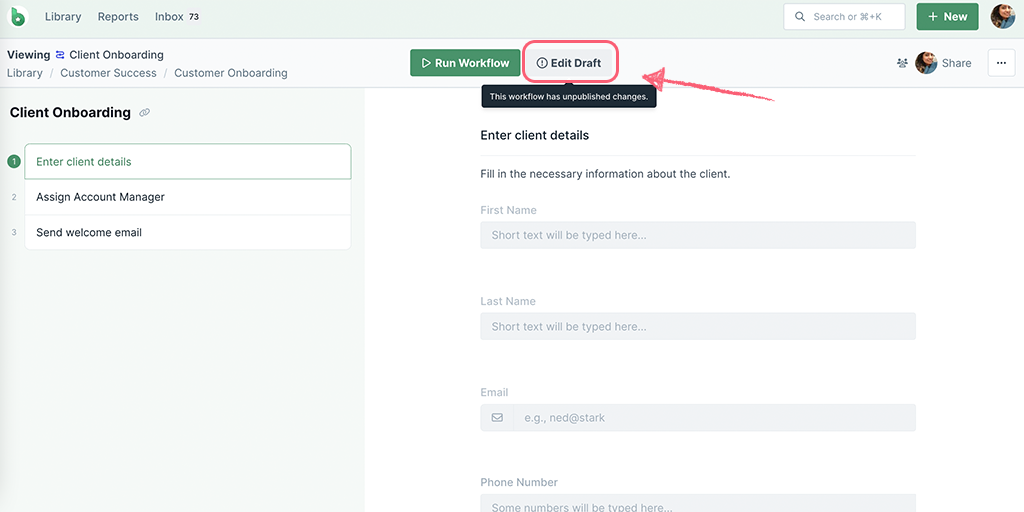
Edit your workflow again, to either publish (or discard) the round of changes since you saved your workflow last.
You can edit your workflow as many times as you need, building in more features and functions as you go.
We recommend that you run instances of your workflow at regular intervals, to test that everything is working as you would like it to.
If you would like to use one of our premade workflow templates rather than starting from scratch, we have a library full of hundreds of examples to help you get started.
Click on the “New” button at the top of your screen and then click Workflow and select “Explore Templates” to access the gallery.
Once the gallery is open, you can search the library by typing a keyword or phrase into the search box shown above or by clicking on a category from the menu on the left.
The gallery shows a selection of workflow templates relating to your search. Each one shows an image and a short description of the workflow, to help you decide which one to use.
To use a workflow from the gallery simply click on it, which adds it to either your organization library or your private library. If you opened the gallery while already inside a folder, the workflow will be added to that folder (you can always move your workflows later if needed).
Now you can look through the whole workflow to see all the tasks and content it contains. You can run your workflow straight away or edit the workflow to suit your specific needs.
Whether you are editing a premade workflow or a blank one, the editor is exactly the same. The only difference is that with a premade workflow, you have a lot more tasks, headings, form fields, and content widgets to start with, that you might want to change.
Navigate to the instructions on how to add tasks and headings to see how to use the task menu in the bottom left corner of the editor, and how to multi-select sections of your workflow.
Once you have a few workflows in your library, you may want to start creating folders and then move your workflows into them.
Help us improve this help center.


