

Like any employee who works at a young startup, last month I was given a task which threw me far out of my depth.
Even though I’m an audio tech graduate whose final project was video-based, I can’t say that my skills destroying VHS tapes and creating feedback loops translated too well.
Either way, the task was clear:
Create a 5-minute demo video for Process Street showing off most of the features, with screen recordings and slides.
It took me much longer than it should have. But, in the end, I polished it off nicely and got back to doing what I’m better at — writing articles (phew).
What is a product demo video?
A product demo video is logical content for SaaS companies because it helps massively with client onboarding and is quality material your customer success team, who can share it with new clients to give them a 5-minute overview of all your product’s features.
It’s also valuable marketing material. We have ours on our landing page because it demonstrates how easy and powerful the app is.
Now I’m going to show you some other demo videos, starting with one from Close.io, our CRM of choice here at Process Street.
It demonstrates the main features of the product and a surprising amount of humor too.
While Close.io is a complex and powerful product, the demo video shows how easy it is to use and get results from.
Here’s another example from Trello:
Trello’s demo video is also great, and follows a similar tone to ours and Close.io’s — it’s not an explainer video or strictly a tutorial, but a quick and exciting overview of the features alongside useful examples.
Take a look at our demo video then read on to see how it was created:
Here’s the story of how someone without much experience creating (watchable) videos made a professional product demo video for a SaaS product.
Write, record and edit a narrative explaining your key features
We split our video down into a few key sections to make it easier to produce (and watch). First, we had the intro. This included information about:
- What the app is
- What it does
- Who it can help
- How it can help them
WorkFlowy is really useful for writing scripts with multiple sections — Vinay and myself collaborated around a shared WorkFlowy document to refine the script, which helped a lot during the editing process because I knew what could be edited out and what was a key point.
Unlike myself, Vinay’s a pretty pro guy when it comes to speaking. Plus, he knows the product inside out. Because of this, he just made some broad notes and expanded them off the top of his head. This meant I had about three times as much audio as I needed (in several takes, too) so I cut it down to size, edited out pauses and stitched it together so it sounded natural.
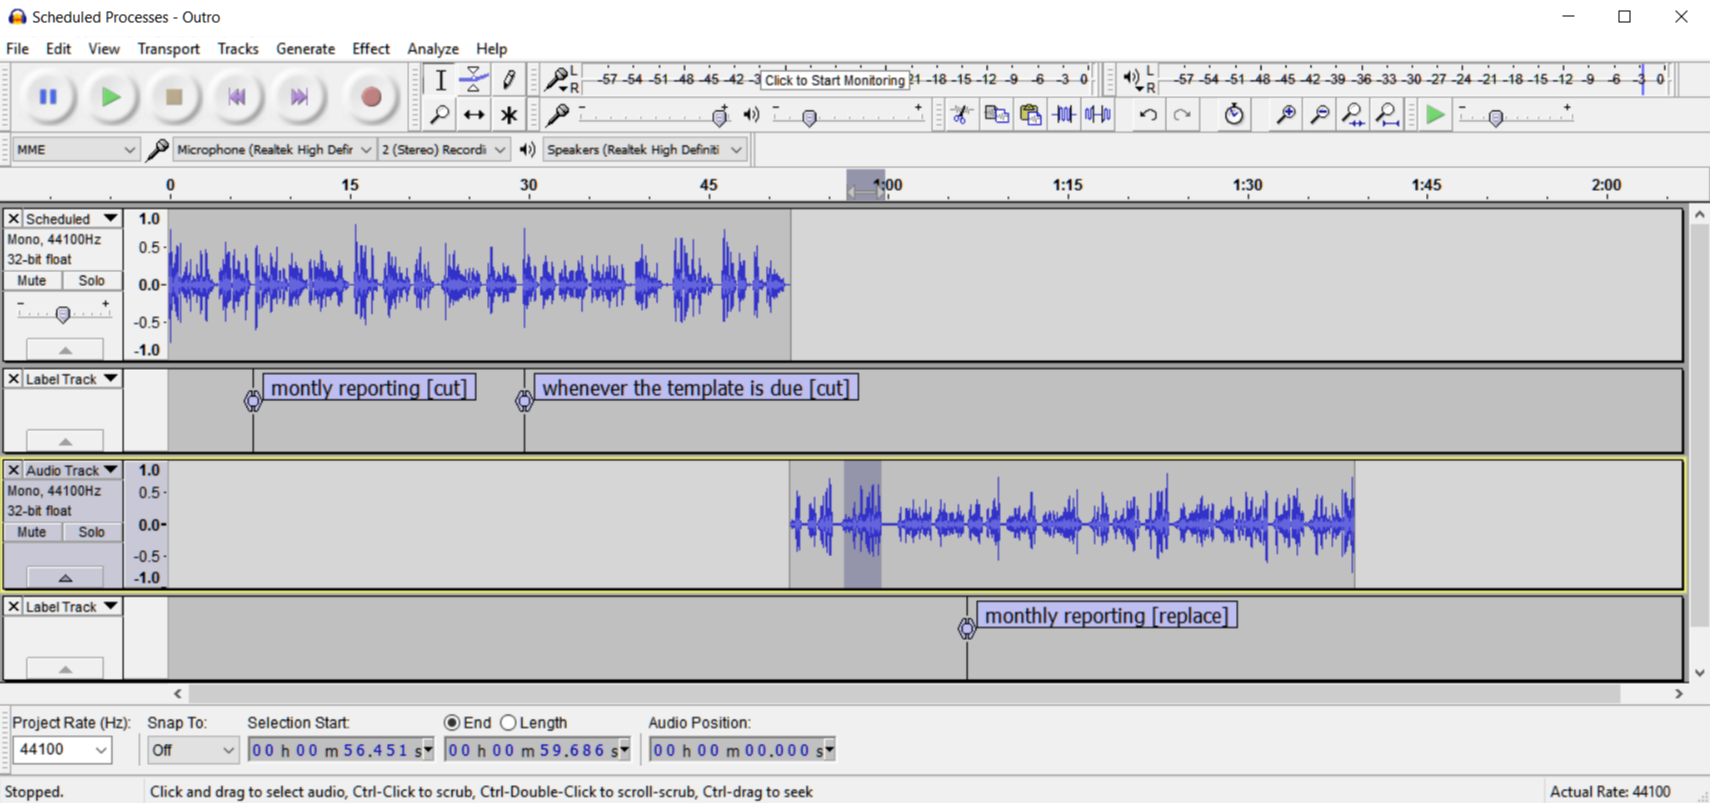
In my all my years, I’ve not found any program of any price that edits audio better than Audacity. It’s totally free, and looks like something that came bundled with Microsoft 3.1, but it’s extremely capable. When I received the raw audio from Vinay, the first thing I did was load it into a new Audacity project and listen to it whilst reading along to the notes.
After a few run throughs, I used Audacity’s labeling function to mark parts of the track that could do with cutting out and replacing with material from the other takes.
The audio editing was the quick and easy part. I trimmed down maybe 15 minutes of audio to 5 in a couple of hours and got it back the same day. The video itself took far longer.
Use Camtasia for screen recording
TechSmith’s Camtasia is ideal for taking screen recordings, but also for editing and piecing the project together as a whole. So much so that I abandoned using Adobe Premier Pro because Camtasia’s editor had all I needed.
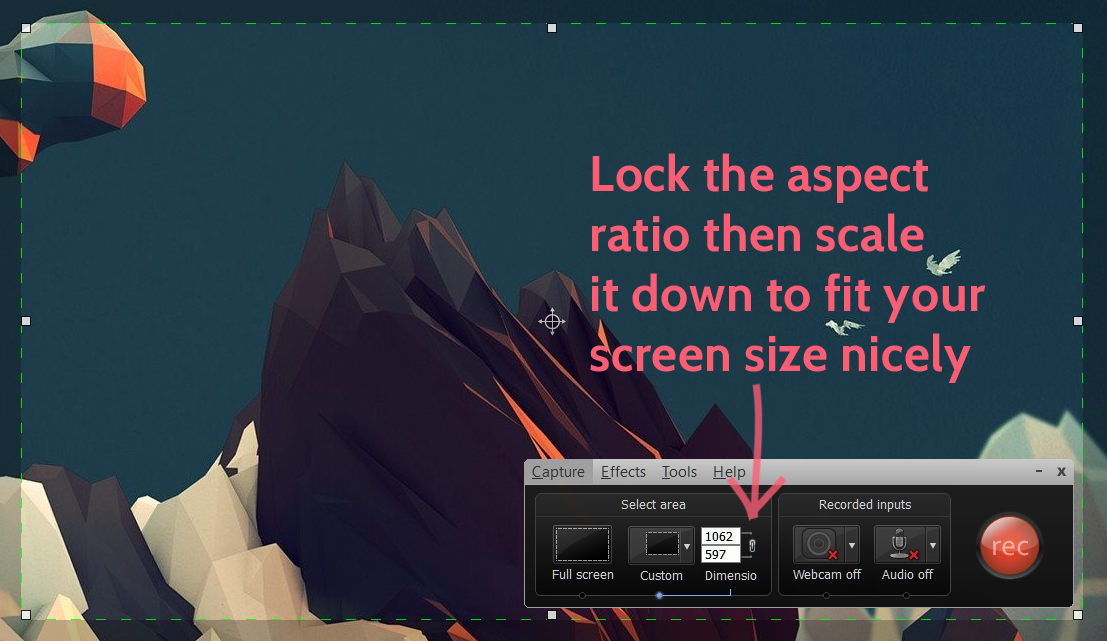
The cool thing about Camtasia’s screen recorder is that it can be locked in an aspect ratio. When you’re recording a 1080p video, you know that you’re going to need an exact screen capture or there’ll be gaps and distortion.
Since not everyone’s screen can practically record 1080p video, you can set it to these dimensions, lock it and then scale it down slightly to fit. In most cases, scaling it back up has no noticable effect on quality.
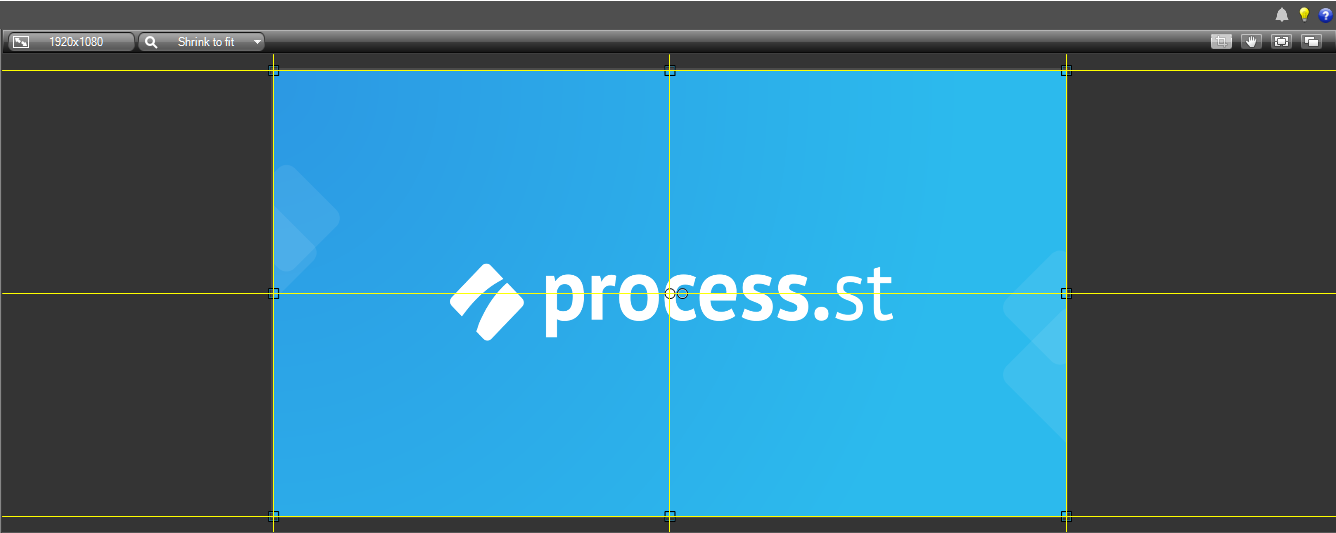
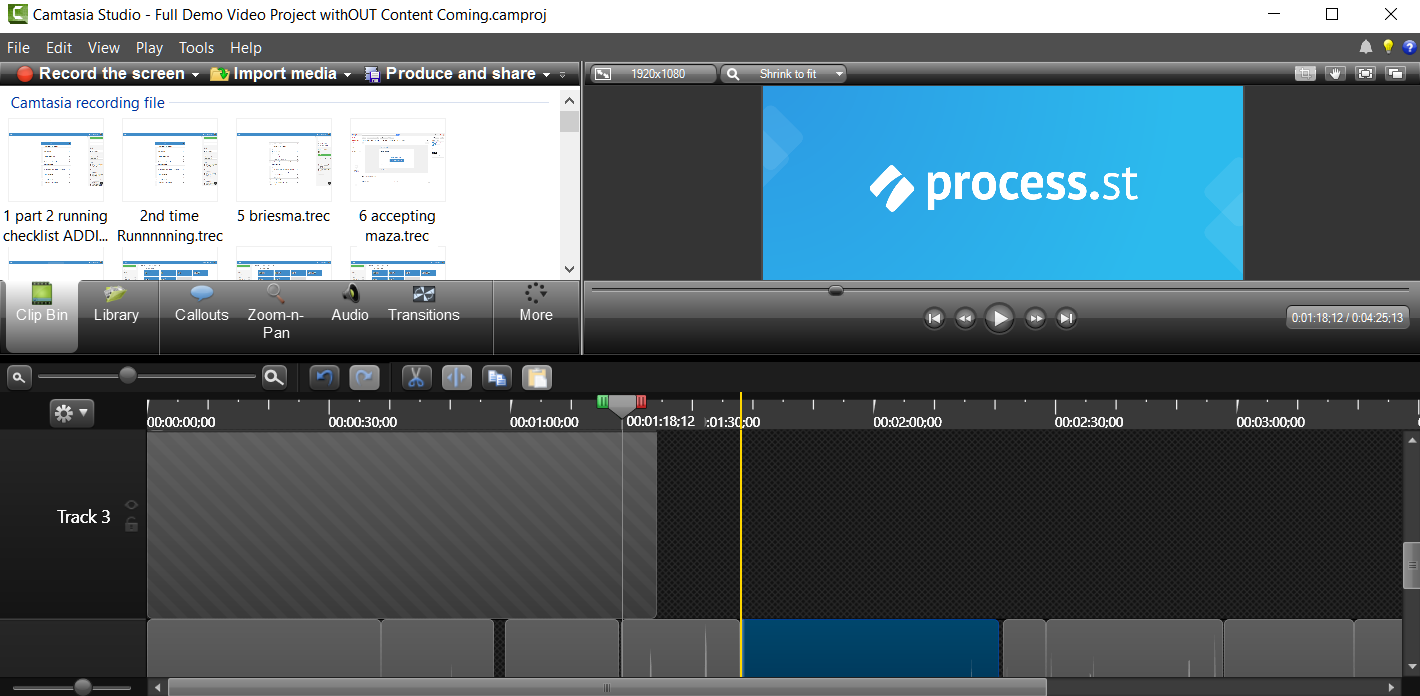
If you want to export Camtasia’s screenshots to a more complex editor, you have to extract the recording contents by clicking on a clip, like this:

Then you’re freed of the .trec and able to use the clip in other programs like Final Cut and Premier. If I’d have know this at the time, I wouldn’t have used Camtasia at all. That said, I’m happy I did because it’s a more intuitive editor than Premier, even if it’s not as a fancy.
For the video, I was basically capturing usage of Process Street to go alongside Vinay’s narrative. For demo videos, it’s best to capture actual natural actions then speed them up or slow them down to fit.
If you have harsh cuts or illogical jumps, it won’t serve its purpose, which is helping the user understand how to use the product. Here are some basic rules for screen capturing:
Always record in the right aspect ratio so it’s possible to place the recording in with the rest without stretching it. The last thing you want to do with a demo video is make your software look worse than expected.
Record all clips with the same screen recorder settings (dimensions, aspect ratio). By keeping everything locked in the same dimensions, you won’t have to remember any numbers or risk forgetting like I did (and had to redo half of my clips).
Use the app naturally. If the clip is too long, speed it up instead of making cuts. You want to demonstrate how it is to use your app, not create an action movie trailer. If your mouse movements or clicks don’t reflect actions the user could replicate, it’ll not serve its purpose.
If an action is one click away, click to it instead of cutting the shot. Just like the above point, you should follow and respect the logical flow of your app, keeping in mind that you want to give an honest and clear representation of the app.
Slow down at key moments. Be painfully slow and deliberate when it comes to easily-missed but vital parts of your app. For Process Street, it’s the ‘Run checklist’ button — notice how I hover over it for a while before clicking it.
Create slides with text and images in Photoshop
This was probably the biggest pain for me. As I’ve said a few times before, I’m not a designer in any capacity. Using Photoshop for things that have to be mathematically correct (sizing, spacing, etc), was a total headache at the start. Luckily, I learned a few tricks as I went along, such as how to center objects on the canvas:

In case that’s not easy enough to see and the strange gif distortion hurts your eyes, the steps are:
- Select the layer with the object you want to center
- Press Ctrl+A to select the everything or drag a rectangle marquee over the whole canvas
- Go to the Move Tool (press V)
- Click ‘Align vertical centers’ and ‘Align horizontal centers’ in the toolbar at the top (small icons).
To create these slides we used material from a design agency we hired, Koombea. We got the logo, blue background and icons, all of which have uses elsewhere on our marketing site so were a great investment. Soon I’ll be writing a post about just that, so watch out for it in the future!
Arrange the material in Camtasia
Once you’ve got your screen recordings, slides and properly edited audio, you’re going to want to take that raw material and polish it up.
Since the editing and arranging process is unique for every video, I’ll condense this section into a few pointers (some common-sense and some I wish I’d known earlier)
- Use the yellow guidelines when positioning your clips on the canvas. Make sure they all 6 are there, not just the tops and sides. It should look like this when you click and hold:
2. The same goes for aligning tracks on the timeline. If there’s no yellow line, it’s not exact.
3. Ensure you’ve aligned slides with the narrative properly. If it’s even slightly off, it’ll be disorientating to watch. To be 100% sure, you’ll have to export the video and watch it in an environment more stable than Camtasia, like VLC. As great as Camtasia is, it gets understandably shaky when you’ve loaded hundreds of clips into it and you’re skipping around quickly.
Edit and overlay a soundtrack
After browsing for some royalty-free soundtracks on YouTube and finding the most awful dross imaginable, I stumbled across Wistia’s incredible library of video music. We ended up using Oaklawn Dreams by Dan Mills, Wistia’s creative director.
Since it was only a couple of minutes long originally, I had to extend it for an extra 3 minutes. Instead of looping the whole thing (because it has a really great outro), I cut it into sections and looped those instead. To do this, I loaded the track into Audacity and found 8 bar sections which looped seamlessly.
To do this first, find a loopable section.
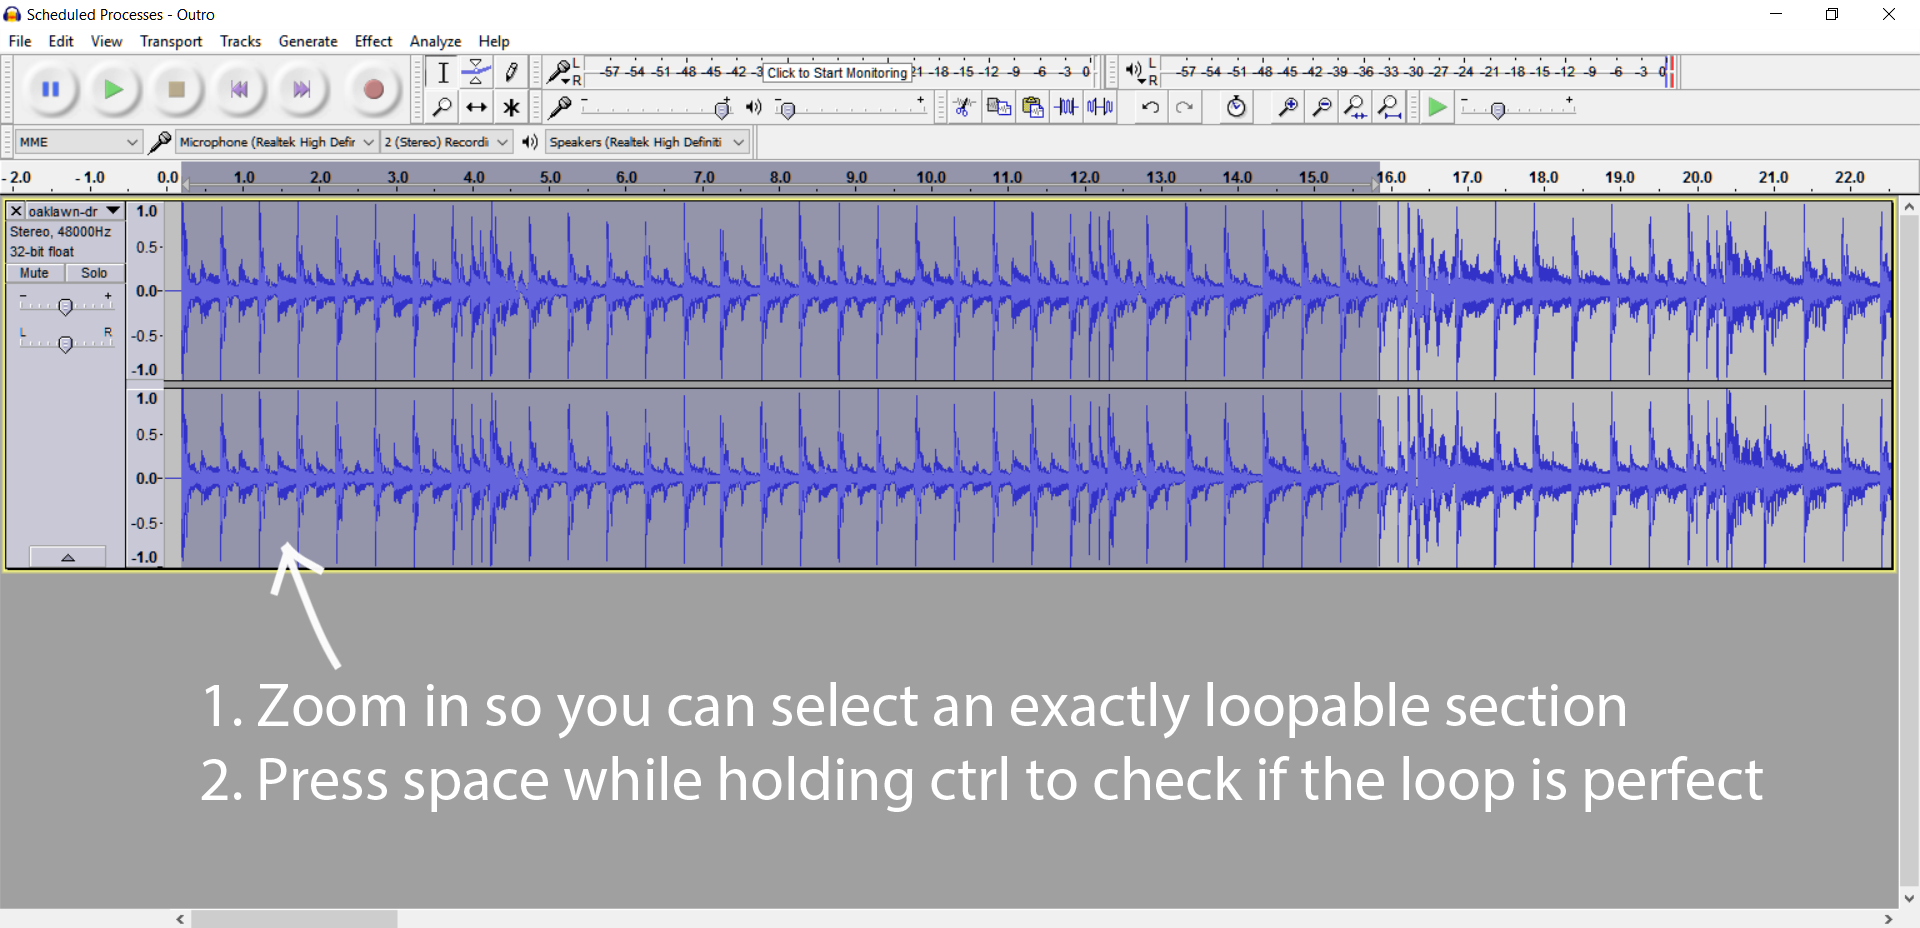
Then, repeat the section a few times. Bear in mind that you’ll want to repeat it a natural amount of times that doesn’t interfere with the actual structure of the piece. That might mean repeating it once, three times or 7 times.
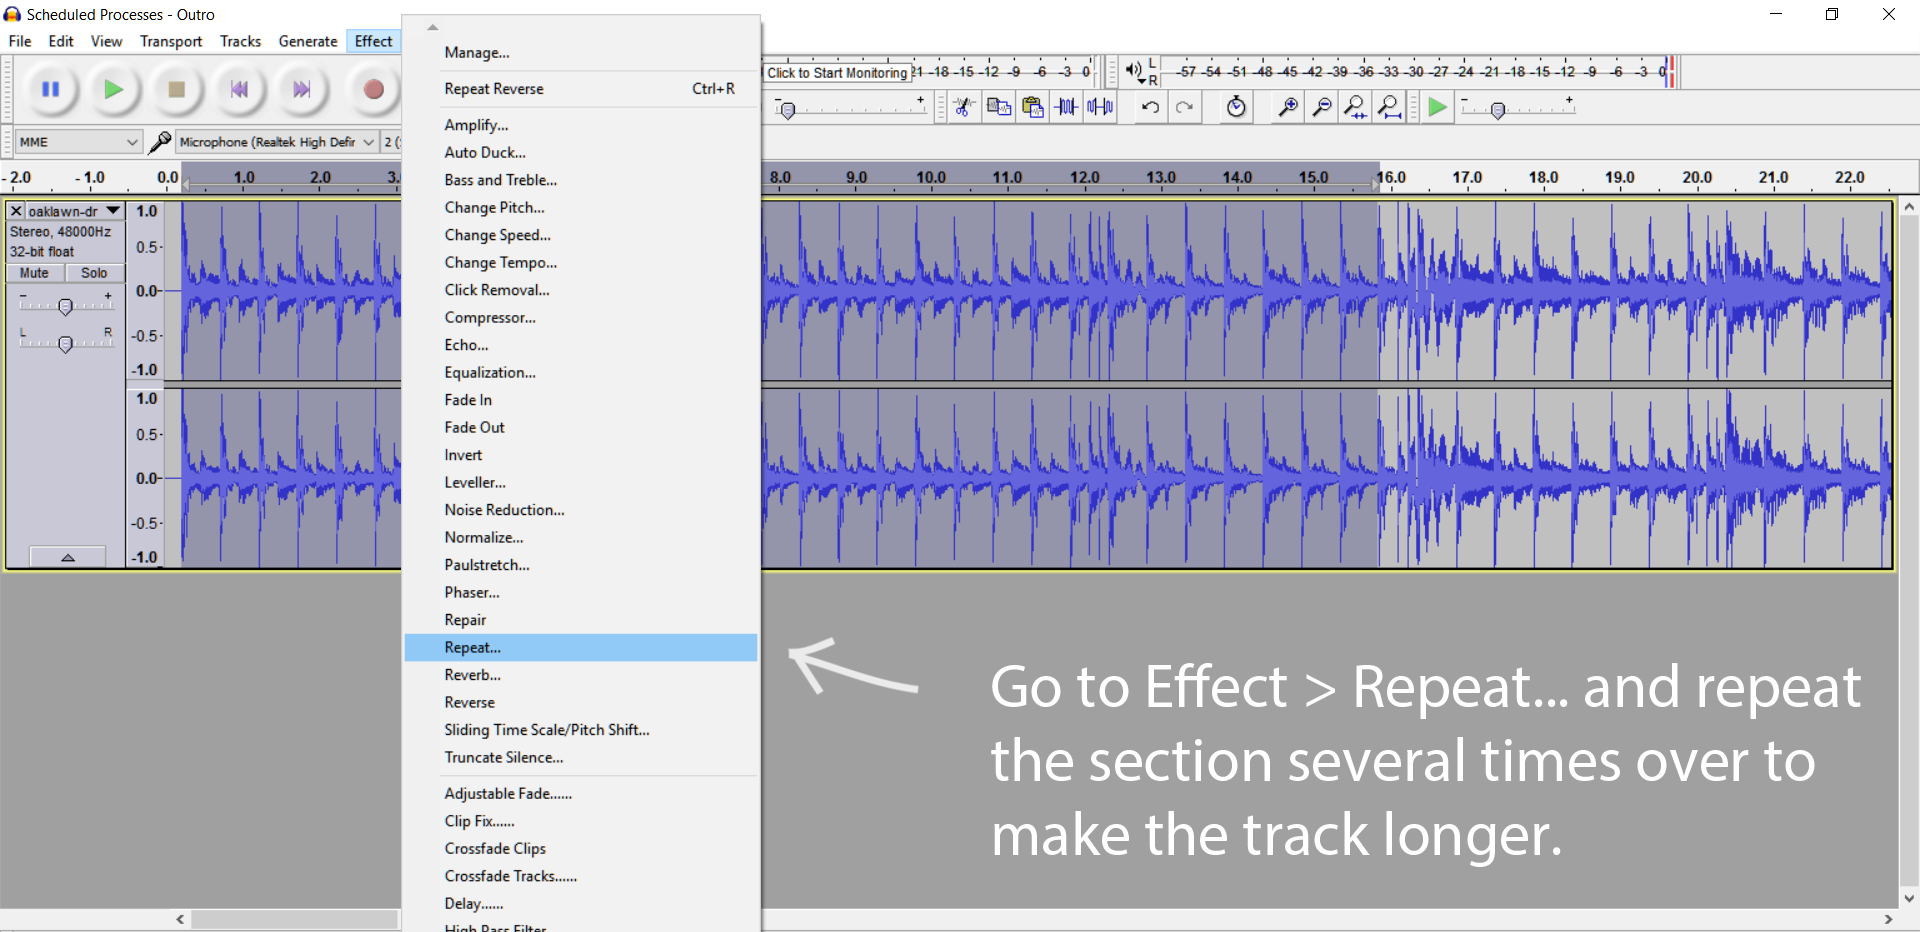
Don’t do this with just one section, especially if you need to extend the track for several minutes. You’ll want to extend sections from the intro, the verse, outro, etc. That way, it won’t sound awkward or dull but will be long enough.
Fades, flourishes, and finishing touches
After laying the soundtrack over and reducing the volume enough so it doesn’t obscure the narrative, it’s time to fade the clips together. Here are a few rules I followed when deciding to fade or not to fade the video:
Always fade:
- Between slides and screen recordings
- Between different sections of the app
- At the start and end of the video
Don’t fade:
- Between consecutive, stitched-together screen recordings
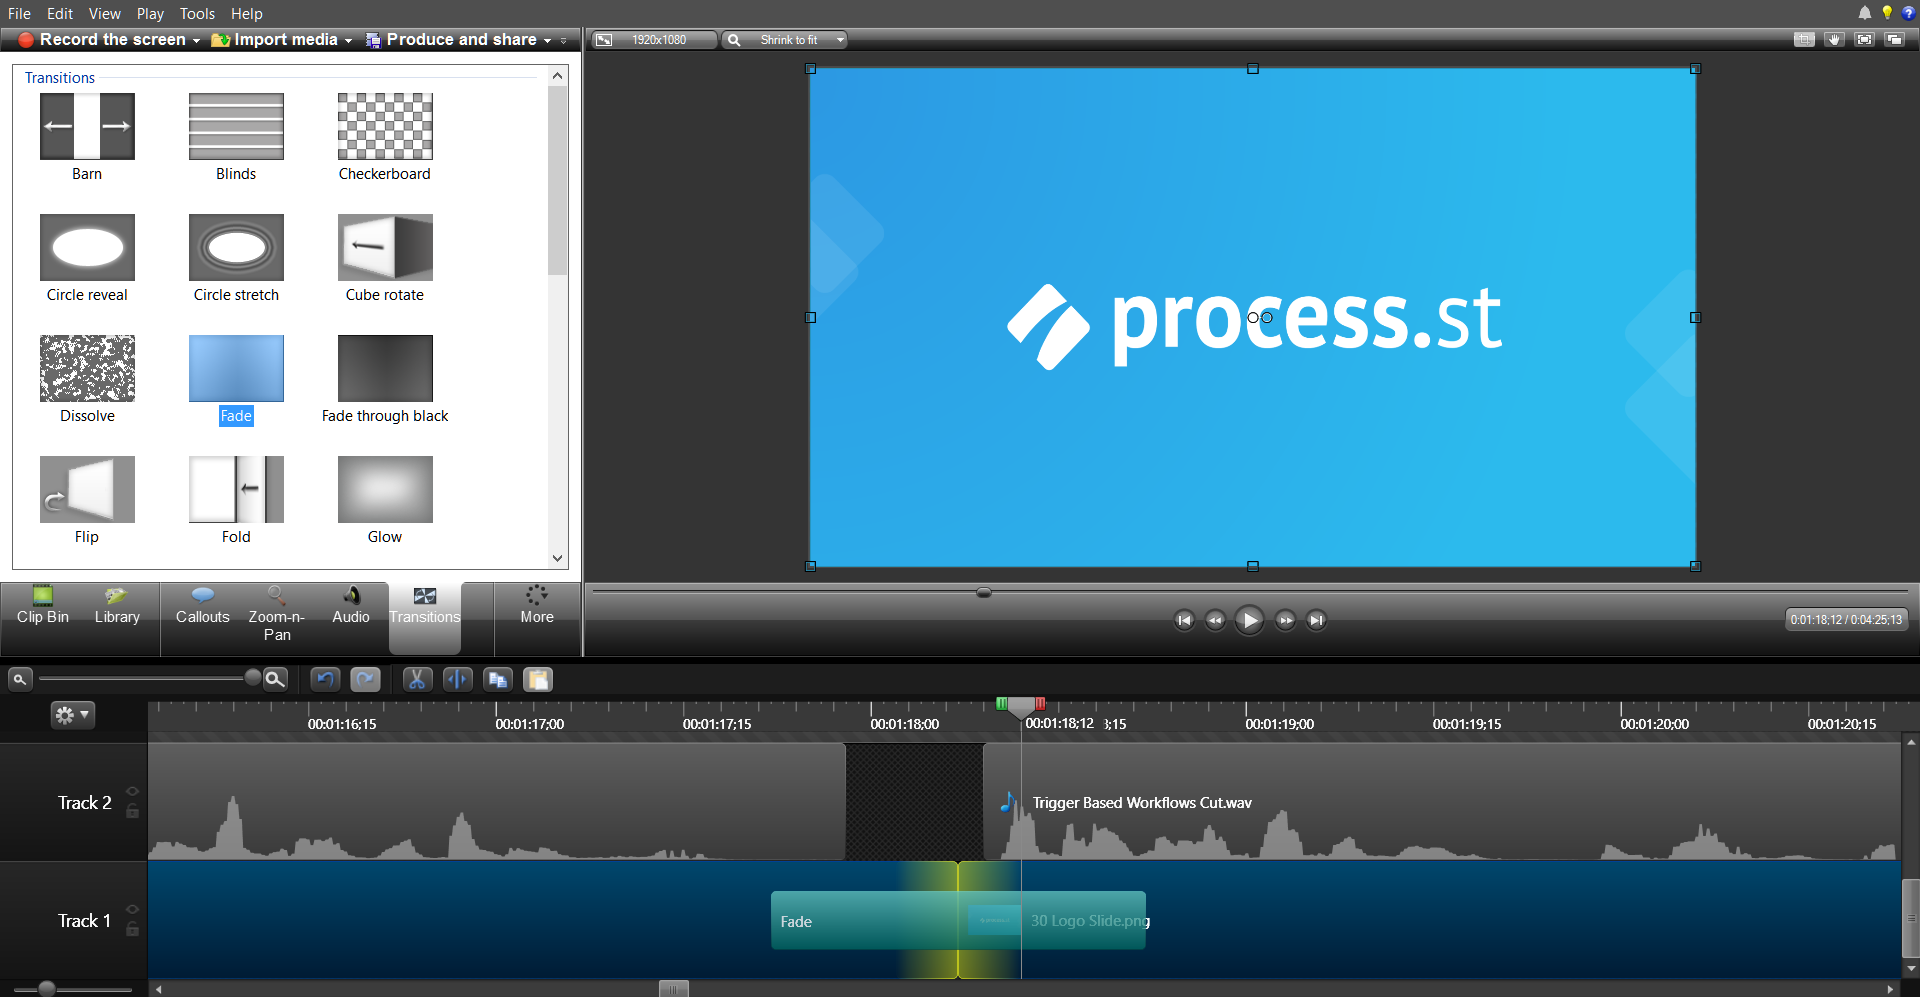
To keep things smooth without making it too obvious, I used a very short fade of around 0.1 seconds.
Fade between two clips in Camtasia by going to the Transitions tab and dragging the fade icon between them:
After the final edits were made, I exported it for what I sincerely hoped was the last time, and sent it back to be published.
The final product
I’m extremely happy with the demo video for a couple of reasons. First, it looks good and will surely help people understand the value and functionality of Process Street. Secondly, now it’s finished I can spend more time writing. 🙂
Here it is!
It goes to show that you don’t need to spend $10,000 to create a quality video.
And on that note, here’s the worst marketing video I’ve ever seen. I have no idea what it’s selling, who it’s by or why they even bothered. I hope someone didn’t pay $10,000 for this.
Do you know someone who would benefit from reading this article? Share it with them, and make sure leave me a comment below if this was helpful.