
You can easily create a PDF from a Process Street workflow run with Zapier.
If you wanted, you could even automatically send that PDF straight to your inbox by adding an optional part to the integration.
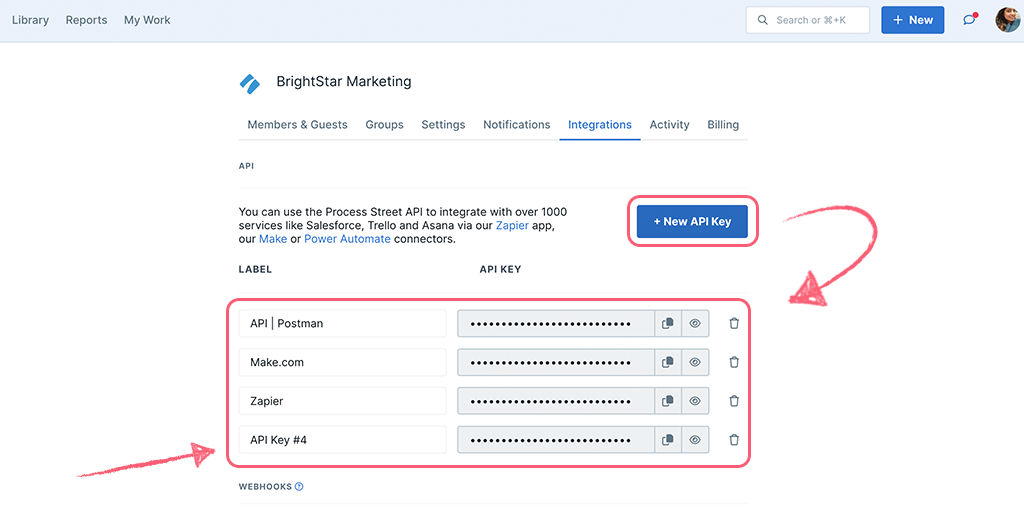
Users: In order to create an API key you must be an Administrator.
Let’s get this set up!
Zapier is a tool that connects over 2,000 different apps. Any action in any of the supported apps (like forwarding an email or adding an attachment to a task) can be set up to trigger another app’s features automatically. Zapier integrates with both Google Docs and Process Street.
The whole recipe (trigger + action) is called a Zap.
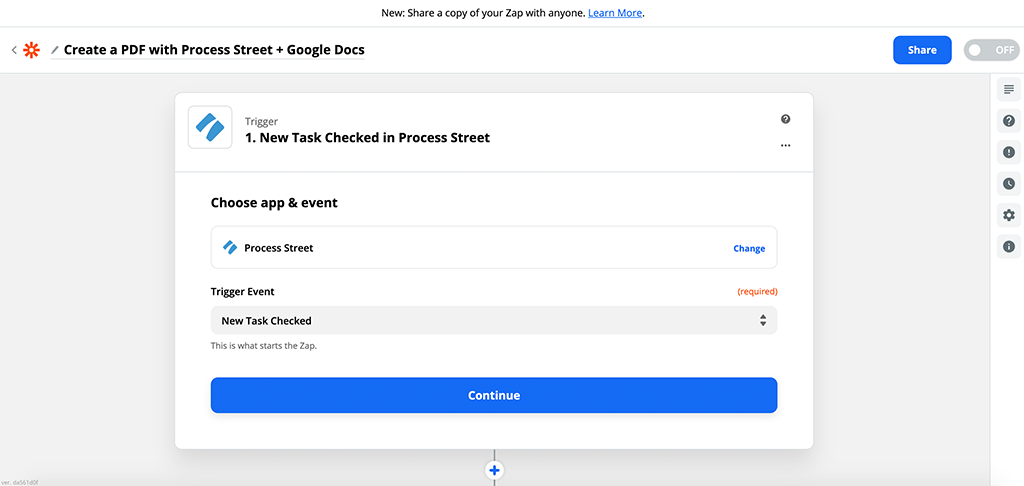
Log into Zapier or create an account, then click ‘Create Zap!’
After you’ve created your new Zap, the first step is to choose a trigger app. Search for “Process Street” and select “New Task Checked” as the trigger:
Now you need to link your Process Street account with Zapier.
If this is your first time using Zapier with Process Street, you’ll need to input your Process Street API key, which can be found in the “Integrations” tab of the organization you wish to add.
Click the “New API Key” button and copy the code into your clipboard. It’s also best practice to give this API a label, in this case, you could call it “Process Street to Google Docs”.
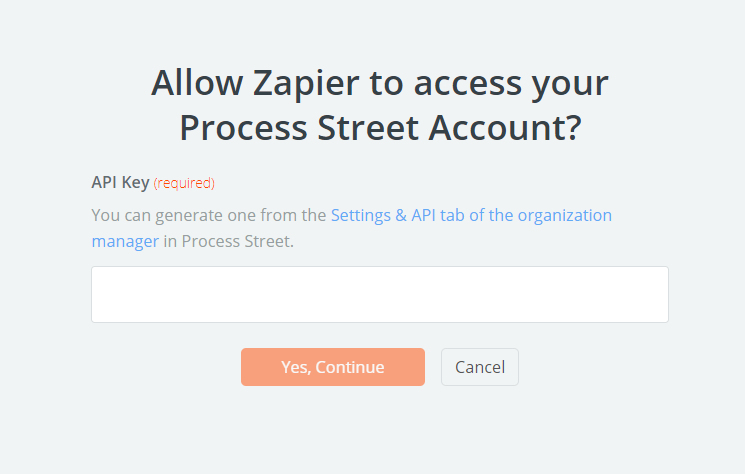
Now, return to Zapier and click “Connect An Account” and input the API key you just created when prompted.
Next, select the workflow you want to use, and specify which task will be the trigger.
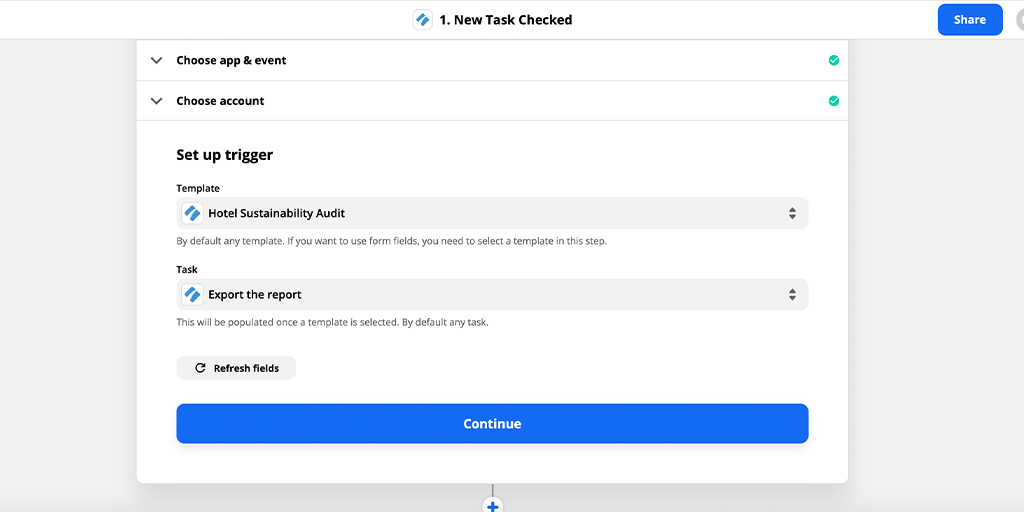
Here, I’ve selected a hotel sustainability audit workflow which is embedded below:
You can either grab that workflow for yourself from the link above or create a similar one for yourself.
When you’ve chosen the workflow you want to use, run the workflow and input the necessary fields into the setup page and click the “Continue” button at the very bottom of the page.
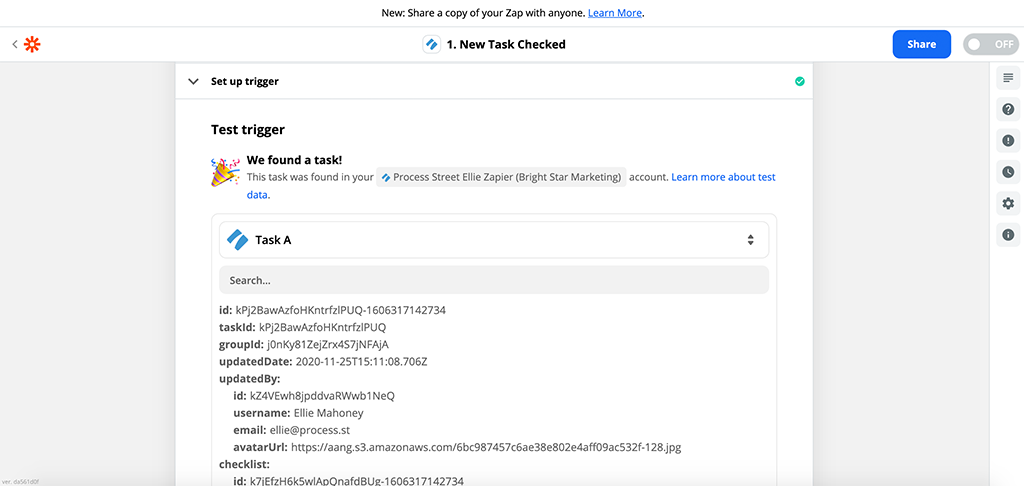
Now you’ll have to wait for Process Street to send a sample to Zapier.
This is basically a test to make sure the trigger is working. To “send a sample” to Zapier from Process Street, run the workflow from the one you selected earlier, and complete it up to the point of the task designated as the trigger.
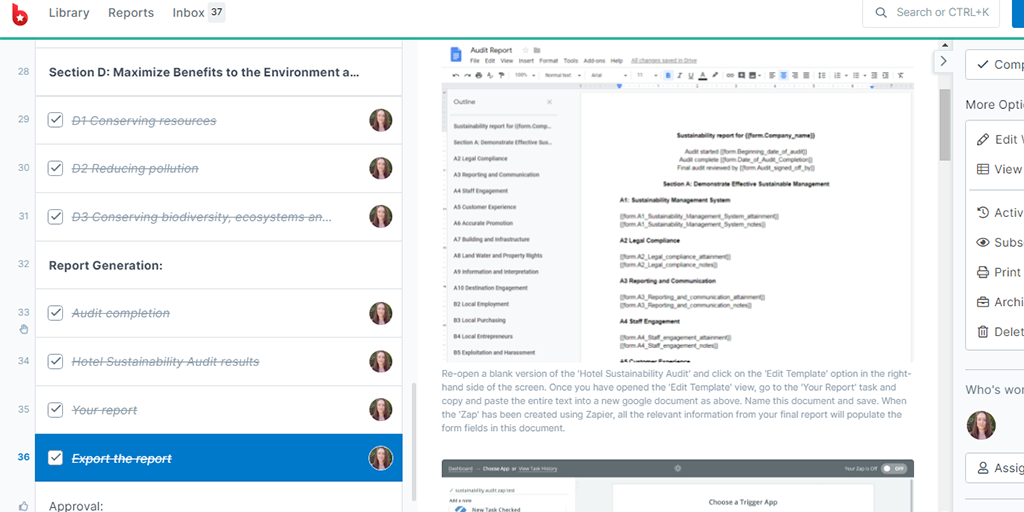
As you can see, I’ve completed the hotel sustainability audit workflow run up to the point of the “Export the report” task.
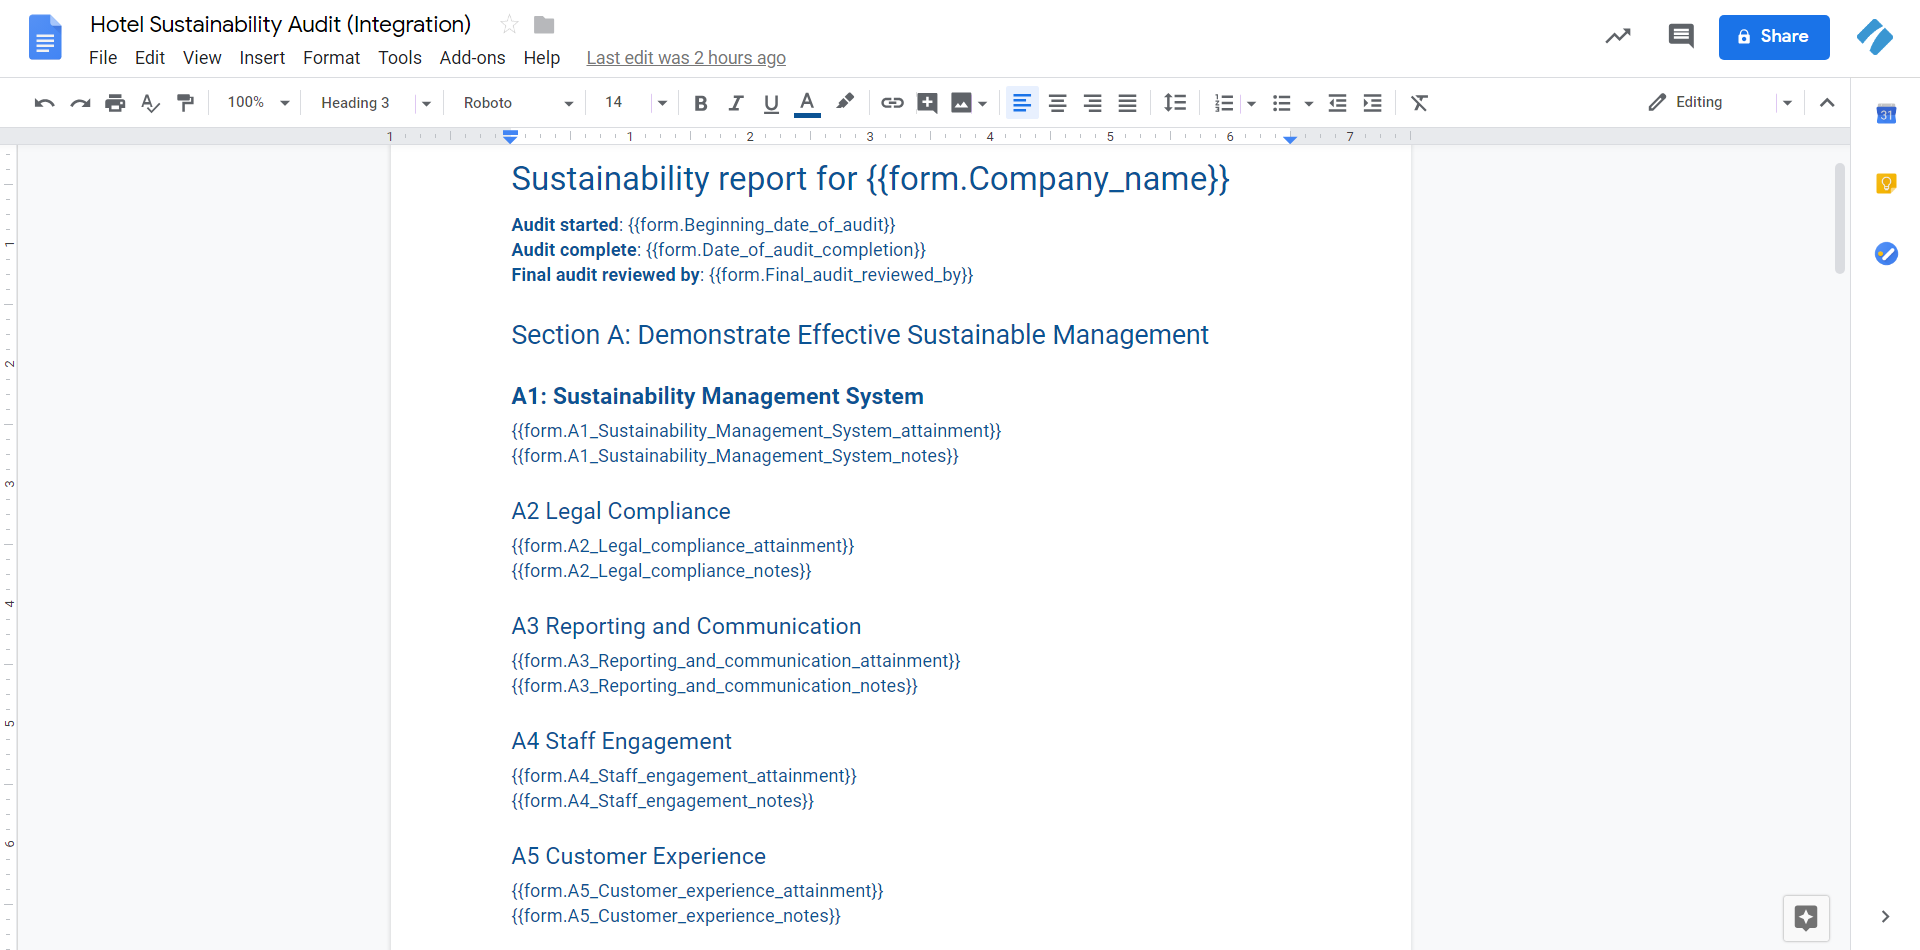
For reference, here’s what the previous task looks like inside Process Street, with all of the fields for the report. This is what we are trying to export into a Google Docs document:
A successfully pulled in sample will look like this in Zapier:
When you get the confirmation, we can proceed with adding the action step in Zapier.
Hit the + button to add a step, select “Action/Search”, and look for “Google Docs”.
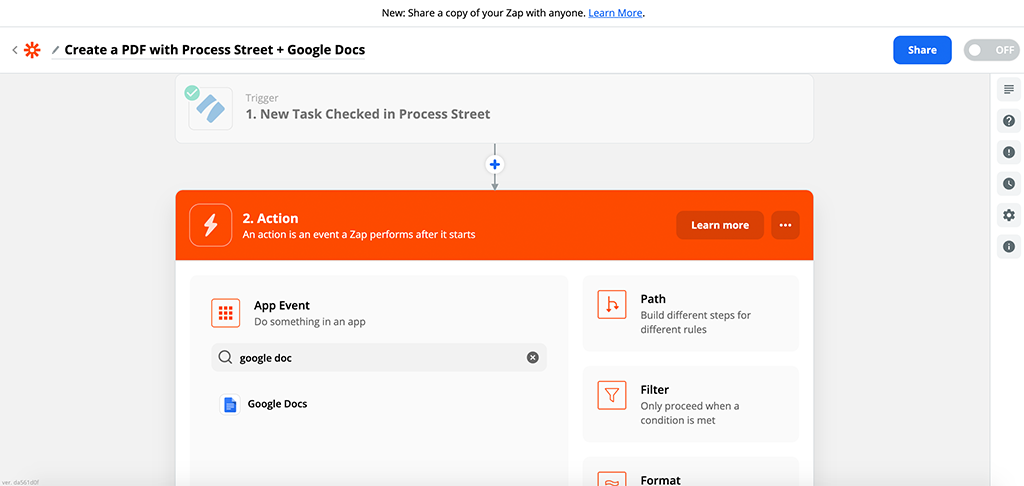
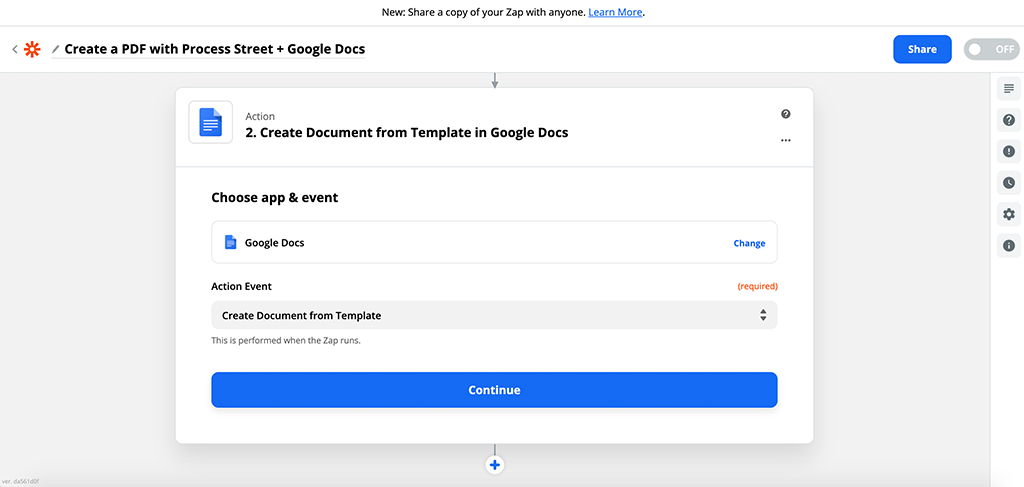
Proceed to select “Create Document from Template” as the action:
Next, you need to connect your Google profile with Zapier. Hit “Connect an account” and sign in with Google in the window that appears:
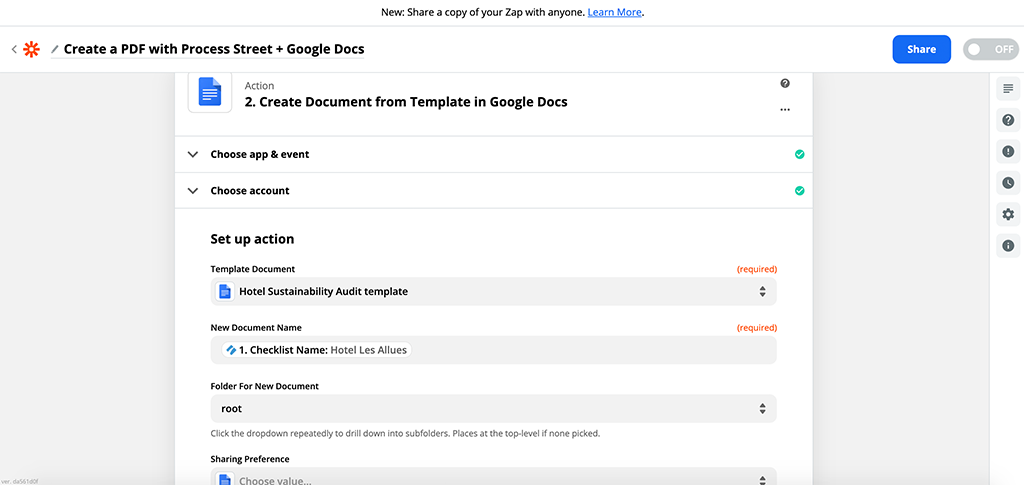
Now configure the Google Docs template you want to use as the action.
This is what my Google Docs template looks like:
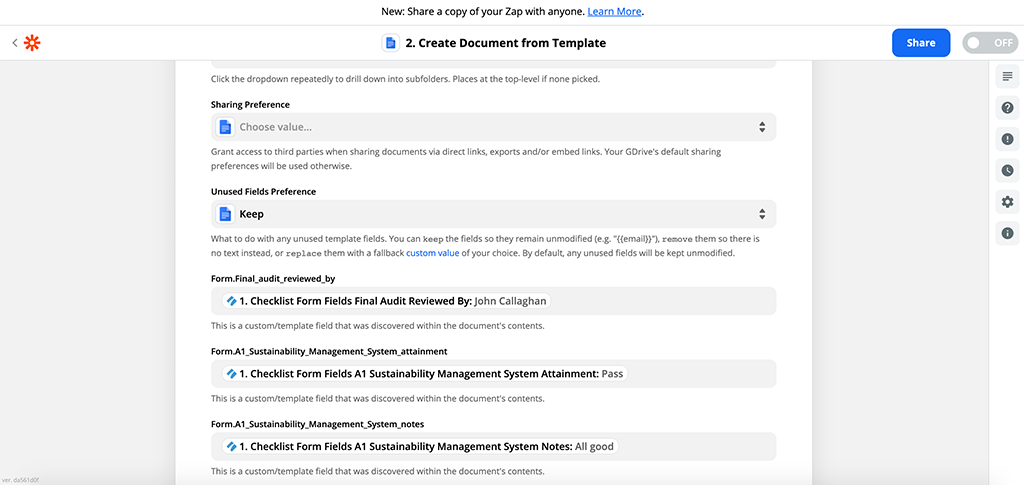
You can use any document, just make sure it has fields in it using double curly brackets. When you select your Google Docs template inside Zapier, hit “Refresh Fields” at the bottom of the page, and you’ll see that all of the fields from your Google Docs template have been pulled in:
I’ve copied the Google Docs form fields straight from the hotel sustainability audit workflow, and then inside Zapier I manually added all of the Process Street fields pulled in from the initial trigger, to match up with the forms here:
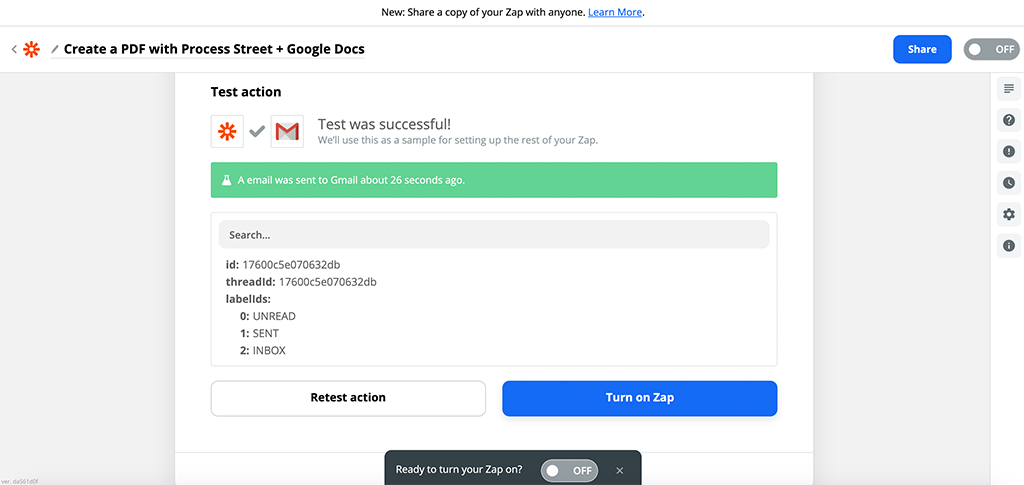
Now all that’s left is a quick test to make sure the report generates the correct data from your Process Street workflow run.
Click “Send a Test to Google Docs” to make sure the action step of the Zap is working.
Hopefully, you’ll then see something like this.
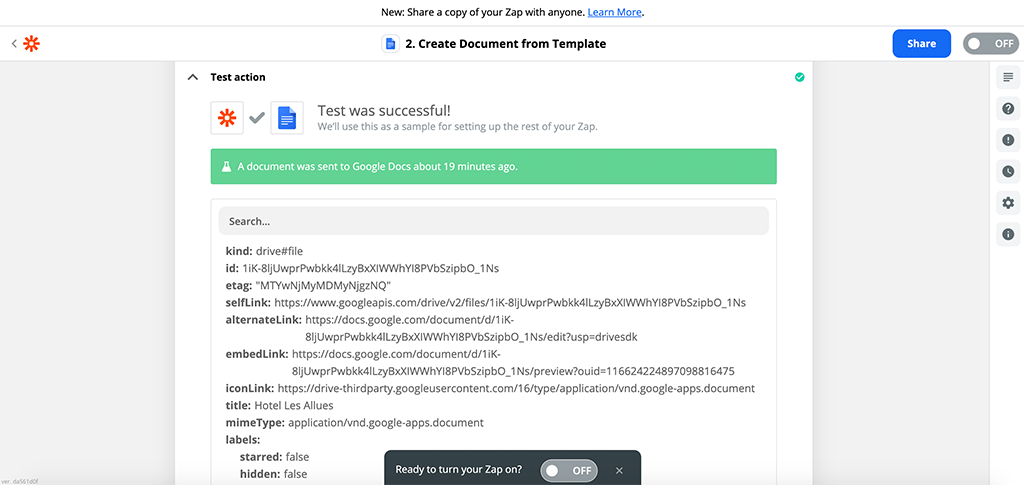
You should also check in your Google Drive to make sure the document was successfully created. Compare it against your Process Street workflow run, and make sure all the fields are correct.
The next step involves locating the Google Docs document we just generated so that it can be used to generate a PDF.
We’ve already generated the Google Docs report from the template, so that will already be in your Google Drive.
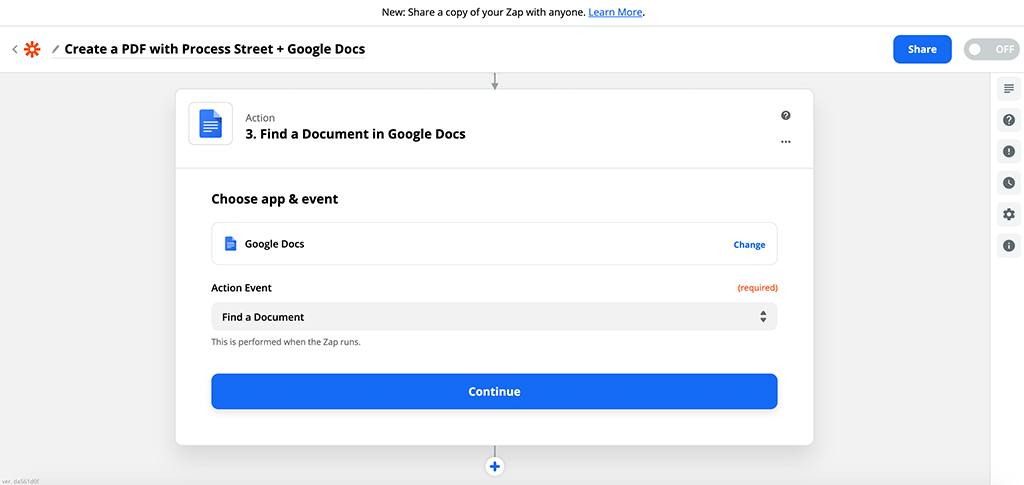
Now, we have to locate that file using the Google Docs API so we can turn it into a PDF.
First, add another step. This time, it’s a “Search” step, but you just do exactly the same thing as you did before – Hit the + button to add a step, select “Action/Search”, and look for “Google Docs”.
The difference is, now you have to select “Find a Document” as the option:
Connect your Google Docs account, same as before, and proceed to set up the “Edit Options” step.
Just make sure the document name uses the field from step 2, or whatever field you used to declare your document name:

Click continue, and on to the testing.
On the testing step, click “Test & Continue” to have Google Docs check to see if it can find the file it needs:
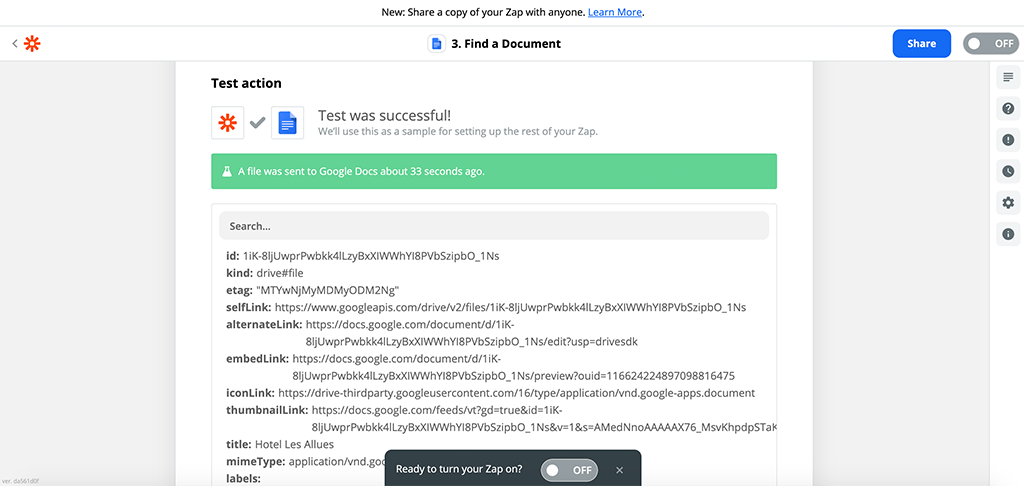
Double-check in your Google Drive to make sure the details pulled up in this test match the document you actually want.
Next, you need to add an action to upload a file in Google Drive.
Hit the + button to add a step, select “Google Drive” and for the action even “Upload File”. Click continue.
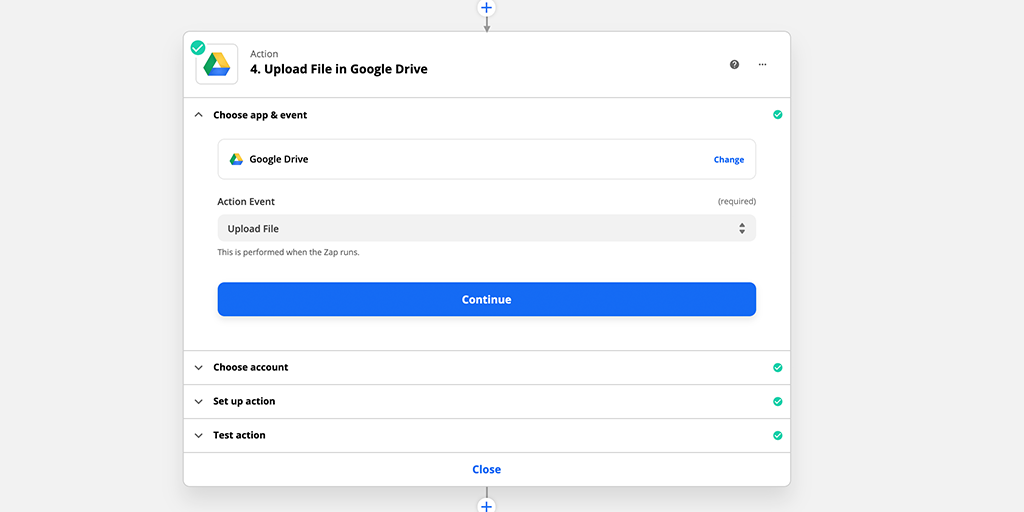
Connect your Google Docs account, same as before, and proceed to set up the “Set up action” step.
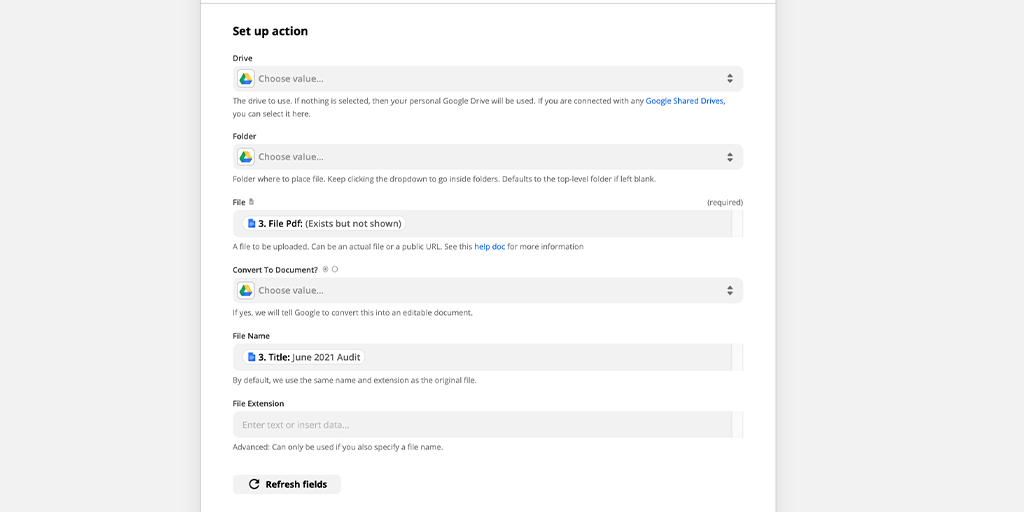 Choose the drive and folder you’d like to upload your PDF to.
In the file field, select “File PDF” and choose a name for your file from one of the previous steps.
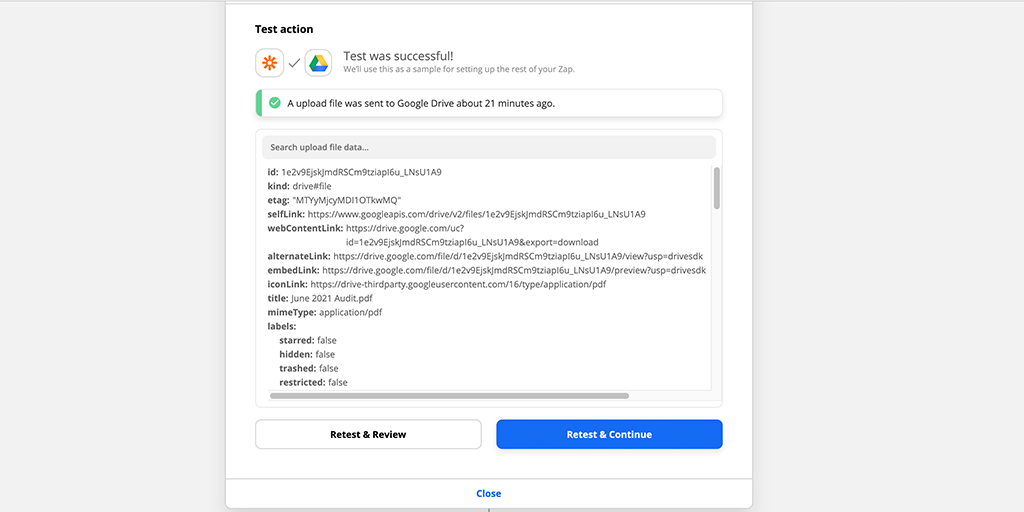
Go ahead and test your action and check Google Drive to see your PDF has been created.
Now the PDF has actually been generated, we need to grab its location with Google Drive so that Gmail knows where it is.
The result will be a freshly created PDF of the initial report sent straight to your inbox, automatically, every time the task in Process Street is checked.
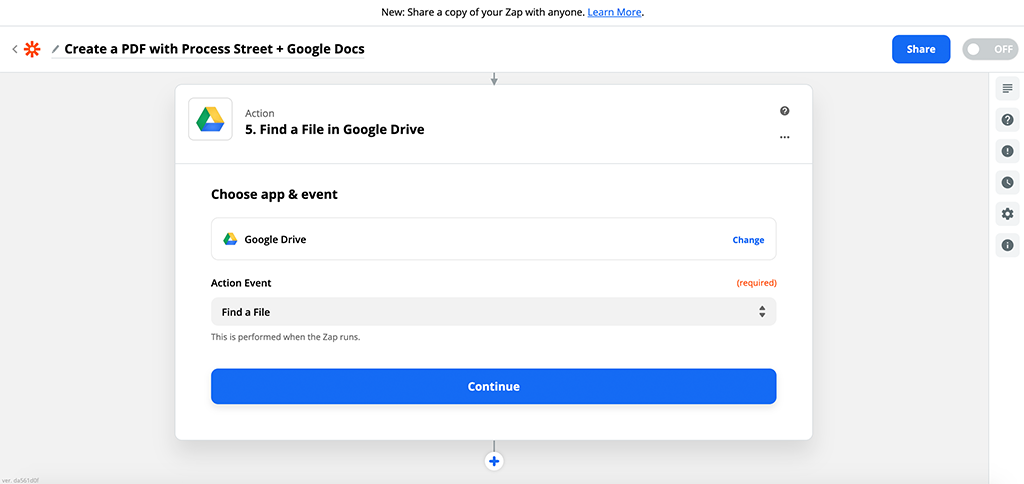
Add another search step, and select Google Drive, then set the option to be “Find a File”:
Link your Google profile, as before.
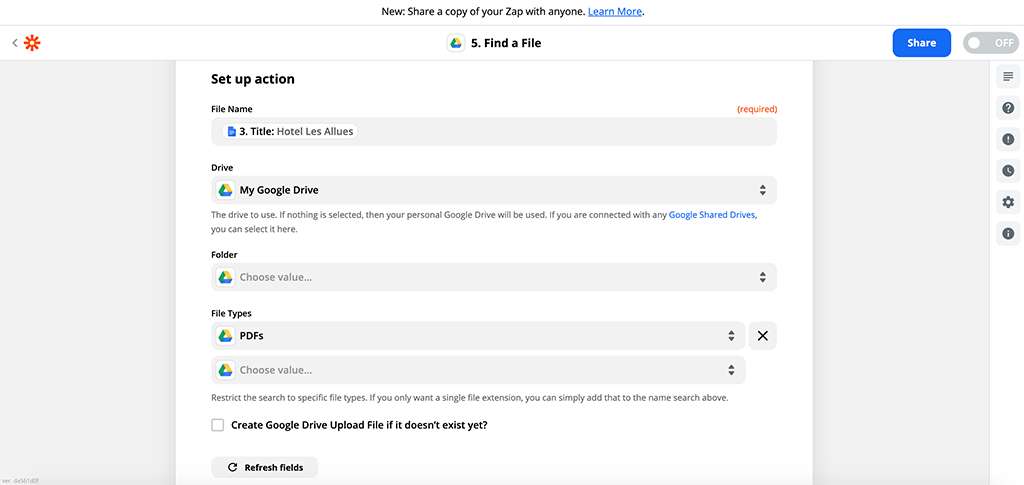
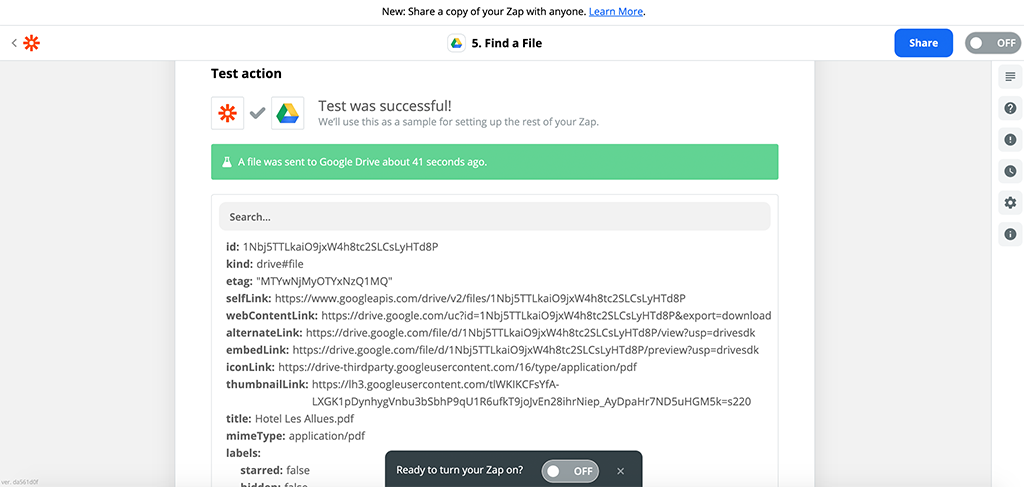
Now, simply set the file name for Google Drive to look for as the field from step 3. I’ve also set the file type to PDF:
Test this step, and make sure to view your file, as before, to make sure Google Drive is locating the right file, and that all the formatting looks okay (there’s no reason it shouldn’t be ok at this point):
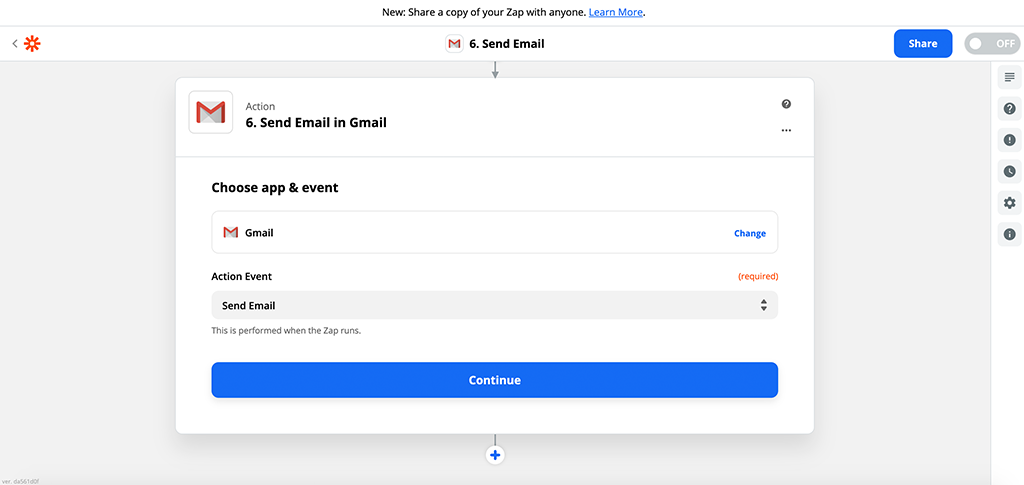
Finally, we’re ready for the final action. Time to set up a Gmail integration to send that PDF to your inbox.
Add another action step, and search for Gmail, then select “Send Email” as the action:
Link your Process Street account with your Google profile.
Now set up the contents of the email. There are four fields you’ll need to worry about:
For the “To” field, simply set the email from the original Process Street trigger. It’ll pull the email address from the person who ran the workflow originally (assuming that was you):
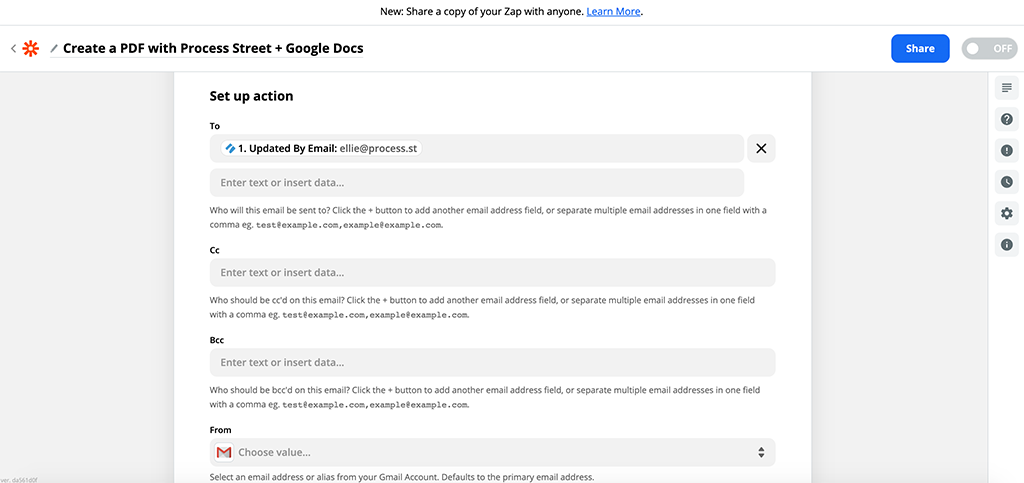
For “Subject”, set whatever you want. I’ve set it to be the title of the generated document. Similarly, “Body” is not really important to us, but it’s required for the Zap to work.
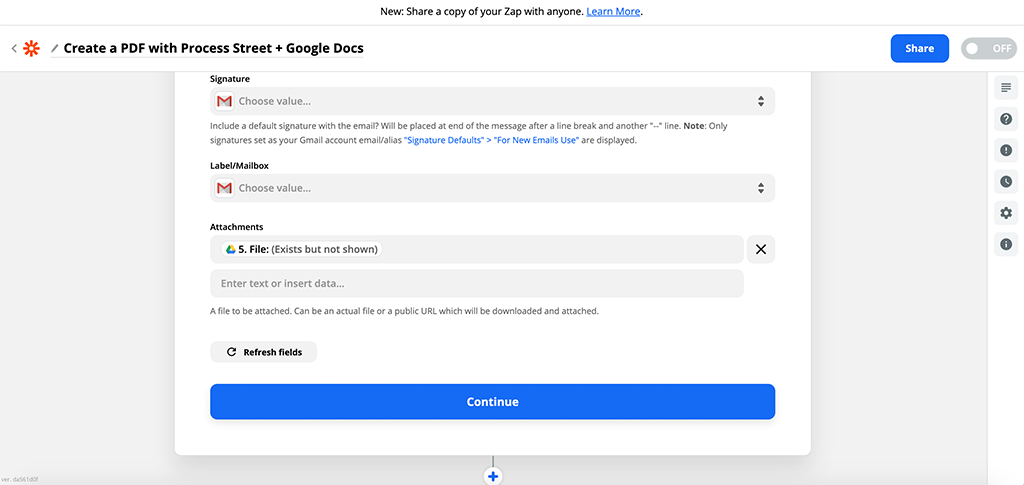
Finally, make sure to set the “Attachment” field to the “File” parameter that Google Drive located in step 5. Again, this may say “(Exists but not shown)”, which is fine:
Now to test that email. If you’ve done it right, you’ll see a screen like this, and find a new email in your inbox with the PDF attached. Nice job.
Don’t forget to give the Zap a name, and turn it “ON”!
Missing sample data
When you start building zaps, there are a couple of reasons Zapier may be unable to pull in a sample or test data from Process Street. Here are some things to look out for:
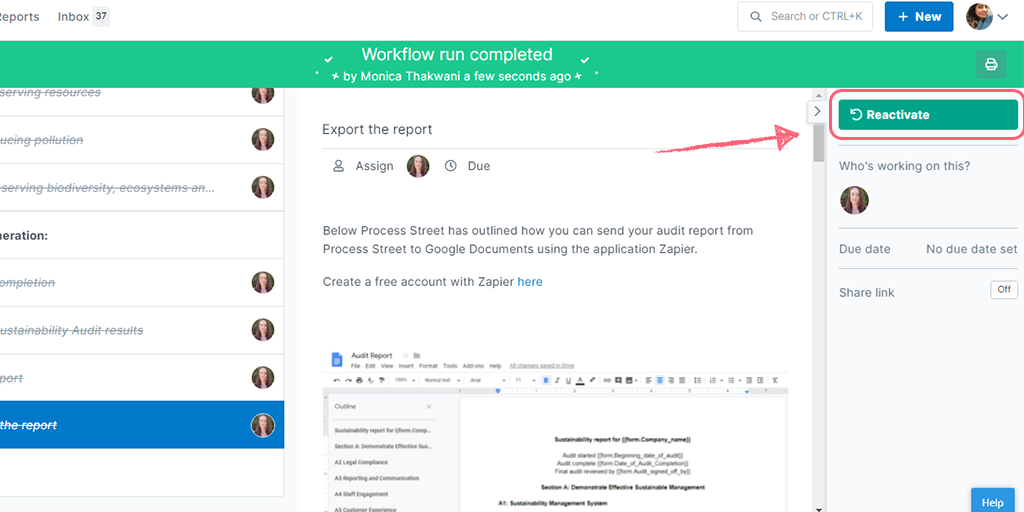
1) Is your workflow run active?
If your workflow run has already been completed, Zapier will be unable to pull it in as a sample. You’ll just want to reactivate that run or run the workflow again. Then refresh the page in Zapier and click the ‘Pull in Samples’ button again.
To reactivate your workflow run, click on the workflow and navigate to “View workflow runs” where you can filter status on “Completed” and “Archived”. Then click on the run to open it, and in the right-hand menu, click the green button to “Reactivate.”
2) If you are setting up the zap based on a completed task, is that specific task checked off?
If the task is not completed, Zapier will not be able to pull a sample of the completed task. Be sure to check that task off inside of your workflow run in Process Street, and then refresh the page in Zapier and click the ‘Pull in Samples’ button again.
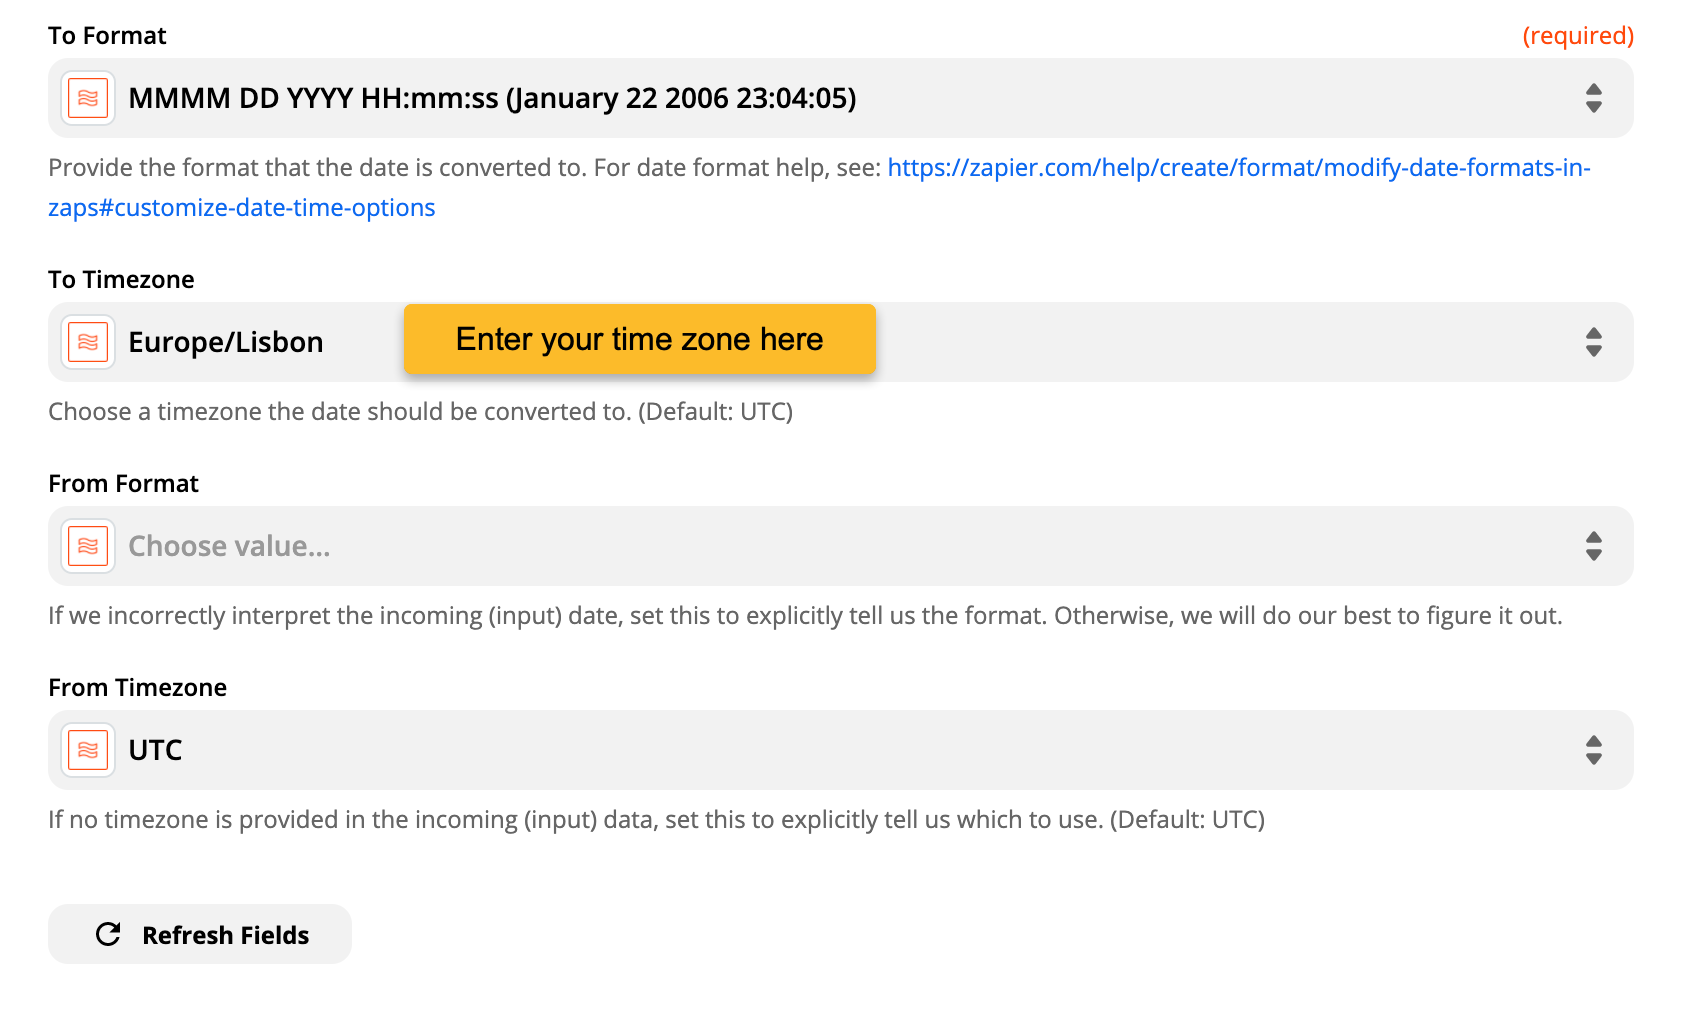
Time zone formatting from Process Street to Zapier
Since the dates from your workflow run are received in Zapier as UTC time zone, you will need to add a step for the Zapier Formatter to adjust dates pulled from Process Street into your current time zone (even if your Process Street and Zapier time zones match!)
In the Zapier Formatter step, select Date/Time then select Format.
Under the “To Format” required field, you will see a field where you can change the time zone:
Help us improve this help center.


