
Stripe is a payment processing software that allows your business to accept payments and scale faster. You can integrate Stripe with Process Street to make your workflows super powerful and automate your work via Webhooks or Zapier.
A Webhook integration can bring information from Stripe that would trigger a new workflow run in your Process Street account. Webhooks are automated messages or payloads sent from apps as a trigger to cause an action in a receiving app.
In this example, we will create a Webhook that runs the E-commerce Product Listing workflow when a product in Stripe reaches the Closed Won stage.
Now, let’s jump into the integration.
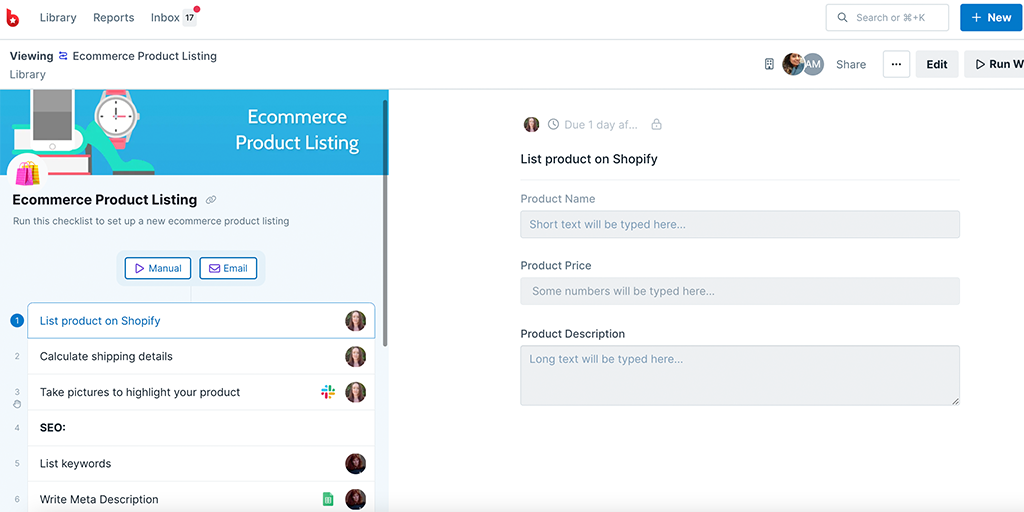
First, create a Workflow in Process Street and ensure to add form fields that are relevant to the data fields in Stripe. This will help you to map the relevant information from Stripe to Process Street.
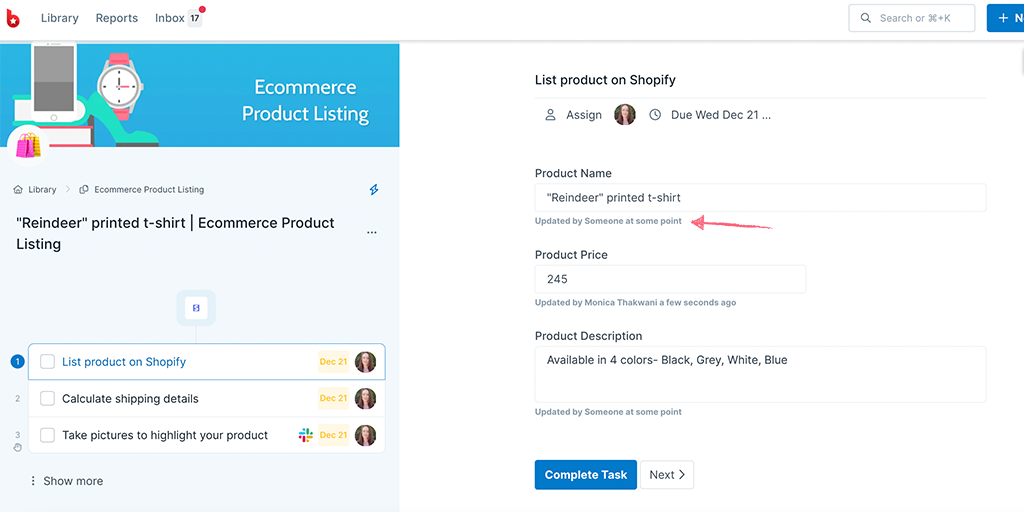
This information is stored in Stripe when a new product is created. So, we need to create relevant form fields in our workflow to push that information through to Process Street. For our example, these form fields should include the product name, product price (number field), product description (long text field), and so on.
This will mean that whoever is creating the E-commerce listing won’t have to look up their information in Stripe, but can instead see all their details in Process Street.
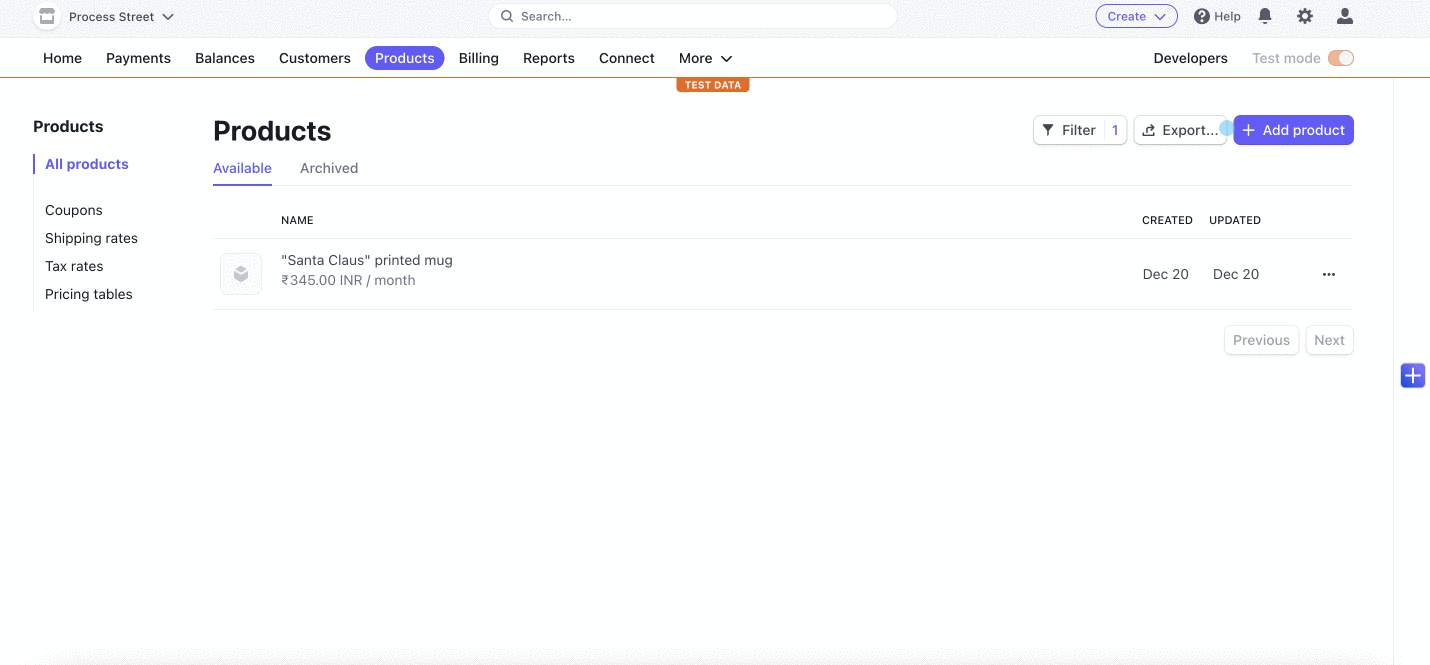
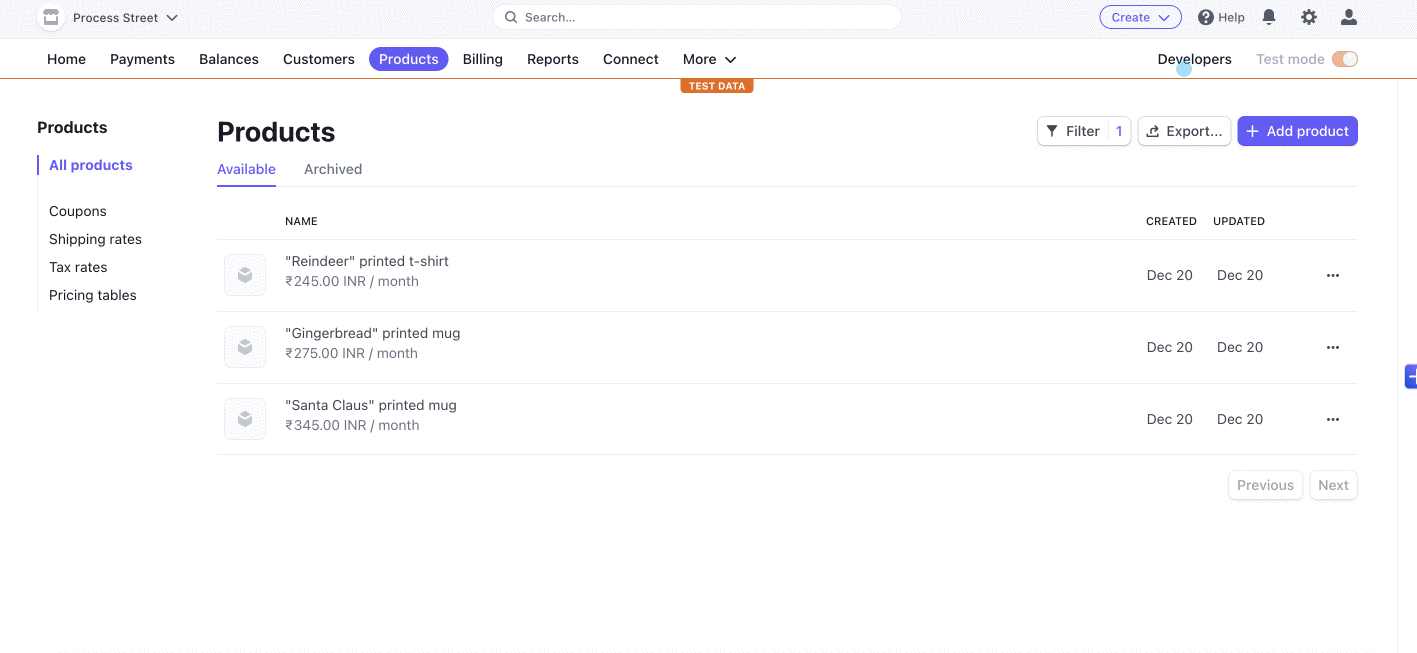
Log into your Stripe account or create a new account. Since we want to trigger a new run in Process Street when a product is created, navigate to the Products tab. To add a new product, click +Add product, fill in the details and click Save.
To get the webhook URL from Process Street, when you’re editing your workflow, click the + icon above your task list on the left. Here, you can look for Stripe as a Trigger to Run this workflow.
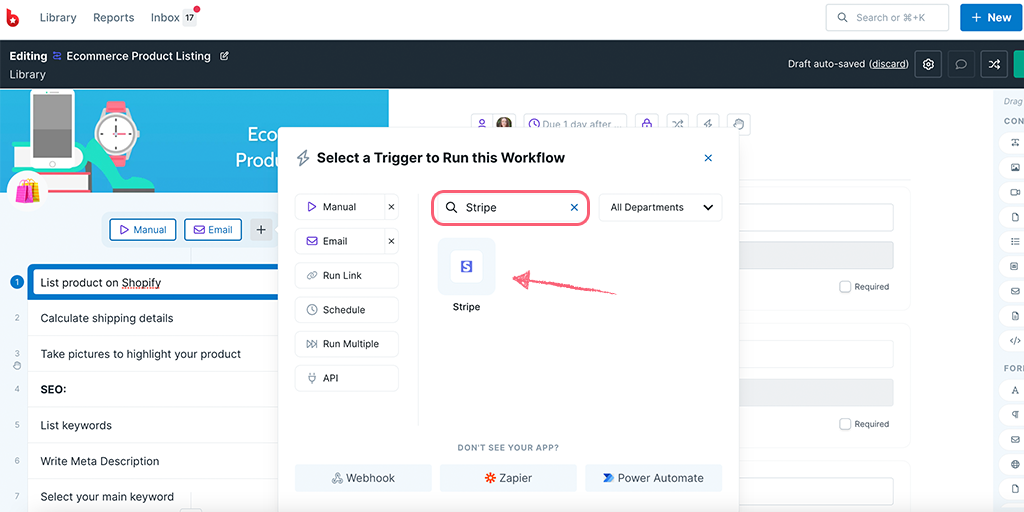
You can name your webhook as the app name or any phrase that helps you identify the Trigger. Then copy your Webhook URL.
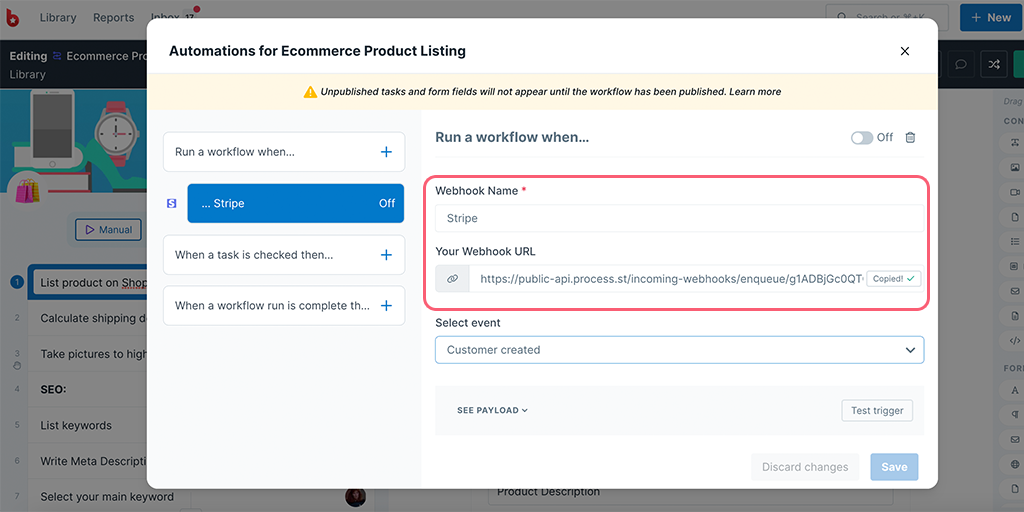
Note: We only have a few events to select as of now. However, you can select any of them irrespective of the webhook you’re creating. For our example, we have chosen the event as Customer created.
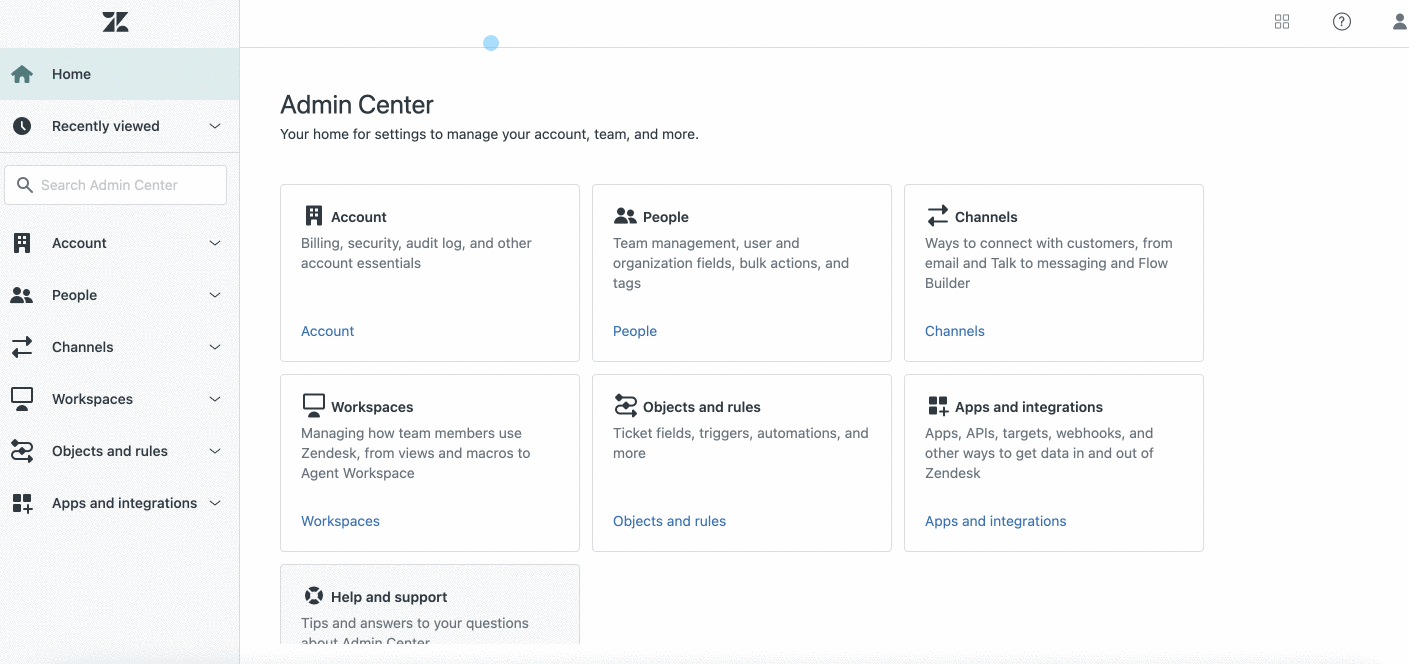
Go to the Developers dashboard from the top-right corner. Here, click on Webhooks from the left panel and click on + Add endpoint.
Here, paste the Webhook URL you had copied in your Process Street setup, and select the events the webhook should listen to. For our example, we have selected the event as product.created.
Now come back to Process Street and test your trigger. Your payload should return as a success but if it doesn’t, you might want to go back to Stripe and create a new product.
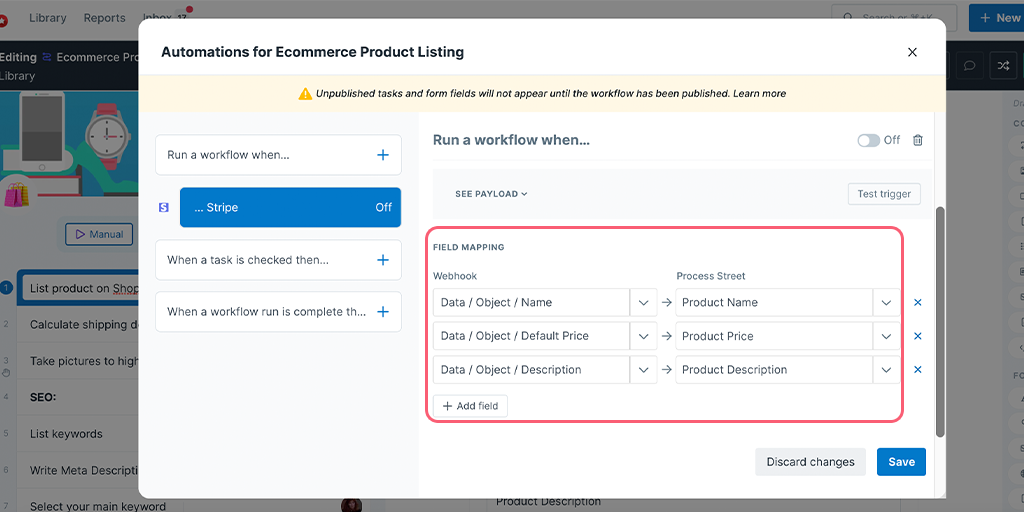
When your test returns successful, you can proceed to map your fields from Stripe’s properties to your Process Street form fields.
Lastly, turn your webhook On and Save it. Then Publish your workflow and you’re all set!
As an extra step, you can go to Stripe, add a new product then come back to Process Street in the Reports Dashboard to confirm a new workflow is run.
Help us improve this help center.


