You can integrate Tettra with Process Street using Zapier.
In this post, we will look at how Tettra can be paired with Process Street, and how important information from a weekly meeting workflow run can be automatically transferred to a new page in Tettra. This will save time as you won’t have to manually create a Tettra page and fill it with information yourself.
Plan: This integration is available to customers on all plans.
Users: In order to create an API key for integrations, you must be an Administrator.
Let’s get this integration underway.
For this use case, we’ll be using the “Ray Dalio’s Meeting Process” workflow, which you’ll find embedded below.
Add the workflow to your account, then run and complete a demo workflow run before you start building the Zap.
To facilitate this integration, we will be using a tool called Zapier.
Zapier is a tool that connects over 3,000 different apps together. The connections between the apps are known as “Zaps”.
Zaps help you automate recurring tasks, meaning you save precious time in the workday while the Zaps run in the background.
After making an account or logging into Zapier, hit the “Make a Zap!” button.
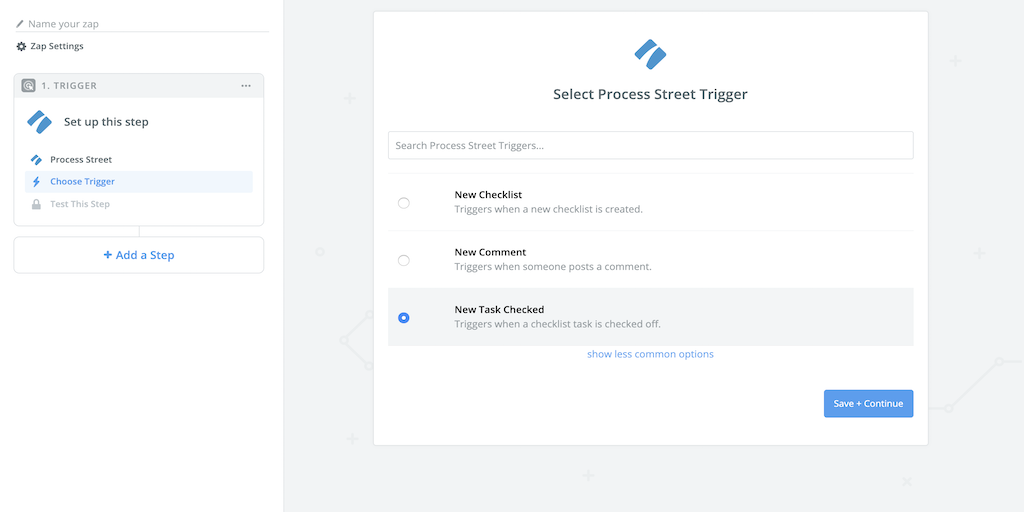
The first step is to type “Process Street” in the middle search bar of the Zapier Editor, and then select Process Street as the trigger app.
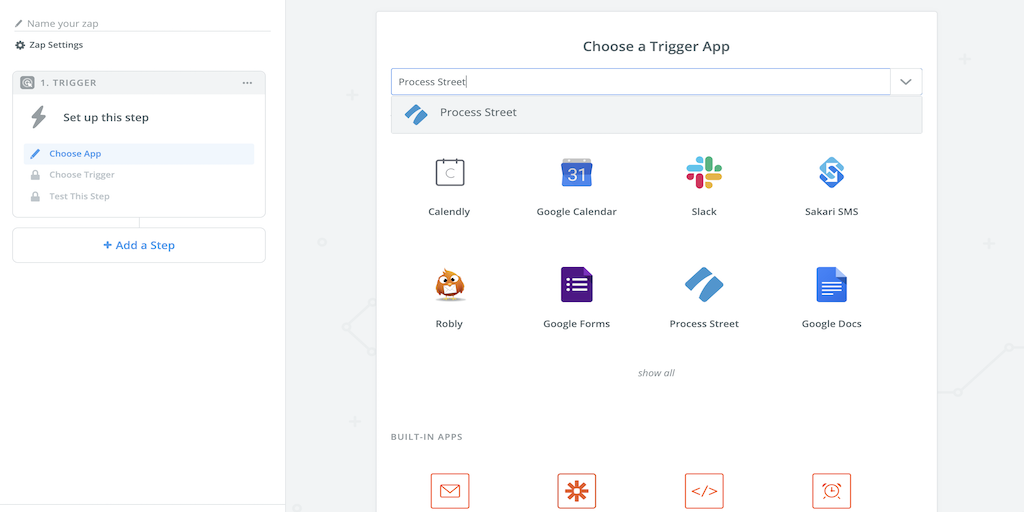
You then want to choose the Zap’s trigger.
For this use case, it is “New Task Checked”.
If you haven’t given Zapier access to your Process Street account before, find your API key by clicking on your organization’s name in the Process Street app, then clicking the “Settings & API” tab.
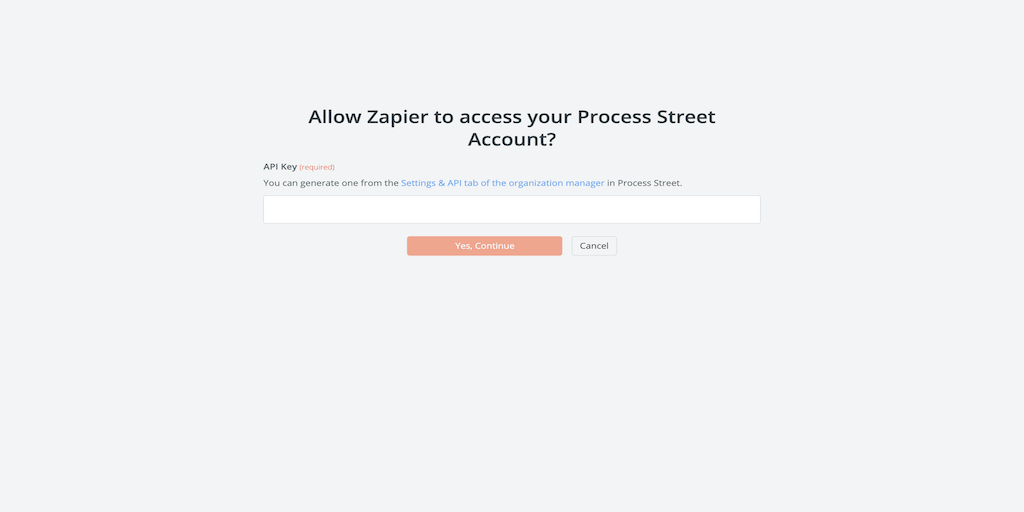
Once added, your Zapier Editor should look similar to the screenshot below.
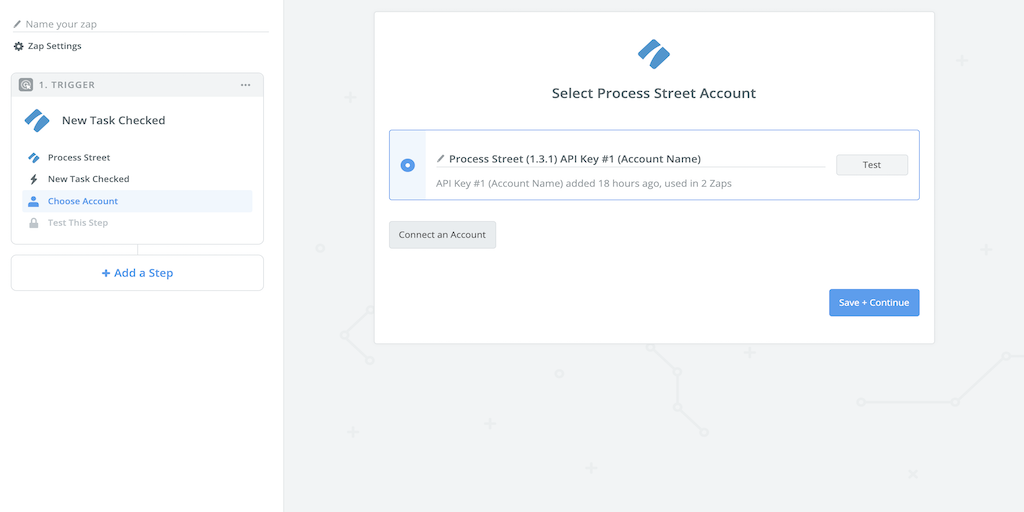
Hit “Save + Continue”.
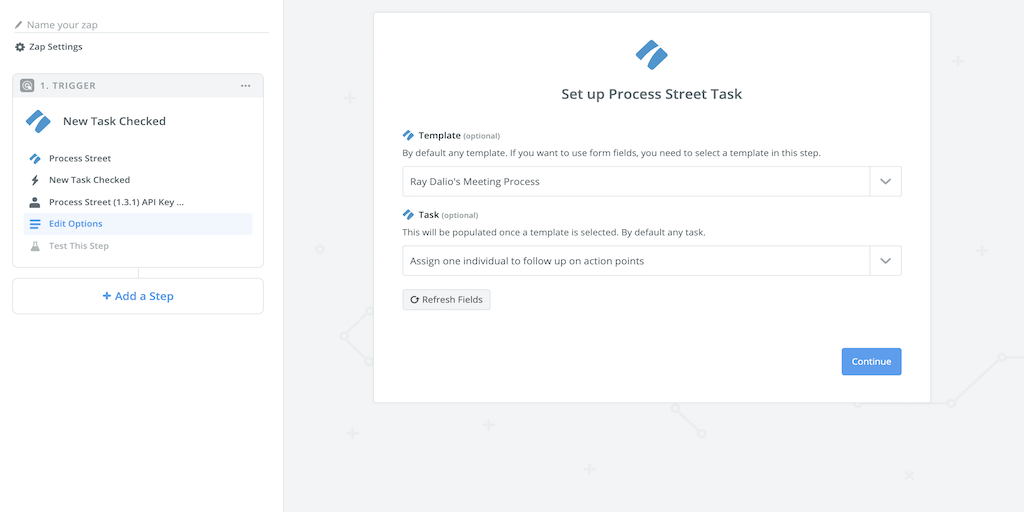
The next step is to choose the workflow you’d like to run, and the task that triggers the Zap.
Make sure the “Ray Dalio’s Meeting Process” workflow has been added to your Process Street account.
Then, in the Zapier Editor, choose “Ray Dalio’s Meeting Process” as the workflow, and “Assign one individual to follow up on action points” as the task.
The last step of setting up the trigger is to test it by pulling in samples. If you’ve completed a test workflow run as advised, the sample will be pulled in instantly.
The sample will appear as “Task A”.

Hit the “Continue” button to set up the rest of the integration.
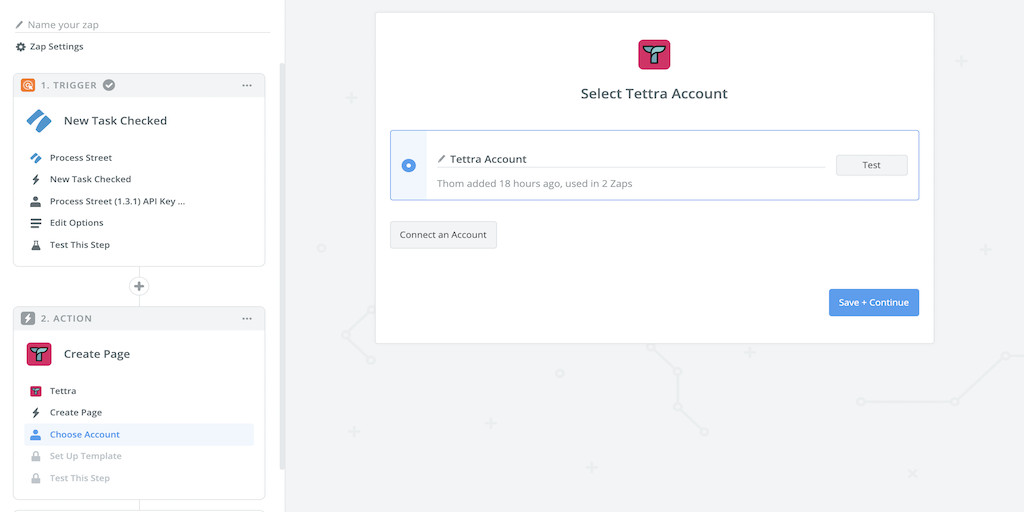
Using the middle search bar, type in “Tettra” and select it as the action app.
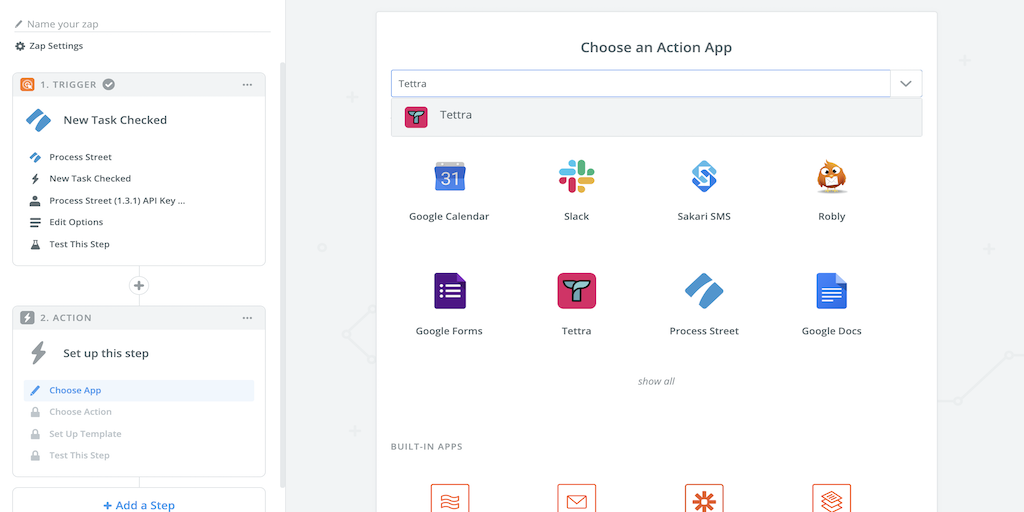
The action is what takes place when the trigger is set off.
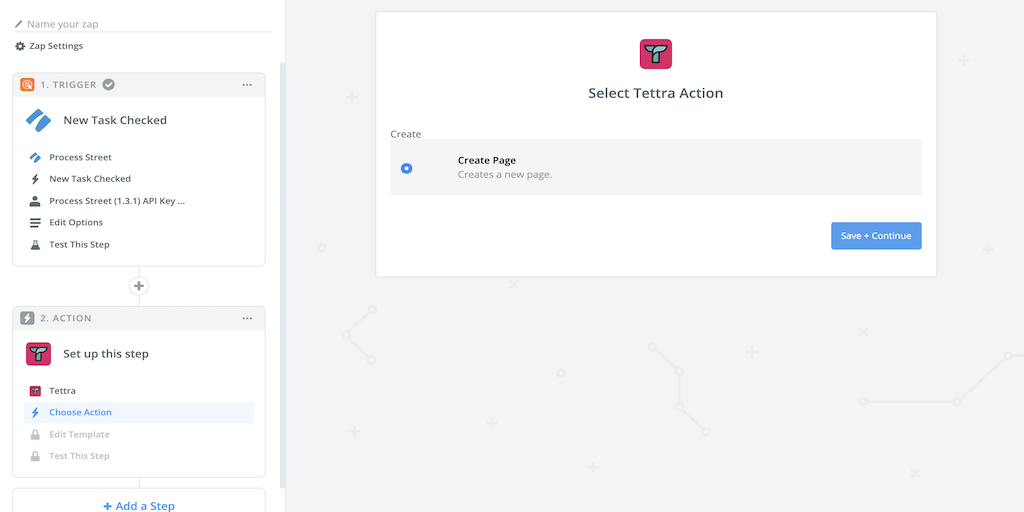
For this use case, you will want to choose the “Create Page” action.
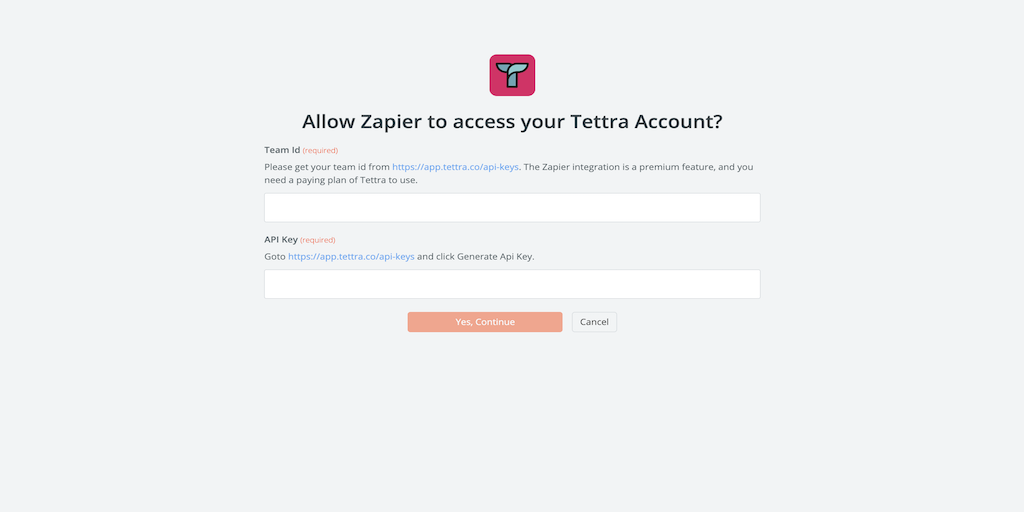
To connect your Tettra account with Zapier, you will need to add your Tettra team ID and API key.
This can be found by clicking on your name in the right-hand corner of the Tettra app, then pressing “My settings”. Then click “My integrations” and navigate down the page to the “API keys” section.
N.B.: You need a paying plan of Tettra to access the team ID and API key.
After putting in the team ID and API key, your Zapier Editor should look similar to the screenshot below.
The next step is to set up what information you want to be pulled from each meeting workflow run, and how you want it to be displayed in Tettra.
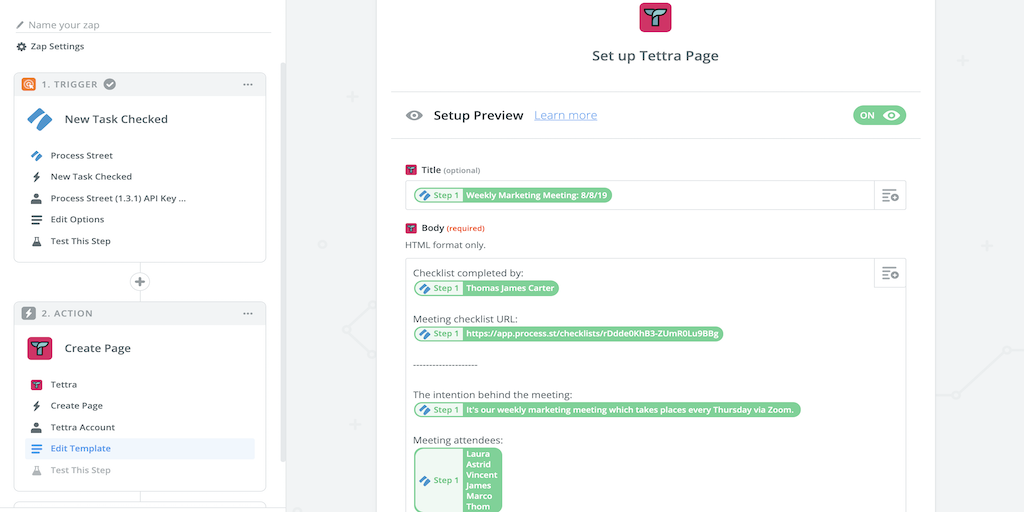
In the “Title” field, you’ll want to add the “Workflow Run Name” form field option. This will help differentiate the pages made in Tettra.
In the “Body” field, you’ll want to manually write the headers as we have (below they’re in bold and prefaced by colons), and include the following Process Street form fields (which have quotation marks around them).
Workflow Run completed by:
“Updated By Username”
Meeting workflow run URL:
“Run URL”
——————–
The intention behind the meeting:
“Form Fields What Was The Intention Behind Calling The Meeting?”
Meeting attendees:
“Form Fields Who Is In Attendance?”
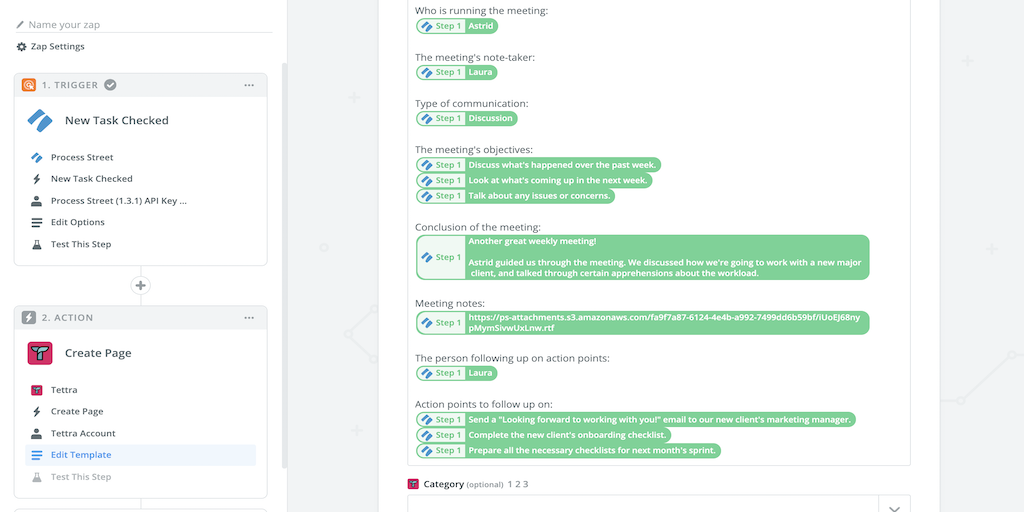
Who is running the meeting:
“Form Fields Responsible Person”
The meeting’s note-taker:
“Form Fields Who Is Taking Detailed Meeting Notes?”
Type of communication:
“Form Fields Type of Communication”
The meeting’s objectives:
“Form Fields Objective 1”
“Form Fields Objective 2”
“Form Fields Objective 3”
Conclusion of the meeting:
“Form Fields Conclusions Of The Meeting”
Meeting notes:
“Form Fields Meeting Notes”
The person following up on action points:
“Form Fields Follow Up Assignee”
Action points to follow up on:
“Form Fields Action Point 1”
“Form Fields Action Point 2”
“Form Fields Action Point 3”
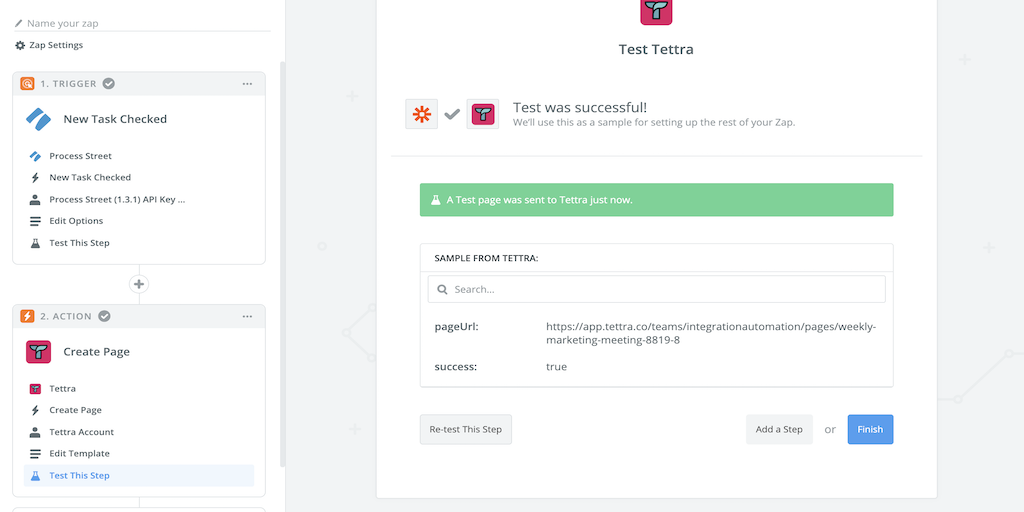
To test the action step, hit the “Send Test to Tettra” button in the bottom right-hand corner.
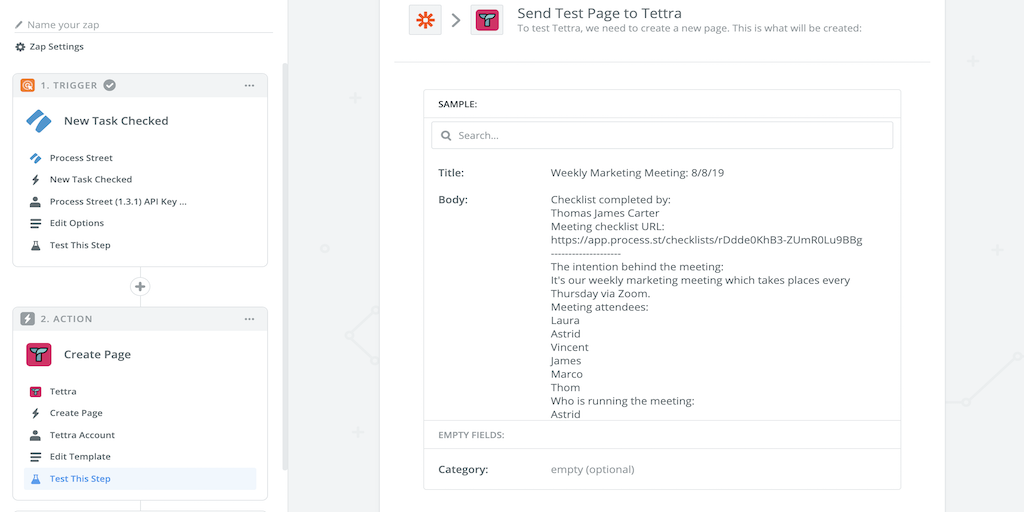
If set up correctly, you will then have a green banner appear telling you a test page was sent.
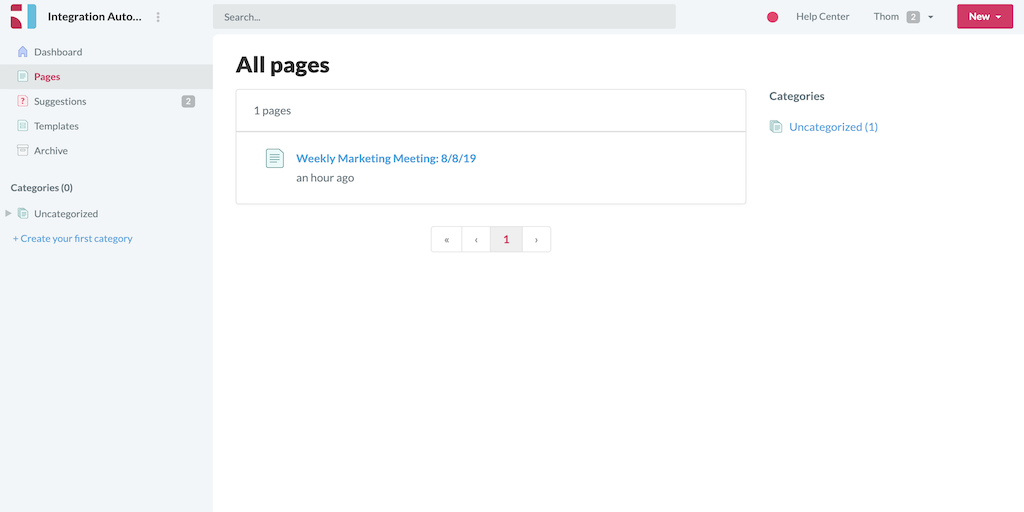
To double-check that the page is correct, go to the Tettra app and click “Pages” on the left-hand side.
If set up correctly, you will see your test page.
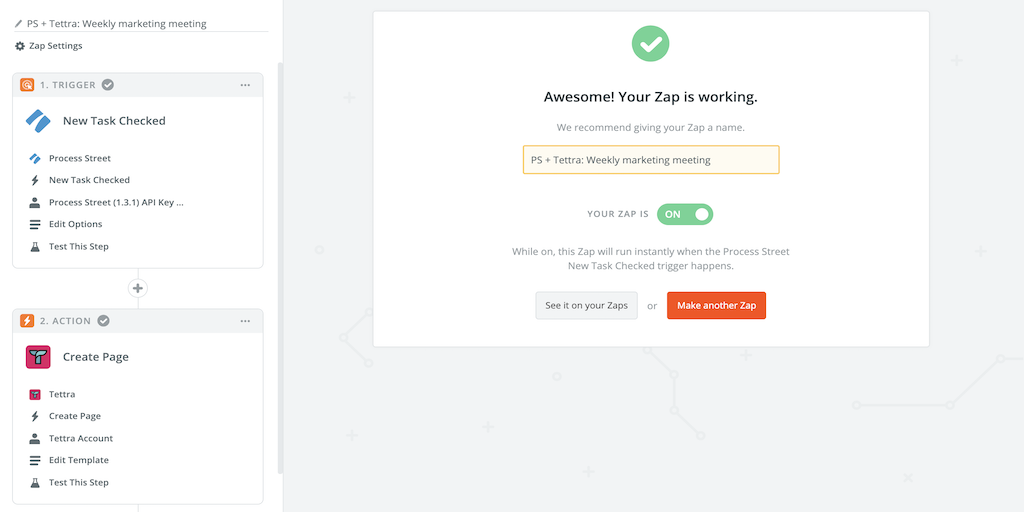
The Zap has now been built.
The final step is to name the Zap, so you can differentiate it from any others you may have. Additionally, ensure the Zap has been switched to “On”.