Process Street‘s Conditional Logic is a powerful feature that allows you to create truly dynamic forms with if-this-then-that logic.
If your forms are more complex, you can also create rules that say if-this-and/or-this-then-that.
You can build steps into your forms that change depending on the users’ form responses as they fill out your form.
There are two ways to create conditional logic rules in your forms. The first is to show or hide content within a step, the second is to show or hide the whole steps.
Whichever way you choose to set up Conditional Logic, you’ll need to start by creating or editing a form.
Preparations: For conditional Logic to work, you will need to have built out multiple steps in your form. You can build logic in a single step as well, in which case, you would need to have added multiple form fields in that step.
A form field will be the trigger that shows or hides the details in your form run once it’s started.
We also recommend that your form is fully built out before you start adding conditional logic to it.
Conditional logic within steps allows you to build logic in a single step with one clear view of all your form fields. This option also reduces the number of steps you need to add to your form.
Edit your form and navigate to the Logic tab to create rules that show or hide form fields.
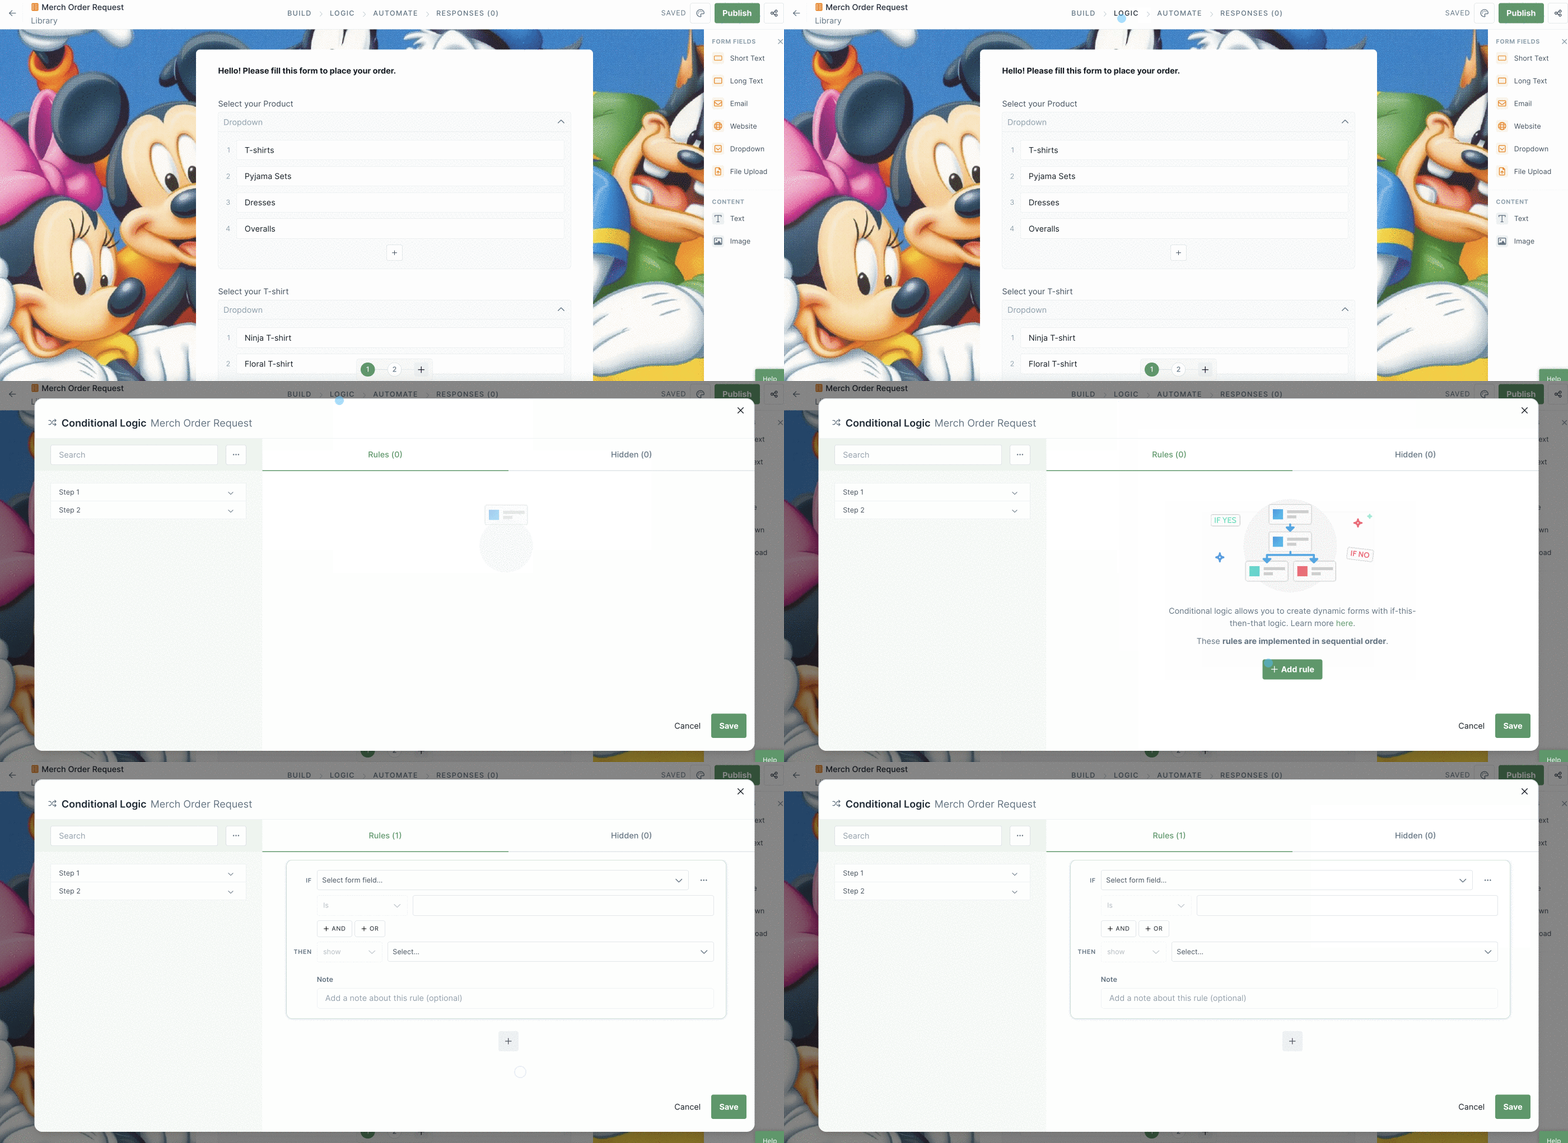
One of the easiest ways to start using Conditional Logic is to start by hiding some information by default, and then showing it at a later stage.
Click on the words “Hidden” as shown below. Next, select the fields you want to keep hidden automatically. You can click on the > arrow to reveal all of the fields within that step. We will show these fields at a later stage by creating rules.
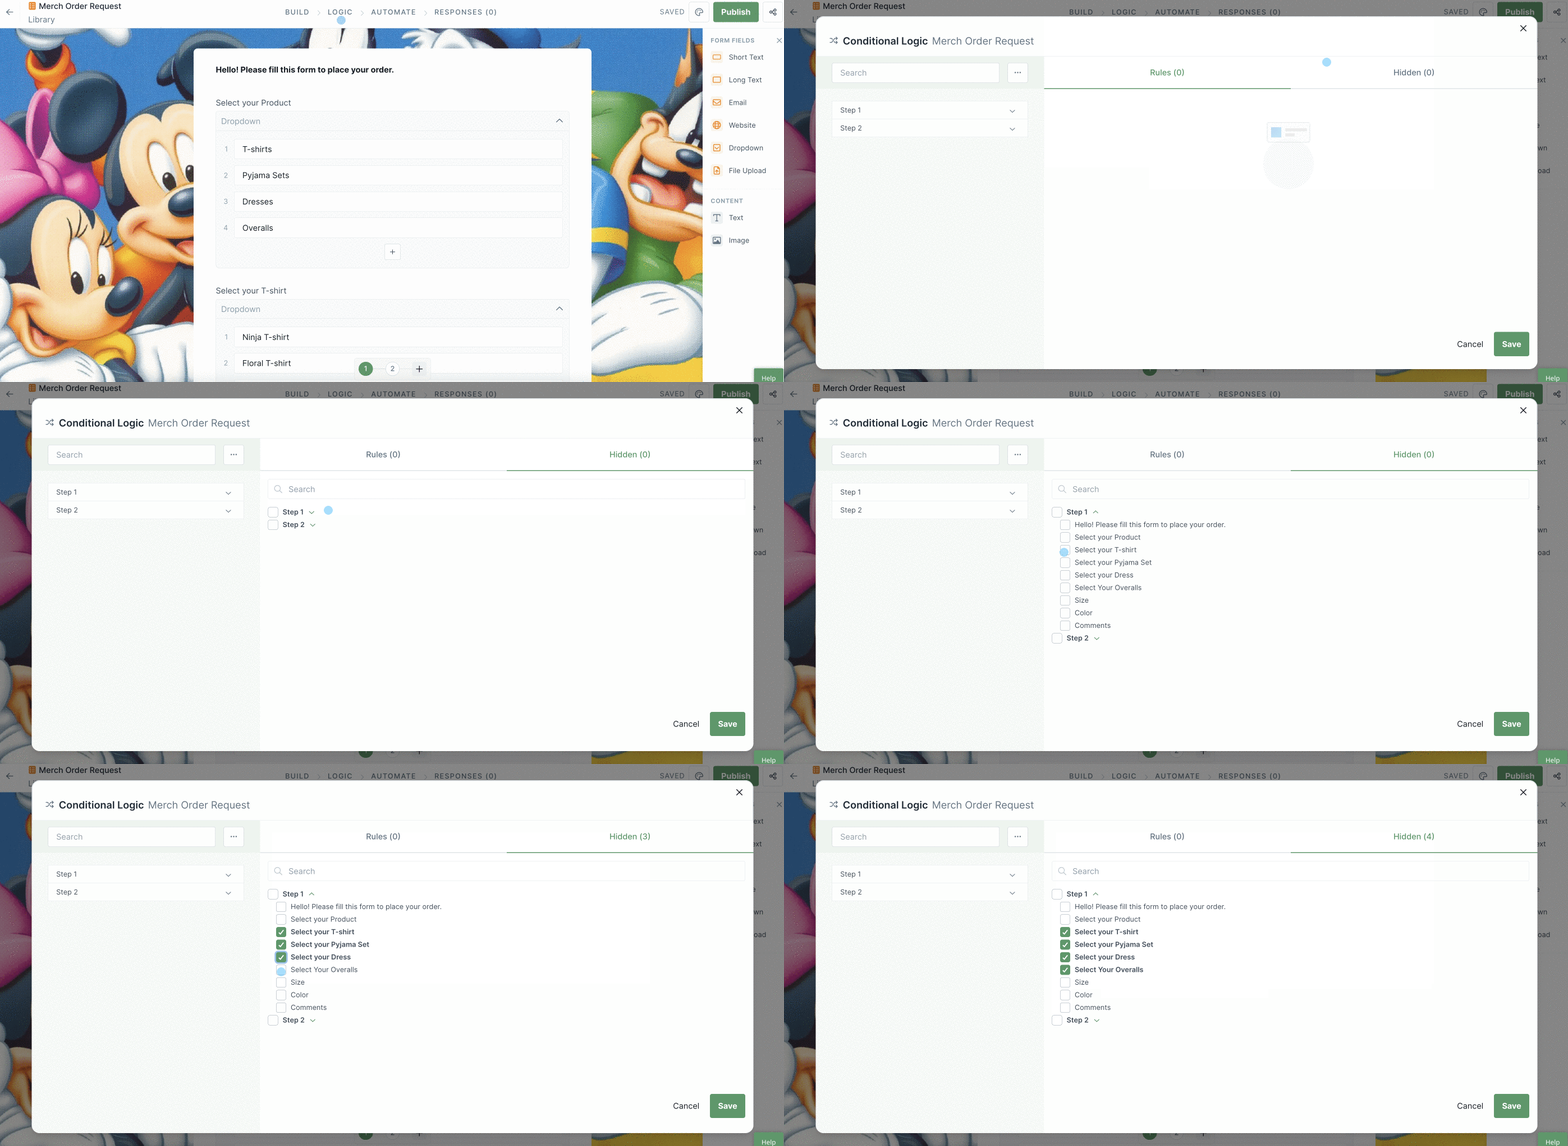
Note: When you set up a rule to show content that you have not previously hidden, creating the rule automatically hides it by default.
Now you can set up the rule/s for your logic, which will act as the trigger for your hidden content to appear.
If you’re adding rules for the first time, click + Add rule in the center of your screen to add your first rule, as shown below. Next, you’re going to choose the form field that will act as the trigger for your rule. This could be a dropdown, or a text field.
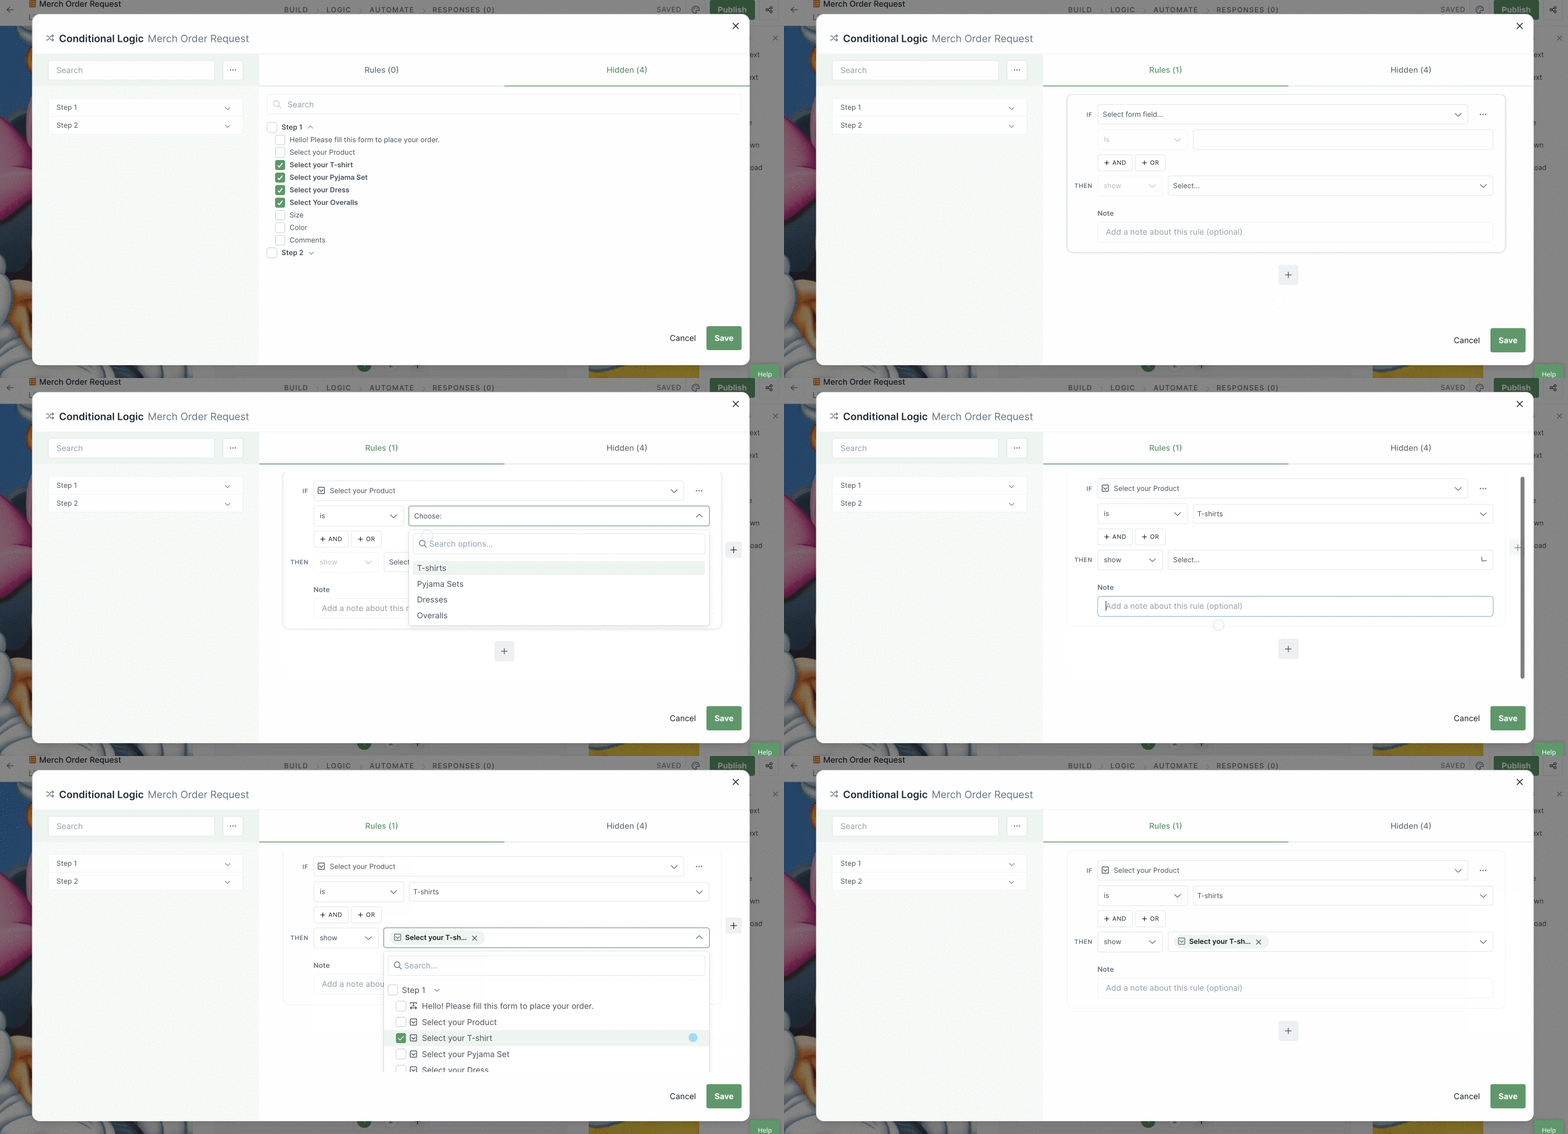
We already added a dropdown form field into our form to act as the trigger for this rule, it’s called “Select your Product”. Based on the user’s selection, we want to show the relevant product choices.
If you already have some rules in place, click the + button on the right side, to add a new rule, as shown below. Click the + button to add more rules, or the three-dot menu to Duplicate, Move or Delete a rule.
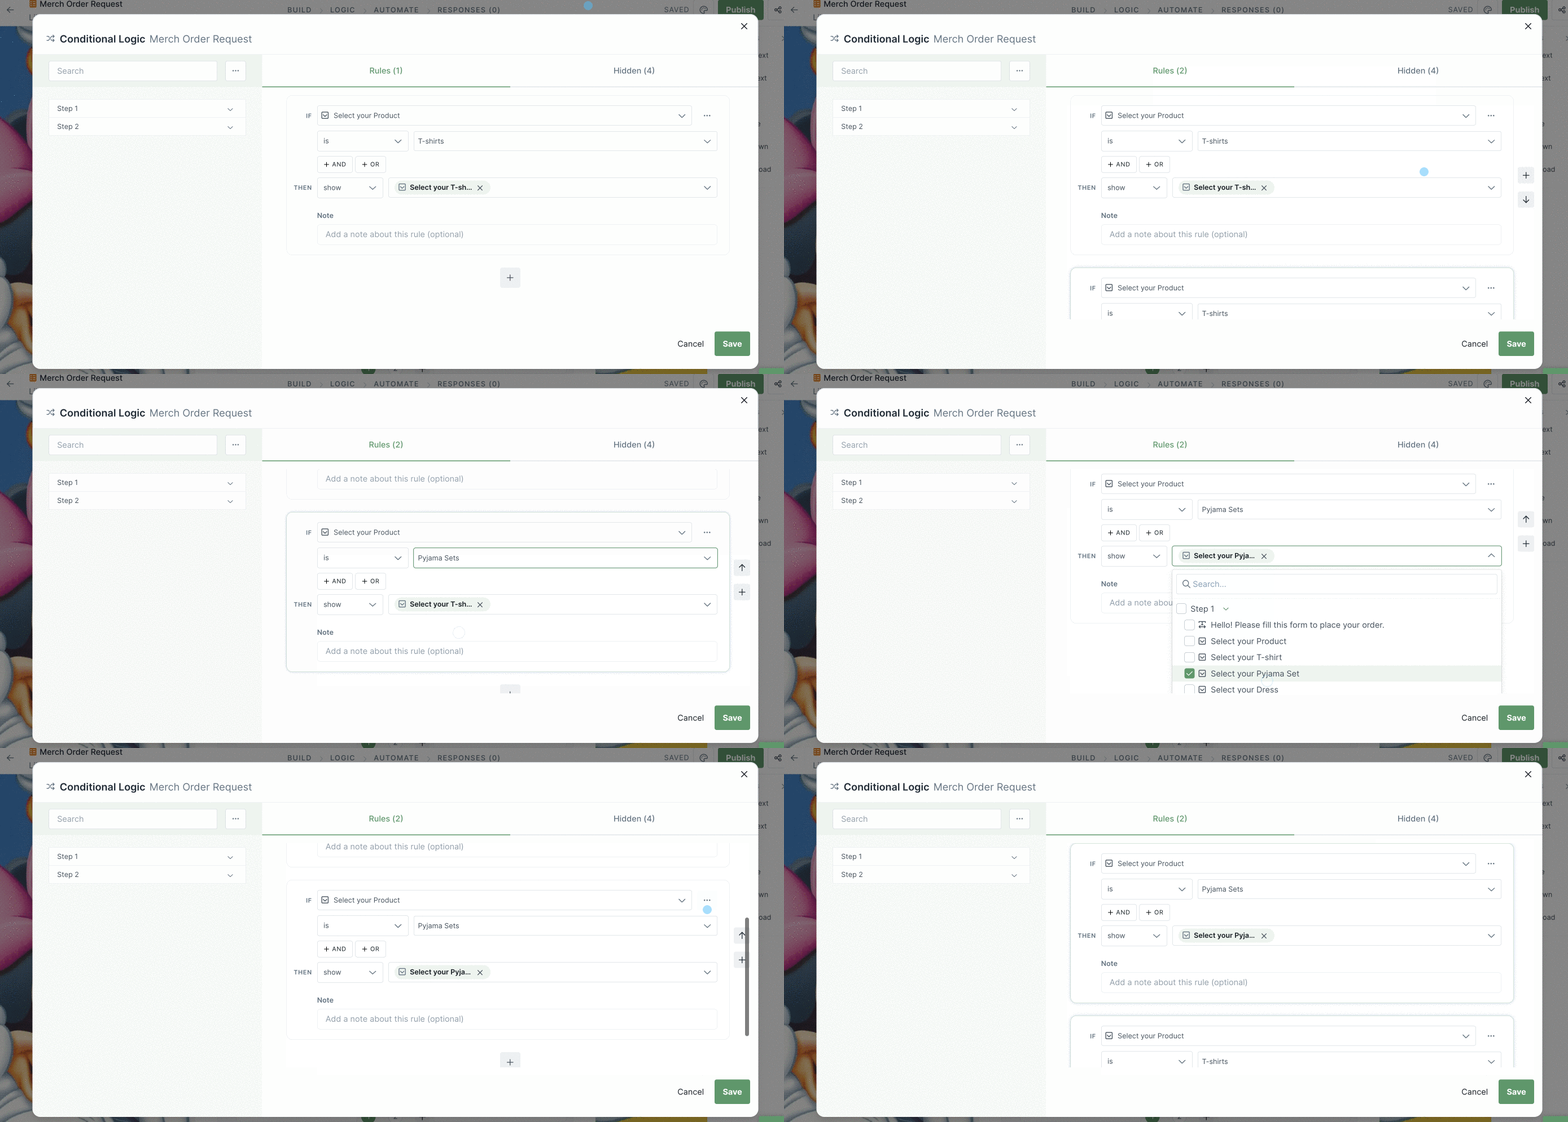
Depending on which type of form field you use as your trigger, you may see different rule selections to choose from.
Click “Done” when you’re finished and then “Save” in the bottom right-hand corner. This saves the changes to your conditional logic rules and then we recommend you also publish the changes to your form.
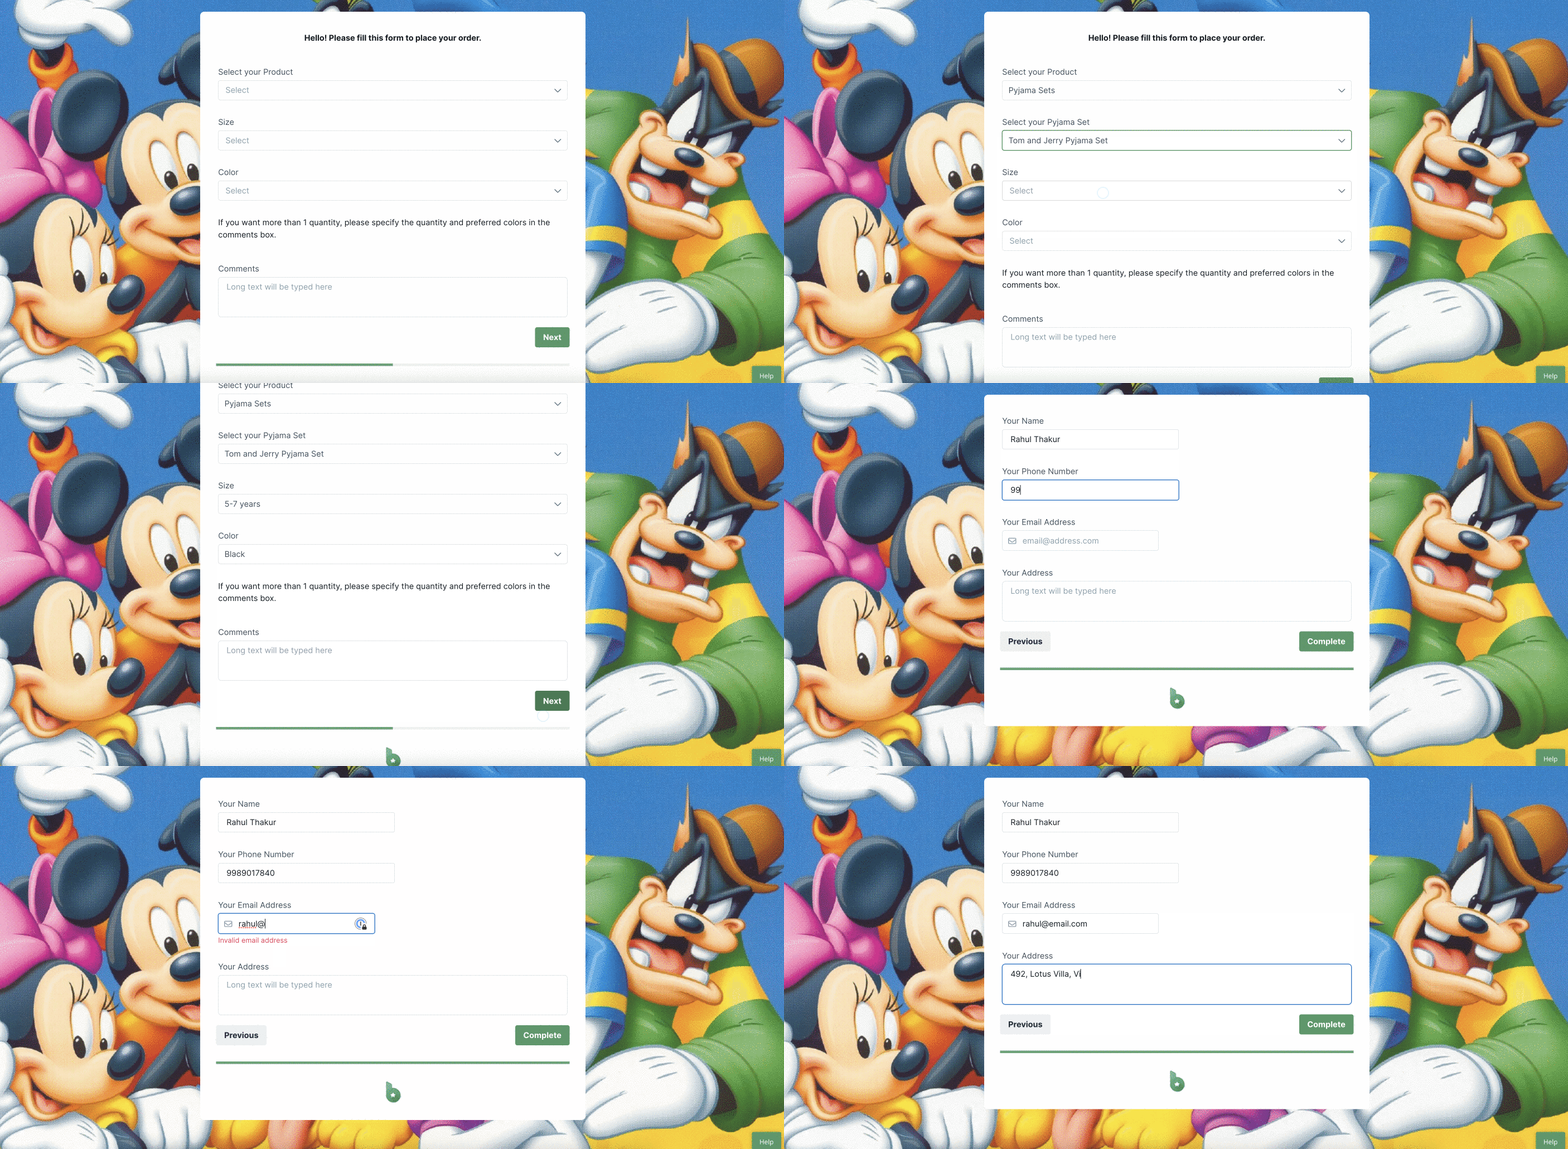
Next, you can fill out a form response to ensure the logic works as you would like it to.
If you need your rules to follow complex logic, you can add And/Or while creating your rules.
For instance, in the Merch Order Request form, If the customer wants a product AND some custom text on it OR a custom print Then, show customization options.
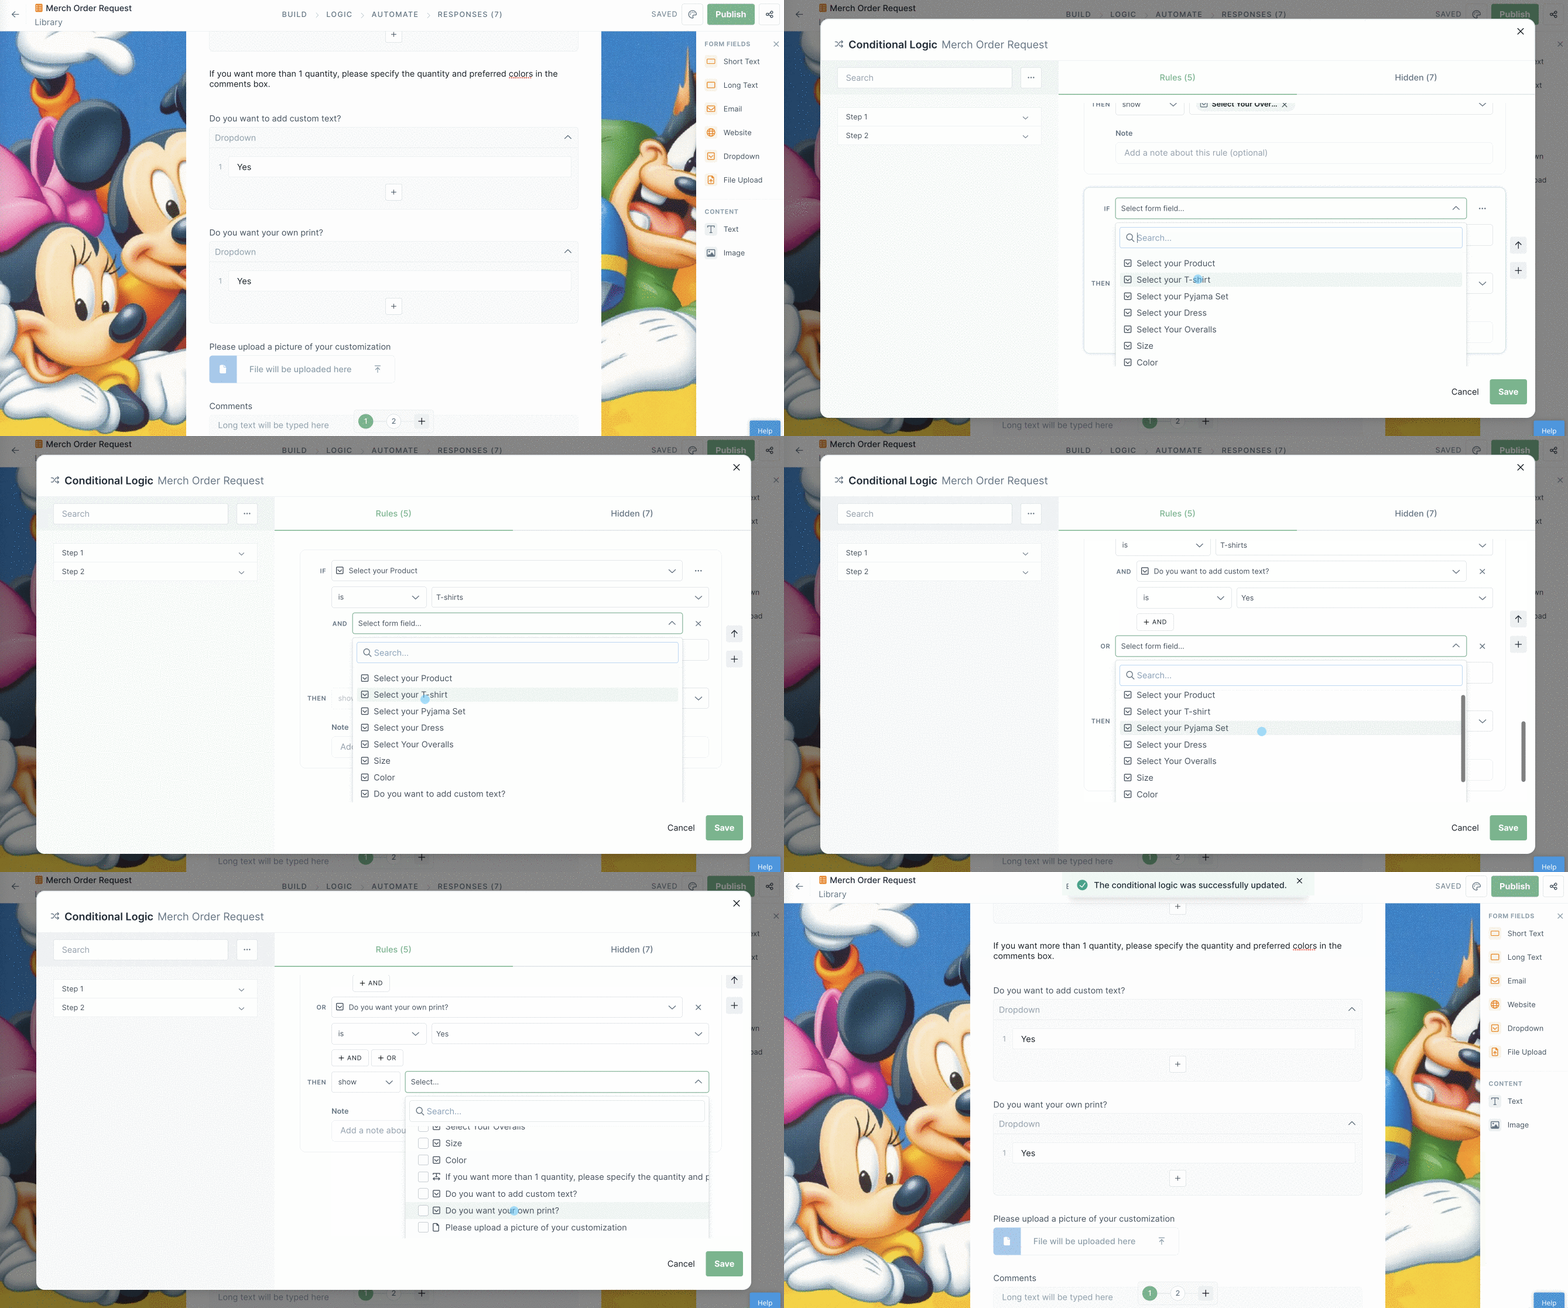
You can add as many And/Or conditions as you need including multiple And rules, multiple Or rules or a mix of both.
Let’s take a look at how to set up a different Conditional Logic example, this time to show or hide whole steps in your forms.
Edit your form and navigate to the Logic tab at the top of your screen then hide a step by default.
One of the easiest ways to start using Conditional Logic is to start by hiding steps by default, and then showing them again at a later stage.
Once you’ve clicked the Logic button you will see the window below open up.
Click on the words “Hidden” as shown below then choose the step you would like to hide automatically.
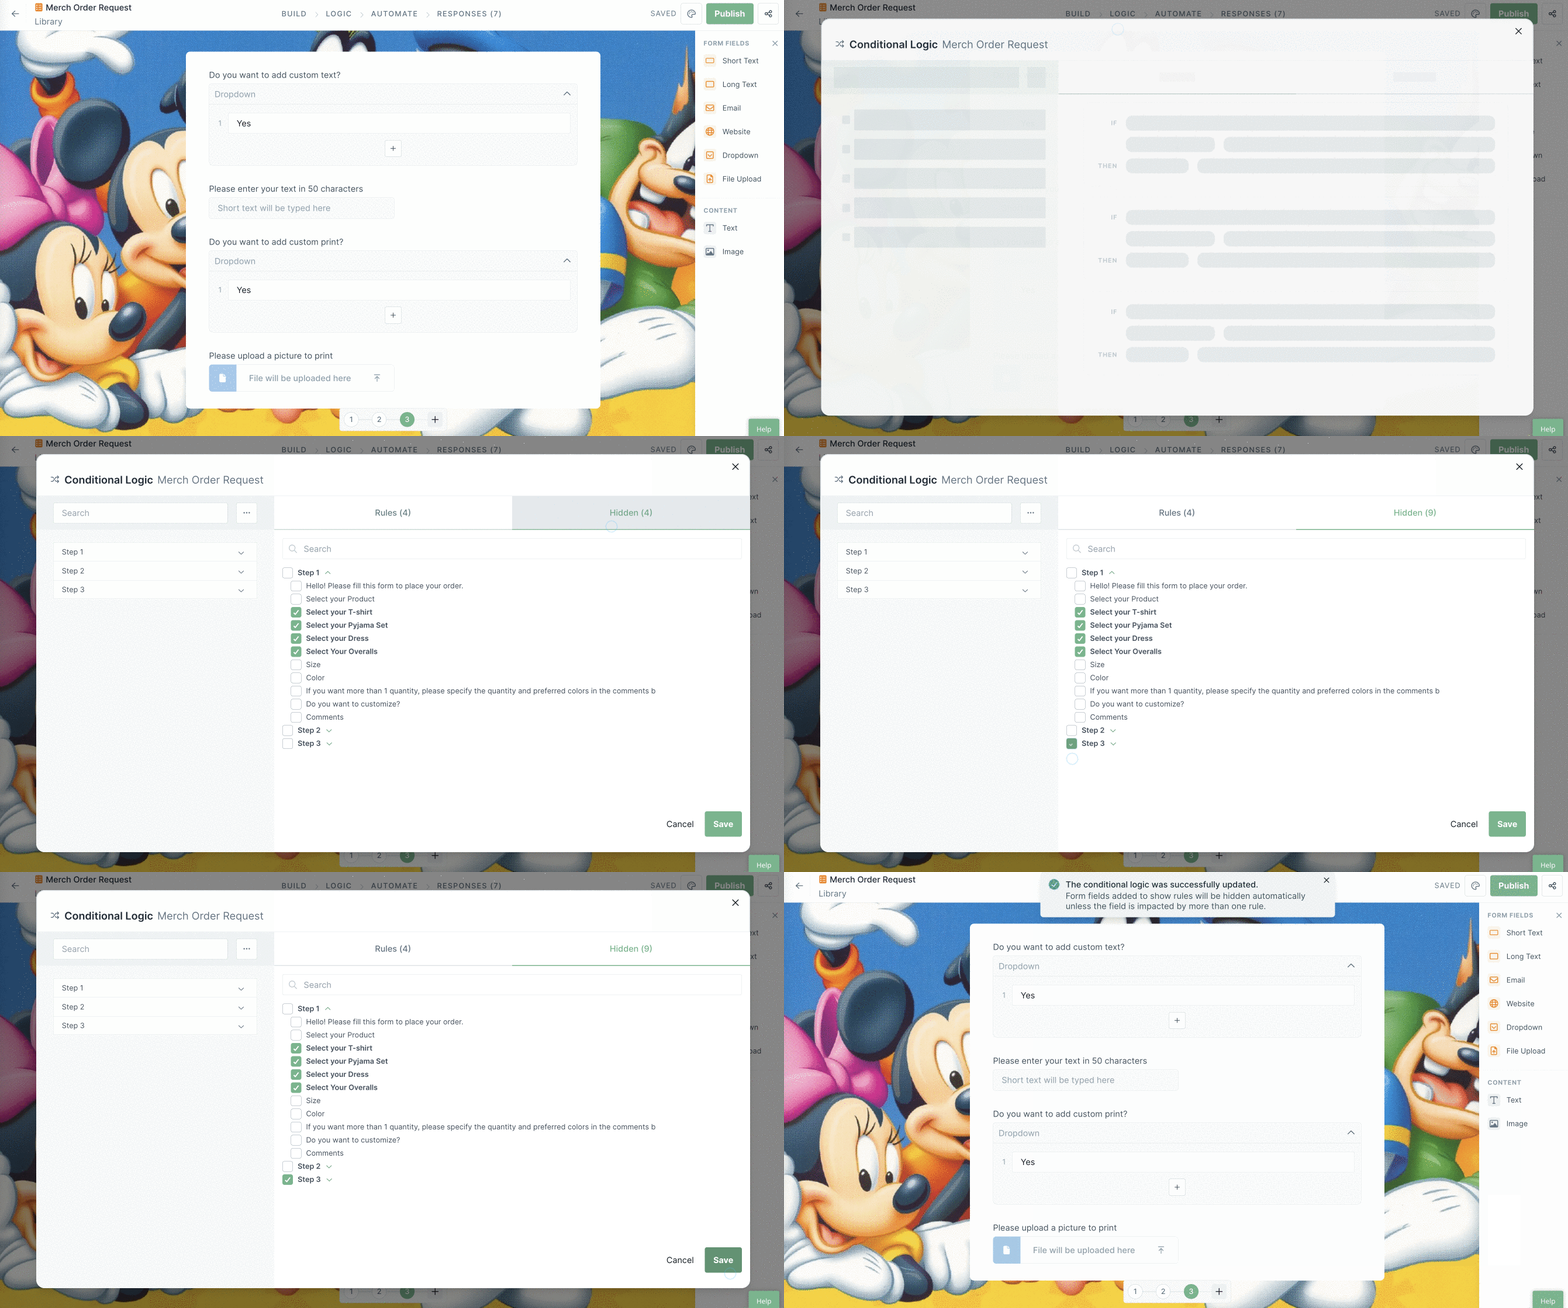
In the example above, we hid one task by default. We will show it again using a rule. This is what you’re going to add next.
Note: When you set up a rule to show a step that you have not previously hidden, creating the rule automatically hides it by default.
Now you can set up the rule/s for your logic, which will act as the trigger for your tasks or steps to appear.
Click the + button to add a new rule. Next, choose the form field that will act as the trigger for your rule. This could be a dropdown field in one of your previous steps.
We already added a dropdown form field in the first step of our form to act as the trigger for this rule. It’s called “Do you want to customize?”
If the answer to the question is “Yes” then we want to show the task we hid earlier:
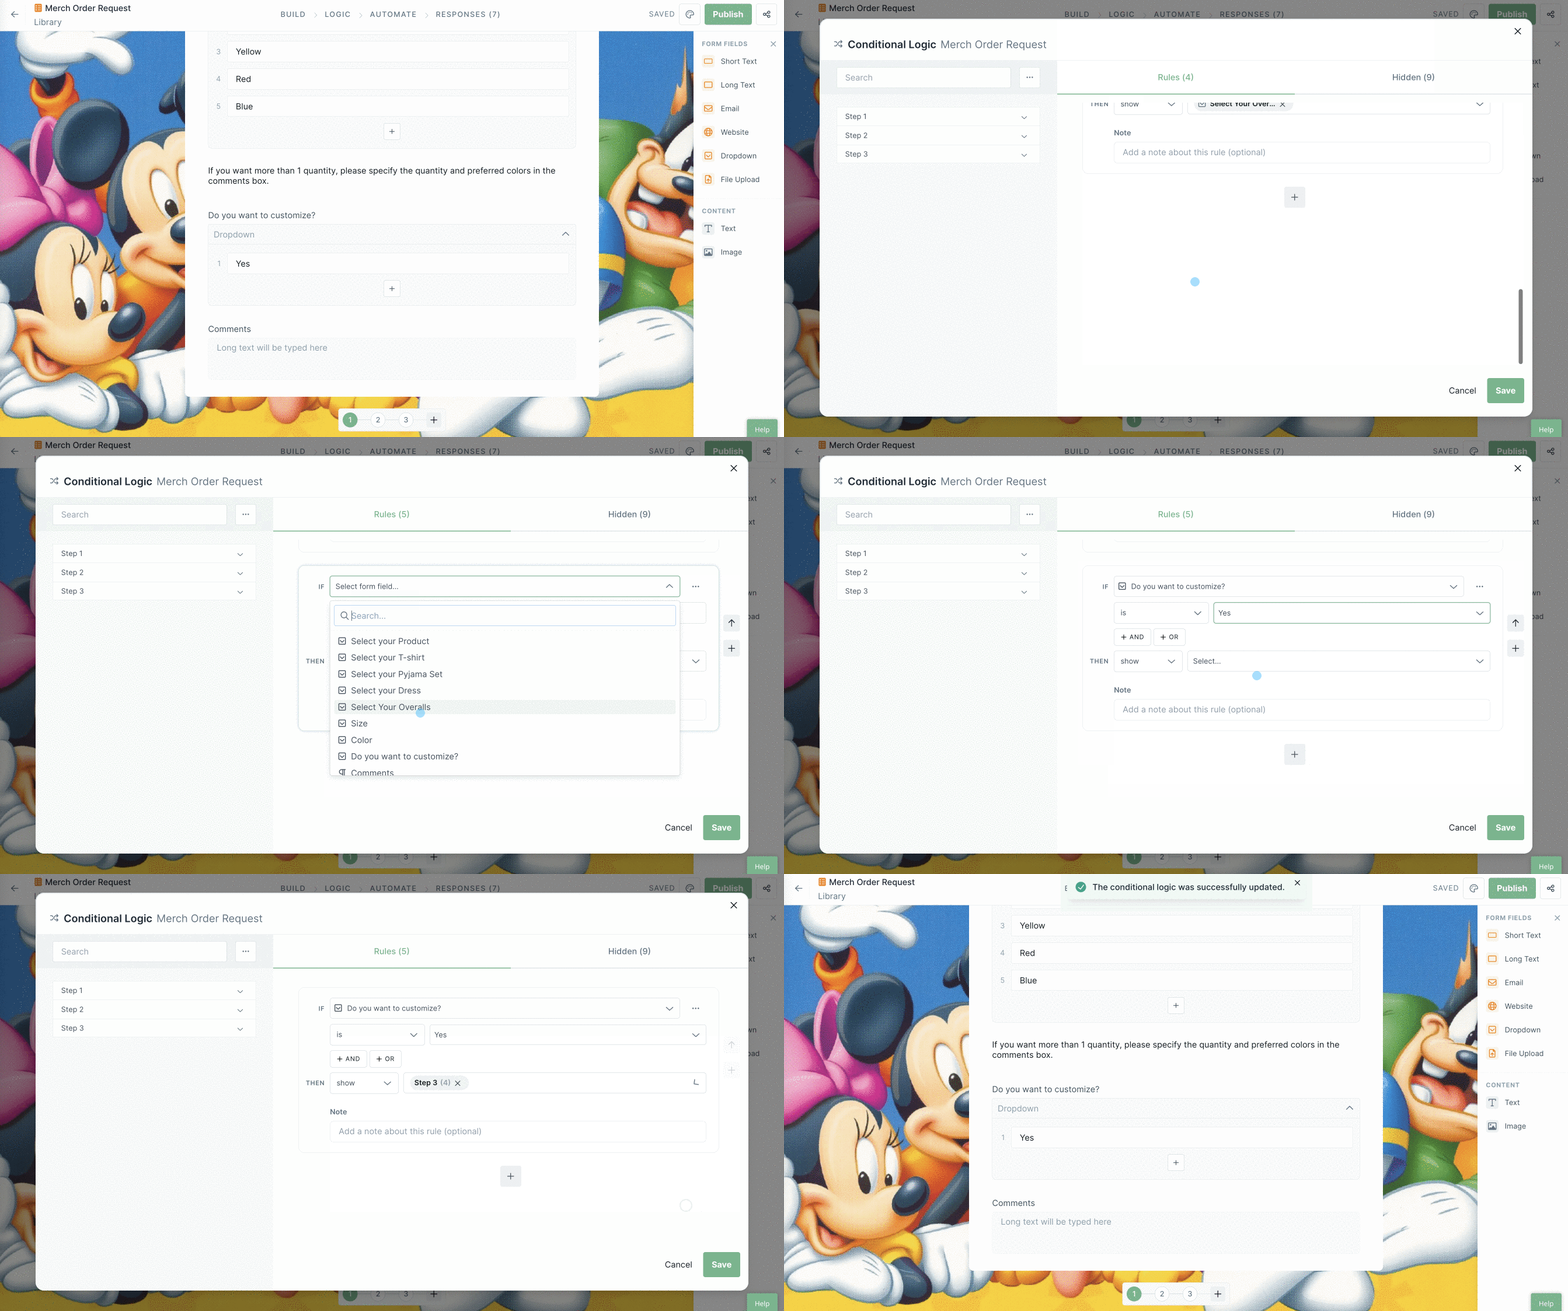
Depending on which type of form field you use as your trigger, you may see different rule selections to choose from. Click “Done” when you’re finished.
Click the + button to add more rules, or the three-dot menu to Duplicate, Move or Delete a rule.

Click “Save” in the bottom right-hand corner to save the changes to your conditional logic rules. Then we recommend you also publish the changes to your form.
We suggest filling in a response after you publish your form to test your setup.
In the two examples above (for Conditional Logic within a step, and hiding or showing a step) we used a dropdown form field as the trigger for our rules. Using dropdowns is a simple way to set up Conditional Logic. However, you can select any of the form fields to act as trigger.
When you create Conditional Logic rules, the first dropdown you see “Select form field…” presents you with a list of all of the form fields from your form that you can use (Hint: the more form fields you add to your form, the more you can choose from in Conditional Logic rules).
The icon to the left of the field name indicates the type of form field that you are working with (e.g. a text field, email, website, or dropdown).
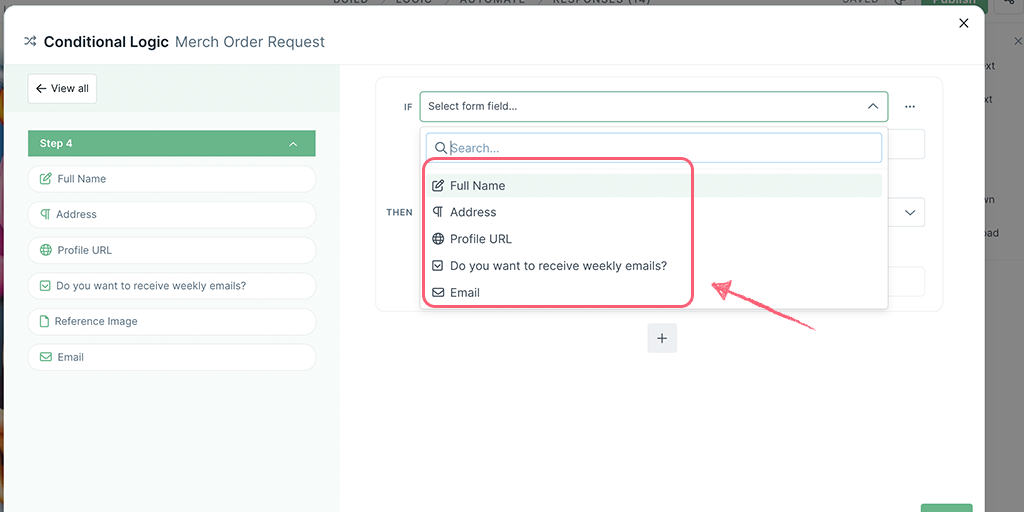
These are the current form fields and their input types that can be used for setting Conditional Logic rules.
Text Accepting Fields:
Non-Text Accepting Fields:
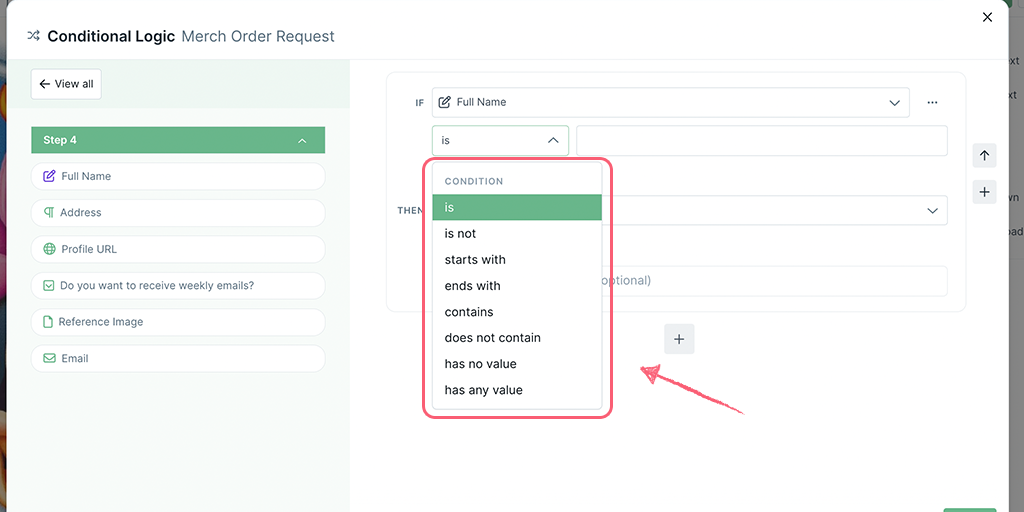
The next dropdown you’ll see after the form fields lists the different types of conditions available for your chosen field.
In the examples above, we used a simple dropdown field as our trigger, to show content, or steps. However, depending on your form you can also set logic rules on the following, more advanced fields:
For short or long text fields, any value can be typed into the third field along.
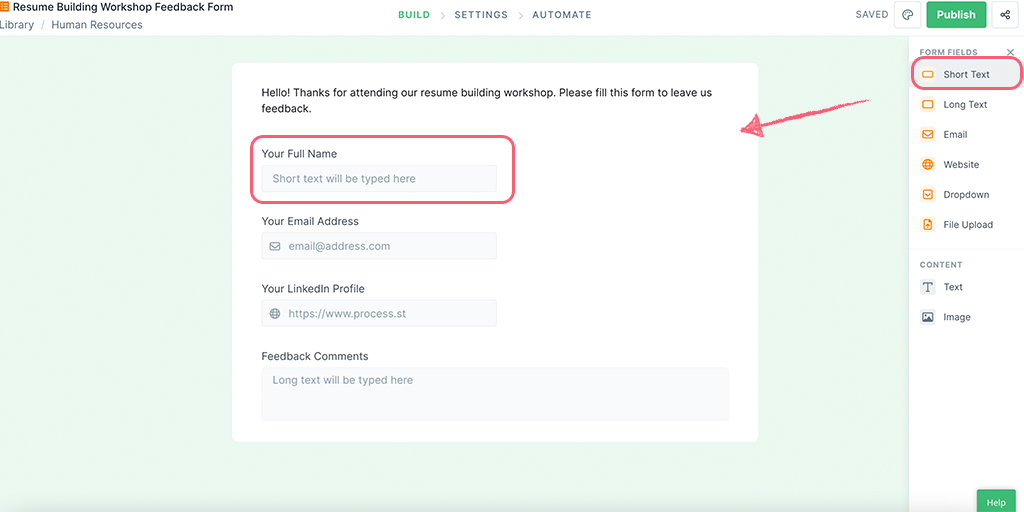
Your condition choices on text fields are:
Email fields are similar to text fields, in that anything can be typed into the third box along. Email fields also have the same condition options as text fields:
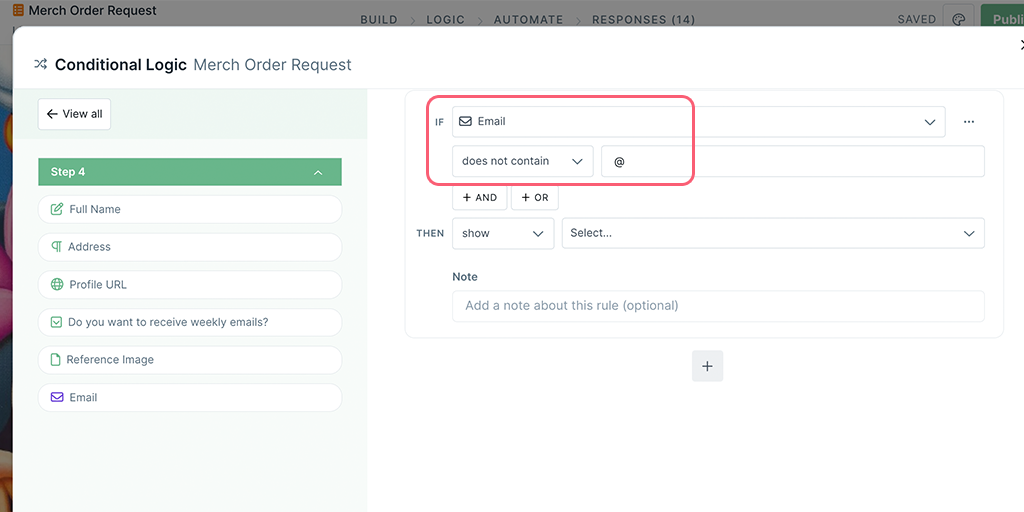
Website fields are similar to text and email fields, in that anything can be typed into the third box along. Website fields also have the same condition options:
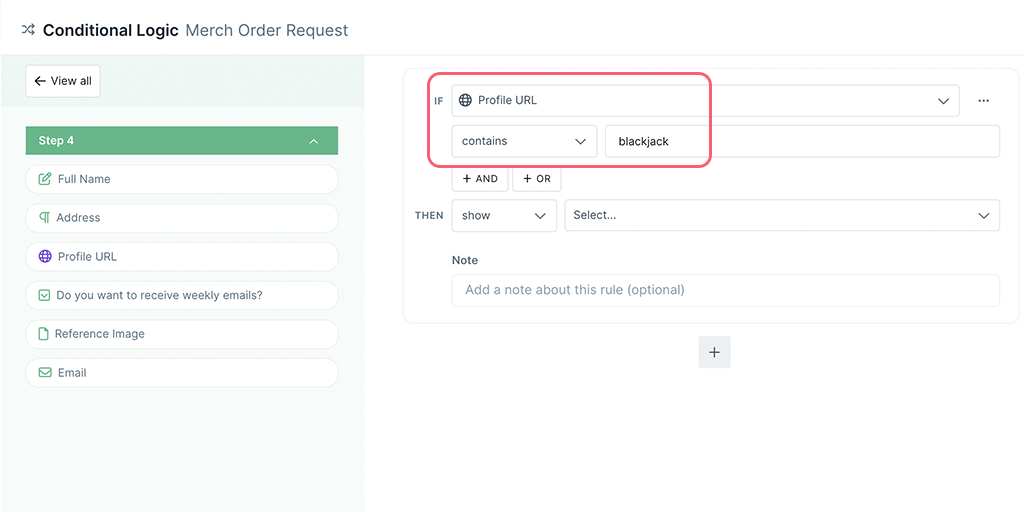
Dropdown fields have slightly different condition options. You can choose one of the dropdown options instead of typing in the field along.
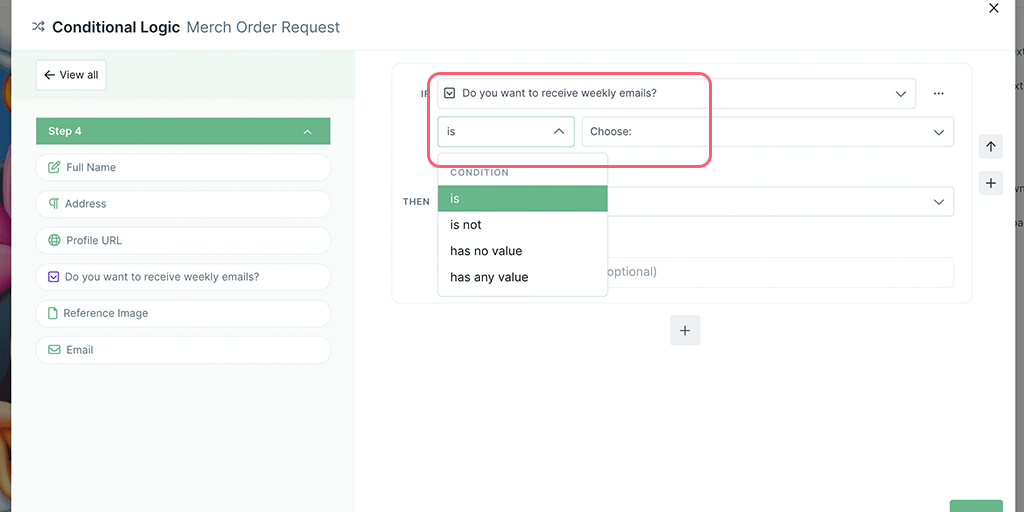
Your condition choices on the dropdown field are:
In the examples we used above, we hid certain content or steps by default, and then set the rules to show them when a condition is met.
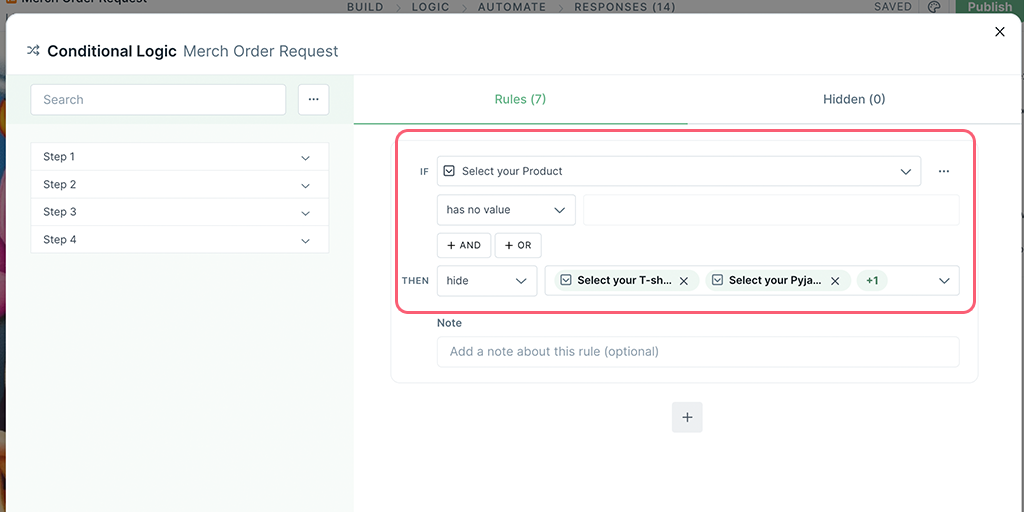
However, if you don’t hide content or steps by default first, you can set your rules to hide content or tasks when a condition is met instead.
You can move your rules up and down to change the order that your logic will follow.
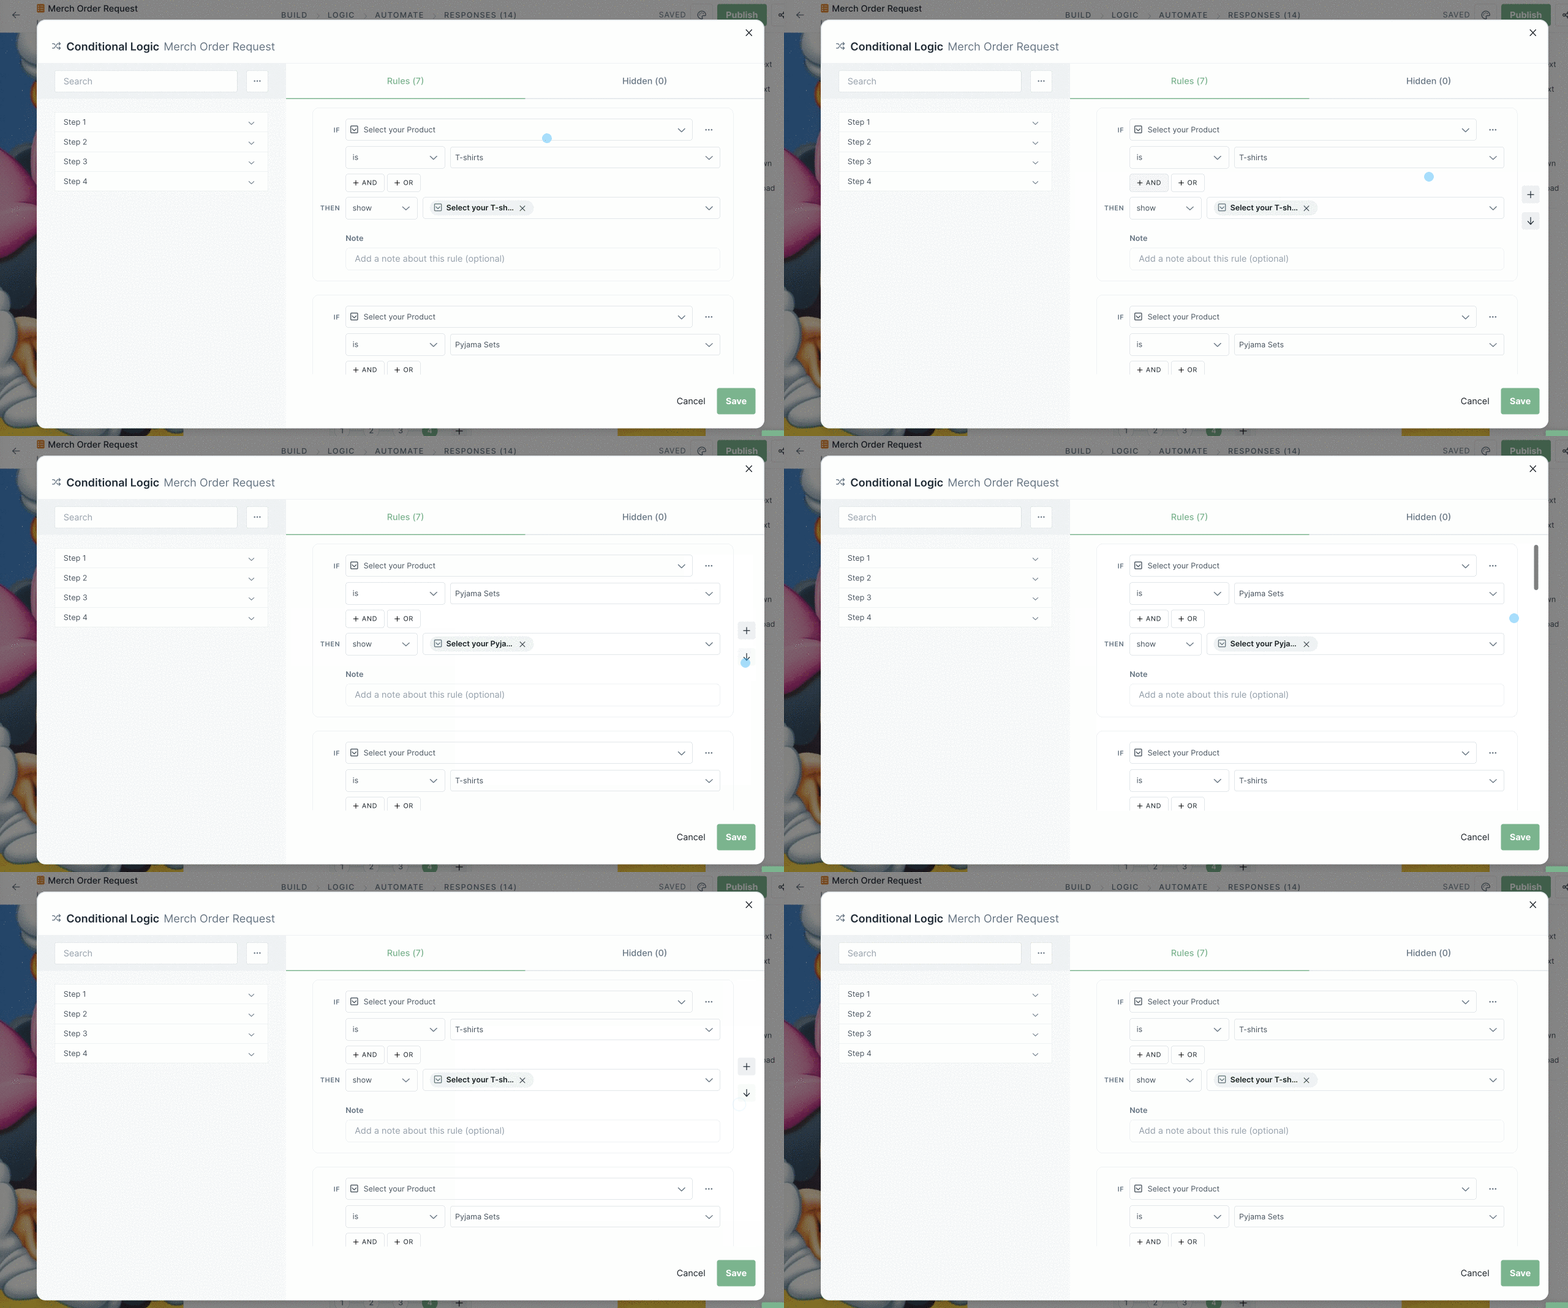
Note: Conditional Logic rules are applied in the top-to-bottom order. It’s a good idea to build your logic rules in the same order as the steps in your form, for this reason.
We highly recommend you test out your Conditional Logic rules by first saving your rules, then publishing the changes to your form, and filling in a test response.
Start to fill out your form and you’ll see the content fields or steps come into play, as your form field responses fit into the logic that you created.
If your form doesn’t perform as expected, go back to edit it and the conditional logic rules. Then save the rules, publish the form, and test it again.
If you have deleted content blocks or form fields that are shown or hidden by the conditional logic rules, you may have to reset your rules around the remaining blocks and tasks.
If you delete a form field or widget that is associated to any conditional logic rules, the relevant conditional logic rule will also be deleted automatically.
If you delete a form field or widget with multiple And/Or rules, the relevant rule will be deleted and the following rule will take its place.
If you get stuck or have any questions, reach out to our Process Pros team.