You can assign groups of users to Workflows and folders instead of adding users one by one.
This allows you to set permissions just once, for all users in that group, either at the folder level or on Workflows.
Assigning a group to a folder or Workflow means that you only have to manage the permission of the group and not each individual user.
Users: In order to manage group permissions, you must be an Administrator.
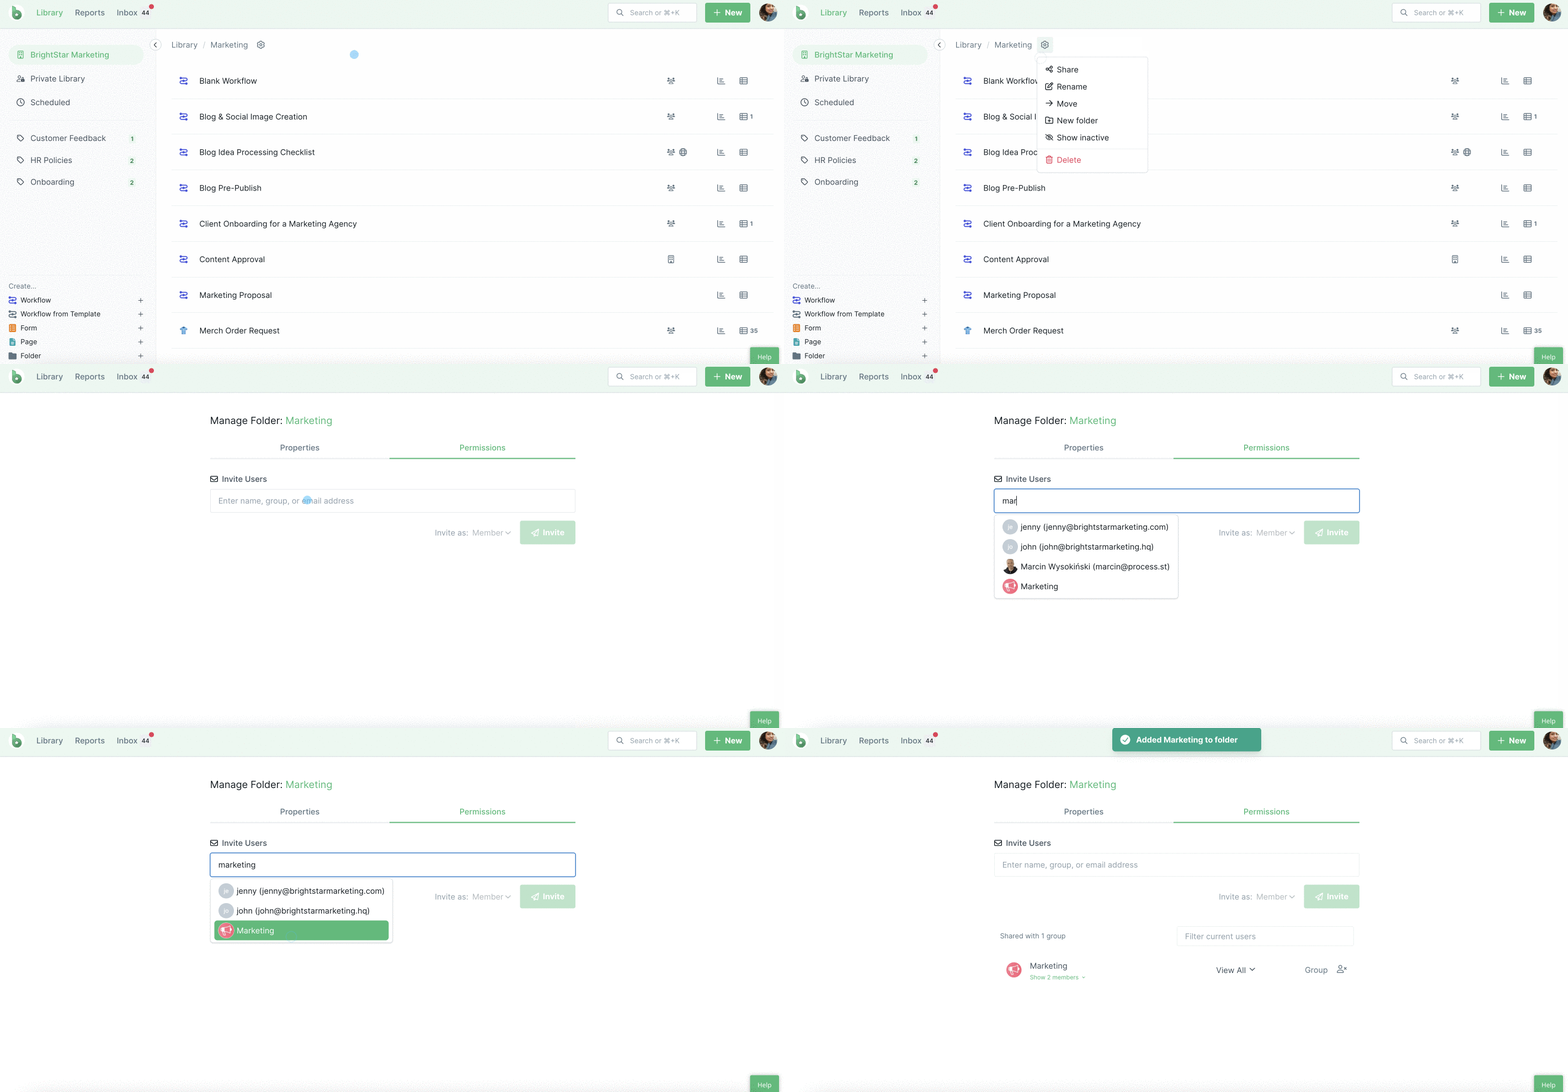
To add a group to a folder, first click the cog next to your folder’s name in your Library and select “Share“.

Type the name of the group into the “Name or Email Address” field and click their group name when it appears, as shown above.
If you don’t already have groups created, you can learn how to do that.
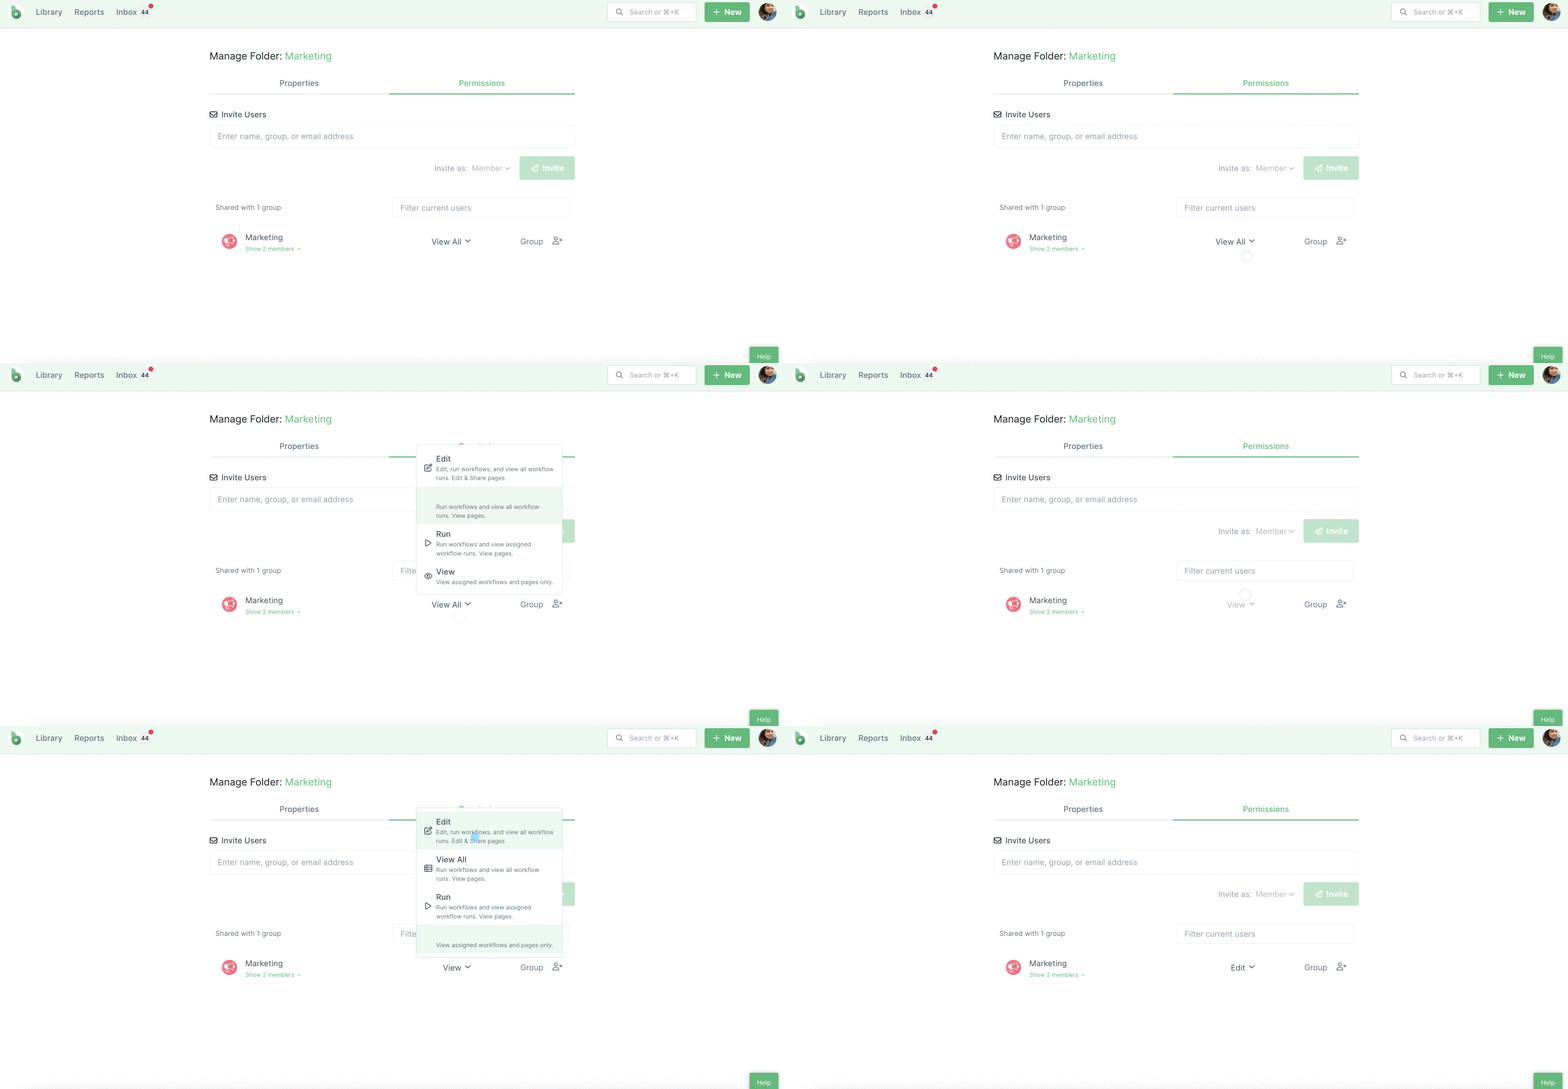
To change the permission level of the entire group on your folder, use the dropdown next to the group name to select either “Edit“, “View All“, “Run” or “View“.

To remove a group, click the remove user icon at the far right of their entry.
To add a group to a Workflow, click the three dots next to your Workflow’s name in your Library (or in one of your folders) and then click “Share” from the dropdown menu.
In the permissions tab, type the name of your group into the “Name or Email Address” field and click their group name when it appears.
To change the permission level of the entire group, use the dropdown next to their entry to select “Edit“, “View All“, “Run” or “View” as shown above.
To remove a group, click the “Remove user” icon at the far right of their entry.
Changing the user permission level (e.g. “Edit”) of a group will also change the permission of any user in that group in the same way.
For example, if a group is assigned to a Workflow or folder and that group’s permission is changed from “Edit” to “View”, everyone in the group will now have “View” permission in that Workflow or folder.
If you want users to have more control, you will need to change their permission to “Edit”.
Learn more about folders, Workflows, and user permissions.
Note that folder-level permissions may affect the permissions you already might have set on Workflows.