Groups in Process Street help you organize users based on teams, such as Sales, Marketing, or Human Resources, or by shared responsibilities across Workflows, Workflow runs, and Tasks.
Groups simplify permission management and streamline assigning tasks, folders, or Workflows to multiple users at once.
If a new colleague joins, assigning them to a group will automatically provide access to all folders, workflows, and workflow runs associated with that group.
Users: Only Admins can create and manage groups.
You can create new groups from your organization’s management area. Click your profile picture in the upper right corner of your screen, then click “Settings“.
Click on the Groups tab and then click the “+ New Group” button, to create your new group.
Give your group a name and click “Create” to save it, as shown above.
If this is the first time you’ve accessed the Groups tab, you’ll see there are four default groups already in your account.
You can choose to keep these and add users to them, edit them or delete them, it’s up to you!

When editing a group, you can invite or remove users, add or change your group icon (or image), change your group’s name, or delete your group.
Click the pencil icon to edit your group to start adding users to it.
Type an email address or search users by name. Click on the user you want to add to the group.
If someone is not already a part of your organization, you can invite them as an Admin or Builder by typing their email address into the field provided and clicking “Invite“.
Note: Depending on your plan, the User role may also be available when inviting new members to a group.
Note: You cannot invite Guests. Learn more about the difference between builders and guests.
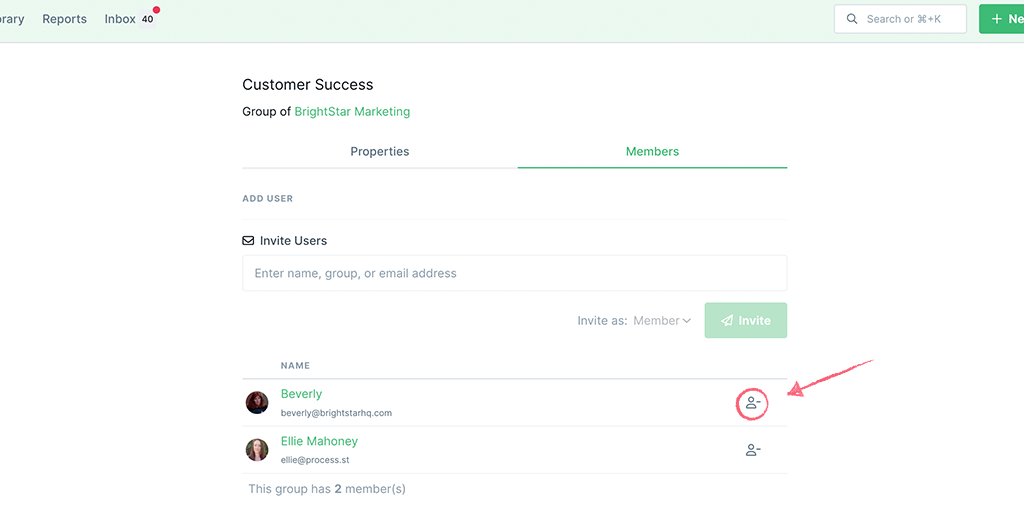
Click the pencil icon to edit or update any of your groups. Next, click the “Remove user” icon shown below to remove a user from your group.
To change the icon or avatar photo on a group, edit the group by clicking the pencil icon.
Next, click on the “Properties” tab, click “Change photo” and upload (or drag and drop) your file. Your image or icon will now appear on your groups page, as shown below.
Your icon or avatar will need to be a minimum of 64 pixels square in size.
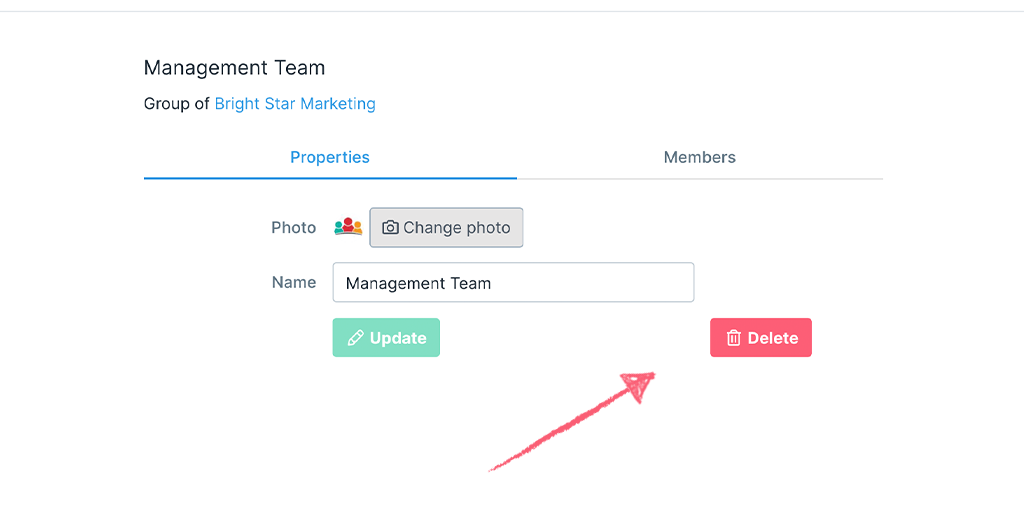
To change the name of a group, click on the pencil icon to edit the group. Next click on the “Properties” tab, change the name of the group and then click “Update” to save your changes.
To delete a group, click the pencil icon, then click on the “Properties” tab.
Click the “Delete” button and then confirm your decision to delete this group from your organization.
Note that when you delete a group, you will also remove any assignments for that group, from folders, Workflows, Workflow runs or tasks. The group will be automatically unassigned anywhere you had used it.
This group doesn’t appear on your group page, however it’s important to know it exists.
Each folder you create or each Workflow, by default, has all your current admins, builders and users assigned to it via the “All Organization” group.

The default permission for groups is “view all”.
You can remove this group from Workflows or folders where it appears, or add it as needed.
Learn more about managing group permissions and assigning groups to tasks
Help us improve this help center.


