Mailchimp is a popular email marketing software that enables businesses to design, automate, and send email campaigns to their subscribers. You can integrate Mailchimp with Process Street to make your workflows super powerful and automate your work via Webhooks or Zapier.
A Webhook integration can bring information from Mailchimp that would trigger a new workflow run in your Process Street account. Webhooks are automated messages or payloads sent from apps as a trigger to cause an action in a receiving app.
In this example, we will create a Webhook that runs the Customer Onboarding workflow when a new customer signs up in Mailchimp.
Now, let’s jump into the integration.
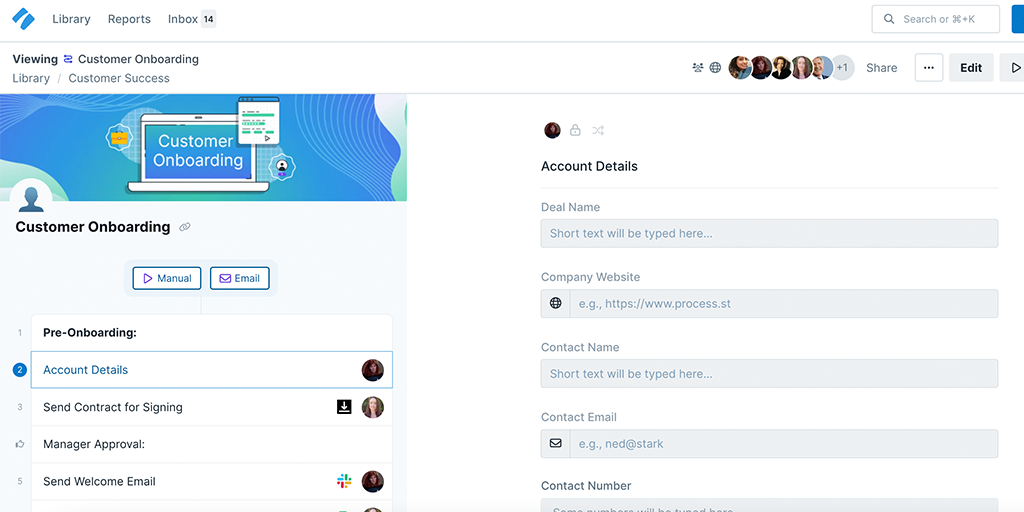
First, create a Workflow in Process Street and ensure to add form fields that are the same as the data fields in Mailchimp. This will help you to map the information from Mailchimp to Process Street.
Their information is stored in Mailchimp when they signup using Mailchimp’s signup form. So, we need to create form fields in our workflow to push that information through to Process Street. These form fields should include the customer’s name (short text field), email address (email field), phone number (number field), and so on.
This will mean that whoever is onboarding the customer won’t have to look up their information in Mailchimp, but can instead see everything in Process Street.
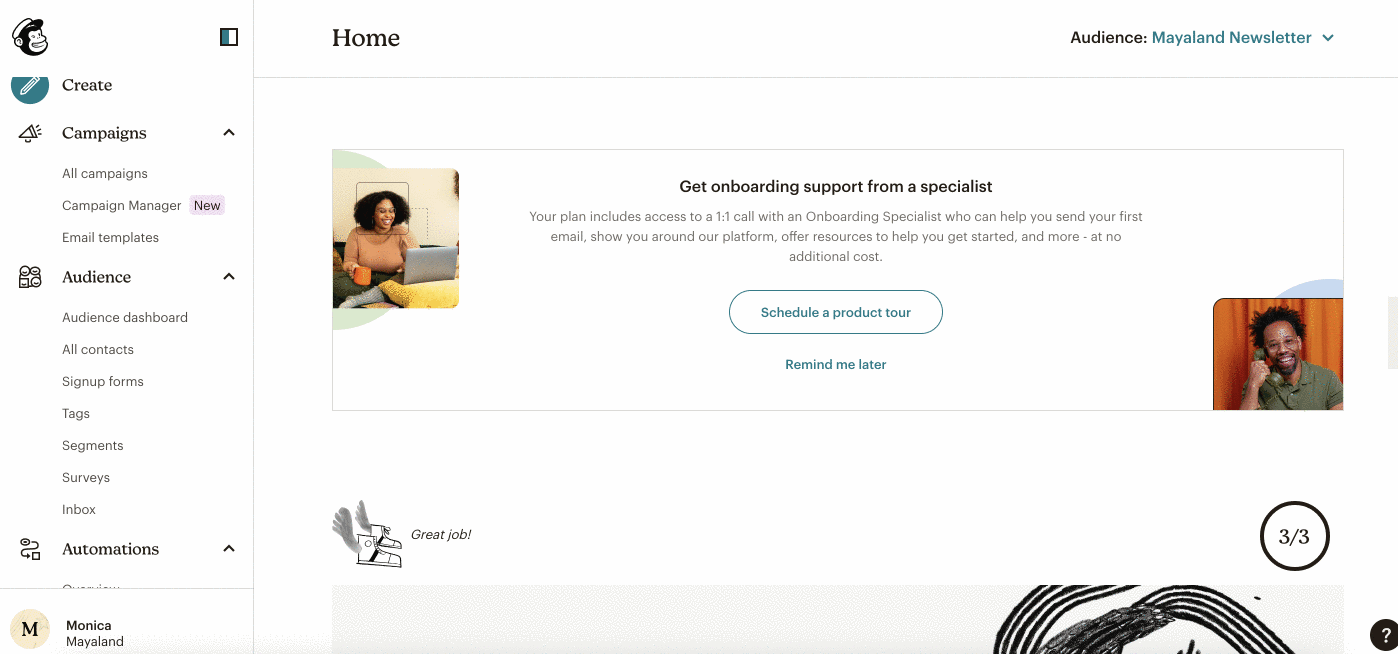
Log into your Mailchimp account or create a new account. For our example, we will first create a signup form. Navigate to Audience in the left panel and select Signup forms, then click Form builder in the center screen.
Build your form using the field options on the right.
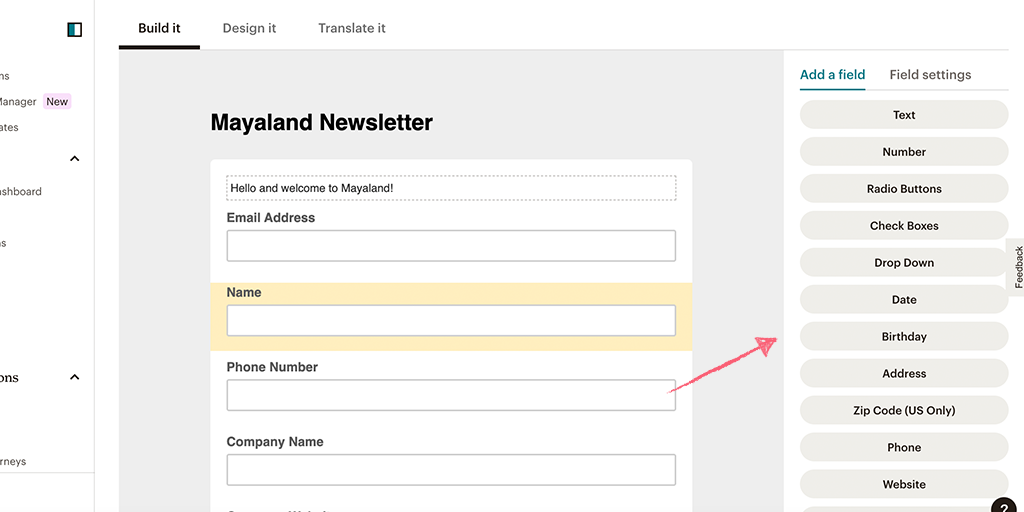
Once you’re done, you can copy the form URL and save it for later.

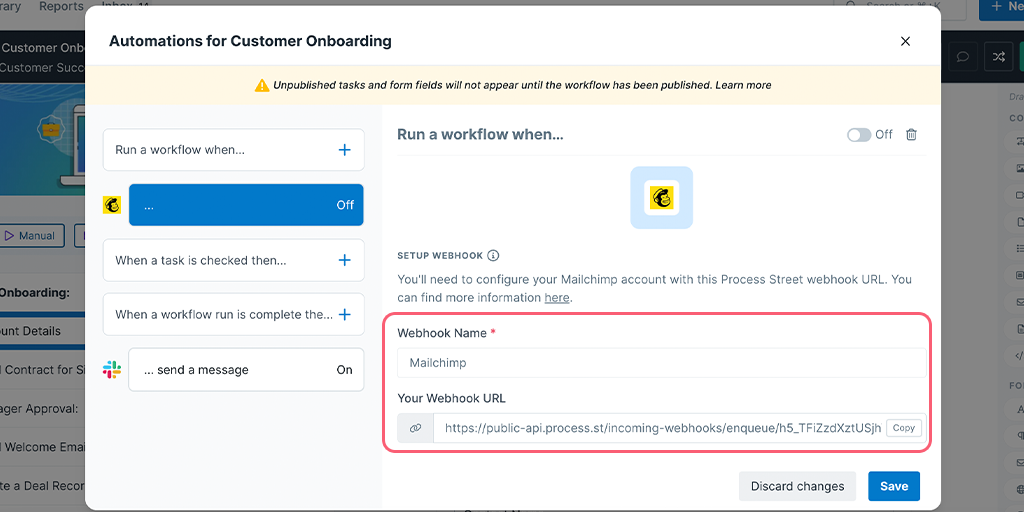
To get the webhook URL from Process Street, when you’re editing your workflow, click “Triggers” above your task list on the left or click the + icon next to your existing triggers as shown below.
Here, you can look for Mailchimp as a Trigger to Run this workflow.
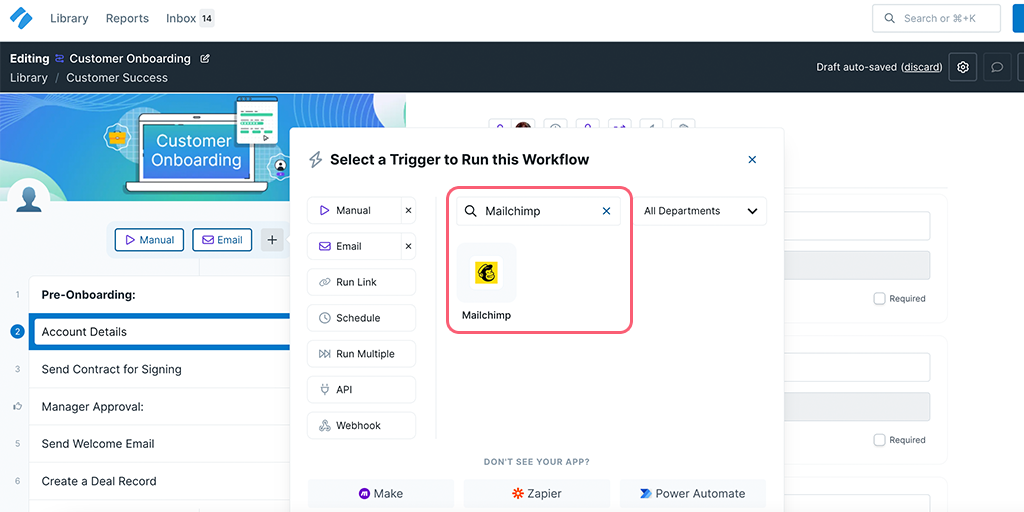
You can name your webhook as the app name or any phrase that helps you identify the Trigger. Then copy the webhook URL as you will need it later.
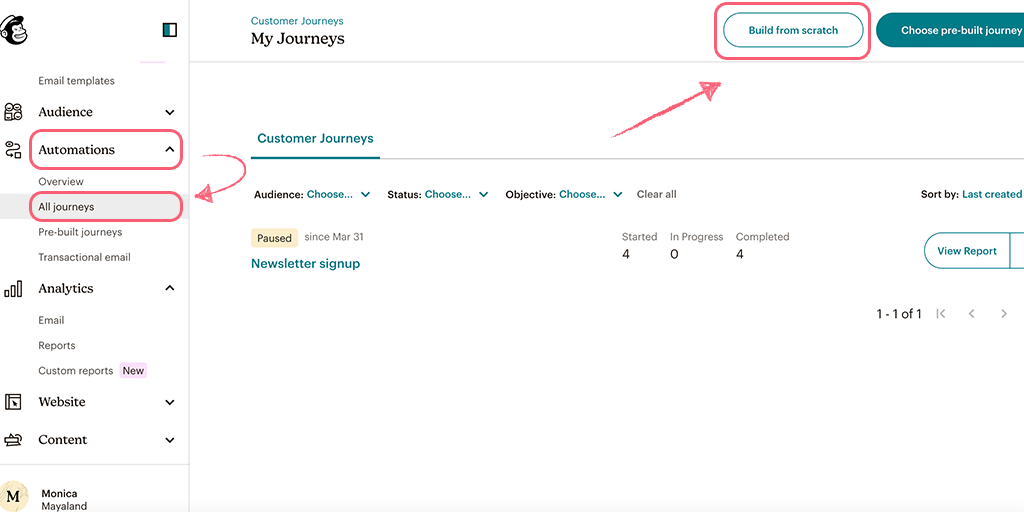
To create this webhook in Mailchimp, we’re going to create a customer journey. To do this, click on Automations in the left panel then click All journeys. Here, you can either choose a pre-built journey or build one from scratch.
If you have any existing journeys that you would like to add a webhook to, you can select that as well.
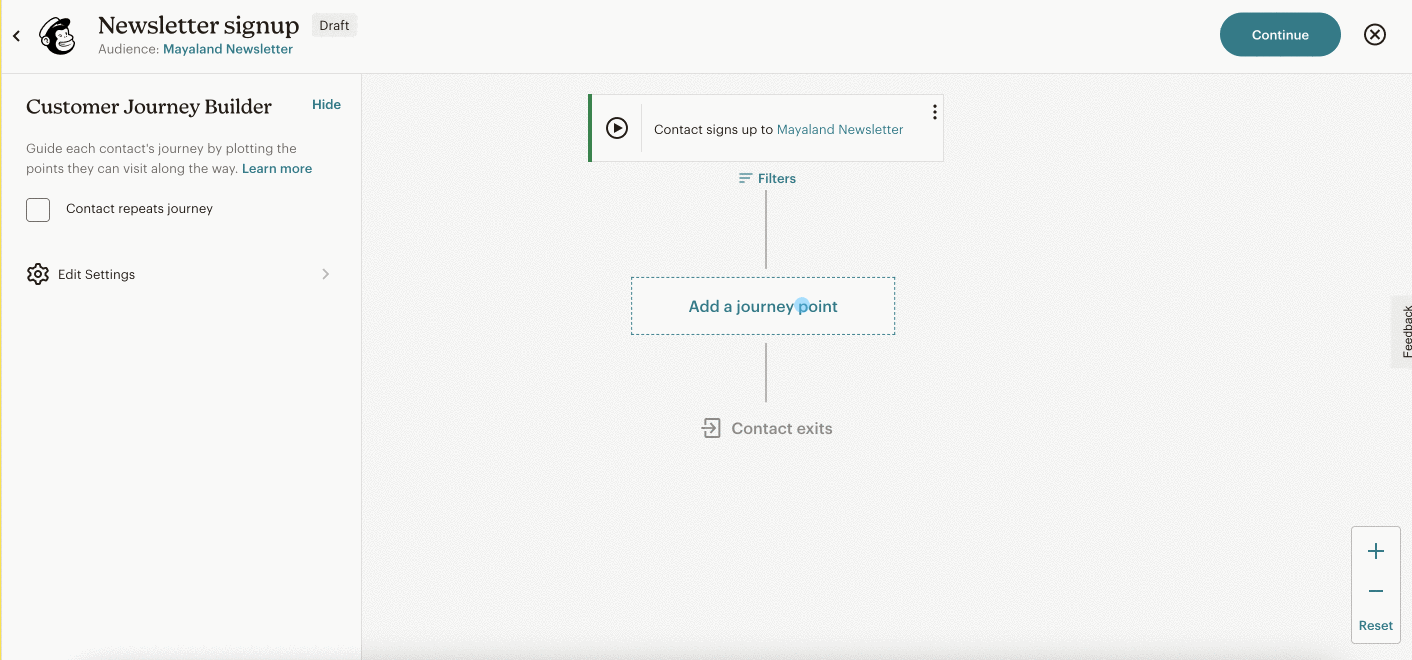
If you’re building a journey from scratch, first name your journey and select your audience. Then select a starting point for your customer. For our example, we have selected the starting point as a new Sign up.

Next, click Add a journey point and select Webhook. Name your webhook and enter the URL destination as the URL you had previously copied in Process Street.
Lastly, enter a payload in JSON and Save your webhook.
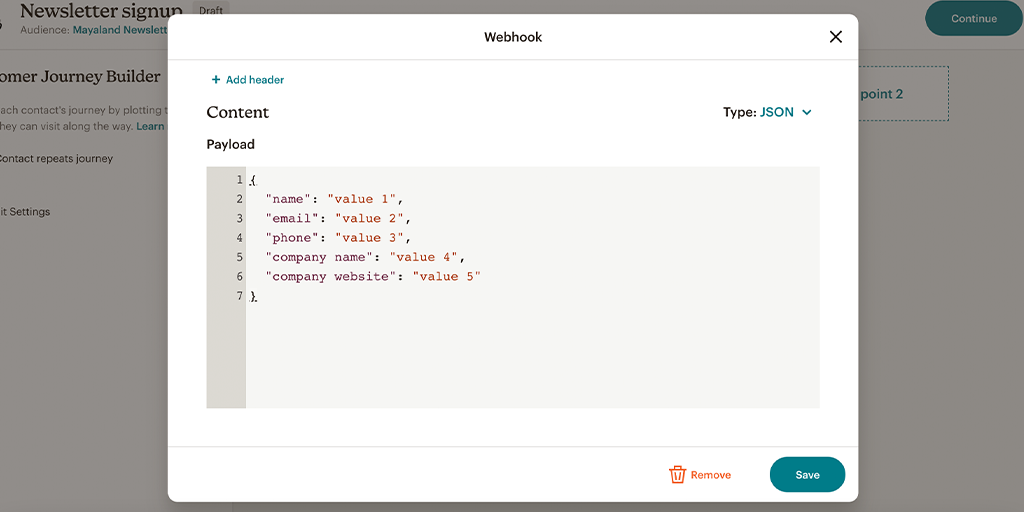
We have entered the following code as an example.
{
  "name": "value 1",
  "email": "value 2",
  "phone": "value 3",
  "company name": "value 4",
  "company website": "value 5",
}
Note: The payload you enter in your webhook is what you will receive in process Street. If you need help with your JSON code, you can reach out to Mailchimp’s Export Support.
Before you come back to Process Street and test your trigger, fill in the signup form. This will ensure you find results in your test.
Once your trigger test returns successful, map your fields from Mailchimp to your workflow form fields.
Lastly, turn your webhook On and Save it. Then Publish your workflow and you’re all set!
Zapier is an integration platform that connects over 2000 different apps. An action in any of the supported apps (like forwarding an email or adding an attachment to a task) can trigger another app’s features automatically. Zapier integrates with both Mailchimp and Process Street. The whole “recipe” sequence (“if X happens, do Y”) is known as a Zap.
For this example, we’re going to set up a trigger for each time a new task is checked in a Process Street workflow run, and an action to update a subscriber in Mailchimp.
Let’s get this set up!
You can either create a new checklist, or use an existing one, like this closing the sale checklist.
The important thing for this integration is that there is an email form field for Mailchimp to parse.
We’ll need that form fields so that Zapier will have a reference to identify the customer when the integration is triggered.
You can quickly add form fields by dragging them from the form field sidebar on the right during a template editing session.
Once that’s done, you’re ready to connect the template to Zapier and start automating.
Zapier is a tool that connects over 1,000 different apps. Any action in any of the supported apps (like forwarding an email or adding an attachment to a task) can be set up to trigger another app’s features automatically. Zapier integrates with both Mailchimp and Process Street. The whole recipe (trigger + action) is called a Zap.
Log into Zapier or create an account, then click ‘Make a zap!’
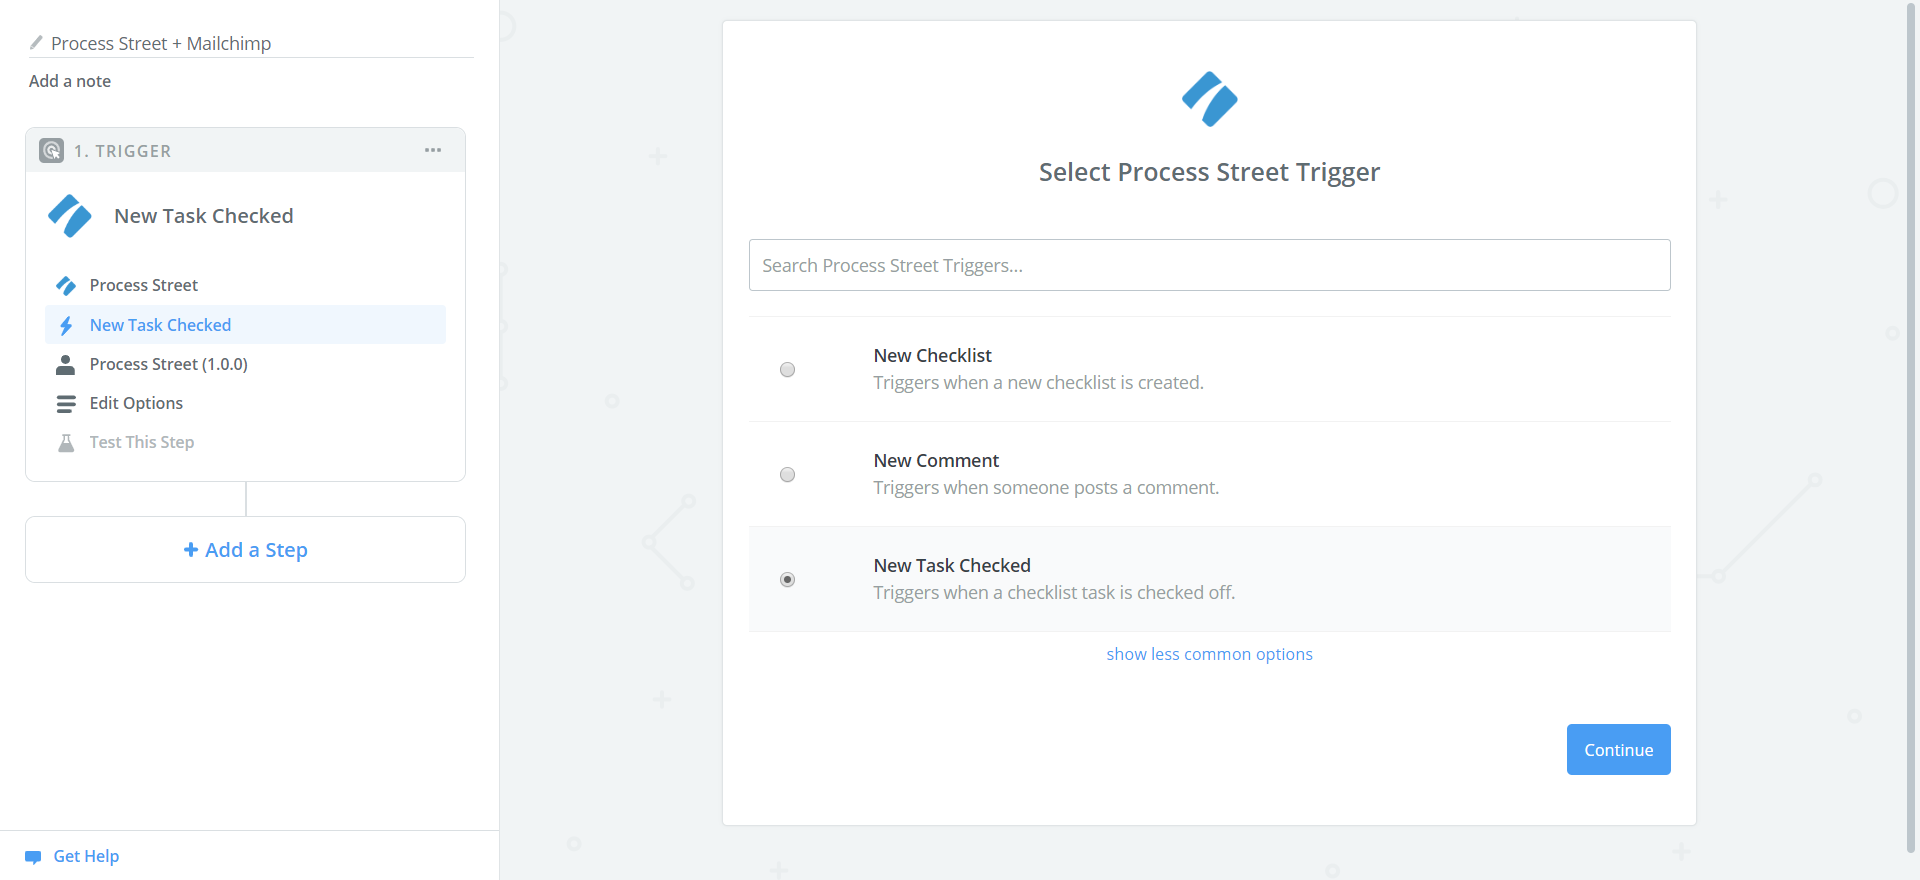
In your new zap, select Process Street as the trigger and select New Task Checked:
Then hit the blue “Save + Continue” button.
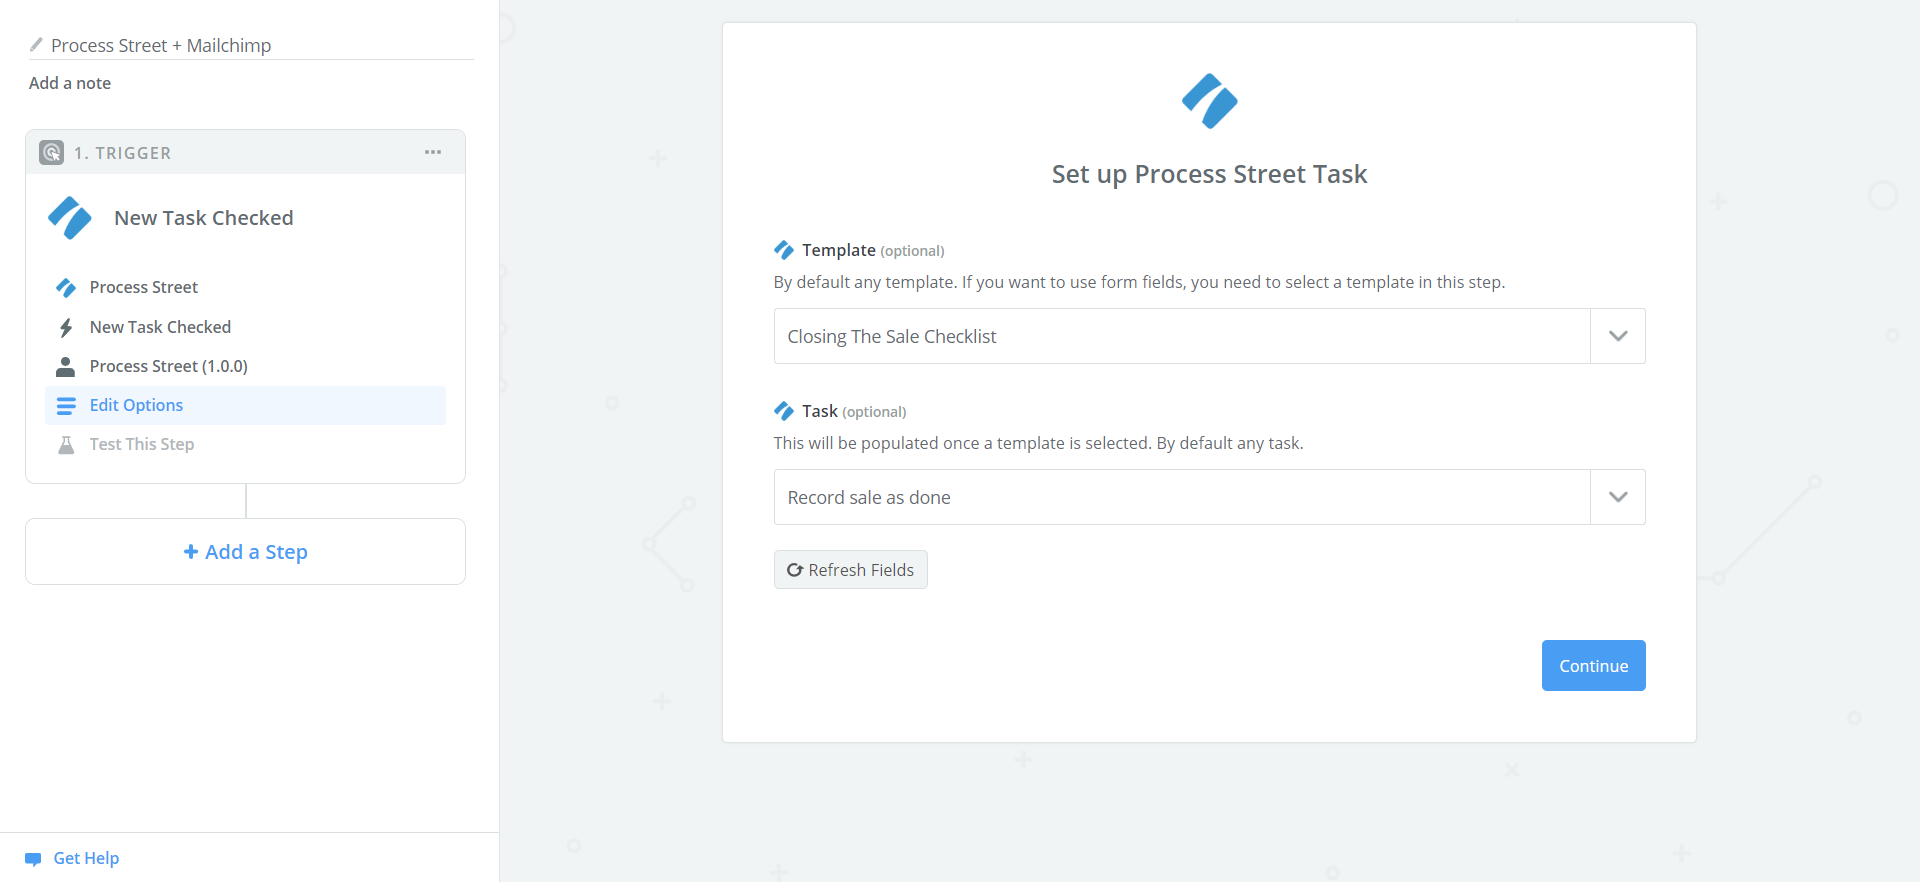
Connect your Process Street account, and proceed to Set Up Options. From the dropdown menus, choose the Process Street checklist you wish to use, and select a task in the checklist which will act as the trigger.
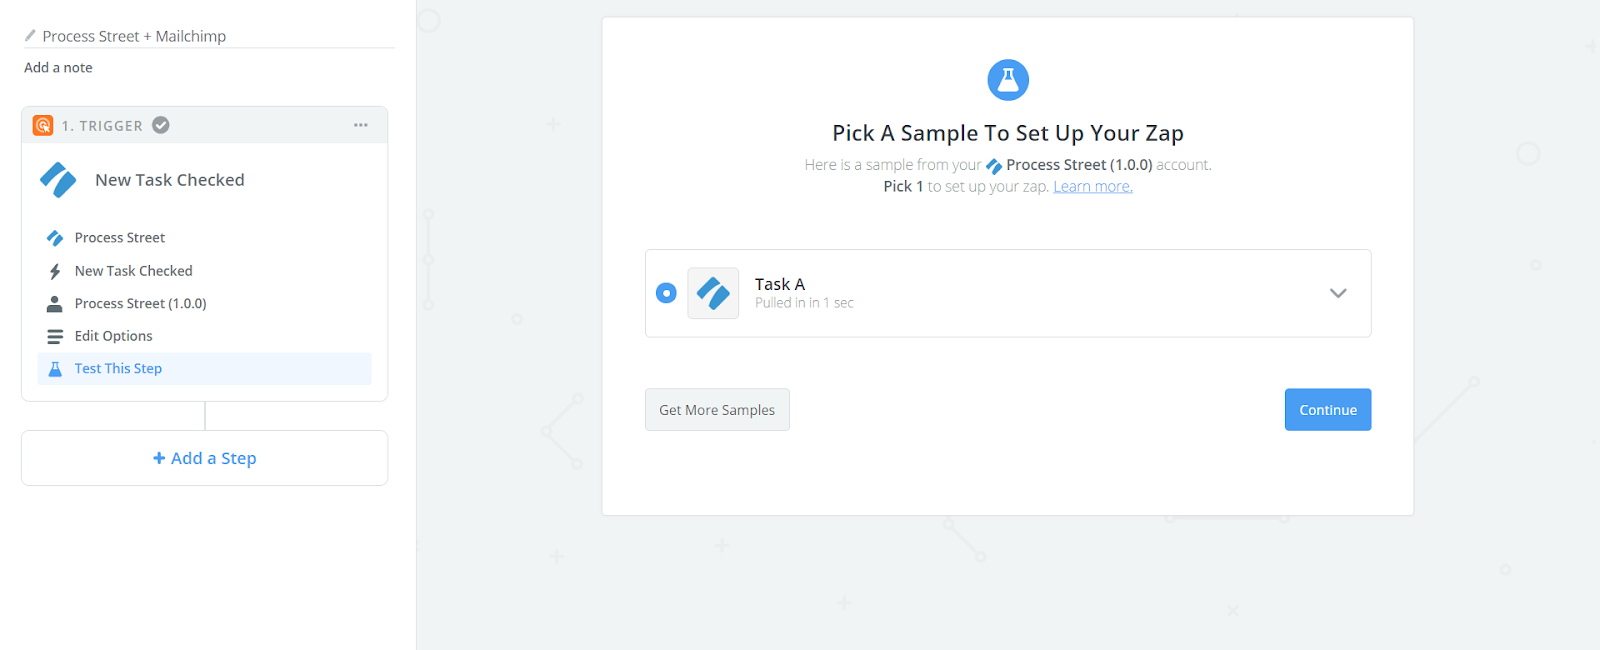
The next step requires that Zapier pulls some information from the template you specified, so you’ll have to actually run your checklist and complete it as far as the trigger task.
When you do, you’ll see something like this:
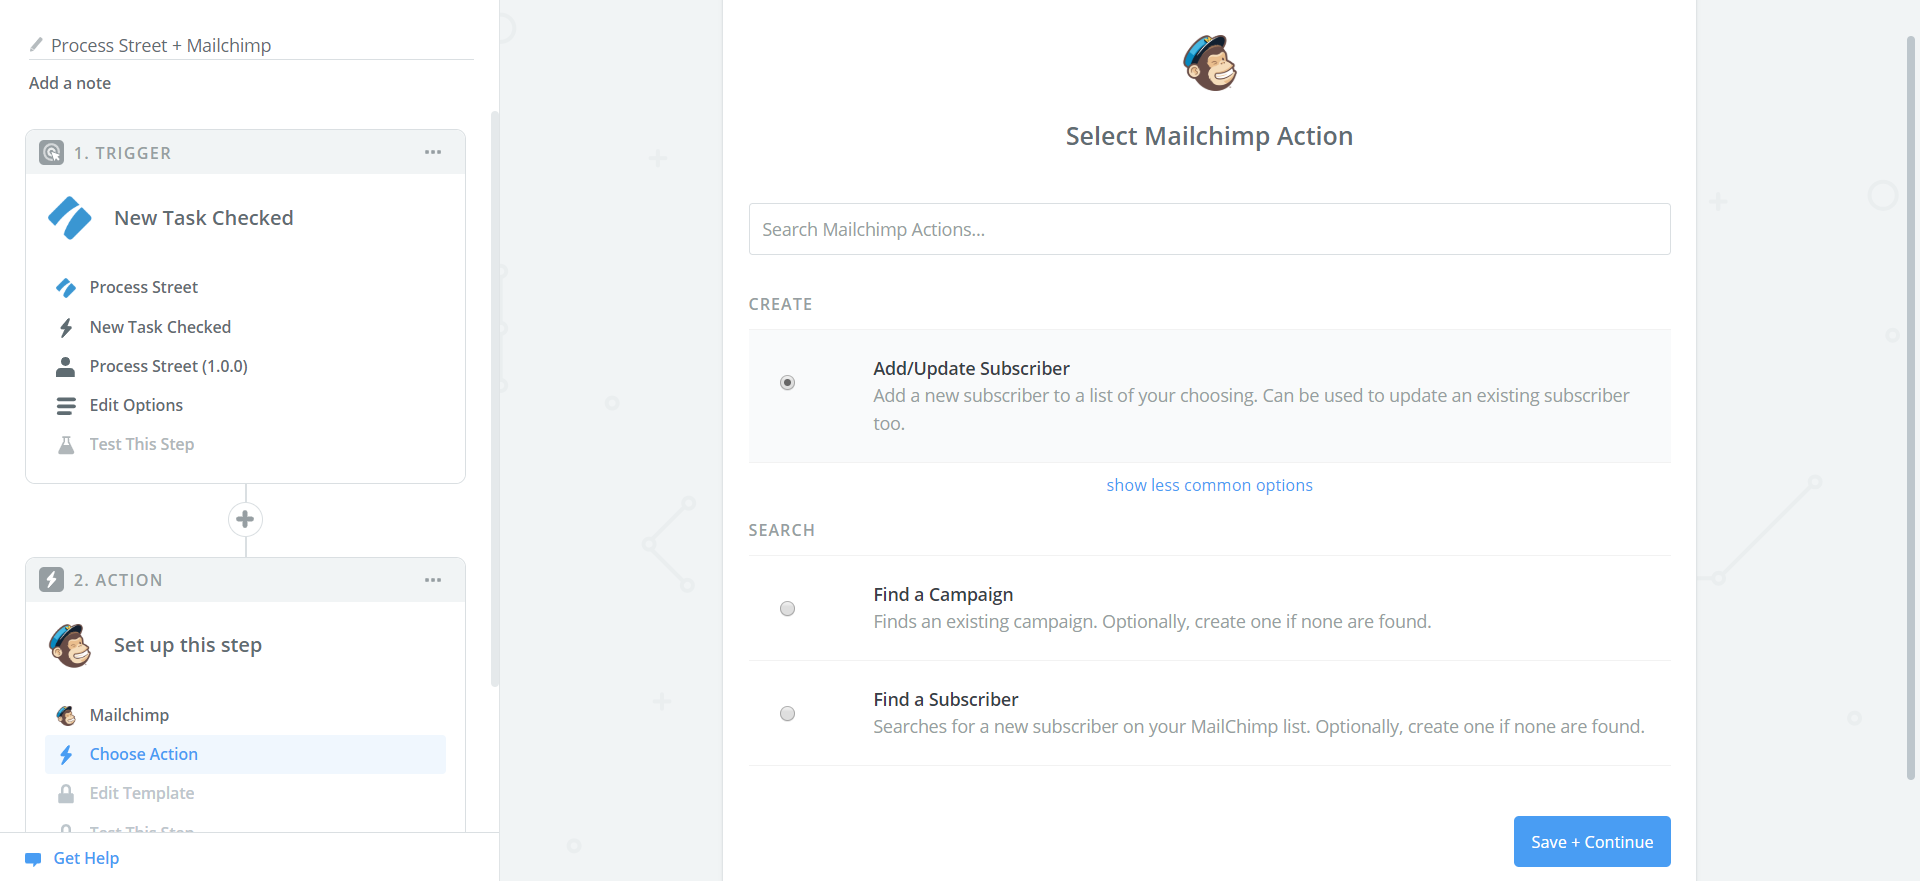
Now it’s time to add an action step.
So first let’s add an action to the Zap, and select Mailchimp. Then, select “Add/Update Subscriber” as the action:
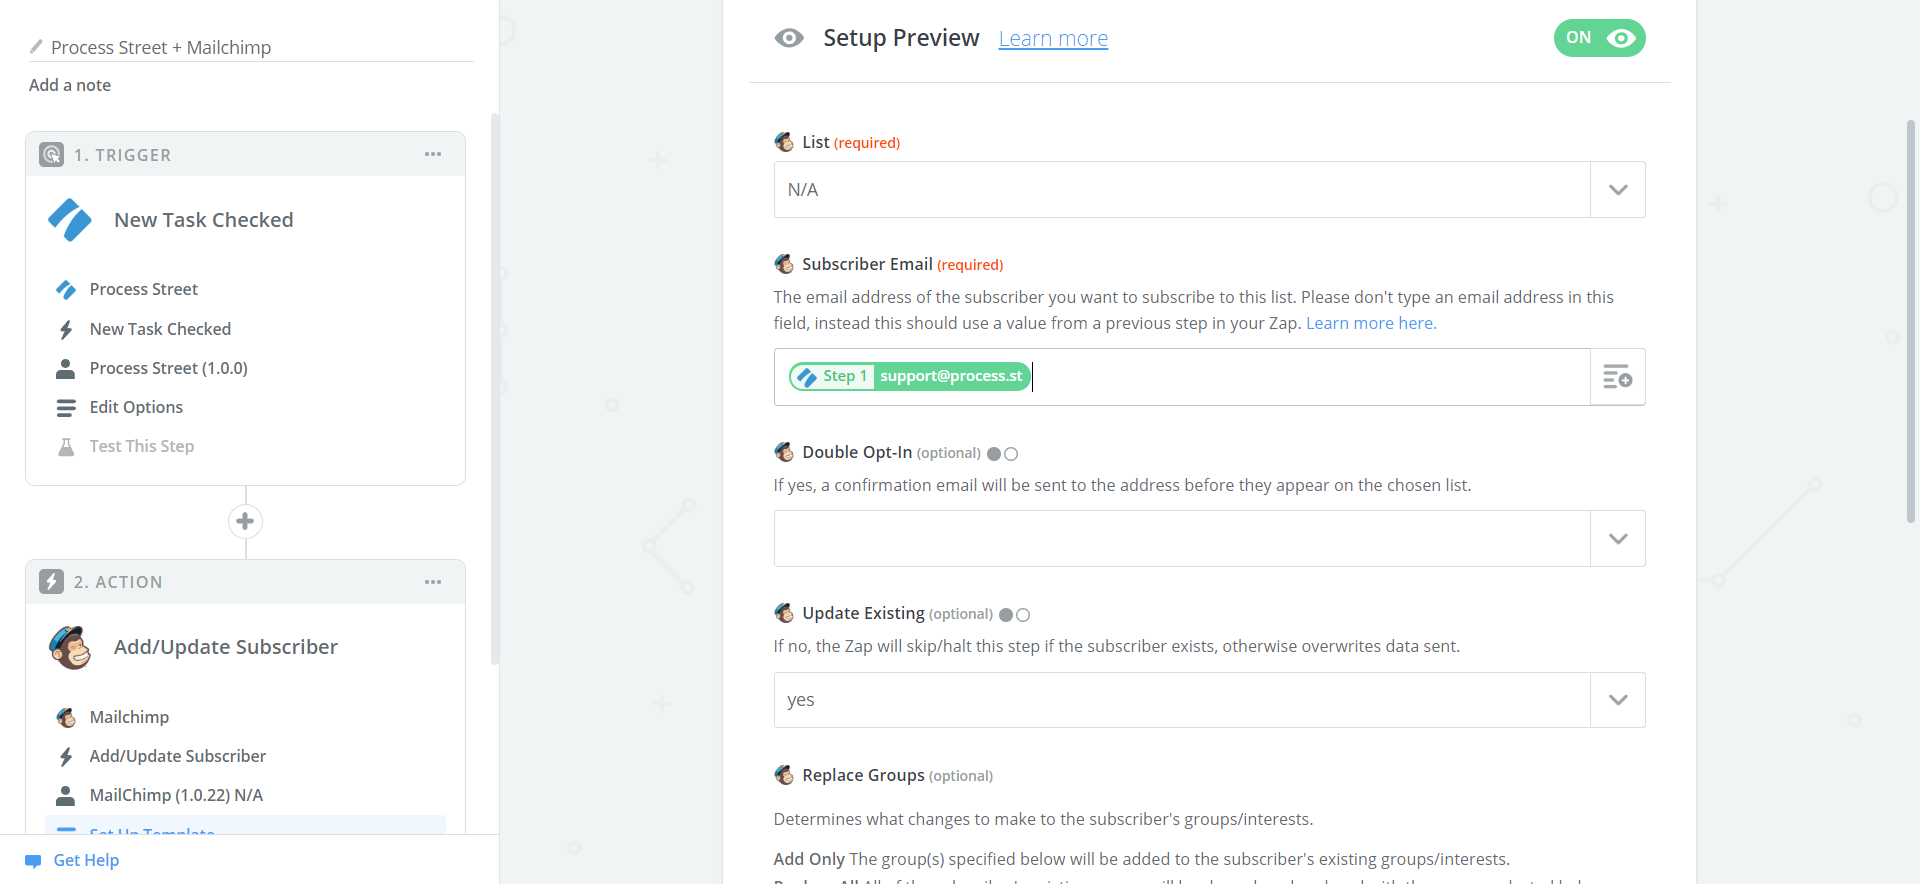
Next you need to grab some tag data from Mailchimp. Make sure you have data your Mailchimp account can use. If you’re just setting up your account for the first time, you’ll have to create some dummy data to test with.
The email address field can be used to identify the contact to add a tag to. Add the email data from the checklist into this field.
Once the data has been specified, it’ll look like this:
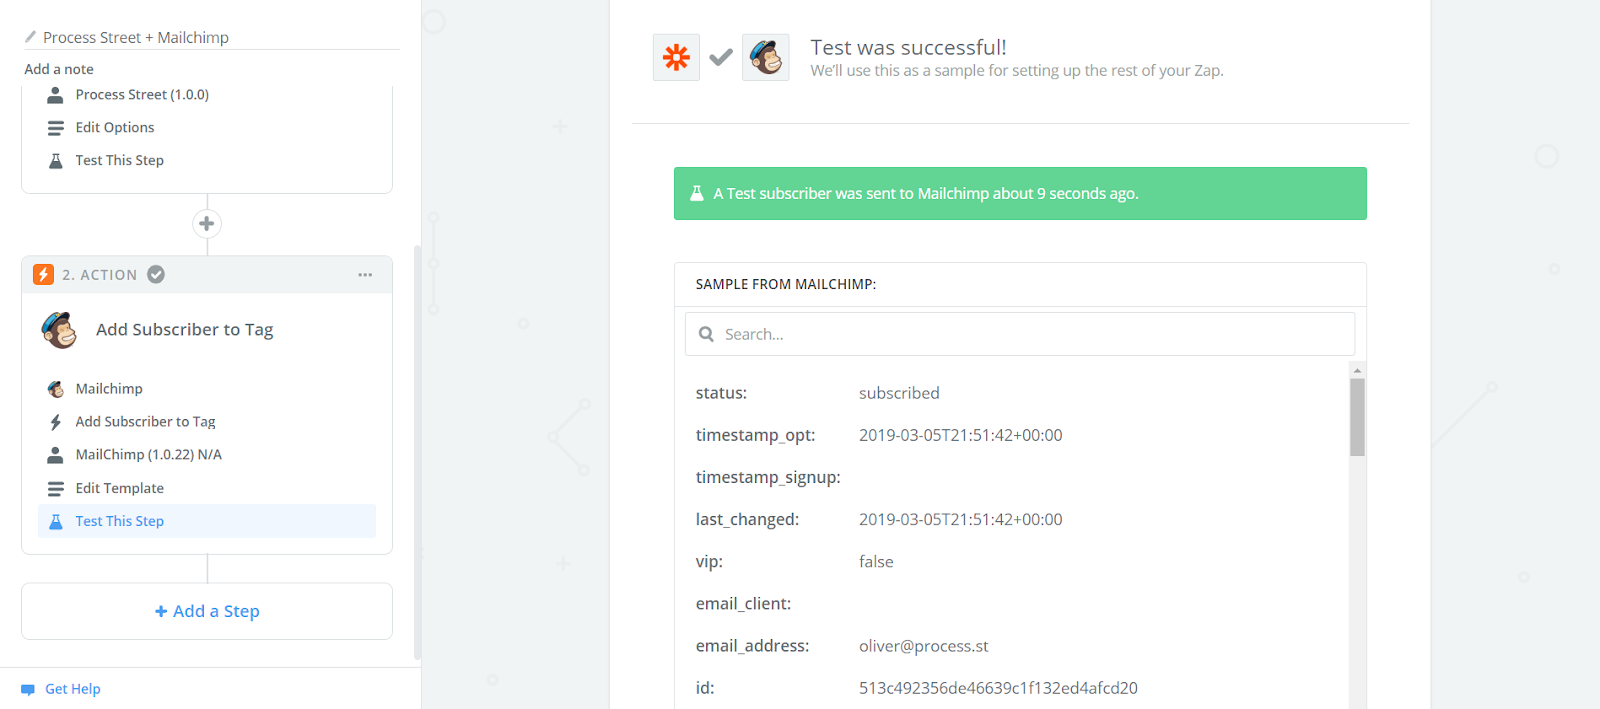
Now you just need to send a test to the email with the sample data pulled in from the checklist. If you’re successful, it’ll give you a message like this:
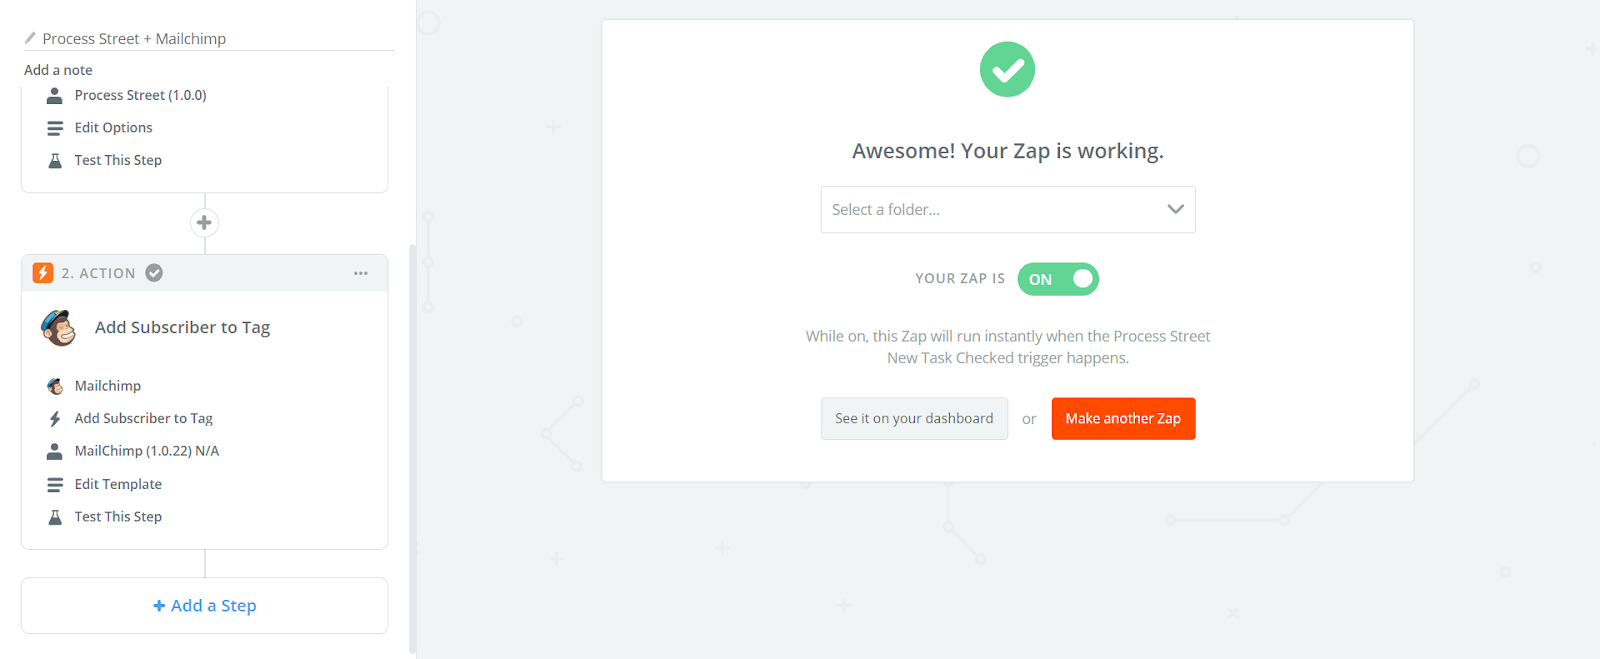
Hit “Finish” and be sure to name the Zap and turn it from “OFF” to “ON”. Don’t forget to give it a name.
Now, when you run a client onboarding checklist your welcome emails will automatically send, filled out with all of the information you need, and you won’t even need to leave Process Street.
Help us improve this help center.


