At Process Street we recognize the importance of being able to integrate our platform with other tools used within your company. Business process automation can save you a huge amount of time and effort by automating your regular tasks.
That’s why, in this article, we explain how you can integrate your Office 365 calendar with Process Street’s workflow runs using Zapier.
This will let you automatically create events in the Office 365 calendar based on what happens in your Process Street workflow runs.
Users: In order to create an API key for integrations, you must be an Administrator.
In this case, as you work through your tasks, setting a date for a particular event will create an event at the set time and date in your Office 365 calendar.
Scroll down if you would like to know more about how you can automate Office 365 calendar with Process Street.
Let’s jump in!
First, you’ll need to grab Process Street’s free public Daily Standup Meeting workflow. This is the process we’ll use to trigger the event to be created in Office 365, although any workflow run can be set up in a similar way to do the same.
Next, we add form fields to this workflow (if it doesn’t already have them) so that the required information is recorded, and thus can later be added to your calendar.
Go to your workflow in Process Street, open it, and select ‘Edit’.
In edit mode, you can add form fields to your workflow as required. In this instance, we have added fields to record the meeting end date, location, expected participants and details. This is the information we want to be added to the event in our calendar.

Once you have edited your workflow as you require, click “Save changes” button to apply them. It’s also a good idea to run your workflow and work through it to make sure it’s working as intended and to provide sample data that we can later use to test your automation.
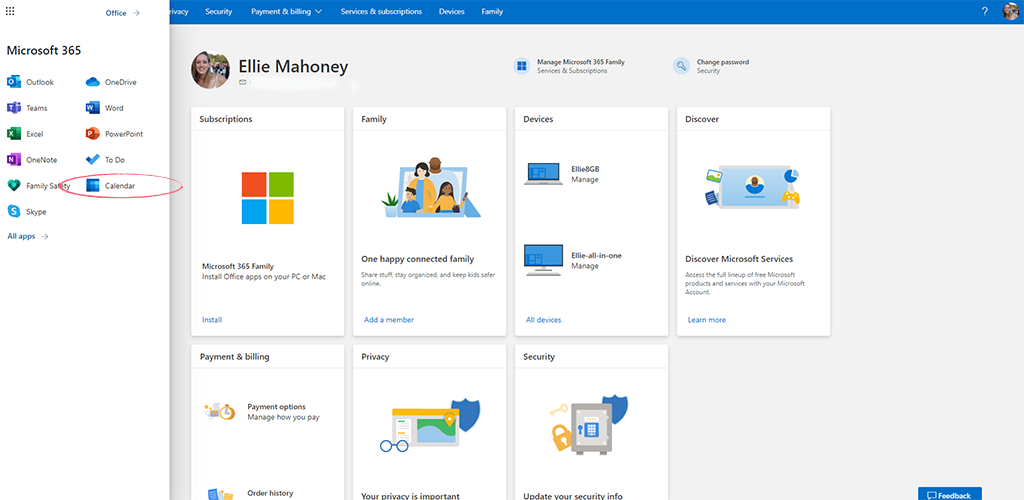
All this step requires is for you to set up an account in Office 365 and log into this account. From your Office 365 home screen, you should see the application “Calendar”. Click on this.
With over 2,000 different applications, there are plenty of supporting apps to choose from in Zapier. In other words, Process Street can be linked with over 2,000 other apps – one of those is Office 365.
A Zap is the ‘instruction’ for these integrations – it’s the logic that Zapier will follow to carry out what you want it to do.
A Zap is made up of a trigger and an action. If you think of a Zap as an “if this, then that” process, the trigger is the “if this” and the action is the “then that”. If the trigger is detected, the action will be performed.
Don’t worry, there is no technical coding involved. In fact, it is very easy to set up.
Firstly you need to log into Zapier or create an account, then click “Create Zap“.
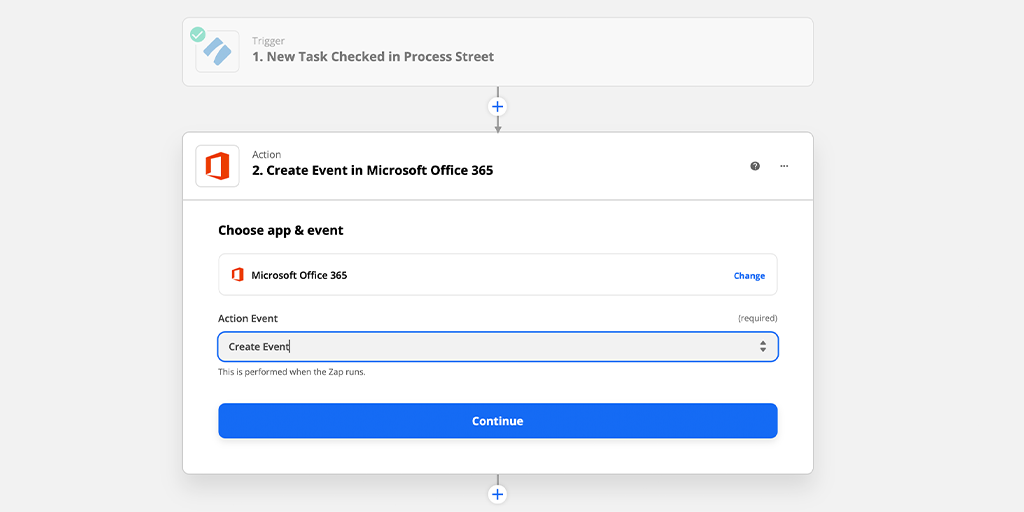
In your new Zap, choose Process Street as your trigger app and then select your trigger action. In this case, it will be a “New Task Checked“.
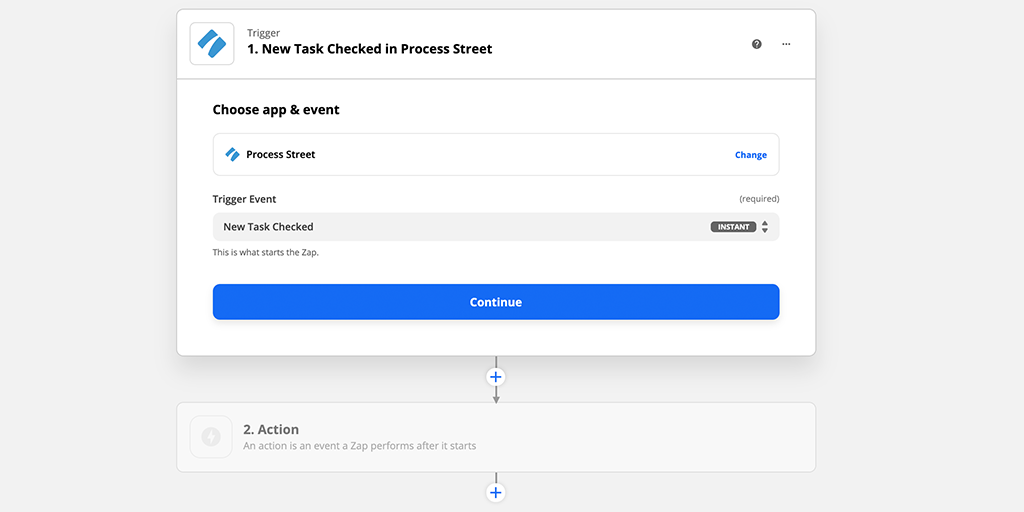
This means that when a particular task is checked off (completed) in a workflow run in Process Street, the automation will begin.
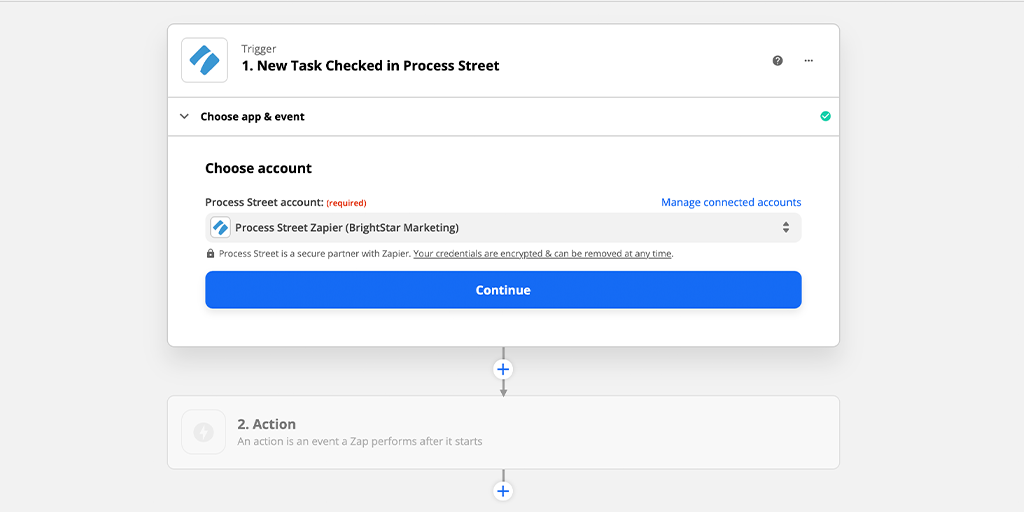
Next, you need to connect your Process Street account before moving onto the next stage. To do this, click on your organization’s name in the top right of your Process Street view to be taken to the organization manager.
Click on the “Settings & API” tab, then click on the “New API key” button and copy the key that’s generated. This is what you need to paste into Zapier when prompted to link your account.
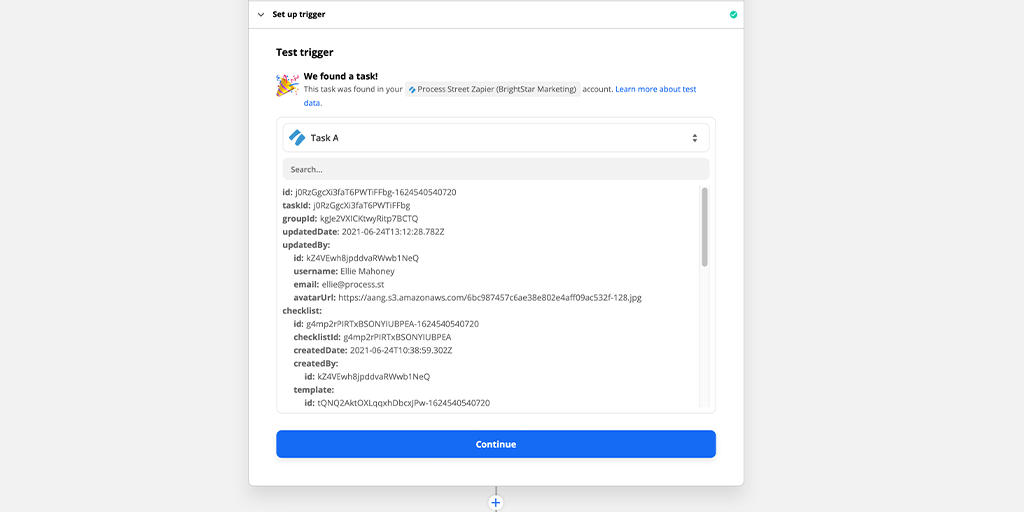
Now you need to select your workflow and the task that Zapier will use to trigger your automation. When this task is ticked off in a workflow run, the Zap will start.
In this instance, the workflow is “Standup Meeting”, and the task to be checked is “Record the meeting details”.

Before you do move onto the next stage, make sure that you have run your workflow, filled in the form fields, and checked off the task that you have set Zapier to detect. This creates sample data, which Zapier can then pull in to help you to create your Zap.
Once you’ve tested your trigger step and checked that the retrieved data is correct it’s time to move on to the second half of your automation; the action.
Much like with the trigger, you first need to choose Office 365 as your action application and “Create event” as your Action. This instructs your Zap to create an event in Office 365 once activated.
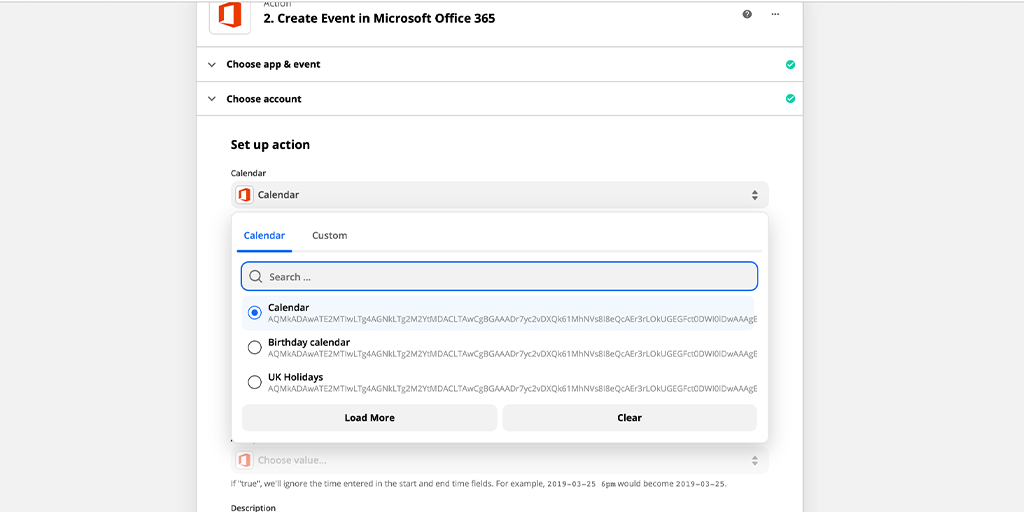
Connect your Office 365 account and click “Continue” to move on to setting up your action step and select the calendar you would like to use.
Here’s where things get really interesting.
You can now enter the details which you want to be automatically pushed through to your Office 365 event. Some, such as the meeting’s start and end date are required but you can push through extra details to fill the event with more information.
Start off by populating the “Required” information fields. Do this by clicking on the “Insert a field” button to the right of each entry and then searching for the corresponding data from your Process Street workflow run (from step 1 in your zap).
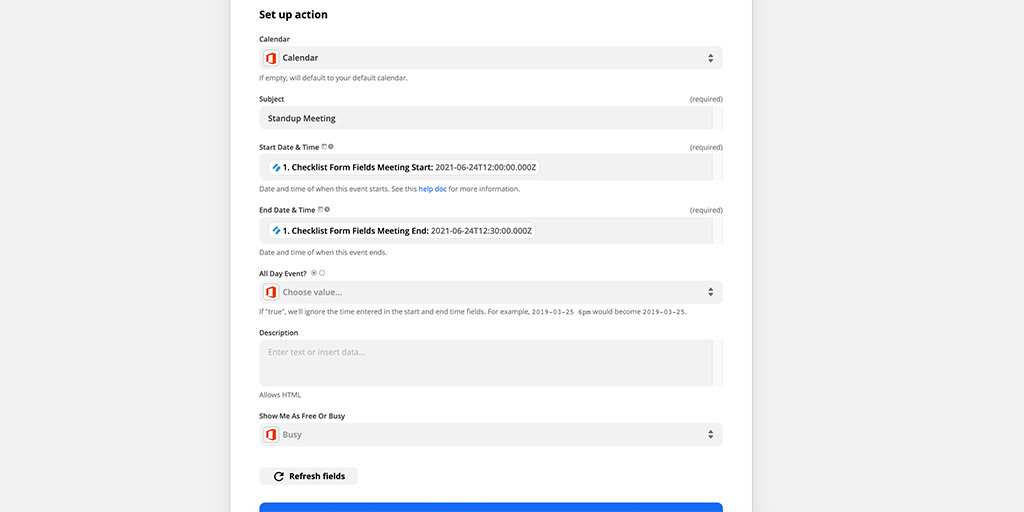
You’ll need to search for the name of the form field in Process Street used to record the information you want (eg, “Meeting Start Date”).
You can then work through the list of details, filling in any extra fields which you want to be added to the event in your calendar.
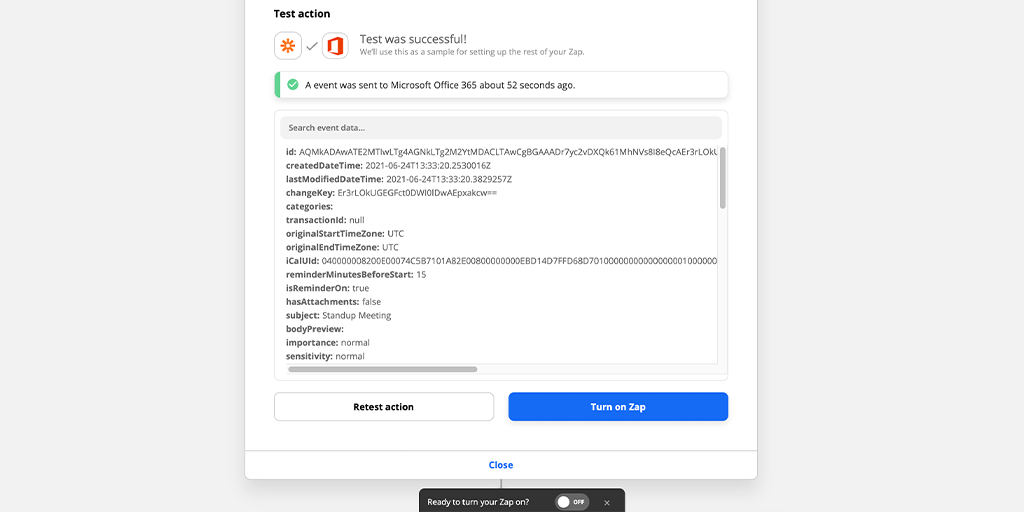
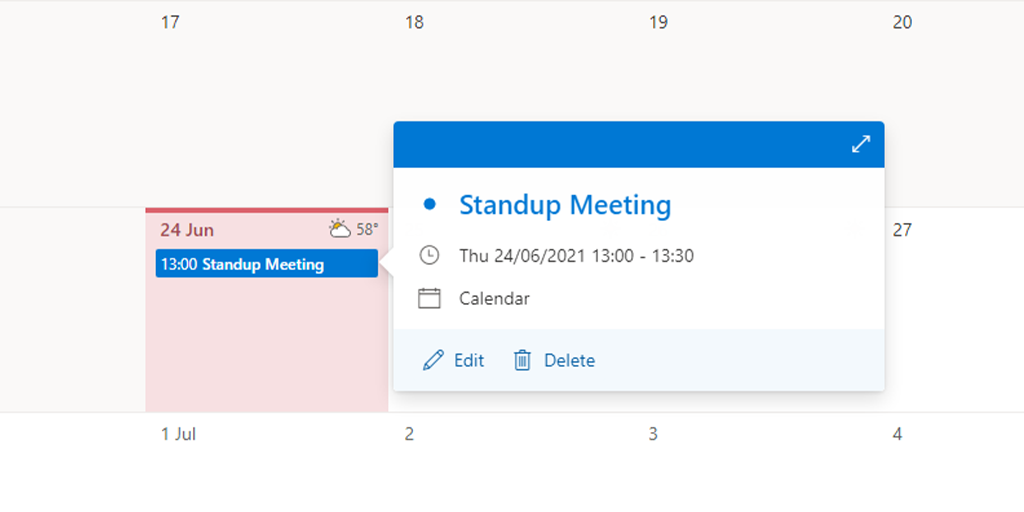
The final step is to test your Zap. Click “Test & Continue” and then jump into your calendar in Office 365 to make sure that the event has been created correctly, with all of your data lining up with expectations.
If your test step was successful, name and save your Zap and then make sure that it’s turned on.
You can retest your Zap by running your workflow, completing the required form fields, and checking off the trigger task. Wait around 15 minutes (if you’re using a free Zapier account) and then check your Office 365 calendar and your new event should be waiting for you.
Congratulations! You have successfully created a Zap integrating Process Street with Office 365.