Artificial intelligence (AI) is beginning to change how we work, whether we like it or not.
While some are afraid of the ways AI and automation are changing the fabric of work life, we at Process Street are excited by it. We see it as a way to improve our product and make our employees happier.
That’s why we’ve begun to use OpenAI within Zapier to create AI-generated automation to make workflows faster and easier than ever before.
In this post, I will walk you through how you can auto-generate your recruitment email process using Process Street and AI.
- What is intelligent automation?
- The value of intelligent automation
- Using AI to automatically generate recruitment emails
- How to set up the workflow
- Confused? No problem! We can do it for you
What is intelligent automation?
Intelligent automation (IA) is the process by which AI “streamlines and scales decision-making across organizations.” Basically, this means that it simplifies business processes in order to make operations more efficient and free up resources.
Intelligent automation is just one thing AI can do. All intelligent automation is AI, but not all AI is intelligent automation. IA also relies on business process management (BPM) and robotic process automation (RPA) – or bots – to power its abilities.
And getting an IA set up is not as daunting as it may seem. It’s no longer the crazy tech we only ever say in movies. It’s available to everyday people and businesses these days. Zapier now works with OpenAI to incorporate AI into automated workflows.
The value of intelligent automation
But why should you invest time and money in setting up intelligent automation? Well, there are a few reasons.
Saves time
Using AI to automate tasks and auto-generate emails saves your company tons of time – as much as 90%. This freed-up time may be scary for employees who fear losing their jobs to AI, but most companies choose to instead redirect their team’s time to tasks of higher value. That can include things like managing client relations and forming business strategies.
Saves money
Time is money, and the time AI saves your company also equates to increased monetary savings. Management consulting company Roland Berger found that businesses could reduce the time spent on BPM by 40-70%, and in turn, that could save organizations 40% every year.
Reduces errors
Automating recurring tasks with AI greatly reduces the risk of human error. And if your company deals with a lot of data reducing errors becomes even more important because even the smallest mistake can have a major impact. If you set up the AI correctly, you should be able to eliminate mistakes in recurring tasks.
Increases job satisfaction
Nobody likes to do tedious, repetitive tasks. Intelligent automation of business processes takes those tasks away from employees, freeing them up for tasks that bring them more fulfillment. This, in turn, leads to greater job satisfaction and less overall churn in companies. Your team should be excited about what AI can do for them, not afraid of it.
Using AI to automatically generate recruitment emails
Process Street integrates with Zapier, which means it also integrates with OpenAI.
Recently, one of our solutions consultants created a workflow for employee recruitment using this integration, and, to be frank, it’s really freaking awesome.
If you don’t want to read about it, you can watch the video she made here:
What the workflow does
In short, the workflow uses OpenAI vis Zapier to create recruitment emails and job offer letters. The whole process is automated and takes a ton of work out of the hiring process, which means you can hire someone faster.
Let’s break it down
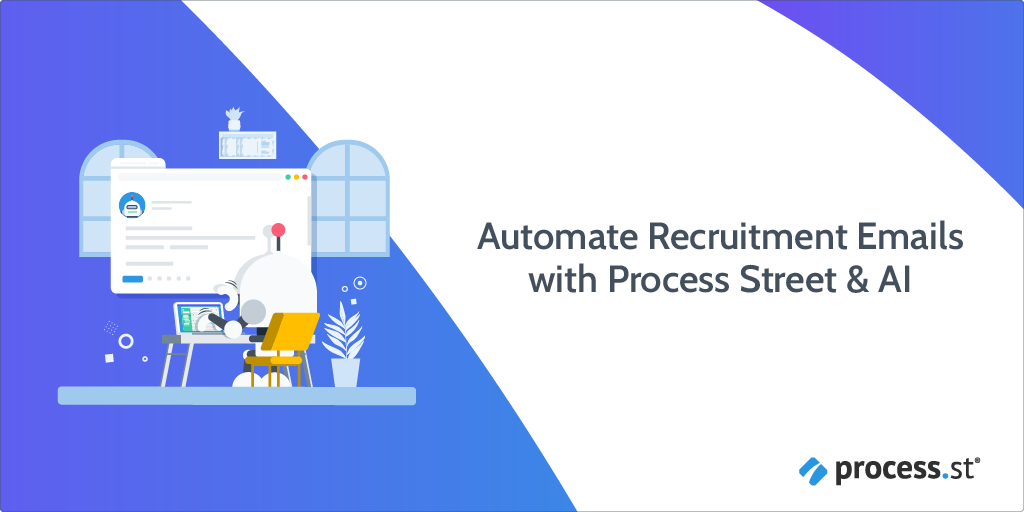
In the first task, the form fields can be automatically filled in by integrating with a hiring website like Indeed. If your company doesn’t use hiring websites, the data can be entered manually in no time at all.
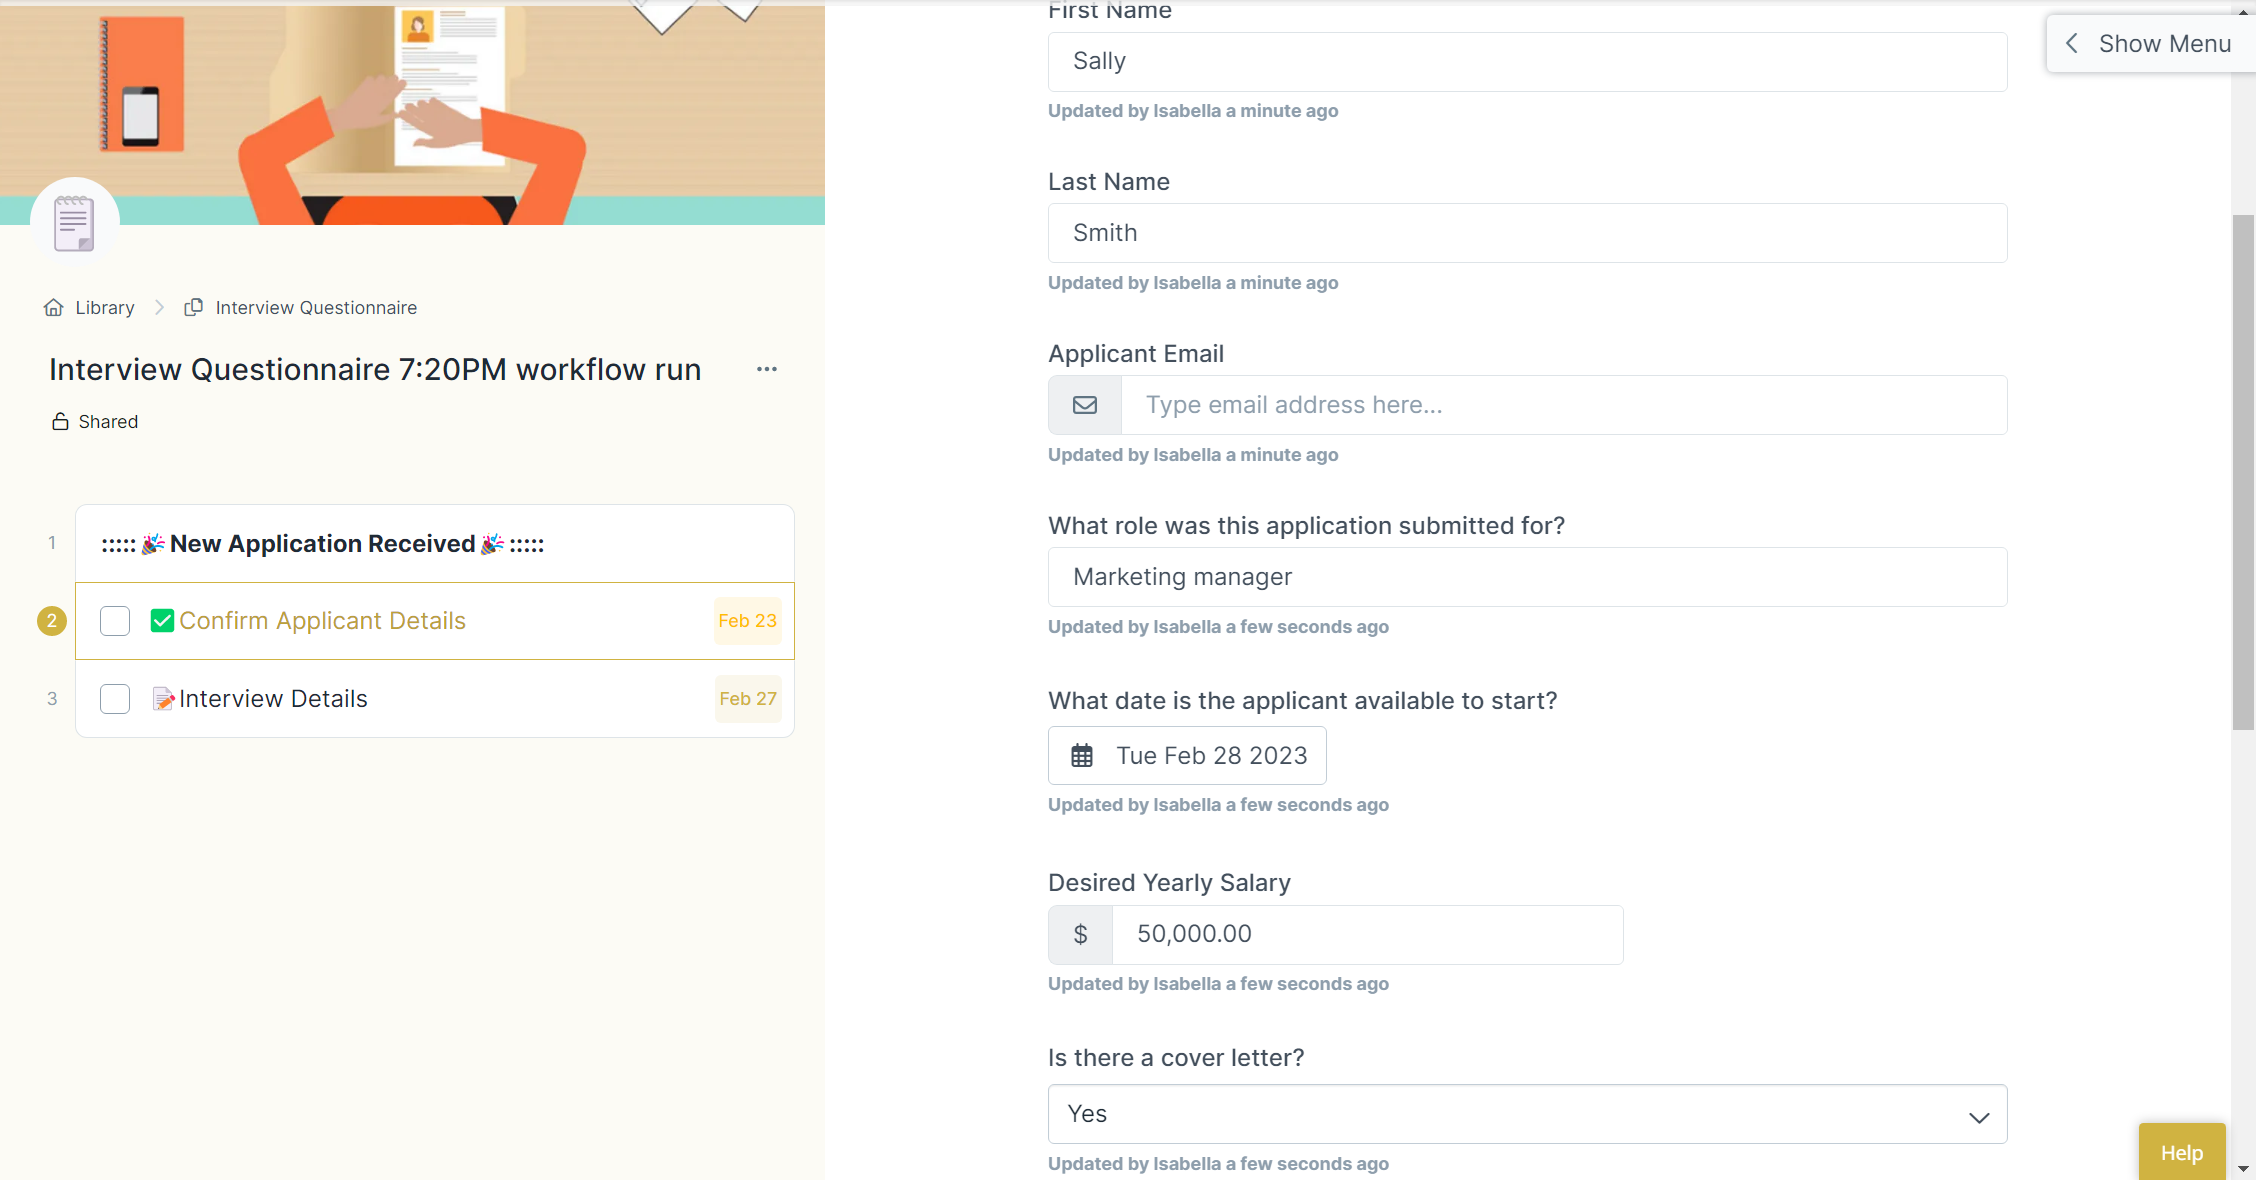
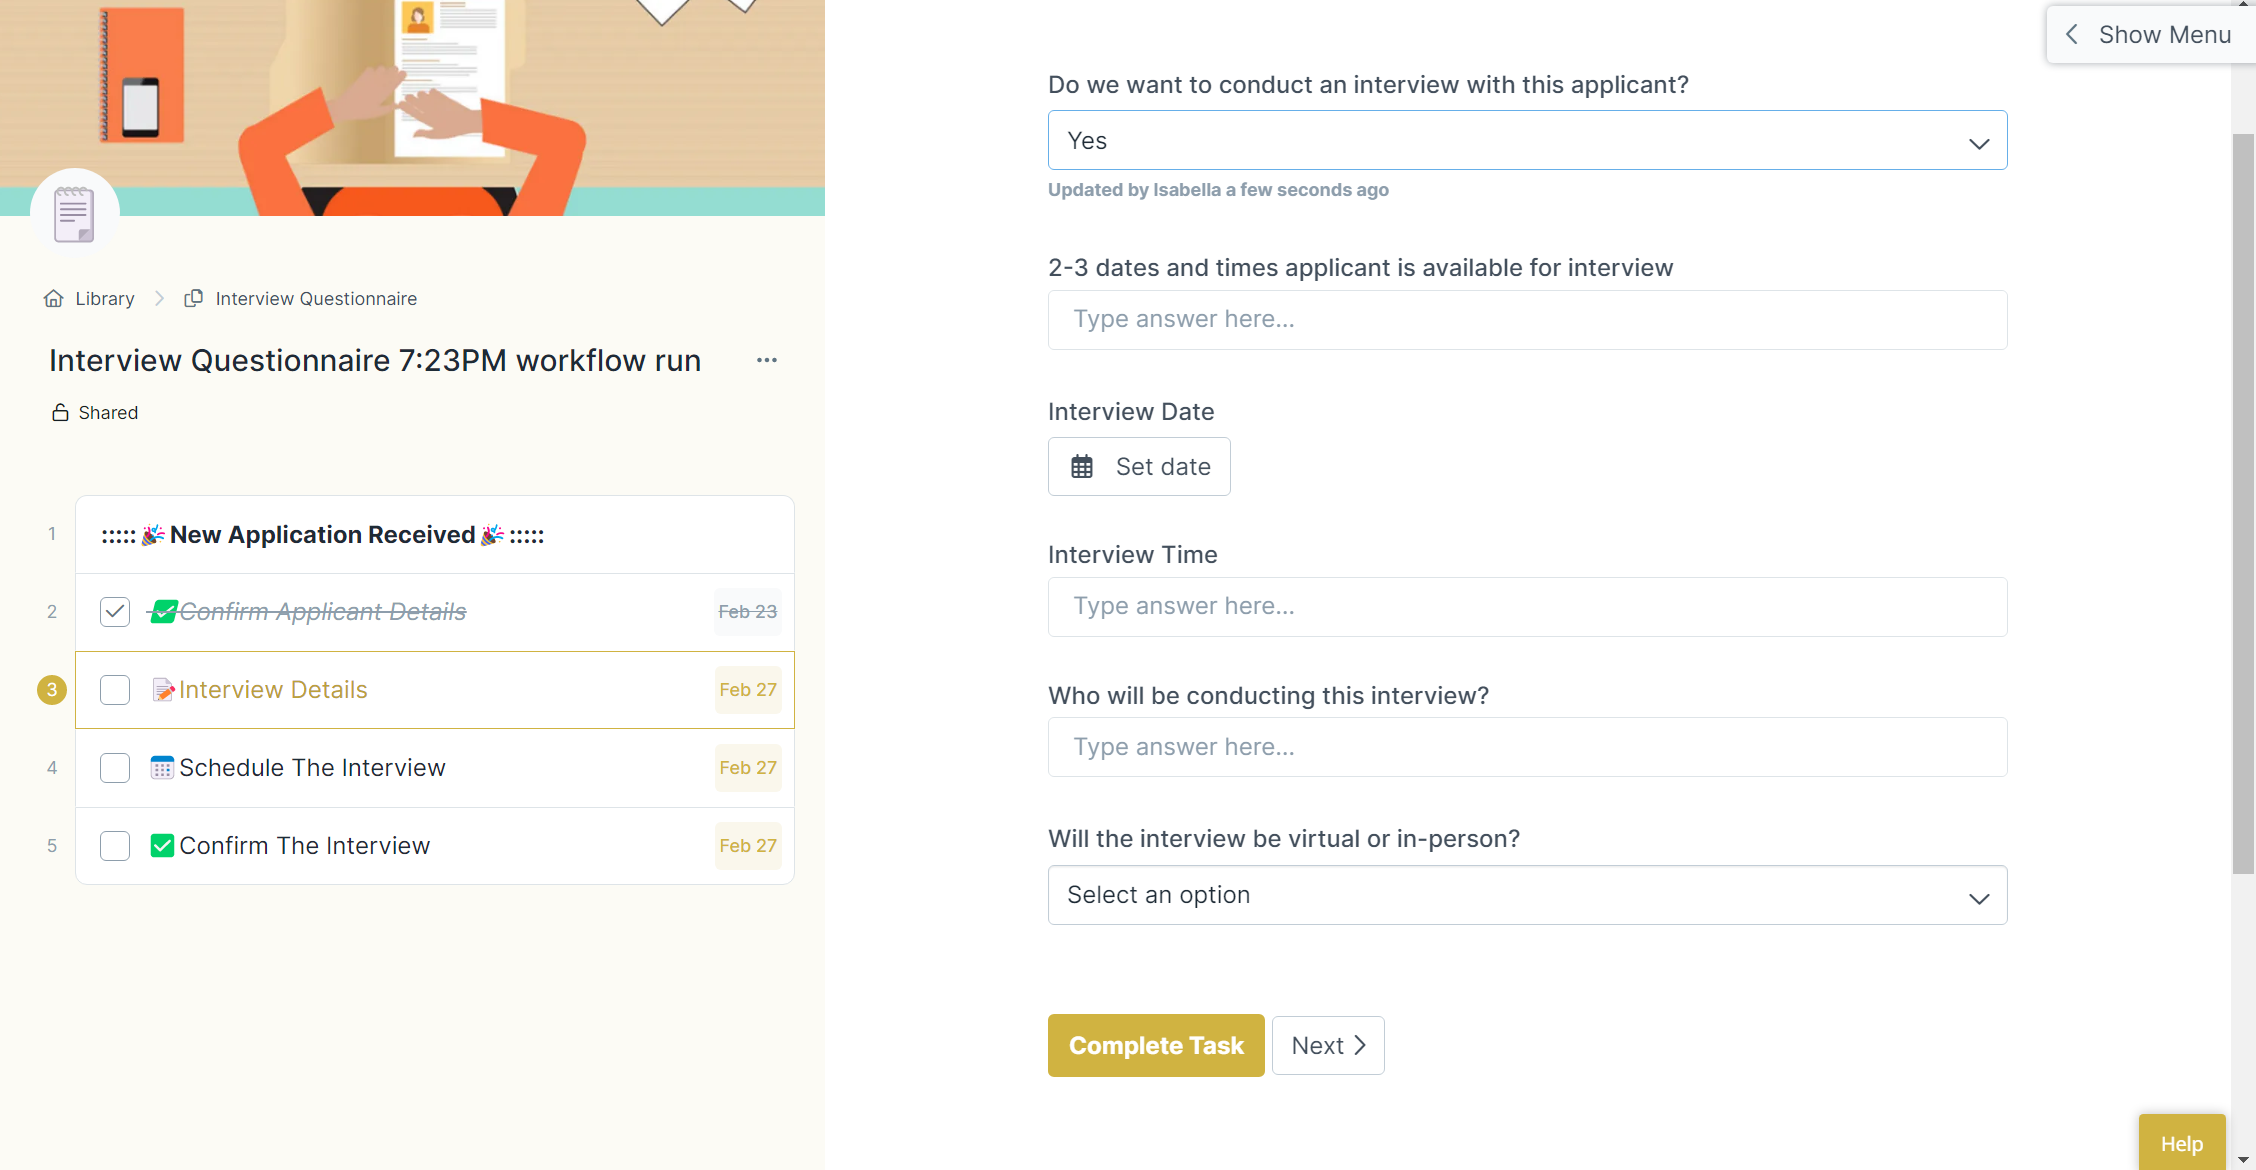
In the next task, you will first be asked if you wish to interview the candidate.
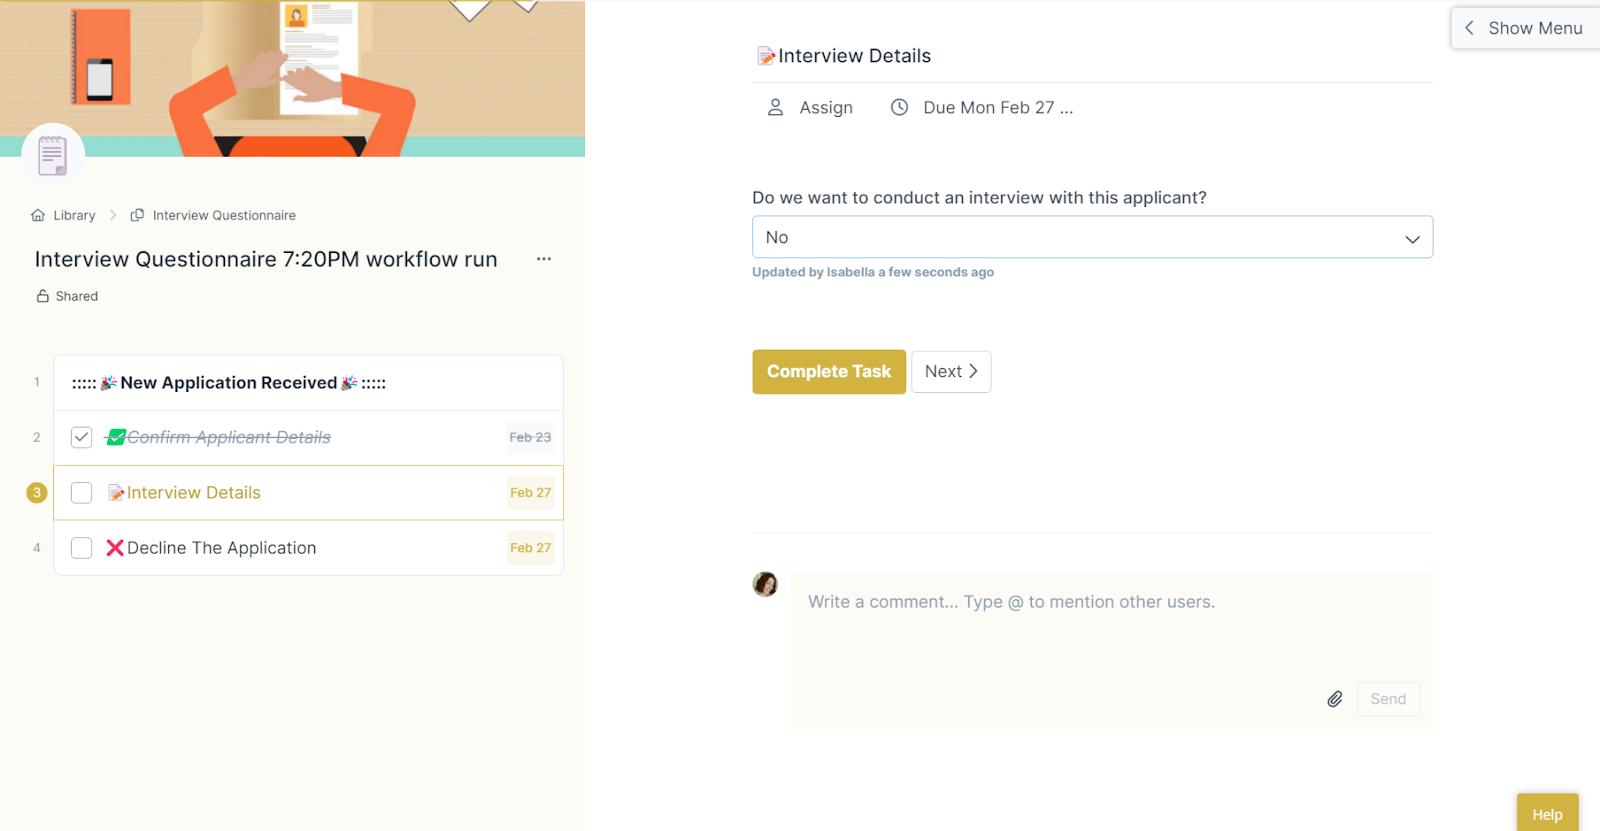
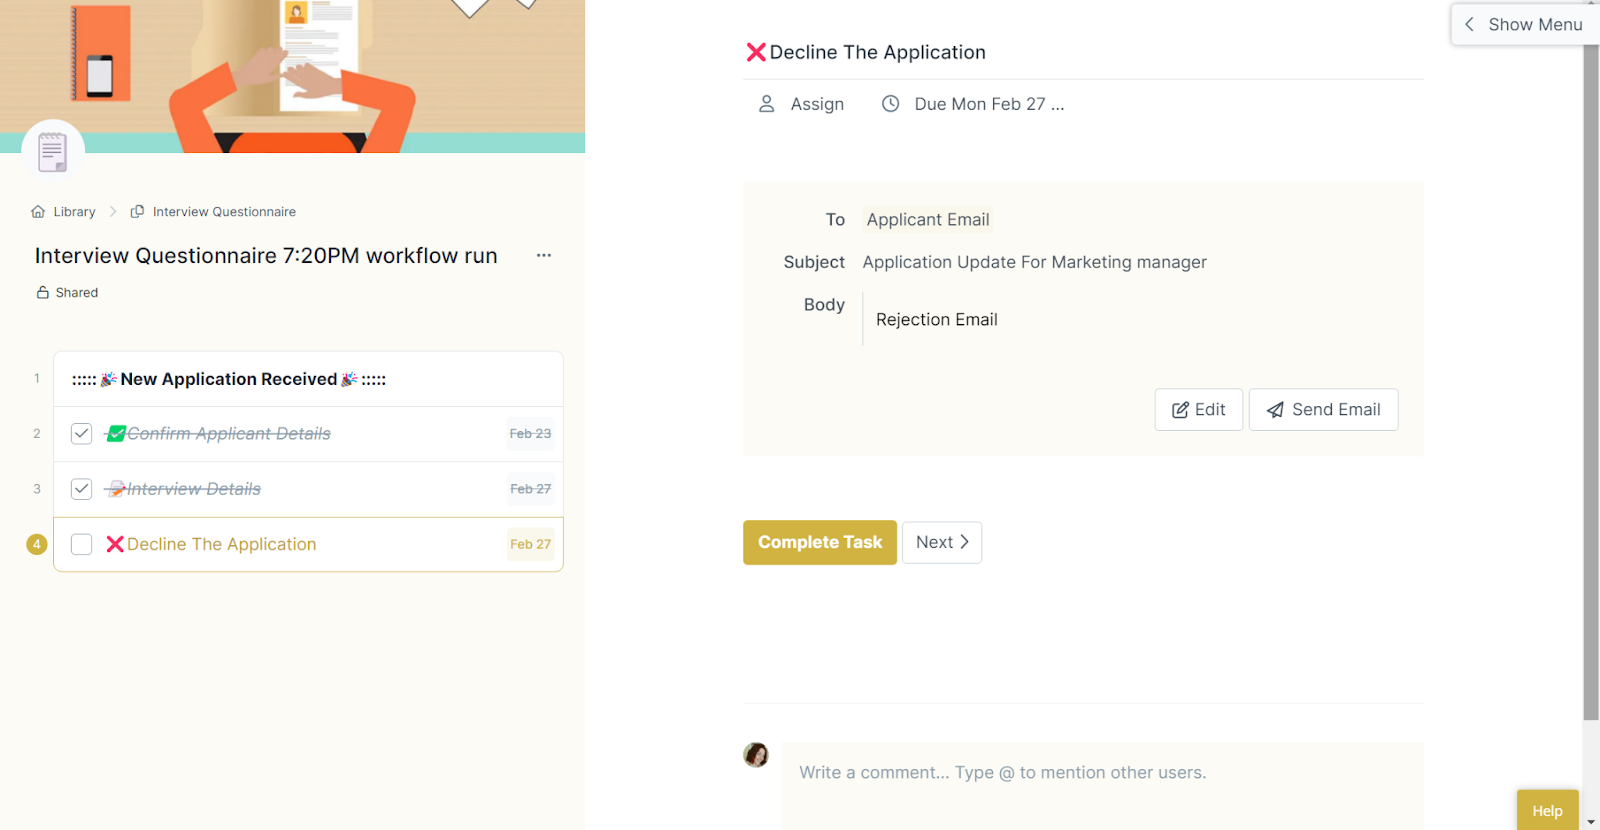
If you say no, the AI will automatically draft a rejection email which you can send directly from the workflow.
If you say yes, you will then be prompted to add all the information about the interview.
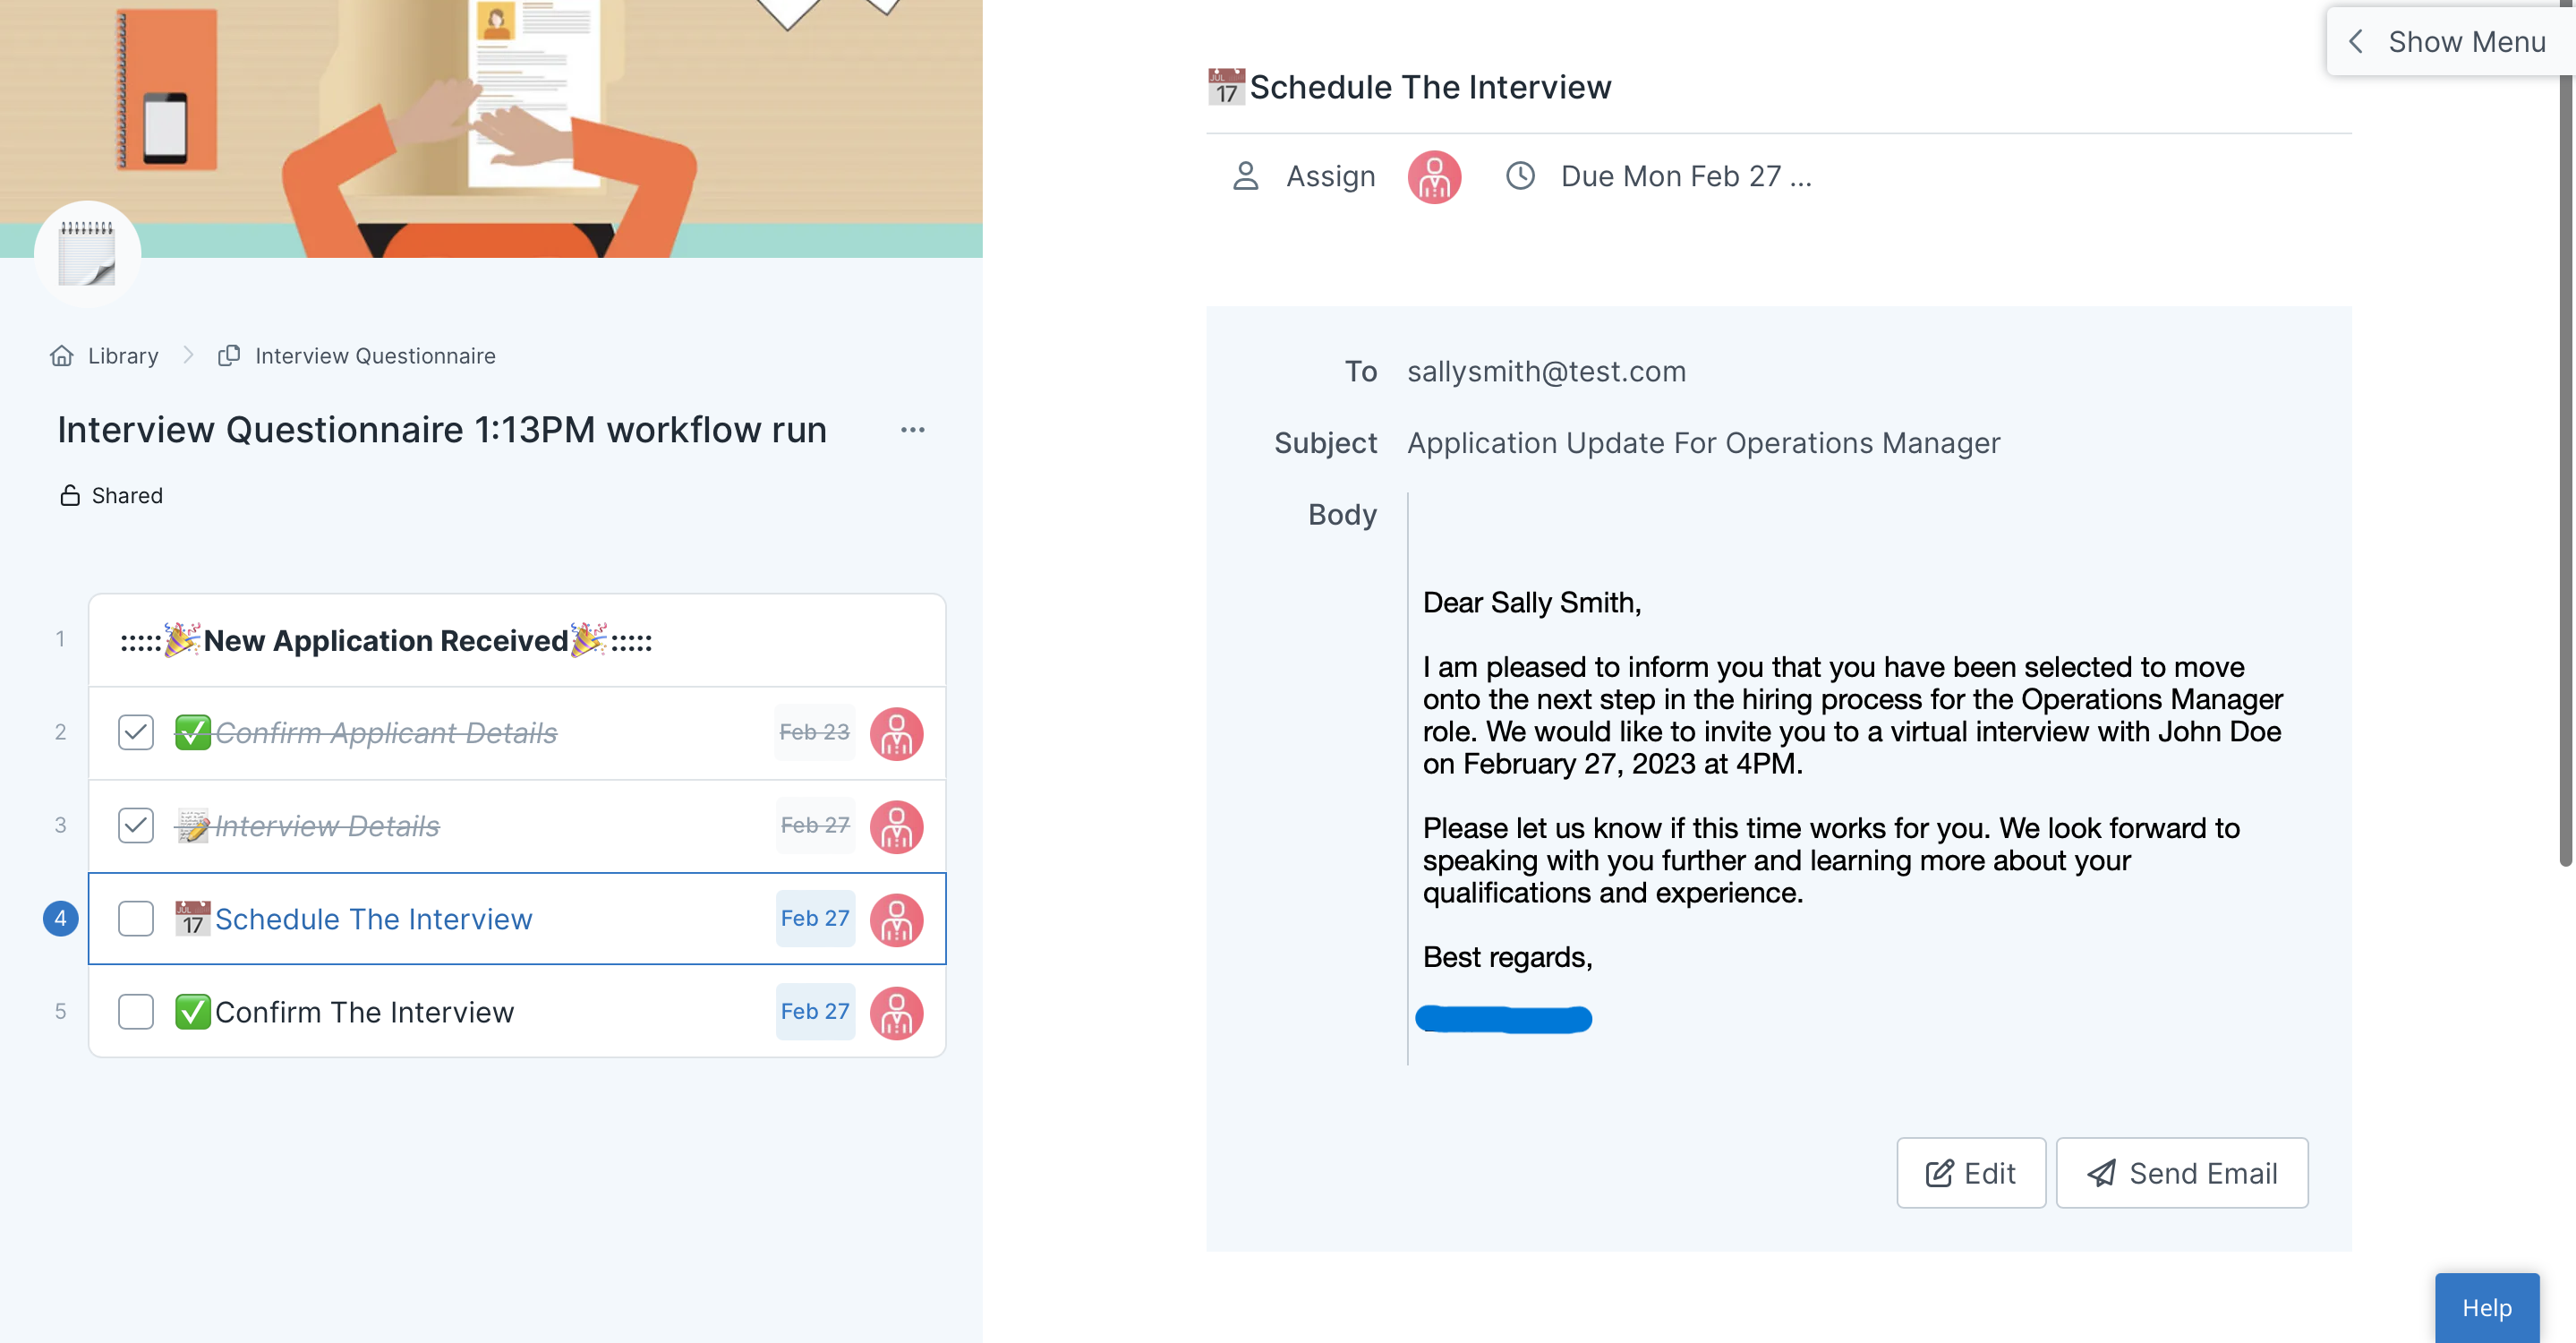
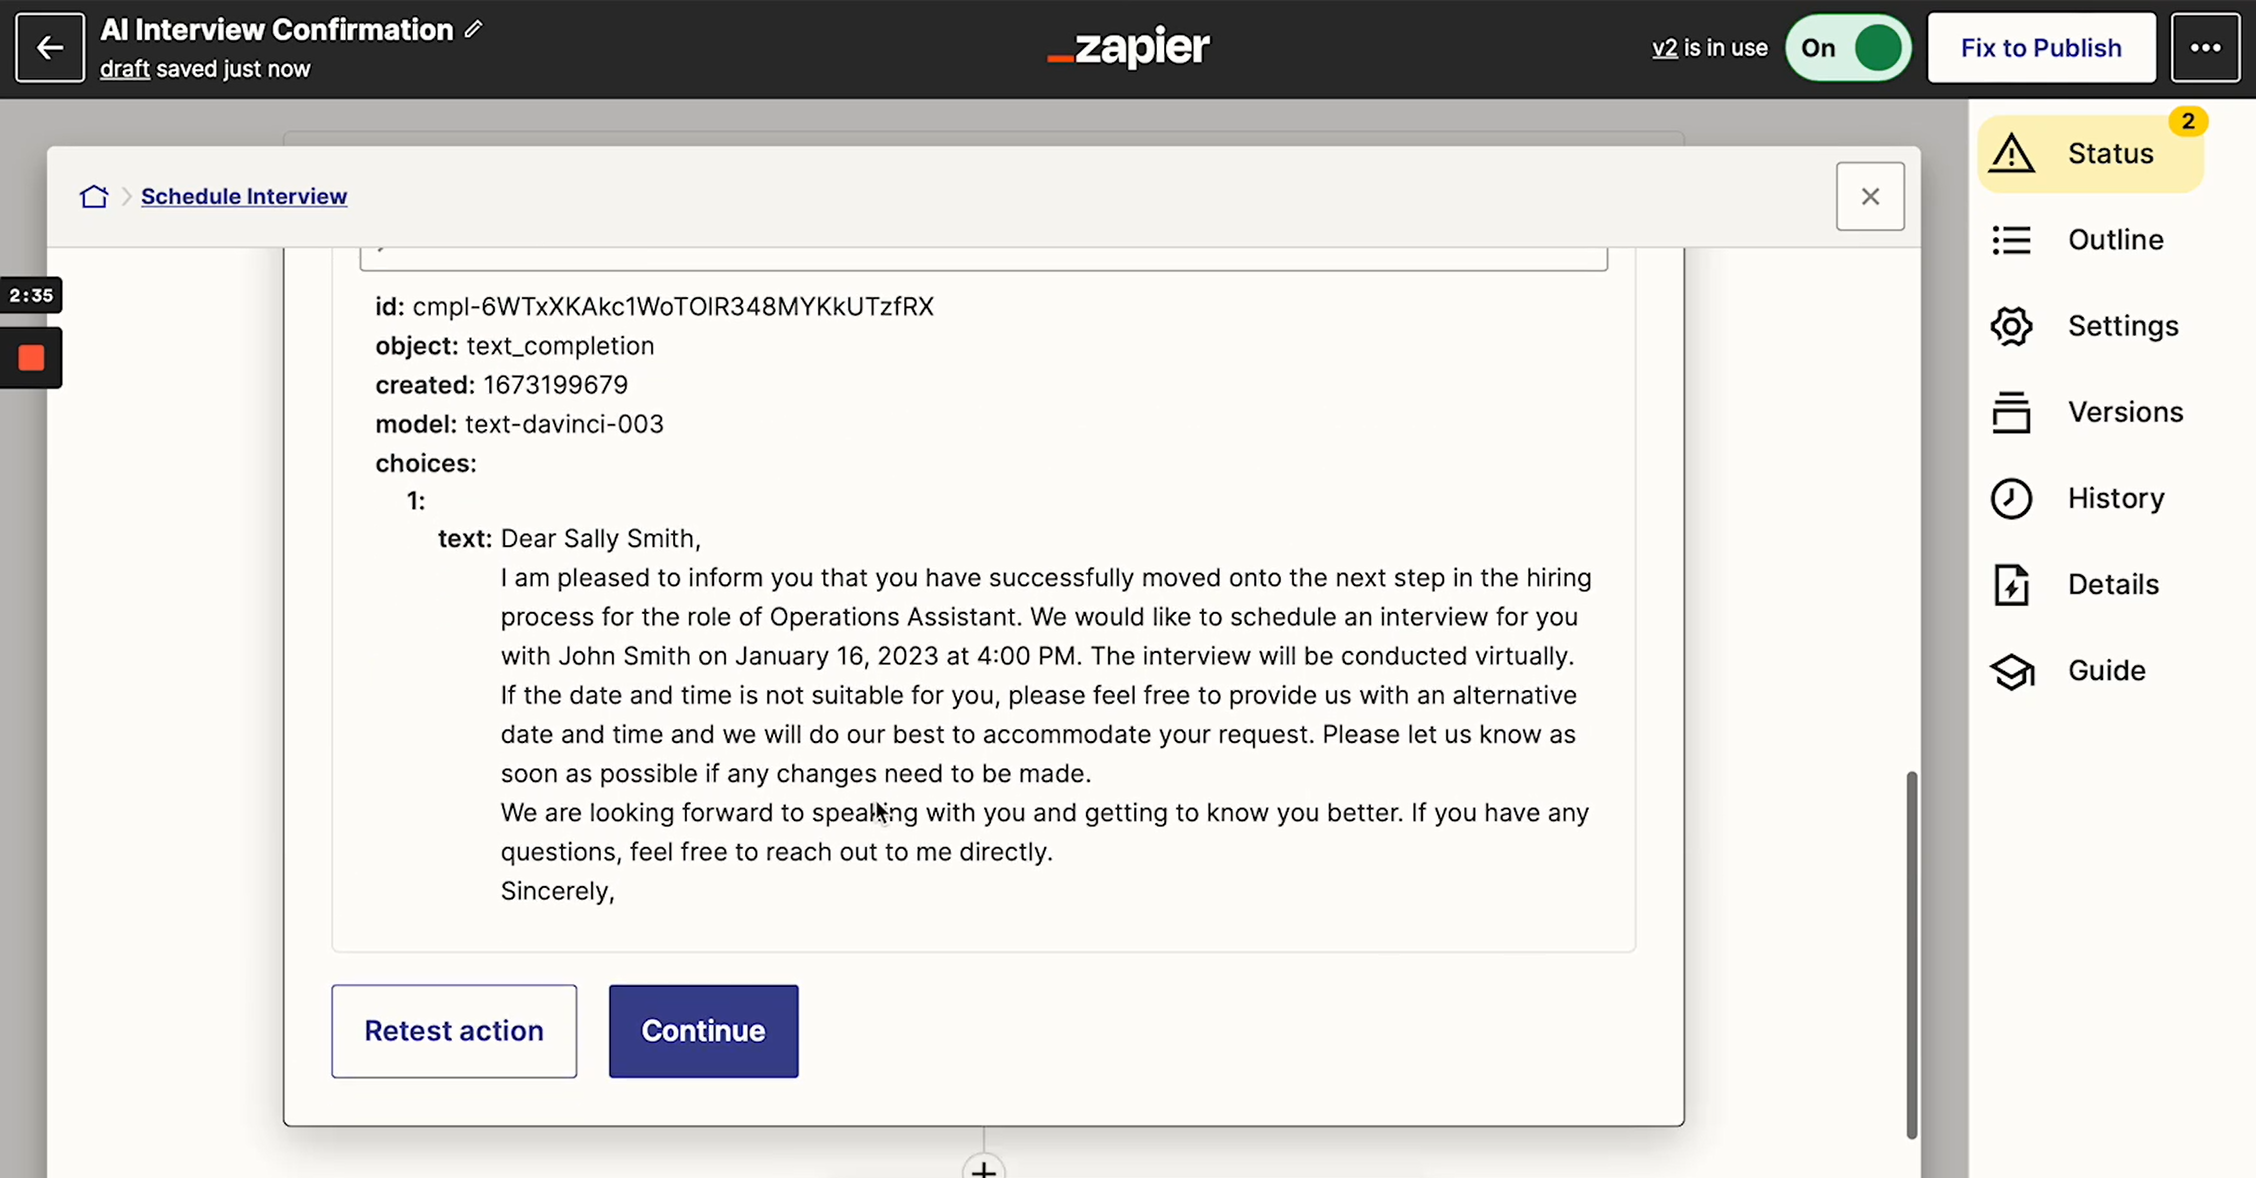
From there, you can set up the interview by sending out the AI-generated email with the invitation.
After that, you will be able to confirm the interview. And if the applicant needs to reschedule, you can add that in as well.
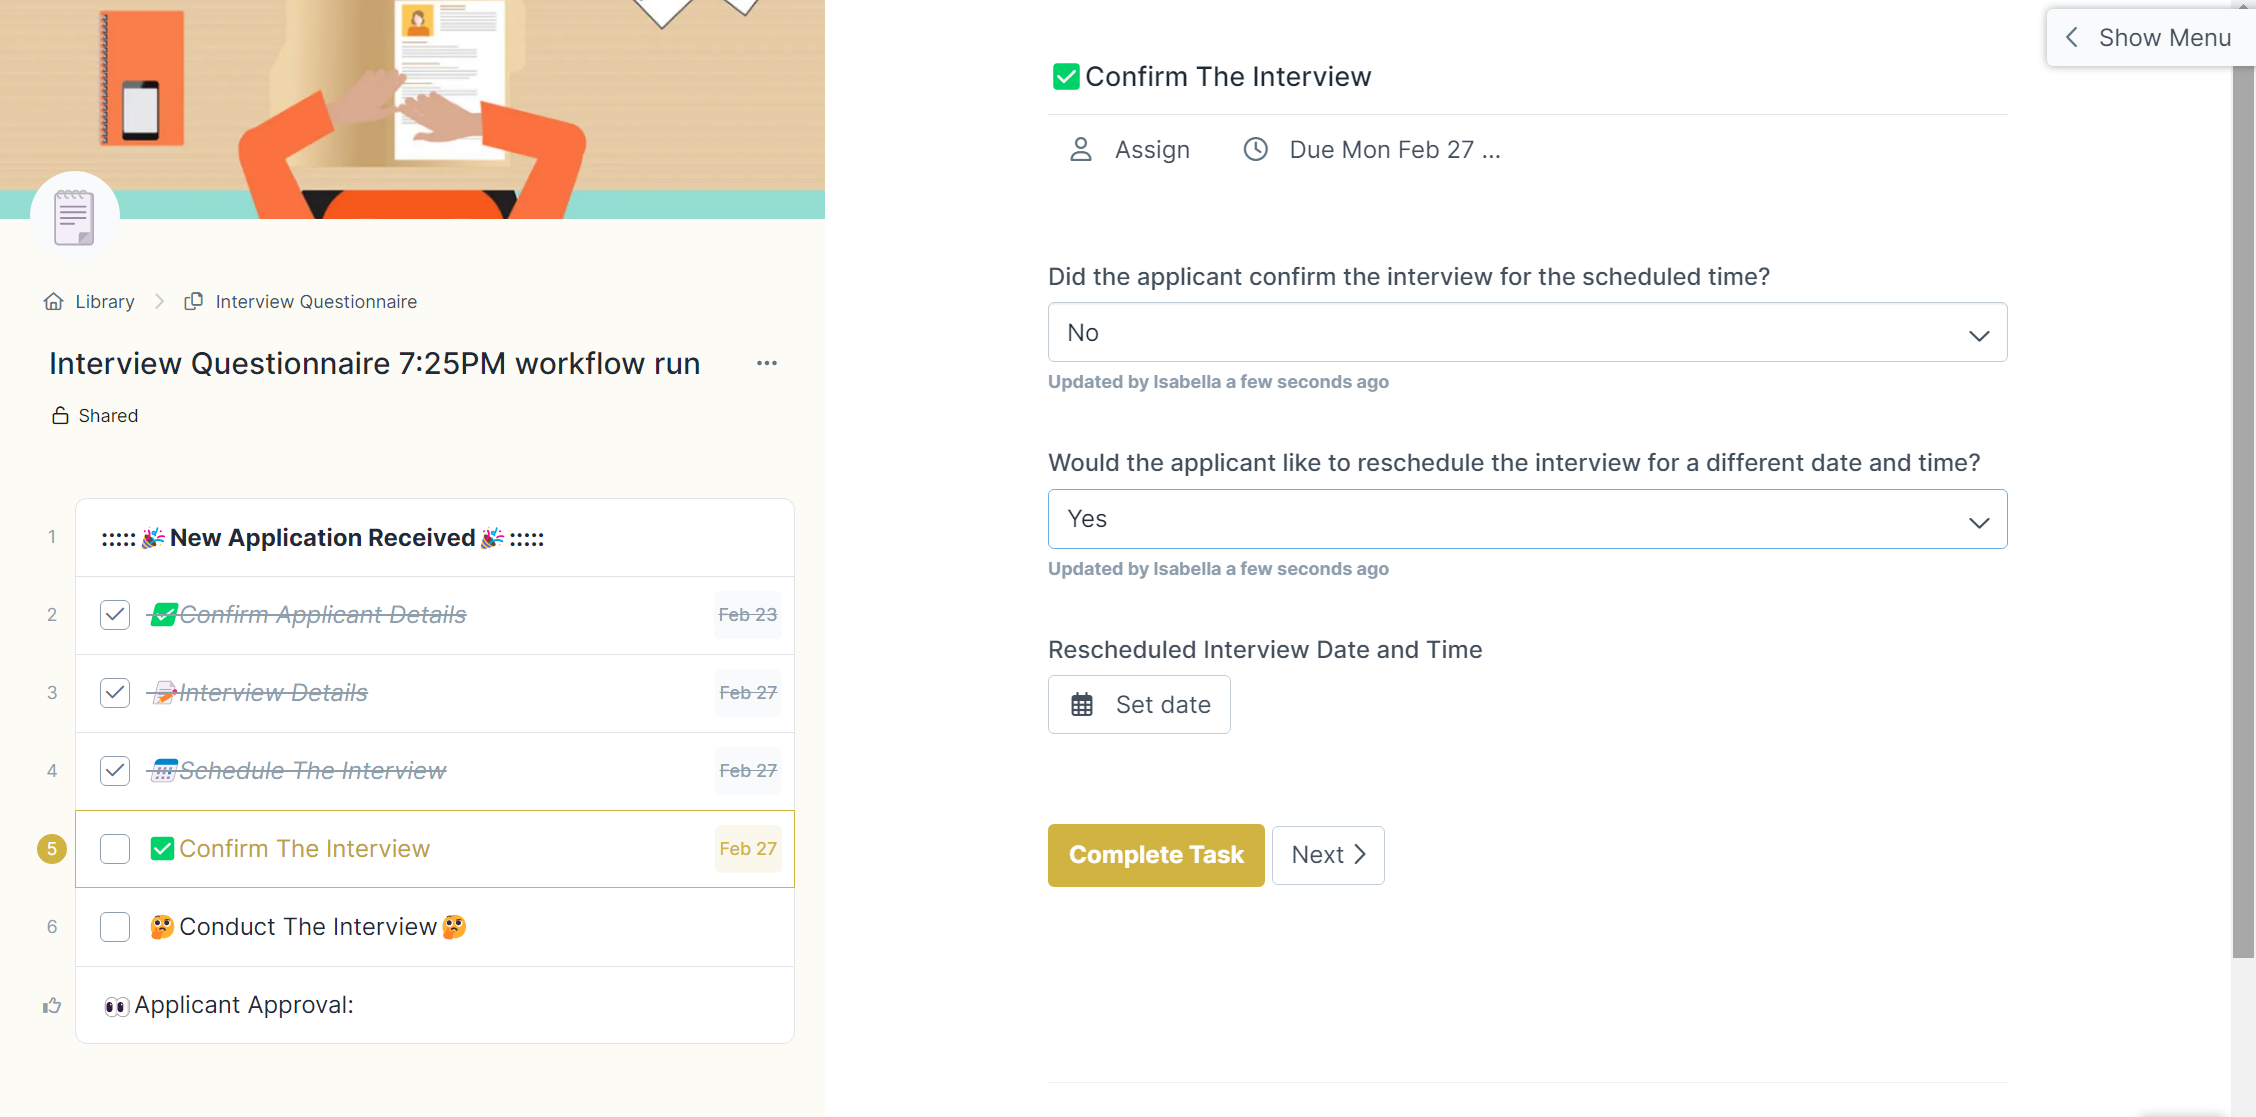
The next phase is to conduct the interview. You can input all your interview questions into the workflow as well as the applicant’s answers.
After the interview, you will be prompted with the option to either accept or reject the applicant. If you reject them, the AI tool will automatically generate a rejection letter which you can send right from the workflow.
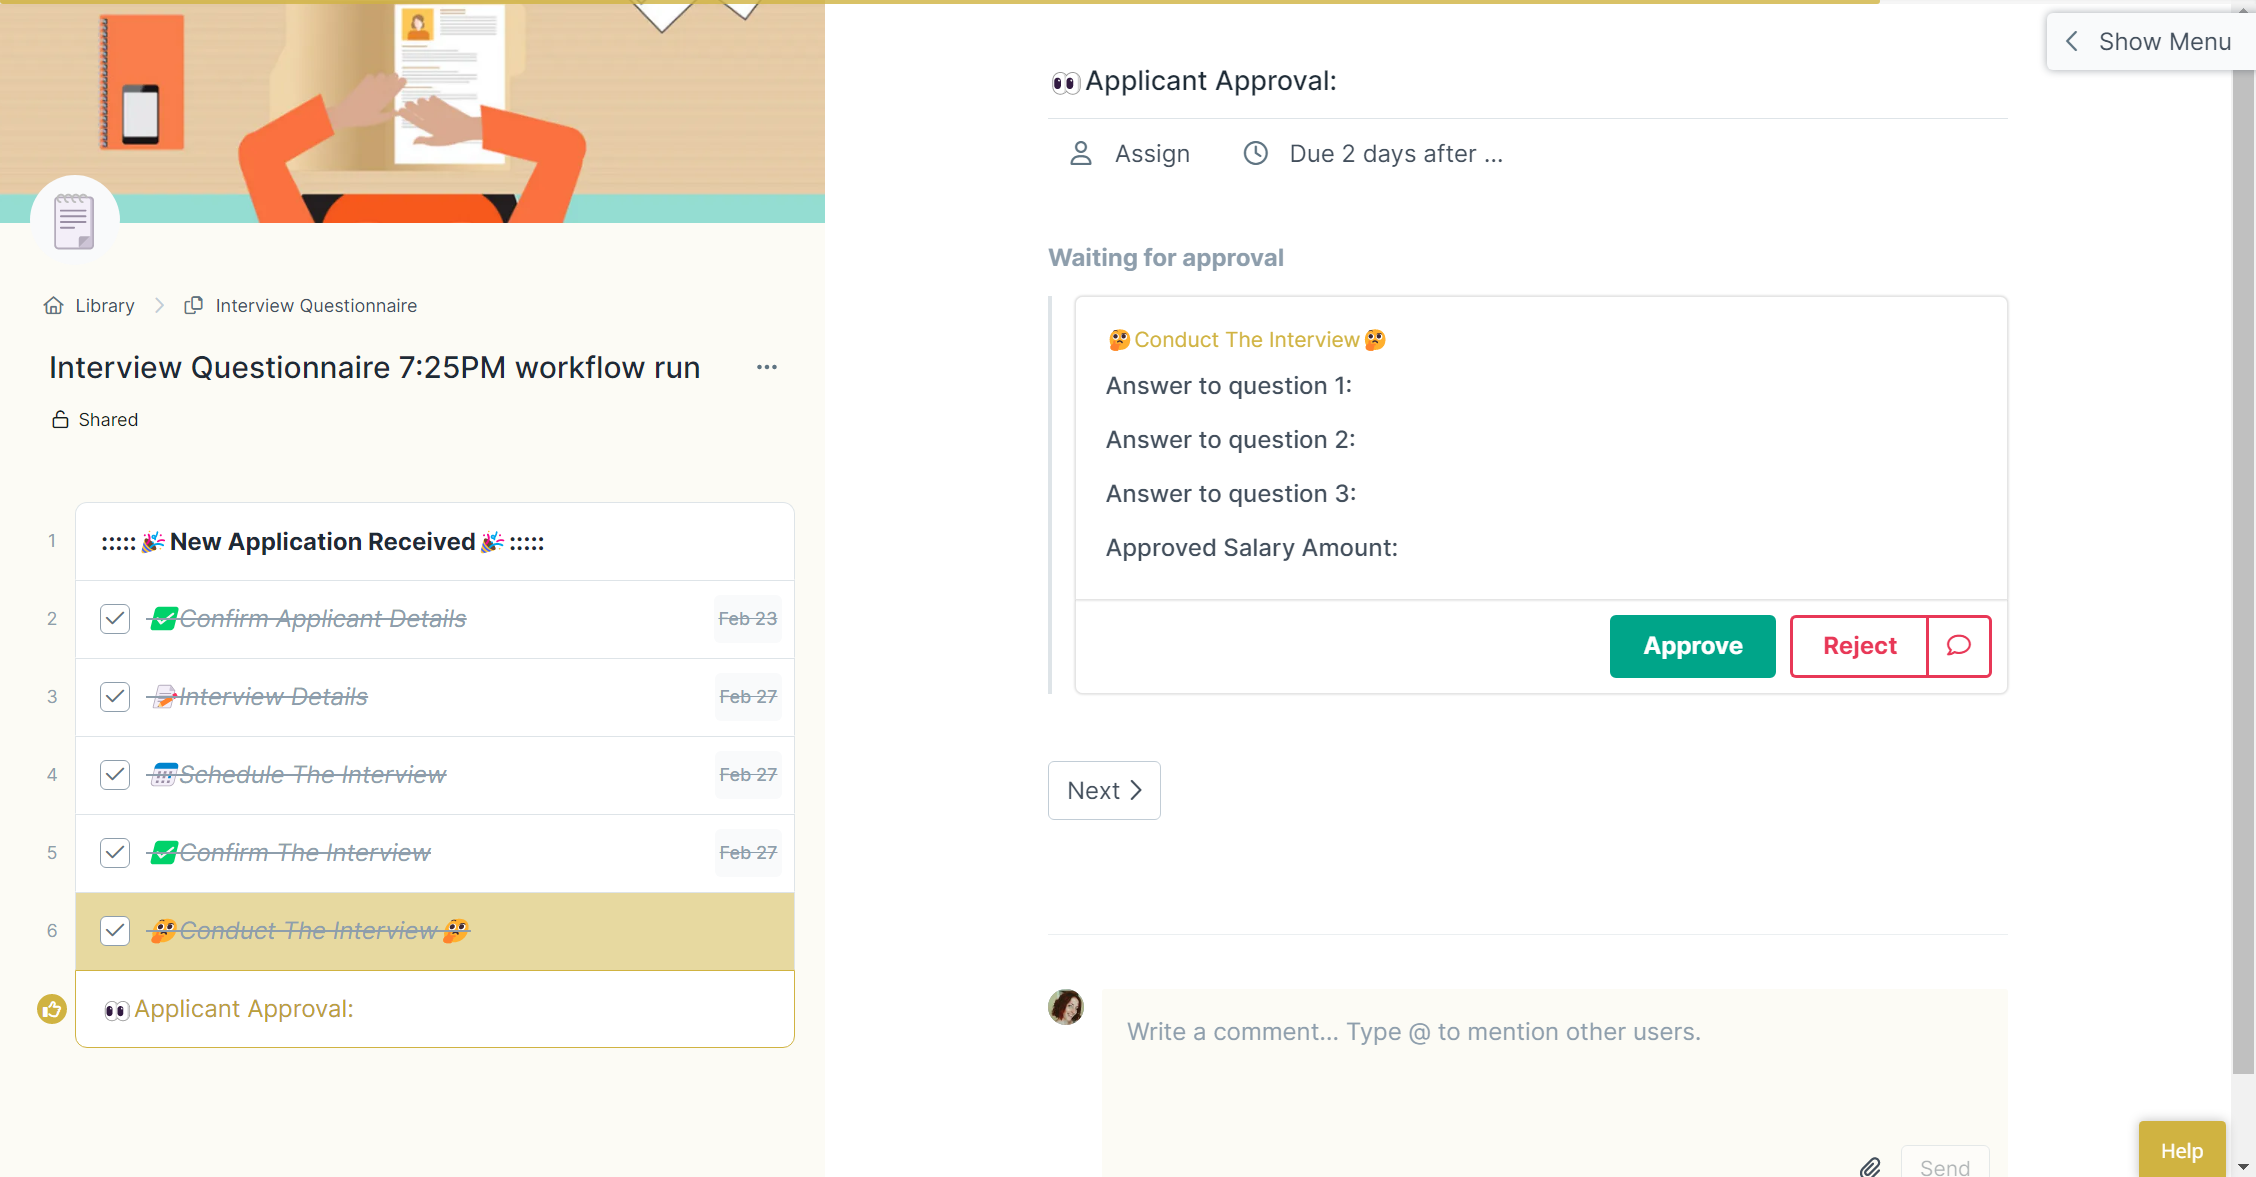
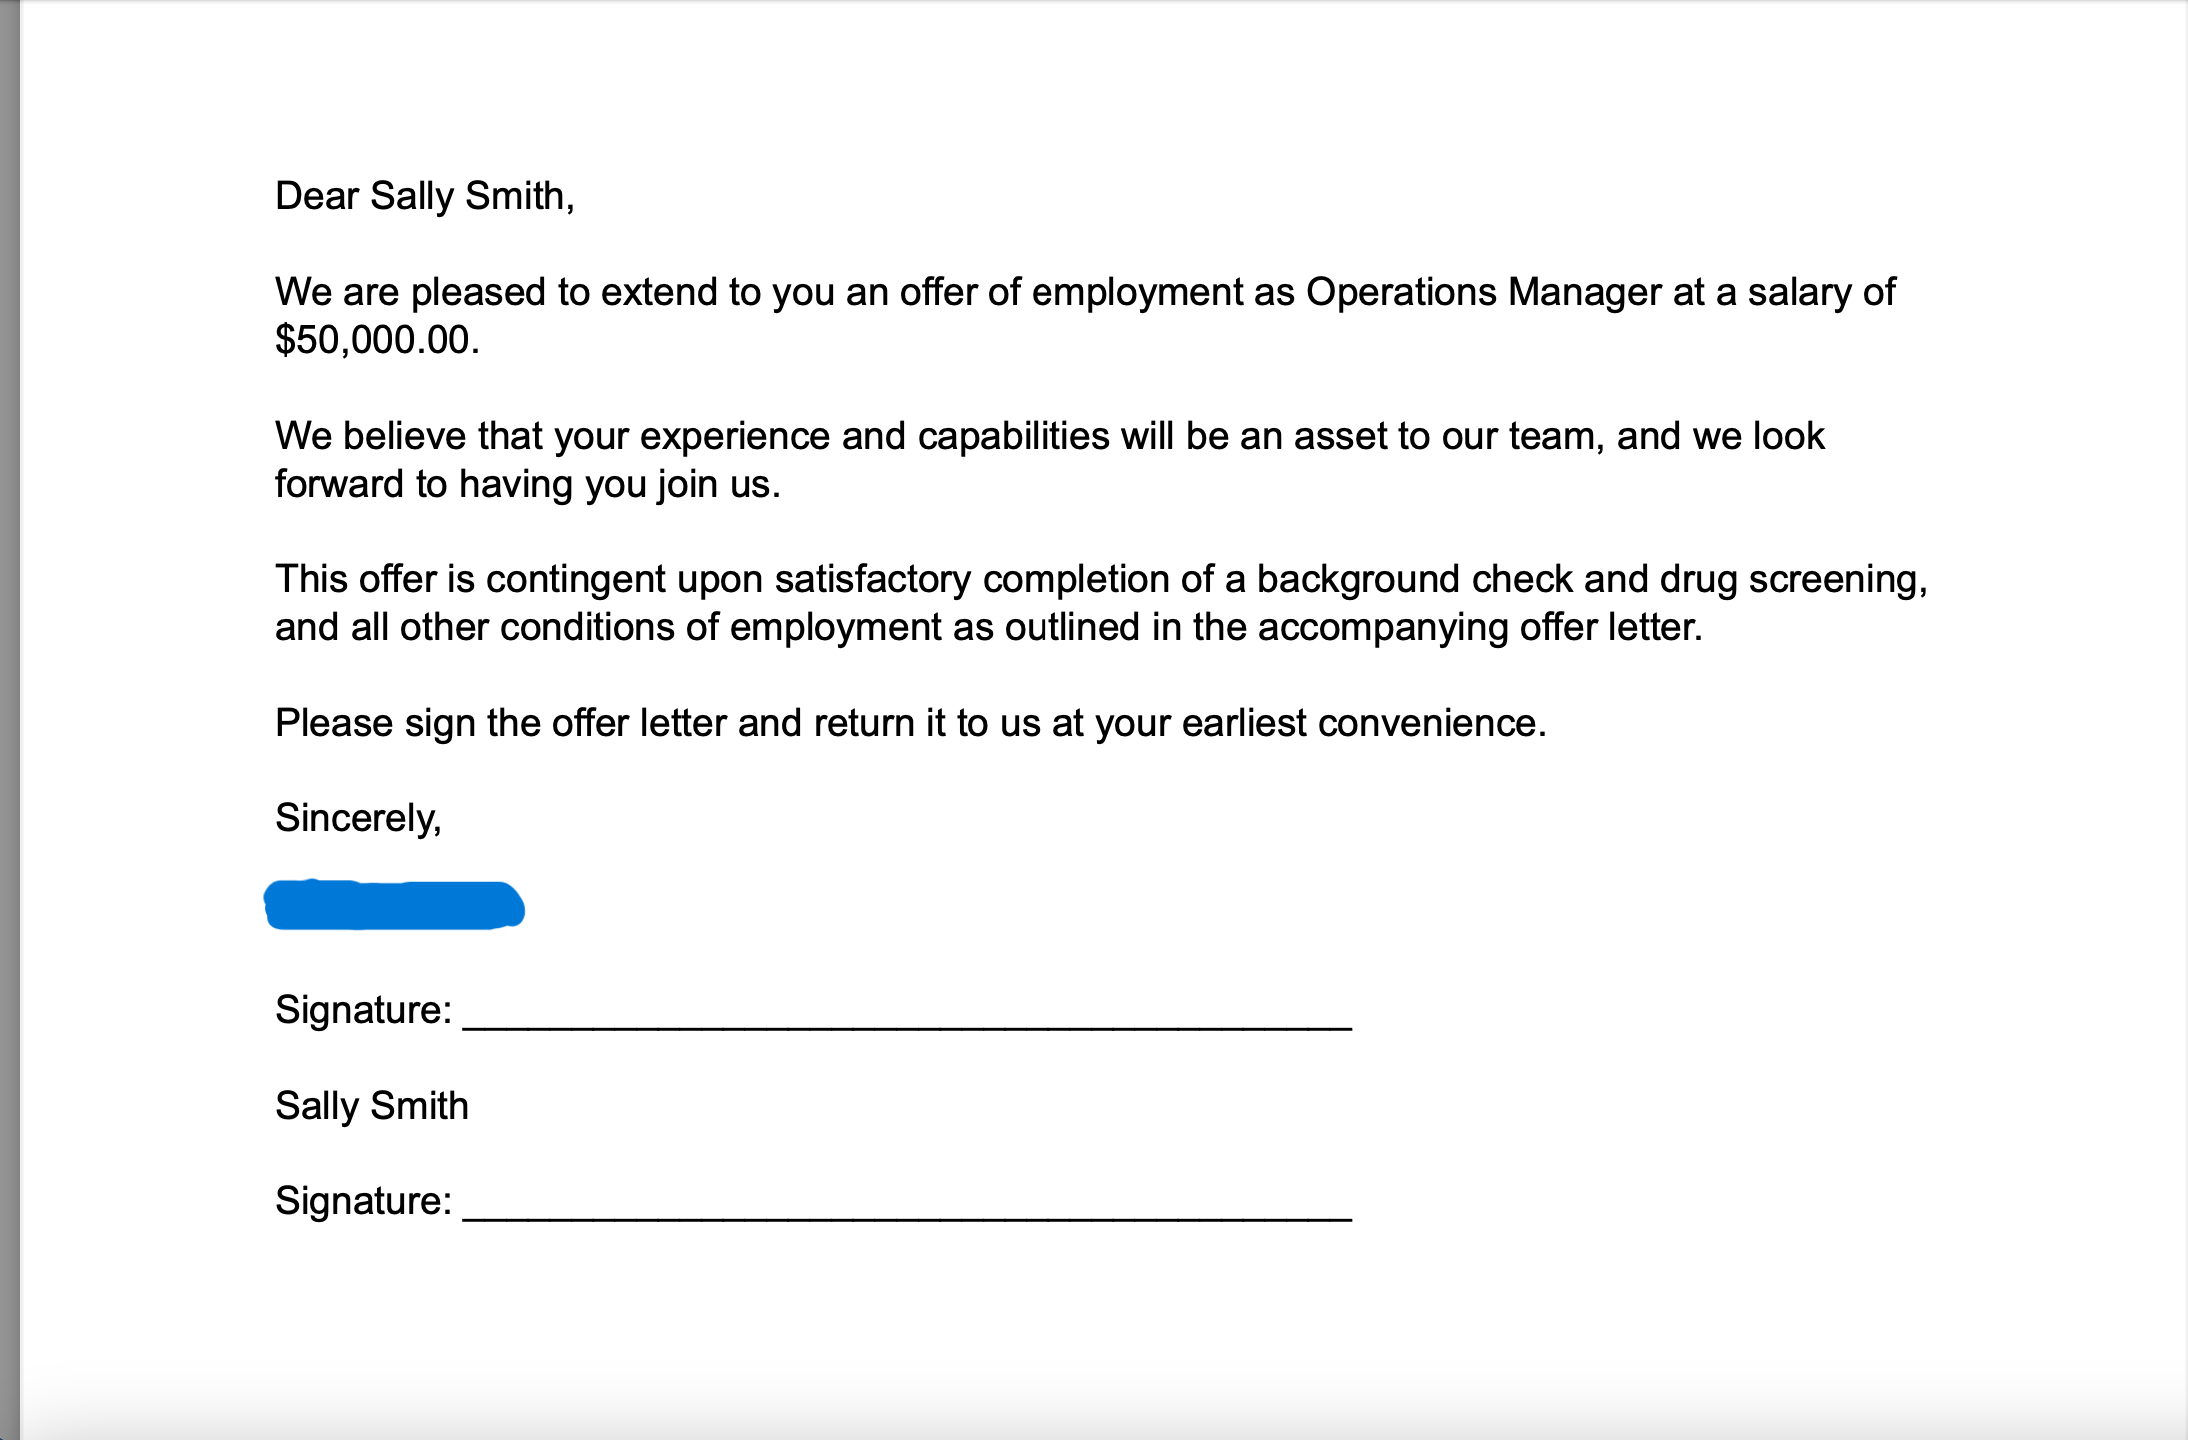
If you accept the applicant, a different email will be created along with the offer letter, which will be automatically put in a PDF format.
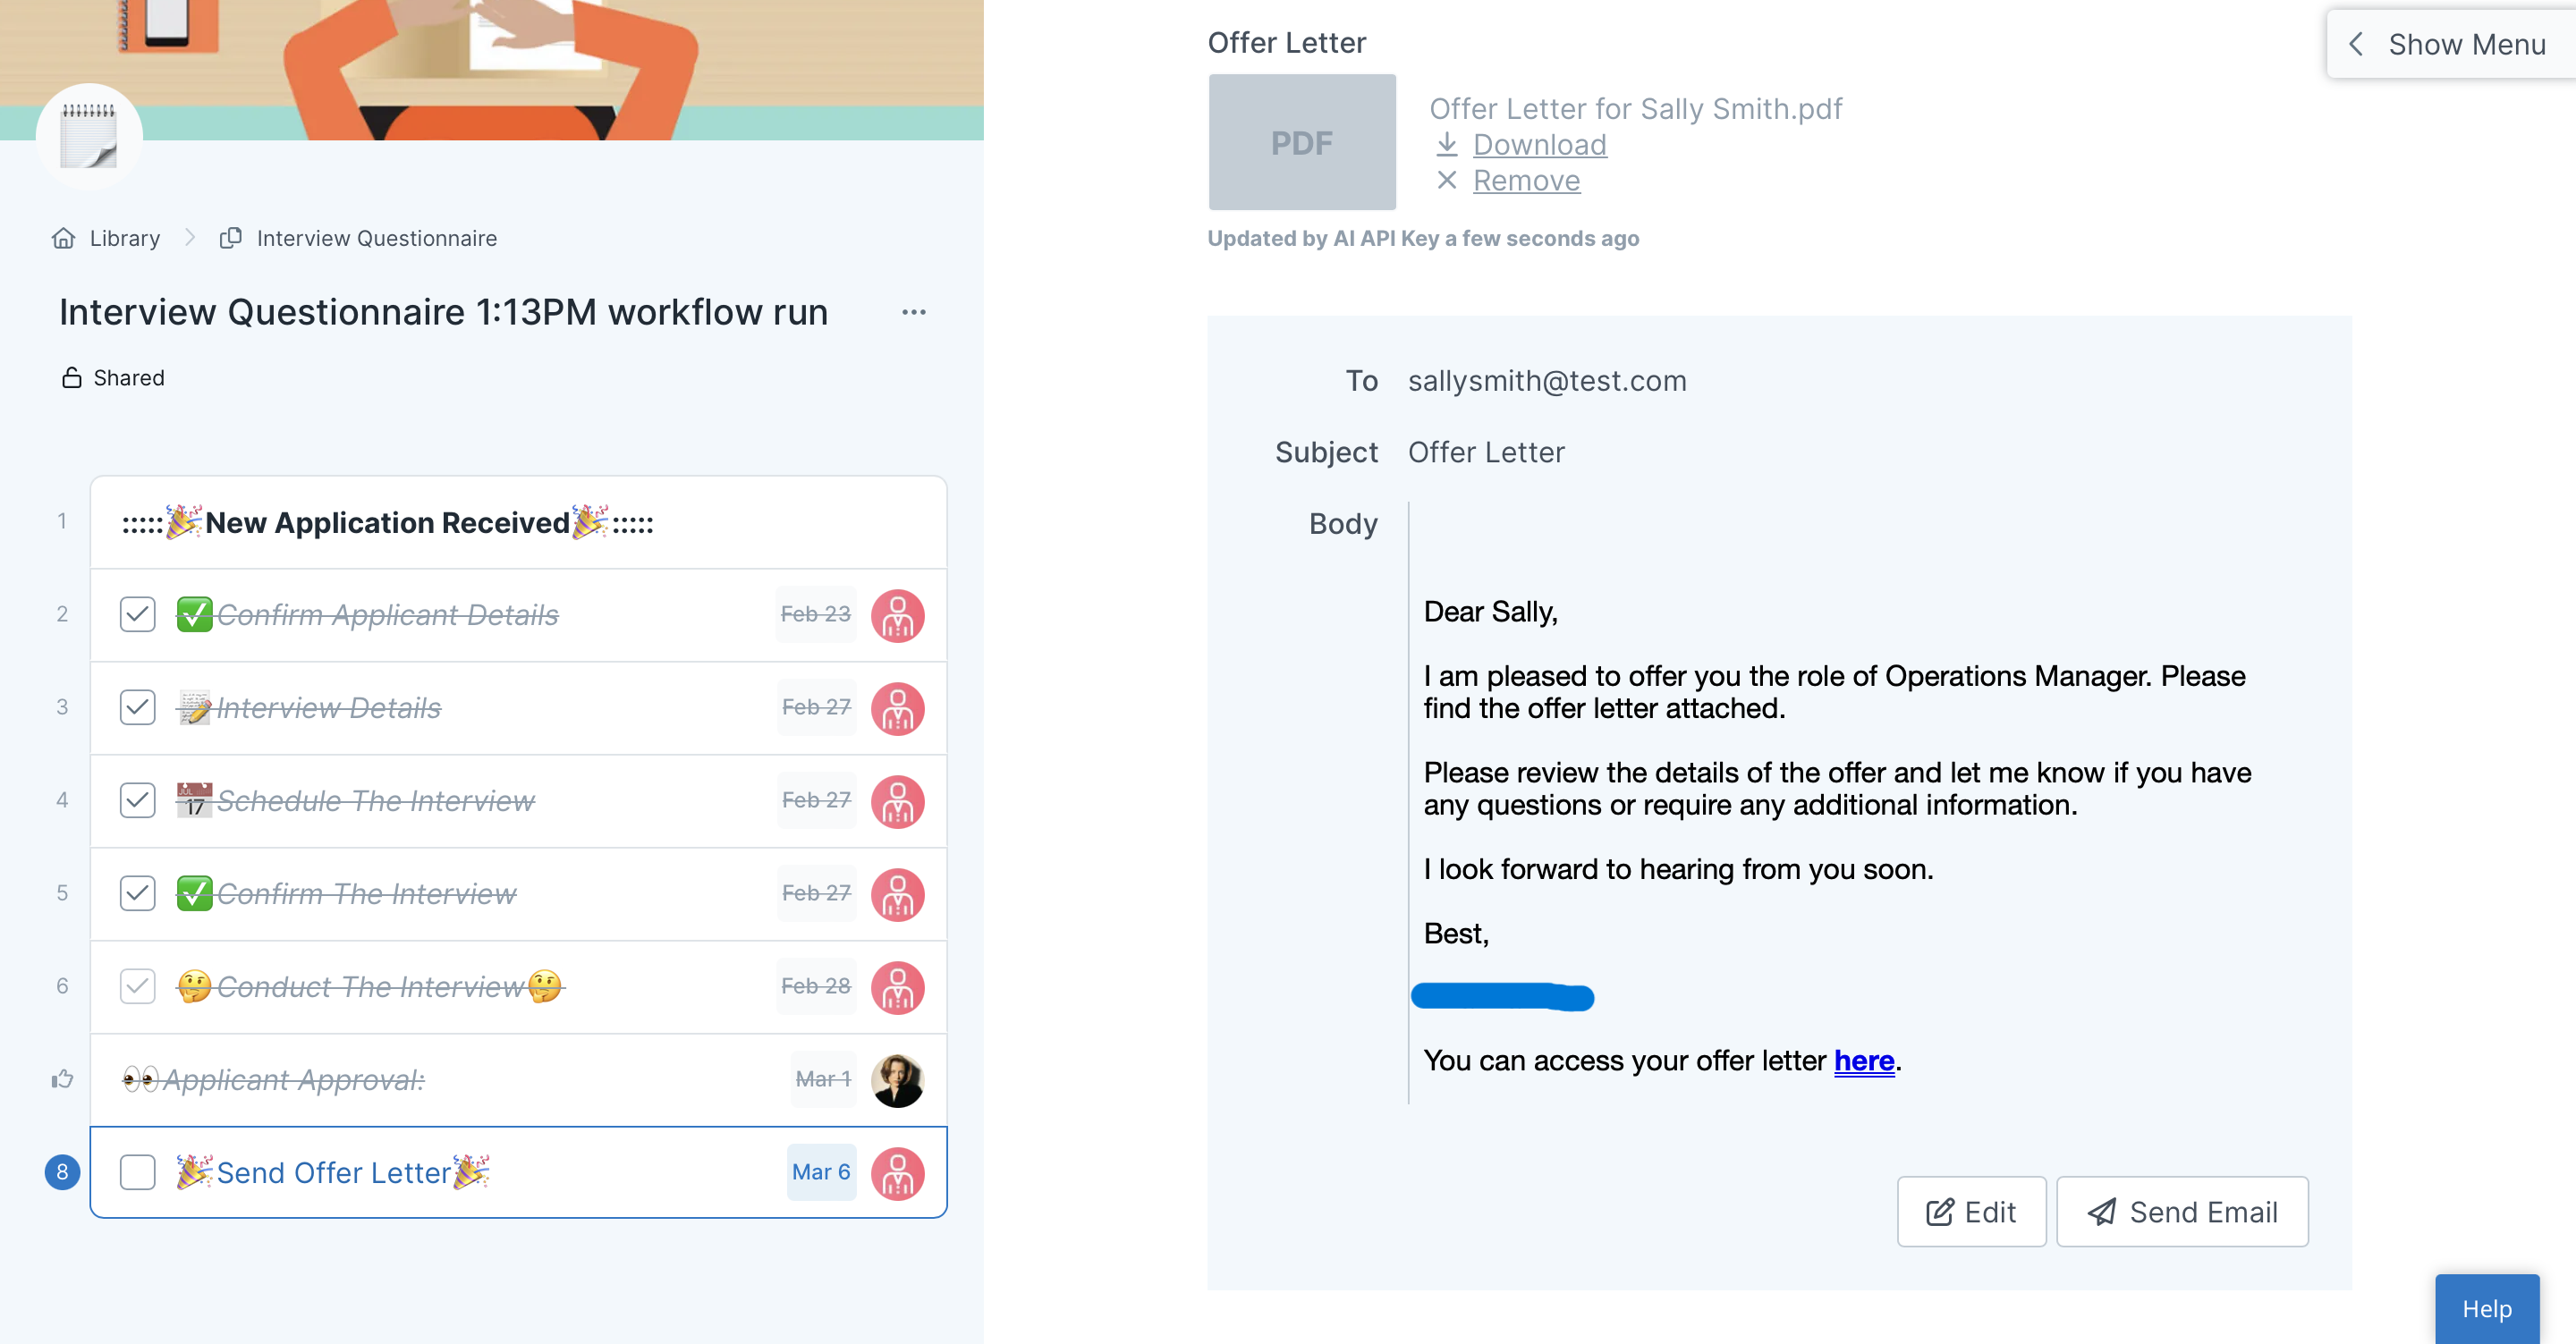
Here’s what the offer letter will look like:
Now, all of this is how we set up the workflow. You can customize it to look however you want it to.
We recommend playing around with OpenAI within Zapier to get everything just right so you don’t have to lift a finger for the hiring process again.
How to set up the workflow
Okay, so I showed you what the workflow does. And if you like it as is, you can use it by adding this template to your Process Street library.
But if you want to know how we did it so you can make something similar, follow me as I walk you through it.
Some pre-information
The solution consultant who made the Interview Questionnaire workflow used three zaps and one webhook to build it. She explains in great detail how she set up each of those in this community post on connecting OpenAI to Zapier.
We would be here all day if I wrote out everything in the 11-minute video she made about it. So for the sake of time (and my sanity), I am only going to go into detail about one of the zaps.
All of the zaps she made with OpenAI follow the same pattern, so it makes more sense to focus on one in detail than to go into all of them.
Sound good? Okay, then let’s do this.
Side note: If you don’t know how to create zaps in Process Street, read our walkthrough on integrating Zapier and Process Street. Everything from this point forward is going to operate under the assumption that you know how to make zaps.
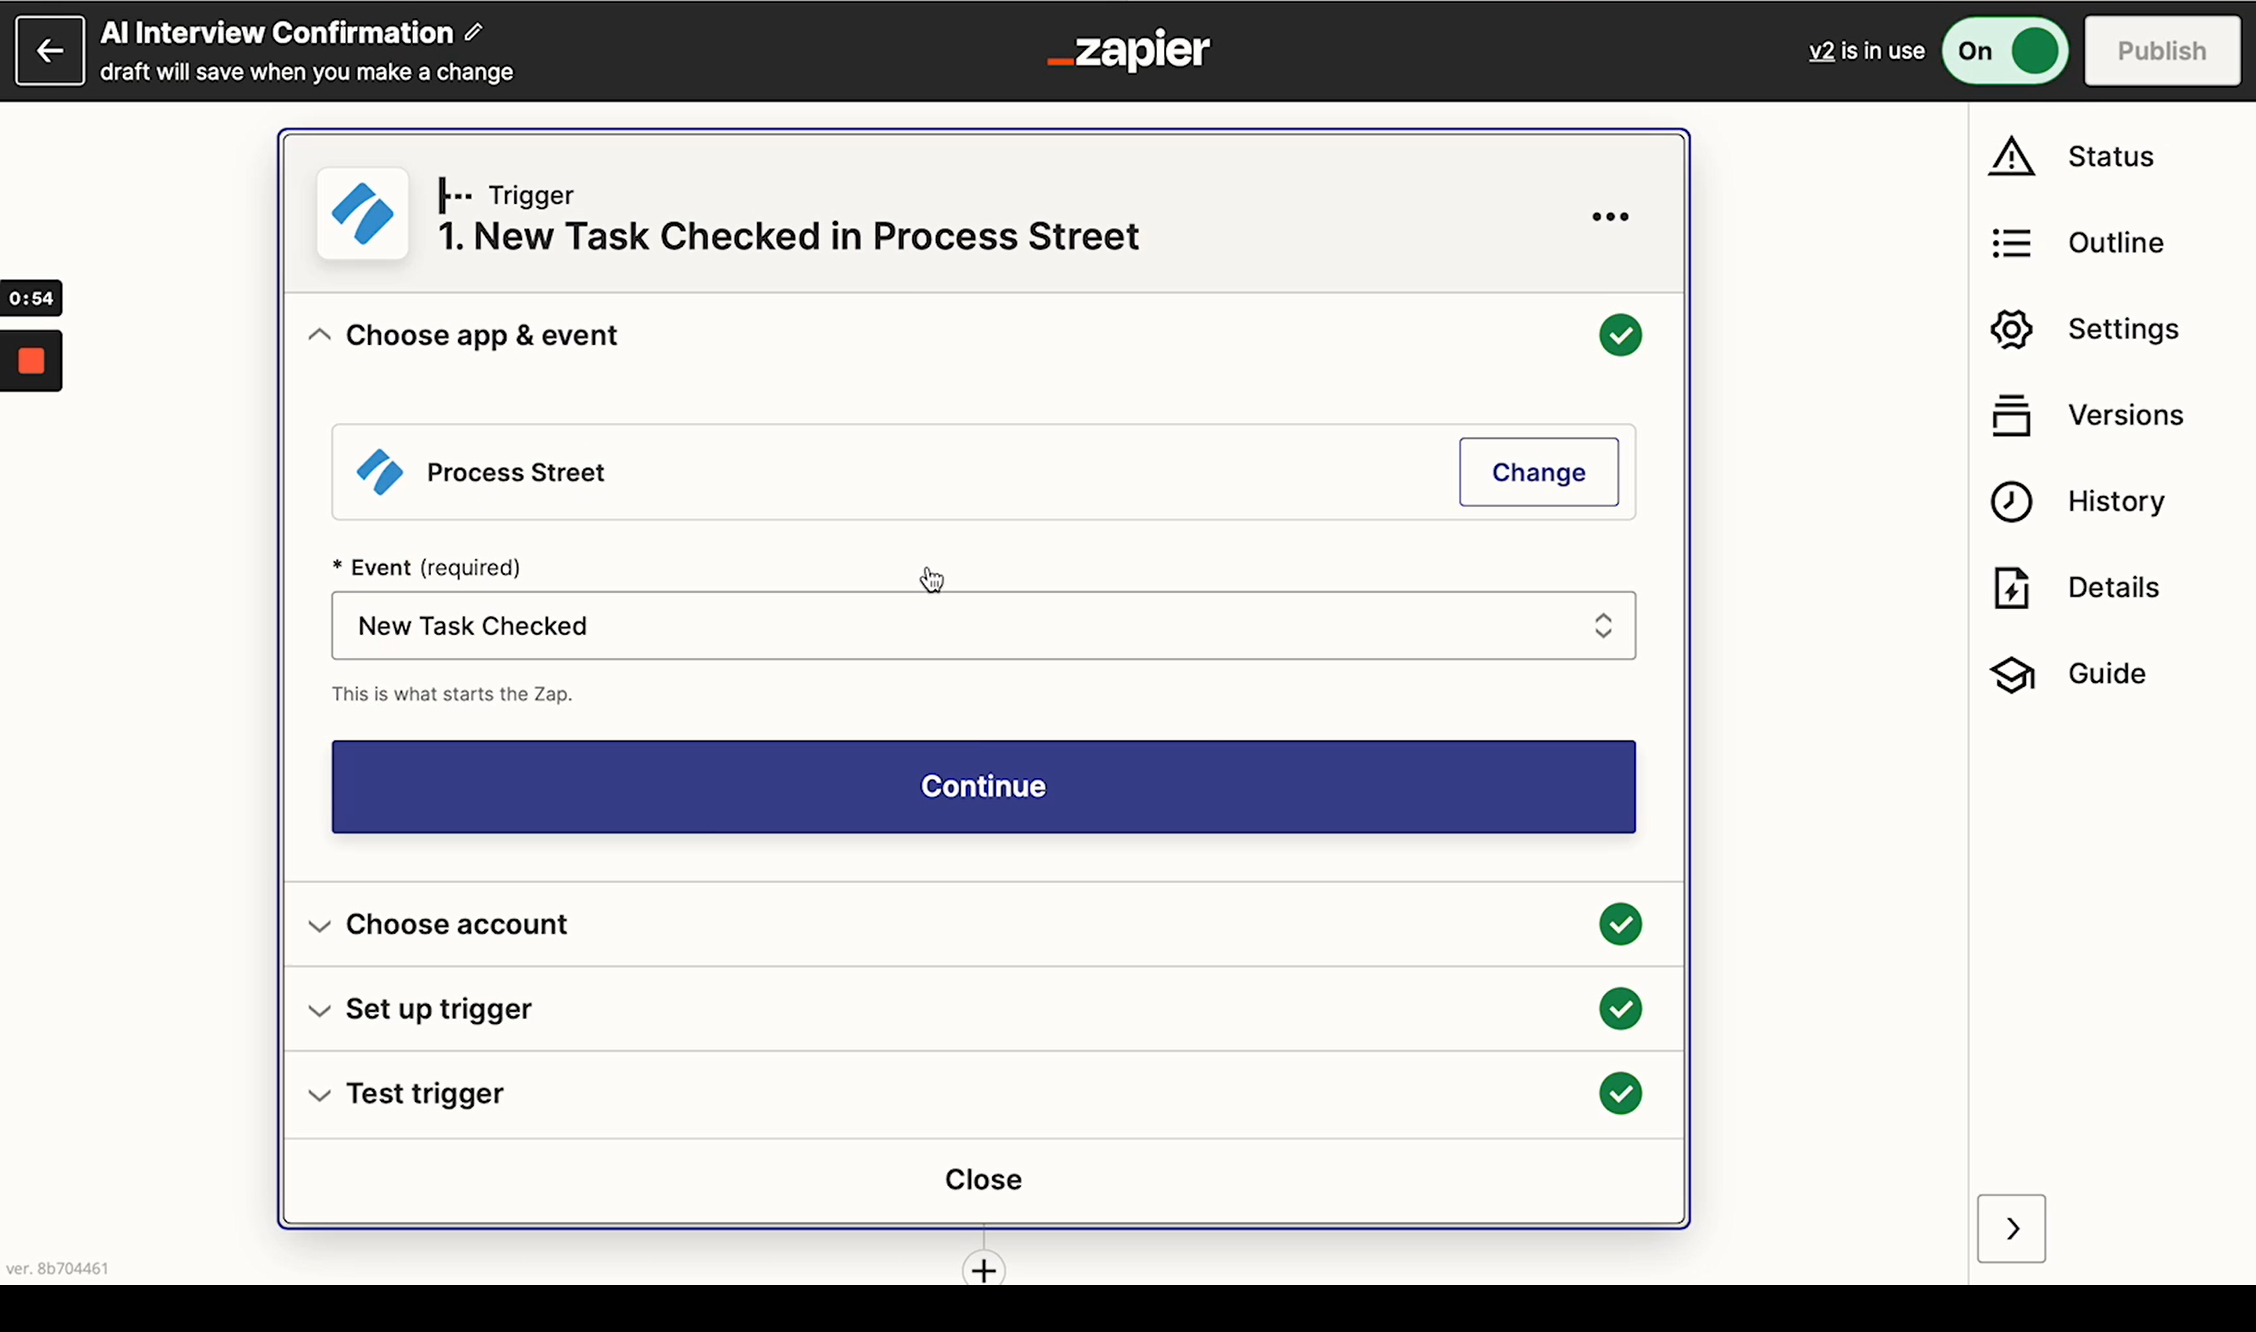
Step 1: Create a zap in Interview Details
In this first step, you need to create a zap for the task labeled “Interview Details” in the Interview Questionnaire workflow.
The Event should be set for “New Task Checked,” so the zap is triggered when the task is completed.
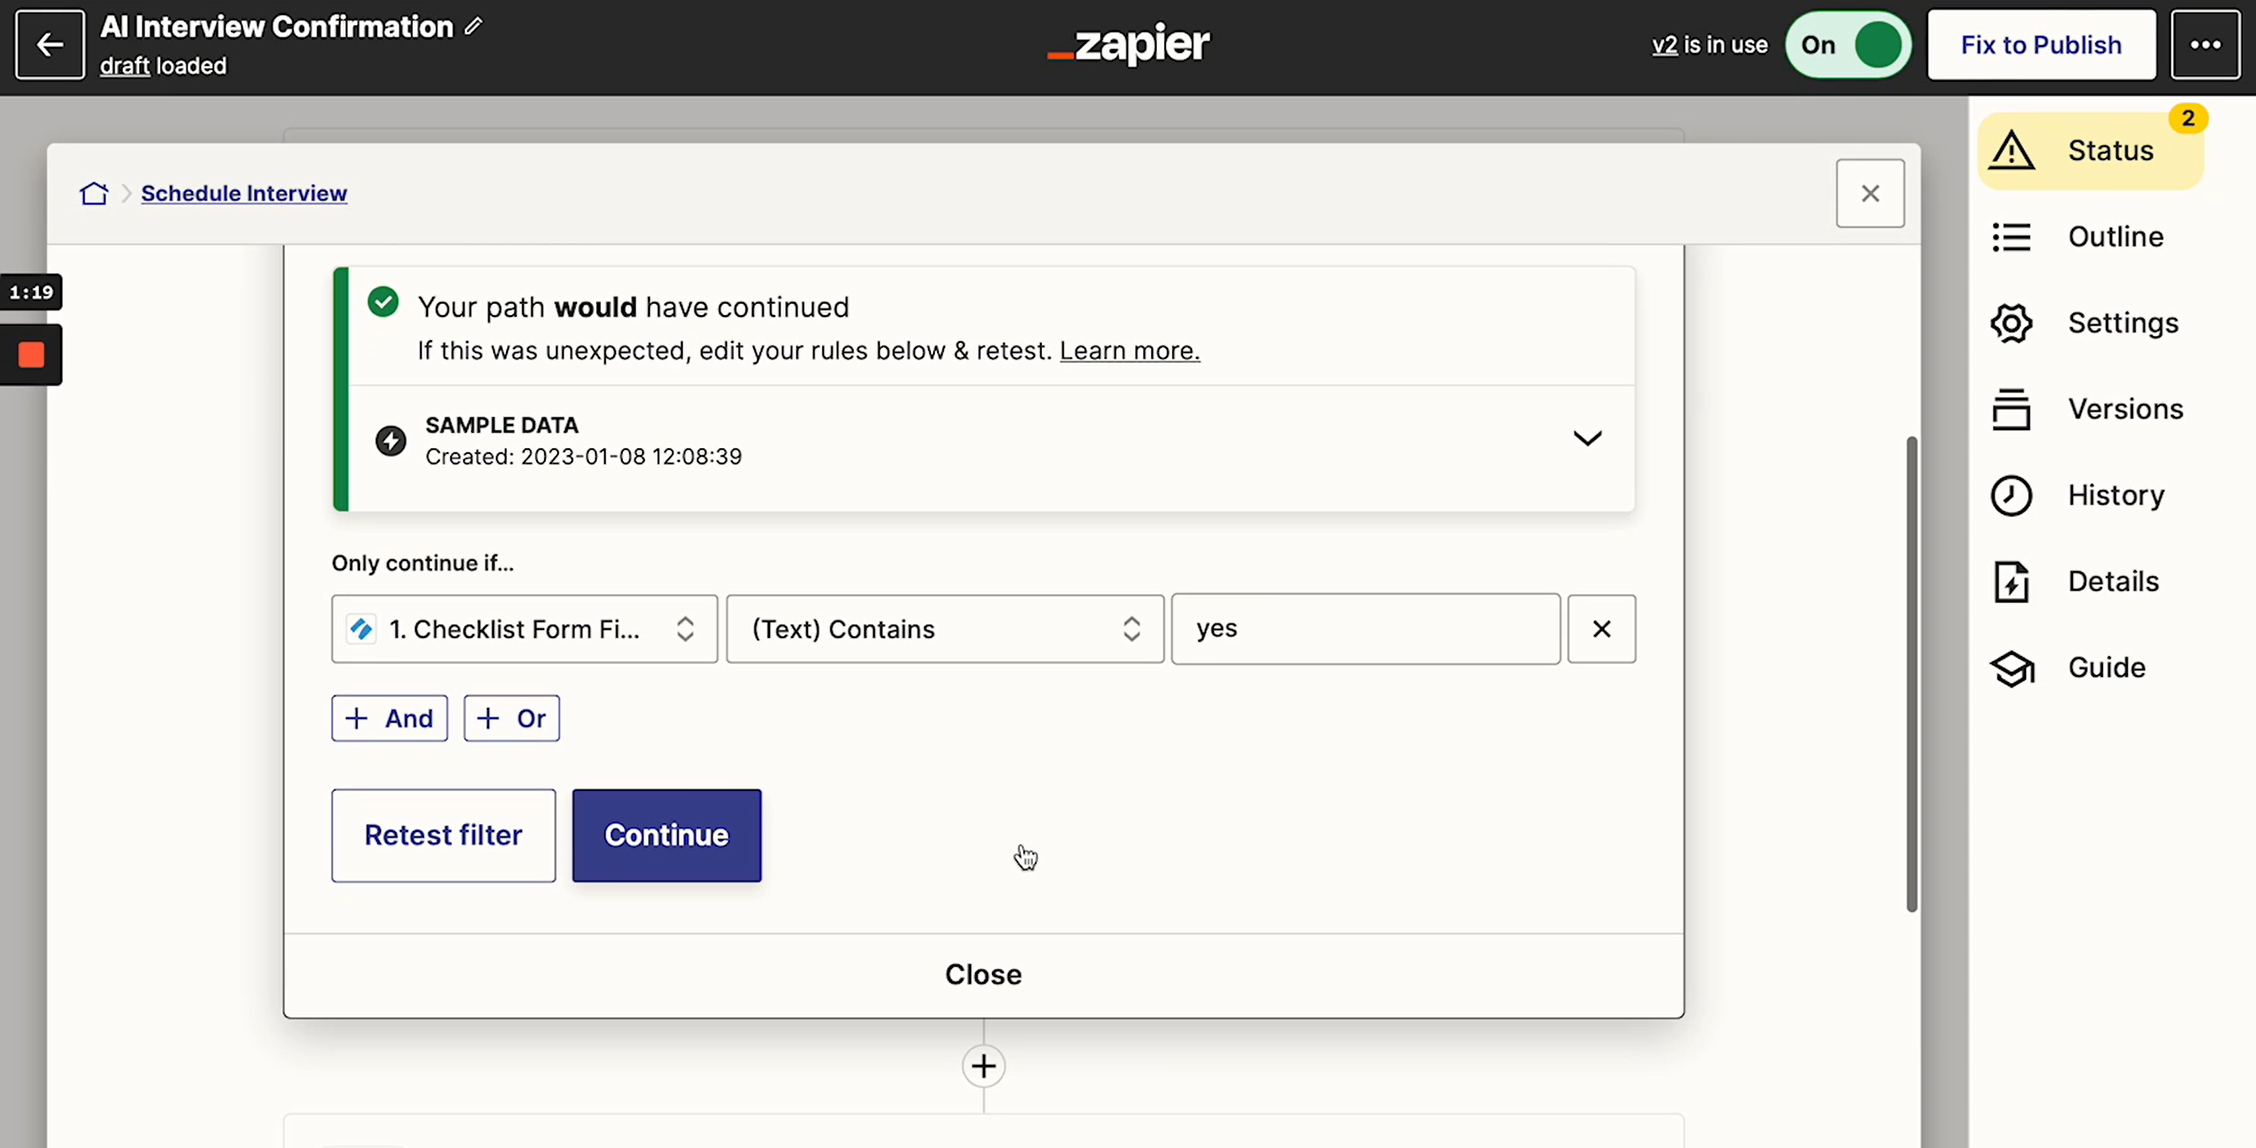
Step 2: Set up Paths
Next, you need to set up the Paths. There will be two for this task, one for if you plan to reject the application (No) and one for if you wish to move forward with an interview (Yes).
For our purposes, we’re going to discuss how to set up the “Yes” Path for sending the email to request an interview. However, it works the same for the “No” Path to reject the application.
Step 3: Add Date/Time Formatter
So as you continue creating the “Yes” Path, you need to set a Date/Time format.
When “Yes” is selected in the workflow, a prompt will be sent to the AI. Adding in the Date/Time Formatter ensures that the dates included in the AI-generated email are correct.
We don’t go into much detail in our video about Date/Time formats, but Zapier has a whole page with a video explaining it if you want to understand more.
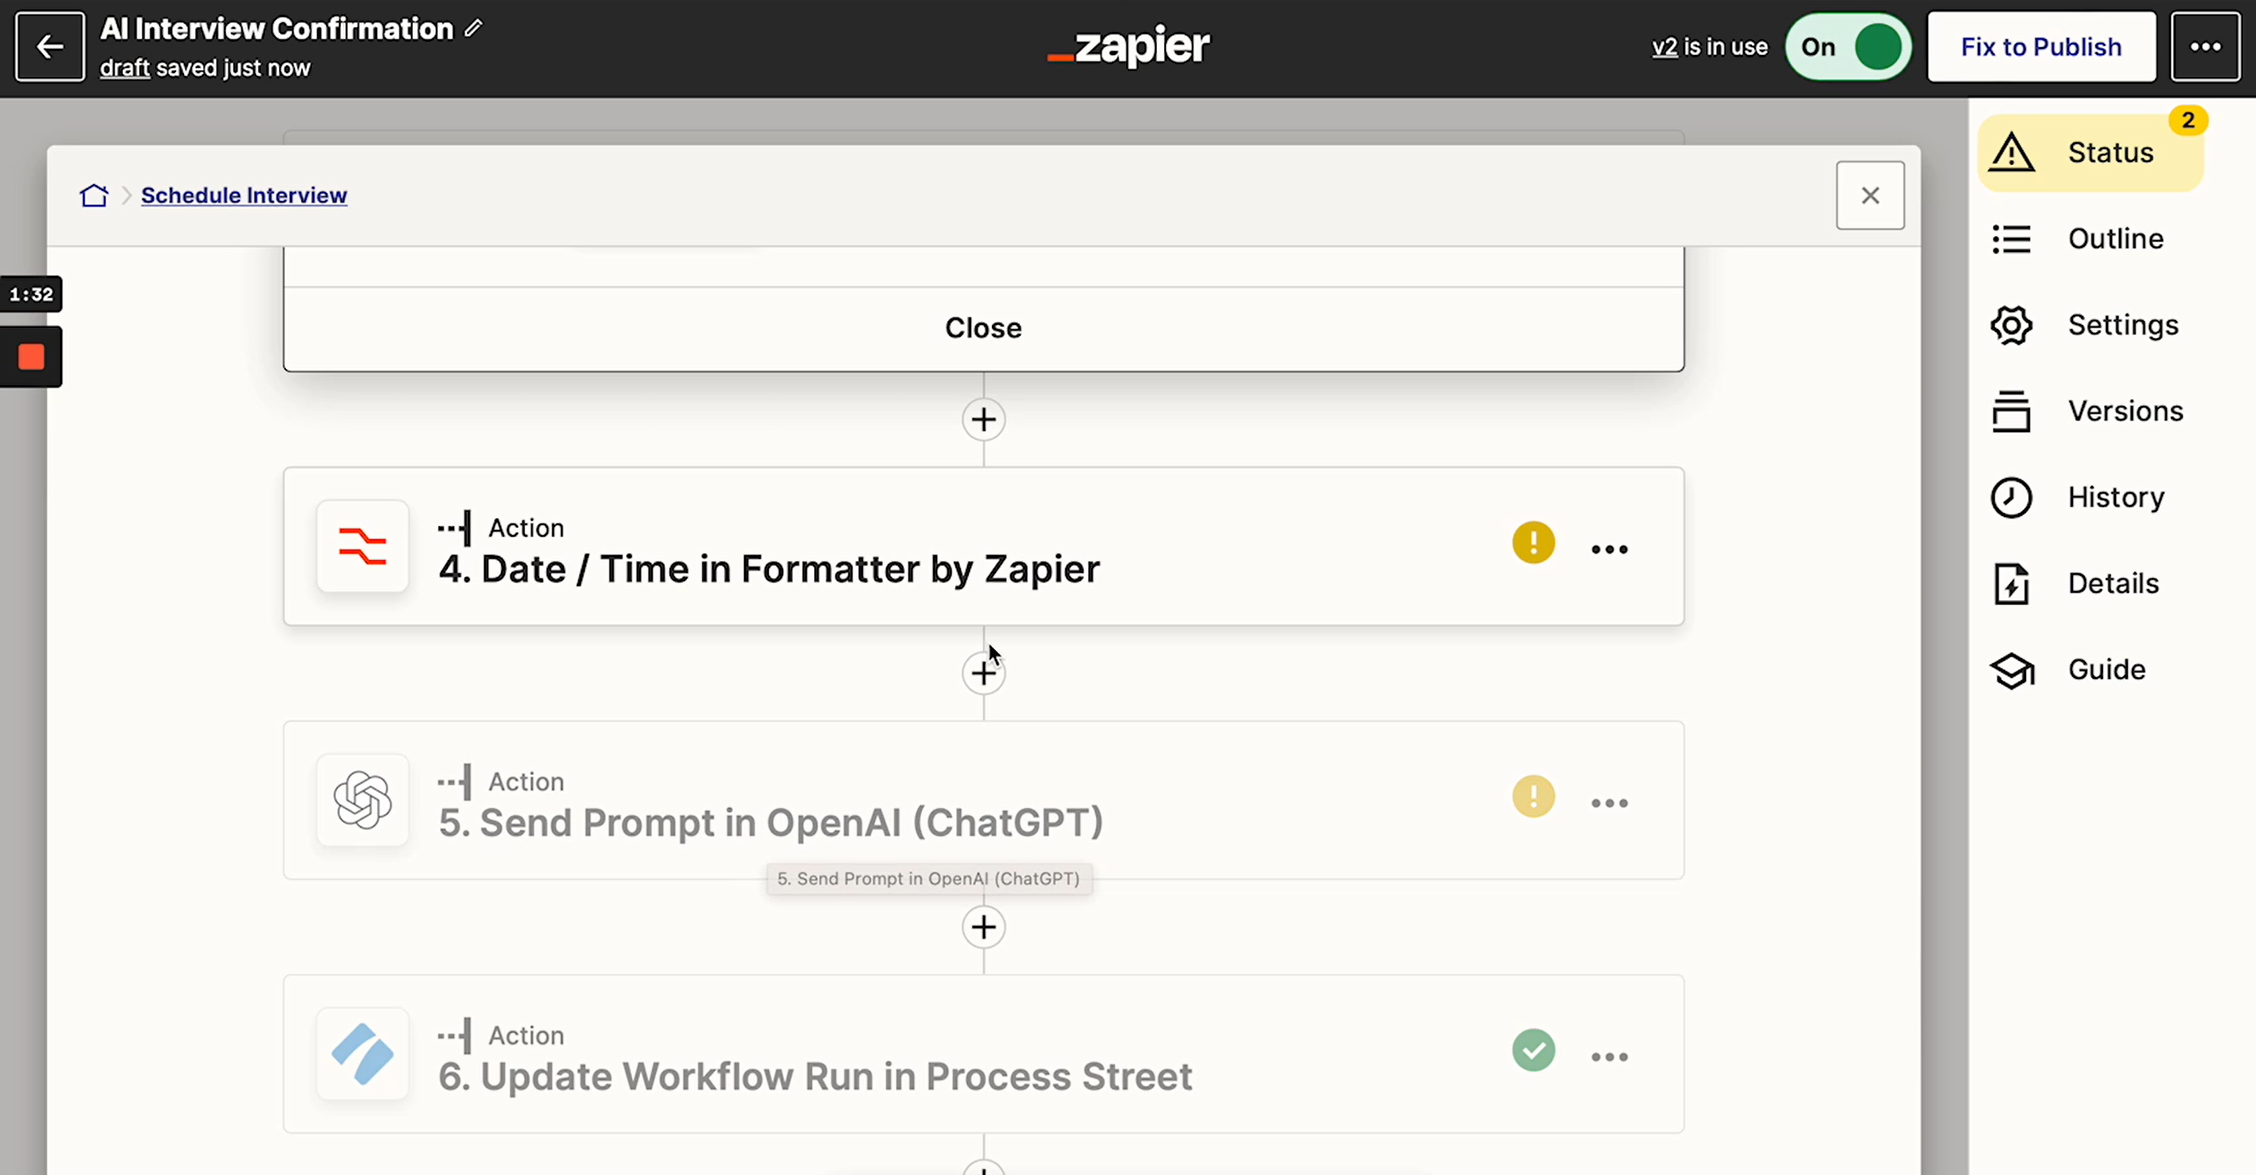
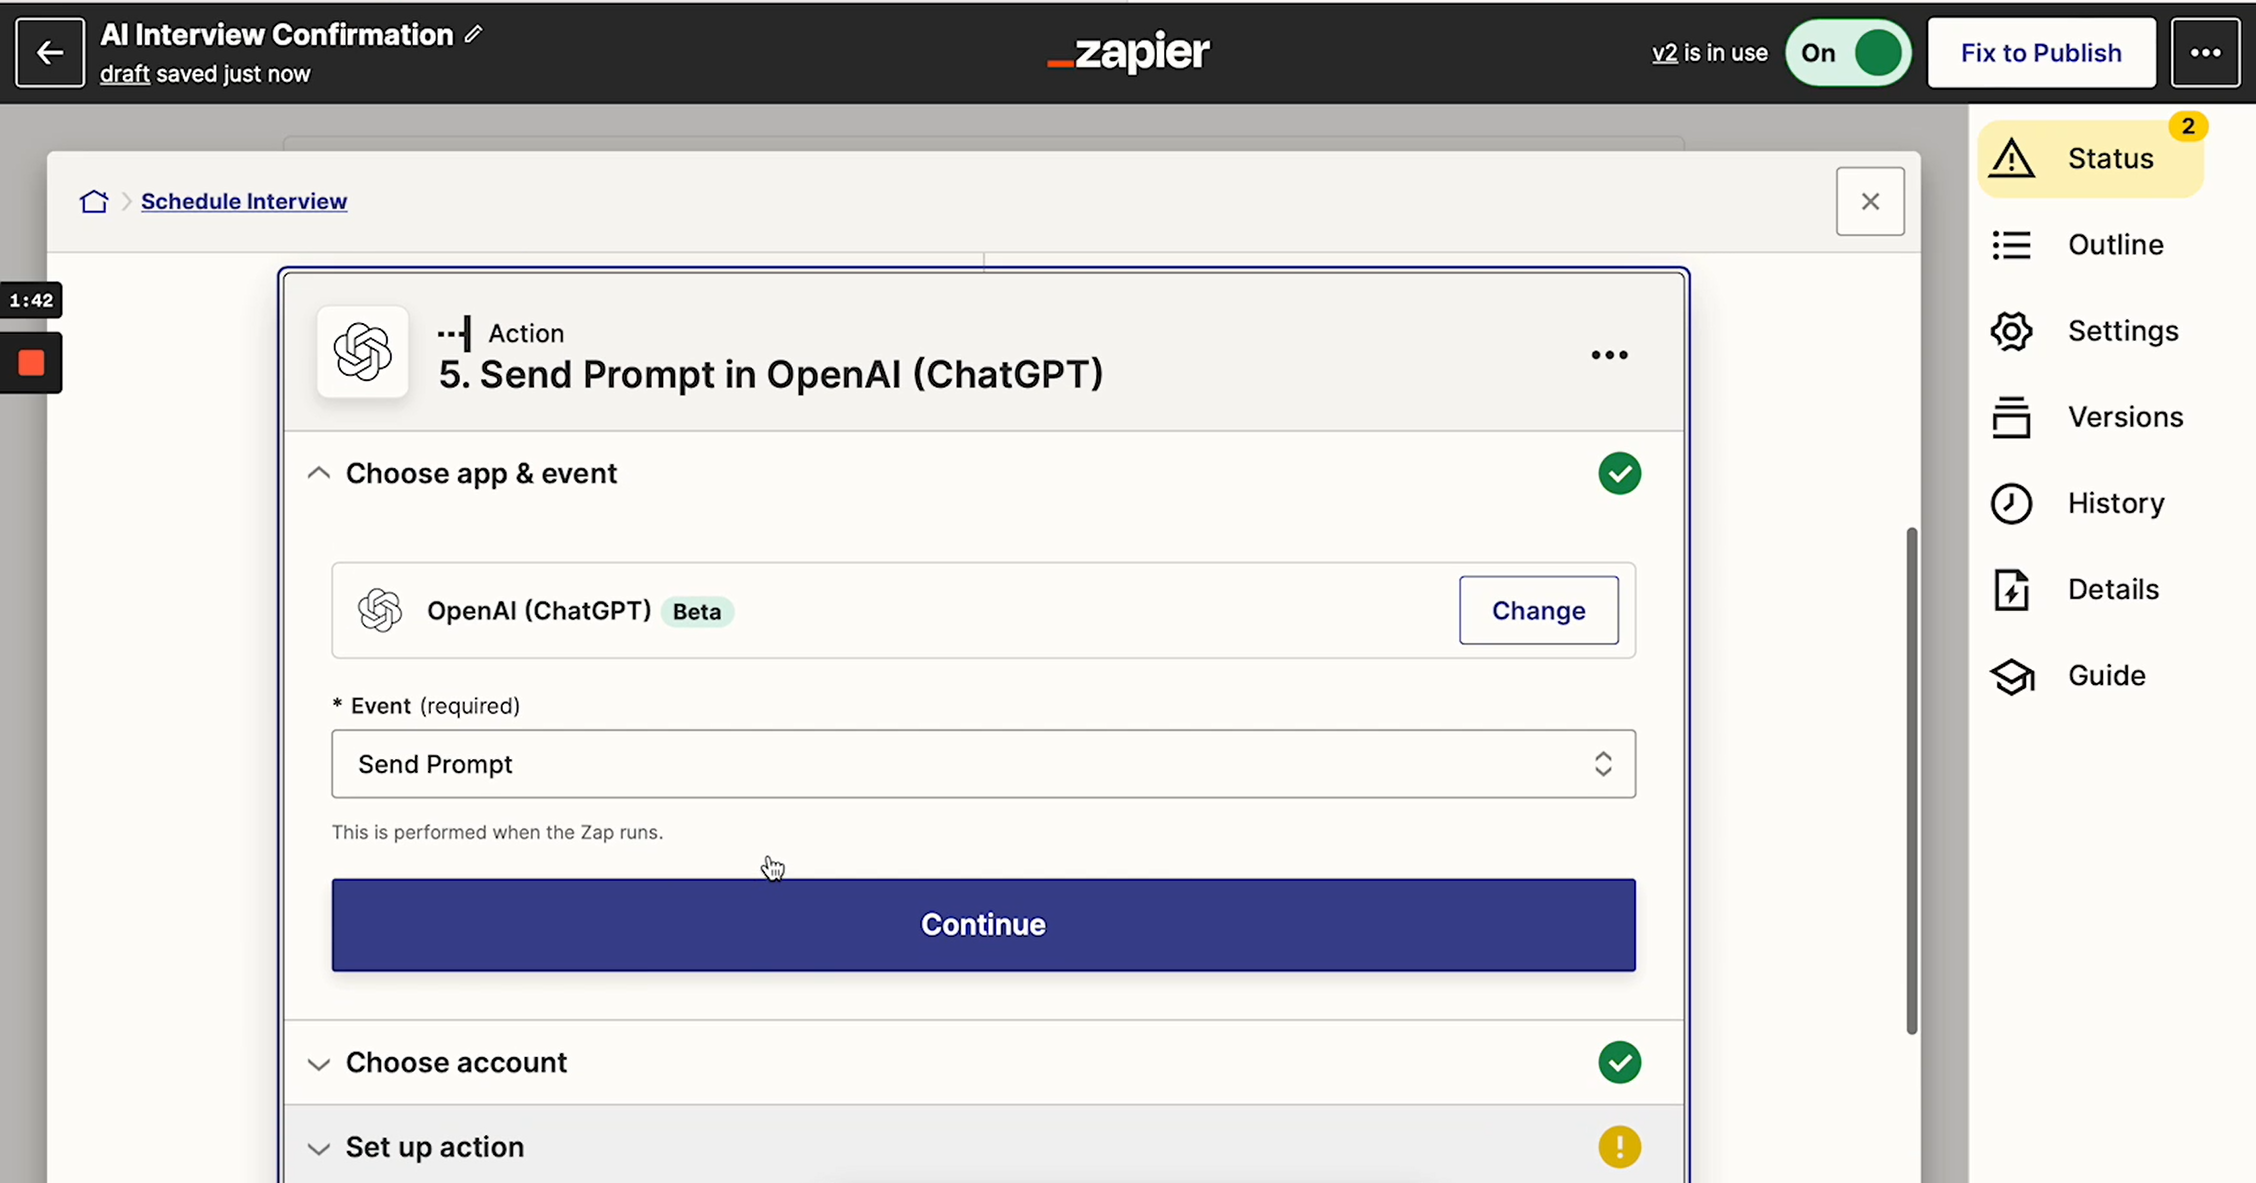
Step 4: Send prompt to the AI
This is the most important step because this is where the AI comes in.
You first need to set the Event to “Send Prompt.”
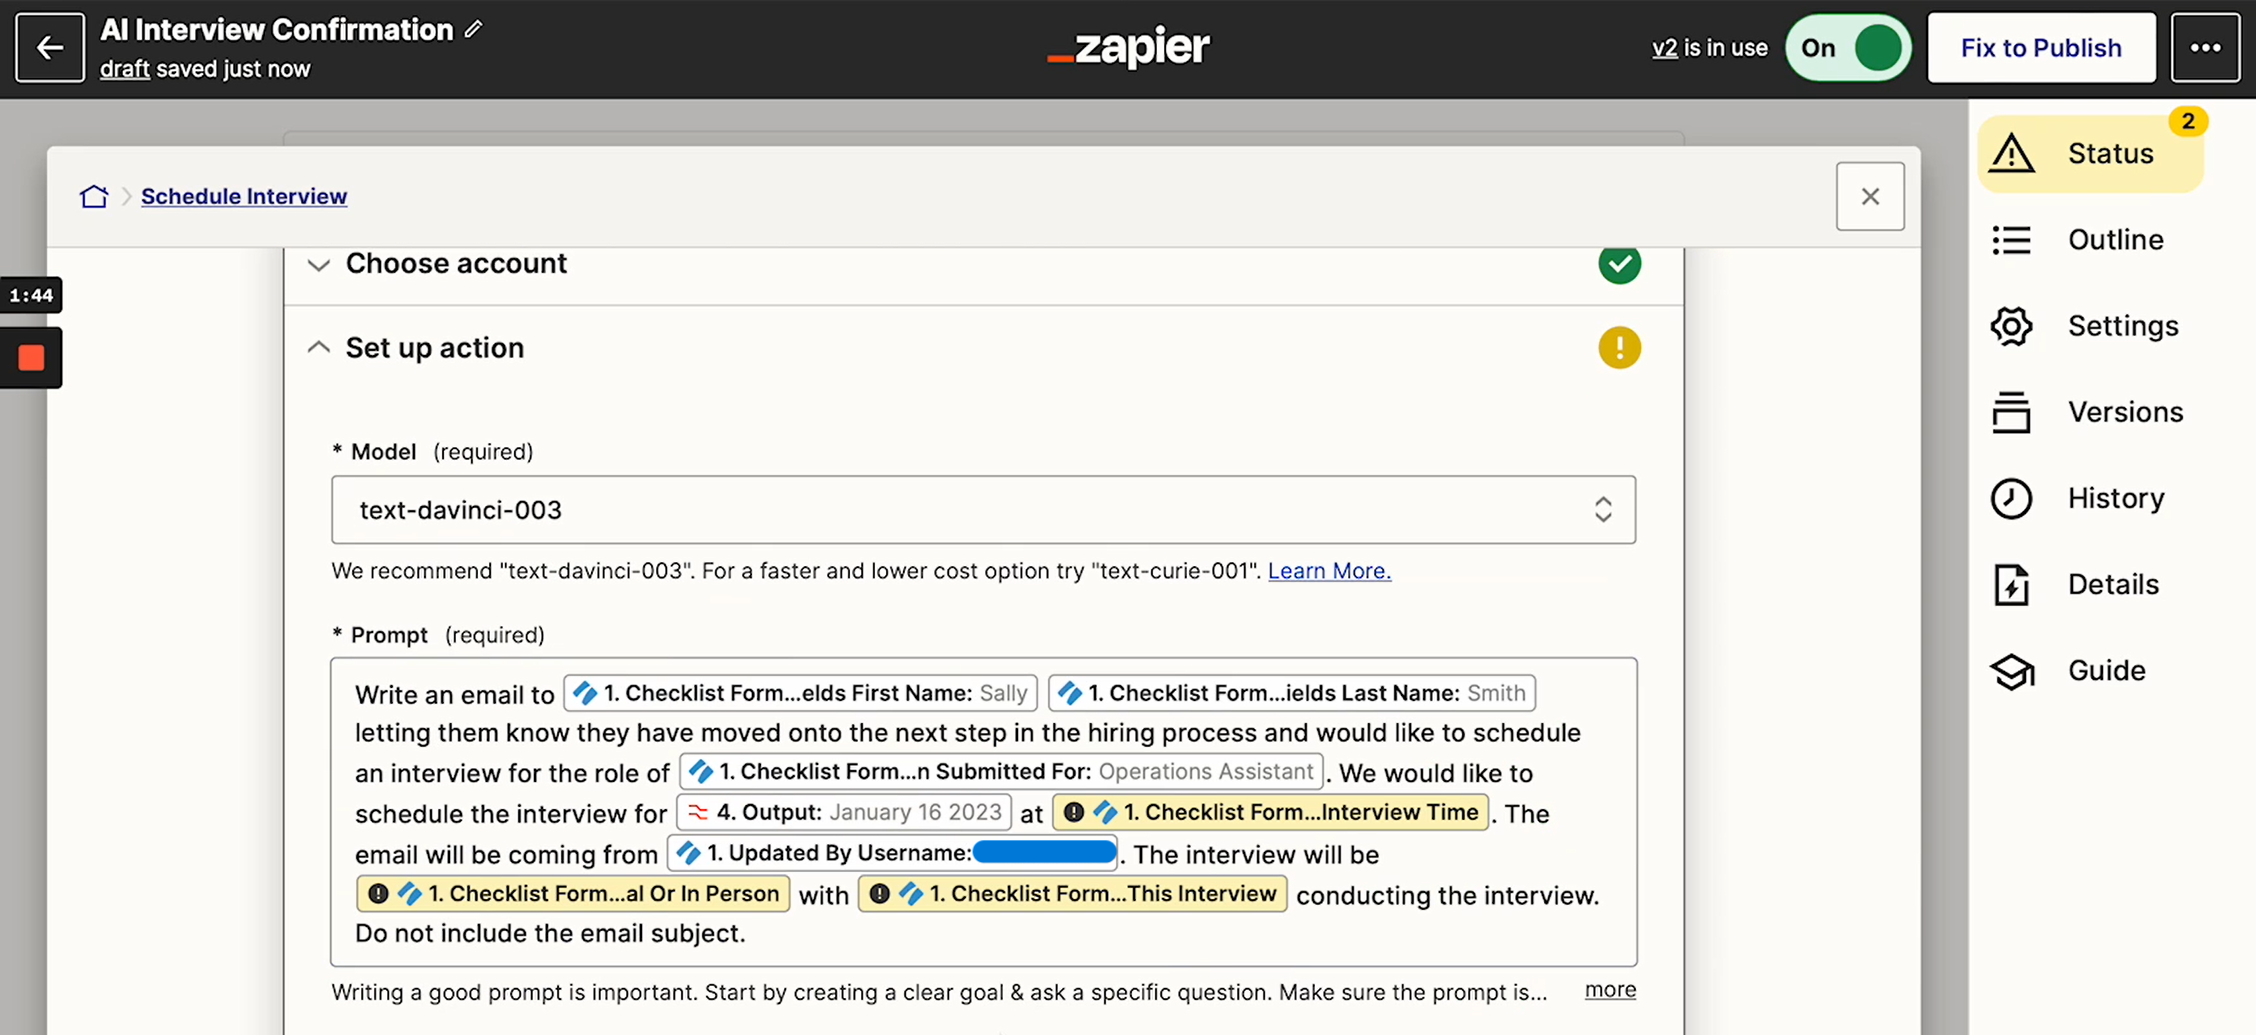
Next, you need to set up the action. This is where you tell the AI what to do. In this case, writing an email. You need to tell the AI what you want to be included in the email, particularly which form fields from the workflow need to be present.
By doing this, you ensure that every email has the correct personal information and dates when the AI is triggered.
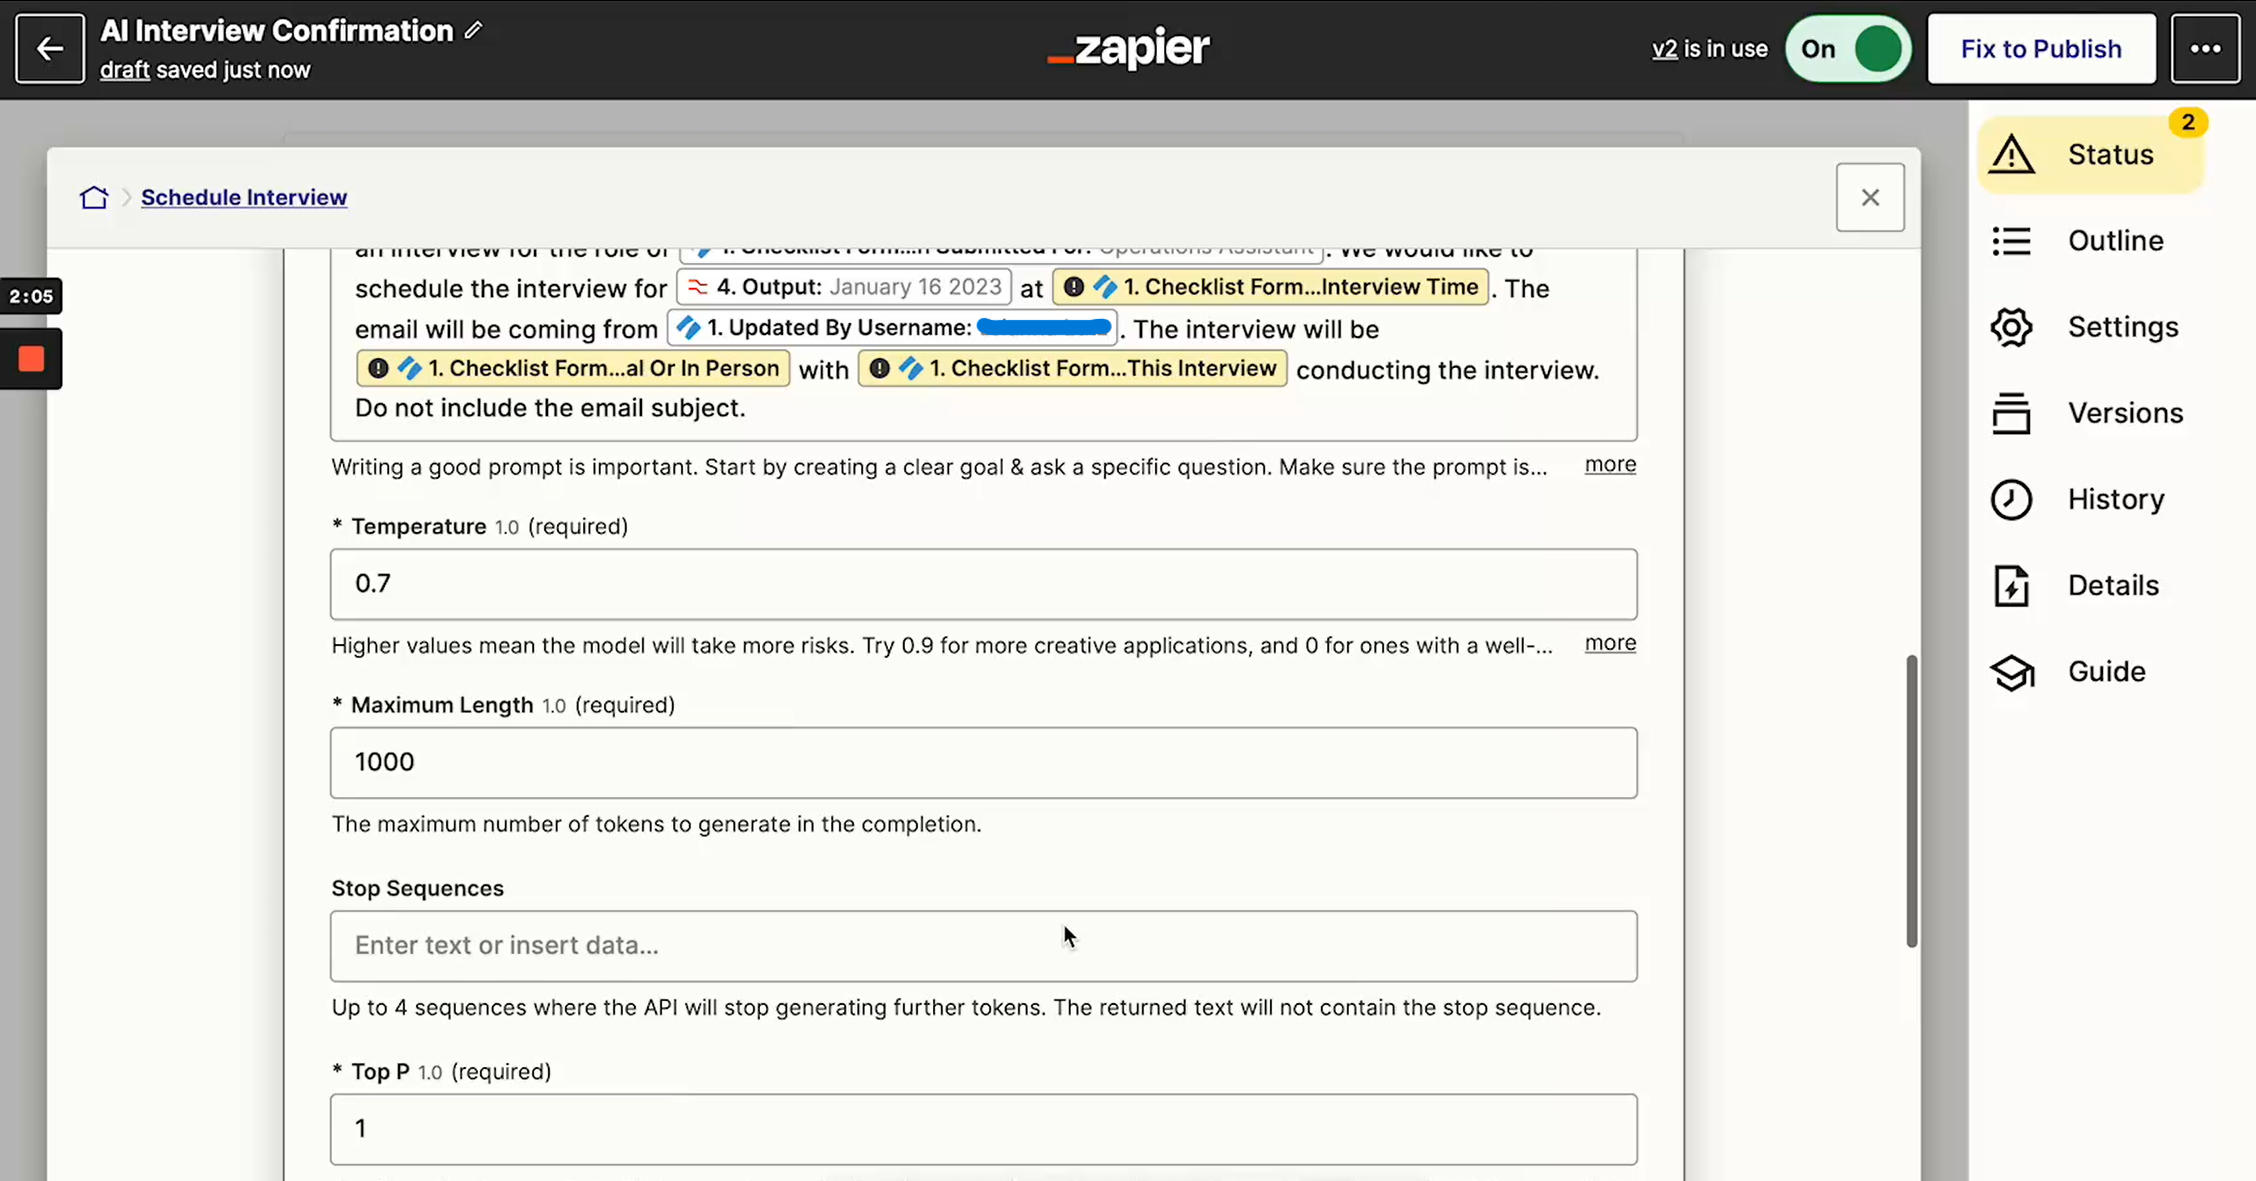
A cool feature of OpenAI is the ability to set the Temperature of the command. The Temperature is the level of creativity you allow the AI to write with. In our case, it was set to 0.7, which you can think of as 70% creative.
You can also set the length you want the email to be. It’s important to do that because if you don’t, the email could be much longer than you want it.
Pro tip: Be as specific as possible when writing the AI prompt. The more specific you are, the better the final product.
Once you’ve done all that, the AI will show you a draft of the email. Give it a read to make sure you like it. If you don’t, make edits at your leisure. If you do, make sure to send a test email so you know it works.
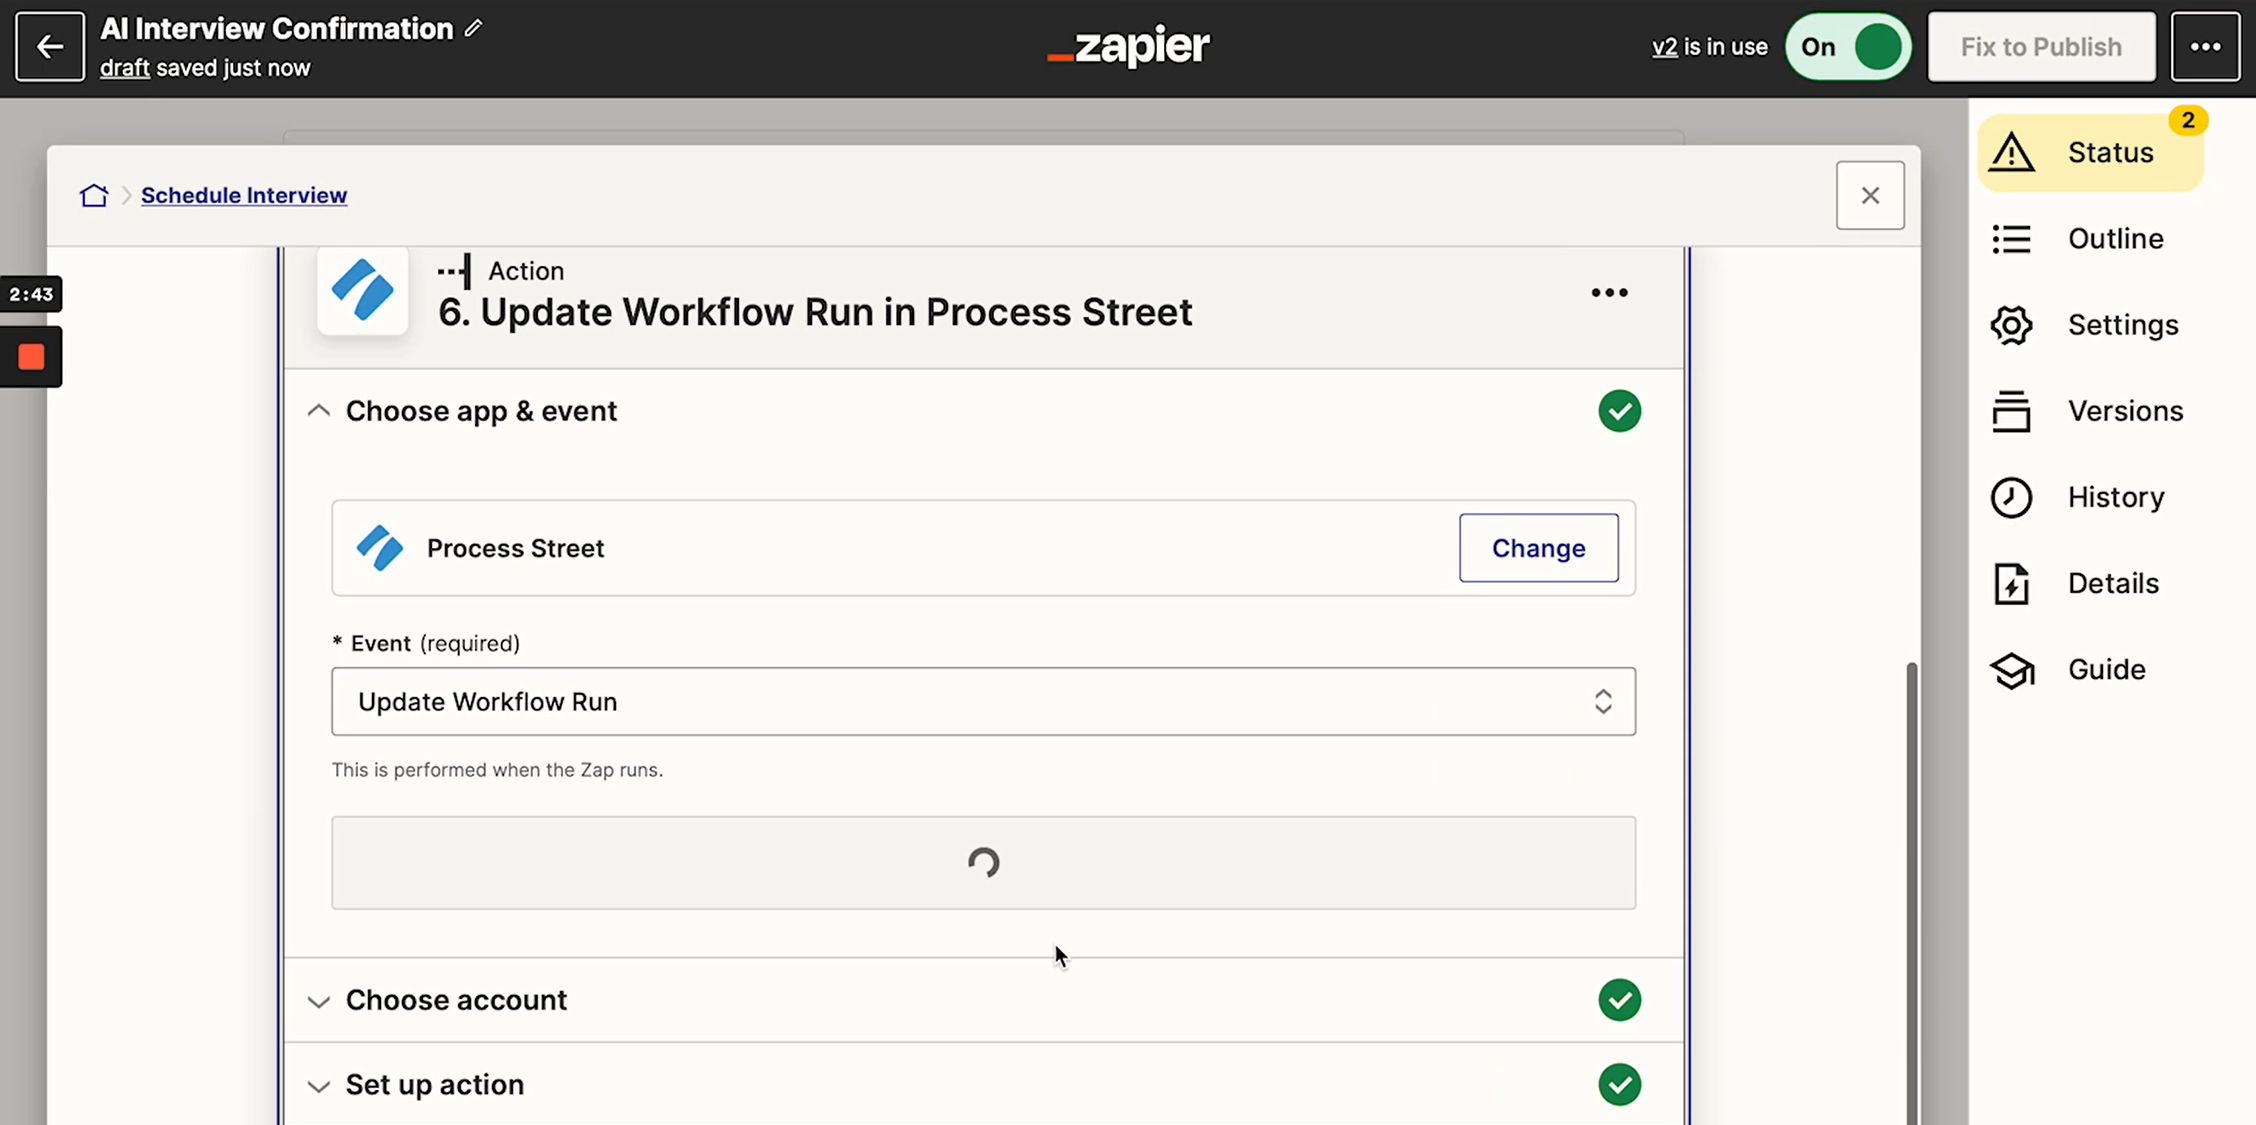
Step 5: Update the workflow
The final step is very simple: Update the workflow in Process Street.
Once you do that, it should be all ready to go! Head back into Process Street, refresh the workflow, and test the task to make sure everything works as you want it to.
Confused? No problem! We can do it for you
If you’re confused, don’t worry. So am I. I may work for a tech company, but I’m a writer by profession and the intricacies of using AI tends to go right over my head.
Luckily, we have loads of way smarter people on our team who can hop on a call with you and walk you through how to do it. You’ll even have your questions answered in real-time.
Feel free to book a demo with us so we can help you!
And if you would prefer us to do it for you, we can! Our solutions consultants can do anything, they’re amazing. Just ask about it in your demo.
Isabella Busby-Priest
Isabella Busby-Priest is a content writer with a keen interest in all things environment, nature, travel, and culture. When she's not creating new blog content, you'll often find her reading in odd places or planning a trip to a new country.