Airtable is a flexible and powerful database management tool that allows teams to organize, track, and collaborate on data in real-time. With its intuitive interface and customizable fields, Airtable can be used for a variety of use cases, from employee hiring to project management and inventory tracking. You can integrate Airtable with Process Street to make your workflows super powerful and automate your work via Webhooks or Zapier.
A Webhook integration can bring information from Airtable that would trigger a new workflow run in your Process Street account. Webhooks are automated messages or payloads sent from apps as a trigger to cause an action in a receiving app.
In this example, we will create a Webhook that runs the Call Center Employee Onboarding workflow when a candidate is Hired for an open position in Airtable.
Now, let’s jump into the integration.
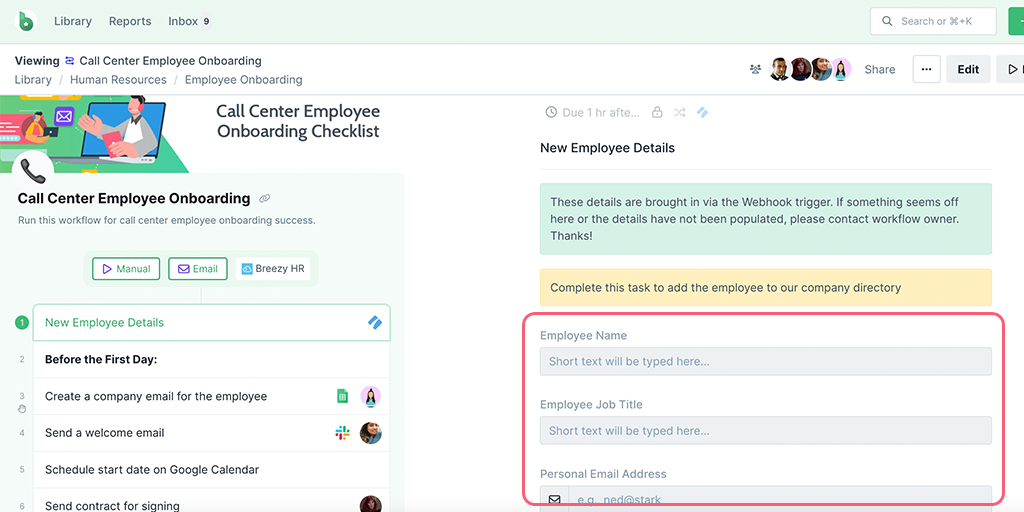
First, create a Workflow in Process Street and ensure to add form fields that are the same as the data fields in Airtable. This will help you to map the information from Airtable to Process Street.
Their information is stored in Airtable while creating a new candidate for an open position. So, we need to create form fields in our workflow to push that information through to Process Street. These form fields should include the candidate’s name (short text field), email address (email field), phone number (number field), and so on.
This will mean that whoever is onboarding the candidate won’t have to look up their information in Airtable, but can instead see everything in Process Street.
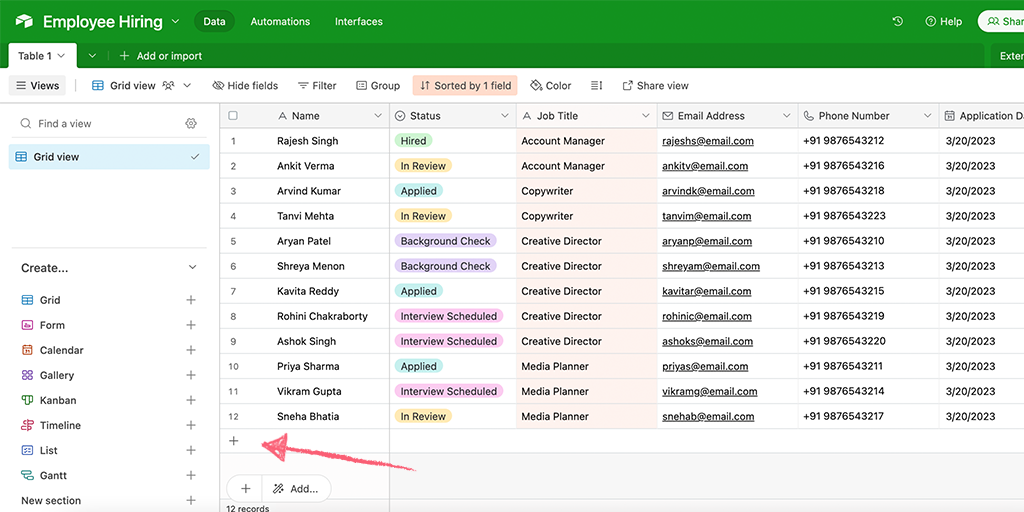
Log into your Airtable account or create a new account. Then navigate to your Main Workspace to create a new base.

For our example, we have created an Employee Hiring base. If you have an existing base that you would like to work with, you can select that base to create your webhook.
If you’re creating a new base, you can add a few employee details by clicking on + Add record as shown below.
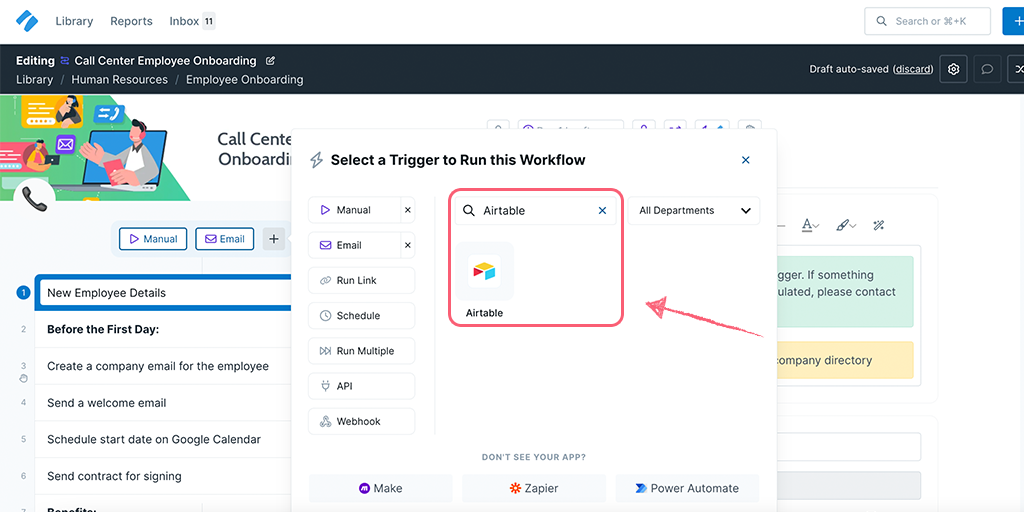
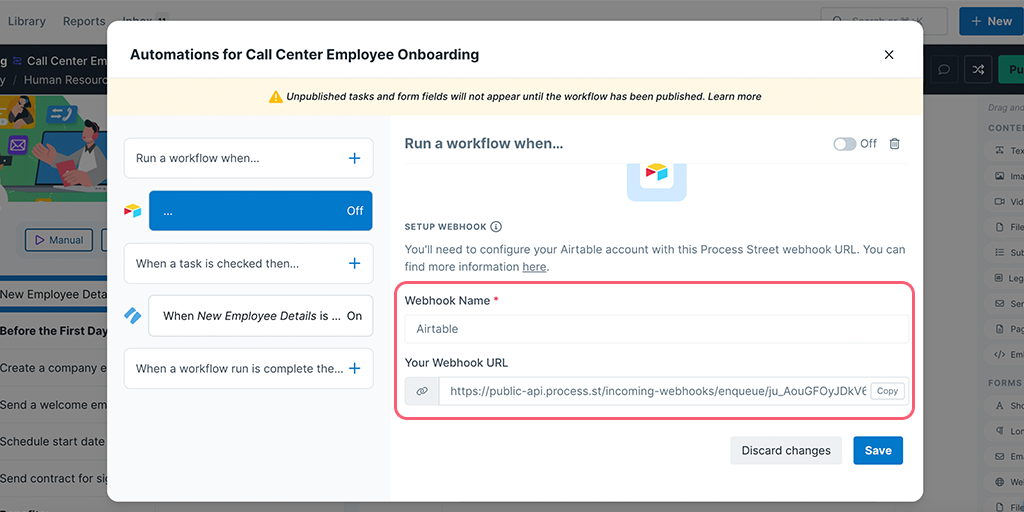
To get the webhook URL from Process Street, when you’re editing your workflow, click “Triggers” above your task list on the left or click the + icon next to your existing triggers as shown below.
Here, you can look for Airtable as a Trigger to Run this workflow.
You can name your webhook as the app name or any phrase that helps you identify the Trigger. Then copy the webhook URL as you will need it later.
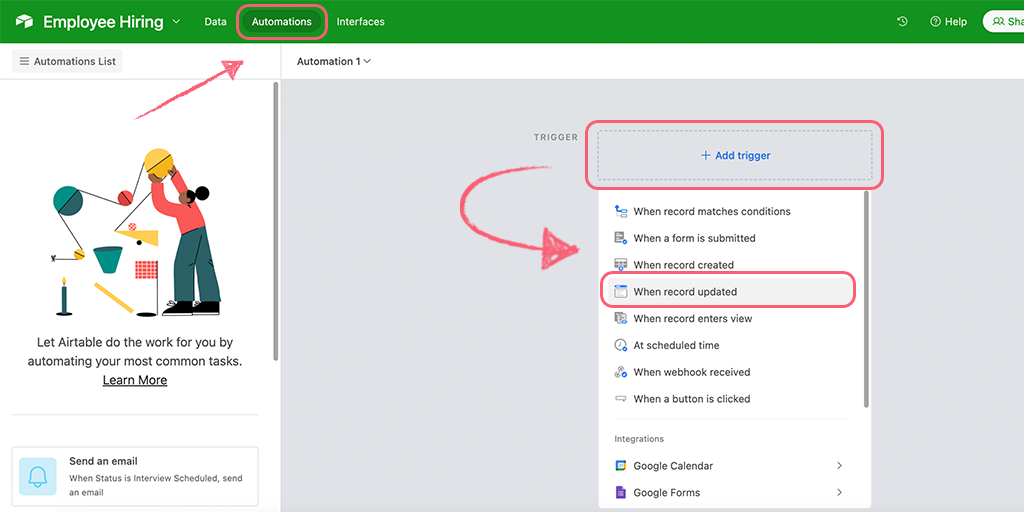
To create a webhook in Airtable, you need to add an automation. Navigate to the Automations tab in the top left corner of your screen. Then click + Add trigger and select your trigger. For our example, we have selected When record updated.
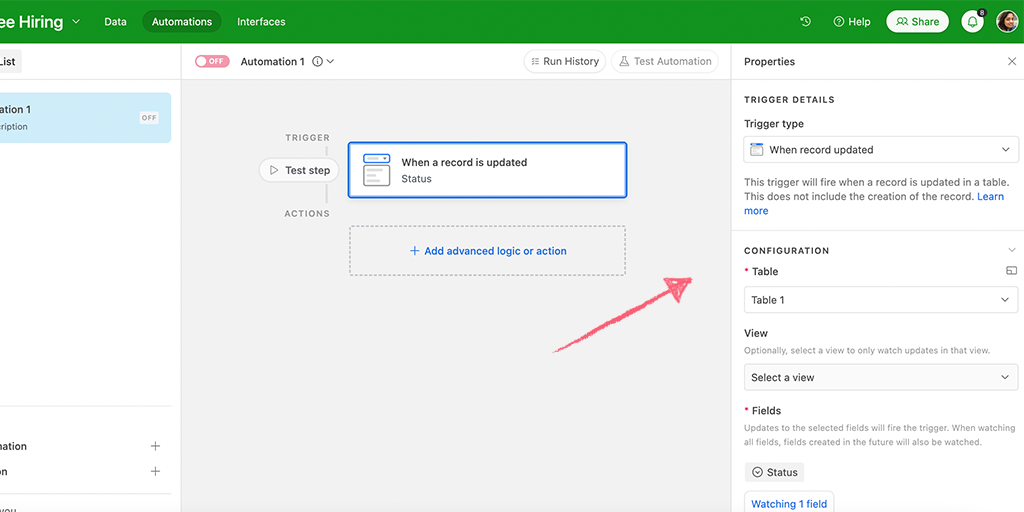
Configure the trigger by selecting the Table, View, and Field that would trigger the webhook. We have selected Status as the field so the automation will trigger when the status of any record changes to Hired.
Set up the action by clicking + Add advanced logic or action and select Run script.
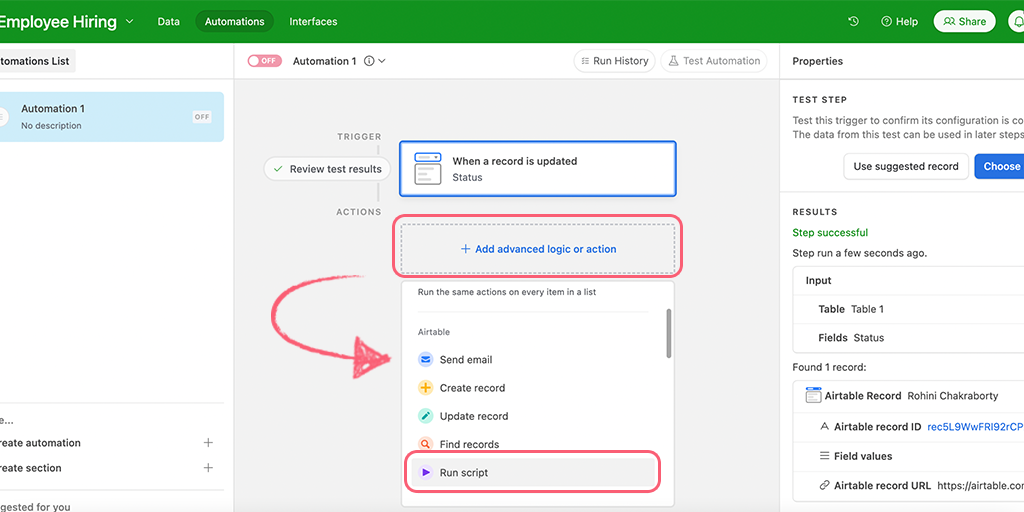
To set up the webhook, you need to enter a custom code with the webhook URL from Process Street. Then test your script as shown below.
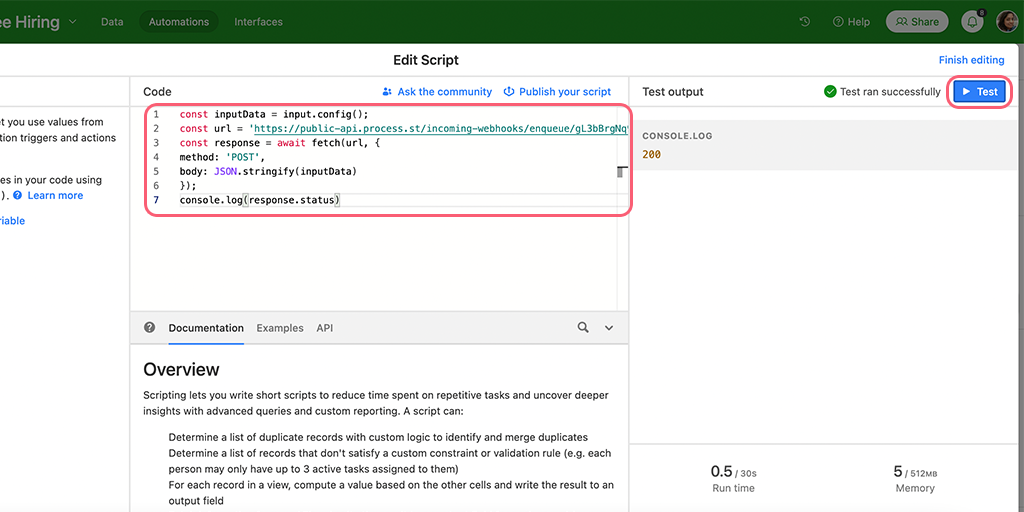
We have entered the following code. You can use the same but remember the URL to your URL that you had copied earlier.
const inputData = input.config();
const url = ‘https://public-api.process.st/incoming-webhooks/enqueue/gL3bBrgNq9NNnI8g5KVEaQ‘;
const response = await fetch(url, {
method: ‘POST’,
body: JSON.stringify(inputData)
});
console.log(response.status)
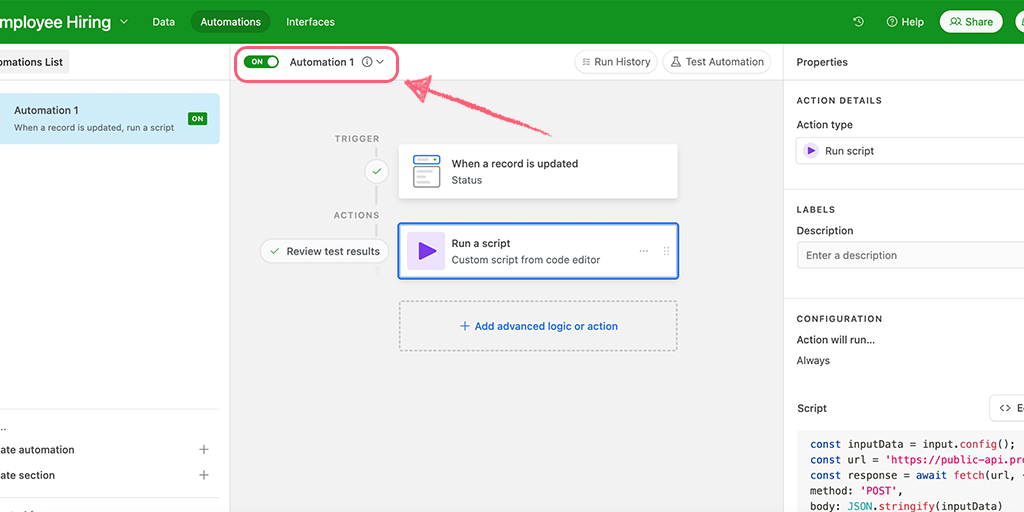
Now go back to Process Street and test your trigger. Once it returns successful, turn on the automation in Airtable.
If it doesn’t, you might want to go back to your base and move a candidate to the Hired stage.
You can now map your form fields from Airtable to Process Street.
Lastly, turn your webhook On and Save it. Then Publish your workflow and you’re all set!
As an extra step, you can go to Airtable, move a candidate to Hired then come back to Process Street in the Reports Dashboard to confirm a new workflow is run by the webhook.
Zapier is an integration platform that connects over 2000 different apps. An action in any of the supported apps (like forwarding an email or adding an attachment to a task) can trigger another app’s features automatically. Zapier integrates with both Airtable and Process Street. The whole “recipe” sequence (“if X happens, do Y”) is known as a Zap.
For this example, we’re going to set up a trigger for each time a new task is checked in a Process Street workflow run, and an action to create a new Airtable record.
Users: In order to create an API key for integrations, you must be an Administrator.
Let’s get this set up!
You can either create your own workflow and edit it to include custom form fields for whatever purpose you need, or you can use one of our many pre-made workflow templates.
For this example, we’ll be using the client onboarding workflow for a marketing agency.
Here it is embedded below:
You can grab it for yourself and add it to your library, or use your own workflow.
Once you’ve decided on the workflow, the next step is to create the Zap in Zapier.
Zapier is a tool that connects over 2,000 different apps. Any action in any of the supported apps (like forwarding an email or adding an attachment to a task) can be set up to trigger another app’s features automatically. Zapier integrates with both Airtable and Process Street.
The whole recipe for a basic integration (trigger + action) is called a Zap.
Sign in to Zapier or create an account, then click “Create zap“.
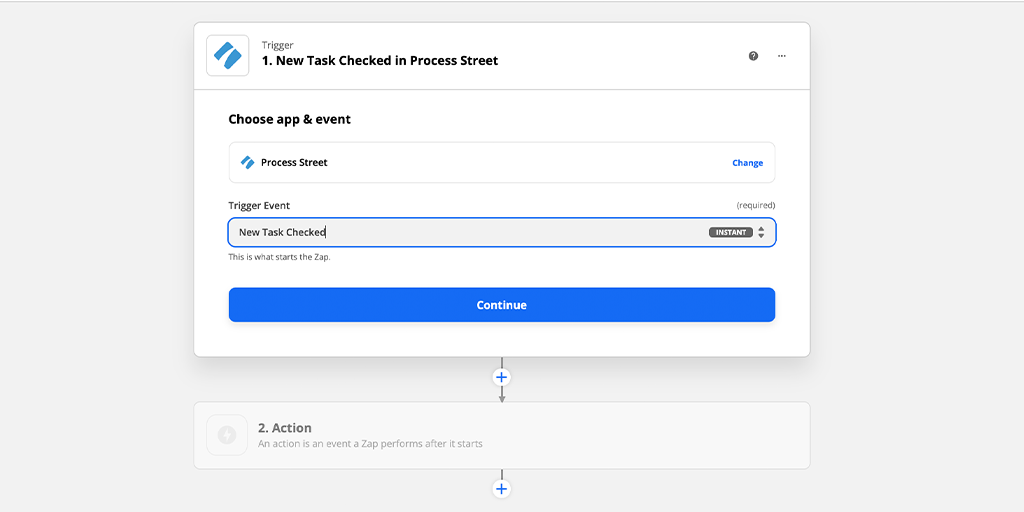
In your new zap, select Process Street as the app and select “New Task Checked” as your trigger:
Click “Continue” and connect your Process Street account. Click “Continue” once that’s done and progress to the Set up trigger stage.
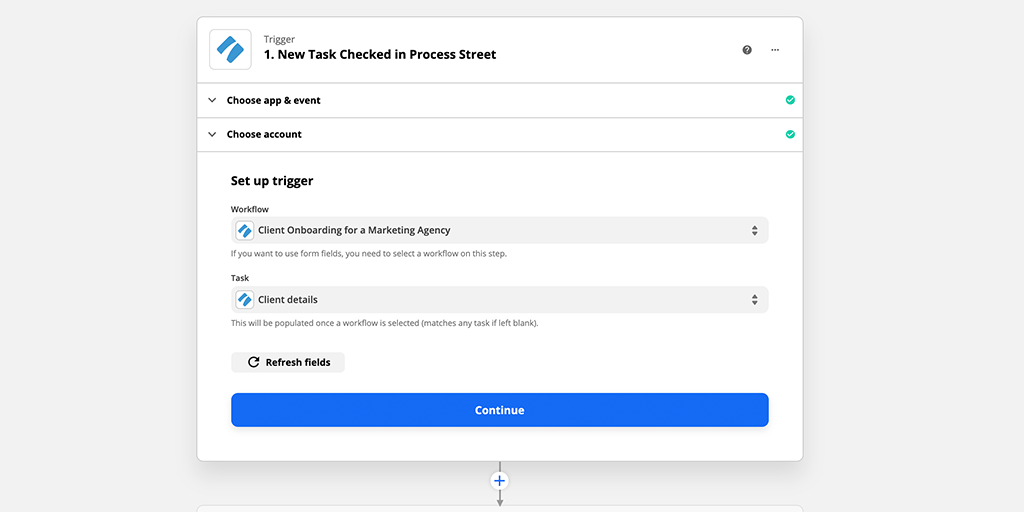
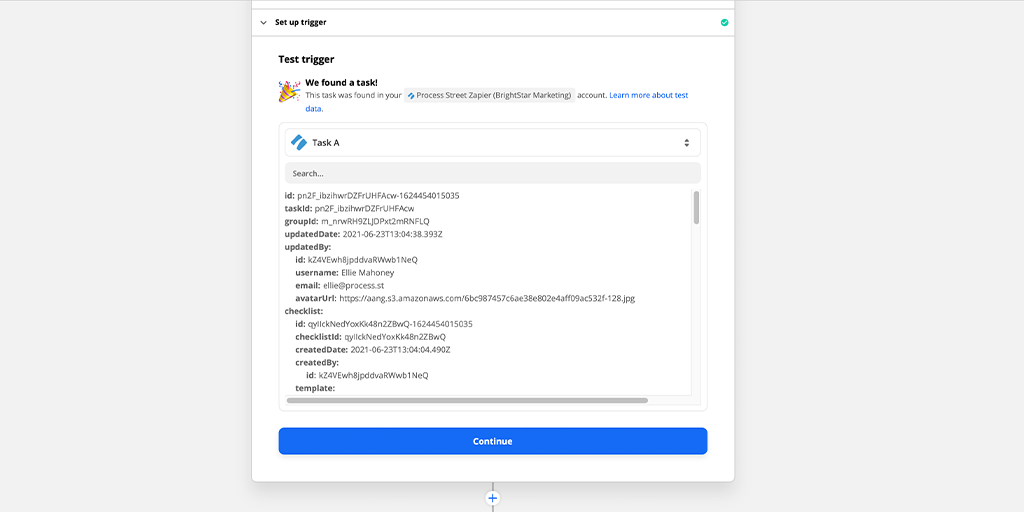
Choose the Process Street workflow run you wish to use, and select a task that will act as your trigger. Click “Continue” and test your trigger.
This step requires that Zapier pulls sample information from the workflow you specified, so you’ll have to actually run your workflow and complete it as far as and including your trigger task.
When you test your trigger, you’ll see something like this:
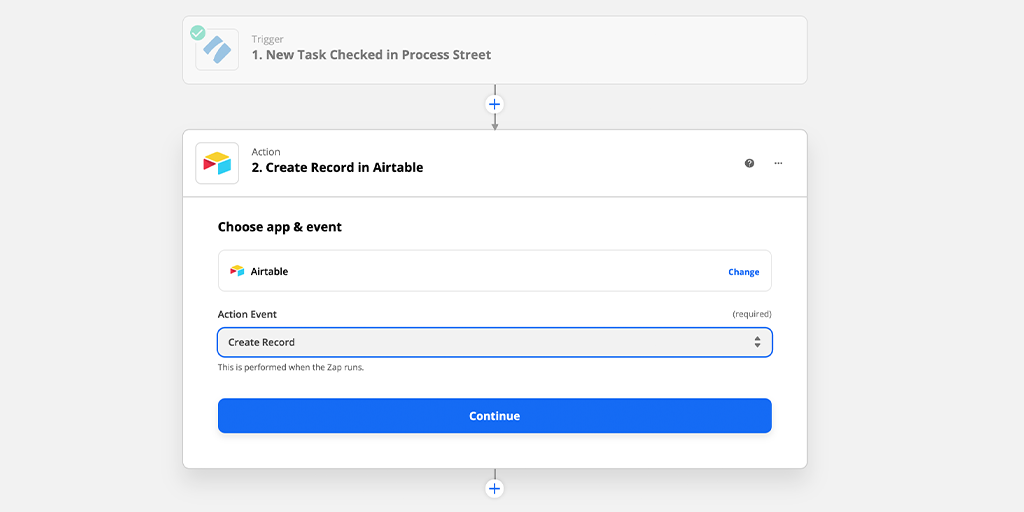
Now it’s time to add an action step.
Click “Continue” and select Airtable as the app and “Create Record” as the action.
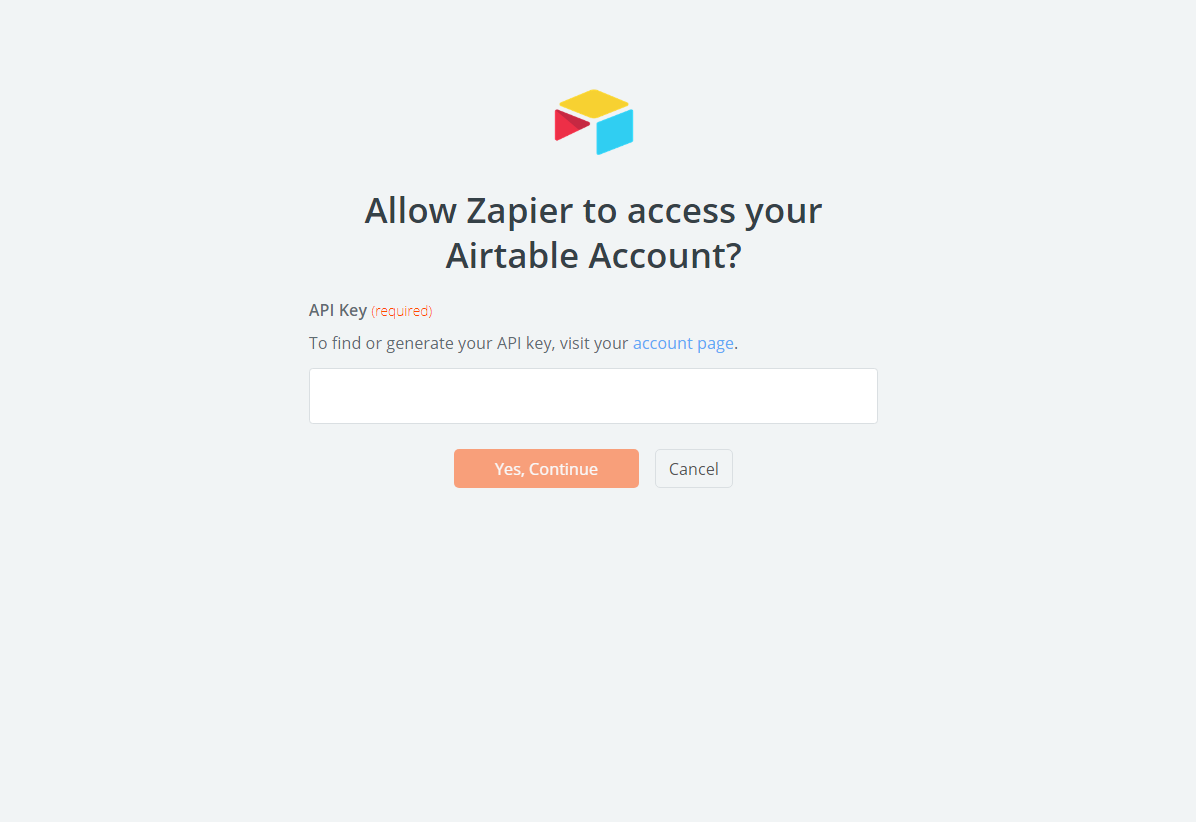
Click “Continue” again and connect your Airtable account by visiting your Airtable account page and copying your API key into the popup window:
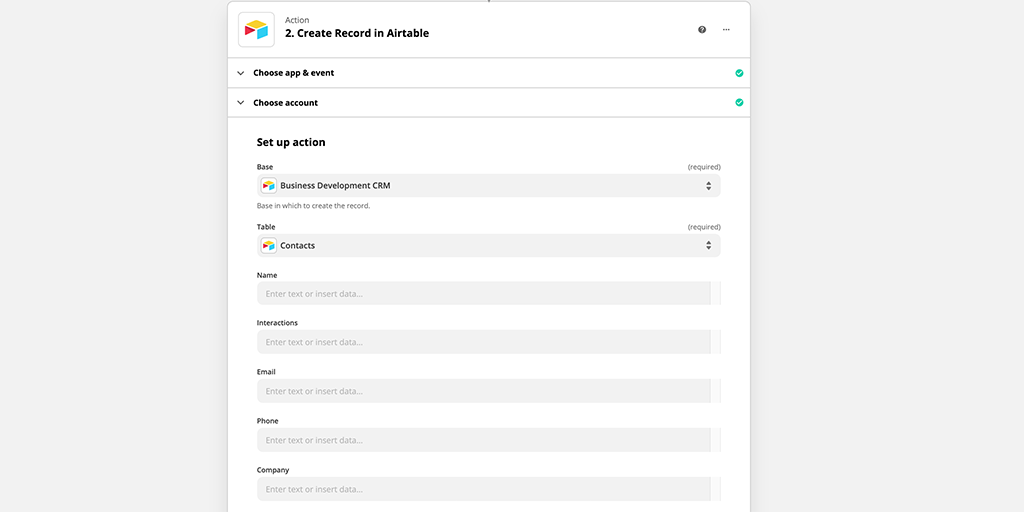
Next, set up the action to tell Airtable what kind of new record to create.
Base and Table are just locations in your Airtable account, so decide where you want the new record to go:
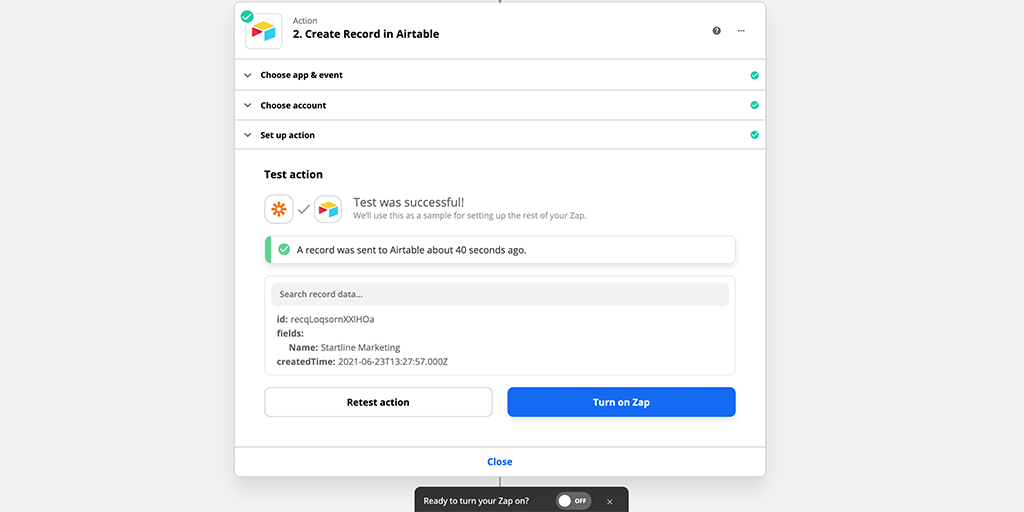
Click “Continue” once you’ve finished mapping fields and test your action. It’s also a good idea to jump into Airtable at this point and make sure the new record was actually created.
If the test was successful, you’ll see something like this:
And finally, just give your Zap a name and turn it “ON”, and you’re good to go!
Help us improve this help center.


