If you have a process that starts with a form and ends in a workflow, creating form automation can maximize your efficiency by taking care of data management for you.
You can create an automation to run workflows or to create, update, and delete data set records when a form response is submitted.
Users: In order to create automation in your forms, you must be an Administrator or a Builder who has been given ‘edit’ access by your Administrator.
In this article, we will go through:
In order for you to create an automation between your form and a workflow or a data set, you need to ensure that you have first created a form and the relevant workflow or data set that you want to connect with it.
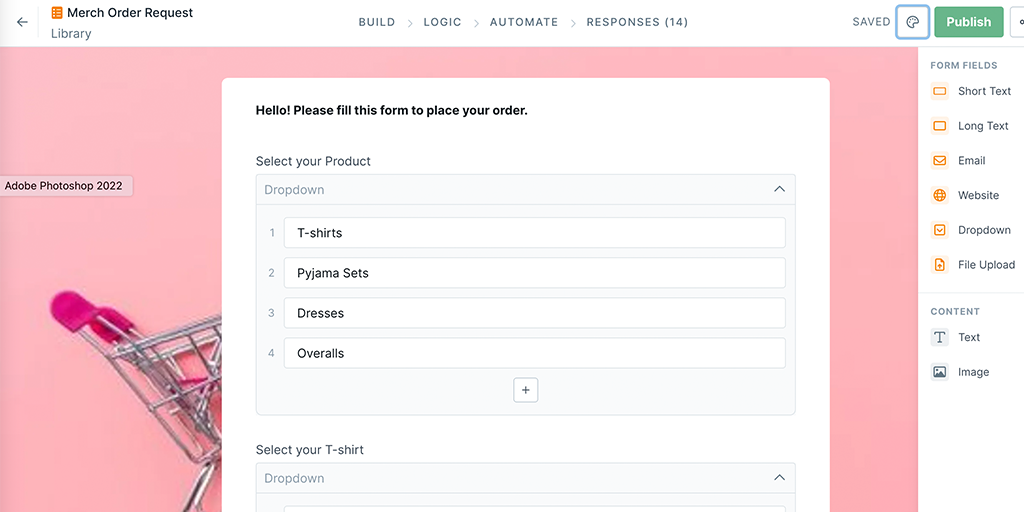
Create a form that collects details to place an order for T-shirts.
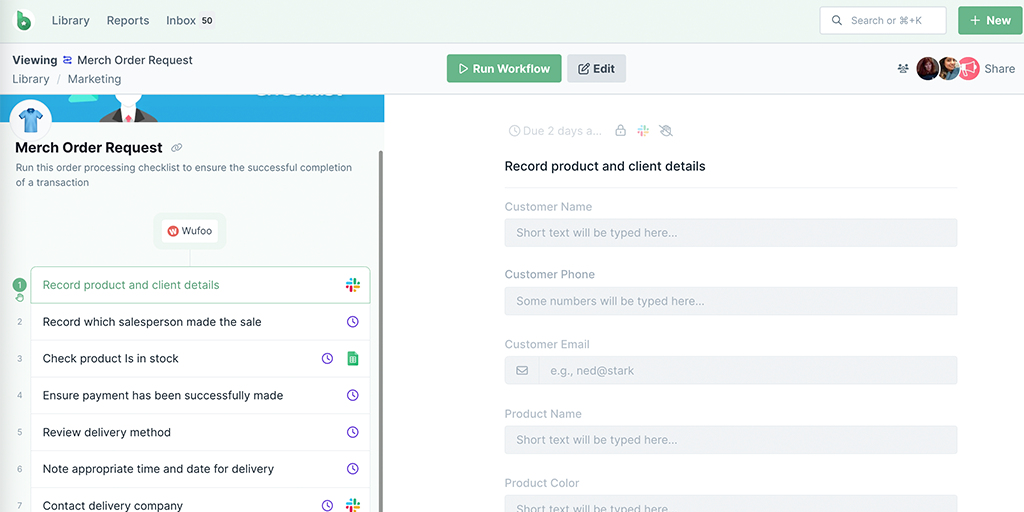
Create a workflow to fulfill the order once the form response is submitted. This workflow must include form fields to collect the data from your form like the T-shirt pattern, color, size, and customer details.
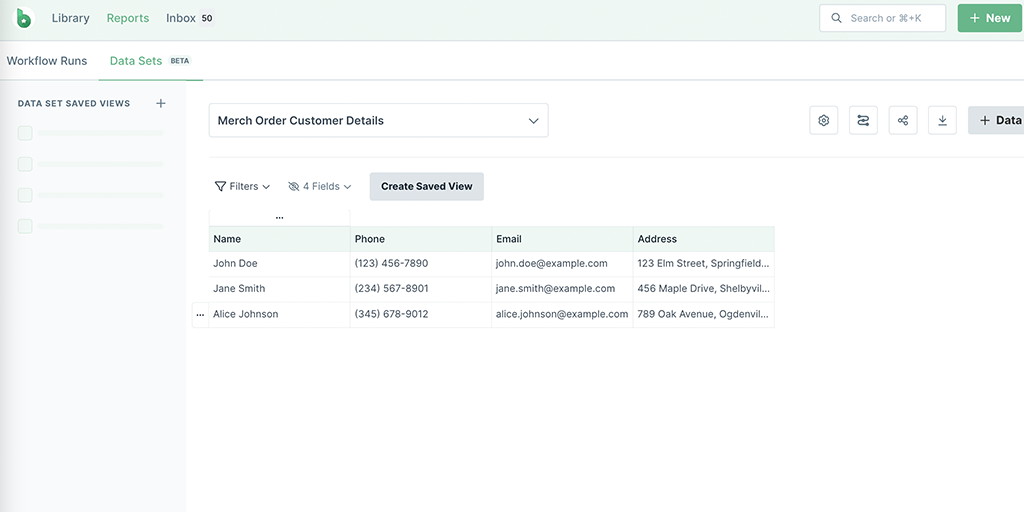
Create a data set to store the customer details once the form response is submitted.
You can create an automation to run a workflow once a form response is submitted. This workflow could be the next step of your process. For example, our Merch Order form will run our Order Fulfillment workflow.
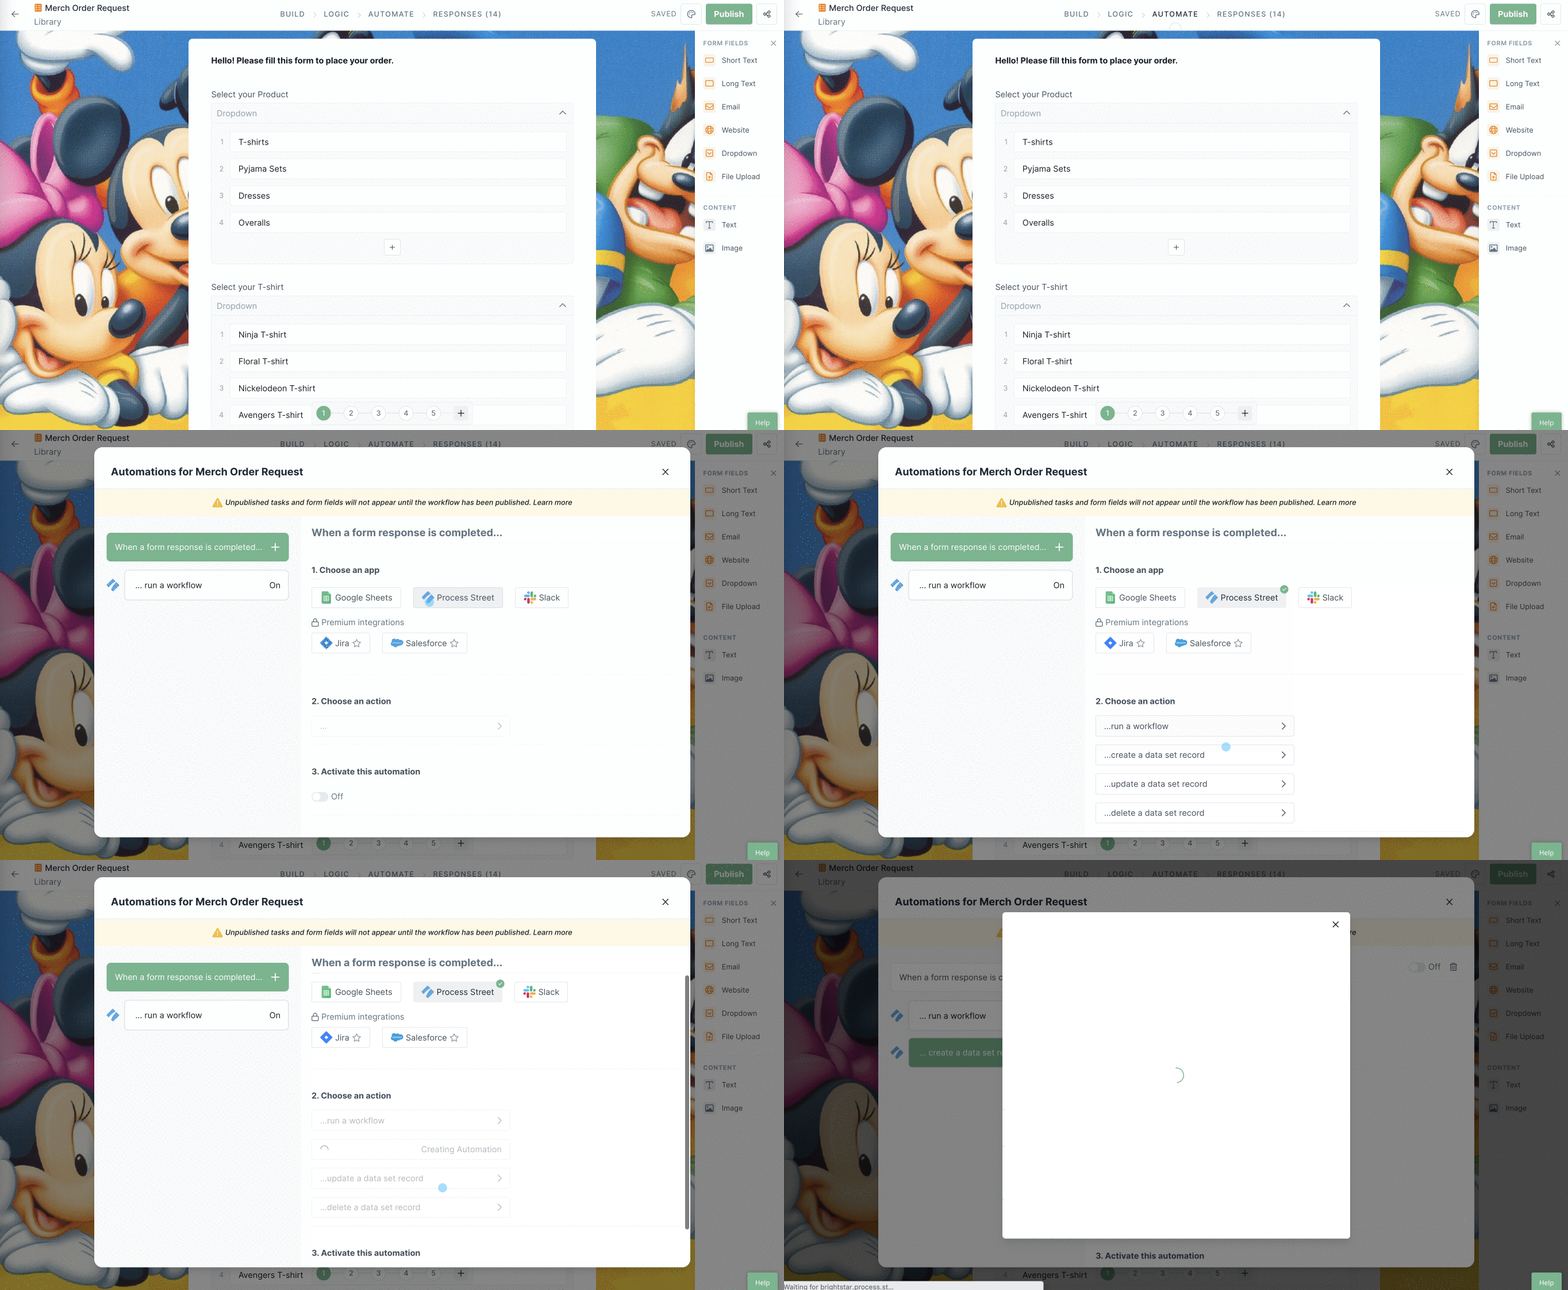
Navigate to your form and go to the Automate tab. Choose Process Street as the app and select run a workflow as the action.
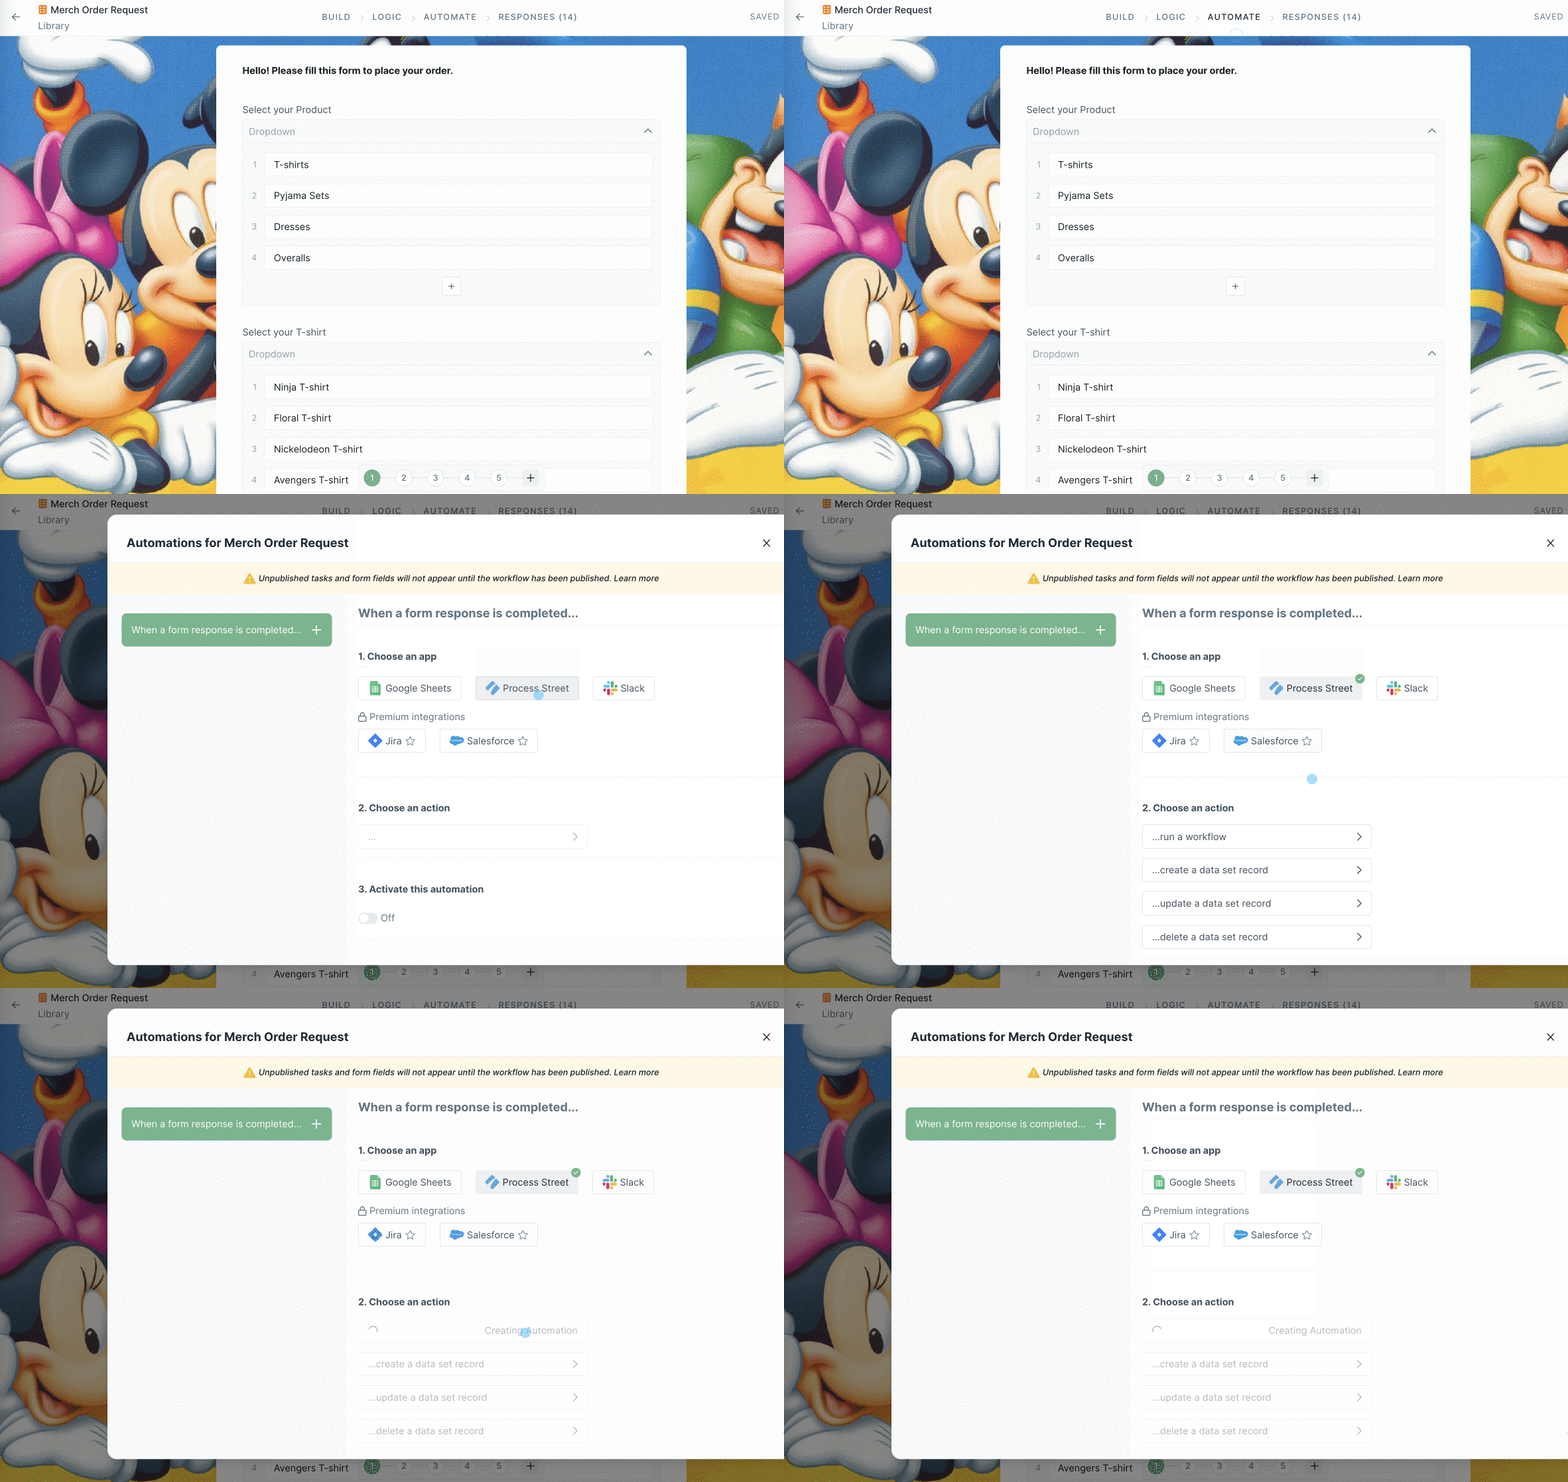
Choose a workflow that should run when your form is submitted. Then select a form response field that should populate as the workflow run name.
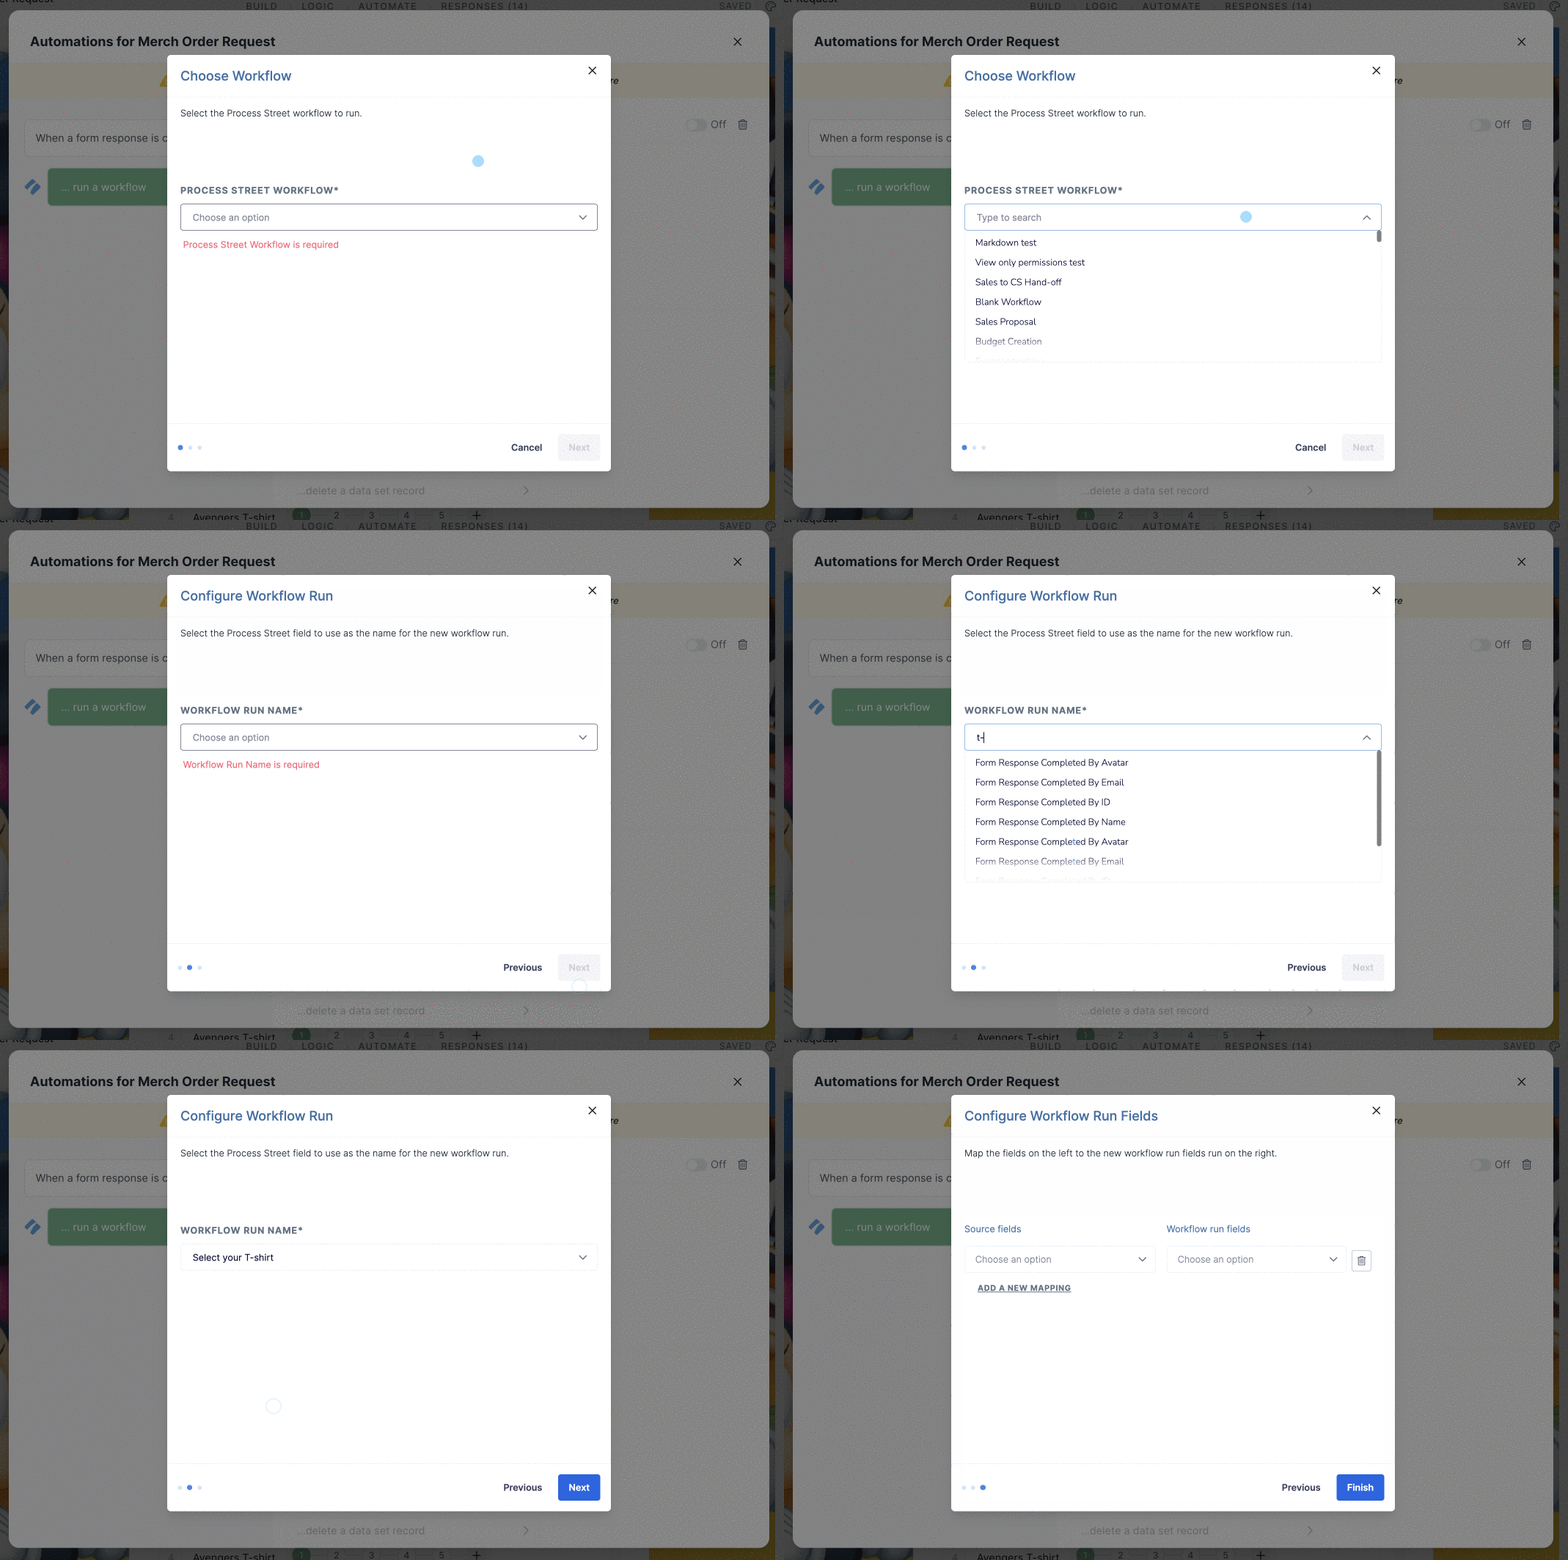
Map your form responses to the relevant form fields in your workflow. These form fields will be auto-populated by the automation when the workflow runs.
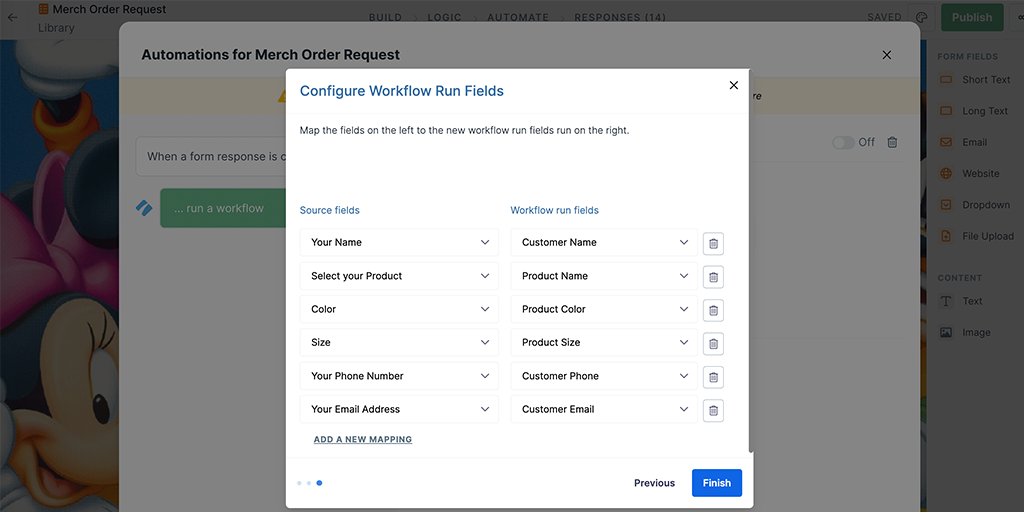
Click Finish and turn on your automation then Publish your form.
You can create a data set record to store any of the details you have collected in your form responses to create a database. You can then use this data, as linked dropdowns, in your workflows.
To create a data set record when your form response is submitted, navigate to your form and go to the Automate tab.
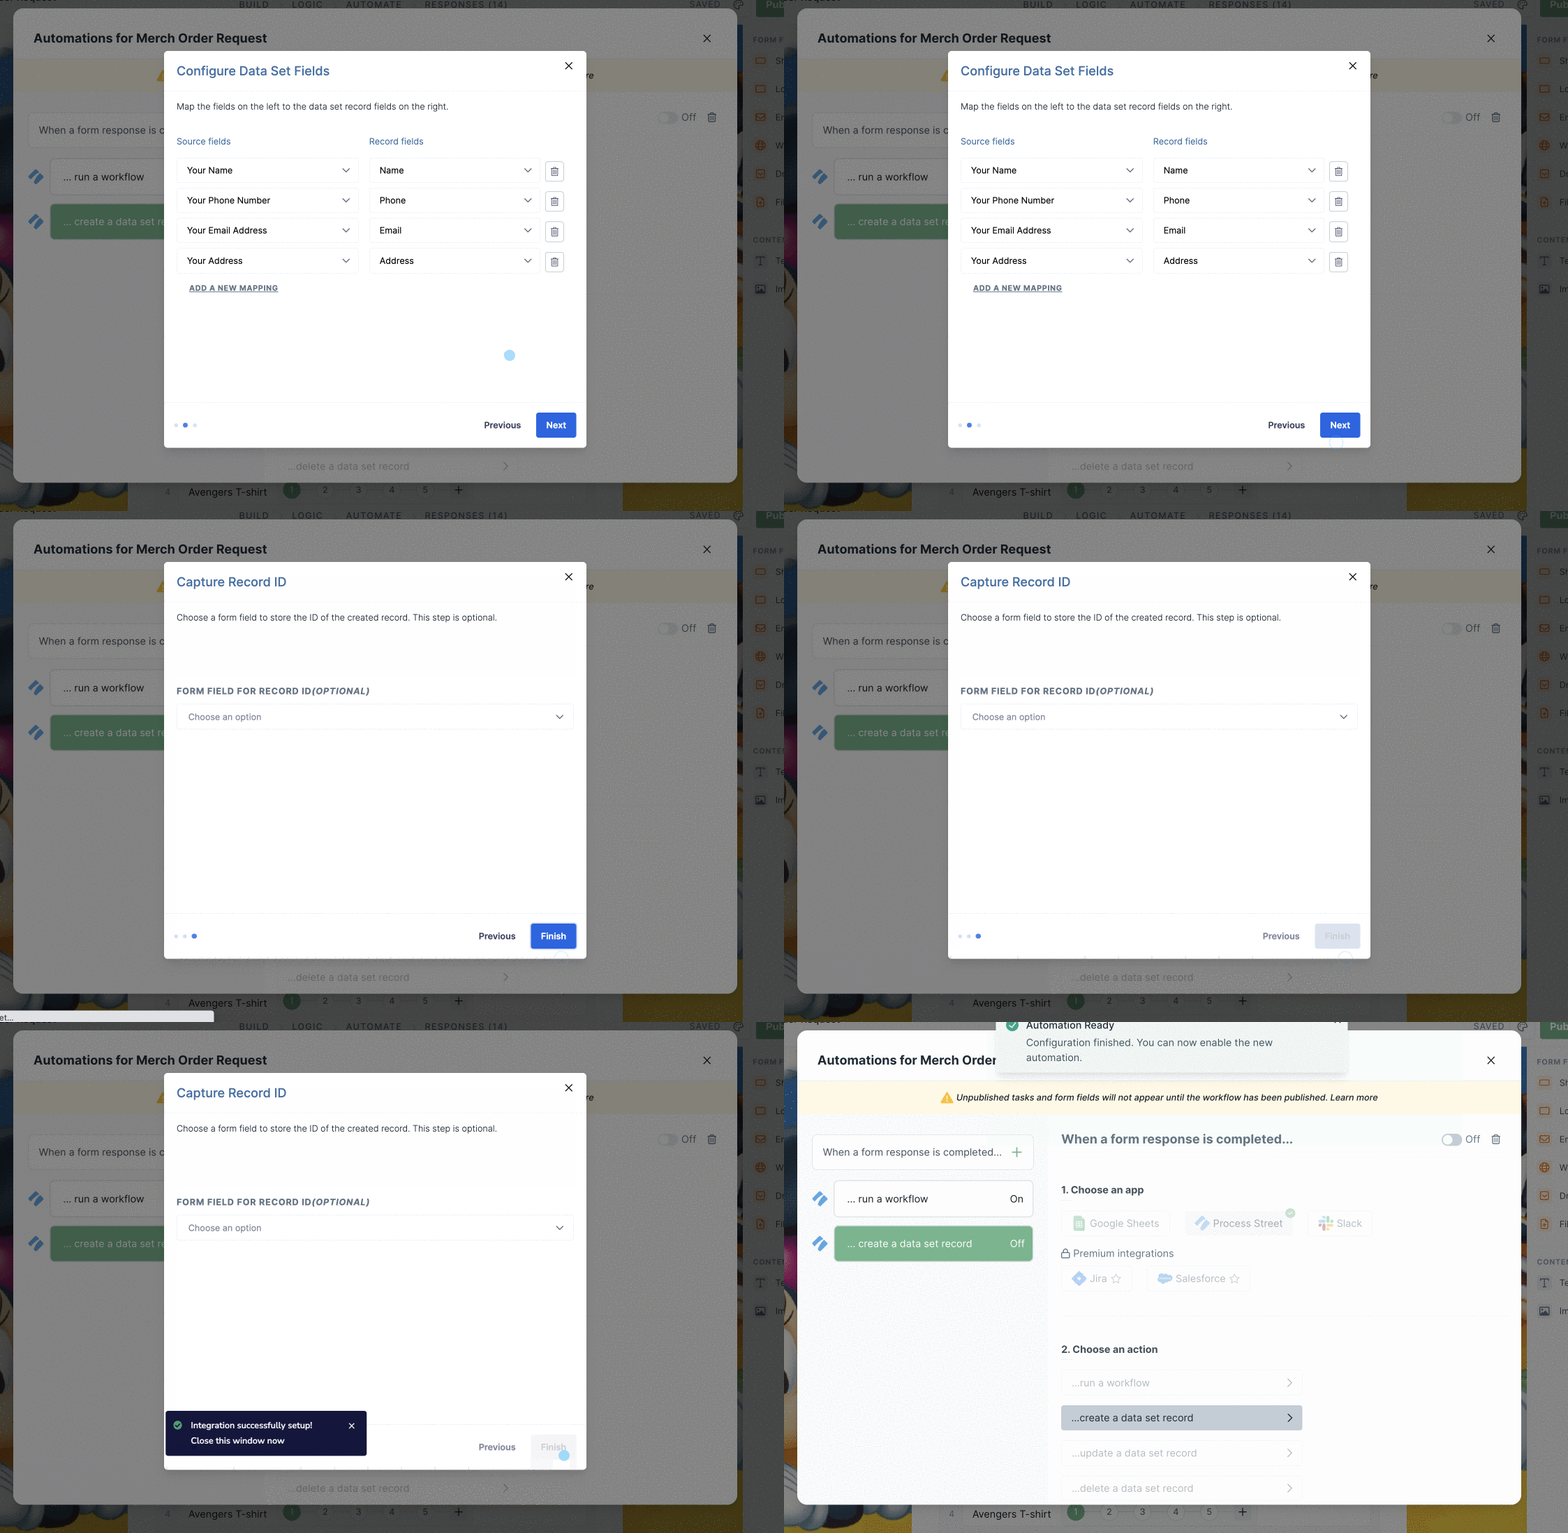
Choose Process Street as the app and select create a data set record as the action, as shown below.
Choose the data set to which you want to add a record. This could be the new data set you created earlier or an existing one.
Then map the form fields from your form to the relevant columns in your data set. This information will add a new record to your data set.
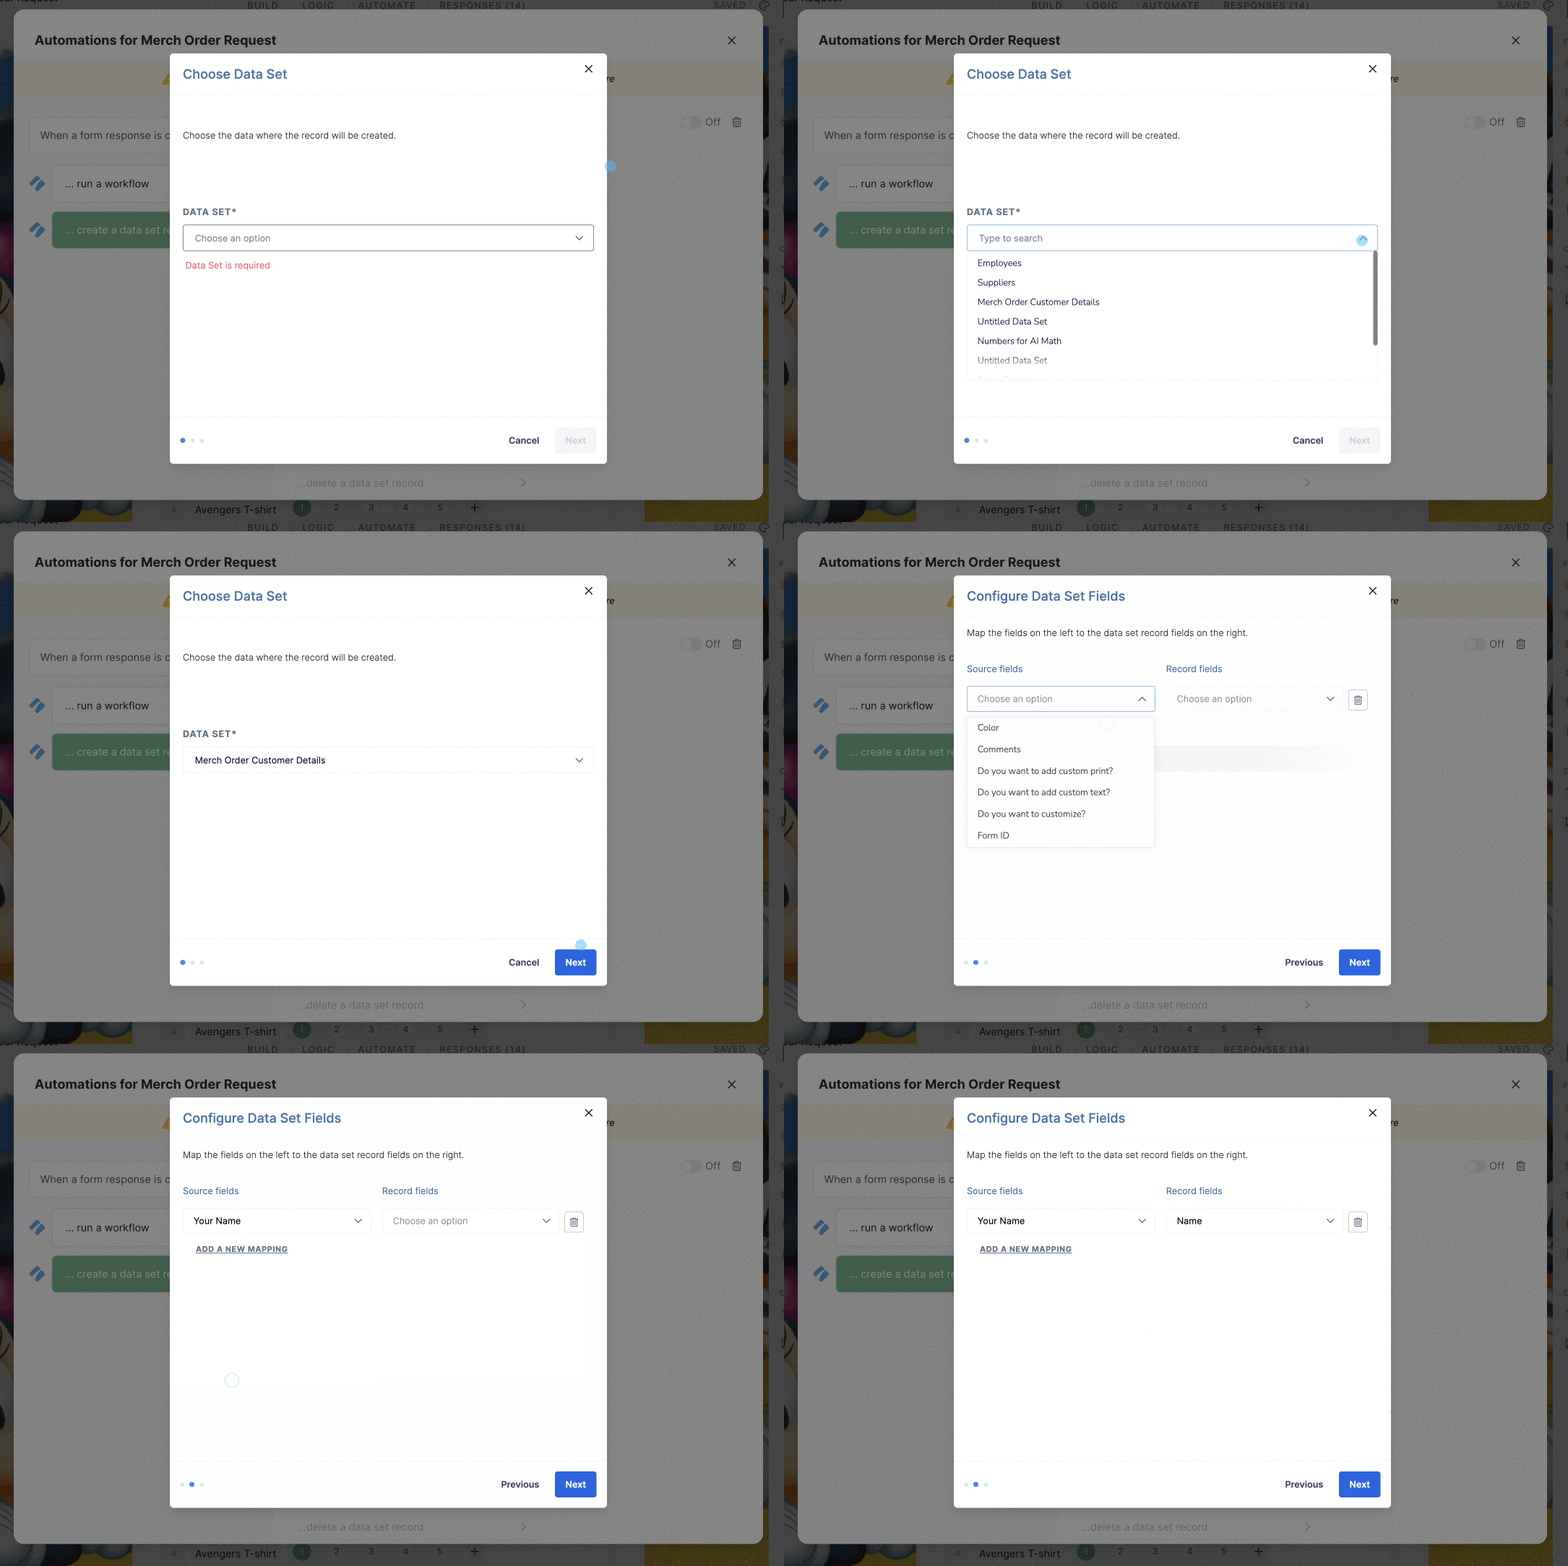
Click Next then click Finish and turn on your automation then Publish your form.
You can update an existing record in a data set when a form response is submitted. This is useful when your form collects updated information for a record that already exists — for example, a customer updating their shipping address or contact details.
Navigate to your form and go to the Automate tab. Choose Process Street as the app and select update a data set record as the action.
Choose the data set that contains the record you want to update.
Select the column that identifies which record to update. This column acts as a key — Process Street matches the value from your form response against this column to find the correct record. For example, if your data set has an Email column, select it as the key so that the automation finds the record whose email matches the form response.
Map the form response fields to the data set columns you want to update. Only the mapped columns change; other columns in the record stay the same.
Click Finish and turn on your automation, then Publish your form.
You can delete a record from a data set when a form response is submitted. This is useful when your form handles cancellations or removal requests — for example, a customer submitting a form to cancel their subscription.
Navigate to your form and go to the Automate tab. Choose Process Street as the app and select delete a data set record as the action.
Choose the data set that contains the record you want to delete.
Select the column that identifies which record to delete. Process Street matches the value from your form response against this column to find and remove the correct record.
Click Finish and turn on your automation, then Publish your form.
You can create an outgoing webhook to trigger actions in third-party applications when your form response is submitted.
Navigate to your organization settings and go to the Integrations tab. Click on +New Webhook and select Form.
Scroll to the bottom of the page and select the form to trigger this webhook, then paste the URL that this webhook should notify. You will get this URL from the third-party app to which you want to connect your form.
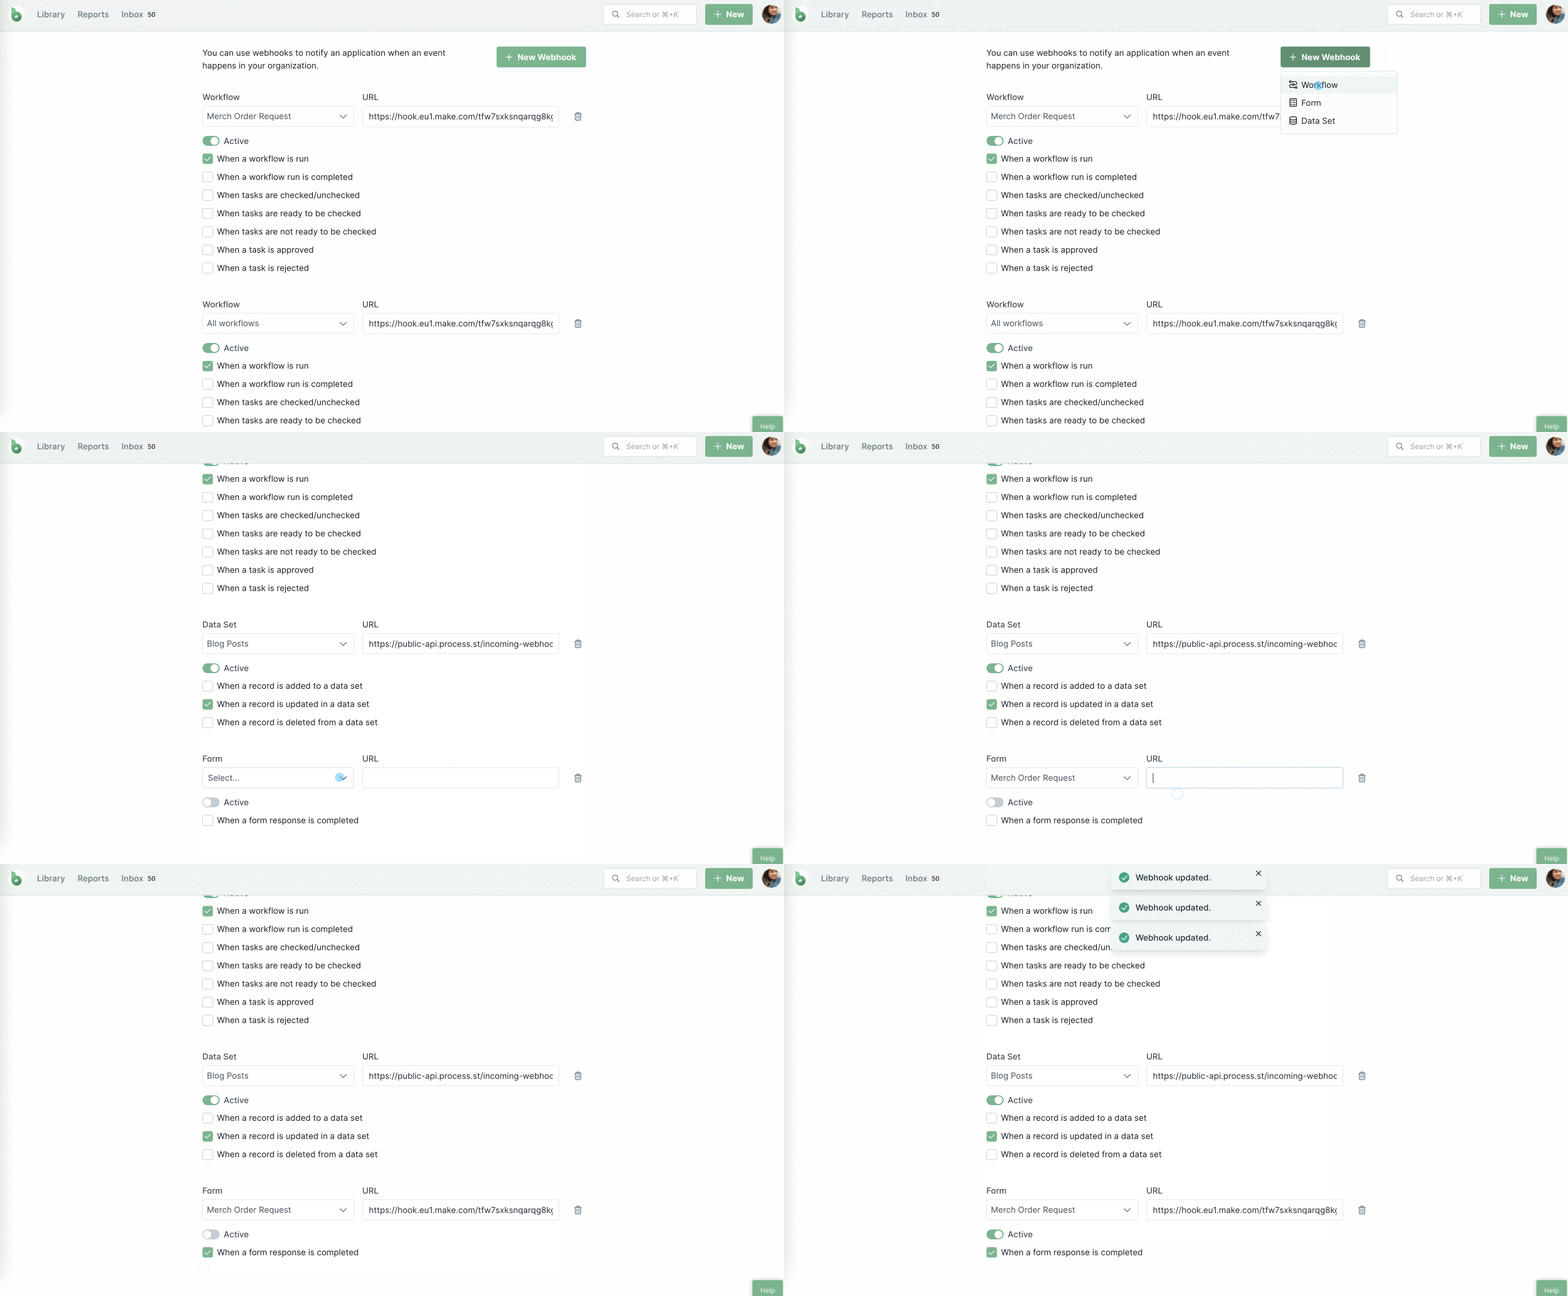
Select when a form response is completed as the action that triggers this webhook and turn on your integration.
Once you have created an automation and turned it on, you can submit a form response to see it in action.
Help us improve this help center.