You can integrate Gmail with Process Street workflow runs using Zapier.
Information you receive by email in Gmail can be used to automatically run and populate workflow runs in Process Street. This means that you don’t have to manually sort through your emails and run your workflows to process them – they can be automatically detected and arranged into tasks to process from your Process Street Inbox.
If you’d like to know more about automating your processes in general, check out our free business process automation guide and our own direct Automations.
Plan: This integration is available to customers on all plans.
Users: In order to create an API key for integrations, you must be an Administrator.
Let’s get this set up!
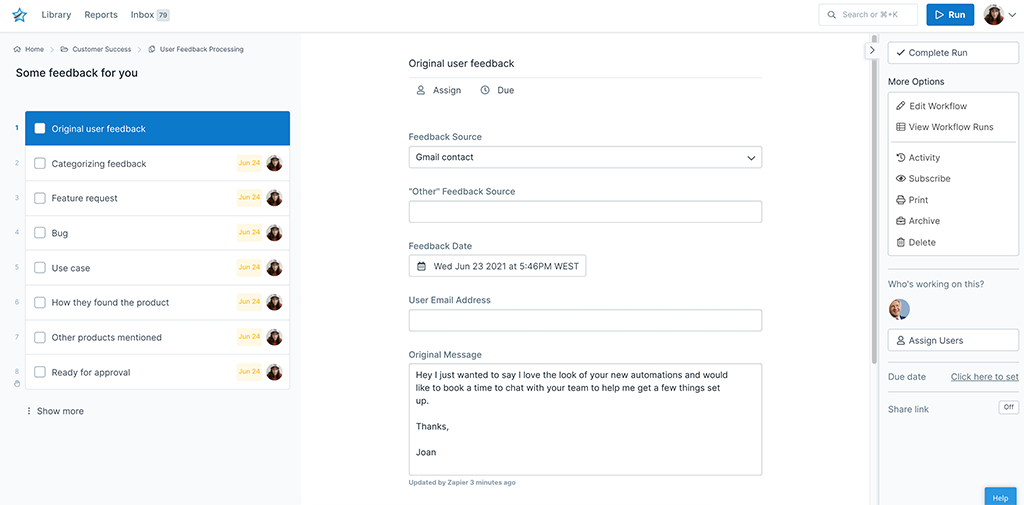
First, we need to add form fields into our user feedback processing workflow in Process Street. These can be used to record data when filling out the workflow run, which we will later use to store information from the email you receive in Gmail as a new event.
You can add form fields when editing one of your workflows.
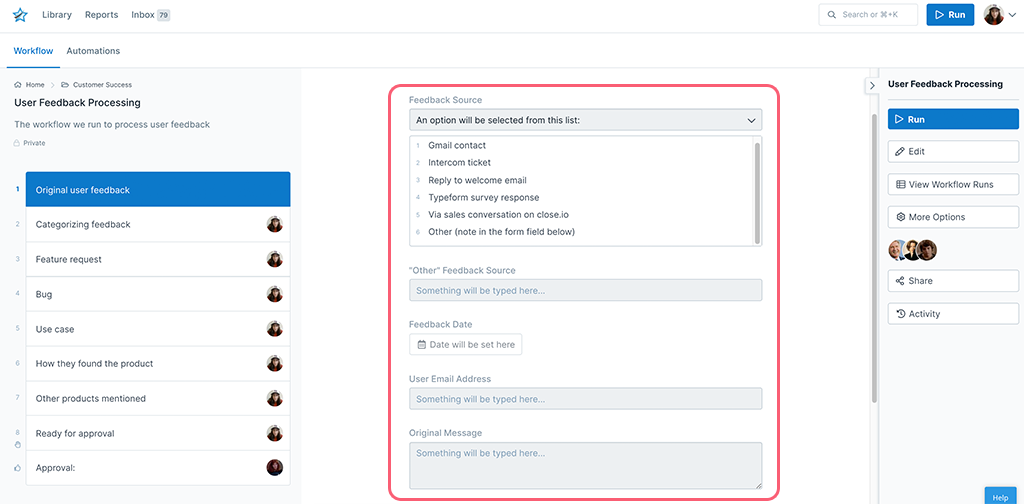
In this case, we’ve set up form fields to capture the following information:
While there are other form fields that have been added to the workflow, these are for later action and aren’t needed to get your Gmail integration up and running.
Add form fields to your own workflow to make space for any information you think will be relevant when processing your user feedback email (such as the elements above). Alternatively, you can always grab our free workflow template below and edit it to your needs to accomplish the same thing.
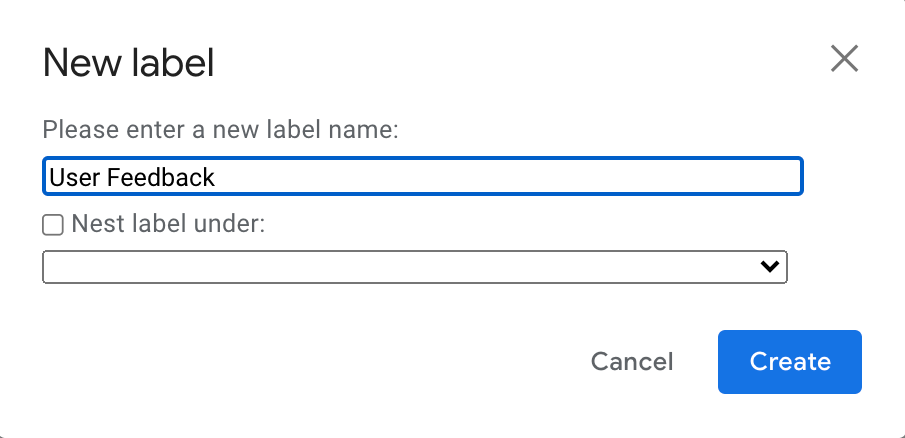
After that, it’s time to make sure that your label is set up in Gmail to signal to Zapier that it needs pushing into your workflow run.
Next, you need to set up your label in Gmail so that you can easily label the messages your receive appropriately. This will also let Zapier know what emails should be pushed into a new workflow run and which should not.
There’s not much to this step, other than that you’ll need to have an account set up and the label created.
Just log into your Gmail account (or create a free account if you don’t have one) and click “Create new label”…

… then pick the name for your new label e.g “User Feedback” and click “Create”.
Zapier is a tool that connects over 2,000 different apps. Any action in the supported apps (like forwarding an email or adding an attachment to a task) can be set up to trigger another app’s features automatically. Zapier integrates with both Gmail and Process Street. The whole recipe (Trigger + Action) is called a Zap.
Log into Zapier or create an account, then click “Make a Zap“.
In your new Zap, select Gmail as the app and choose “New Labeled Email” as the trigger.
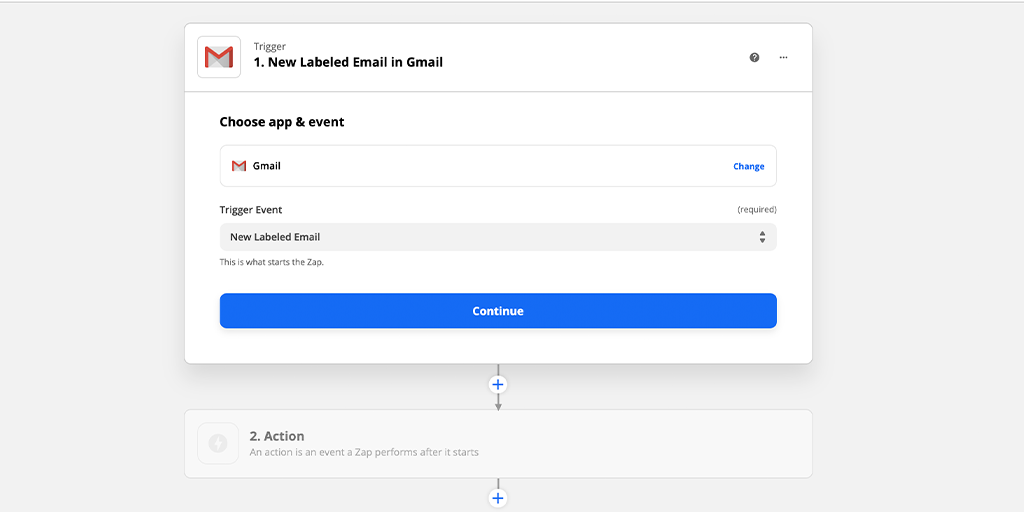
Click “Continue” connect your Gmail account, and click “Continue” again to move onto the “Set up trigger” step.
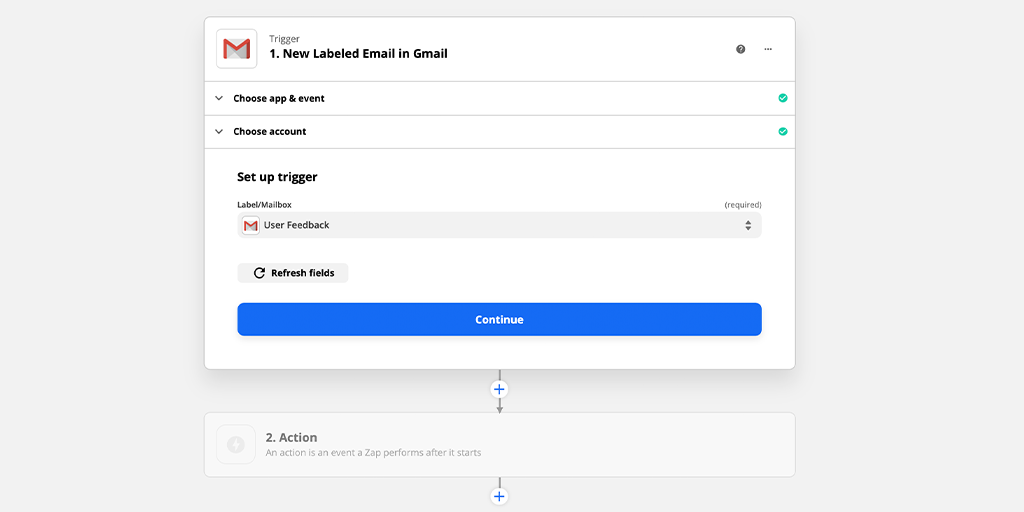
From the dropdown menu, select the label that we set up earlier, then click “Continue“.
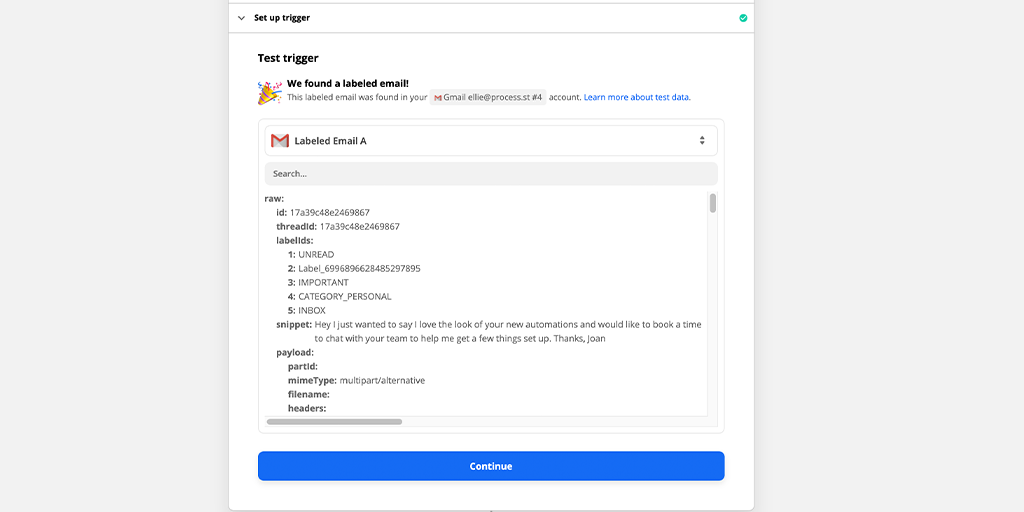
Before you go on to test your trigger in Zapier, make sure you’ve recently labeled an email as “User Feedback” – you can always send yourself an email to test this out. Otherwise, Zapier won’t have any sample data to pull in and validate.
Congratulations! You’ve just set up Gmail as your Trigger for the Zap. Next it’s time to set up Process Street as your Action step.
Choose Process Street as your app and “Run Workflow” as the action. This tells Zapier to run your workflow in Process Street when it detects that you’ve labeled an email as in the previous section of this article.
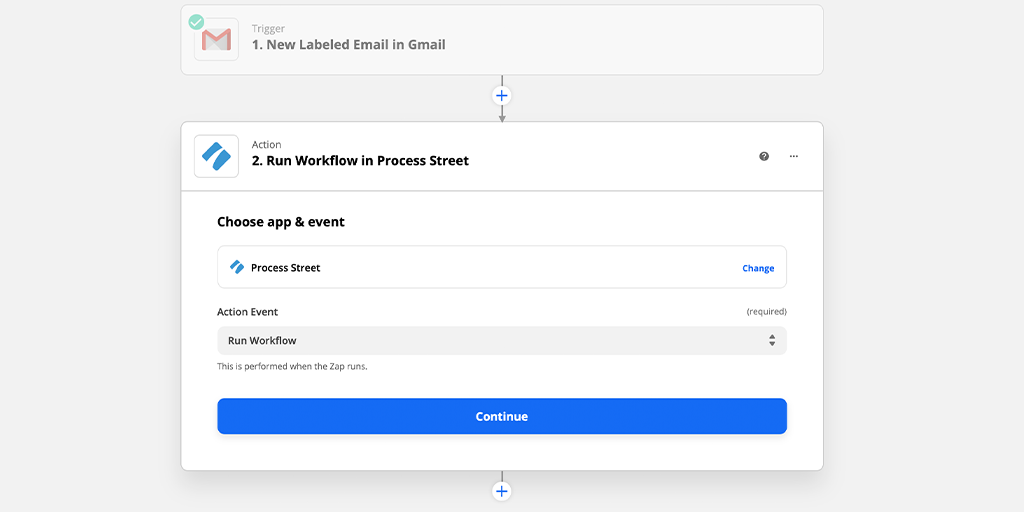
Connect your Process Street account and then move on to choosing and setting up the workflow you will run.
Here you need to select the workflow that you will run using the dropdown.
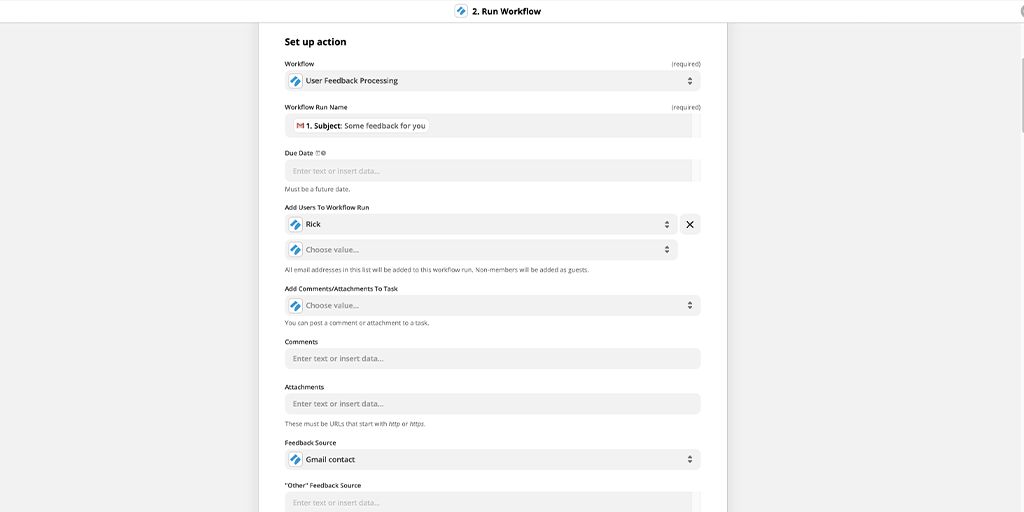
Once that’s done, all that you have left to do is to map data to the form fields in your workflow run with information from your email in Gmail.
Do this by clicking the field you’d like to map data into, and then use either the dropdown or search bar to find the information you want to push through.
In this example, I linked:
Continue through to the test phase and make sure your test is a success.
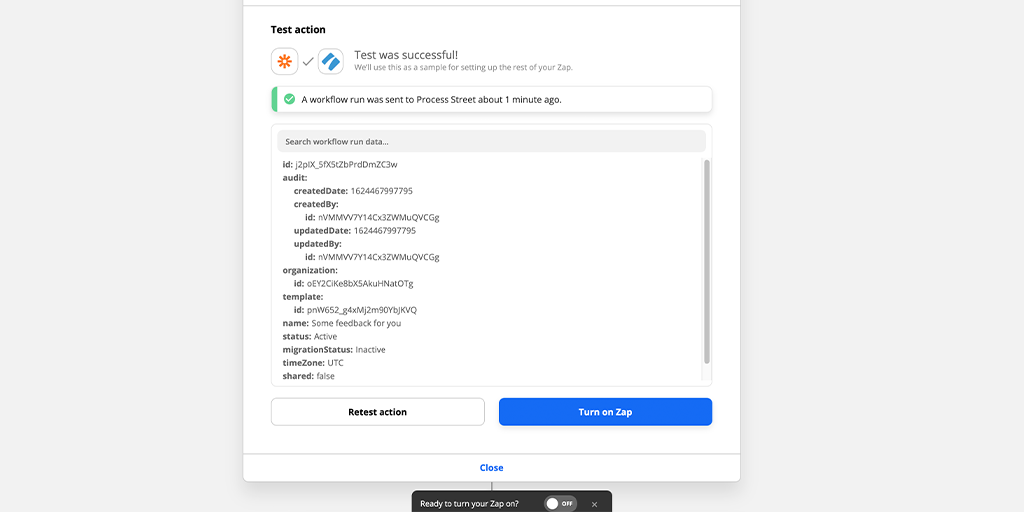
Next, head over to your Process Street reports ensuring that your workflow run has been created and populated correctly.
Once that’s done, name and turn on your Zap, then test it out again by sending yourself a test email and assigning the label that we set up earlier to it. Make sure that your workflow run is created correctly with all of the relevant information in the right place.
And there you have it! Here’s to saving time and energy that’s better spent on your more important tasks.
Help us improve this help center.


