You can integrate ShareFile with Process Street using Zapier.
This particular integration allows you to automatically upload rental inspection reports to ShareFile from Process Street. If you work in the lettings and estates industry, this will not only keep integral documents safe, but also help you save time again and again.
Plan: This integration is available to customers on all plans.
Users: In order to create an API key for integrations, you must be an Administrator.
Let’s get building the Zap.
For this use case, I used the “Rental Inspection process“, which is free from the Process Street workflow library.
You’ll also find it embedded below.
Before making the Zap itself, add the workflow to your account and launch a workflow run. Then add information to the form fields in each task (uploading the file in task 19 is particularly crucial).
This will ensure Zapier can pull in the necessary data.
Zapier is a powerful tool which connects over 1,000 apps together. By connecting apps, you can improve your workflows and automate recurring tasks and processes.
This saves you time and effort which could be spent on other important duties.
Make an account or log into Zapier, then hit the “Make a Zap!” button.
In the Zapier Editor, use the middle search bar to type in and find Process Street.
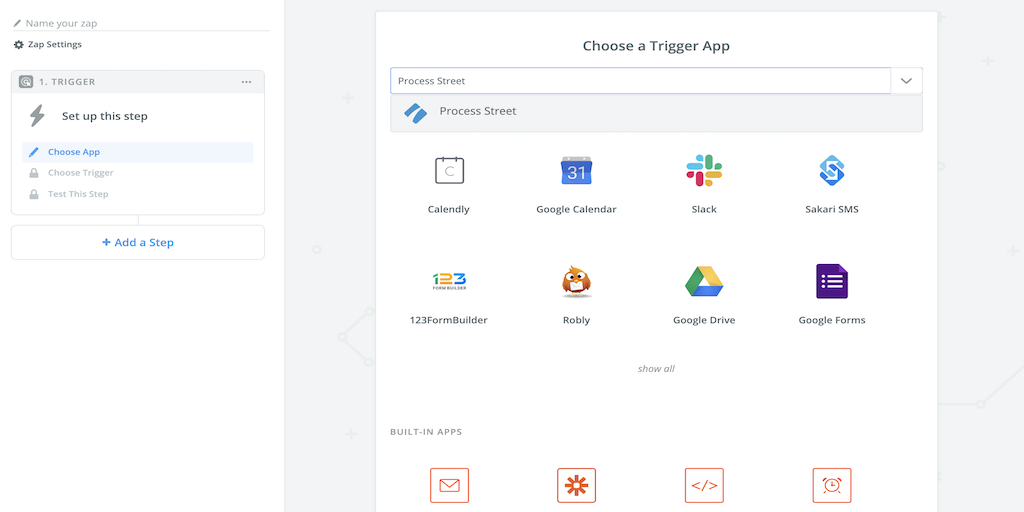
Select it as the trigger app.
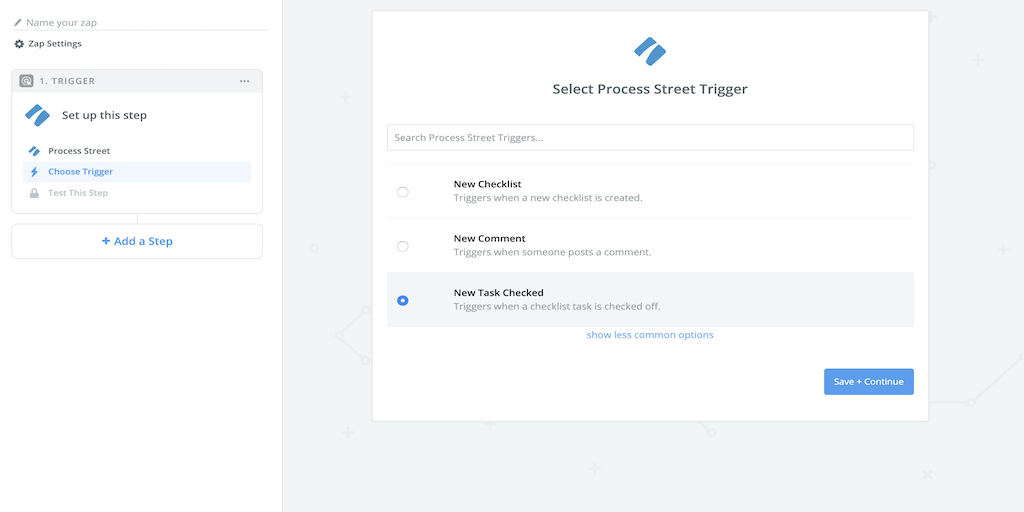
The trigger, when set off, is what enables the action to happen.
For this use case, the trigger is “New Task Checked”.
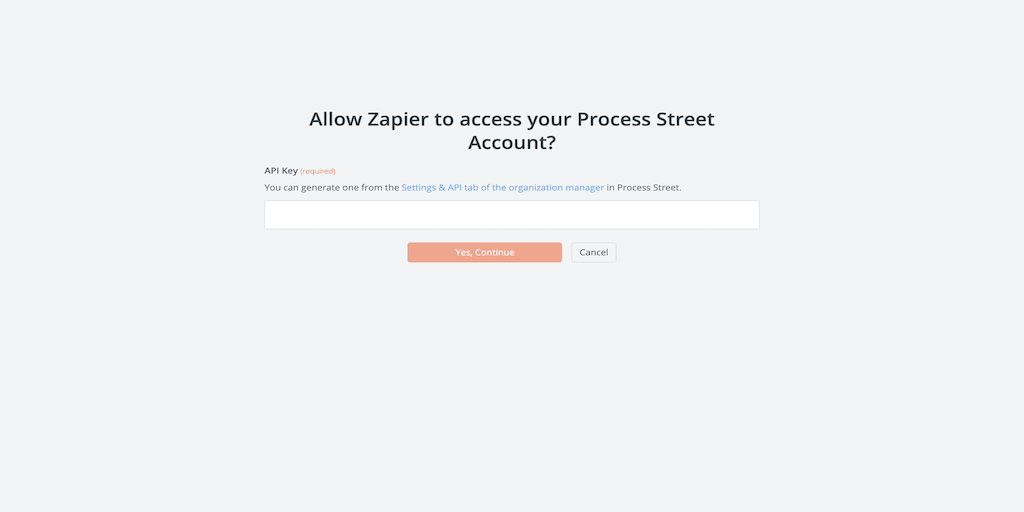
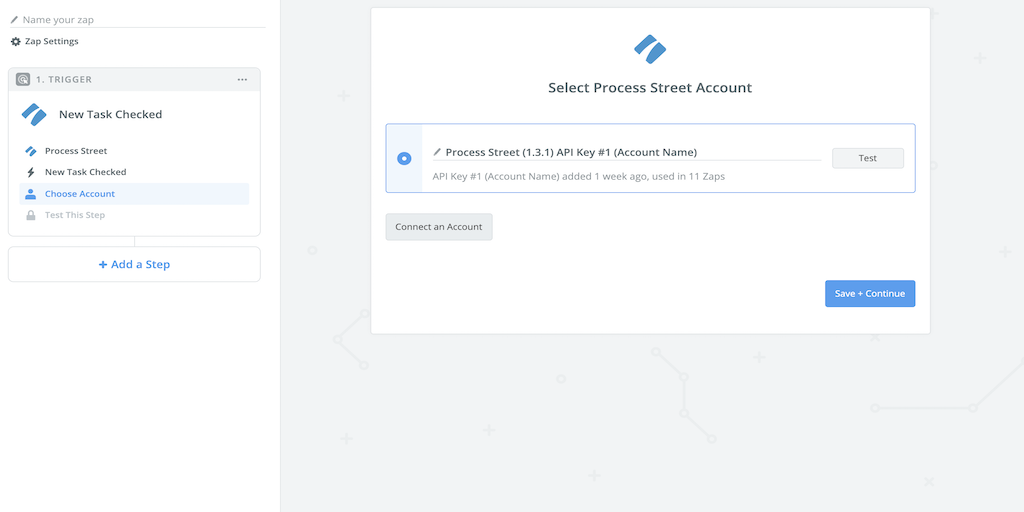
To connect Process Street with Zapier, you’ll need to provide your Process Street account’s API key.
This can be found by clicking on your organization’s name at the top right-hand corner of the app. Then, click on the “Settings & API” tab and scroll down.
Once the API key has been added, your screen should look similar to the screenshot below.
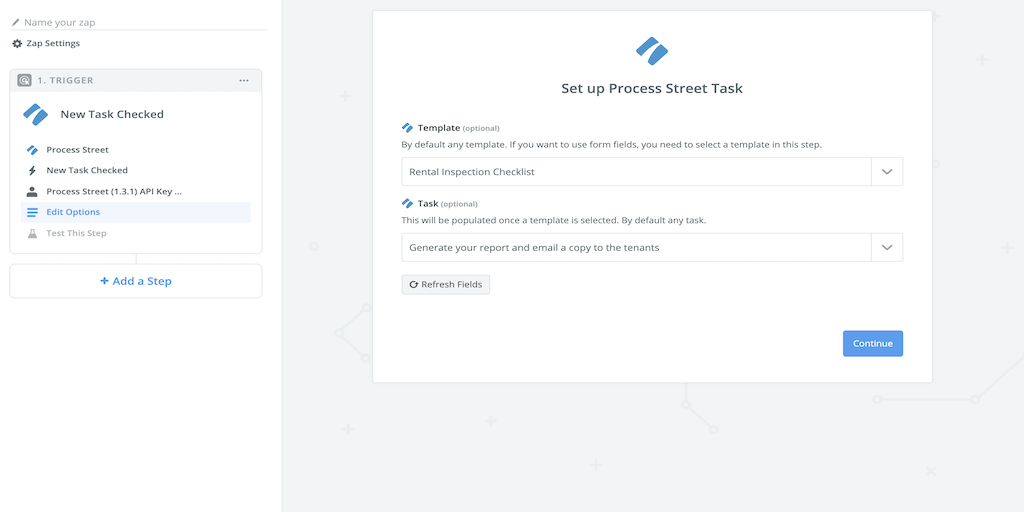
The next step is to select the workflow that the workflow runs will be launched from, and the task that will trigger the Zap once it’s been marked as complete.
Select “Rental Inspection process” as the workflow, and then “Generate your report and email a copy to the tenants” as the task.
You’ll now want to test that the trigger works by pulling in samples.
Make sure you have the appropriate task – task 19, which requires you to upload the file to Process Street – checked off in an active workflow run. This means you will need to uncheck task 18 so the workflow run remains active.

The sample will be called “Task A”.
Hit the “Continue” button to set up the second half of the integration.
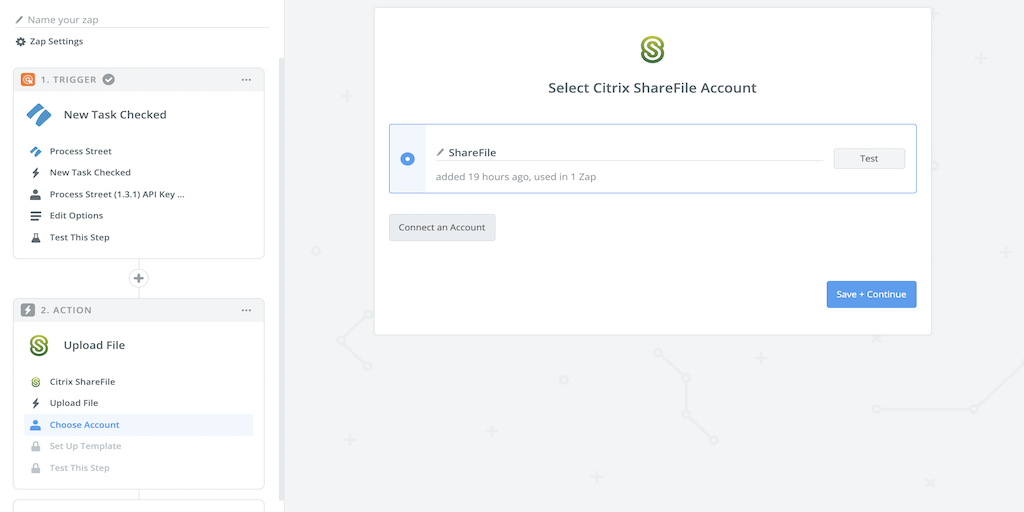
Using the middle search bar in the Zapier Editor, type in and find ShareFile.
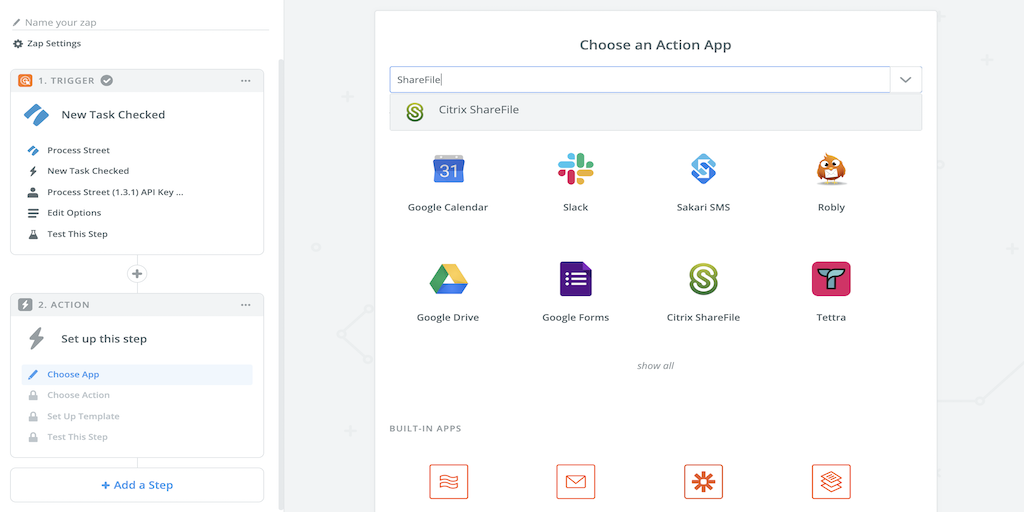
Select it as the action app.
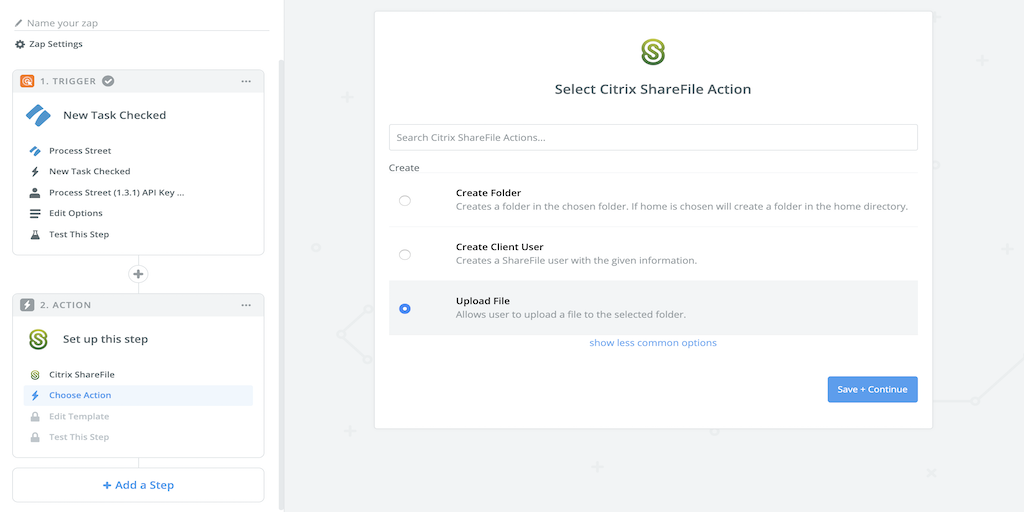
The action is what happens after the trigger has been set off.
For this use case, the action is “Upload File”.
To allow Zapier access, all you need to do is log in via the new window using your ShareFile email and password.
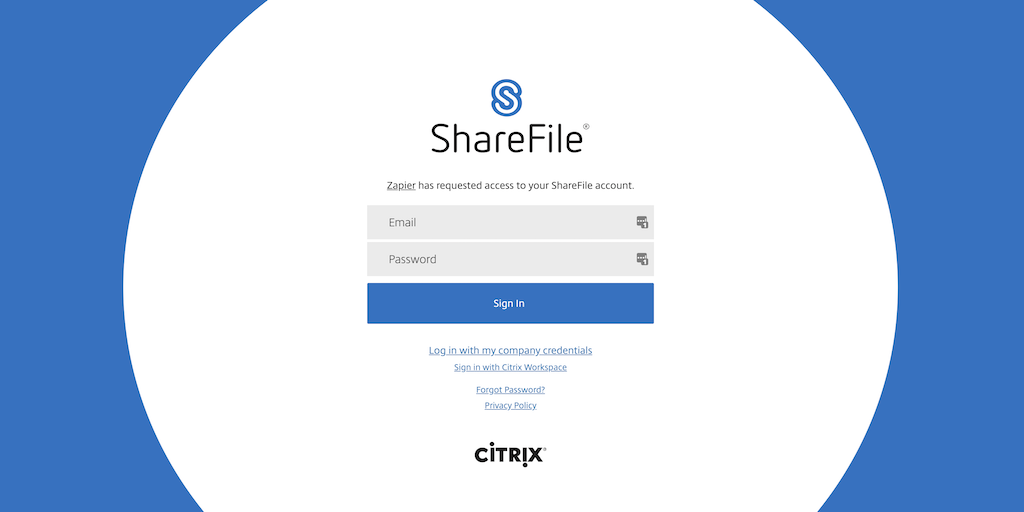
Once Zapier has access, your screen should look similar to the screenshot below.
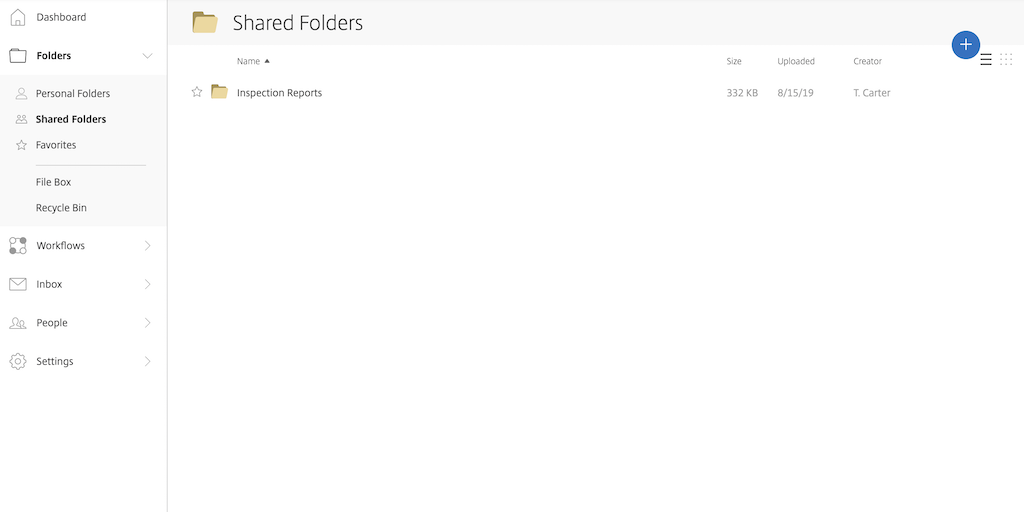
So the uploaded rental inspection reports have a specific folder to go in, click on “Shared Folders” in the ShareFile app, and then create a folder called “Inspection Reports”.
The next step is to set up what you want to be transferred from Process Street to ShareFile, and where you want it to go.
For the Folder field, choose “Shared Folders” from the dropdown list. After waiting a few seconds, click on the field again, and choose “Inspection Reports”.
For the File field, choose “Form Fields Inspection Report” from the dropdown list. This means whenever an inspection report is uploaded to a workflow run launched from the “Rental Inspection” workflow, and the corresponding task (task 19) has been checked off, the file will then be automatically uploaded to the “Inspection Reports” ShareFile folder.
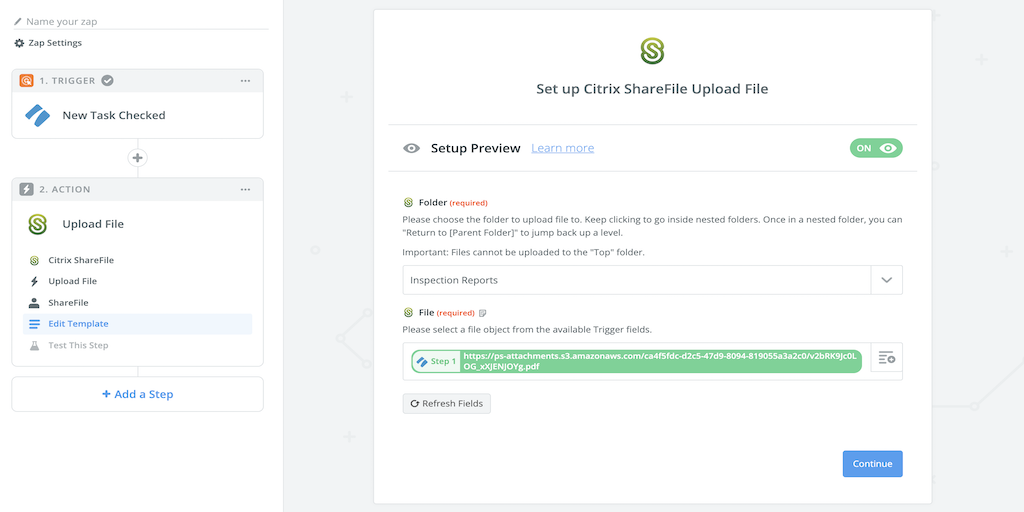
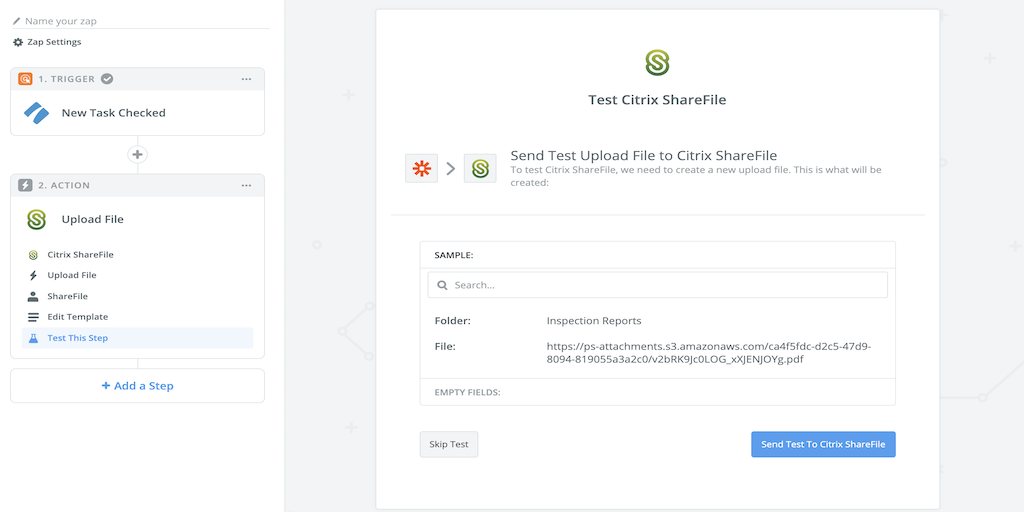
To see if the action has been set up correctly, press the blue “Send Test to Citrix ShareFile” button.
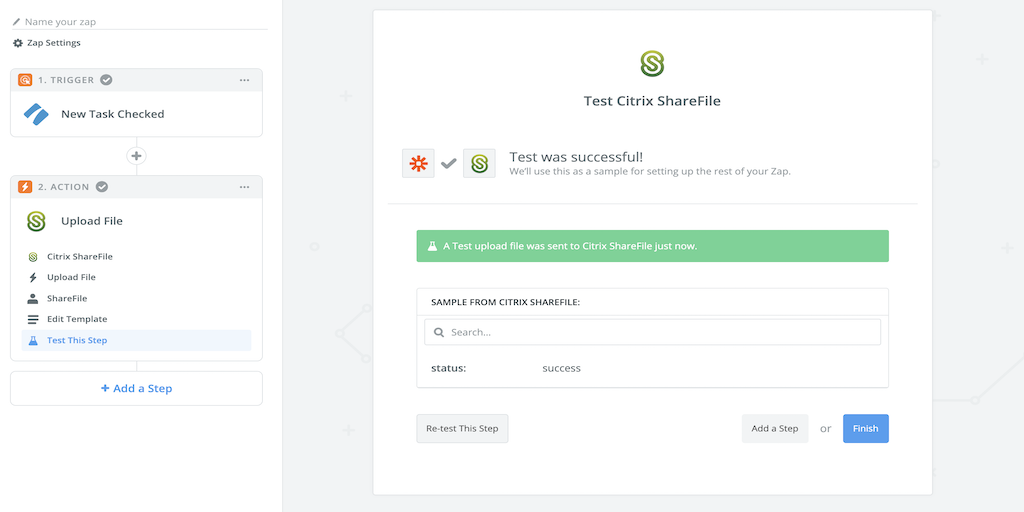
Once sent, a green banner should appear telling you the test was successfully sent.
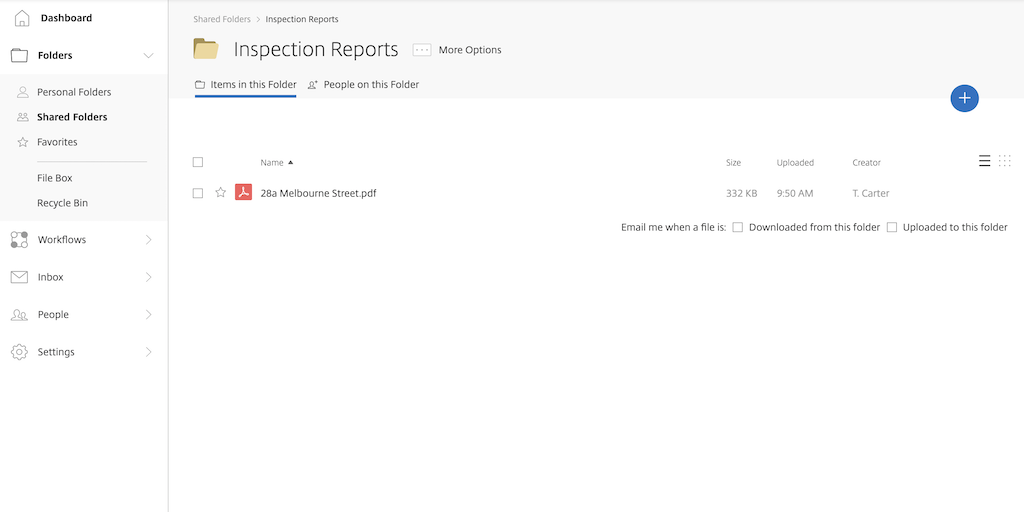
To double-check, the test worked, go to the “Inspection Reports” folder you made earlier. You should then see the file you uploaded in task 19 of the “Rental Inspection process”.
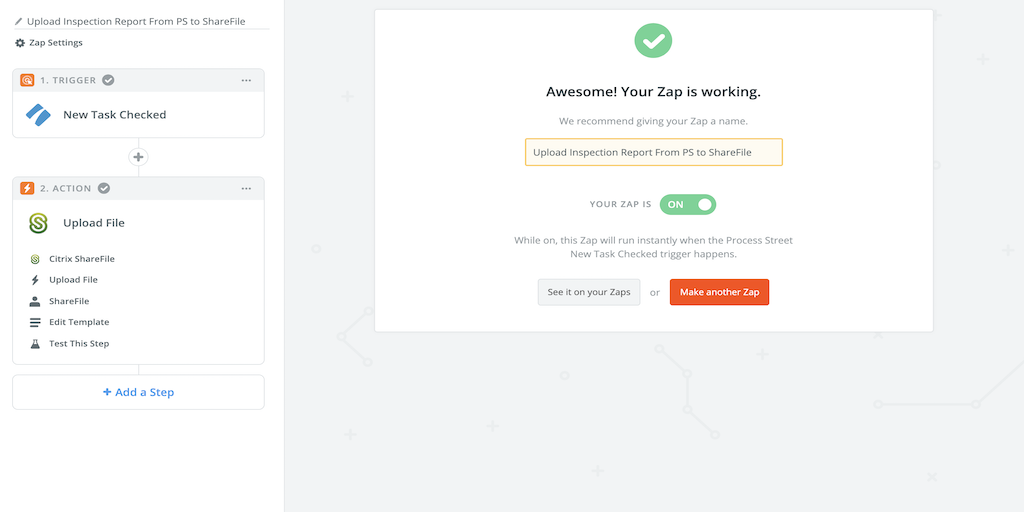
The Zap has now been built!
Make sure the Zap is “On”, otherwise it won’t run in the background.
Also, name your Zap so you can remember what it’s for. I’ve chosen “Upload Inspection Report from PS to ShareFile” as the title, but you can call it whatever you wish.