
Typeform has everything you need to build beautiful, interactive forms with absolutely no coding needed. You can supercharge your forms by integrating Typeform with Process Street via Webhooks or Zapier. For example, when your form is submitted in Typeform, that could trigger a workflow in Process Street.
A Webhook integration can bring information from Typeform that would trigger a new workflow run in your Process Street account. Webhooks are automated messages or payloads sent from apps as a trigger to cause an action in a receiving app.
In this example, we will create a Webhook trigger that runs the Cold Calling Process workflow when a Lead Capture Form is submitted in Typeform.
Now, let’s jump into the integration.
First, create a Workflow in Process Street and ensure to add form fields that are relevant to the data fields in Typeform. This will help you to map the relevant information from Typeform to Process Street.
This information is stored in Typeform when a form was submitted. So, we need to create relevant form fields in our workflow to push that information through to Process Street. For our example, these form fields should include the lead’s name (short text fields), phone number (number field), email address (email field), company website (website field), and so on.
This will mean that whoever is initiating the cold calling process won’t have to look up their information in Typeform, but can instead see all their details in Process Street.

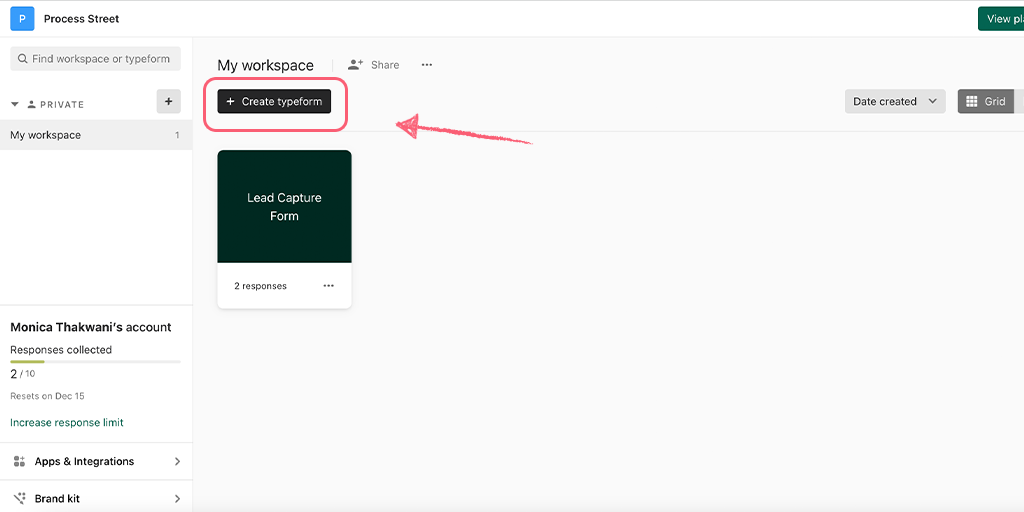
Log into your Typeform account or create a new account. Since we want to trigger a new run in Process Street when a form is submitted, we first need to create a form. To set this up, click the + Create typeform in your workspace. If you have an existing form, you can use that to create your trigger as well.
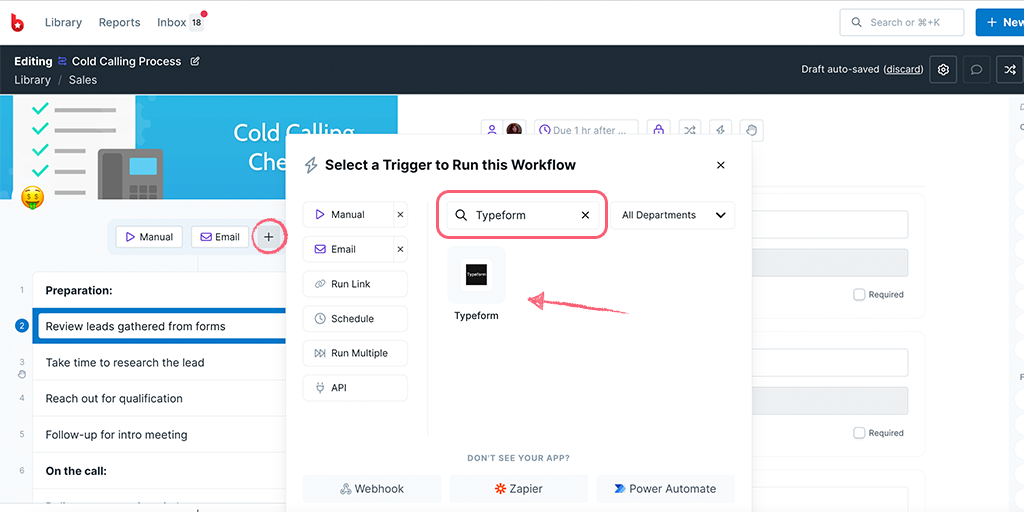
To get the webhook URL from Process Street, when you’re editing your workflow, click the + icon above your task list on the left. Here, you can look for Typeform as a Trigger to Run this workflow.
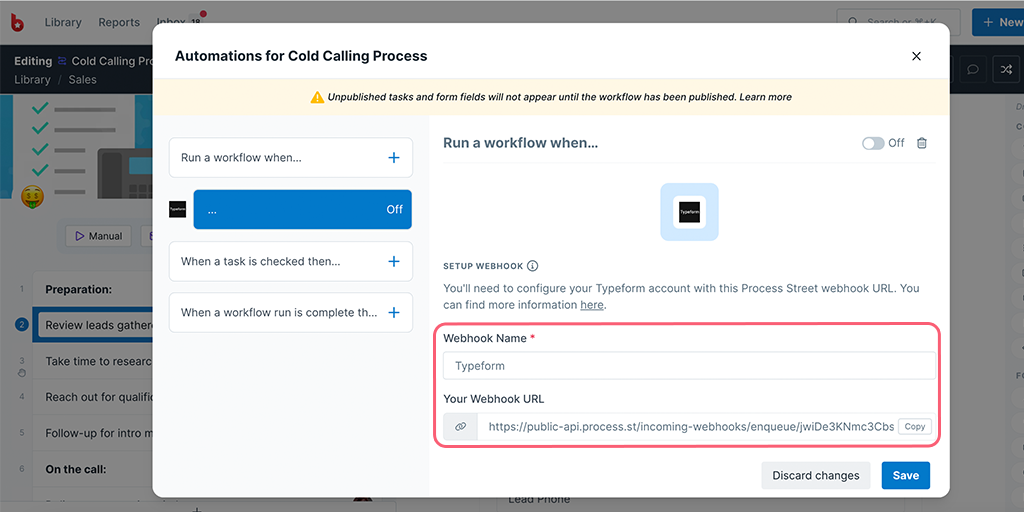
You can name your webhook as the app name or any phrase that helps you identify the Trigger. Then copy your Webhook URL.
To set up webhooks in your Typeform, while editing your form, click on Connect. Then switch to the Webhooks tab and click Add a webhook. In the pop-up box, paste the webhook URL and click Save webhook. Remember to turn your webhook On once you’ve saved it.

Now come back to Process Street, select the event as Form submitted and test your trigger. Your payload should return as a success but if it doesn’t, you might want to go back to Typeform and submit a form response.
When your test returns successful, you can proceed to map your fields from Typeform properties to your Process Street form fields.
Lastly, turn your webhook On and Save it. Then Publish your workflow and you’re all set!
Zapier connects over 1,000 apps together. It’s an “if this, then that” tool, meaning that once a trigger has occurred, an action will then take place. This helps to save you time and effort by automating processes.
In this example, we look at the survey tool Typeform which provides a clean and simplified way to launch survey campaigns that are easy and enjoyable for your audience to take.
Users: In order to create an API key for integrations, you must be an Administrator.
Let’s look at how you can do this.
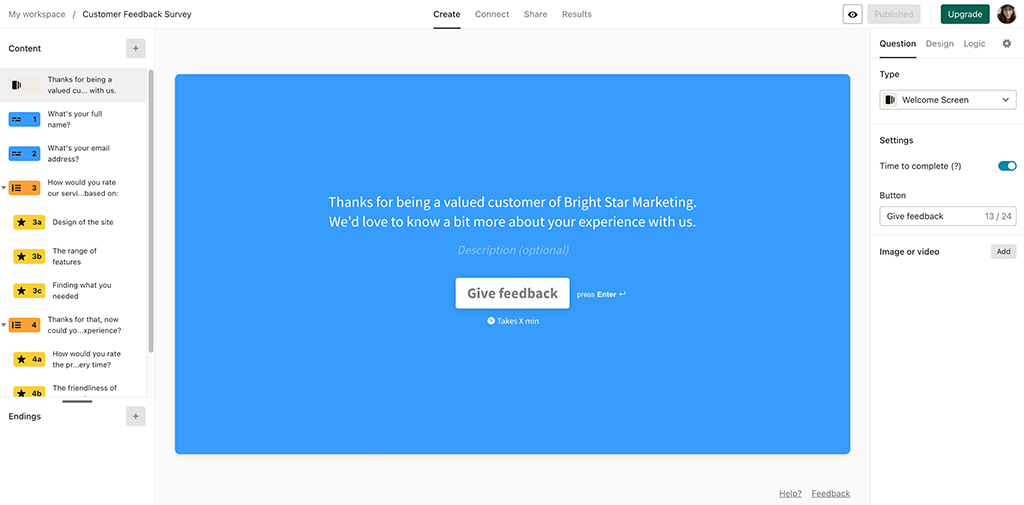
Typeform survey – you can get started by using a template in Typeform and then edit it.
Process Street workflow – you can use this in your account by clicking “Edit checklist“.
Zapier is structured so that you pick a trigger and then an action. In our integration, submitting a Typeform survey is going to trigger the zap. The zap will then take the data and give that to Process Street where it will perform the action of launching a workflow run.
Now that you have your workflow and your form set up you can go and login to Zapier.
Click “Make a Zap” to get started.
This will take you to the zap building screen where you can select the trigger app which is Typeform and the trigger event is “New Entry“.
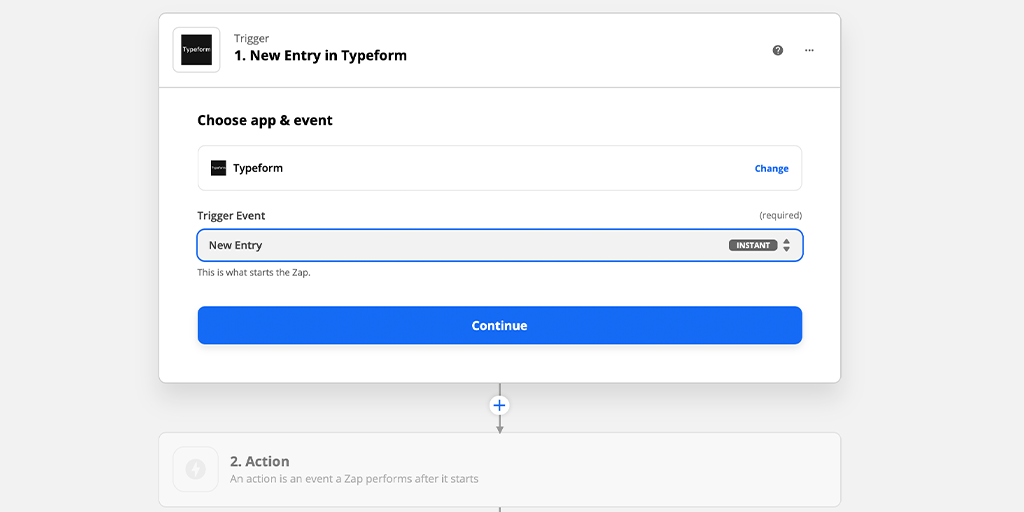
Click “Continue” and sign in to your Typeform account. Click “Continue” again to move onto set up your trigger.
Here you need to choose the name of your for in Typeform. In this case, it’s a customer feedback survey.
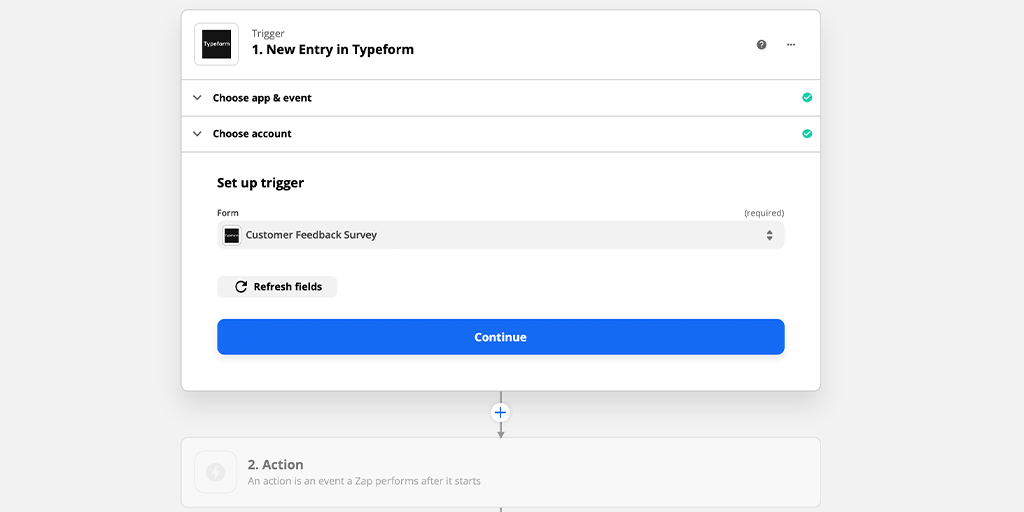
At this point, you’ll need to fill out your Typeform survey so that you have sample data to pull into the next few steps.
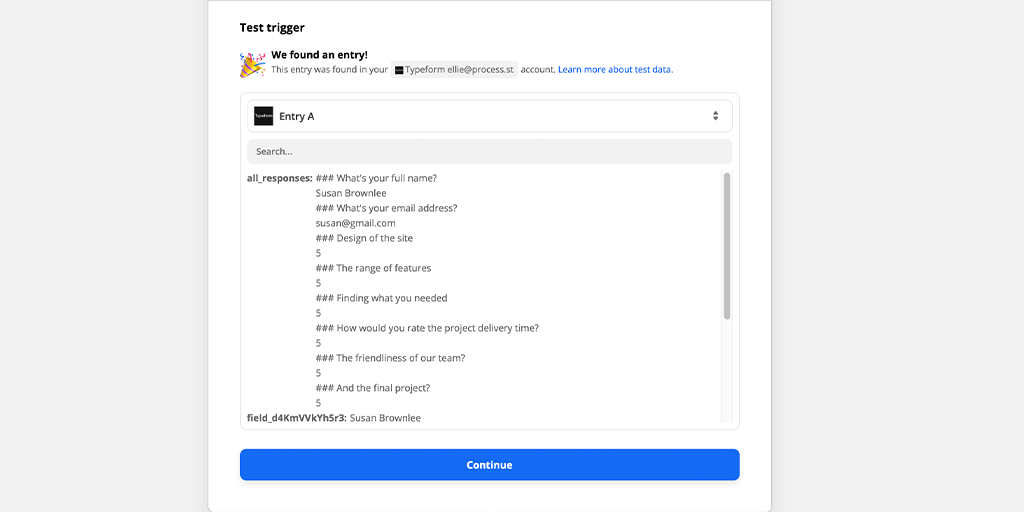
Once you’ve done that, click “Continue” and test your trigger.
Click the plus icon to add a filter.

This will show you the parameters you can filter by.
In the survey, we ask the client if they consent to be contacted about their response. If they consent, they enter their email in the section provided. Choose the parameters as seen in the image below.
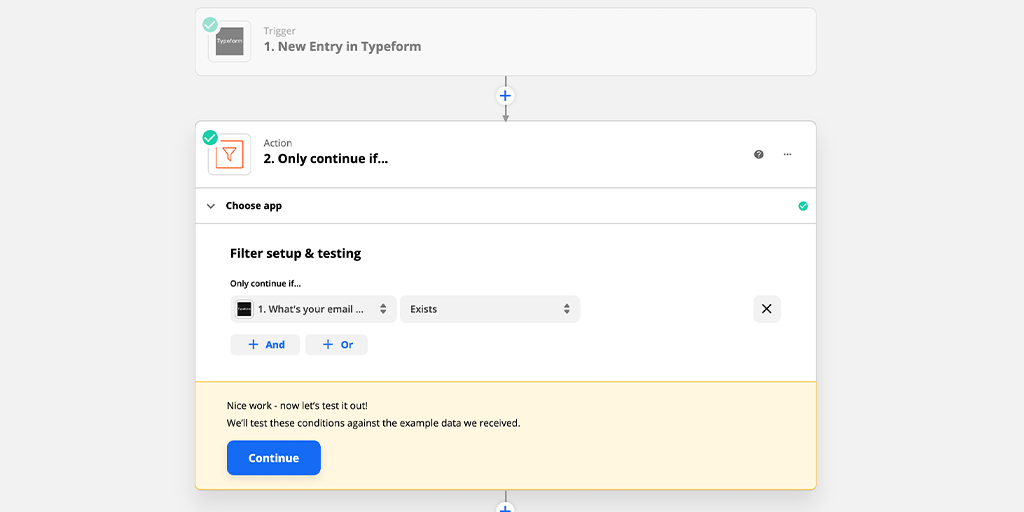
Click continue to test this step and move on to setting up your Process Street action step.
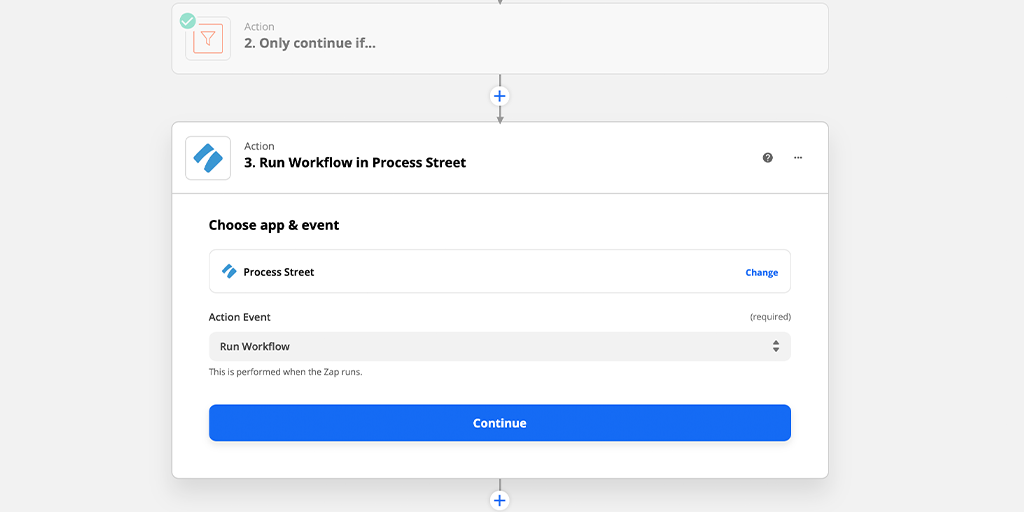
Select Process Street as your action app and the trigger option “Run Workflow“.
You can find the API key in your organization manager under your Integrations tab (you will need to be an admin in Process Street to access this).
Click “Continue” to set up your action. Select the Process Street workflow you want to run when the form is submitted.
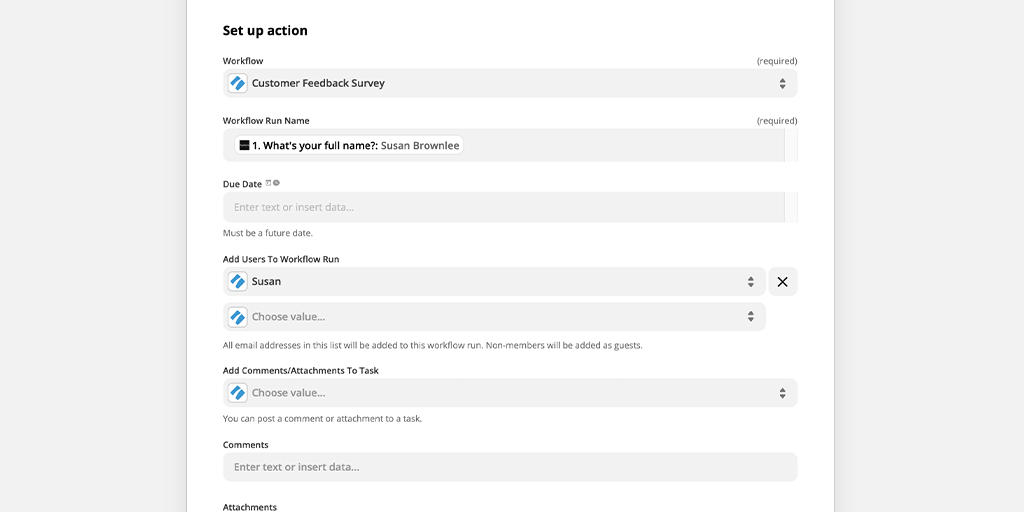
In the workflow section, click the dropdown to find your customer success workflow. For the workflow run’s name, you can choose any of the fields from your Typeform submission.
Decide the due date for your employee to complete the workflow run and then who in your team will be assigned when the workflow runs.
Use the “Submit date”+ 24h which gives your workflow run a due day 1 day after the form was submitted.

You can find a number of Zapier help articles about general help with field types or specific articles for modifying dates and times.
Next, you can map more data from your client’s responses into the form fields of your new workflow run.
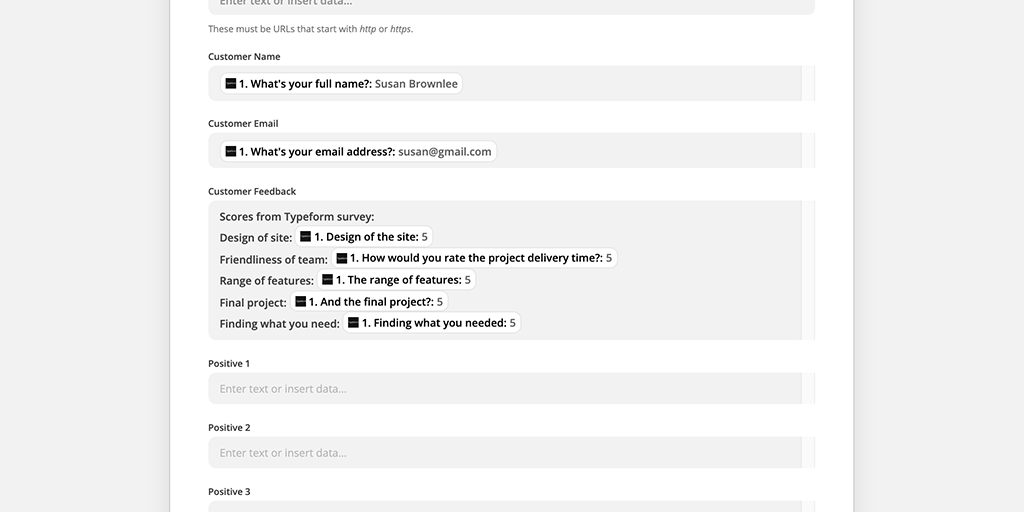
You can use a mix of static text and variable fields from your Typeform fields, as shown above.
Click “Continue” and test your action.
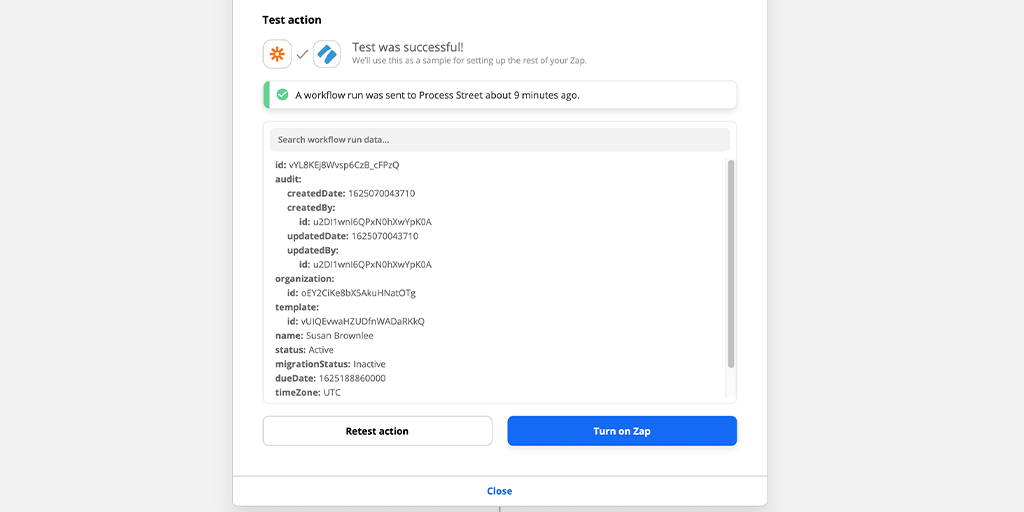
Nex head to your Process Street account and check that your workflow run was created, with all the data filled out in your form fields.
If everything looks OK, turn on your Zap and you’re all set!
Help us improve this help center.


