OK: Other clients section
Process Street offers a Model Context Protocol (MCP) server, accessible via app integration, which allows AI assistants and other applications to access your workflows, workflow runs, tasks, users, and data sets from outside the Process Street platform.
This server provides a way to interact with your Process Street organization through various AI platforms and tools that support MCP.
Most MCP clients can connect automatically using Dynamic Client Registration (DCR), so no client ID or secret is required. Clients that don’t support DCR can still connect using a Process Street API key.
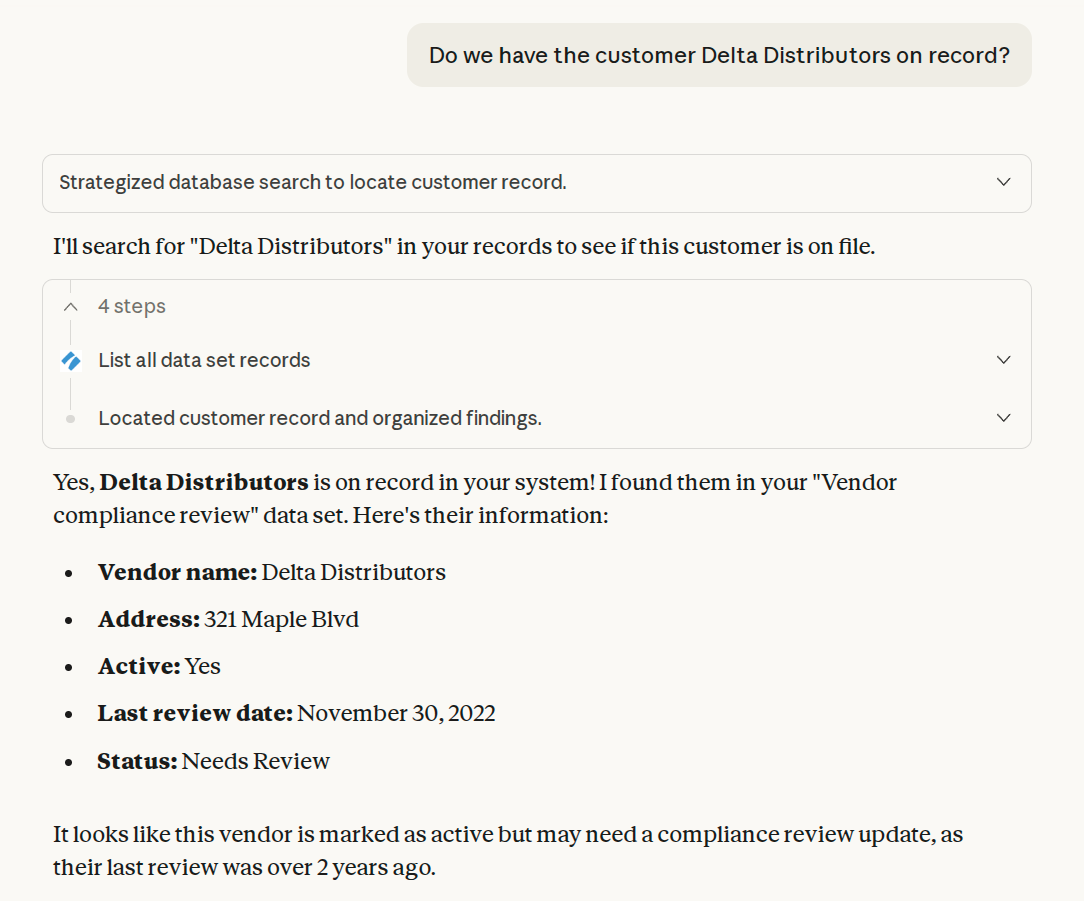
With this server, Process Street customers can:
Example requests users could make from outside Process Street using the MCP:
The MCP server supports most Process Street API endpoints as tools.
The MCP server uses your Process Street login credentials to access it, including organizations with SAML SSO enabled.
Admins, Builders and Users can use the MCP server and can only interact with resources they have permissions to.
A compatible MCP client, including:
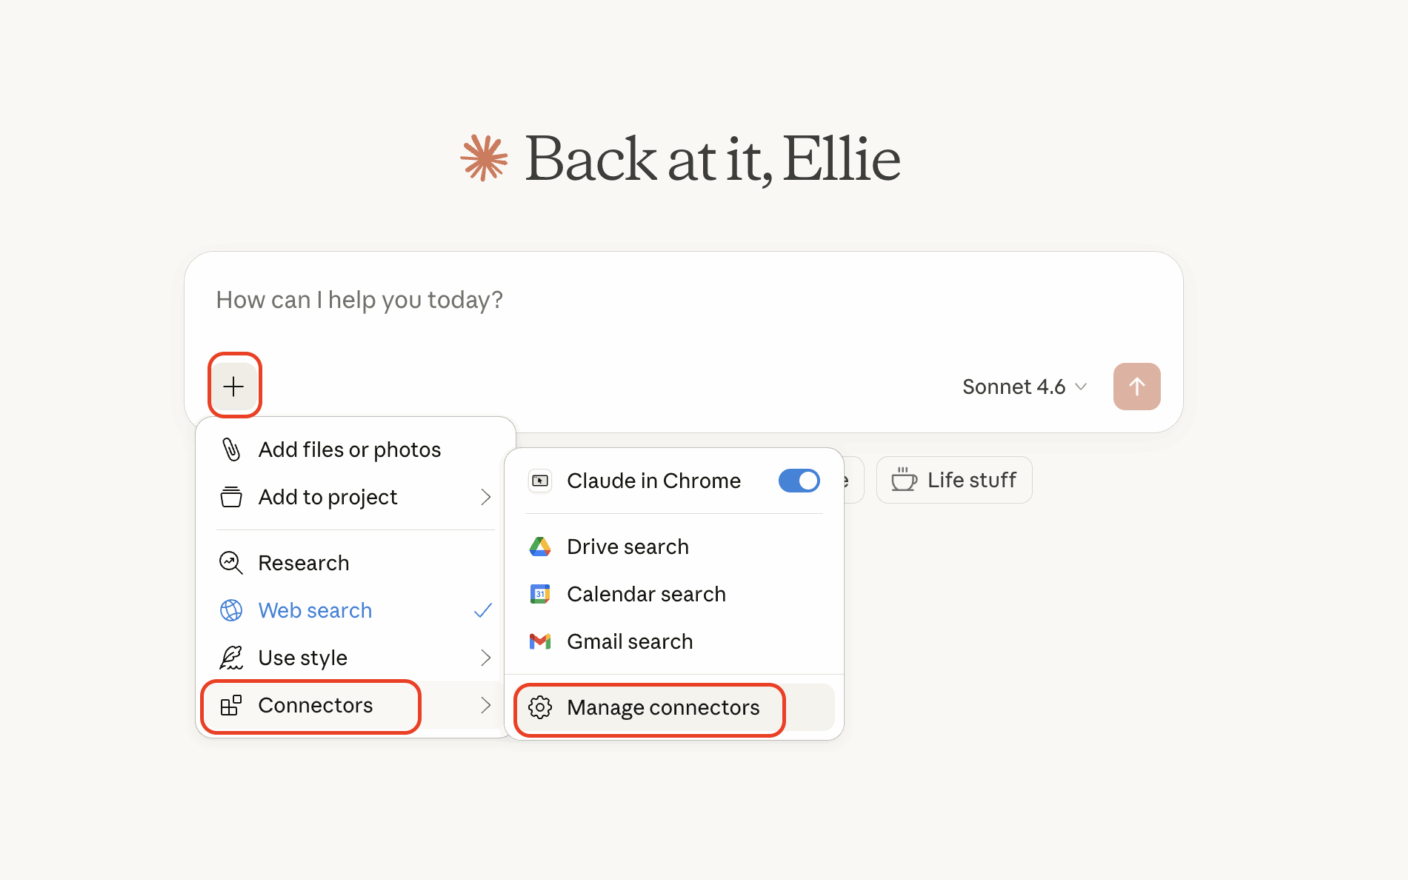
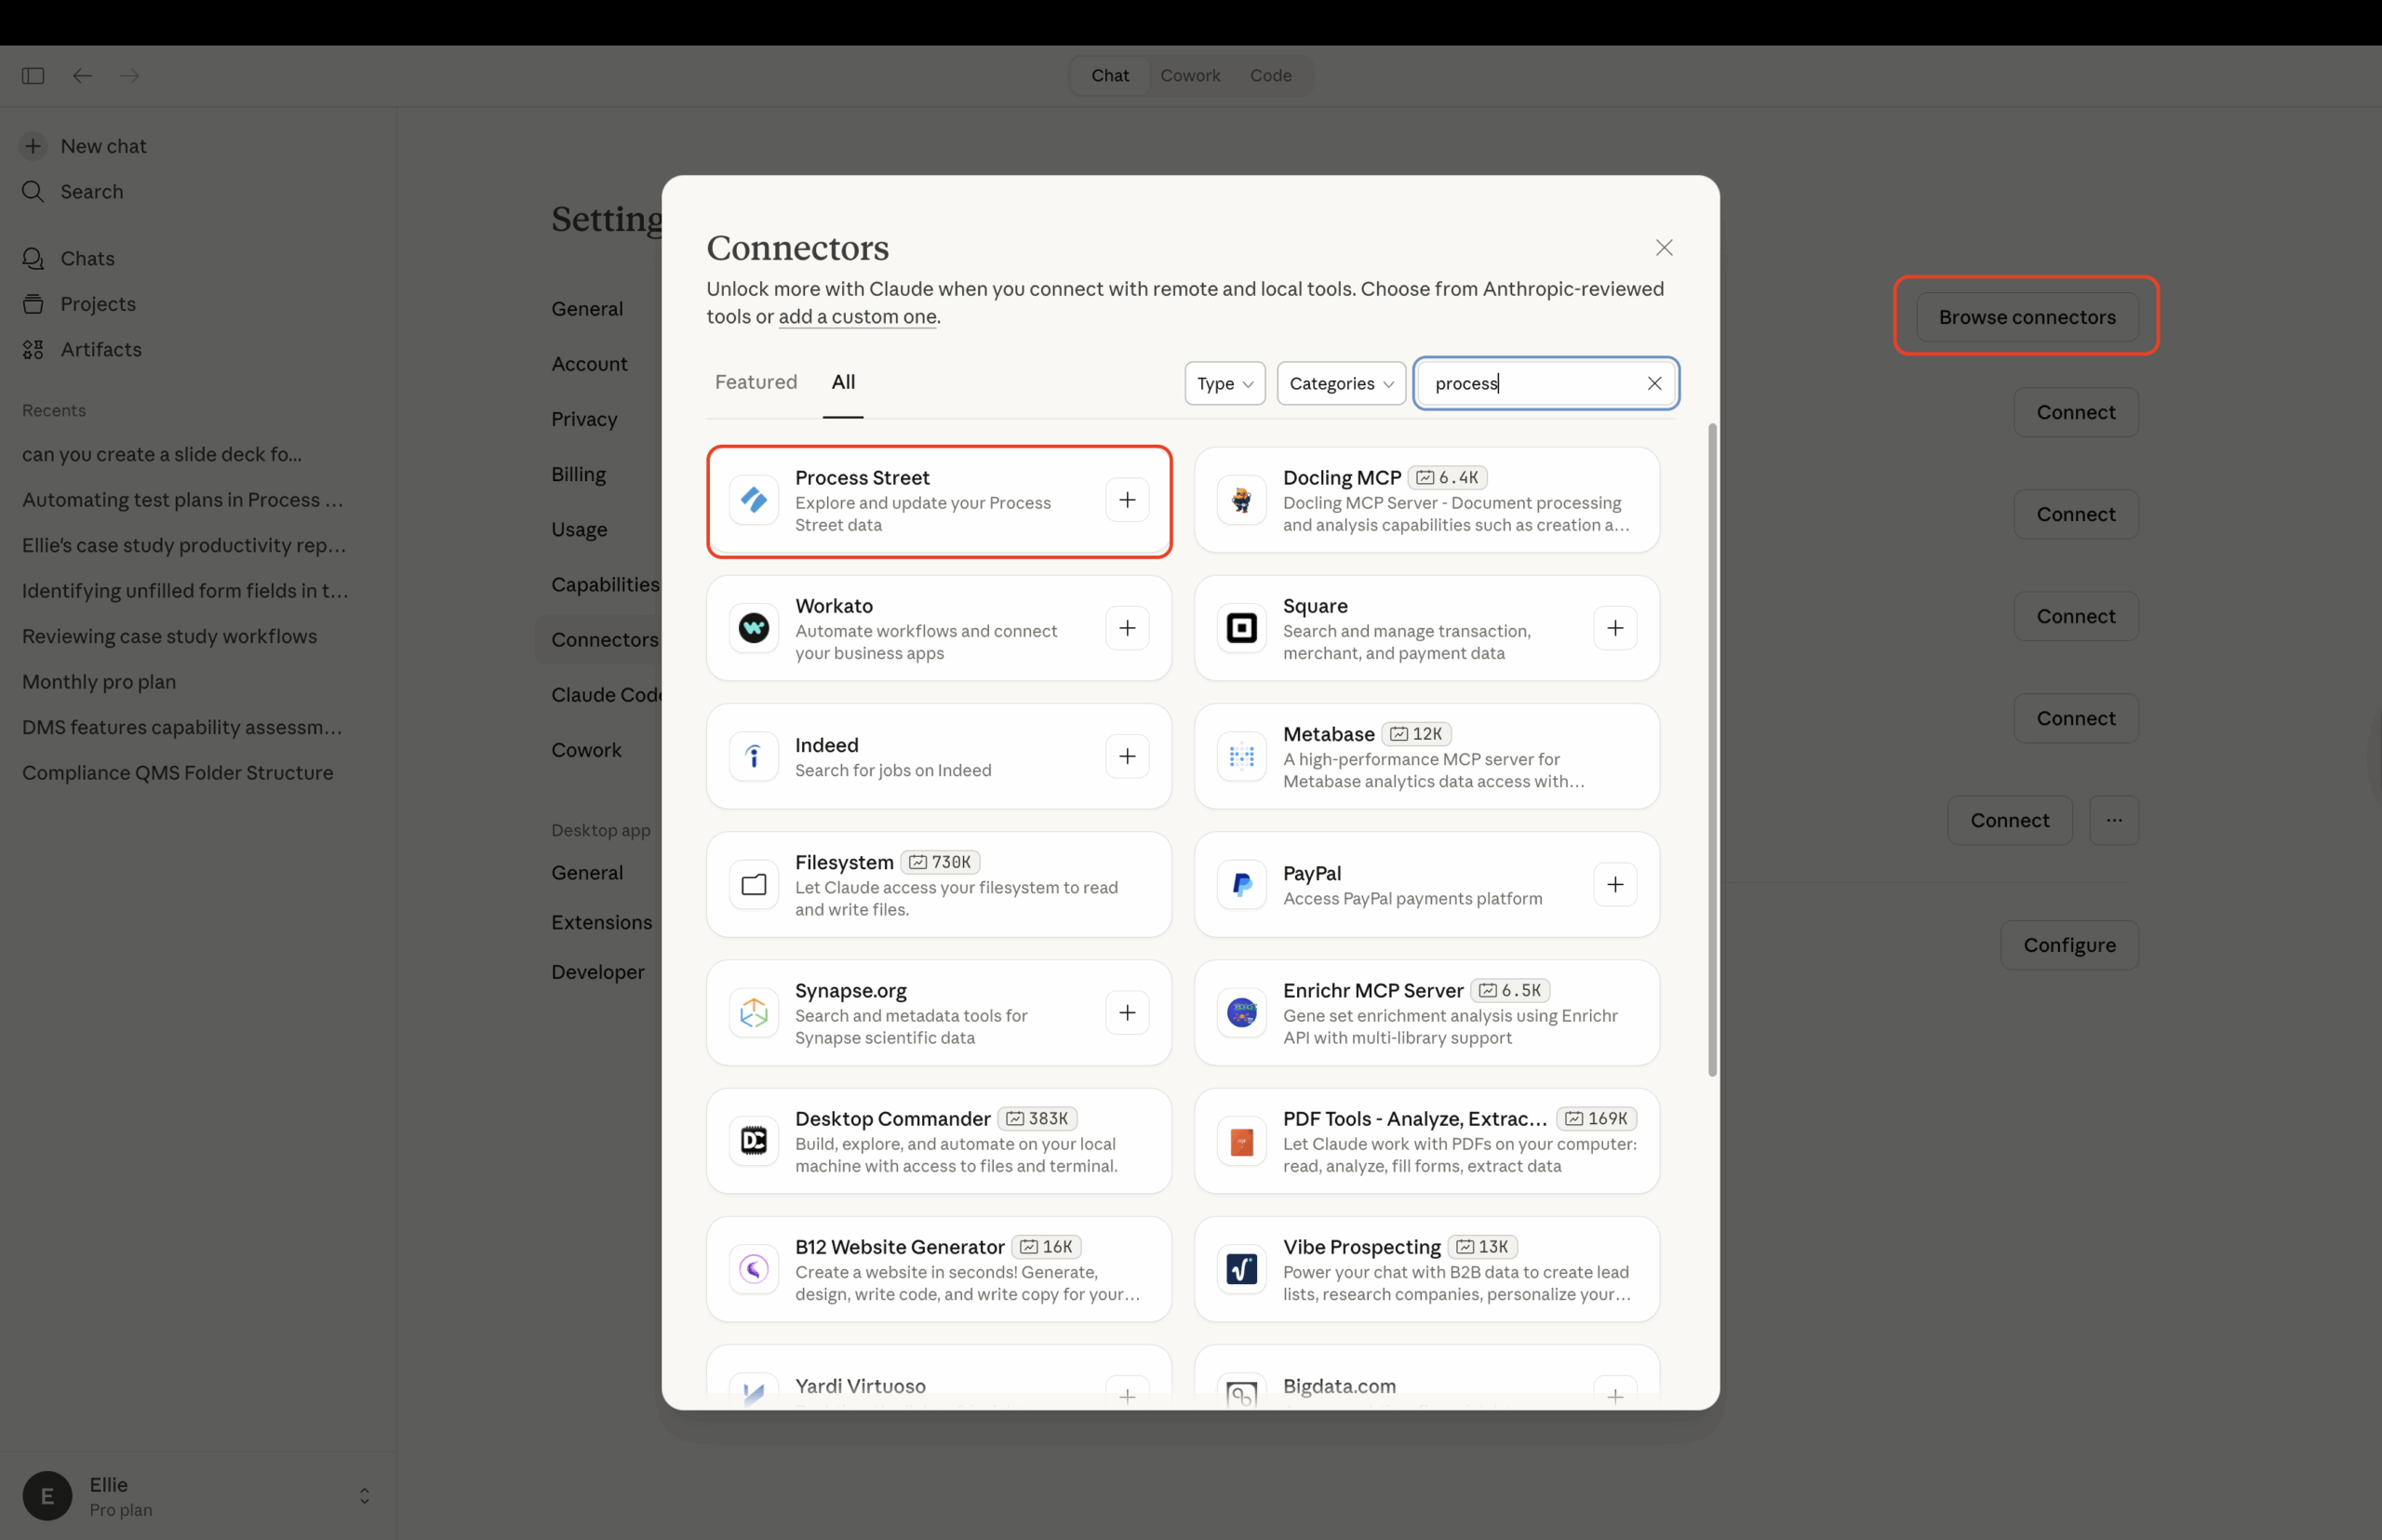
Note: ChatGPT Business, Enterprise, and Edu plans support full MCP access, including creating runs and updating tasks. Pro plans can connect with read-only access. On Business plans, only workspace admins and owners can add custom apps. On ChatGPT Enterprise and Edu, your ChatGPT admin may need to give you developer mode access first.
https://mcp.process.st/Tip: ChatGPT usually asks you to confirm before running actions that modify data in Process Street (such as creating runs or updating tasks). Read-only actions like viewing workflows or pulling reports usually run without a confirmation prompt. Exact behavior depends on your ChatGPT app permissions.
Each time you connect an MCP client (through Claude, ChatGPT, or Copilot Studio), Process Street displays an authorization screen. This screen shows the name of the application requesting access, the permissions (scopes) it needs, and the redirect URI, so you can confirm you recognize the application before granting access.
Click Approve to grant the application access to your Process Street data, or Cancel to deny the request. Canceling returns you to the connecting application without granting access.
After authorizing an application, you can review and manage all your connected applications from your personal settings.
The Apps tab lists every OAuth-connected application across all organizations you belong to. Each row shows the application’s name, the permissions (scopes) it has, and when it was connected and last active.
To disconnect an application, click Disconnect next to it, then confirm in the dialog. Once disconnected, the application can no longer obtain new access tokens. Any access it already has through previously issued tokens may remain valid for up to one hour.
If no applications have been authorized yet, the tab shows an empty state.
Process Street’s MCP server works with any application that supports the Model Context Protocol.
If your client supports OAuth with Dynamic Client Registration, point it to the MCP server URL and the client handles registration automatically:
https://mcp.process.st/ as a remote MCP server in your clientThis method works with VS Code, Cursor, Claude Code, Gemini CLI, and most other modern MCP clients.
Note: Some clients, such as Gemini Enterprise, don’t support DCR and require the API key method below instead.
For clients that don’t support OAuth or DCR, add Process Street as a remote MCP server and authenticate with a bearer token, using a Process Street API key as the token.
You’ll need two things:
https://mcp.process.st/Then add an Authorization: Bearer YOUR_API_KEY header to your client’s MCP configuration. Two common examples follow. Treat your API key like a password.
Tip: VS Code supports Dynamic Client Registration. Instead of the API key configuration below, add Process Street as a remote MCP server, choose Dynamic Client Registration when prompted, and leave the client ID and secret empty. VS Code handles the OAuth flow automatically.
If you prefer to connect with an API key, add the server to .vscode/mcp.json in your workspace, or open your user configuration with the MCP: Open User Configuration command. Using an input keeps the key out of the file: VS Code prompts for it once and stores it securely.
{
  "servers": {
    "process-street": {
      "type": "http",
      "url": "https://mcp.process.st/",
      "headers": {
        "Authorization": "Bearer ${input:ps-api-key}"
      }
    }
  },
  "inputs": [
    {
      "id": "ps-api-key",
      "type": "promptString",
      "description": "Process Street API key",
      "password": true
    }
  ]
}Tip: Cursor supports Dynamic Client Registration. Instead of the API key configuration below, add Process Street as a remote MCP server, choose Dynamic Client Registration when prompted, and leave the client ID and secret empty.
If you prefer to connect with an API key, add the server to ~/.cursor/mcp.json (available in every project) or .cursor/mcp.json (for a single project), then replace YOUR_API_KEY with your Process Street API key.
{
  "mcpServers": {
    "process-street": {
      "url": "https://mcp.process.st/",
      "headers": {
        "Authorization": "Bearer YOUR_API_KEY"
      }
    }
  }
}
The same pattern, a remote MCP server with an Authorization: Bearer header, works for any other MCP client that supports remote servers but not Dynamic Client Registration.
If you’re using an MCP client that we don’t already support and need a hand, reach out to our support team.
Help us improve this help center.