Writing a blog post can be a lengthy process that requires time and multiple resources.
Process Street‘s AI Blog Post Generator utilizes the power of ChatGPT to do that work for you, creating blog posts in a fraction of the time.
Users: In order to create or edit workflows you must be an Administrator or a Member who has been given ‘edit’ access by your Administrator.
Whether you’re creating a new workflow or working with an existing one, you can add AI tasks to generate blog posts for you.
Create or edit your workflow and add form fields to collect information like the blog post title, description, SEO terms, and more. This data can be used to create your prompt for the AI task.
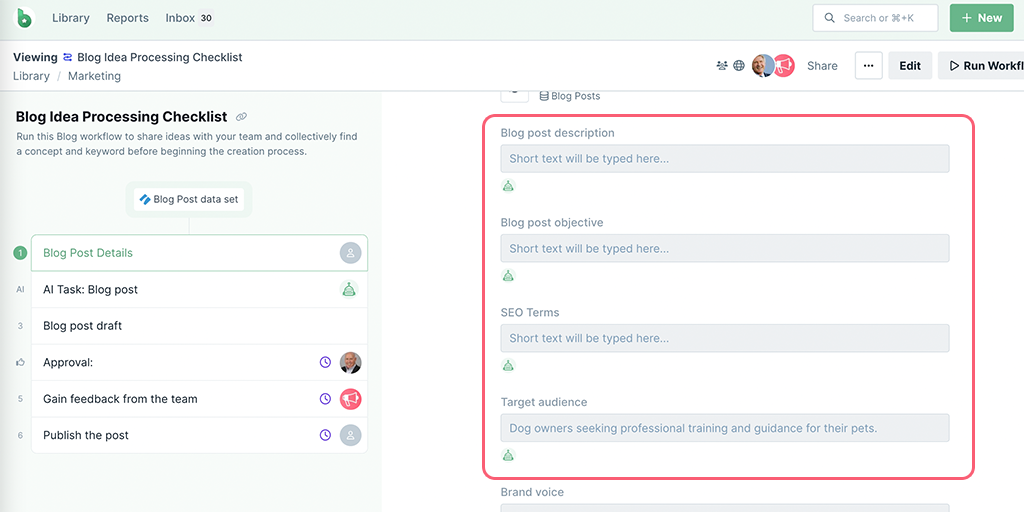
You can use these form fields as the input in your AI tasks.
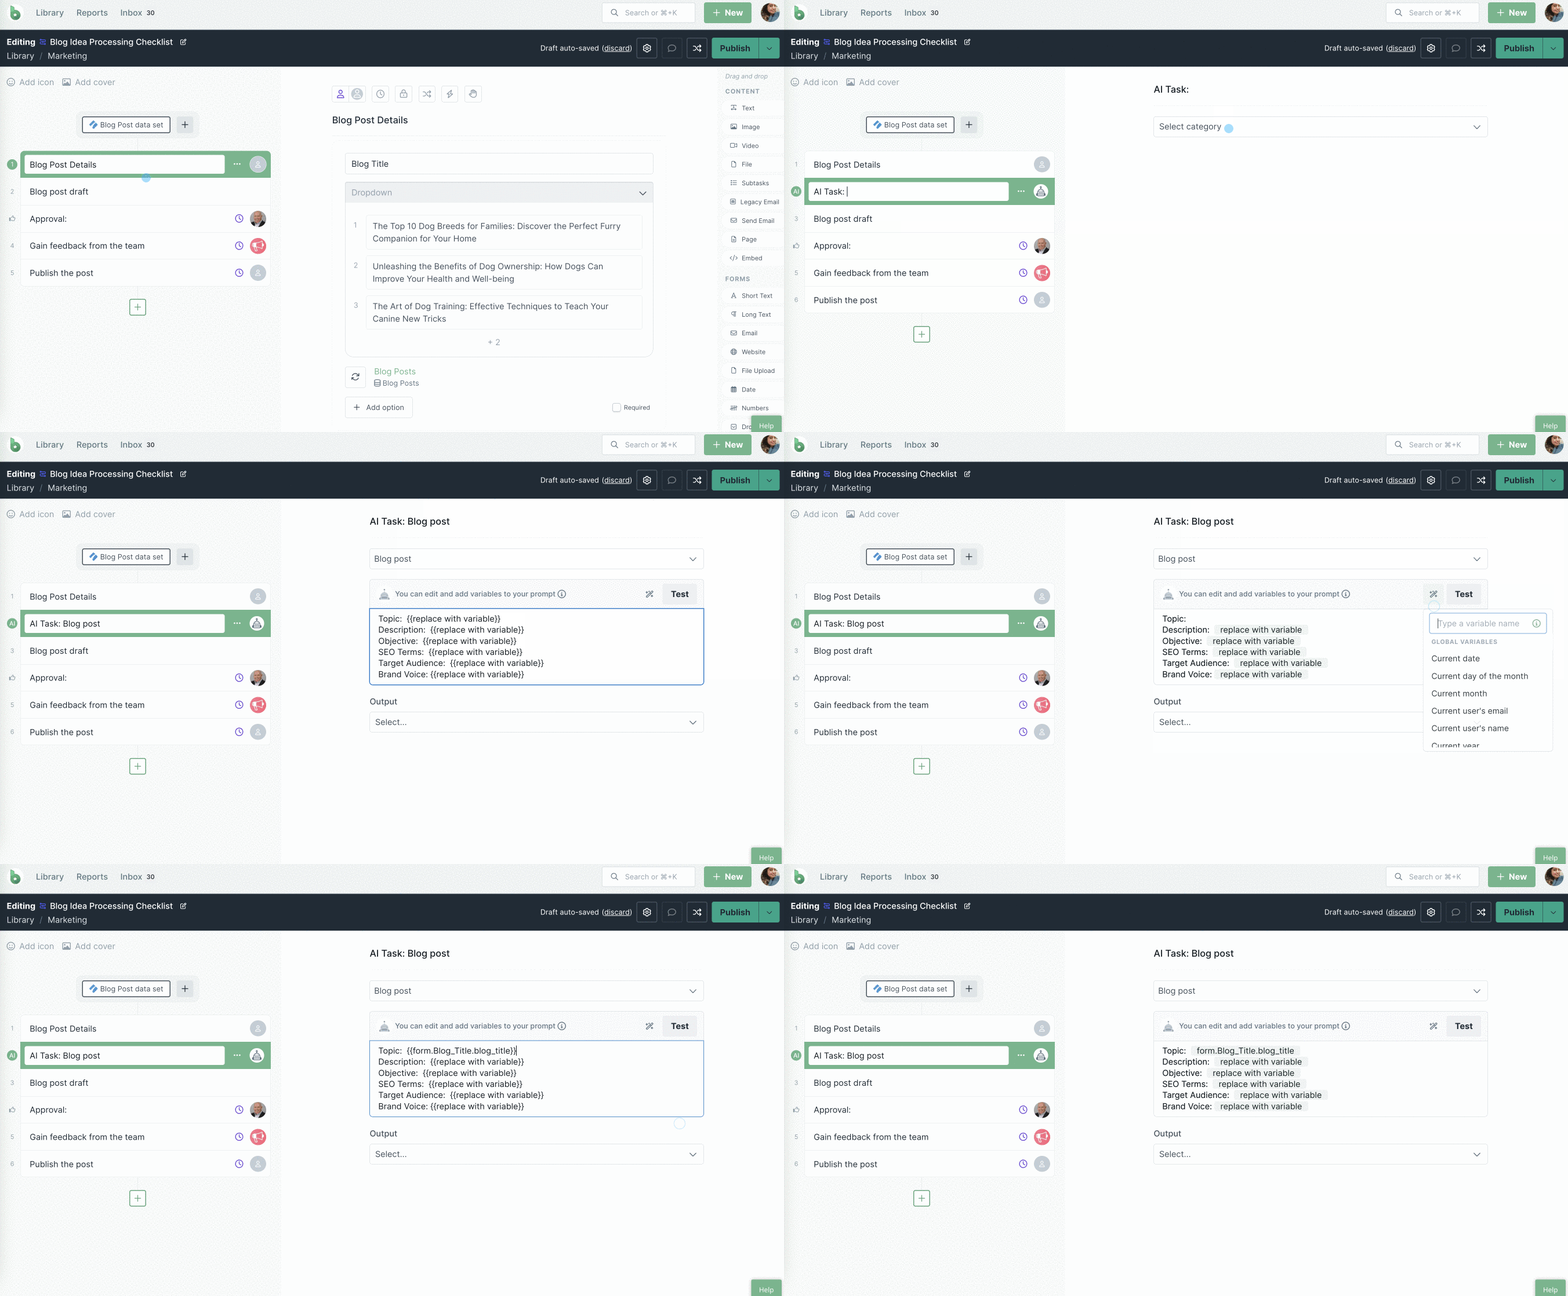
Next, navigate to the task after which you want to add the AI task and click on the + button at the end of your task list. Select AI Task then select Blog Post from the category dropdown, as shown below.
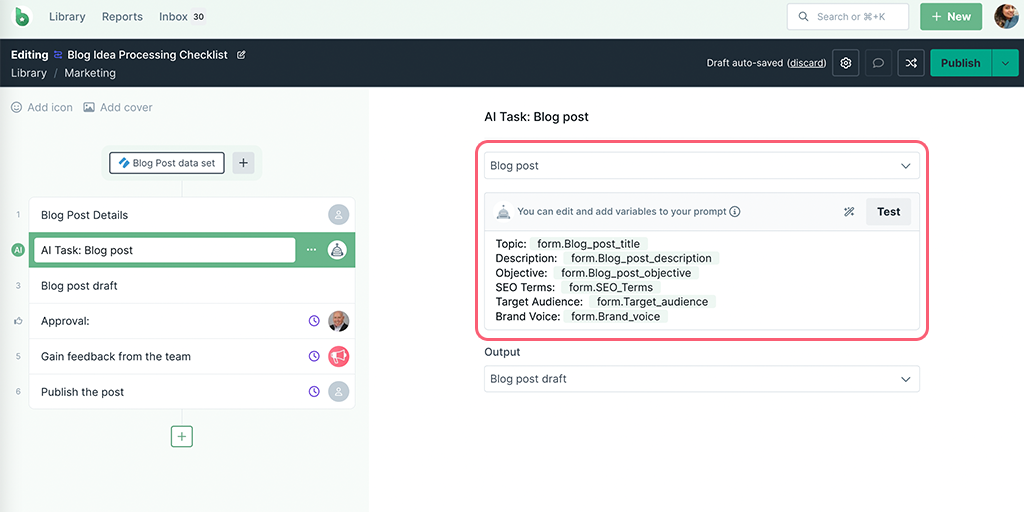
Edit the pre-populated prompt to add variables from your workflow run, shown below. You can also edit this prompt to add or delete instructions.
Before you finalize your prompt, you can test it to make sure it delivers the desired response in your workflow runs. Once you’ve created or edited your prompt click Test.
When you open the testing modal you’ll be taken to the instructions tab. Here you’ll see the prompt that you edited in the step before.
Populate the form fields like you would in an active run then click Generate to review the response, as shown below.
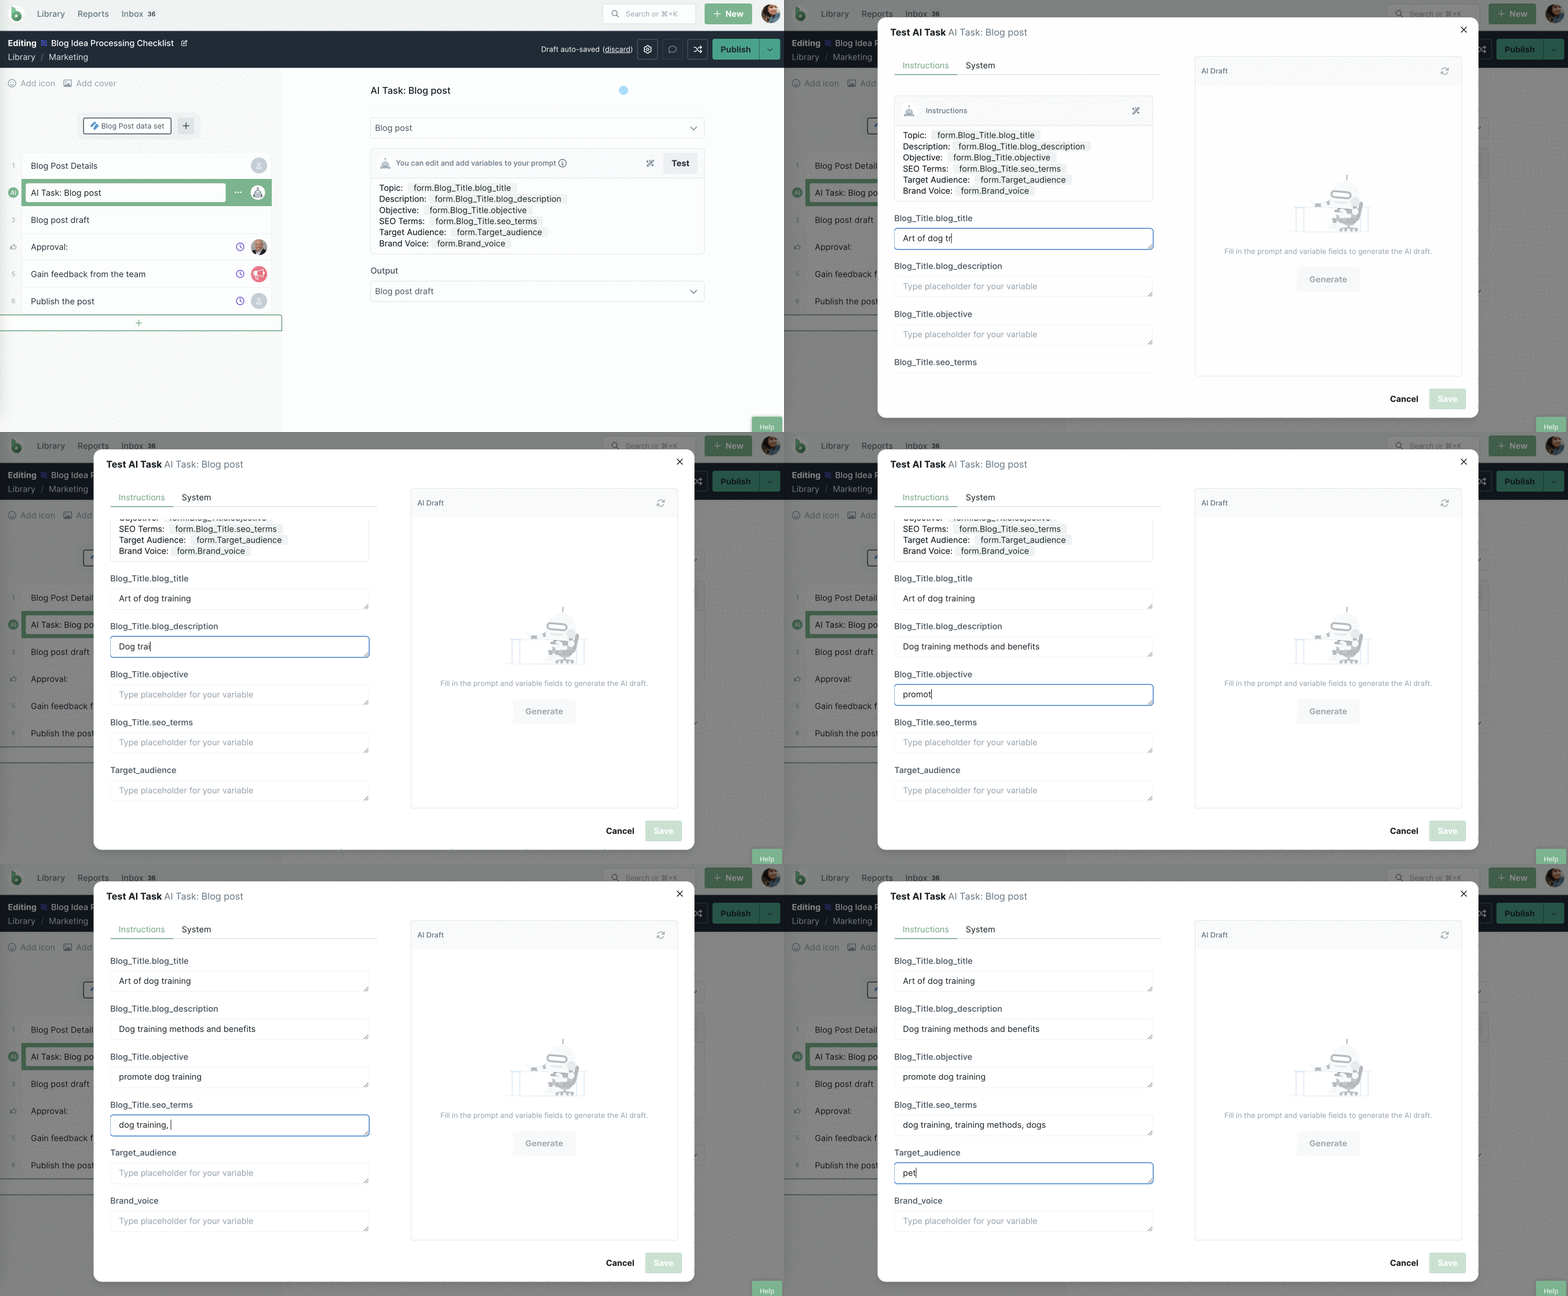
If you’re not happy with the response, you can edit the prompt and regenerate the response, repeating this step until you’re satisfied. Then click Save to save your edited prompt.
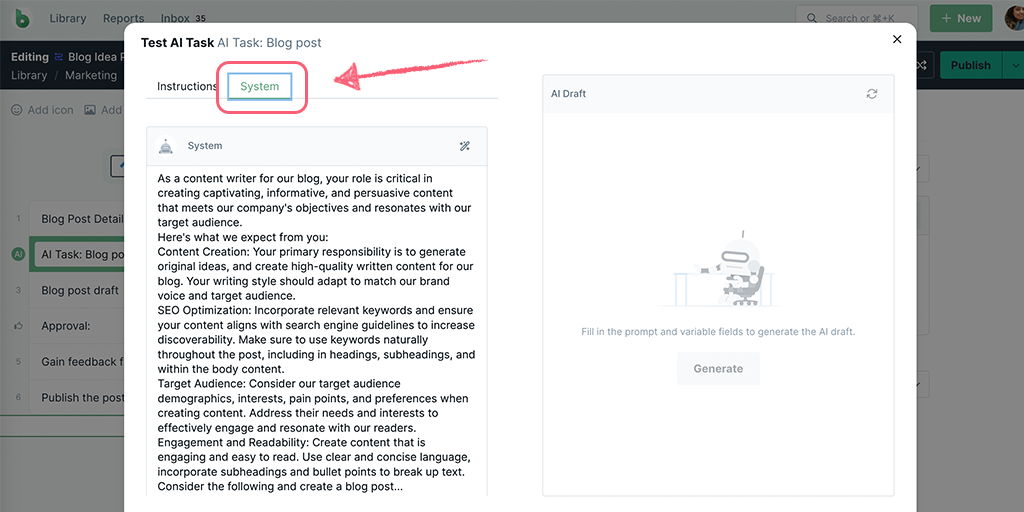
Click on the tab next to instructions, System prompt.
The System prompt is pre-populated for you. You can edit it or create your own.
Note: AI tasks do not have web browsing capabilities. If your workflow requires data from the web for an AI task to process, you can use Zapier’s Web Parser.
The output field is the form field where a response will be populated by the AI Blog Post Generator. This field could be in a task that’s typically after the AI task.
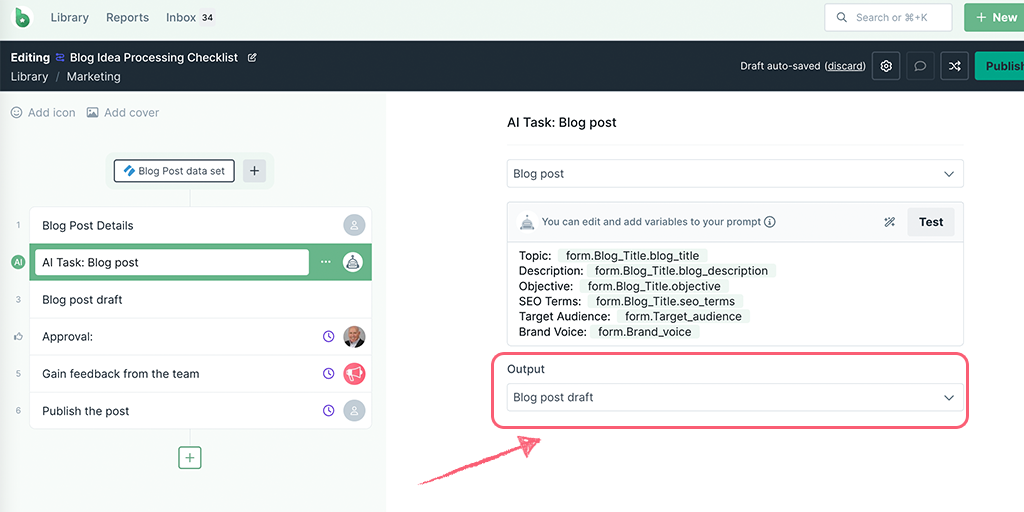
Form fields that can be selected as an output field are:
Optional: Add an approval to have one of your team members review the blog post generated by the AI Task.
When you’re done editing, publish and run your workflow and start filling out the details in your input form fields.
Completing the task before the AI Task triggers it to run, then you can watch as your blog post is generated for you.
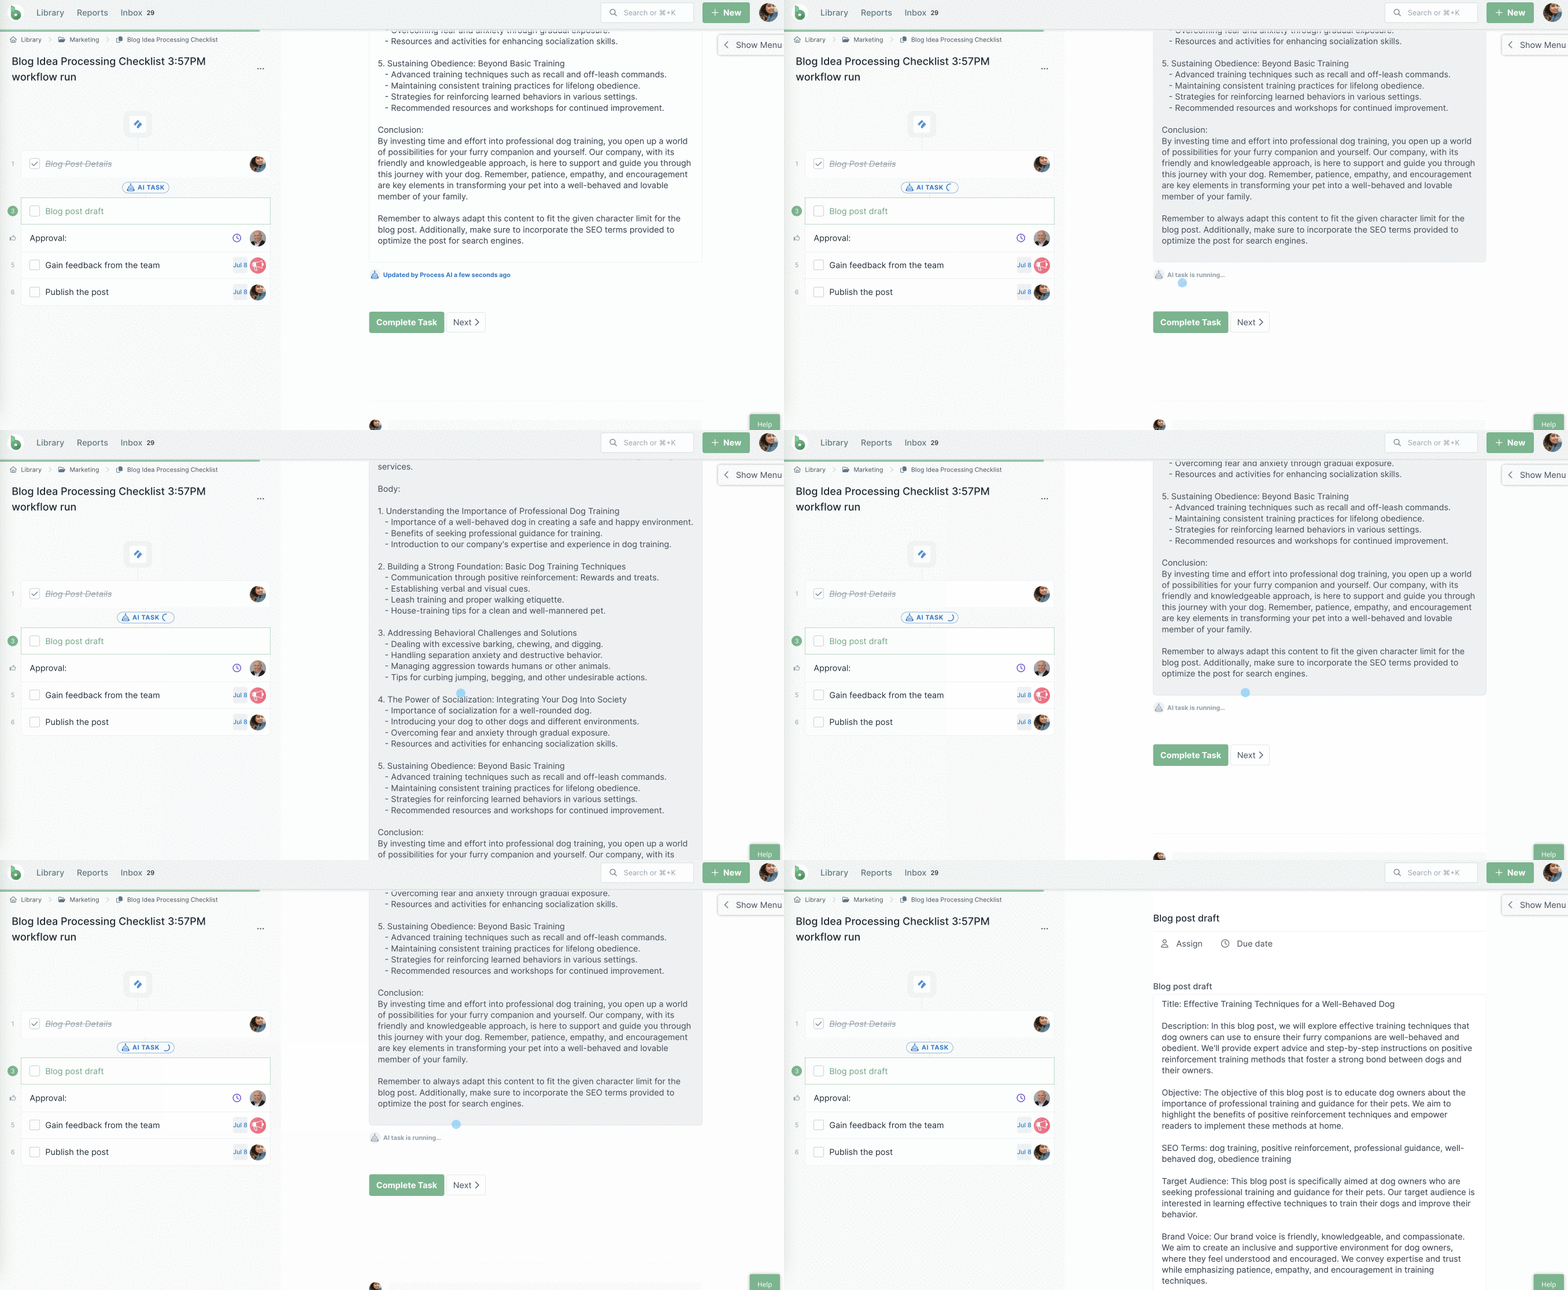
In an active run, if you want to regenerate the blog post, uncheck the task before the AI task and mark it complete again.
Discover more AI Tasks.