In this lesson we’re going to cover:
Estimated time for this lesson ~ 20 minutes
This lesson is part of our onboarding program. Find out more about what you’ll learn from the program when you’re getting started.
The Send Email widget lets you create pre-written emails in your workflows so that you can send emails from your workflow runs at the click of a button. It also lets you use data collected in form fields from within that workflow run to pre-populate the email — no double-typing names, email addresses, or dates.
The widget has two email format modes:
Remember those form fields and variables from a previous lesson? This is where they start to save you time when sending out emails, especially repetitive emails you send on a recurring basis.
Think about each time you hire a new team member, onboard a new client, start a new marketing campaign, or contact a new freelancer. If you have a recurring process like this, you’ll no doubt be sending a lot of emails.
When you’re working through a workflow run, you can send out those emails at the click of a button. Add as many email widgets as you need for different parts of your process.
First, you’ll need to be in your workflow editor. Head to your chosen workflow, click on your workflow’s name, then click “Edit” in the top-right corner.
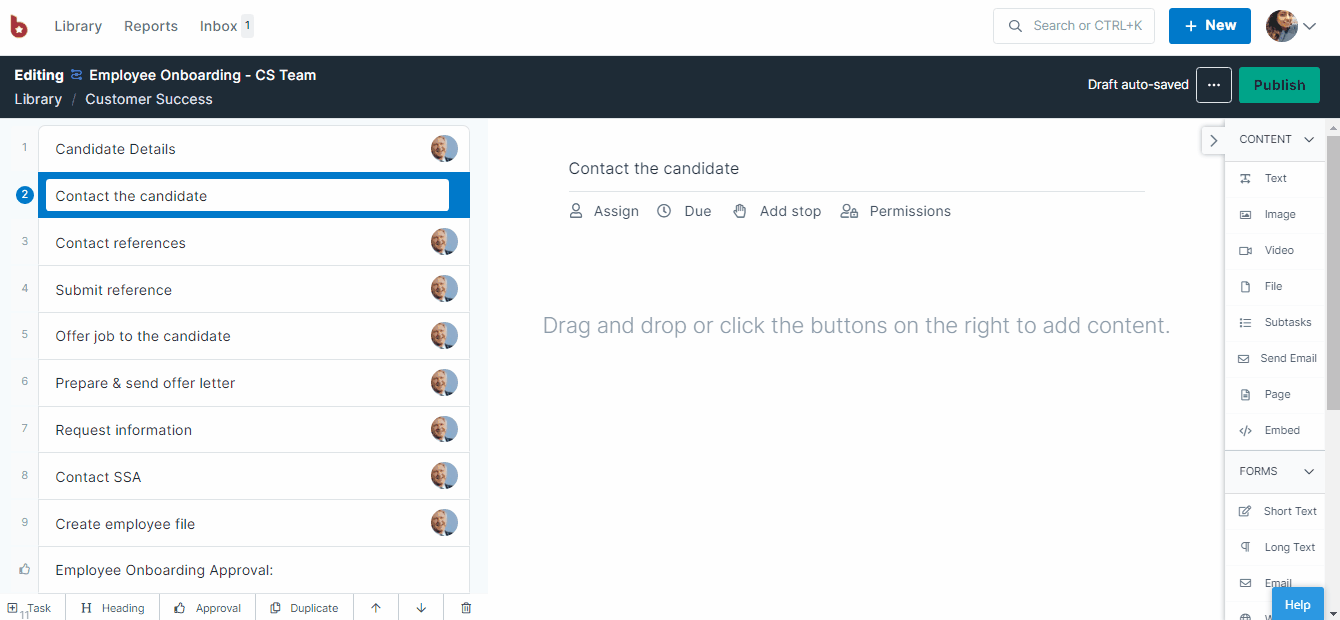
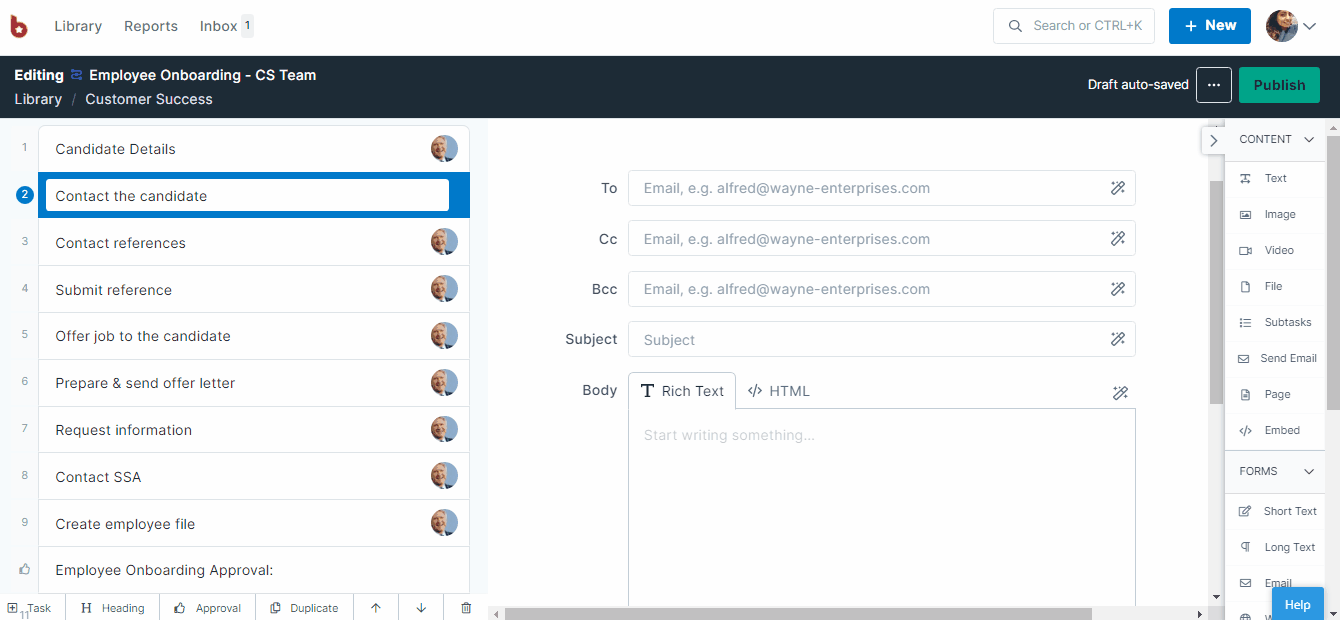
Find the task where you’d like to add the widget and click it to select it.
Then, from the right side of your page, drag and drop the email widget into the middle section of your screen, as shown below.
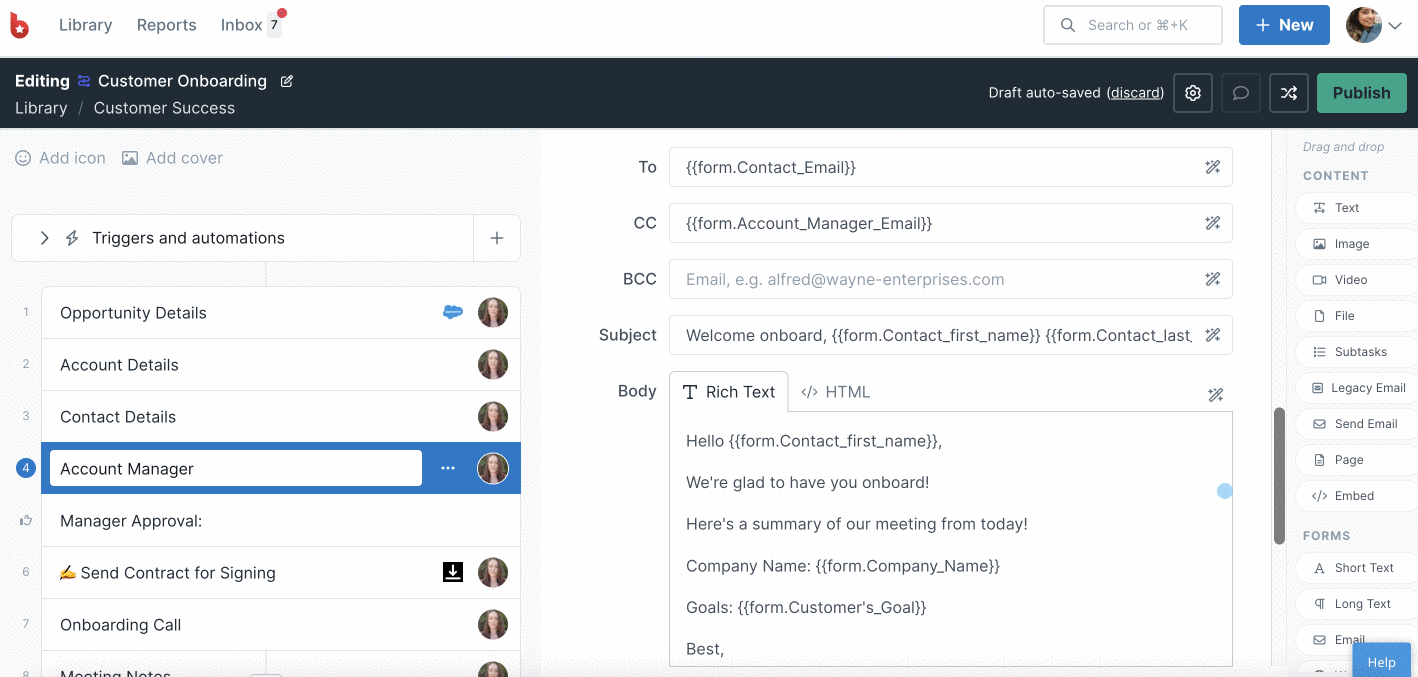
You can populate the email fields using variables. Click on any of the magic wands in the widget and choose from the list that appears (you’ll see global variables as well as the form field variables you’ve added to your workflow).
The Send Email widget has a format setting that controls how the email is composed and sent. Open the widget’s settings to choose between two modes:
When using this mode, you have two editor tabs for the email body:
Add text formatting, headings, and hyperlinks to your email.
Use HTML to create your email with advanced formatting, including images and tables.
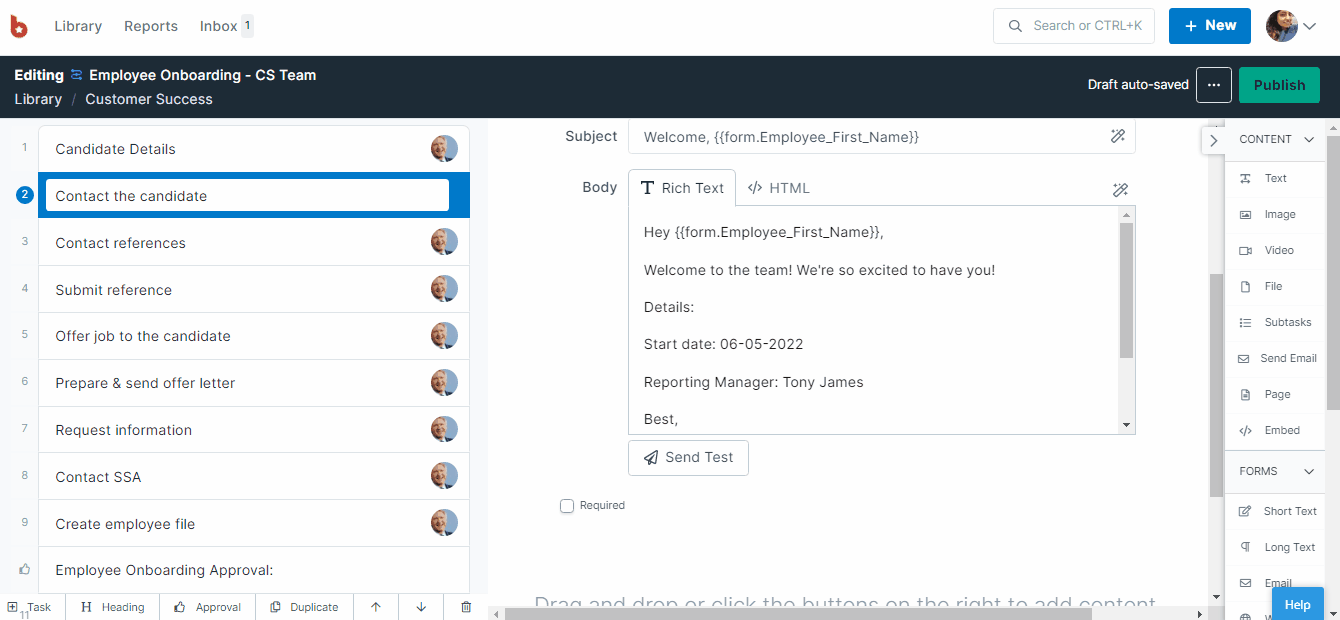
Pro Tip: Preview your email before sending or click the Send Test button to check how it looks. The test email goes to your email address, but when sent from a workflow run, it goes to the recipient defined in the To field.
When using Plain text mode, you compose a plain-text email body inside Process Street. When a user clicks Send during a workflow run, their default email client opens with the To, Subject, and body pre-filled. The email is sent from the user’s own email address — not from process-street-mail.com.
This mode is useful when the recipient needs to see the sender’s real email address, or when you want replies to go directly to the person running the workflow.
Static pieces of information stay the same every time — for example, the body of your email, the Cc or Bcc fields, and the sign-off. However, the email address you’re sending to, the person’s name, and the date of your meeting may vary. These are variables.
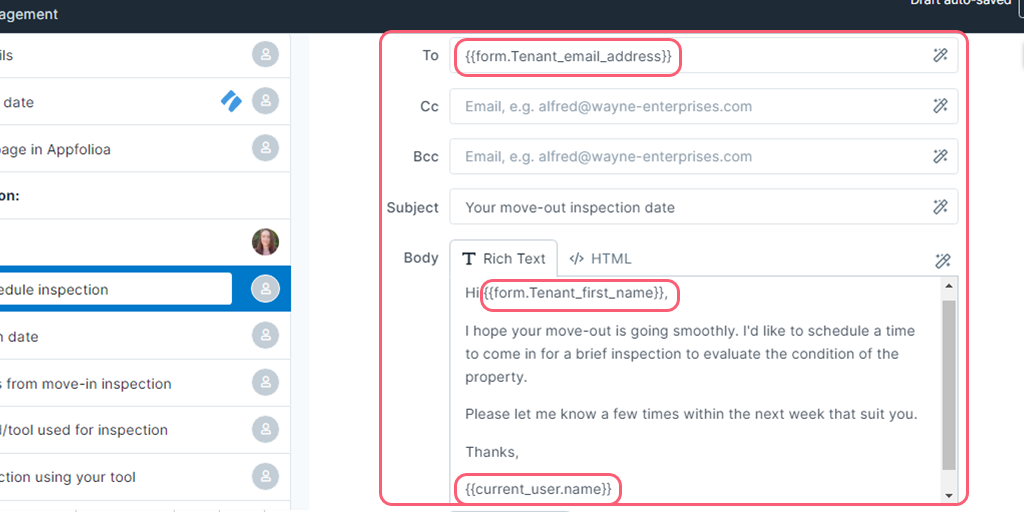
Variables are the fields surrounded by curly brackets as shown above.
Pro Tip: If you use the File Upload form field as a variable in the email widget, avoid symbols like &, *, # in the file name — these characters are not currently supported.
Look up the step-by-step guide on How To Use the Email Widget, which includes FAQs and best practices.
There is also an article to help you troubleshoot the email widget if you need further assistance.
The Send Email widget lets you keep consistency with emails you send on a recurring basis. When you cut out time spent double-typing email addresses (using variables instead) and email content, you’ll save heaps of time.
Don’t forget you can test send the email before you’re done creating your workflow to make sure everything works as expected.
Pro Tip: Make your form field names as unique as possible when building out your workflow, so you can search and find them easily when using them as variables.
Send a test email from your workflow and see how the emails turn out. Looking good? Great job!
Next Lesson – Optimize Your Processes >
< Previous Lesson (Running Workflows)
< Back to the Getting Started home page
Help us improve this help center.


