Power Automate lets you connect all your favorite business tools, to create seamless and efficient automations.
Since there are around 500 connectors with multiple triggers and actions, what you create in a Power Automate is really up to your imagination.
Create simple two-step or three-step flows, or get fancy with multiple steps, multiple tools, branching paths, variables and increments. The choice is yours!
Users: In order to create a Power Automate connector or an API key, you must be an Administrator.
This article covers:
Power Automate uses a series of triggers and actions to automate your work. A trigger is something that starts a flow and an action is something that happens once the flow has been triggered.
Login to Power Automate or create an account if you don’t already have one.
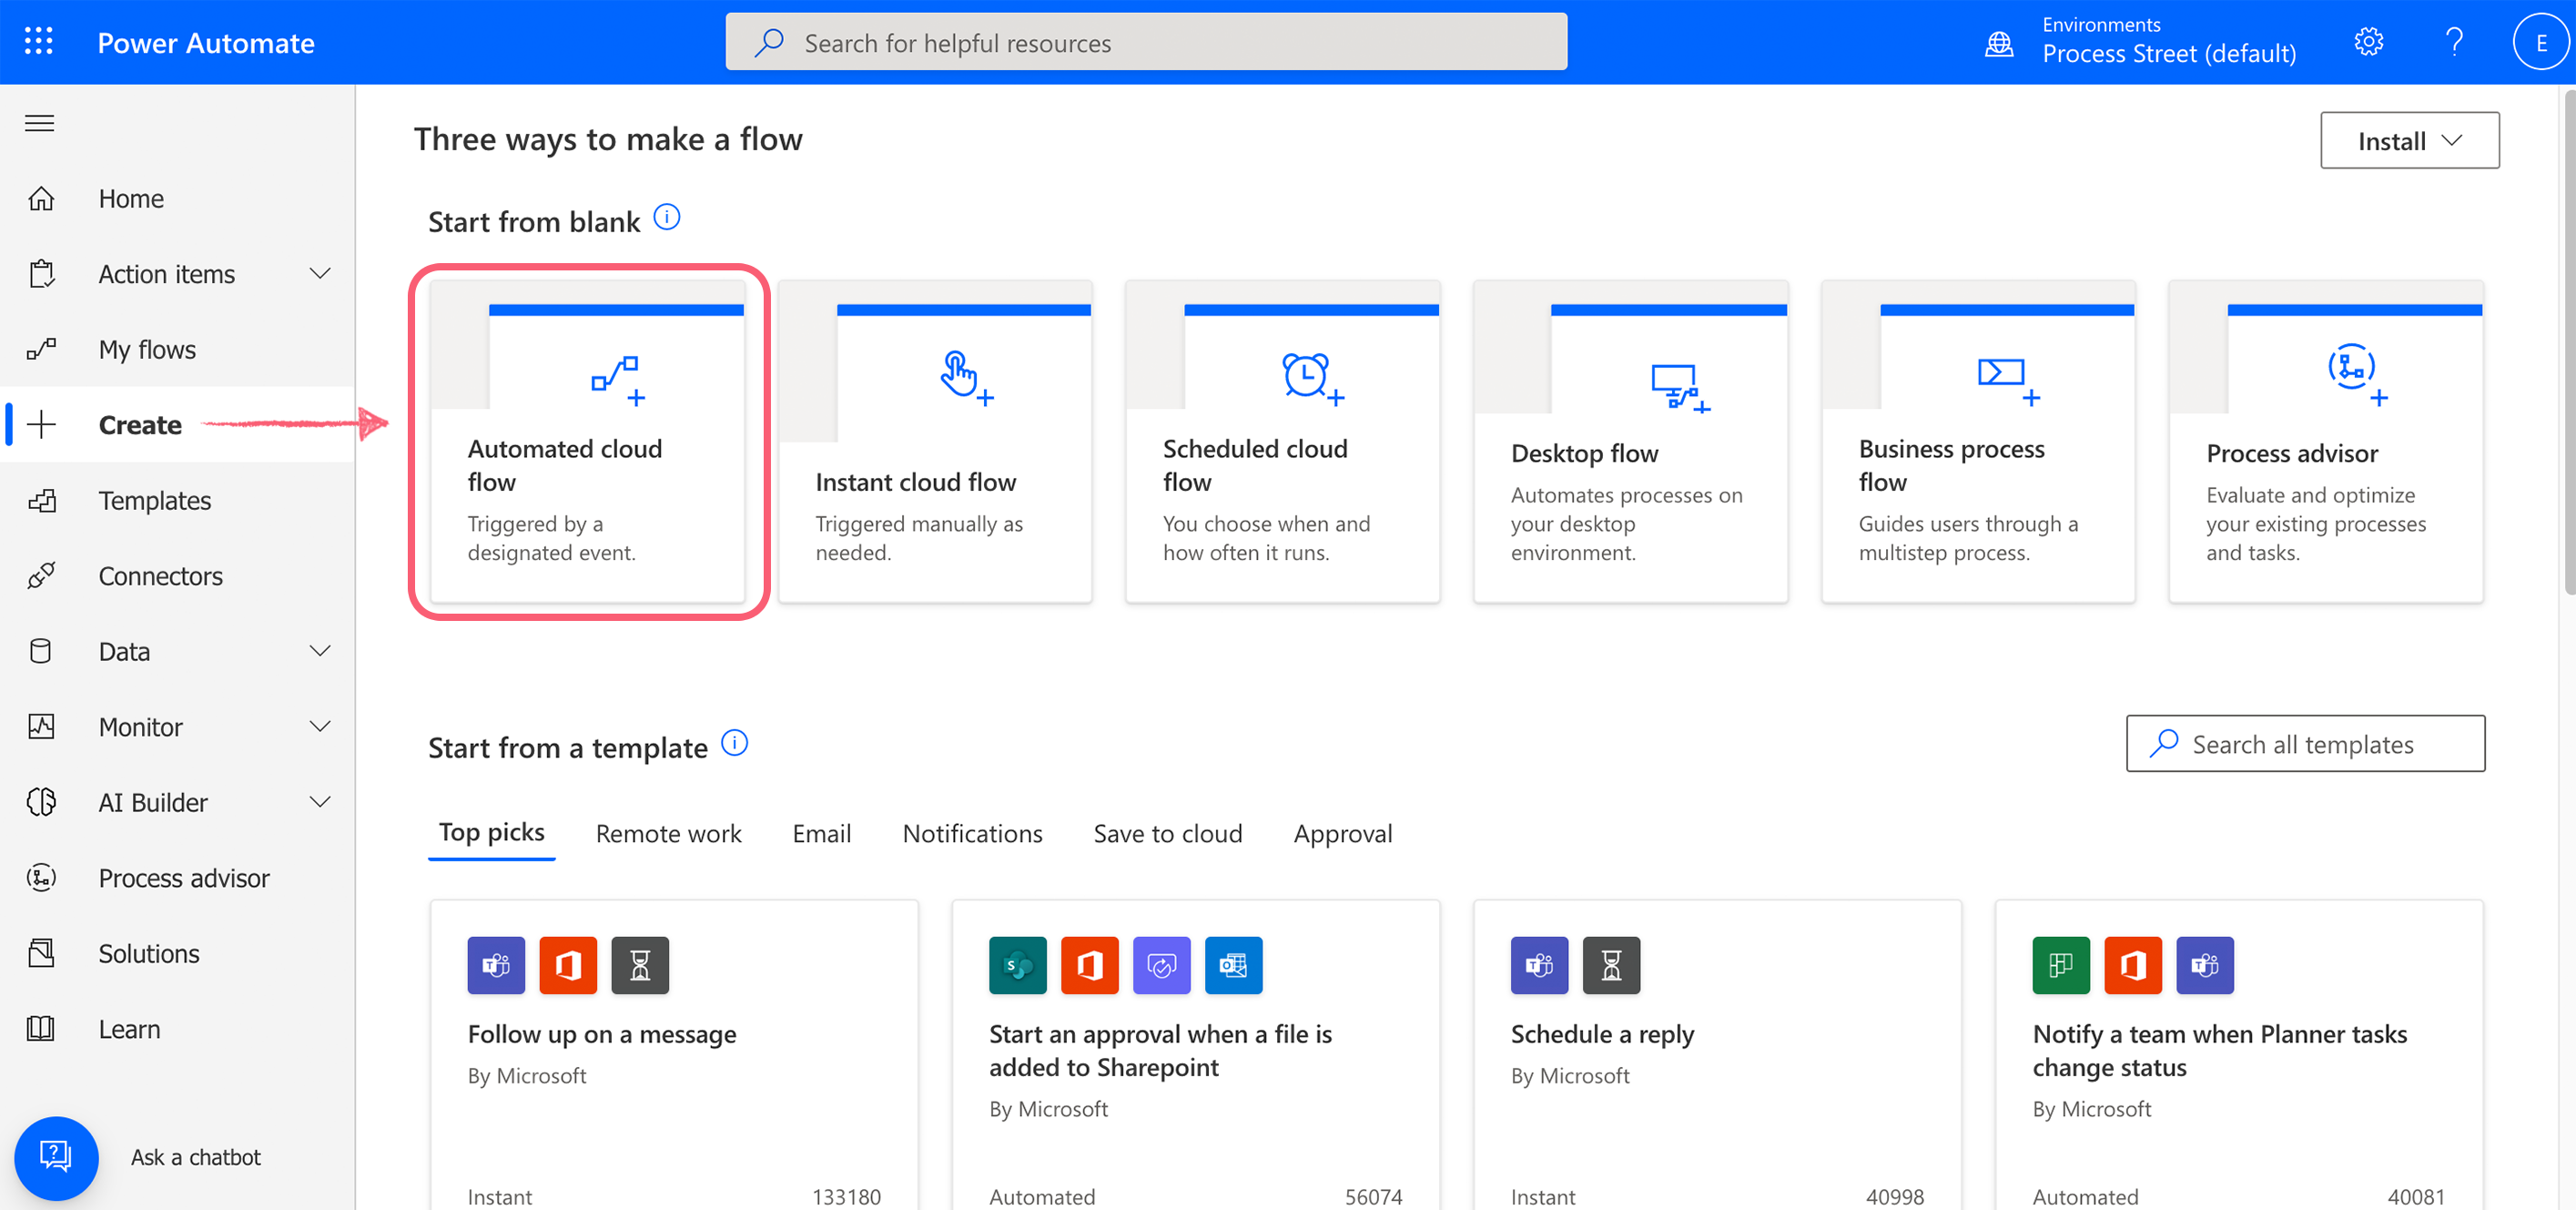
On the left-hand menu, click Create and then select Automated cloud flow.
In the next screen, add a name for your flow and select a trigger. You can type Process Street to view the triggers available.
Note: This is if you’d like something happening in Process Street to happen before you add an action. (At this point, you could add another connector from another app as your trigger and have an action in Process Street as the next step if you prefer).
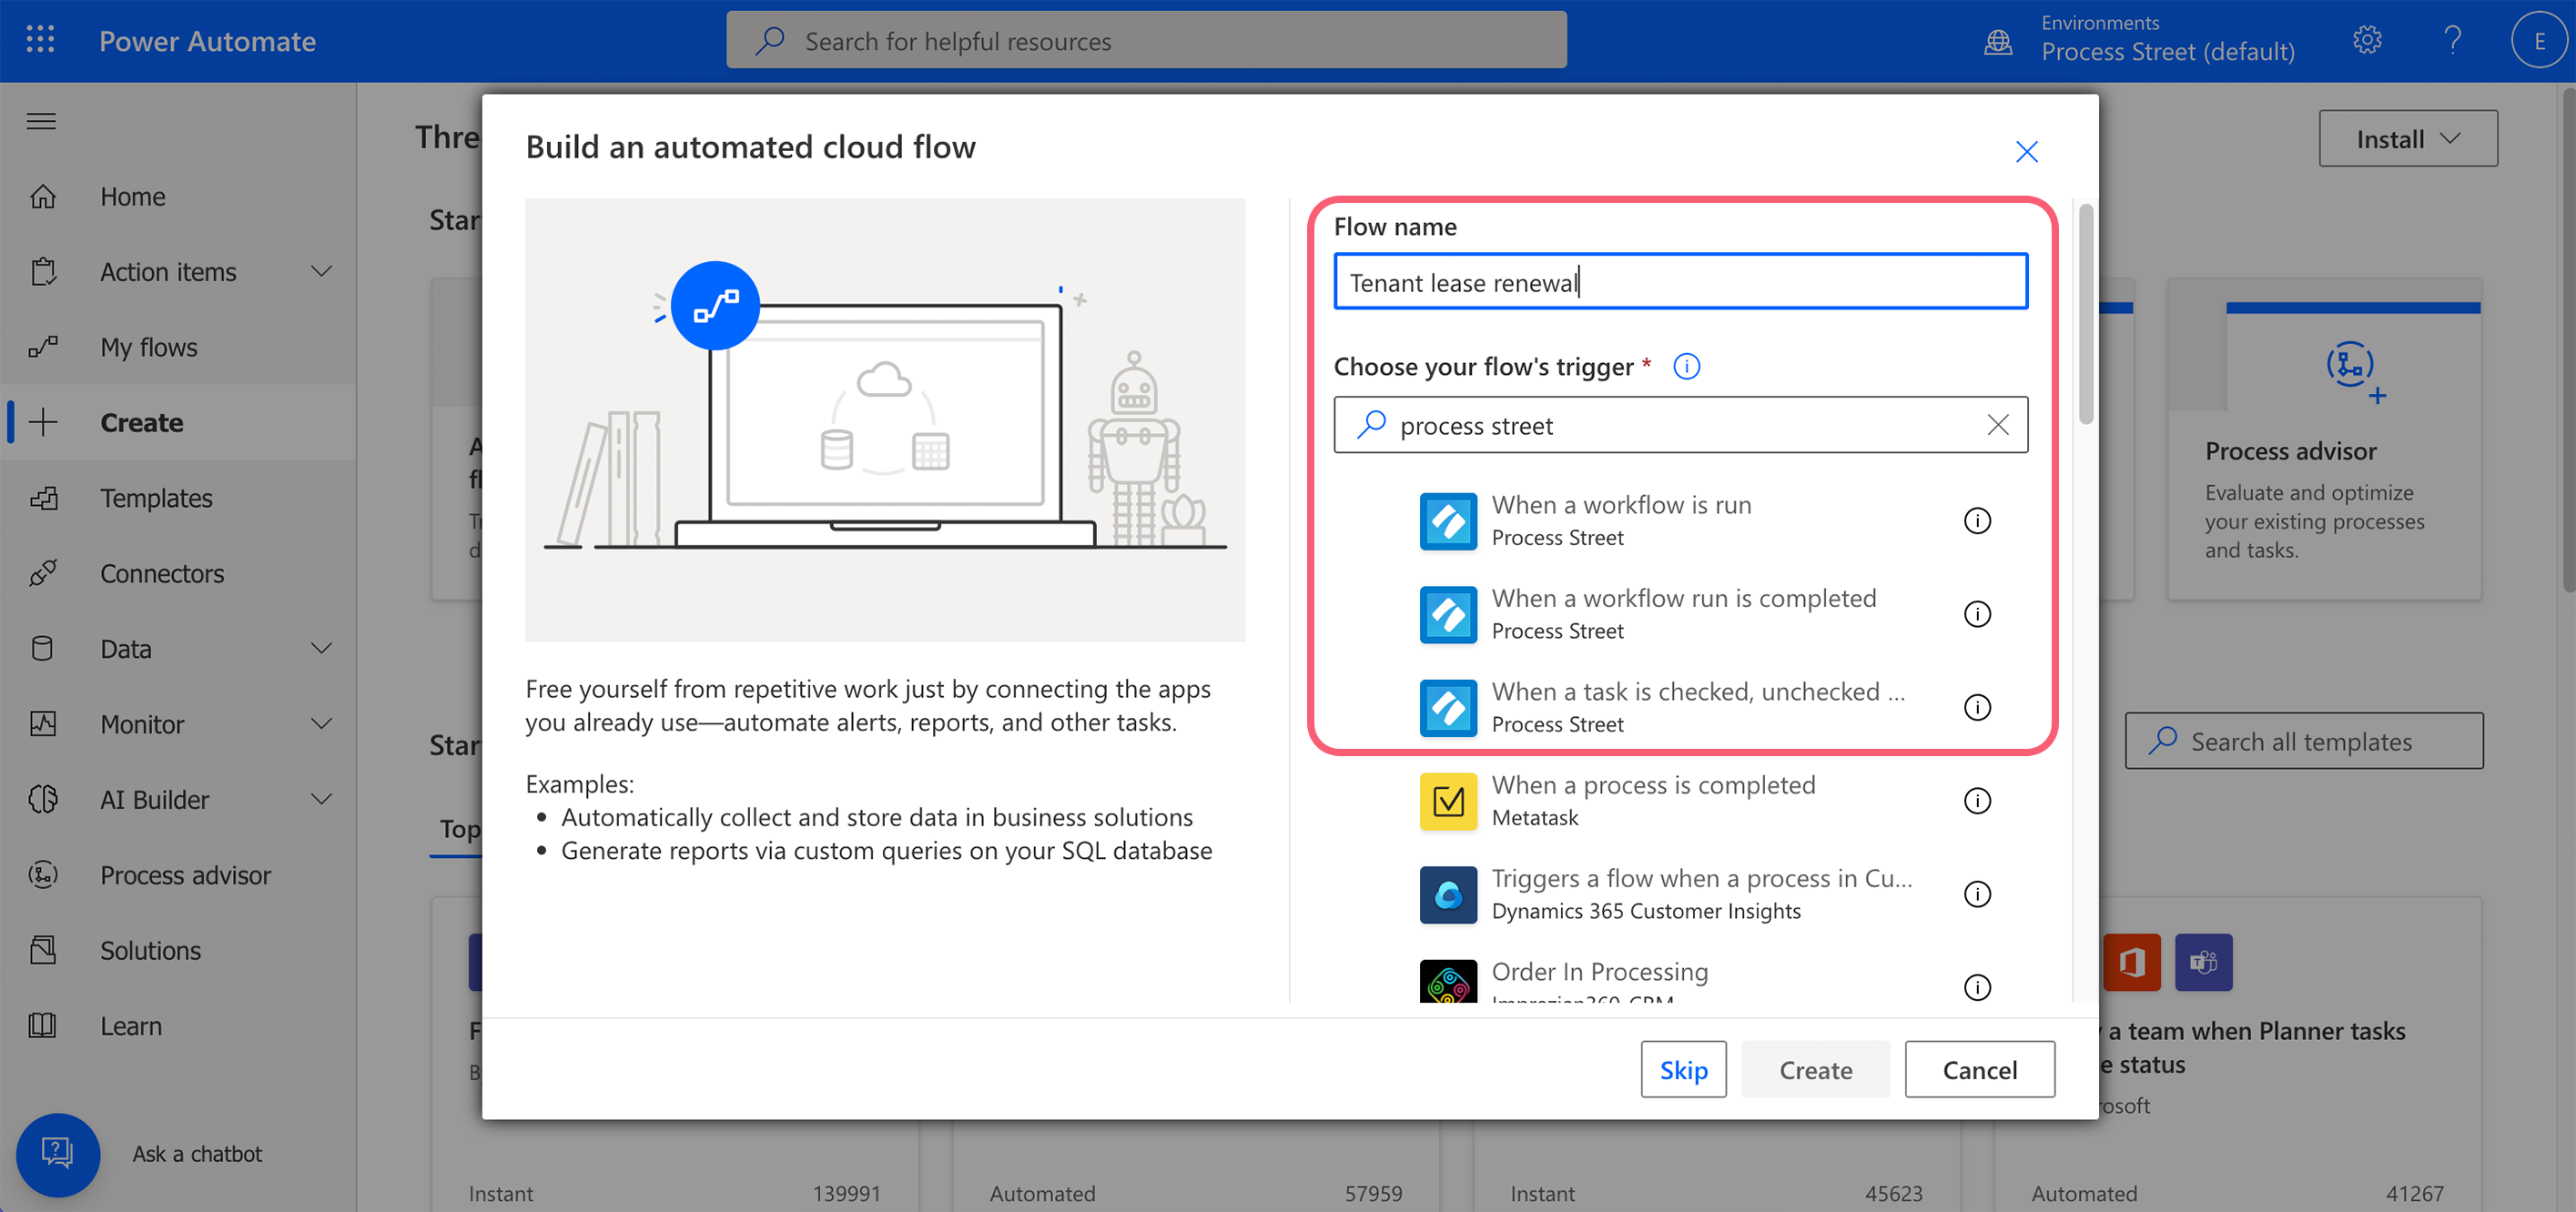
Once you’ve chosen a trigger, click Create.
If you’re not sure what trigger to use for now, click Skip.
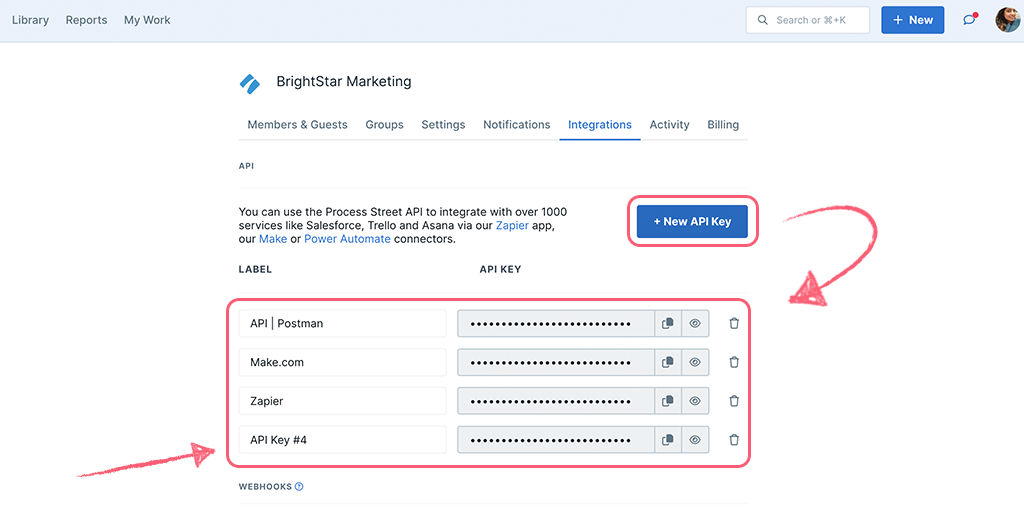
Once you have selected a Process Street trigger, you’ll be prompted to add your API key (if you’ve already added your API you won’t see this step).
You can generate and name a new API key from the integrations page in your Process Street organization manager area (for admins only).
The name of your API key will show in notification emails sent to users you have provisioned, so it’s best practice to change the default label (API Key #1) to avoid confusion (e.g. you can name it Power Automate, or anything else you’d prefer).
Add a name for your connection (e.g. your organization name) and add your API key. Click Create to continue.
Next, let’s take a look at creating an example flow.
Use case: A property management company wants to send one of their tenants a lease renewal workflow run to complete. The property manager checks a task as complete in the run, which triggers Power Automate to turn on the run share link and email a link to the run to the tenant.
We’re going to use four steps to create this flow:
Select the trigger When a task is checked, unchecked, or ready.
In the task state field, select Task Checked.
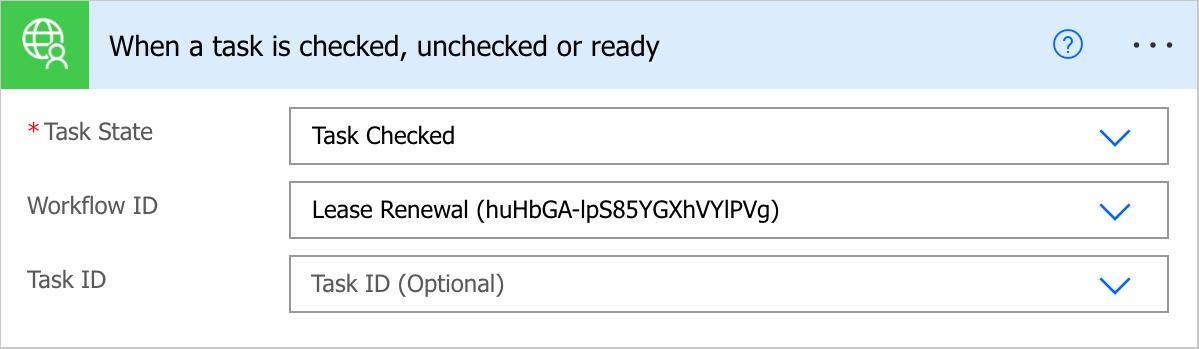
Next, select your workflow by name (or ID). (If you leave the workflow ID field blank, this will trigger for all workflows in your organization).
Note: You can only search for workflows in your organization library, not those that have been created in your private library.
Next, select the specific task you’d like to trigger your flow. If you don’t specify a task it will work when any tasks in that workflow run are completed.
Click New Step to add more steps to your flow.
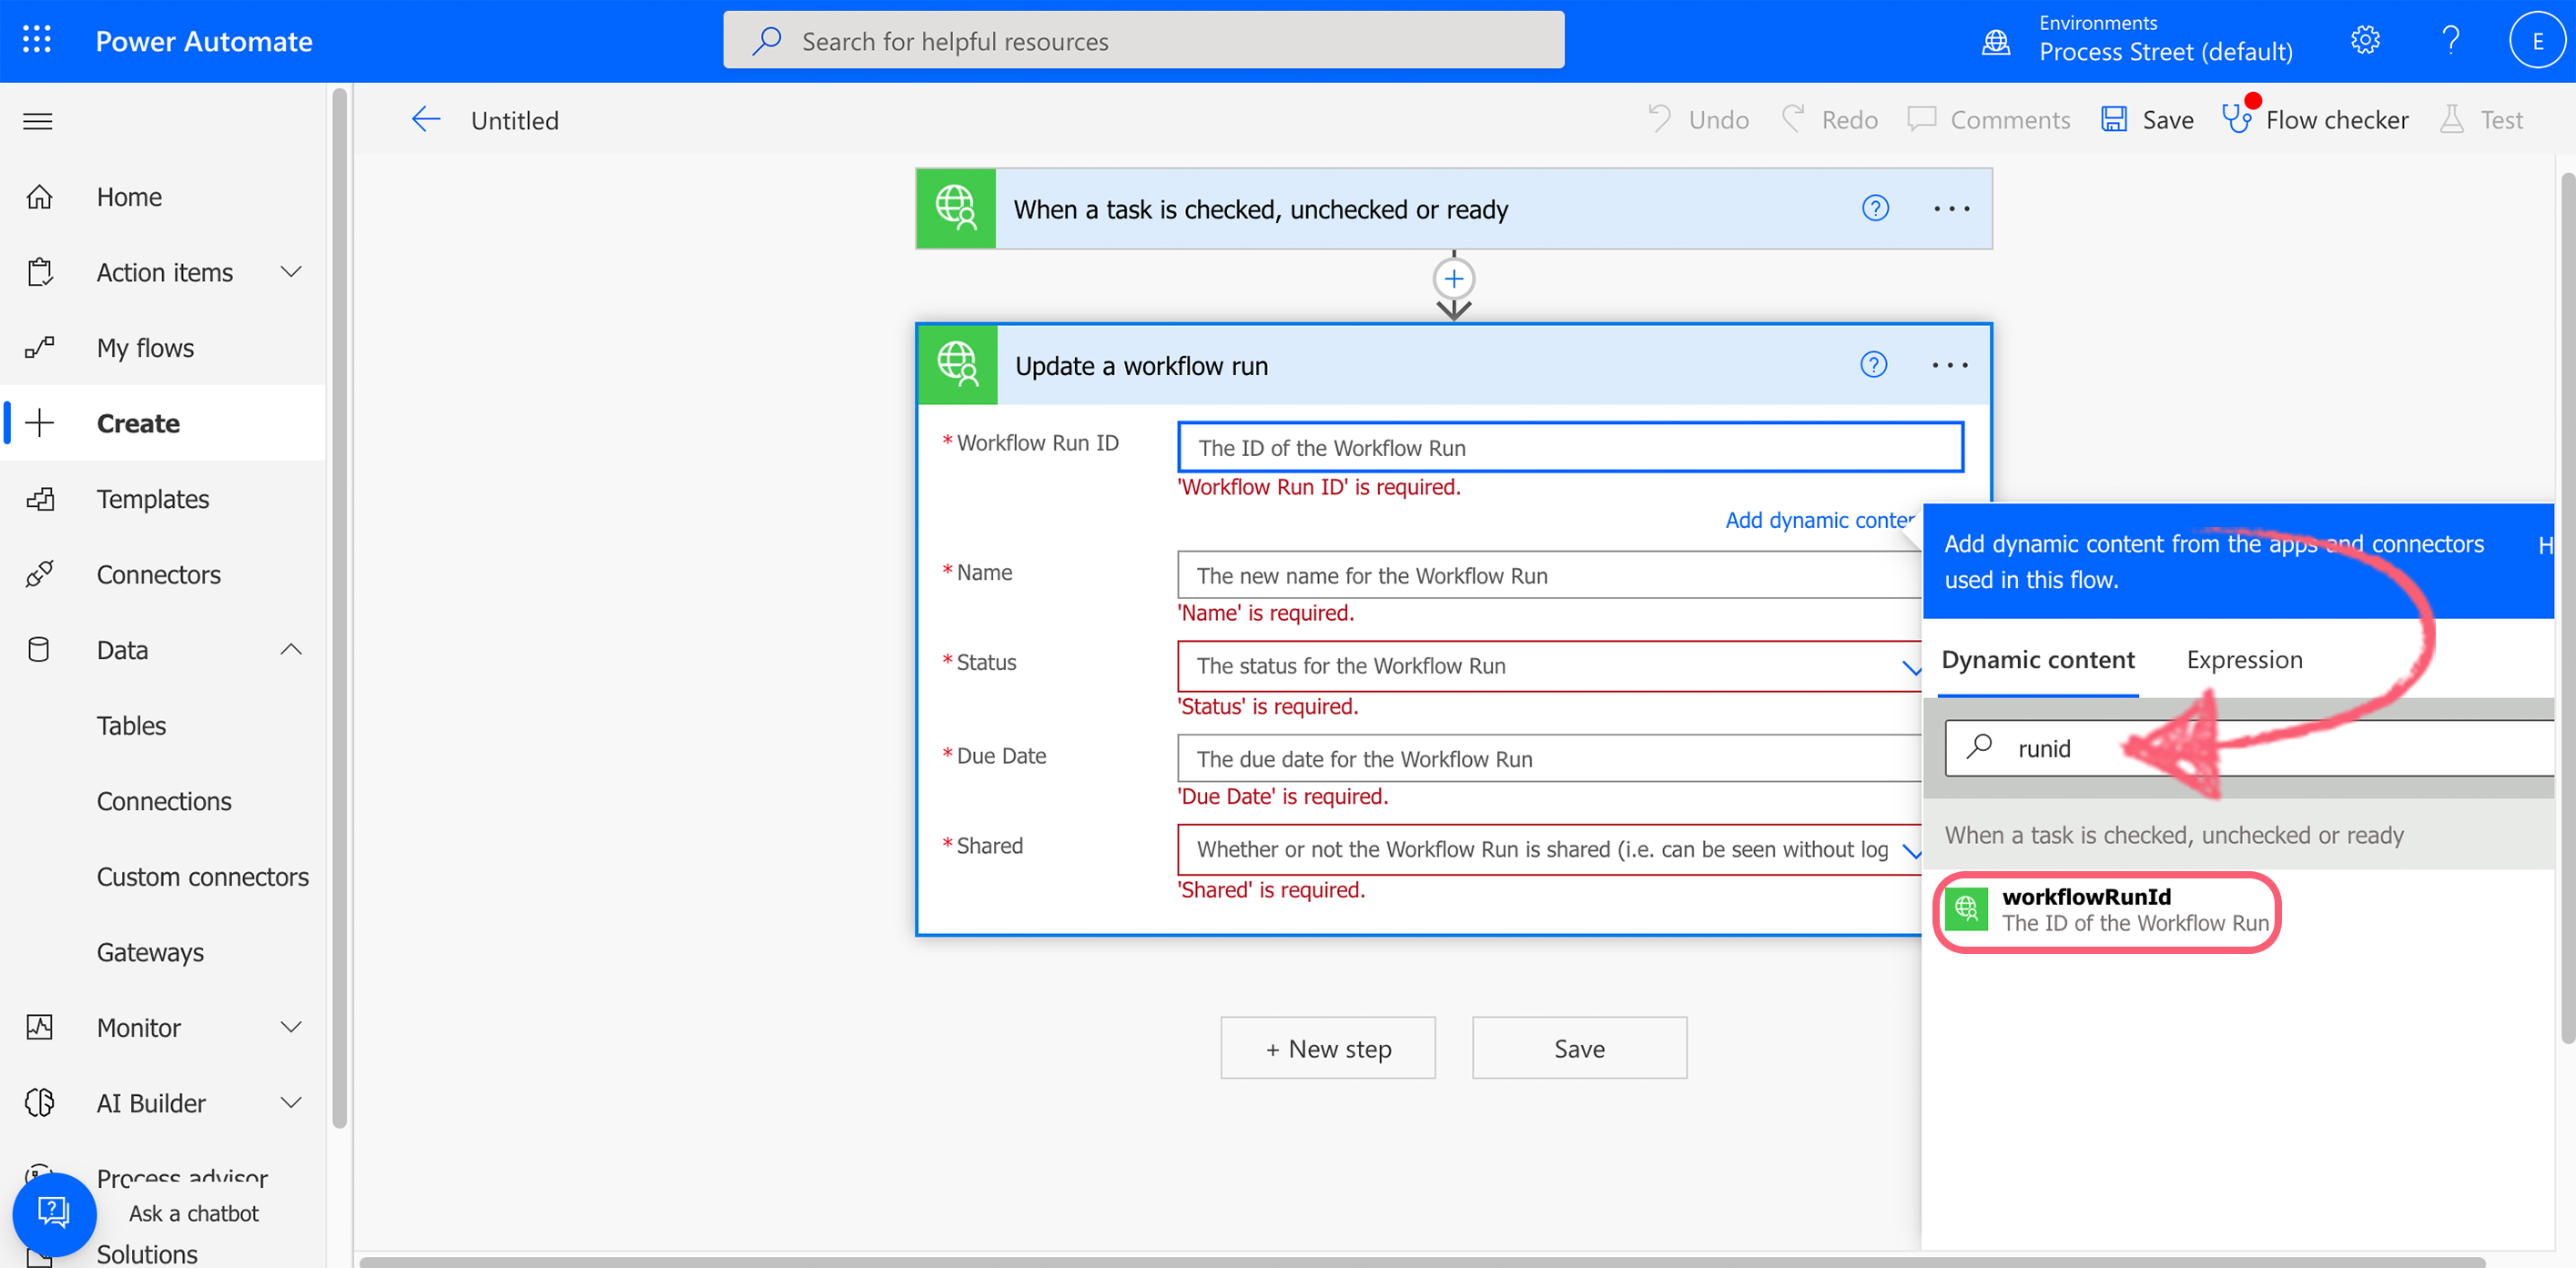
Choose the action Update a workflow run.
Click the field for Workflow Run ID and search for runID in the dynamic content modal. Select WorkflowRunID, as shown below.
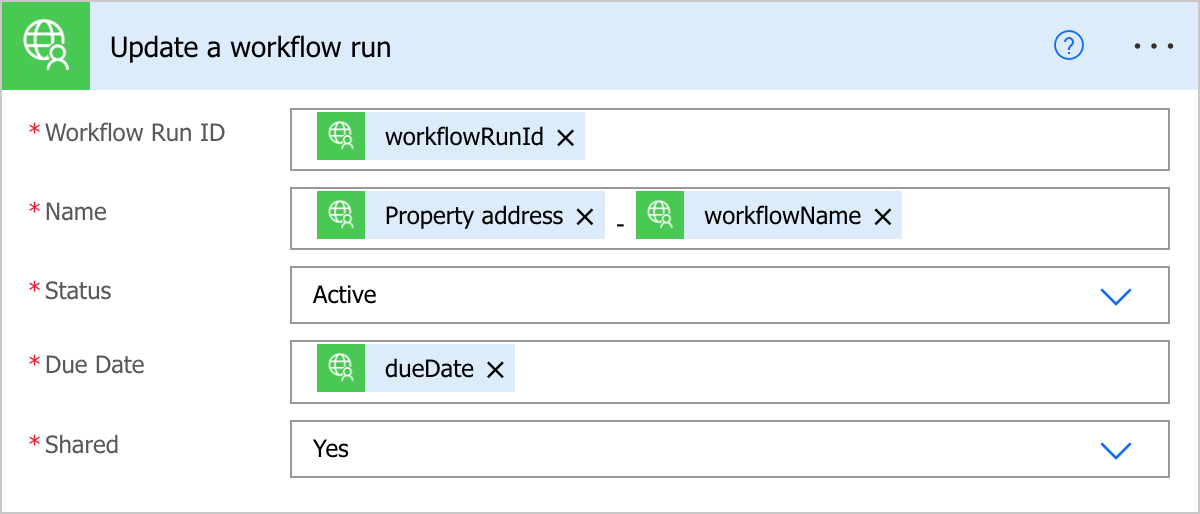
Next, since we don’t want to change the name, status or due date for the workflow run, we’re going to choose the name for this workflow run from the dynamic content, select Active as the status and select the due date from the dynamic content.
Optional: If you’d like to give your new workflow run a different due date, use the following date formatting: YYYY-MM-DDTHH:mm:ss. For example: 2022-07-10T15:00:00.00.
Click the shared field and select Yes to automatically turn on the share link for the workflow run.
Click New Step to add the third step to your flow.
Choose the action Get workflow run form fields. Select the dynamic workflow run ID, the workflow and then the task that your email field is in.

Click New Step to add the final step to your flow.
In this example we’re going to send an email via Gmail to our tenant. We can use the dynamic field for Tenant email address that we have set up in our Process Street workflow.
Click Add dynamic content to search for the email field.
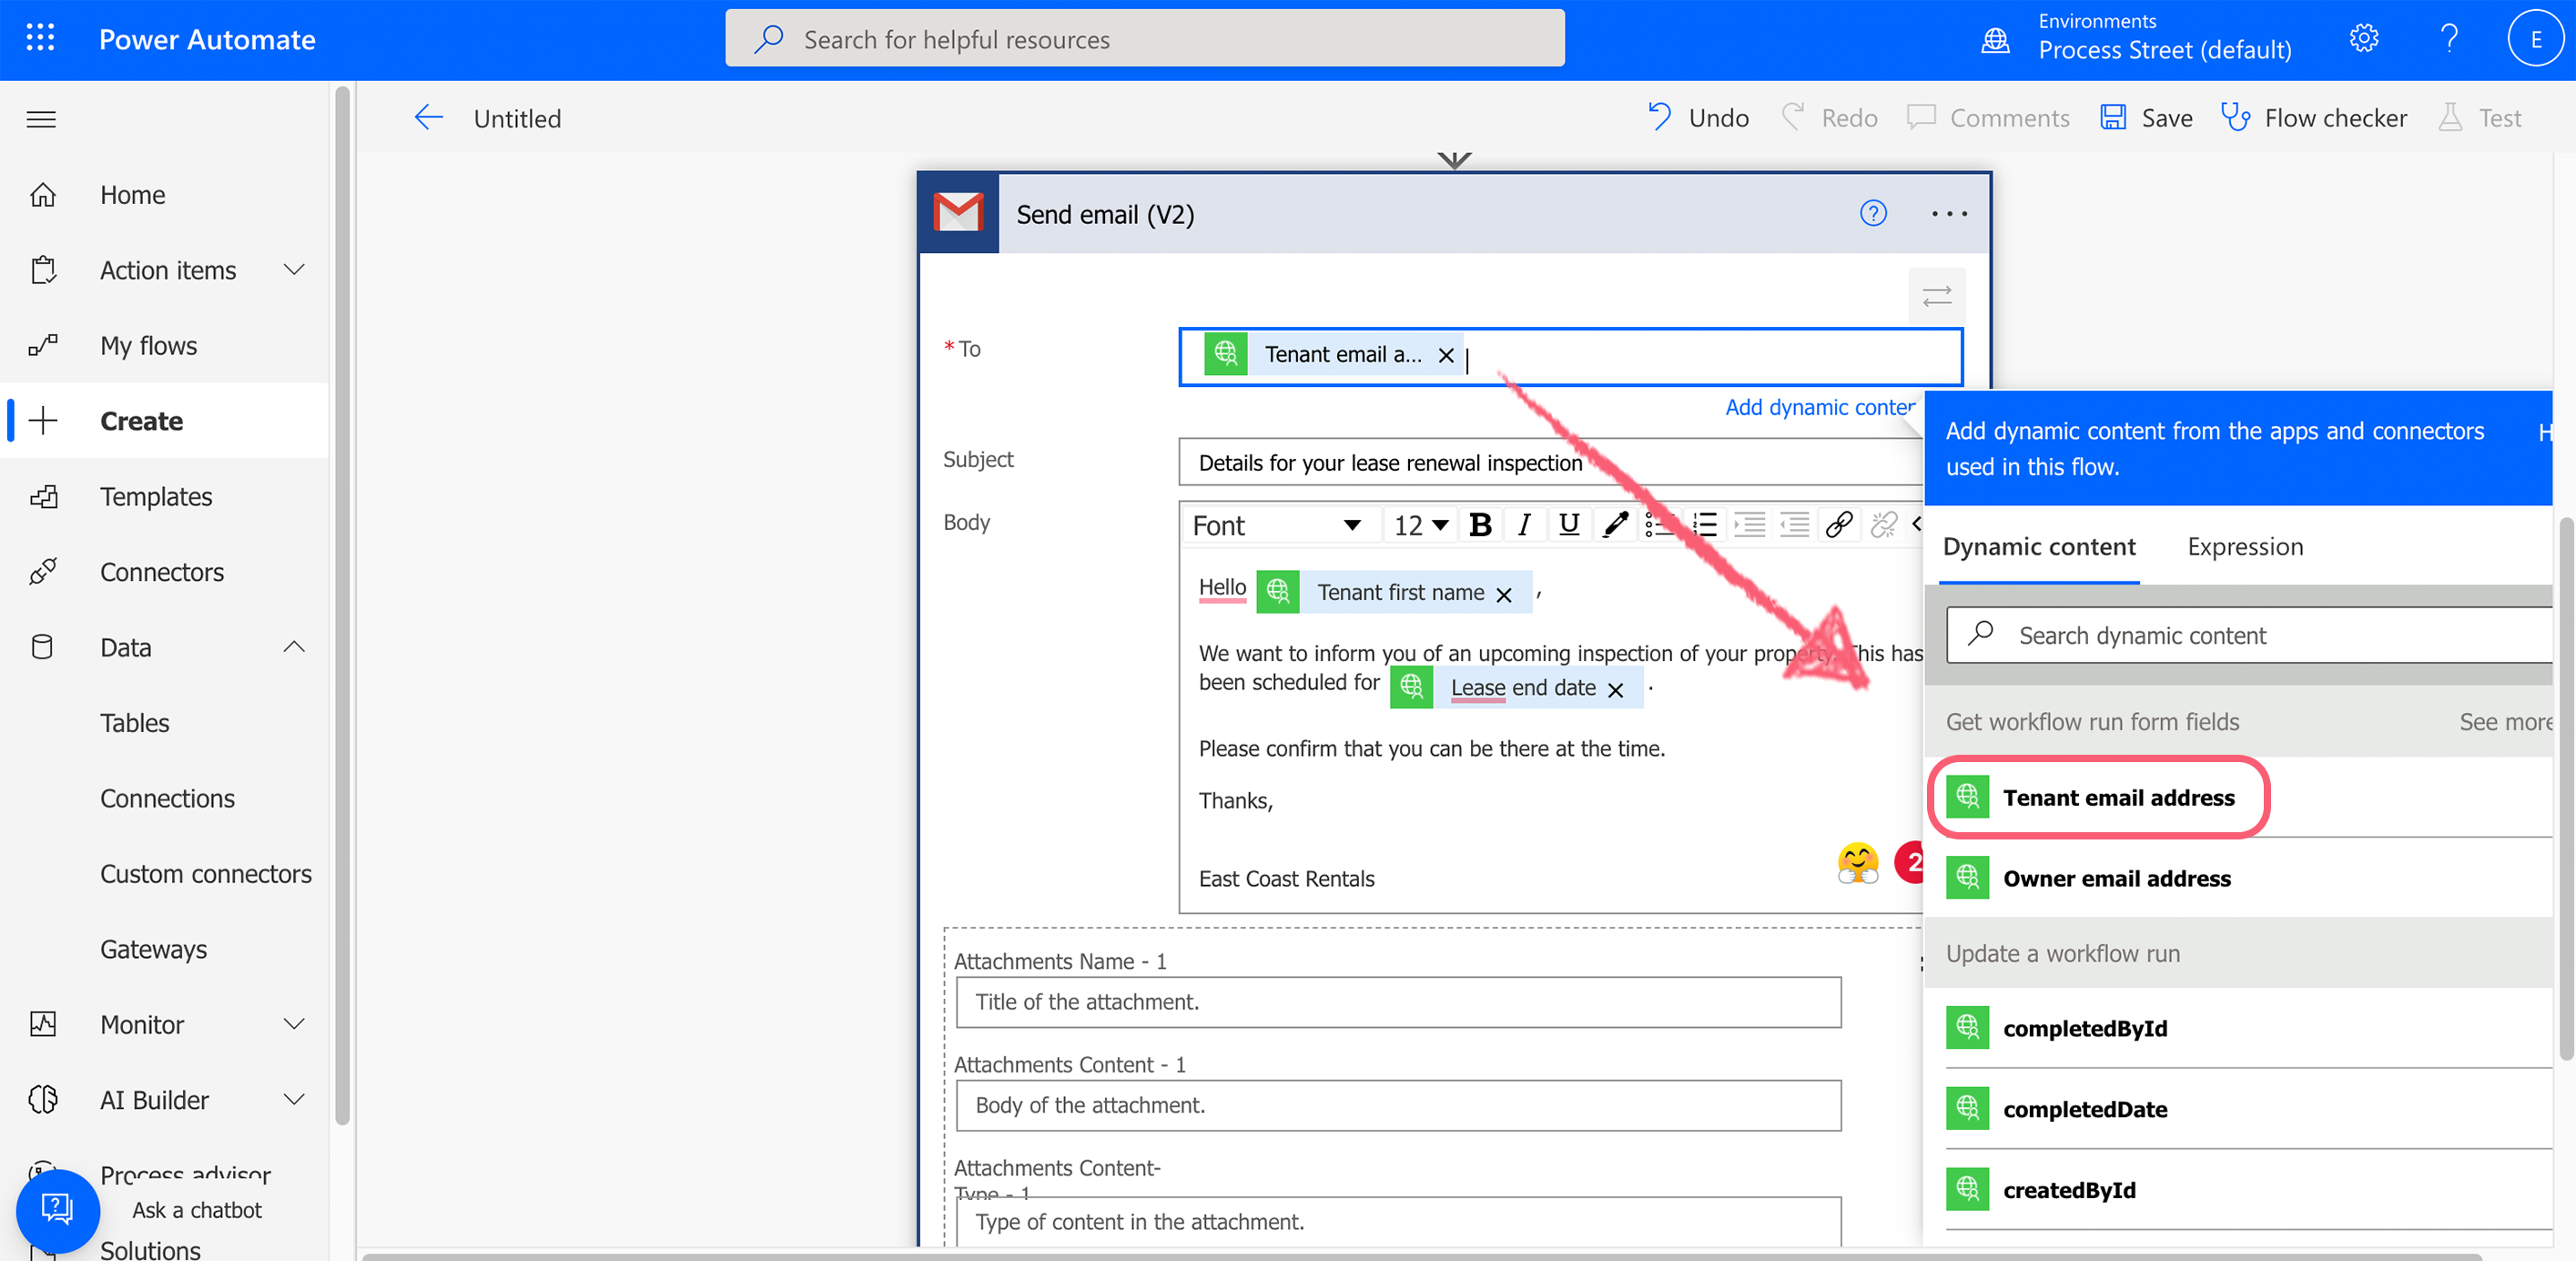
Add a link to your workflow run into the body from the dynamic fields. Type URL in the search field to find it quickly.
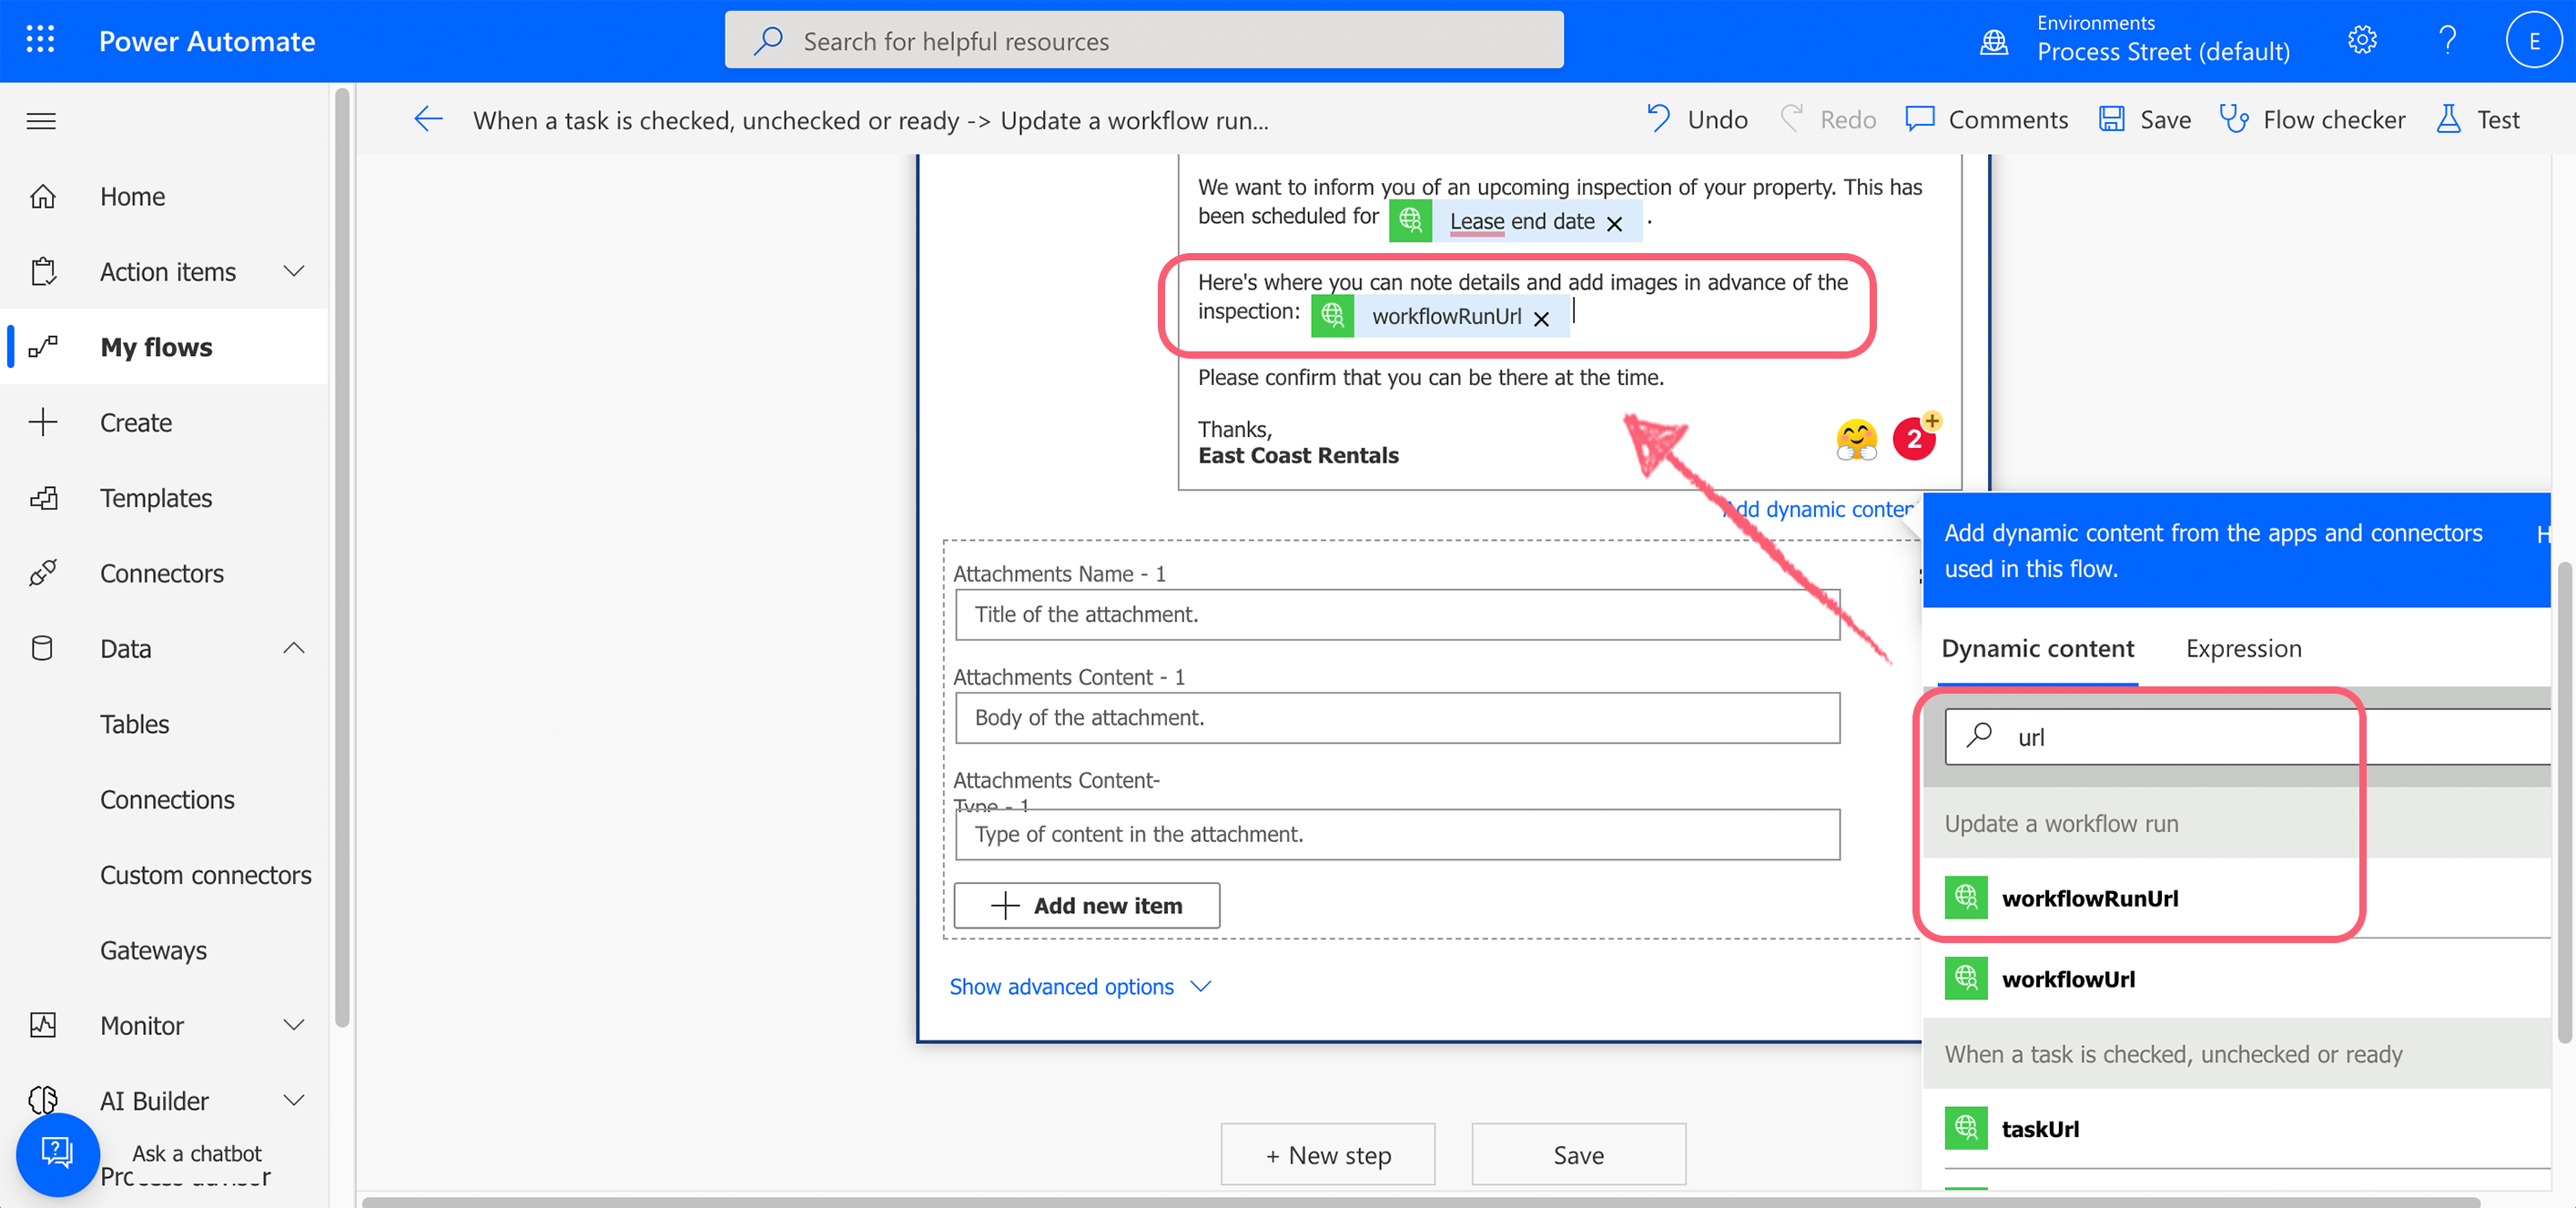
In the subject and the body of the email, you can choose more dynamic fields and add any attachments you might need to send.
Your flow set up is complete! Click Save, then click Test in the top right corner of your screen.
Manually test the flow. Head to a test workflow run in Process Street and check off the task that you’ve set up as the trigger.
Once you’re done testing, you’ll see a banner message like this to confirm you’re good to go.

There are literally thousands of ways that you can create flows to streamline your business operations. Here are a few suggestions to help you get started:
Help us improve this help center.


