Adding a “✋ Stop” to a task in a workflow will turn it into a “Stop Task” in a workflow run.
Stop Tasks stop a workflow run at a given point. No tasks past that point (or the workflow run itself) can be completed until the stop task is completed. This simple action turns basic runs into powerful workflows.
You can use single stop tasks in your workflows, add a series of stops to sections of your process, or add Stop Tasks to every task, which effectively enforces the order that your workflow run is completed in.
Here are a few things you can do with stop tasks:
Users: In order to add or change Stop Tasks in a workflow, you must be an Administrator or a Builder who has been given ‘edit’ access by your Administrator.
First, select the workflow you wish to edit from your Library and click your workflow’s name then click “Edit“. Next, select the task/s you would like to add a Stop task to.
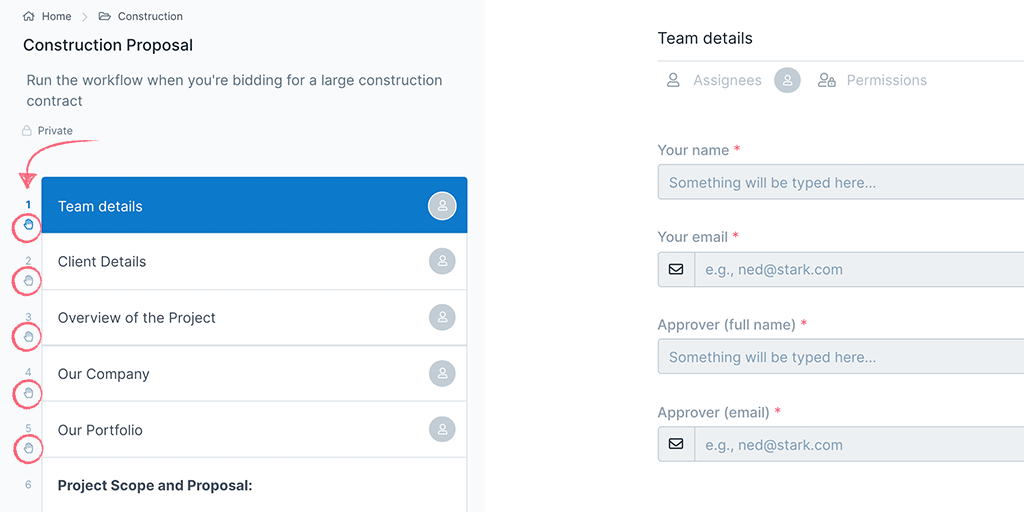
In the example below, we have multi-selected all the tasks and added a Stop Task to each one, which enforces the order that this workflow run will be completed in.
Pro Tip 1: To select many tasks in one go, select the first task and hold down the “Shift” key (Windows & MacOS). Now select your last task to add a stop to (holding down the shift key) and all the tasks in between will become highlighted. You can then click the “Add Stop” button to add a stop to every task. Publish your workflow to finish.
Pro Tip 2: To select multiple separate tasks at once, you can use the “CTRL” key (Windows) or “Command” key (MacOS) to individually select multiple tasks at a time. Hold down the “Ctrl” or “Cmd” key and use your mouse to click all the tasks you want to add a stop to. You can then click the “Add Stop” button and save your workflow to finish.
Stop tasks are indicated with a hand ✋ icon just underneath the task number in your workflow and workflow runs.
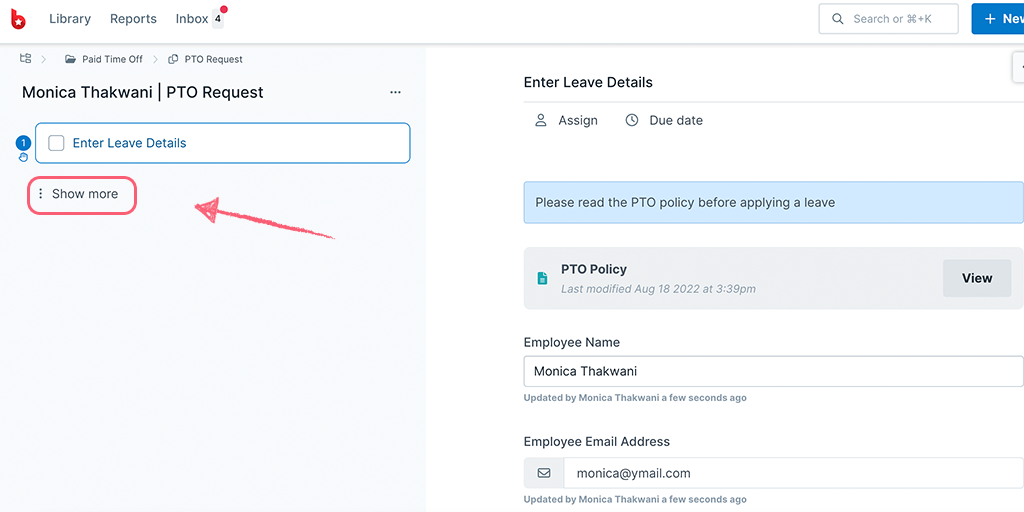
Once you run the workflow with a stop task, the tasks after the stop task will be disabled and hidden by default. Click the three dots next to “Show more” to see the disabled tasks (as shown below). Disabled tasks cannot be completed until the previous stop task is complete.
Once the preceding stop task is complete, the next task is enabled and can be completed.
Disabled tasks (those following a Stop Task) do not trigger email notifications to anyone assigned to them and do not appear in that user’s My Work until they’re enabled (when the preceding task has been completed).
As soon as a stop task is completed, anyone assigned to the next task(s), will receive their email notification and those tasks will appear in their My Work.
This is a great way to pause email notifications for other users, on tasks that may not be ready to complete. It also means that they only have tasks showing in their My Work that are ready to work on.
If your workflow run contains tasks with required fields before the stop task, the stop task will not be able to be completed until all required fields have been completed.
This is a great way to ensure that certain information is submitted before a workflow run can continue.
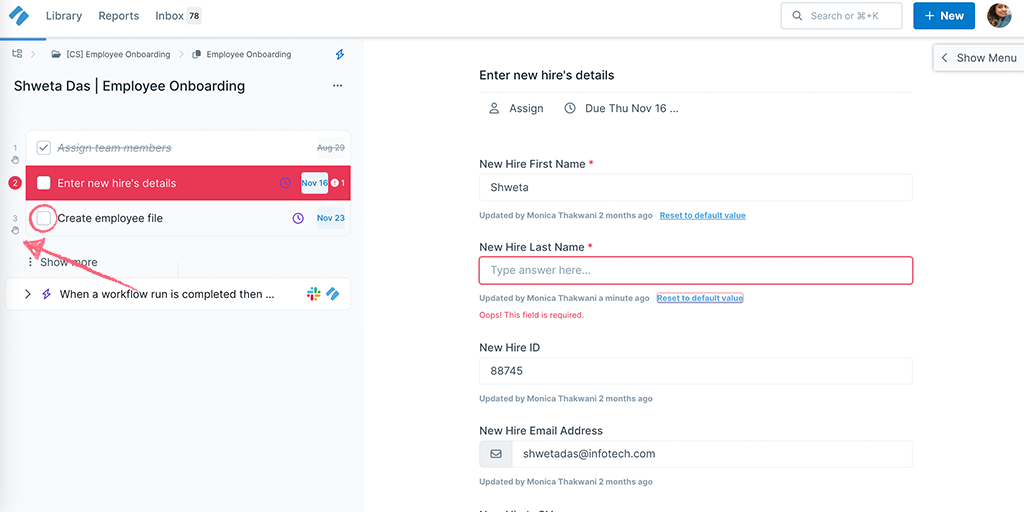
If you try to complete the task with the Stop Task on it, before all the required fields in the preceding task have been completed, you will see warning messages. The task with the incomplete required fields is highlighted in red, as is the form field you need to complete (as shown above).
For more ideas on how to use Stop Tasks, check out our blog post on 6 Ways to Use Stop Tasks to Improve Your Team’s Workflow.
Help us improve this help center.


