 I’m a Windows user. If you’re reading this, you probably are too.
According to Microsoft, over 400 million people use Windows 10.
Unlike apps and websites, there isn’t really much of a difference between users and active users. The operating system you use is something you use every time you are on your computer – probably every day.
This is why we at Process Street have decided to try to piece together a number of tips and tricks we think you may not know which can help you make the most of your operating system and boost your workflow. Some of them might improve performance and others may increase productivity.
We’ve compiled this big list to help you make the most of your workspace!
Top 29 Windows 10 tips and tricks
1. Use Chrometana to search by voice in Chrome
 Let’s kick off with one of the more exciting tips! The future of voice commands!
I really like the concept of Cortana. I find her to be generally useful, or at least, to have a lot of potential.
The main gripe I had with Cortana is that she would always open web pages in Edge and use Bing as the search instead of Google. I wouldn’t use either of those tools normally, so it just seemed out of my normal workflow to have Cortana drag me into different windows every time I wanted to employ her.
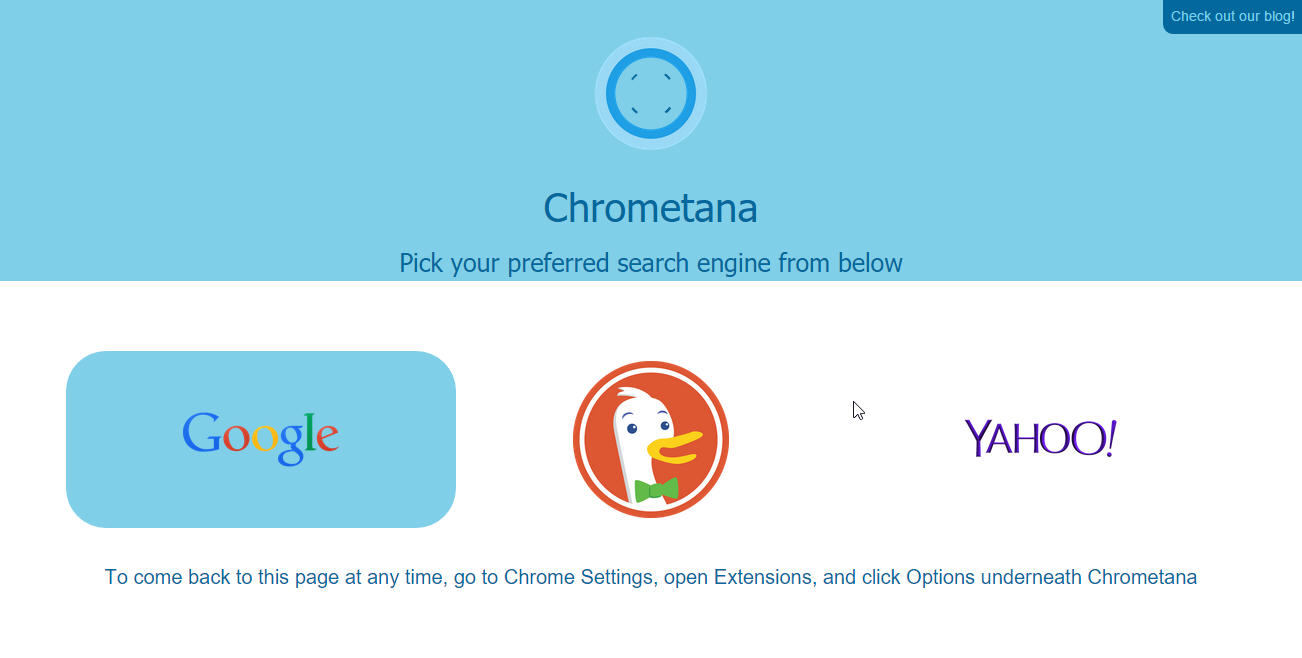
To fix this, you can find the chrome extension Chrometana. It does exactly what you would expect it to do.
It forces Cortana to use Chrome and Google to operate. It’s a small change, but one which has made this feature much more useful for me.
2. Compartmentalize your work with Virtual Desktop
One of the first things to do in any article about Windows 10 is to congratulate Microsoft for abandoning Windows 8.
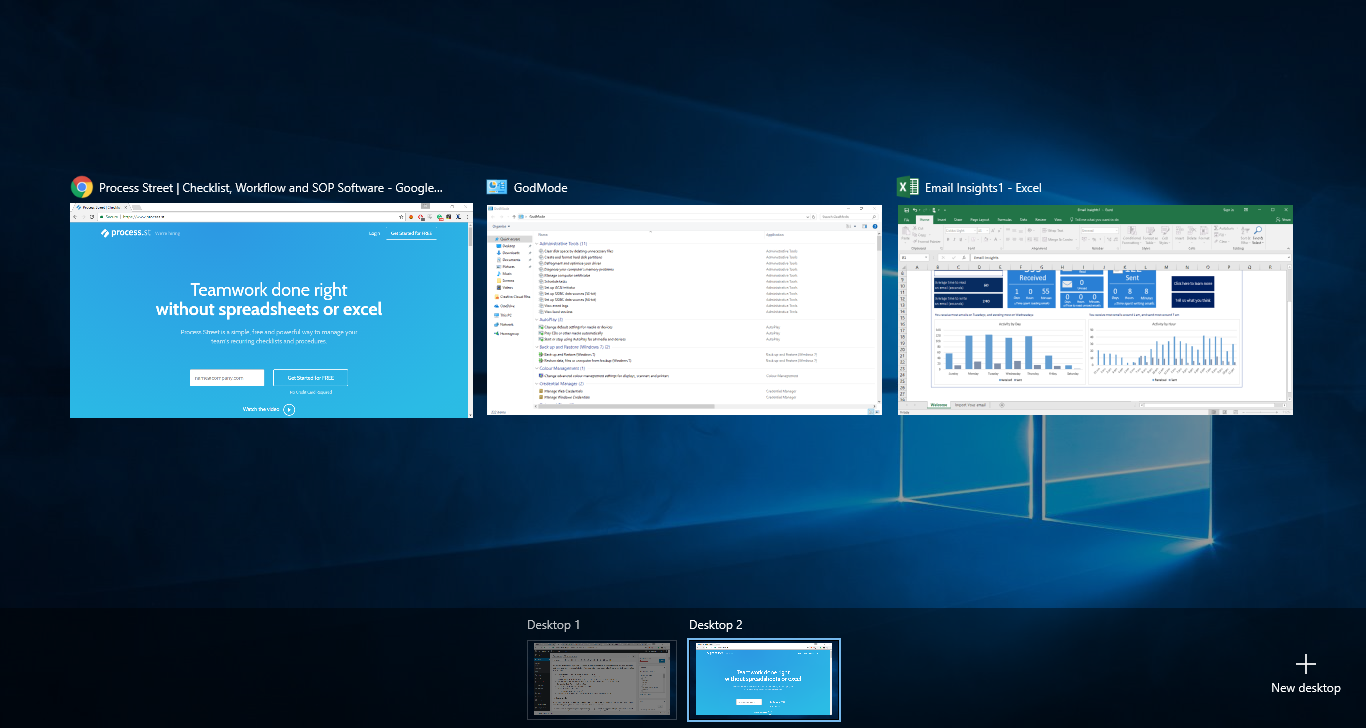
The second thing to do is to thank them for bringing in a number of features which have been staples of MacOS and certain Linux environments for a while. The main one worth mentioning here is the introduction of Virtual Desktop.
This allows you to navigate your working environments easily and to separate out your workspaces. For instance, I have one workspace now with Slack, Trello, Google sheets, Airtable, and other work-related resources.
I have another one with some interesting articles about the upcoming UK general election in a separate workspace for me to pop over to on my breaks. Separating my workspaces helps me remain focused and the virtual desktop feature seems to understand that.
Good addition.
3. Task View helps you organize your Virtual Desktop
Task view is just a simple add-on to the Virtual Desktop feature. This helps you easily manage which windows you want to have in which desktop. It acts as an overview of your different windows and helps you categorize your work so that you can find it more easily.
If you find yourself enjoying the Virtual Desktop then you should use the task view to help you manage it more easily. It’s only a simple little feature, but it’s included for the organized folk out there.
4. Keyboard shortcuts always save you time
We all know how useful keyboard shortcuts can be if used well. With the addition of virtual desktop and the shift away from some of the panel display of Windows 8, here are a couple of handy shortcuts which could speed up your workflow:
- To create a new Virtual Desktop – Windows + CTRL + D
- To close the current Virtual Desktop – Windows + CTRL + F4
- To switch to the next Virtual Desktop in the queue – Windows + CTRL + Right Arrow
- To switch to the previous Virtual Desktop in the queue – Windows + CTRL + Left Arrow
- To open the Task View – Windows + Tab
- To toggle Cortana listening – Windows + Ctrl + C
- To launch Cortana – Windows + S,
- or alternatively: “Hey Cortana”
- To snap apps to the top of bottom of a screen – Windows + Up / Down Arrow
5. Game mode lets your PC optimize itself
If you want to have your PC optimize itself for certain activities, in this case gaming, you don’t need to fiddle with the settings every time you want to switch its allocation of resources.
To enable Game mode you can pop into your settings and go to your Gaming panel to toggle Game mode on or off. You can also use the shortcut: Windows + G, to bring up the Game bar. This way, you can get the most out of your Windows 10 set up in seconds.

6. The Xbox integration expands your gaming horizons
I’m not an Xbox user, so I haven’t made use of this feature. But maybe you’re an Xbox user? Maybe you really want the ability to stream Xbox games onto your PC?
If so, this feature is for you. You can log into your Xbox live account from your laptop and you can easily record videos of gameplay using the Game DVR option.
Check out the Xbox website for a whole host of info about making the most of this integration.
7. Privacy settings are the last line of defense against snoopers
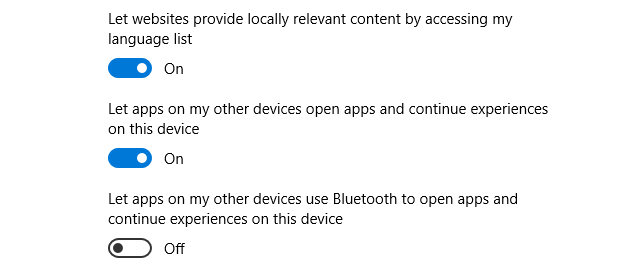
Thanks to the recent Creators Update for Windows 10, we now have a host of new privacy controls to play with. With these controls you can decide what information you give out to third parties.
For example, you can control whether or not you want websites to access your language list, which helps them provide content more geared to you and more accessible to you. Or you can control whether apps can access a unique ID of you as a user. This ID helps them track you and provide you with more targeted adverts.
Maybe you want all of these features turned on? At least, the choice is yours now.
8. God Mode gives you divine control
The grandiose God Mode title is possibly overselling itself.
However, that doesn’t take away from its effectiveness. God Mode is simply a reworking of your settings display which enables you to have greater and easier control over the actions and behaviors of your computer. In short, it combines your settings and your control panel into one easy to access display. It sounds complicated to set up, but it’s actually not too tricky.
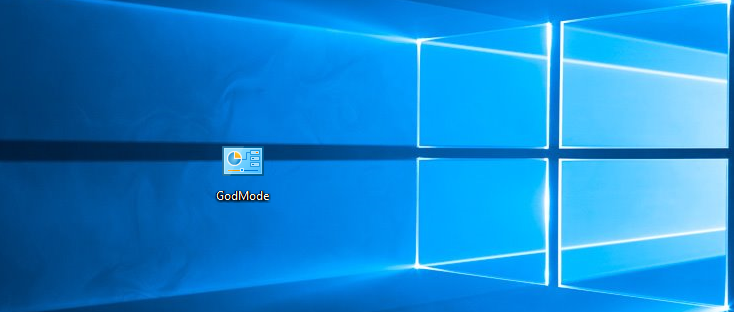 First, you right-click on your desktop and select New > Folder. Then you have to name the folder. You don’t have to call it GodMode. I could call mine AdamMode or whatever I like. The text before the period below can be changed, but keep the code after the period the same:
GodMode.{ED7BA470-8E54-465E-825C-99712043E01C}
The code in the squiggly brackets will sort out the setting up of the folder. This will then display a control panel-esque icon titled with whatever you put in the text section.
Click on your icon and your God Mode display will pop up. Simple.
9. Understand what’s happening inside with DirectX diagnostics
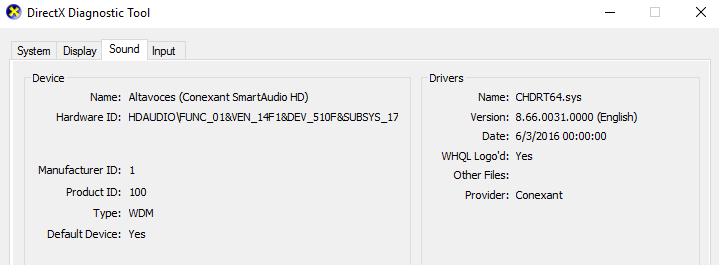
If you want a quick health check on your computer and want to see where all its energy is being spent, a good place to start is the diagnostics.
From here, you can analyze performance and fiddle with settings. The more technically minded amongst you are probably pretty interested in optimizing performance, and this is a good place to start.
One easy way to jump into your diagnostics is to type “dxdiag” into your search bar on the bottom left. This should bring up the DirextX diagnostic tool which can help you investigate your PC or laptop performance.
10. Add detail to Task Manager to see performance more clearly
To build on the diagnostic capabilities of Windows 10, you can also see a little more within your Task Manager too.
If you press the keyboard shortcut: Ctrl + Shift + Esc, your Task Manager will pop up in front of you and display all the running processes currently going on.
The different columns will show you what the task is plus how it affects the CPU, memory, disk, and network performance. If you choose to right click on any one of these columns, your task manager will provide you with options for other variables which you could add to this overview. You can drag and drop the different columns and optimize their display.
Once you’ve optimized it one, you won’t need to do it again. Good for the techies in the building.
11. Tie your Windows key to your Microsoft account
As cloud technology further dominates the software landscape, tying your ownership of your operating system to your computer seems to be a backward way of operating.
What if you have to buy a new computer? Do you have to buy a new copy of Windows?
A better way of working would be to have your Windows ownership tied to your Microsoft account directly so that you could reuse it easily on future machines without worrying. Well, that’s exactly what Windows 10 is offering. You can do this by going to Settings > Update & Security > Activation.
12. Clean installs can declutter your machine
A clean install pretty much gives you a fresh version of Windows unencumbered by the previous data held by your existing apps or programs. If you want to do a clean install, it’s probably best to consider backing up your existing data. If you want to learn about how to do that, then try this CNet article on backing up.
To run a clean install, simply go to Settings > Update & Security > Recovery > Reset this PC. Once you click the provided option Get Started, you’ll be presented with two or three more options, depending on your version.
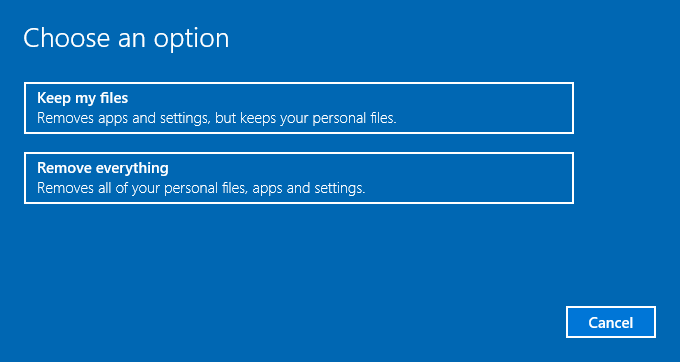
You can choose the top option to remove all programs but keep your files. Or the second option which clears everything and runs Windows 10 fresh. You might also be presented with a third option which returns you to factory settings – only select this option if your PC came with Windows 10, not if you upgraded.
13. Personalize your desktop for that stylish workspace
This one isn’t new. I remember the hours of fun I had making my first copy of Windows XP look like Windows 95, customizing everything I could.
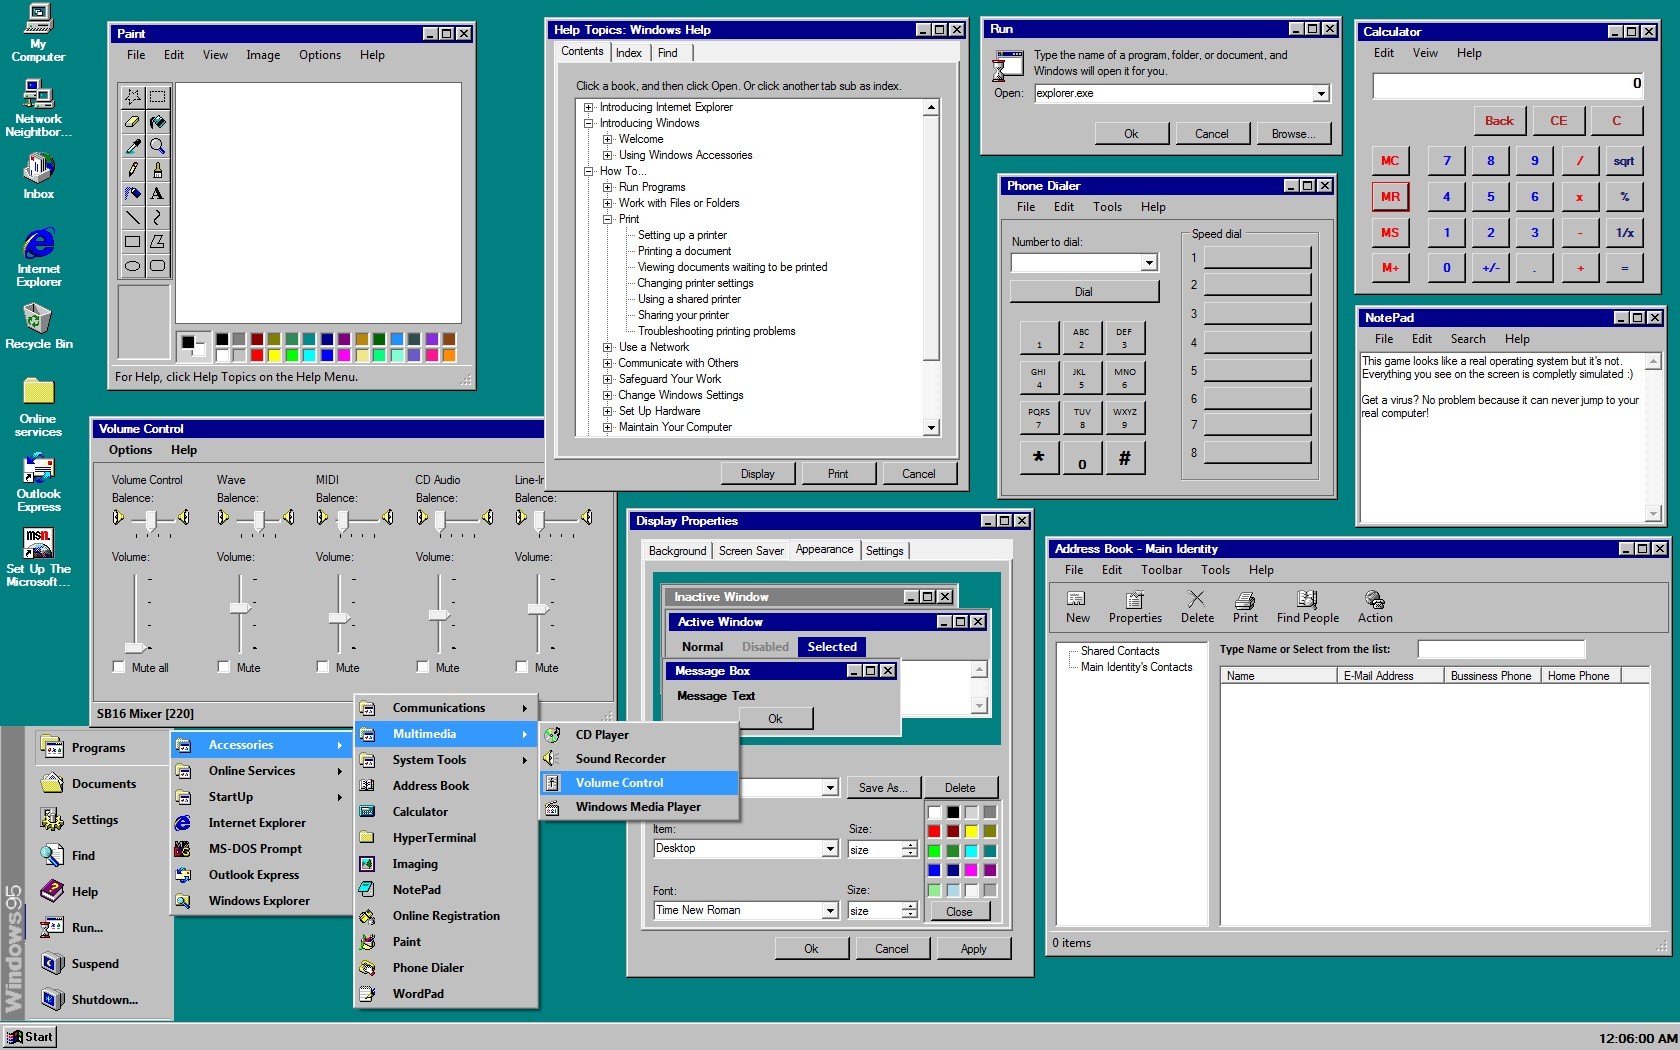
Windows have seemingly realized they don’t need to include all the customization features they had in the past. Yet, with the current existing features, it’s quite easy to create small stylish changes to make your desktop that bit more personal. Sometimes it’s just nicer to feel a sense of ownership over your space.
For those who like subtle customizations, a quick Google Chrome extension tip: you can use an extension like Momentum to customize your new tabs when browsing in Chrome – adding nice images, motivational quotes, and to do lists. FYI.

14. Feng shui your space with a customizable start menu
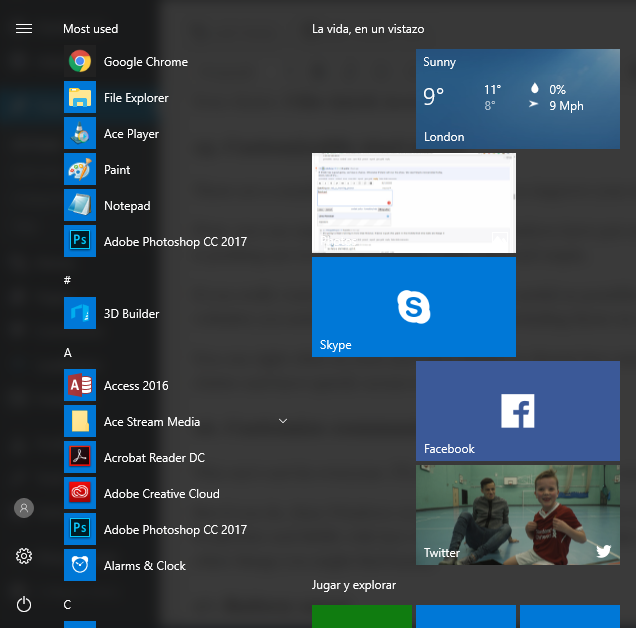
There are a number of little tricks you can do to improve your start menu in Windows 10.
First, you can unpin all the defaults which Windows have put on there. I have no need for most of the stuff Windows is pushing me toward. So I simply right-click and unpin.
If you really want to make your start menu as useful as possible, I recommend thinking about what core programs or websites you need quick access to, and only including those on your menu.
You can right-click on each and select Resize to choose how much space they take up. This way, you remove the clutter and have speedy access to exactly what you need.
15. Now with Bash shell for the Linux fans
Not all people who use Windows are passionate advocates of Windows.
If you’re a developer, there’s a good chance you feel pretty comfortable utilizing a Linux means of operating. Now, thanks to changes in the Anniversary update, you can use a Linux approach to your PC.
To be clear, this isn’t running Linux inside your Windows environment. This is simply employing Linux practices within your Windows. Think of it as one more Microsoft effort to drive your productivity forward.

If you want to use Bash shell inside Windows, first enable it by going to Settings > Update & Security > For Developers > and then toggling on Developer mode. Once you’ve switched this on, you’ll need to restart. After you’ve successfully rebooted, go to Control Panel > Programs > Turn Windows features on or off > then scroll down the list presented until you find Windows Subsystem for Linux (Beta). Check that option and press OK.
Once everything has installed, click Restart Now. After your computer is back up and running, you’ll need to search within your start bar for “bash.exe”. When it opens the command prompt, type “y” and press enter. This should start downloading from the Windows Store. When it has downloaded, you’ll need to type in a UNIX account username – you can choose pretty much anything other than “admin”. Press enter and let it set everything up. You can now close the command prompt.
Bash should show up in the start menu now like any other application!
16. Microsoft print to PDF is fast and easy
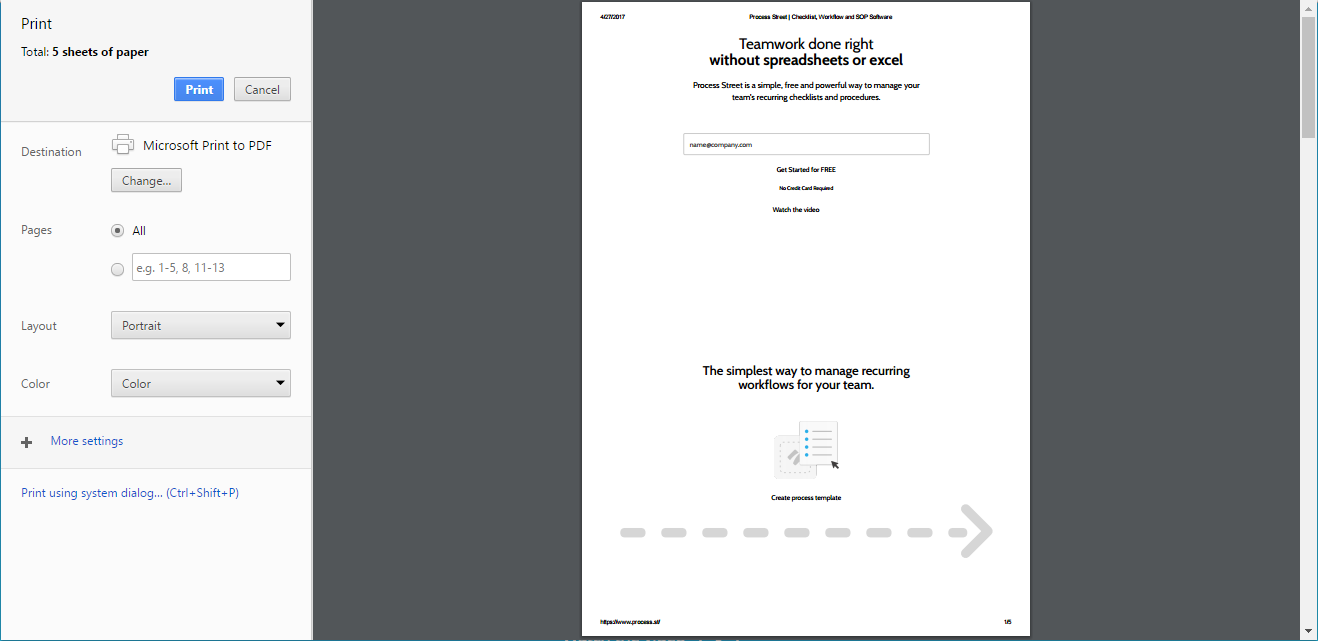
This isn’t the most glamorous feature on the list, but it is one you’re more likely to use often.
If we’re talking about work practices in a professional environment, dealing with PDFs and having to send other people PDFs is likely a semi-regular occurrence.
With this new addition to the Windows’ functionalities, you can save things straight to PDF without having to use a third party service. No need for Adobe’s constant updates and slow loading.
Example: Right click on this article in your browser and click print. Then choose the option: Microsoft Print to PDF. It will automatically format the website for you as a PDF and save it. Super simple.
17. Schedule updates to stop interruptions
One of my pet peeves as a Windows user is the constant updates I keep having to accept. Sometimes, in the past, these have interrupted my workflow or forced a shutdown while I’ve been away from my laptop.
There’s not much more annoying then nipping off for lunch and coming back to see your tabs gone and your windows closed. Thanks.
Fortunately, this glaring error has been tackled and you’ve been given the power to schedule them to occur outside of the hours which matter to you. Go to Settings > Update & Security > Windows Update > and you’ll find your Update Settings. Here you can play around and adjust the active hours.
Friday night at 11 pm. Do your worst, Windows. I’ll be having fun elsewhere.
18. Run Windows 10 in a virtual machine
So, this is a weird one.
Basically, if you’re not using Windows 10 right now but would like to shift to it, this might be of interest to you.
This feature allows people who haven’t yet upgraded to Windows 10 to run it virtually within their own environment. This also works for users on a Mac. Though, if you’re using a Mac I doubt you’re 2000 words into an article about Windows 10…
You can use a tool called VirtualBox to create virtual machines and run separate operating systems. You can see how this works in the image below – OS-ception.
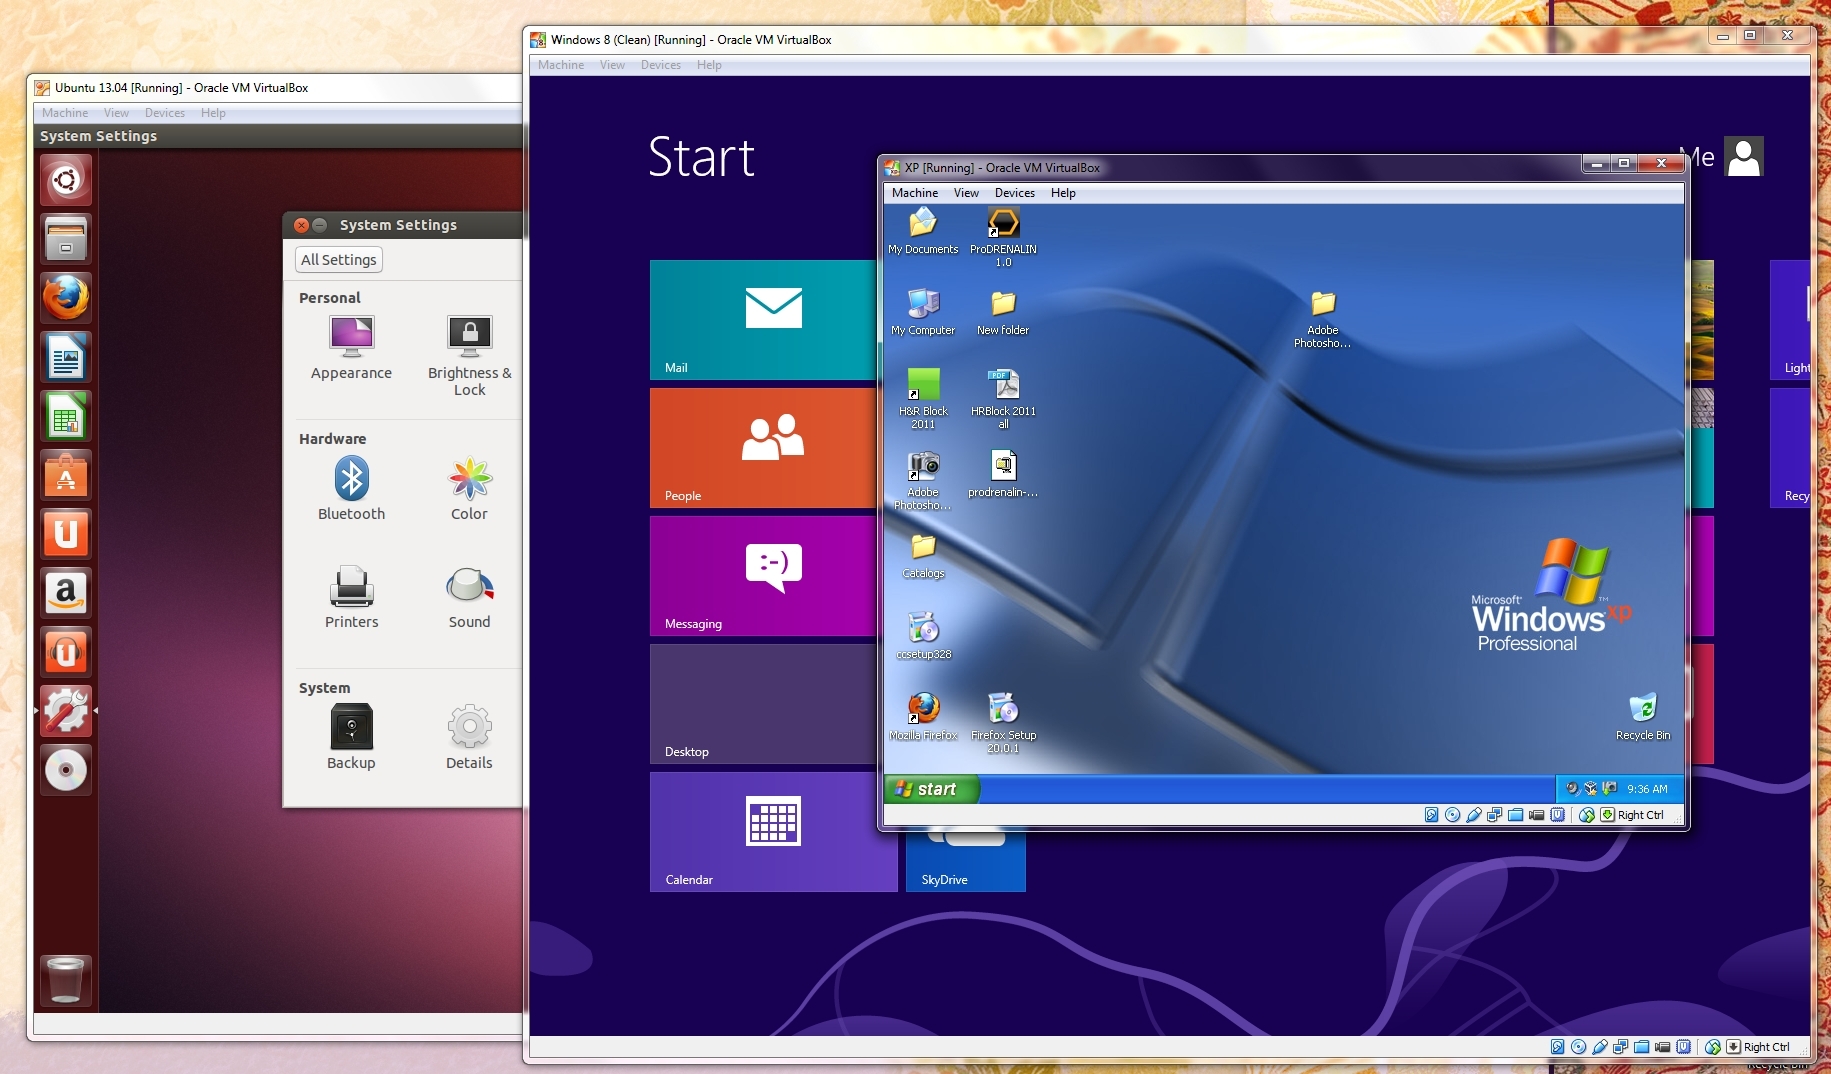
The first step is to go onto the Windows website and download the Window’s 10 ISO file. Then, hop over to VitrualBox to download the latest version from Oracle. Install VirtualBox and then you’ll be able to create a virtual machine.
- Click New
- Name your machine
- Select your type: Microsoft Windows
- Select your version: Window’s 10
- Match the x64 version with a 64-bit virtual machine
- Allocate 2GB of RAM for the x64 version
- Select the size of your virtual drive to be more than 20GB – make sure you have space on your hard drive
- Enter into the settings for this new virtual machine you’ve made
- Go to Storage > Controller: SATA > Choose Disk > and find the Windows ISO file
- Check the display tab to see how much video memory you’re allocating – follow the recommended settings
- Press Start in VirtualBox
- Run the Windows installation process
- Log in with your Live ID.
- Go back into VirtualBox and go to Devices > Insert Guest Additions CD Image, and save that.
- Enter into your Windows File Explorer and locate that Guest Additions file and run it.
- Reboot the virtual machine.
- Go back into Virtual Box > View > Switch to Fullscreen
Now, finally, you’ll be able to use Windows 10 as a full-screen desktop via VirtualBox. Pretty cool, no?
19. Windows Explorer Quick Access predicts what you need
The new Windows Explorer helps you locate your files much more easily than before.
The way it does this is through its Quick Access setting which preferences the things you’ve recently viewed or tend to view more often. It uses this predictive approach to improve your workflow.
If you’re not a fan of this Quick Access, you can change it by going to View > Options > Open File Explorer > This PC. Which will simply return it to the way Windows has always been.
Your choice. I like Quick Access.
20. Customize command prompt to make it prettier
This one’s not for everyone. I’ll admit, I don’t really use my command prompt that much.
But if you do, then Windows 10 gives you greater flexibility to customize and manipulate it. You can go into Properties and fiddle with how it looks or works. You can make it transparent or enable word wrap or a range of other things you might find handy.
21. Never die unexpectedly again with Battery saver
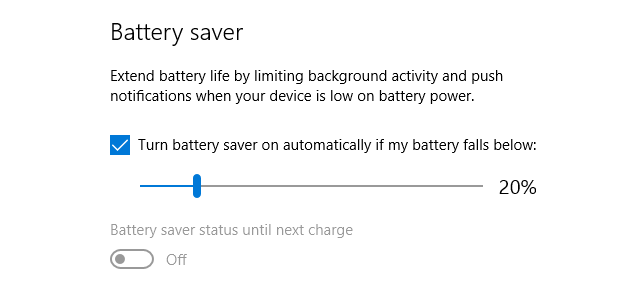
One of the problems with a lot of laptops in comparison with their Mac or Chromebook equivalents is battery life.
Thankfully, Windows has recognized this and brought in their battery saver feature. This allows you to decide at what percentage of battery life your computer will put itself into Battery Saver mode.
You can tweak how Battery saver mode works, and decide to what extent you wish to lower performance while in this setting. This is a generally useful addition. If your battery is like mine and likes to accelerate down to 0 as quickly as possible once it passes 20%, then you’ll probably appreciate this feature.
22. Background scrolling for people who hate activating new windows
Simple addition, and not one which will change your world. Nevertheless, it can be useful.
Normally, in Windows, if you hover over an open window you’re unable to interact with it – you have to click to activate the window before you can use it. With the added virtual desktop features, you’re more likely to find yourself hovering over windows which you’ve not activated, as a result Windows has decided to allow you to interact with these screens while hovering.
Go to Settings > Devices > Mouse & Touchpad, and you’ll find the option to toggle this ability on and off.
23. OneDrive integration means you’re always cloud-connected
In a further step toward cloud dominance, Windows 10 has brought in the ability to sync with its cloud storage platform OneDrive.
You can choose to sync everything to OneDrive, if you wish. This gives you a full backup of all your files and means you can access them from wherever you wish – on a different computer or on a mobile device.
If you don’t want to sync everything with the cloud, then you don’t have to. You can choose to sync only certain folders – keeping other materials private on your machine.
24. Offline maps for the intrepid traveler without internet
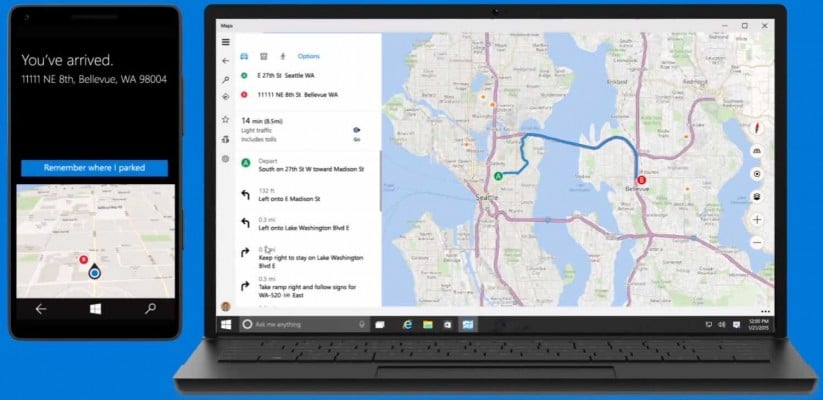
It feels like over time we’ve all accepted the fact the Google Maps are the default maps which we use.
Microsoft, though, isn’t lying down and letting that happen without providing some useful map-based features of their own.
With the new maps on Windows 10, you can not only enjoy browsing maps – what else do you do on a Saturday night? – but download these maps to your computer to make them accessible in times where you might be lacking internet.
This could be an unnecessary feature, or it could be a very useful addition. It depends on you. My guess would be that as we see the rise of touchscreen laptop-cum-tablets, we’ll be seeing a greater number of people needing offline access to certain things. I don’t know. That’s probably not it.
It’s a nice feature though.
25. Praise the Lord, you can turn off notifications!
A personal pet peeve of Windows is the incessant notifications.
I just want to get on with my work. I don’t need to know about every single thing which is happening in the background. Much of which does not feel important nor relevant to me.
You can turn these notifications off by going to Settings > System > Notifications & actions. From there you can tell your laptop to calm down and keep its personal life to itself.
26. “What do we want?” “No Office ads”
“When do we want it?” Now.
This isn’t an issue for everyone. But it might be an issue for you.
If you don’t have Office then Microsoft will pester you until you do. It plays the same trick when it tries to force you into using Edge as your browser.
No, Microsoft. I don’t care that you think it’s faster. I’m stuck in my ways and I’m happy.
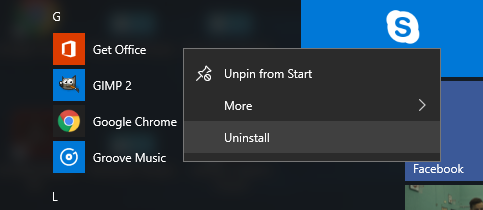
If you want to avoid having your own computer advertise Office to you every other day, go into your start menu and look for a red icon which says Get Office next to it. Now right-click and you should see the option to uninstall.
Bye bye, Adverts. Adverts, bye bye.
27. Enter fullscreen in Microsoft Edge to remove all distractions
I know I’ve already moaned about 4 times so far about Microsoft Edge, but maybe some of you use it? I dare say, some of you may even like it or prefer it over Chrome.
So, this one’s for you!
If you want more space on your screen to view web pages, and you don’t need your taskbar or your tabs, what you’re looking for is fullscreen mode. As a former Chromebook user, I’m a big fan of fullscreen mode and feel it provides a much better browsing experience.
If you want to go fullscreen in Edge, hit the Windows key + Shift + Enter. Boom. You’re fullscreen. Isn’t it glorious?
28. Robotask will automate processes while you kick back
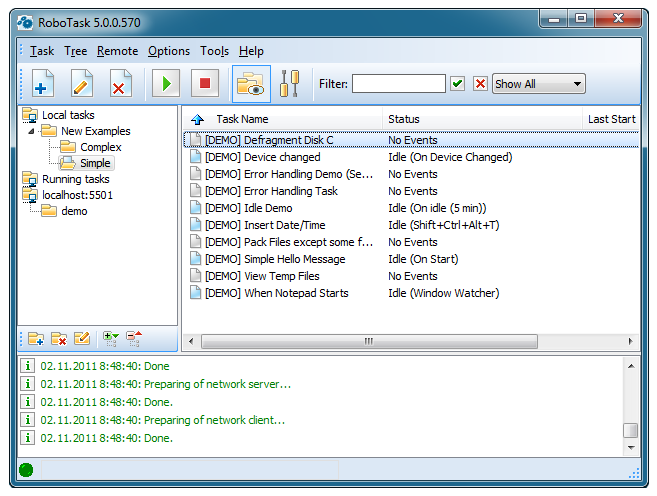
This Windows 10 tip and the following one are not really Windows 10 specific. Sorry.
But, I think they’re cool and fit well within the theme of this article so I’m going to tell you about them anyway. They’re both task automation tools and the first one is Robotask.
Robotask allows you to automate your workflows. You can set Robotask to connect different programs together so that if you do something in one program it can trigger an action in another. You can use it offline or online or both, and you can even add some more complicated elements to the workflow management. Variables like IF/ELSE statements, loops, and other custom variables can be used to add real depth of functionality.
You don’t need to be a tech whizz to make the most of Robotask, and it could really help your productivity.
29. Textexpander. For people who have to type, but don’t want to.
Lastly (finally), we have Textexpander. This program helps you make custom shortcuts for text. So, if you regularly type chunks of text then you can automate these processes. You simply start typing the text you want to enter and Textexpander will give you the option to fill in the rest.
This is really useful if you want to make a series of saved email templates or if you’re writing code where you have to reemploy certain structures. It’s just a handy productivity tool which you might like.
Put them into practice and boost your workflow!
By now, you should have a good idea of how to navigate your virtual desktop and task view, get in-depth reporting on how your machine is performing, and you should have picked up some time savers along the way.
My tip of choice, if I had to choose, is the Chrometana.
I like the idea of Cortana but I’m not too interested in her popping Bing open for me within Microsoft Edge. It’s just not appealing. Having Cortana work within my existing workflows makes her considerably more appealing and useful.
Which is your favorite? Do you have any tips or tricks for Windows 10 which you feel I’ve missed out or would like the world to know about? Let me know in the comments below!


Adam Henshall
I manage the content for Process Street and dabble in other projects inc language exchange app Idyoma on the side. Living in Sevilla in the south of Spain, my current hobby is learning Spanish! @adam_h_h on Twitter. Subscribe to my email newsletter here on Substack: Trust The Process. Or come join the conversation on Reddit at r/ProcessManagement.