Process Street‘s Conditional Logic is a powerful feature that allows you to create truly dynamic workflow runs with if-this-then-that logic.
If your workflows are more complex, you can also create rules that say if-this-and/or-this-then-that.
You can build paths into your workflows that change depending on actions that occur within the workflow run.
Users: In order to add or edit Conditional Logic, you must be an Administrator or a Member who has been given ‘edit’ access by your Administrator.
There are two ways to create conditional logic rules in your workflows. The first is to show or hide content within a task, the second is to show or hide whole tasks or headings.
Whichever way you choose to set up Conditional Logic, you’ll need to start by editing a workflow.
Preparations: For conditional Logic to work, you will need to have built out some tasks and also added at least one form field into your workflow. This form field will be the trigger that shows or hides the details in your workflow run once it’s started.
We also recommend that your workflow is fully built out before you start adding conditional logic to it.
Conditional logic within tasks allows you to build logic in one clear view so that it’s easy to manage the rules you set up and see which fields you are impacting. This option also shortens the length of your overall workflow and the workflow runs you create from it.
Let’s take a look at how to set this up in your workflows with a simple example from an employee onboarding workflow.
Edit your workflow and go to the task where you’d like to add Conditional Logic. Click the three dots next to your task name and select “Conditional Logic“.
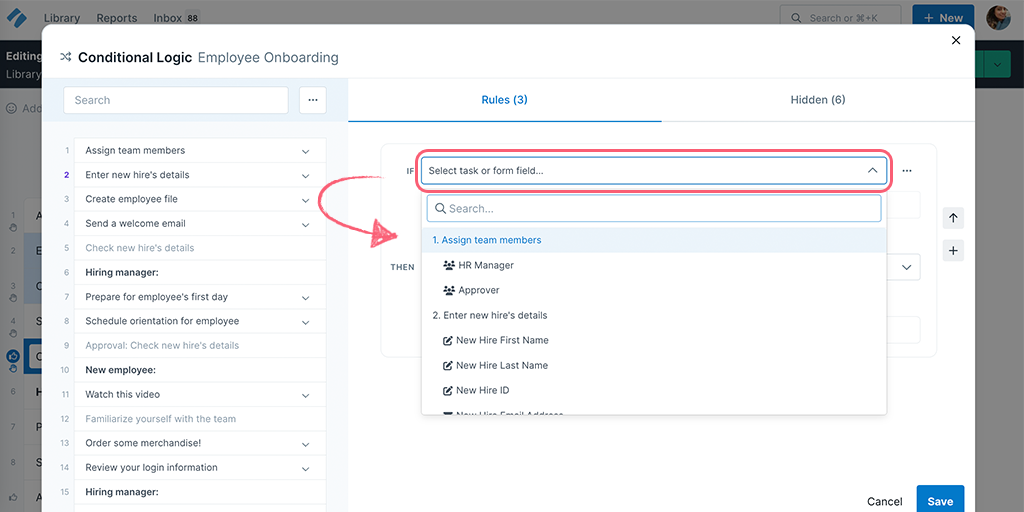
Note: Opening the conditional logic rules in a task will show you the rules and form fields related to that task only. To view all the existing rules and form fields, click on View All in the top right corner as shown above.
Alternatively, you can click the ‘Conditional Logic’ button within each task or in the top left of your screen.

One of the easiest ways to start using Conditional Logic is to start by hiding some information by default, and then showing it later.
Once you’ve clicked the Conditional Logic button you will see the window below open up. Click on the words “Hidden” as shown below. Next, select the tasks or fields you want to keep hidden automatically. You can click on the > arrow to reveal all of the content fields within those tasks, then click ‘Save’.
In this example, we hid the send email fields so that they don’t show when we first run the workflow. We will show them again using a rule. This is what you’re going to add next.
Note: When you set up a rule to show content that you have not previously hidden, saving the rule automatically hides it by default.
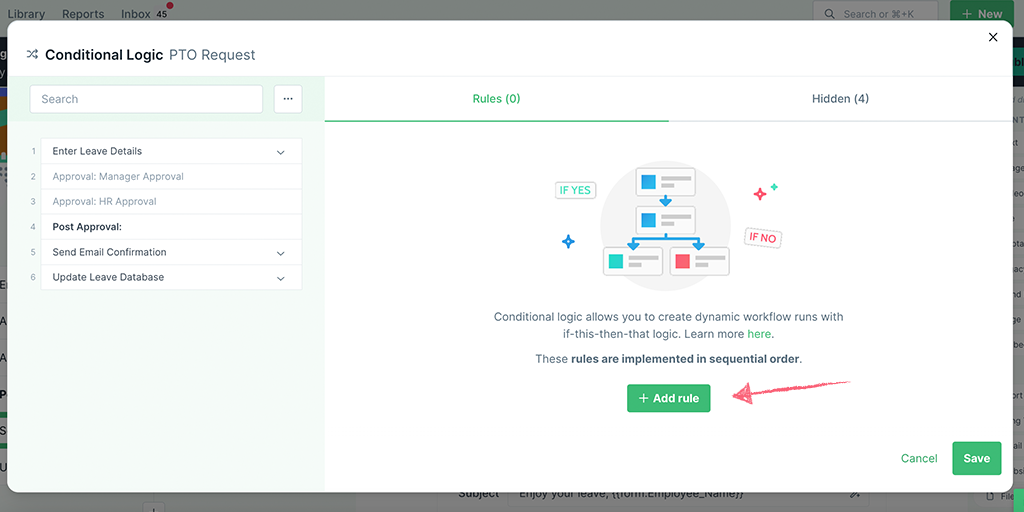
Now you can set up the rule/s for your logic, which will act as the trigger for your content to appear.
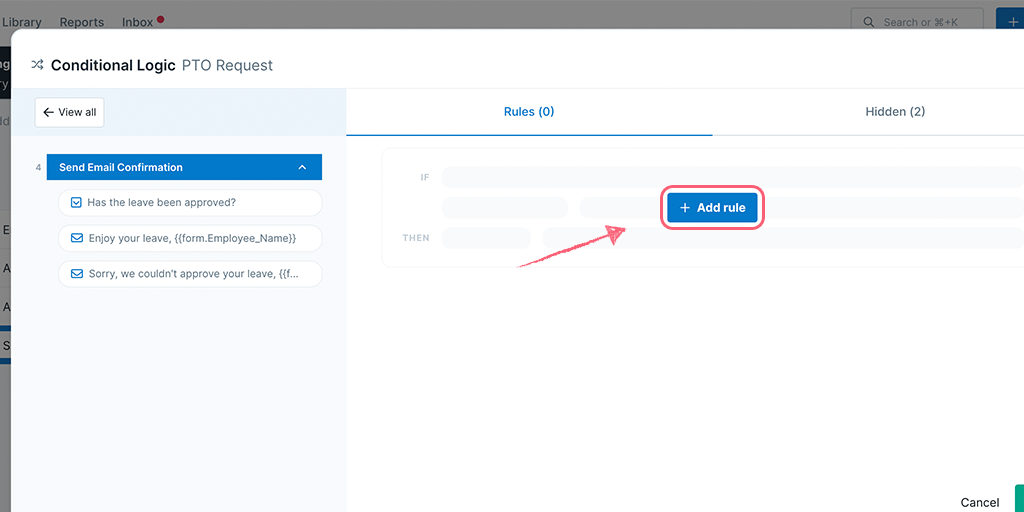
If you’re adding rules for the first time, click + Add rule in the center of your screen to add your first rule.
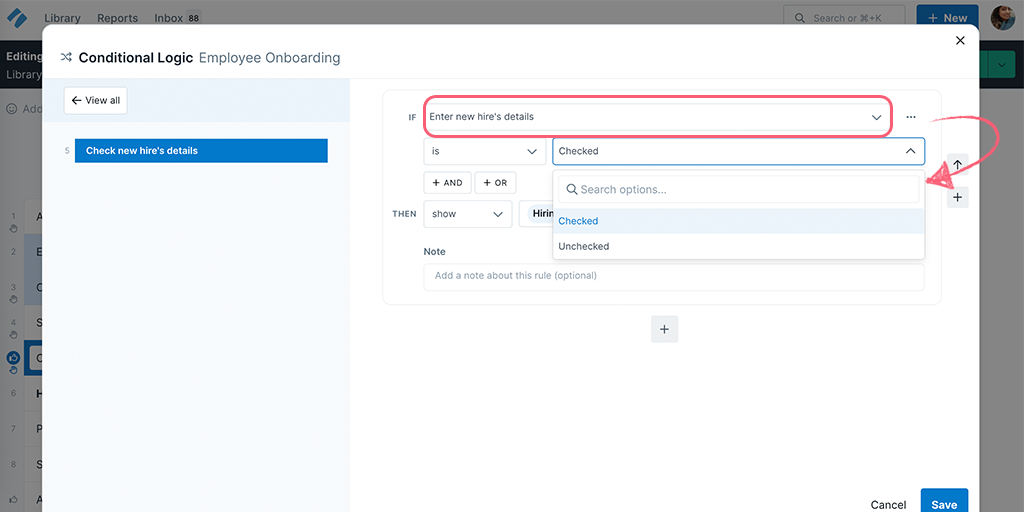
Next, choose a task or form field that will act as the trigger for your rule. This could be a dropdown, multi-choice field, date field, or some text (more on these options below).
We already added a dropdown form field into our workflow to act as the trigger for this rule, it’s called “Has the leave been approved?”
If the answer to the question is “Yes” then we want to show the same form fields we hid earlier:
Depending on which type of form field you use as your trigger, you may see different rule selections.
If you already have some rules in place, click the + button on the right side, to add a new rule.
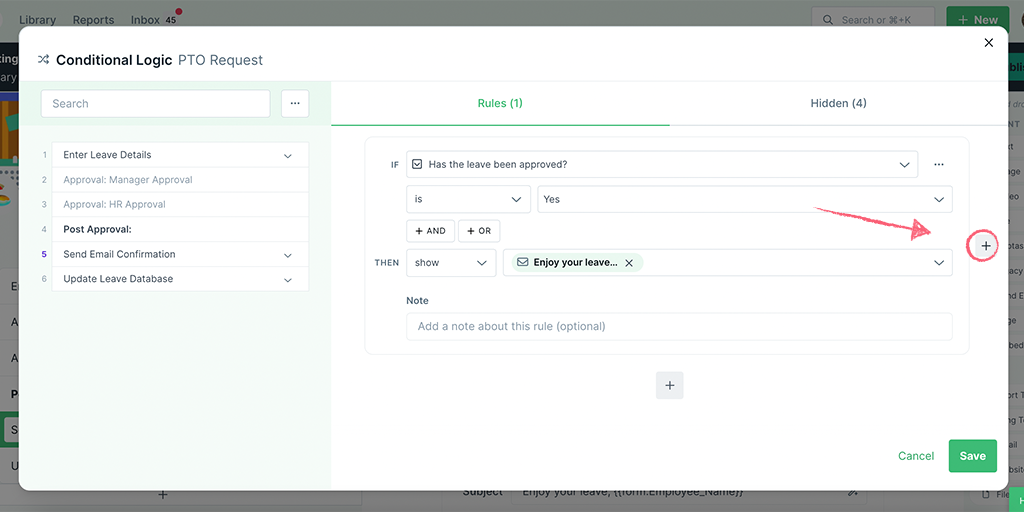
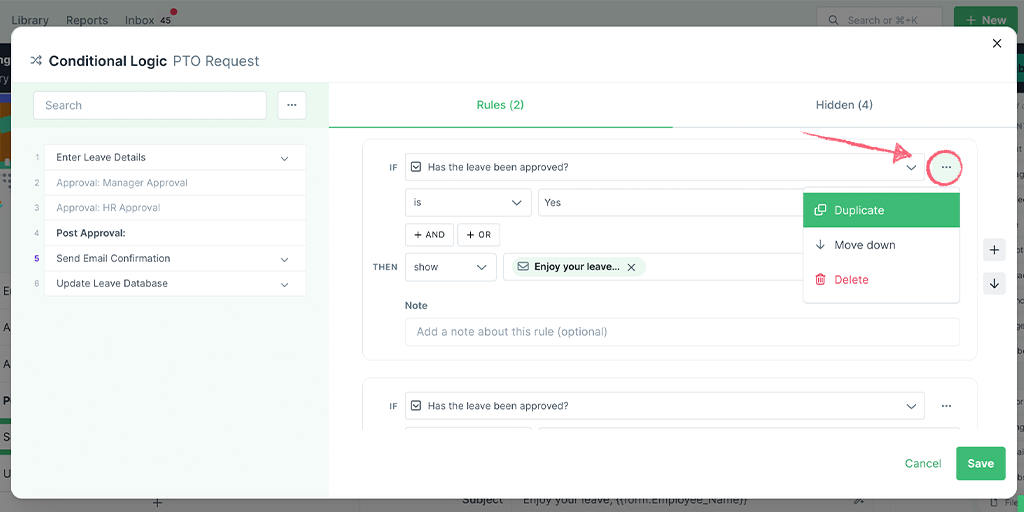
Click the + button to add more rules, or the three-dot menu to Duplicate, Move, or Delete a rule.
Click “Done” when you’re finished and then “Save” in the bottom right-hand corner.

This saves the changes to your conditional logic rules and then we recommend you also publish the changes and run your workflow to test it, as shown below:
Note: If you’re showing or hiding video content, make sure to give your videos a description, as this will differentiate one video from another when setting up your rules.
If you need your rules to follow complex logic, you can add And/Or while creating your rules.
For instance, in an Employee Onboarding workflow, If the employee is in USA AND is a full-time employee OR works onsite Then, show benefits.
You can add as many And/Or conditions as you need including multiple And rules, multiple Or rules or a mix of both.
Let’s take a look at how to set up a different Conditional Logic example, this time to show or hide tasks or headings in your workflow runs.
Edit your workflow and hit the “Conditional Logic” button in the top right corner of your screen.
One of the easiest ways to start using Conditional Logic is to start by hiding tasks or headings by default and then showing them again later.
Once you’ve clicked the Conditional Logic button you will see the window below open up.
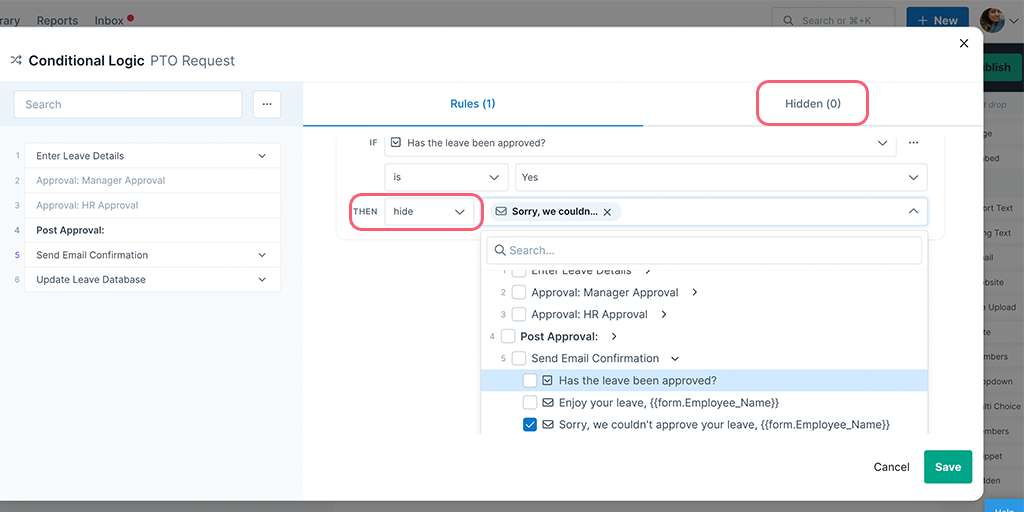
Click on the words “Hidden” as shown below then choose the task or heading you would like to hide automatically.
When you make selections for headings or tasks, headings are indented slightly to the left of your view, and tasks are indented slightly to the right. The right arrow > opens up the content within your tasks as shown below.
In the example above, we hid one task by default. We will show it again using a rule. This is what you’re going to add next.
Note: When you set up a rule to show tasks or headings that you have not previously hidden, saving the rule automatically hides them by default.
Now you can set up the rule/s for your logic, which will act as the trigger for your tasks or headings to appear.
If you’re adding rules for the first time, click the button in the center of your screen to add a rule.
If you already have some rules in place, click the + button on the right, to add a new rule.
Next, you’re going to choose the task or form field that will act as the trigger for your rule. This could be a dropdown, multi-choice field, date field, or some text (more on these options below).
We already added a dropdown form field into our workflow to act as the trigger for this rule, it’s called “Has the leave been approved?”
If the answer to the question is “Yes” then we want to show the task we hid earlier:
Depending on which type of form field you use as your trigger, you may see different rule selections.
Click the + button to add more rules, or the three-dot menu to Duplicate, Move, or Delete a rule.
Click “Done” when you’re finished and then “Save” in the bottom right-hand corner.
This saves the changes to your conditional logic rules and then we recommend you publish the changes and run your workflow to test it, as shown below:
In the two examples above (for Conditional Logic within a task, and hiding or showing a task) we used a dropdown form field as the trigger for our rules. Using dropdowns (or multi-choice fields are two of the simplest ways to set up Conditional Logic.
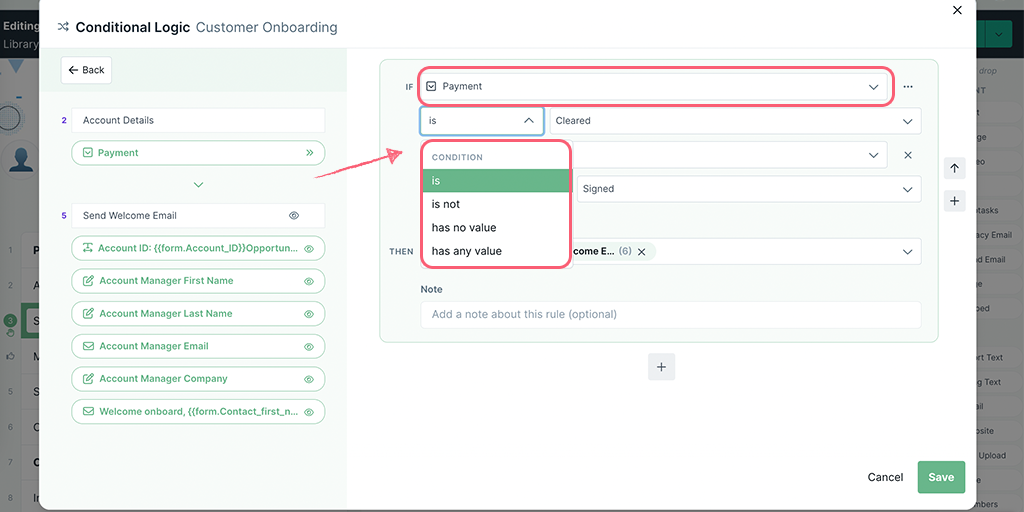
When you create Conditional Logic rules, the first drop-down you see “Select task or form field…” presents you with a list of all the tasks from your workflow that can be used. You can create conditional logic rules based on whether a task is completed.
You can also create a rule based on whether an approval task or an AI task is completed.
Select a task from the dropdown above and choose whether the task should be checked or unchecked. Then select Hide any other task, form field, or content widget from your workflow
You can also choose to hide content by default and then choose to Show it when a task is checked or unchecked. Go to the Hidden tab then choose the task or heading you would like to hide automatically, then create a rule for your task.
Once you have your task conditions in place, publish and run your workflow to test it. If you have hidden a following task, heading, form field, or content widget by default, it will not be shown in the task sidebar of your active workflow run. Complete a task with conditions to show it, as shown below.
The same drop-down as above, “Select task or form field…” also presents you with a list of all the form fields from your workflow. (Hint: the more form fields you add to your workflow, the more you can choose from in Conditional Logic rules)
The icon to the left of the field name indicates the type of form field that you are working with (e.g. a text field, email, website, or date field).
These are the current form fields and their input types that can be used for setting Conditional Logic rules.
Text Accepting Fields:
Non-Text Accepting Fields:
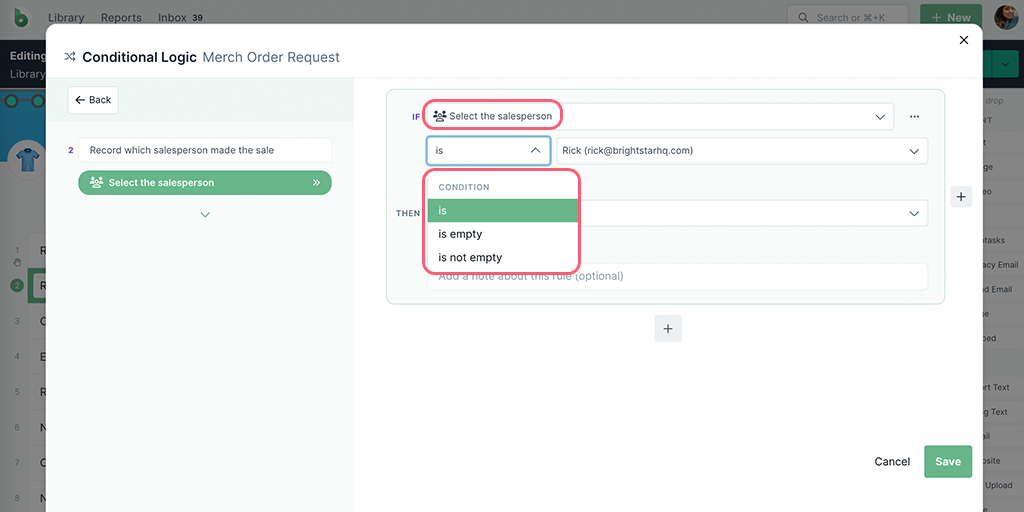
The next dropdown you’ll see after the form fields lists the different types of conditions available for your chosen field.
In the examples above, we used a simple dropdown field as our trigger, to show content, tasks, or headings. However, depending on your workflow you can also set logic rules on the following, more advanced fields:
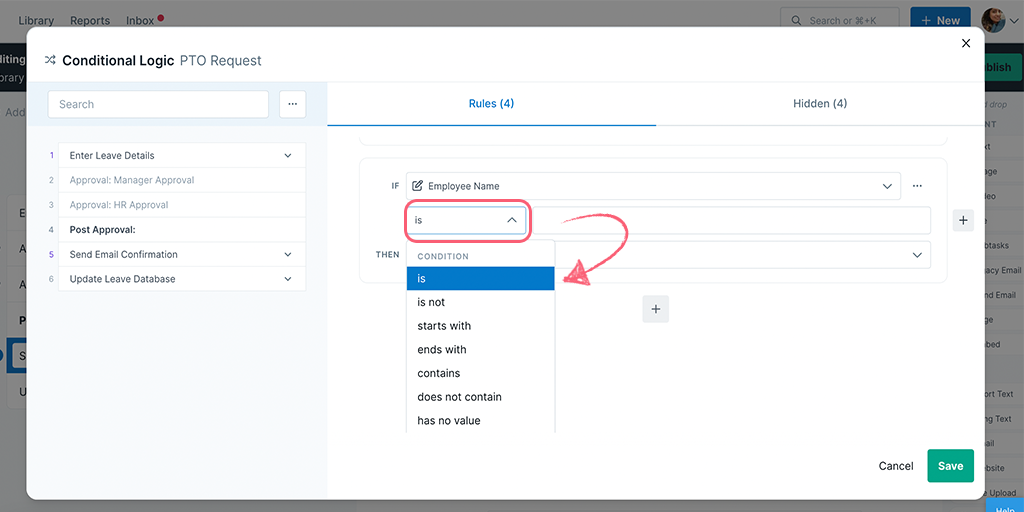
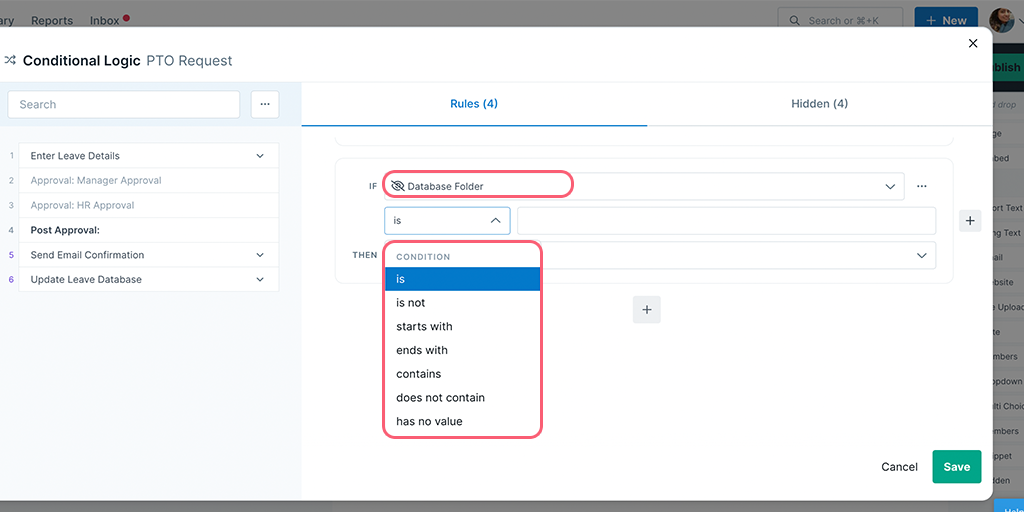
For short or long text fields, any value can be typed into the third field along.
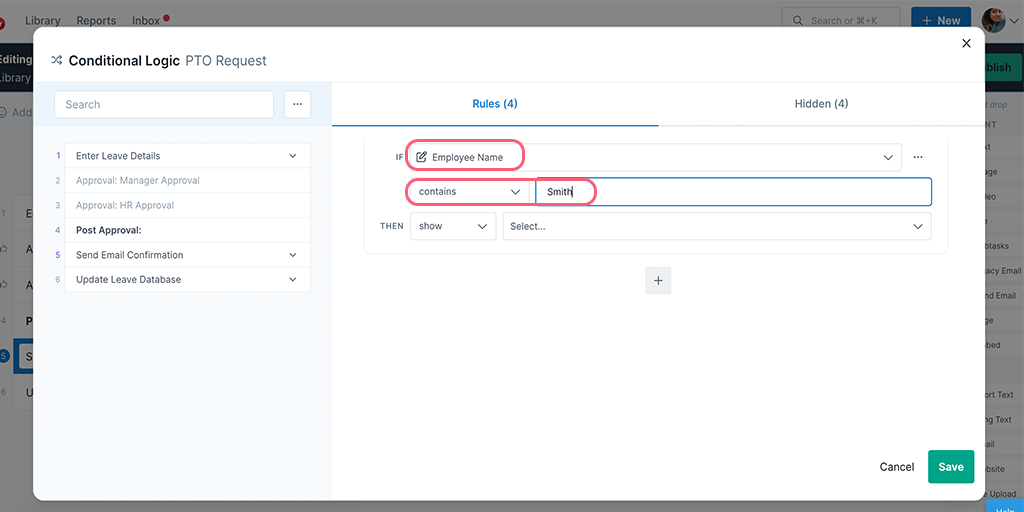
Your condition choices on text fields are:
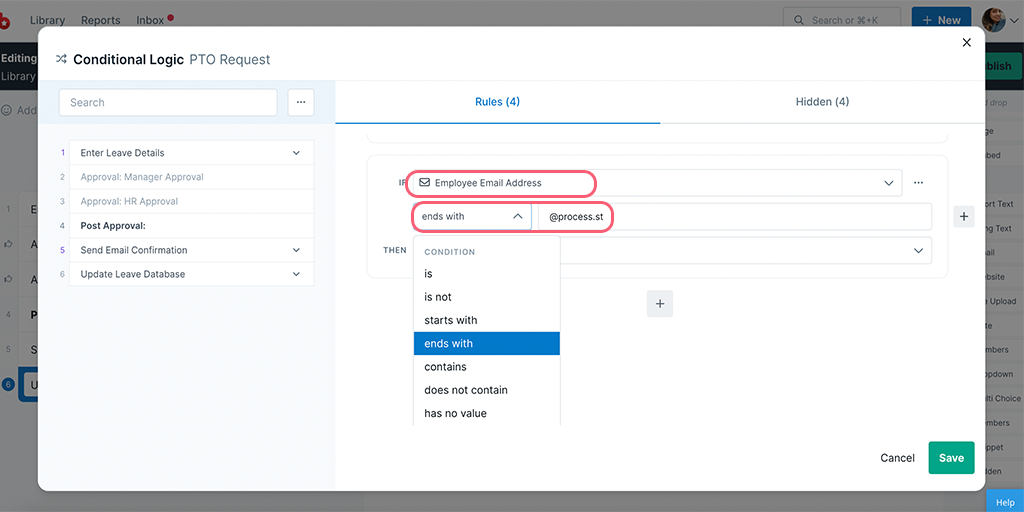
Email fields are similar to text fields, in that anything can be typed into the third box along. Email fields also have the same condition options as text fields:
Website fields are similar to text and email fields, in that anything can be typed into the third box along. Website fields also have the same condition options:
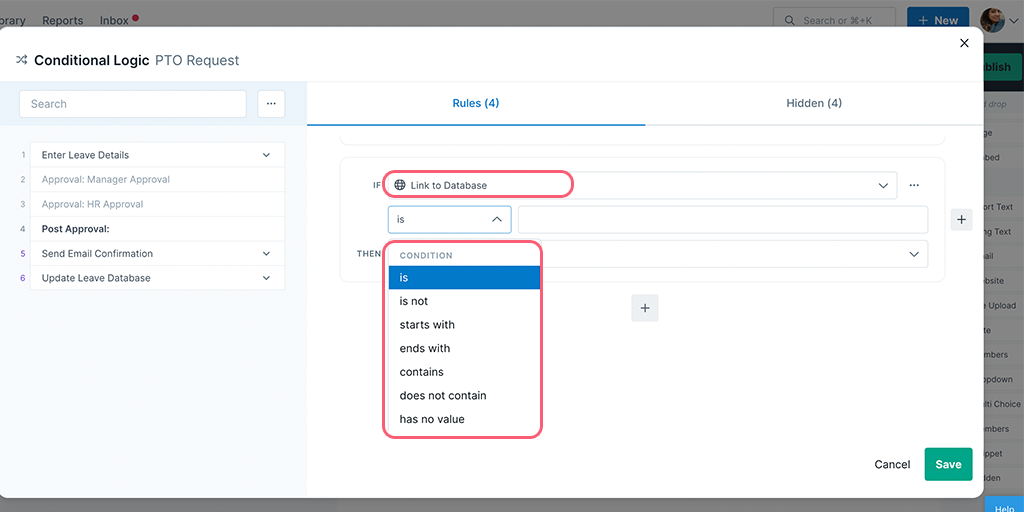
If you are using a hidden field with automations and integrations, you can also use this field in your conditional logic rules:
For Date fields, you can base your conditional logic rules on a date and time you select using the date picker.
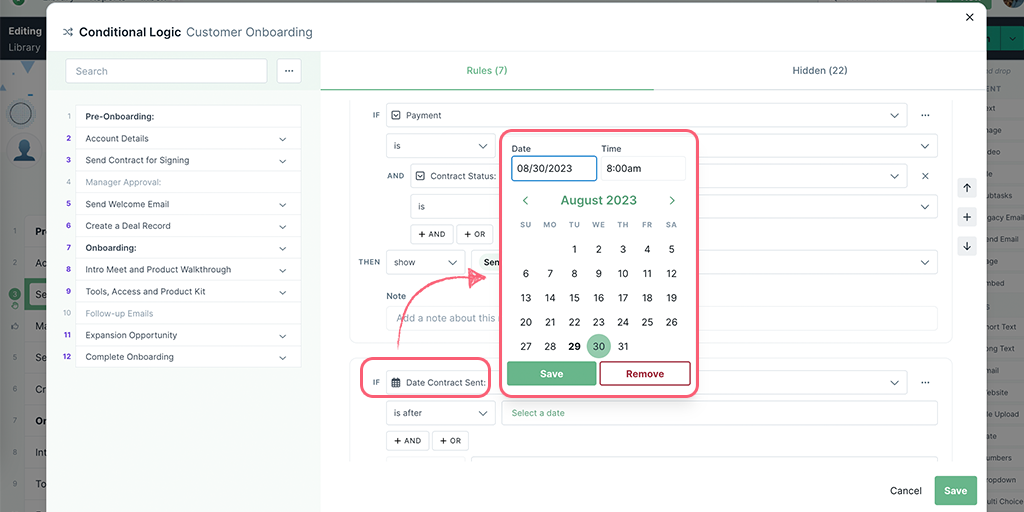
Your condition choices on date fields are:
For Dropdown fields, you can create a rule by selecting one of the options from the dropdown field. If you want to display a different outcome for each of the dropdown options, you would have to create multiple rules.
Your condition choices on dropdown fields are:
Multi-choice fields have slightly different condition options to dropdown fields as every multiple choice field can have more than one options as a response.
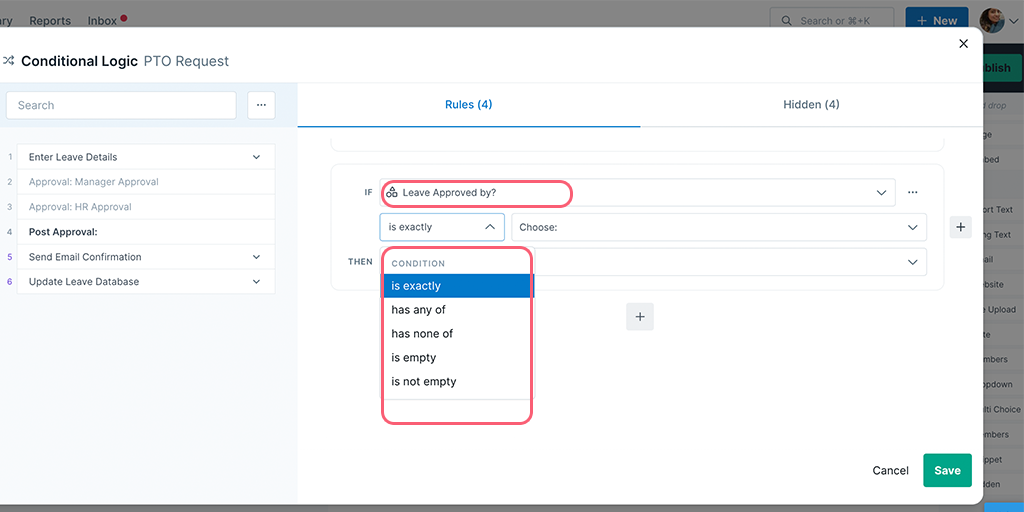
Your condition choices on multi-choice fields are:
If you’d like users to be able to make more than one selection in your multi-choice field, use the condition “has any of“.
For Member fields, you can create rules to show or hide information based on whether a member is selected in that field.
Your condition choices on member fields are:
In the examples we used above, we hid certain content or tasks by default, and then set the rules to show them when a condition is met.
However, if you don’t hide content or tasks by default first, you can set your rules to hide content or tasks when a condition is met instead.
You can move your rules up and down to change the order that your logic will follow.
Note: Conditional Logic rules are applied in the top-to-bottom order. It’s a good idea to build your logic rules in the same order as the tasks in your workflow, for this reason.
We highly recommend you test out your Conditional Logic rules by first saving your rules, then saving the changes to your workflow, and running it.
Start to fill out your workflow run and you’ll see the content fields or tasks and headings come into play, as your form field responses fit into the logic that you created.
If your run doesn’t perform as expected, go back to edit your workflow and the conditional logic rules. Then save the rules, publish the workflow and test run it again.
Only use tasks to show or hide content, don’t try to show or hide content in headings – Whilst you can use Conditional Logic to show or hide headings, you should not add form fields into headings. Form fields and other content can only be shown or hidden within tasks.
Changes to pre-existing rules – If you have tasks and content hidden by default, and previously only had the tasks showing with a rule, then you will need to check off all the content within those tasks, to have them show or hide correctly in your workflow runs.
If you have deleted content blocks or form fields that are shown or hidden by the conditional logic rules, you may have to reset your rules around the remaining blocks and tasks.
If you have used a multi-choice field as your trigger, you may want to use the condition “has any of”. Create as many rules as you have options in your multi-choice field and use that same condition in each one.
If you delete a form field or widget that is associated to any conditional logic rules, the relevant conditional logic rule will also be deleted automatically.
If you delete a form field or widget with multiple And/Or rules, the relevant rule will be deleted and the following rule will take its place.
If you get stuck or have any questions, reach out to our Process Pros team.