Custom notifications allow you to schedule and send email notifications to workflow run or task assignees, along with a customized note. You can also send out these notifications to any stakeholders who want to keep up with the progress of the workflow run.
For example, in your employee onboarding process, you can send out a custom notification to your new hire when you run the workflow, with a custom message welcoming them to your organization and introducing them to Process Street.
Users: In order to add or edit Custom Notifications, you must be an Administrator or a Member who has been given ‘edit’ access by your Administrator.
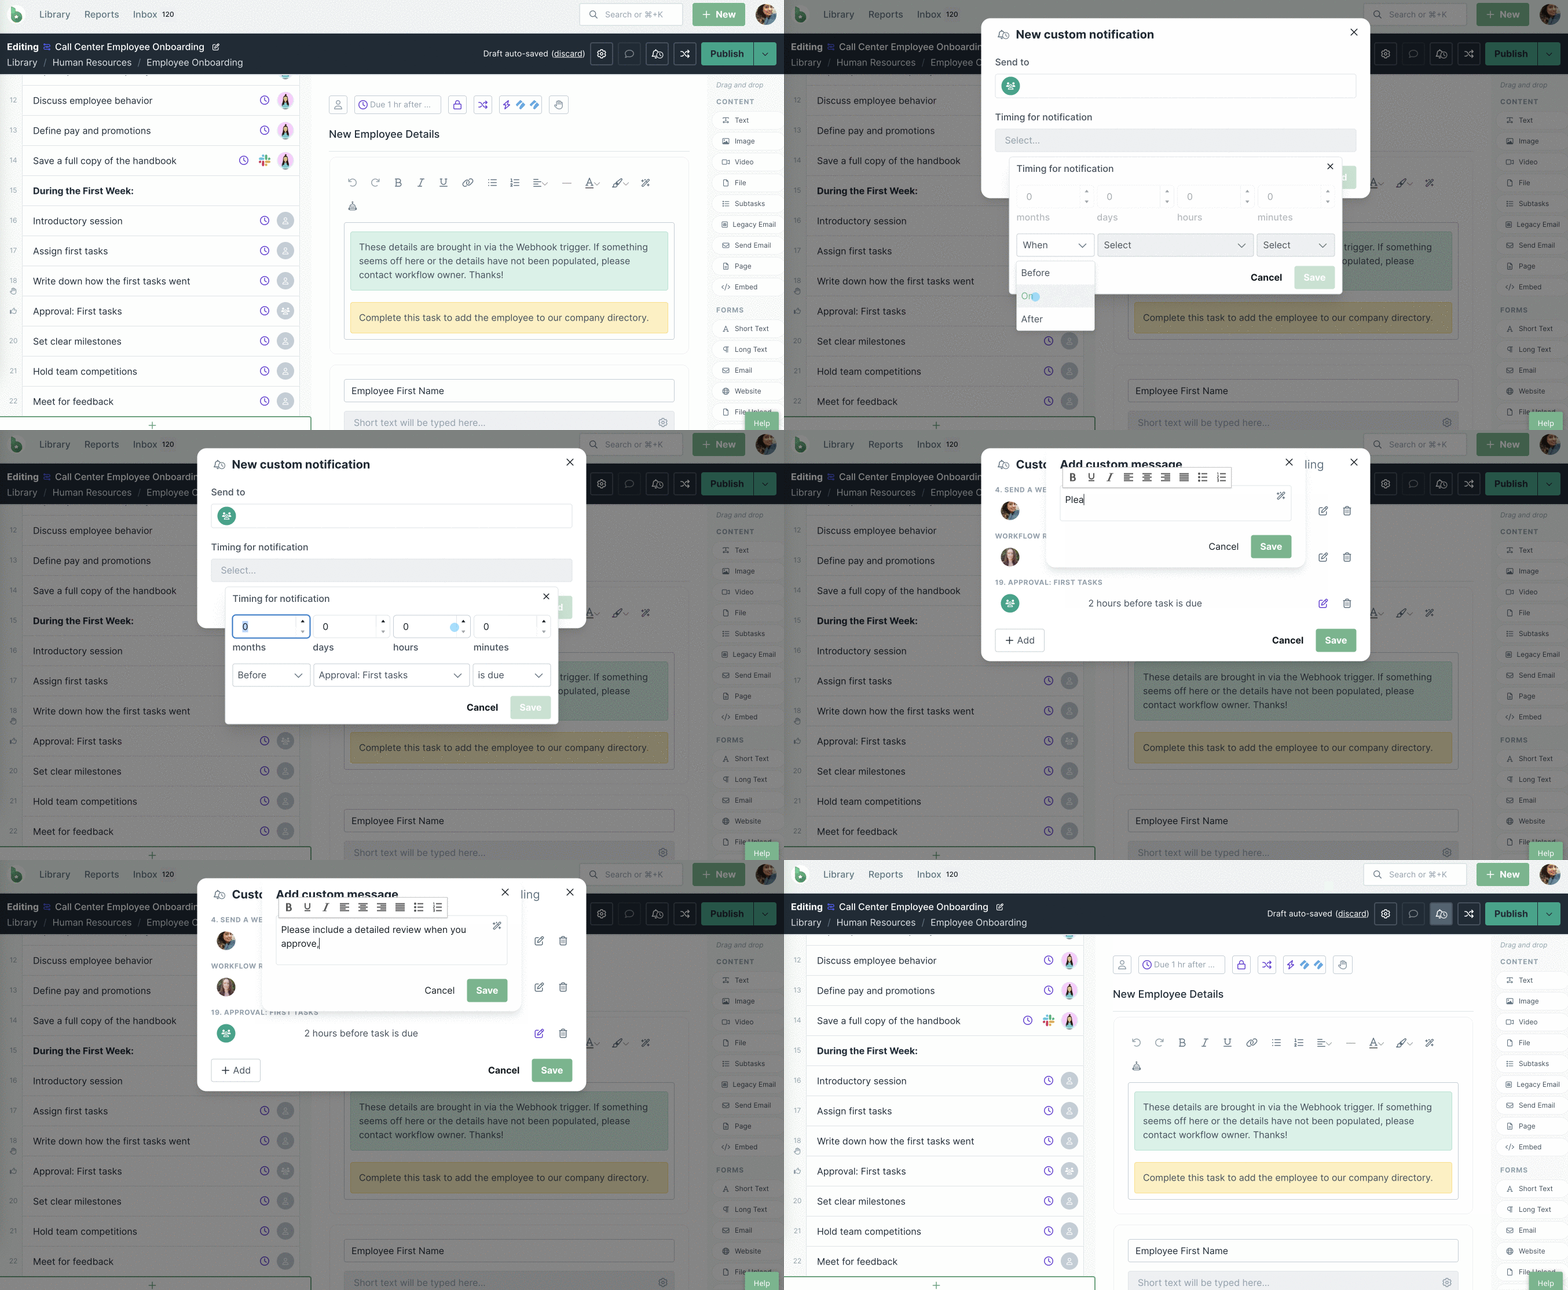
To set up custom notifications, locate a workflow in your Library, go to the workflow editor then click the custom notifications icon in the top right corner.
![]()
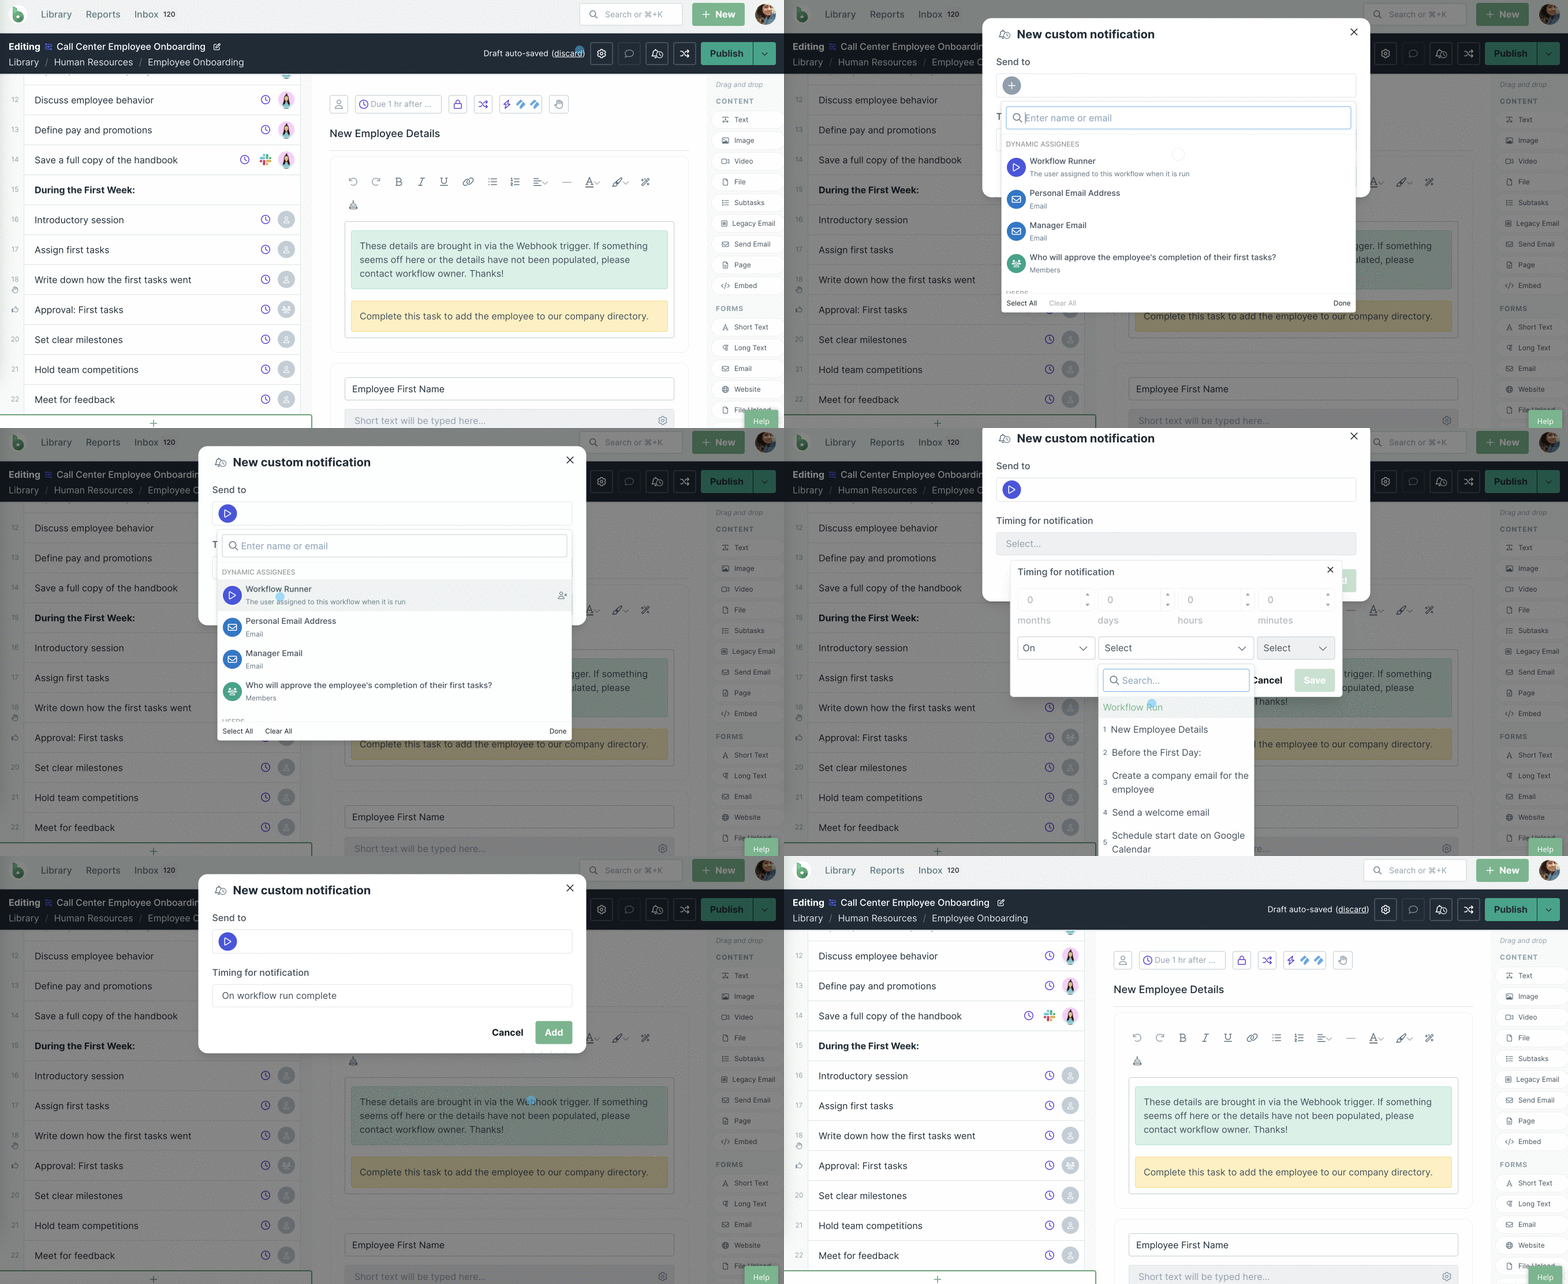
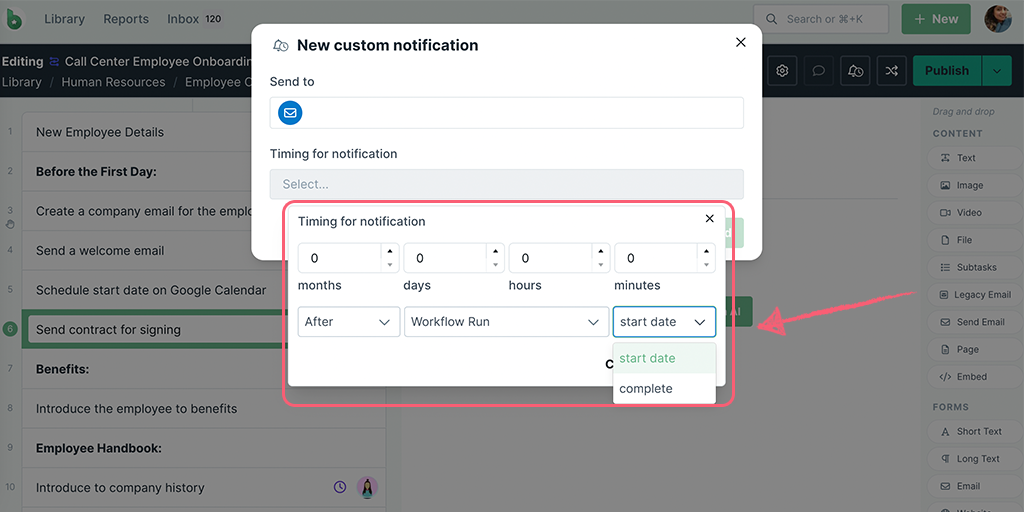
Click the + Add button to add a new notification. Select the user to whom you want to send the notification then select the timing when they should receive it, as shown below.
Click Add then click Save to save your changes.
Note: Custom notifications will not be sent to unverified email addresses. If you or your team members are unable to receive custom notifications, ensure you have verified the email address being used with your Process Street account or contact our support team.
You can select any dynamic assignees from the workflow run like the workflow runner, or a user from the email field or the member field.
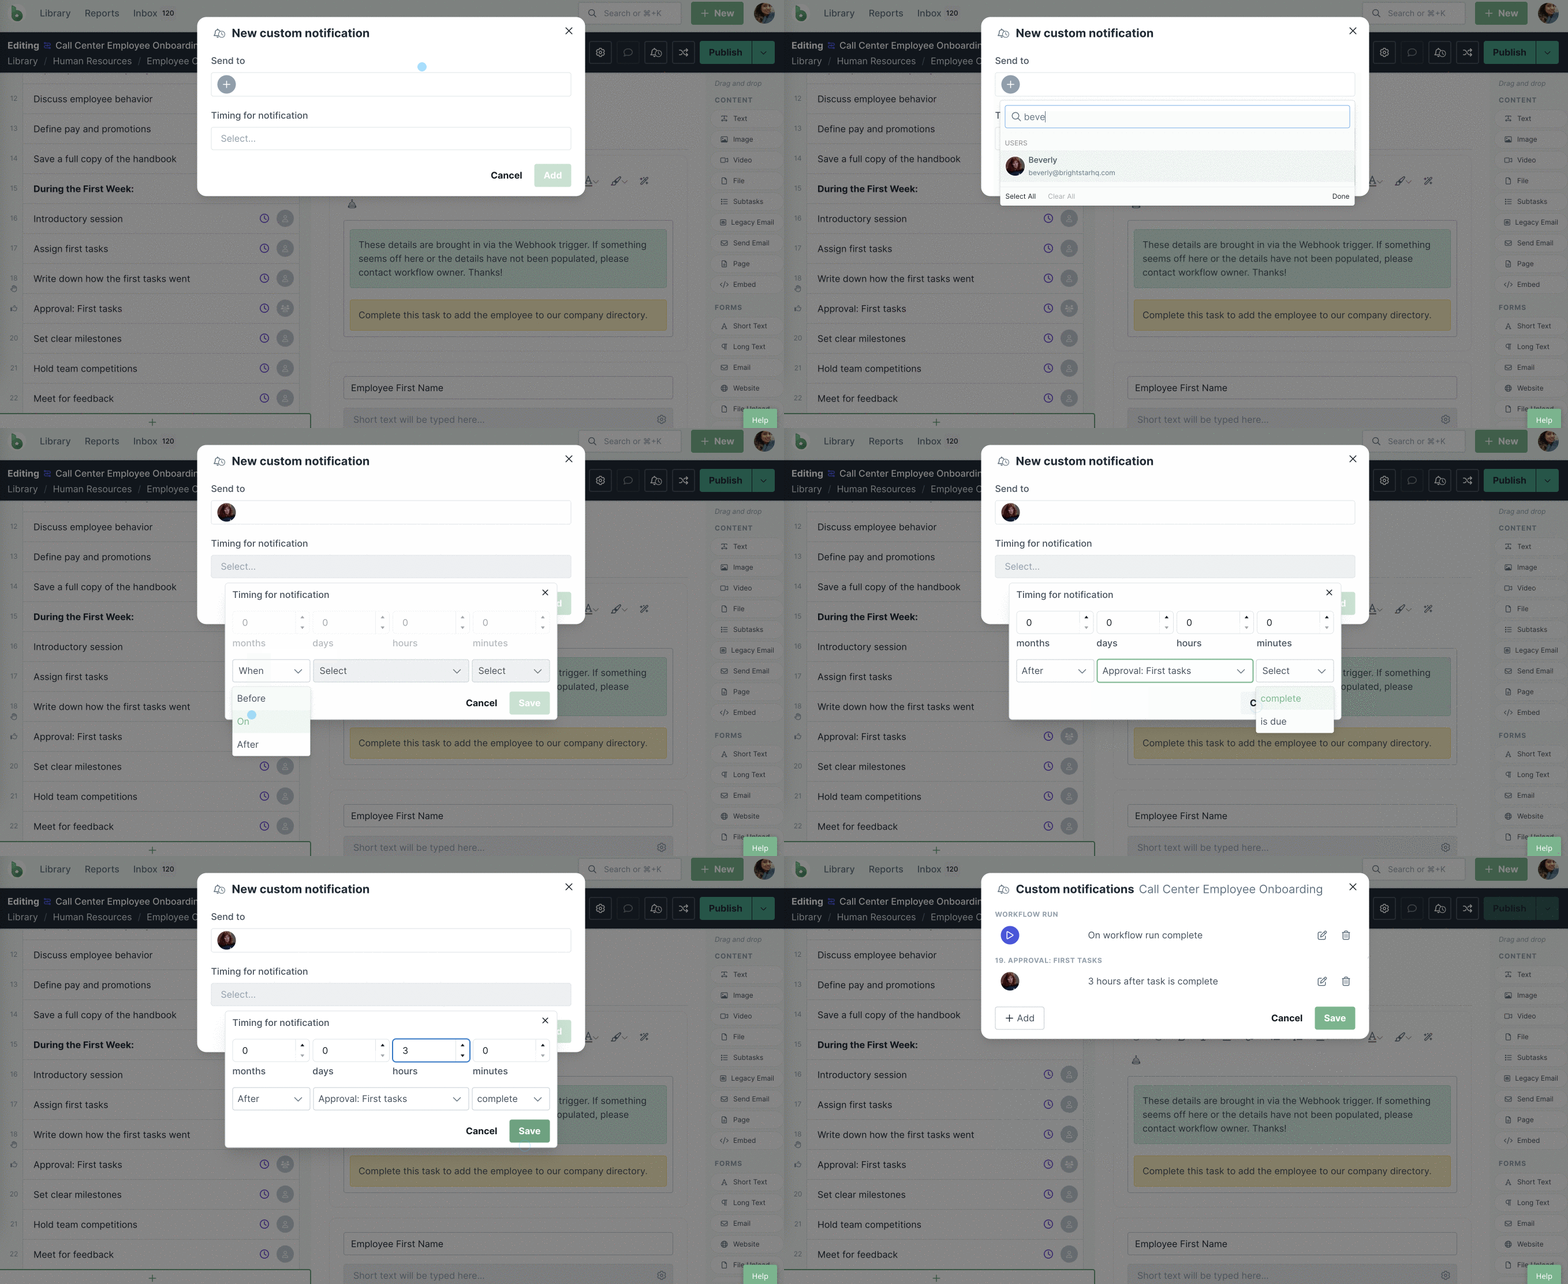
You can also select stakeholders who may be interested in staying updated with the work progress, even if they are not assigned to any tasks or the workflow run.
To do this, create a new custom notification then use the search bar under Send to and look for the person who should receive the notification. Select the timing when they should receive it then click Add and Save.
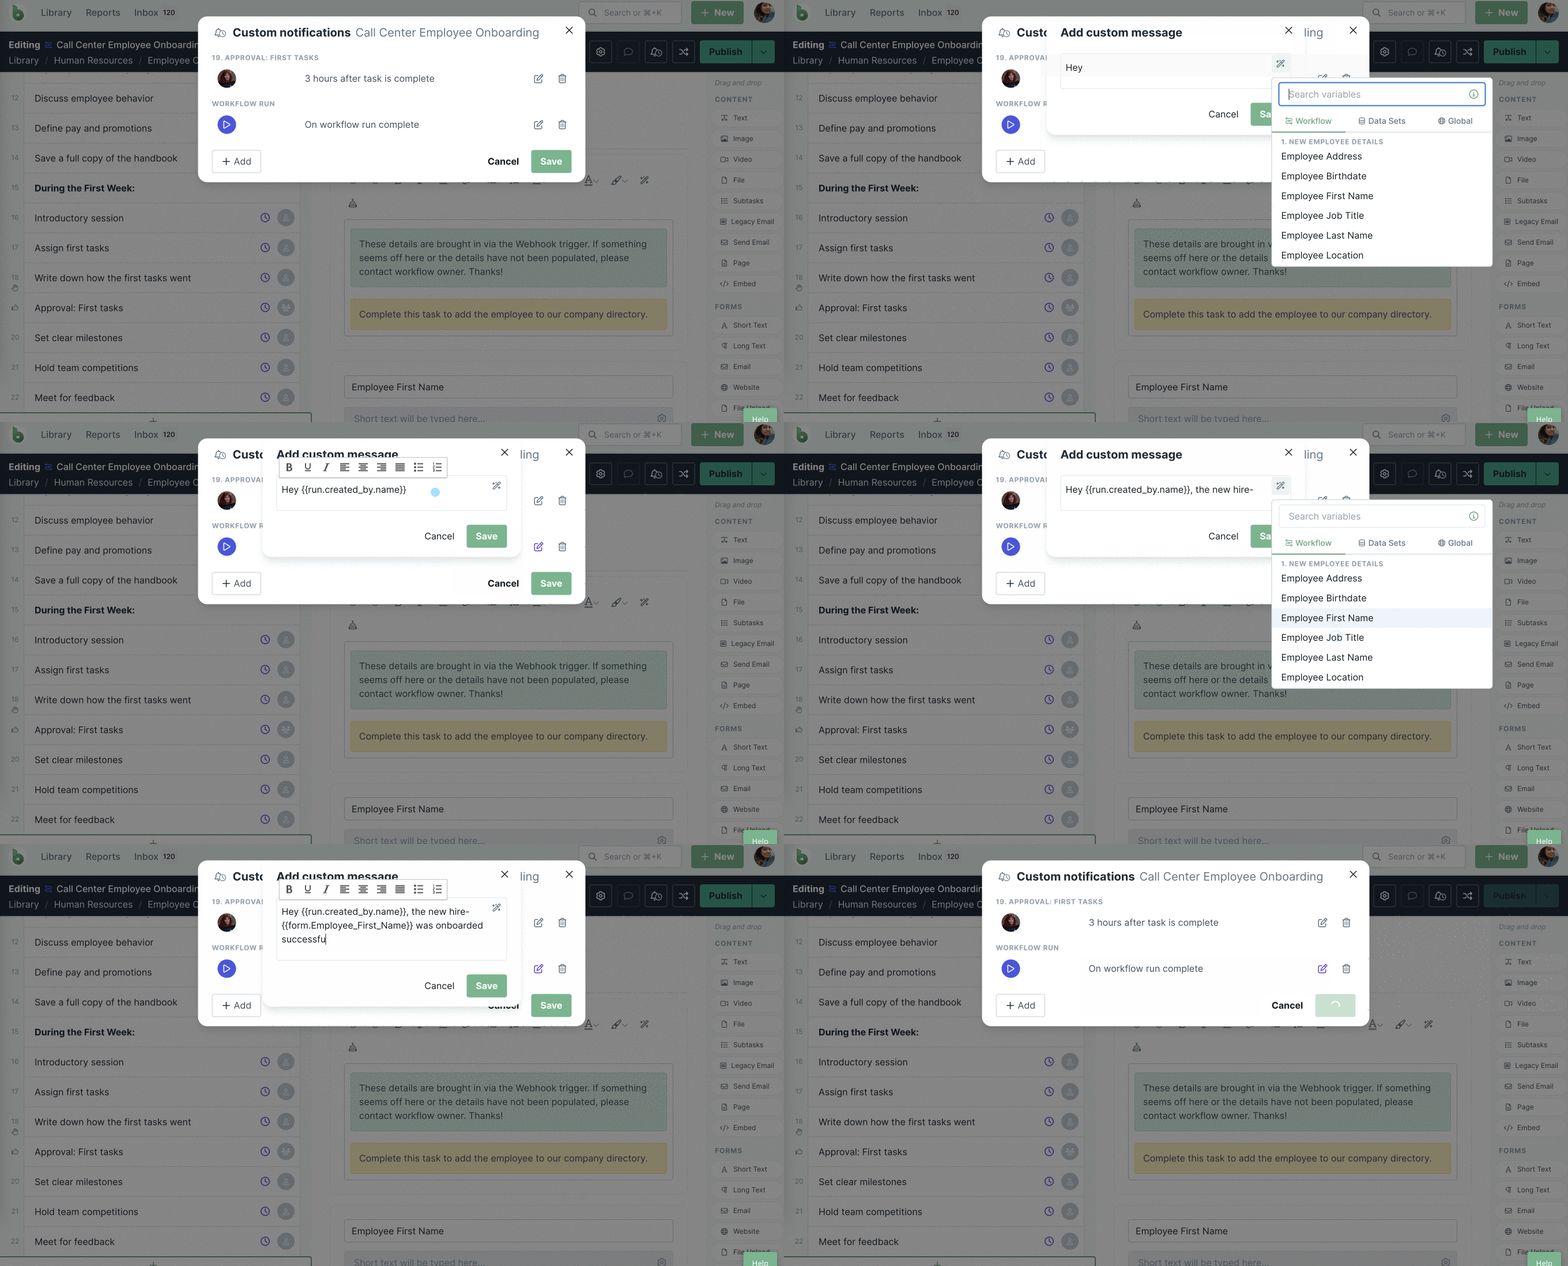
You can add a custom note to make your notification more personal or to provide additional context about the tasks to your users.
First, create your custom notification then click on the note icon next to the notification. Type your custom message here, including variables, and Save your note then Save the changes made to your notifications.
You can add multiple recipients for your custom notifications, even if they are not assigned to tasks.
Create a new custom notification and click Send to add multiple users, as shown below.
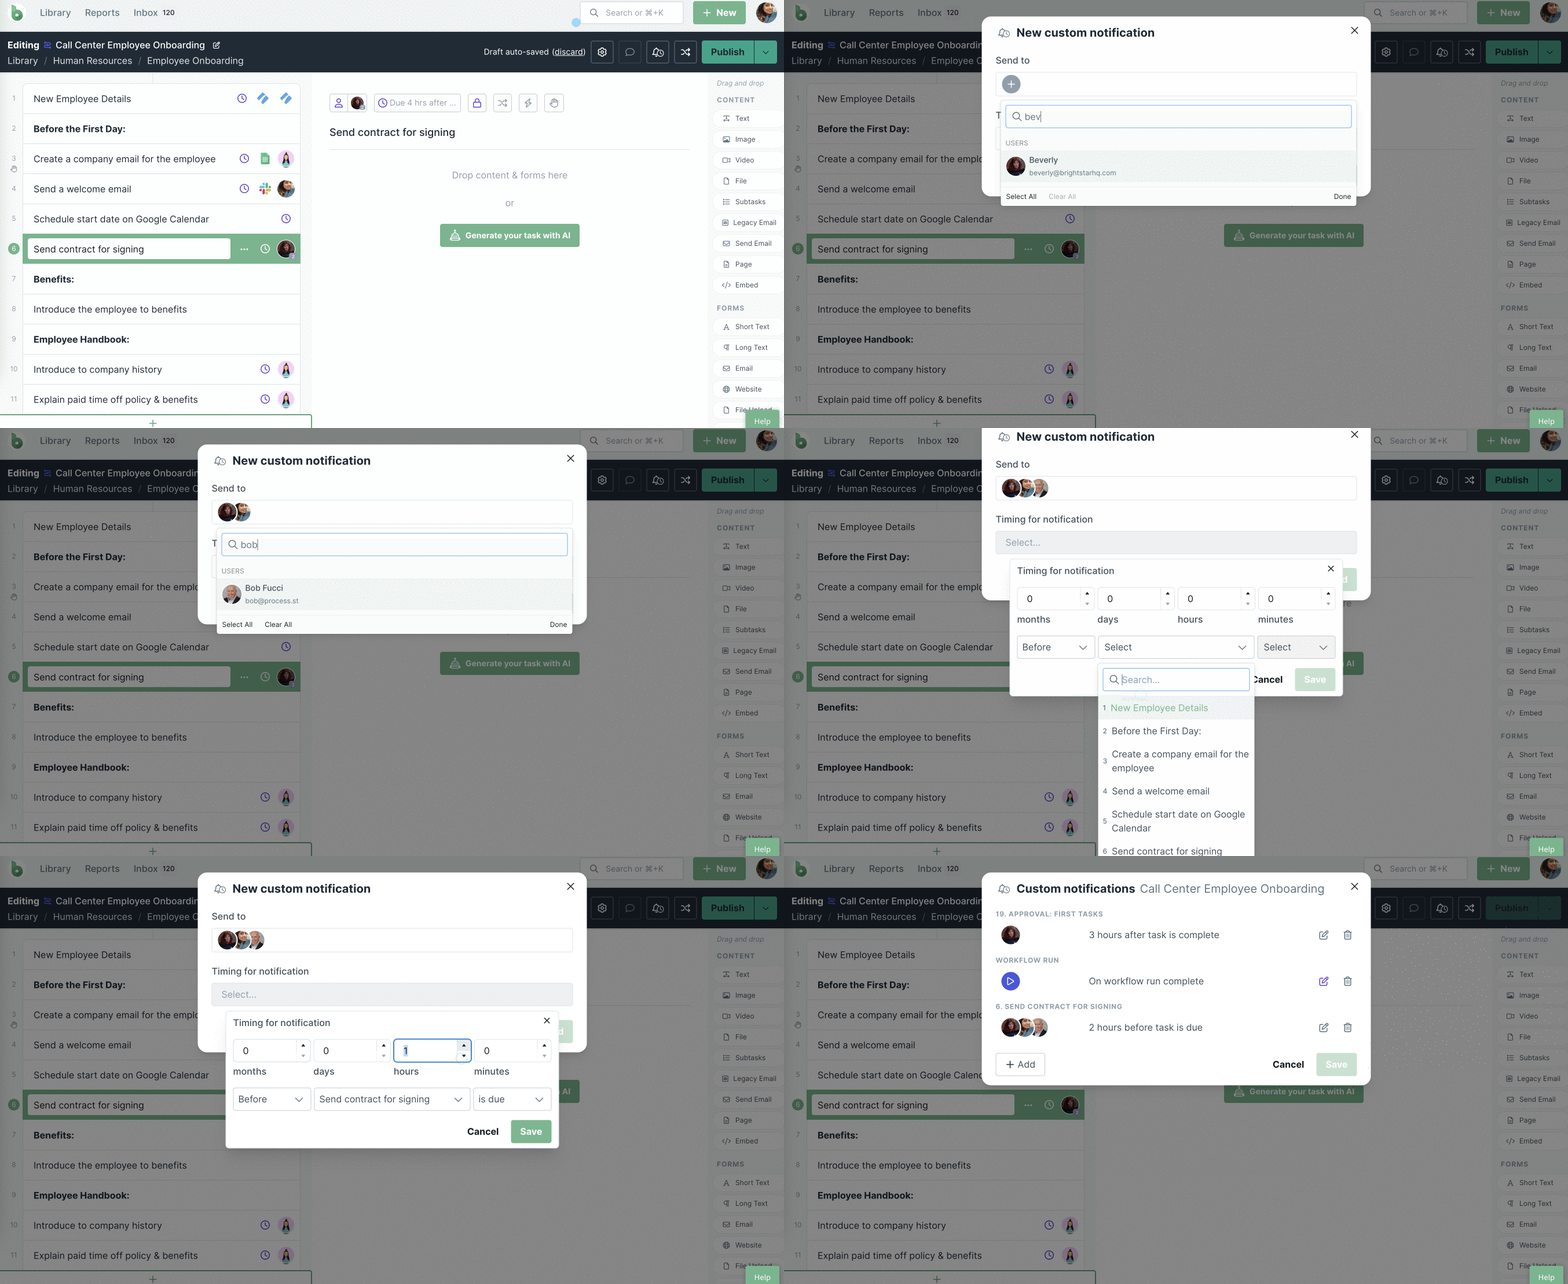
Note: You cannot select a group to send custom notifications.
To delete a custom notification, click the delete icon next to it then click Save.
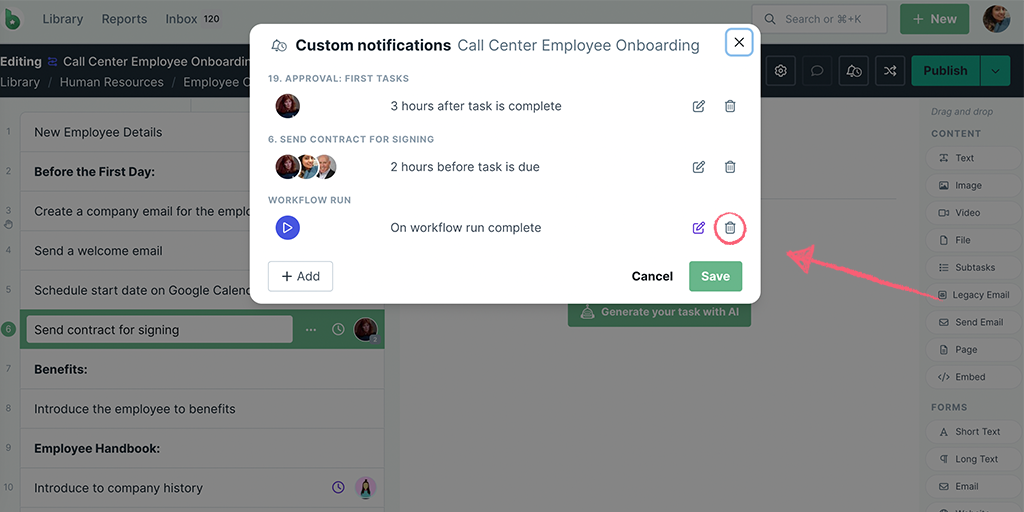
Once you delete the custom notifications, you can choose to publish your changes to your active workflow runs or only the new ones.
Go to custom notifications and click on the recipients to add or edit them. Then click on the notification timing to edit it.
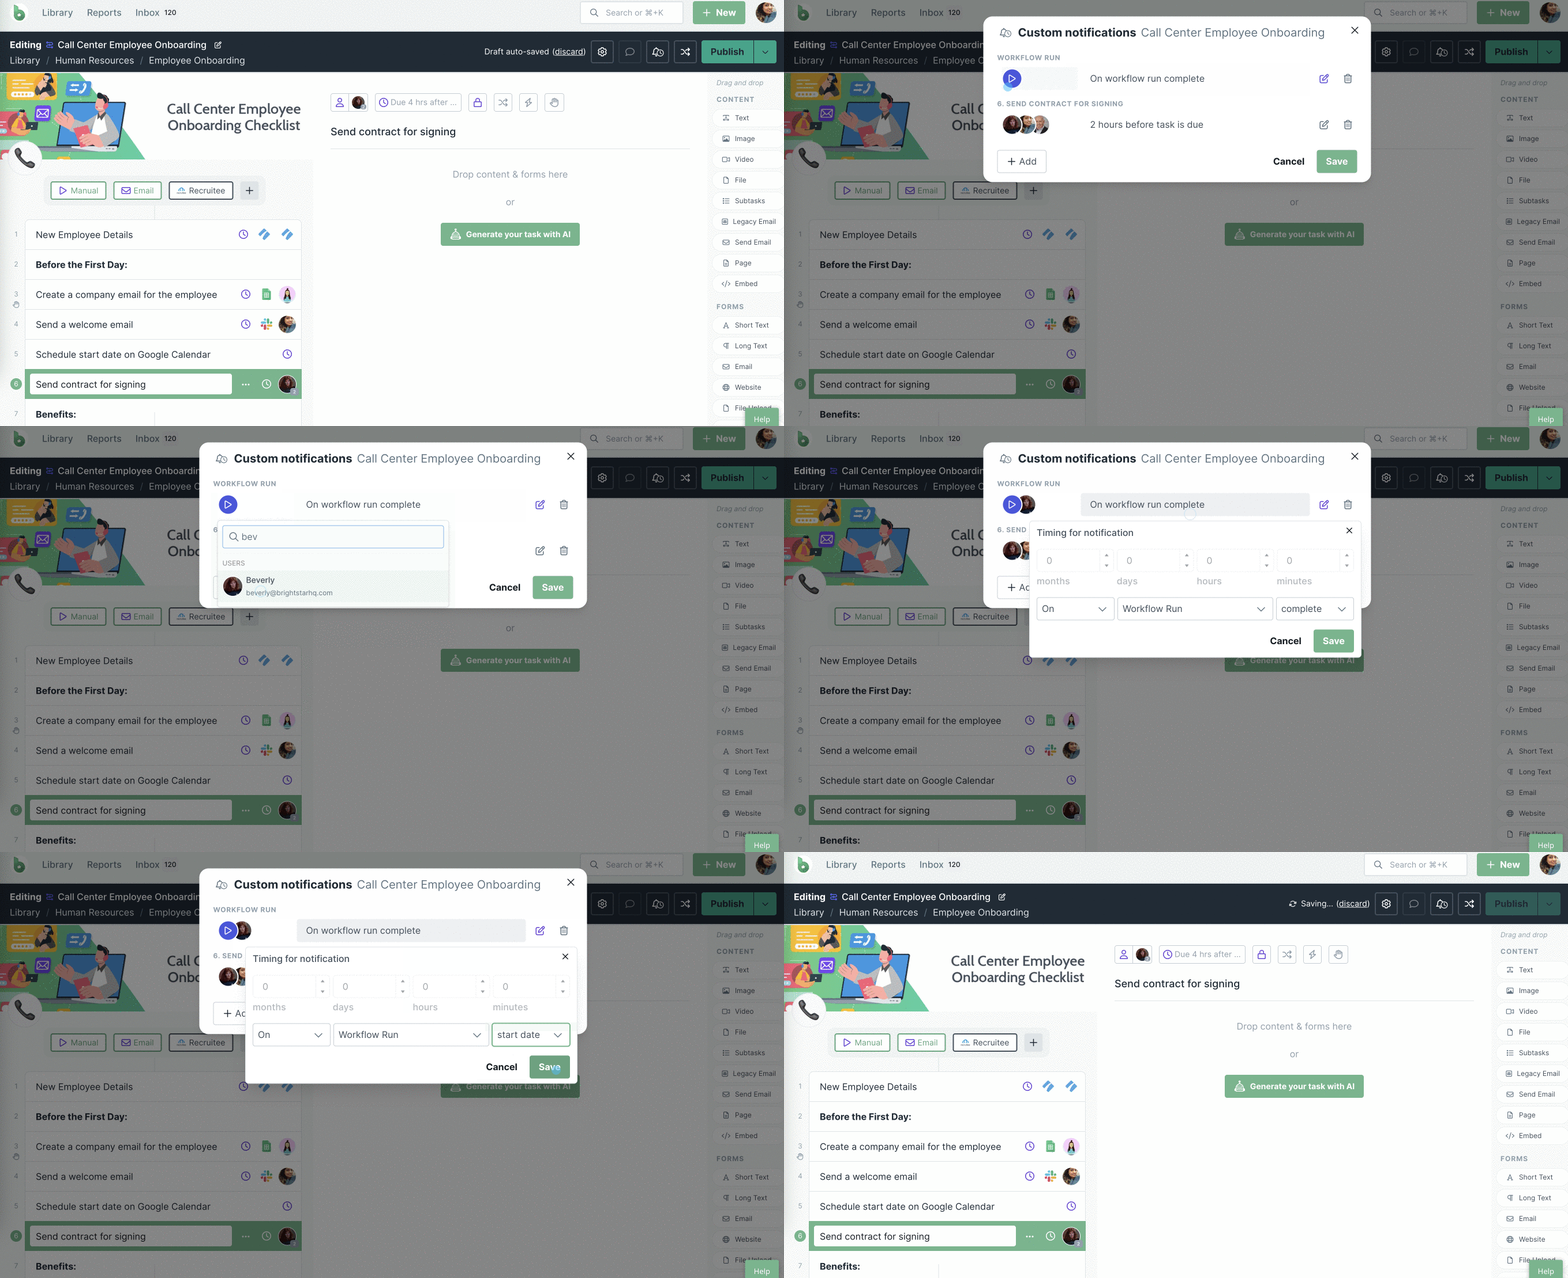
To edit the message, click on the note icon, edit or delete the message then click Save.
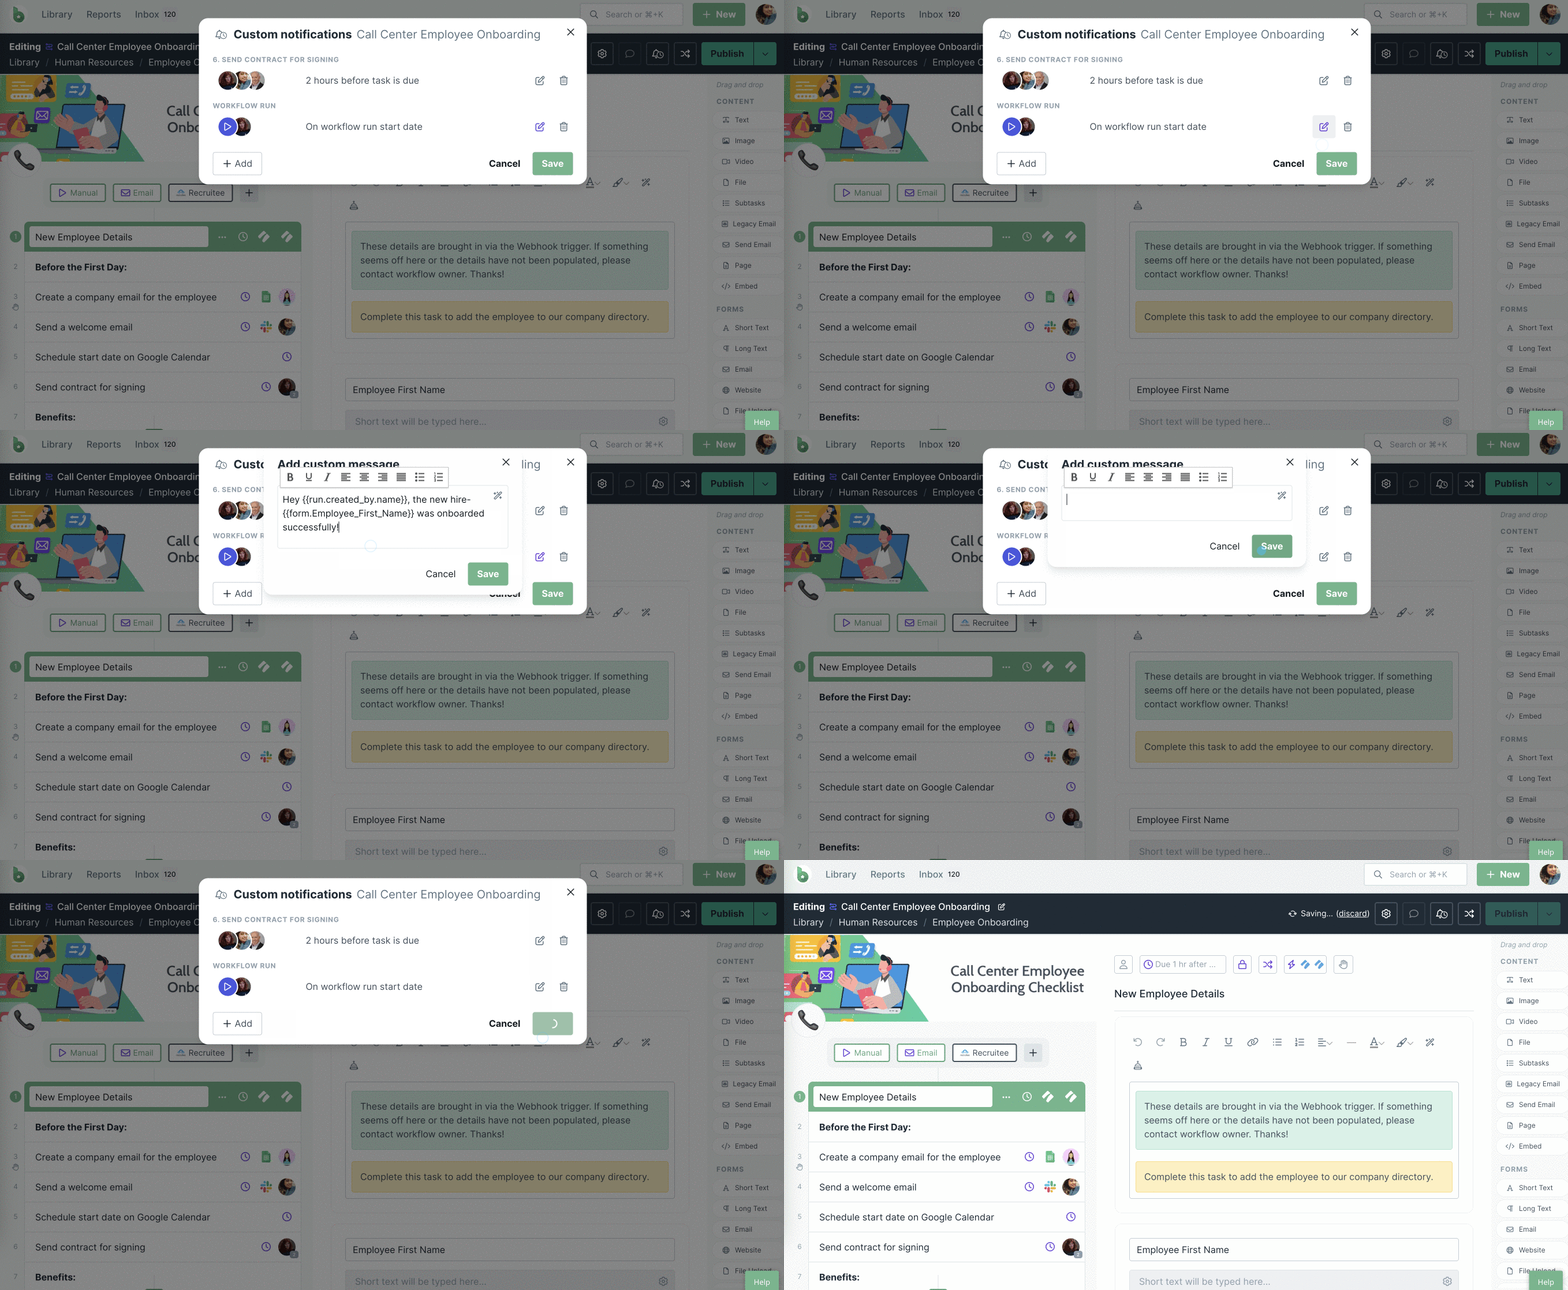
Once you edit the custom notifications, you can choose to publish your changes to your active workflow runs or only the new ones.
You can select the notifications to go out before, on, or after task due dates, task completion, workflow run start date or workflow run completion.
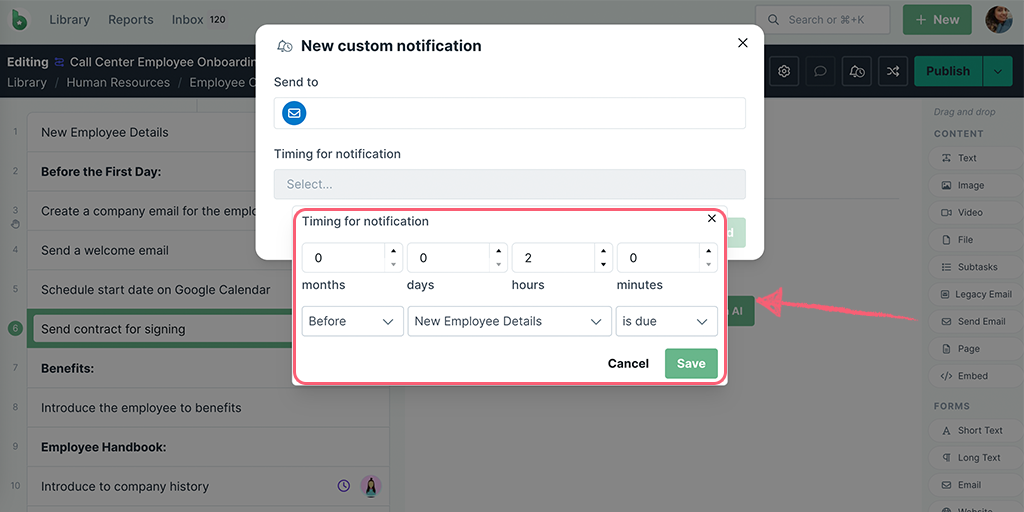
You can select custom notifications to go out a few months, days, hours, or minutes before a task is due.
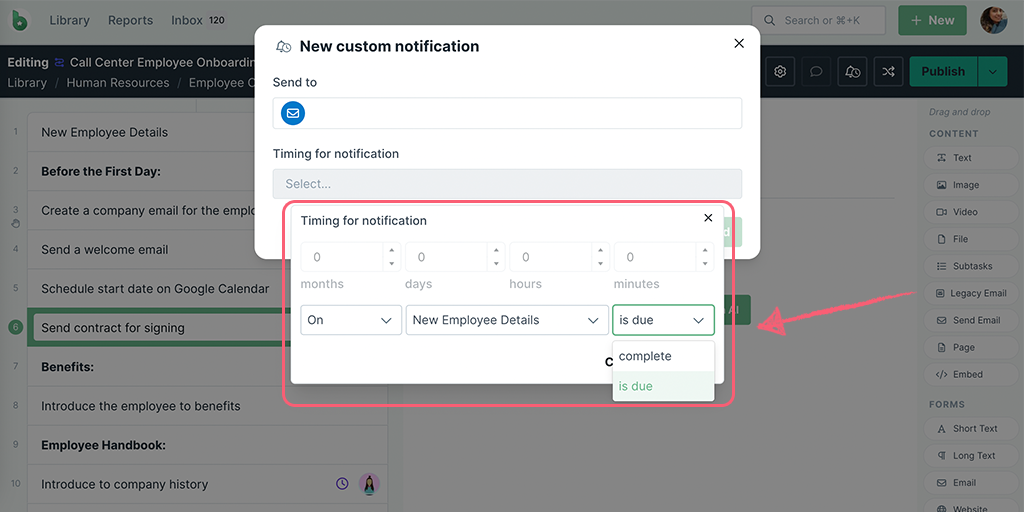
You can send out custom notifications as soon as a task is due or is completed.
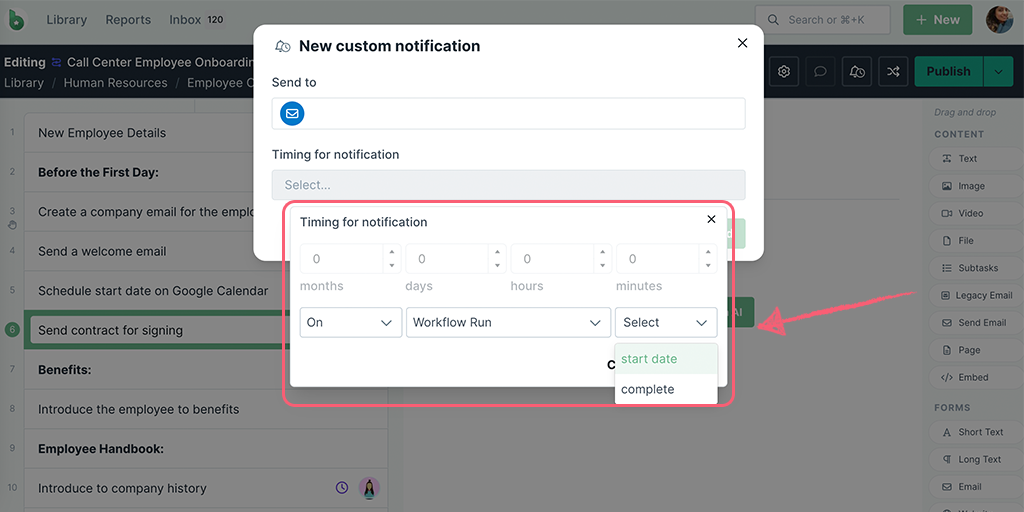
You can also send out notifications as soon as a workflow run is started or is completed.
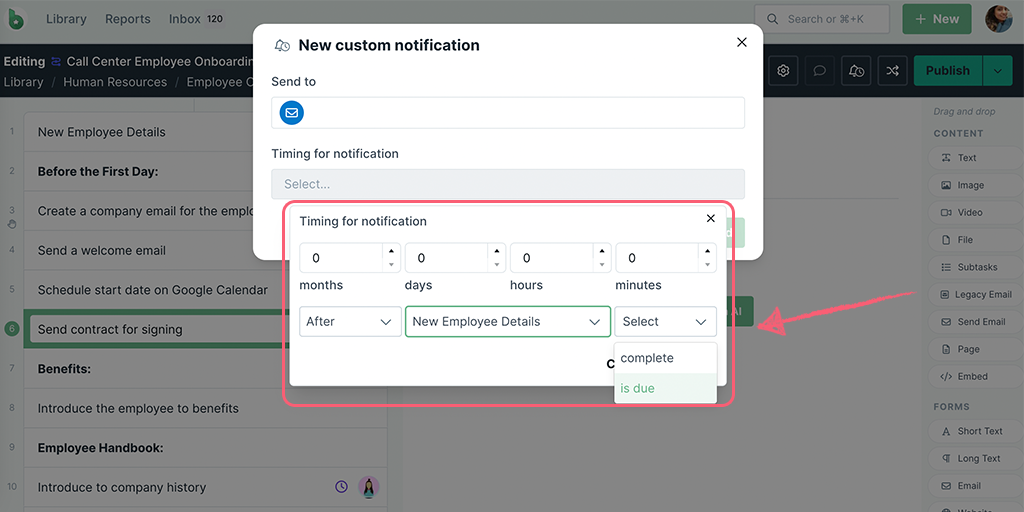
You can send out custom notifications after a task is due or is completed.
You can also send out notifications after a workflow run is started or is completed.
Once you have set the custom notifications, click Publish and save changes to your workflow.
Your team will receive these custom notifications in Slack if you have the Process Street app added to your Slack organization.

By clicking the View button, they can view and complete the task in Slack or open it in Process Street.